Herunterladen Inhalt Inhalt Diese Seite drucken
auna iTuner 320 BT Bedienungsanleitung
Vorschau ausblenden Andere Handbücher für iTuner 320 BT:
Inhaltsverzeichnis

Werbung

Verfügbare Sprachen
  • DE

Verfügbare Sprachen

  • DEUTSCH, seite 1

Werbung

Inhaltsverzeichnis
loading

Inhaltszusammenfassung für auna iTuner 320 BT

  • Seite 3: Inhaltsverzeichnis

    Sehr geehrter Kunde, wir gratulieren Ihnen zum Erwerb Ihres Gerä- tes. Lesen Sie die folgenden Hinweise sorgfäl- tig durch und befolgen Sie diese, um möglichen Schäden vorzubeugen. Für Schäden, die durch Missachtung der Hinweise und unsachgemäßen Gebrauch entstehen, übernehmen wir keine Haf- tung.
  • Seite 4: Technische Daten

    TECHNISCHE DATEN Artikelnummer 10034063 10034064 100-240 V ~ 50/60 Hz , 1 A Stromversorgung Netzgerät , 1 A USB-Ausgang UKW-Radio Frequenzbereich 87,5 MHz - 108 MHz Frequenzbereich 174-240 MHz...
  • Seite 5: Sicherheitshinweise

    SICHERHEITSHINWEISE Allgemeine Sicherheitshinweise • Lesen Sie alle Hinweise genau durch, bevor Sie das Gerät verwenden und bewahren Sie die Bedienungsanleitung für den zukünftigen gebrauch auf. • Verwenden Sie ausschließlich die Stromspannung, die auf dem Typenschild des Geräts angegeben ist. Vergewissern Sie sich, dass Ihre Steckdose geerdet ist.
  • Seite 6 • Achten Sie darauf, dass der Netzstecker des Radios während eines Gewitters nicht in der Steckdose steckt. • Das Gerät wird warm, wenn es über einen längeren Zeitraum verwendet wird. Das ist normal und weist nicht auf ein Problem des Geräts hin. Stromanschluss •...
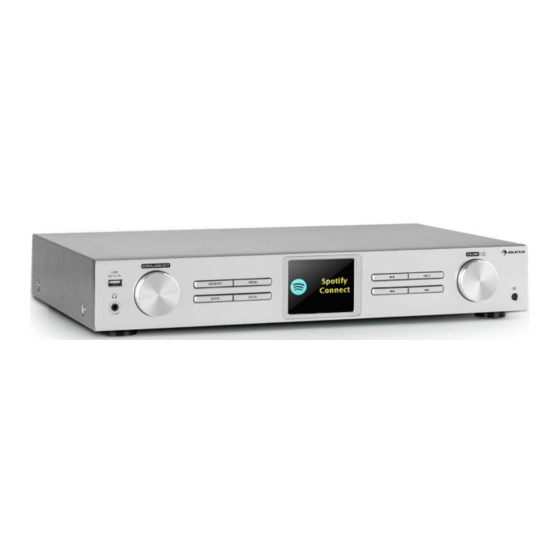
  • Seite 7: Geräteübersicht

    GERÄTEÜBERSICHT Vorderseite USB-Anschluss Wiedergabe/Pause Köpfhöreranschluss 10 Titel zurück Titel vor Scrollen/auswählen Memory-Taste 12 Info-Taste Modus 13 Lautstärke / Ein-Aus Zurück-Taste 14 IR-Empfänger Menü Display Rückseite 15 Stromanschluss 19 Optischer Ausgang (digital) 16 WLAN-Antenne 20 Koaxialausgang (digital) 17 Audioausgang (analog) 21 LAN-Eingang 18 Audioeingang (ein/aus) 22 Stabantenne...
  • Seite 8: Fernbedienung

    FERNBEDIENUNG...
  • Seite 9 Ein/Standby 13 Modus Info 14 Memory (Speicher) Menü 15 zurück Menünavigation hoch 16 Menünavigation rechts Menünavigation runter 17 Menünavigation runter Auswahl 18 Lautstärke + Lautstärke - 19 Sendersuche vorwärts Sendersuche rückwärts 20 Wiedergabe/Pause Titel zurück 21 Stumm 10 Titel vor 22 Equalizer Mono/Stereo 23 Weckwiederholung...
  • Seite 10 Batterie der Fernbedienung auswechseln Drücken Sie auf die Lade des Batteriefachs und schieben Sie die Lade heraus. Legen Sie die CR2032-Knopfzelle gemäß den Polaritätsmarkierungen ("+" und "-") im Fach und auf der Fernbedienung ein. Legen Sie die Ladae in das Fach, drücken Sie sie leicht nach unten und schieben Sie sie hinein, bis sie einrastet.
  • Seite 11: Anschluss

    ANSCHLUSS Das Gerät ans Stromnetz anschließen 1. Auf der Rückseite befinden sich der Audioeingang und -ausgang (analog), der optische Ausgang (digital) und der Koaxialausgang (digital) für den Anschluss an einen Verstärker oder ein HiFi-System. 2. Schließen Sie die mitgelieferte Stabantenne an. Zur gewünschten Länge ausfahren.
  • Seite 12: Inbetriebnahme

    INBETRIEBNAHME Gerät ein-/ausschalten 1. Drücken Sie zum Einschalten des Radios die Standby-Taste auf dem Gerät oder auf der Fernbedienung. 2. Drücken Sie die Standby-Taste, um das Gerät wieder in den Standby- Modus zu versetzen. Modus wählen Drücken Sie mehrfach die Taste MODE am Gerät oder die Tasten USB, FM/ DAB, AUDIO IN, Internet, Spofity, um zwischen den Modi Musicplayer, DAB- Radio, FM-Radio,Line in, Internetradio and Spotify Connect zu wechseln.
  • Seite 13 System verwendet, um Zeit und Datum zu beziehen. Wenn "Update from Network" ausgwählt wurde, fahren Sie mit dem nächsten Schritt fort, um die Zeitzone zur korrekten Anzeige der Zeit einstellen. Wählen Sie anschließen "Daylight saving" [ON] oder [OFF] (Sommerzeit an oder aus).
  • Seite 14: Systemeinstellungen

    SYSTEMEINSTELLUNGEN Drücken Sie die Taste MENU um das Menü anzuzeigen, drücken Sie Taste , um die System Einstellungen auszuwählen und drücken Sie zum  Bestätigen die Taste SELECT. Equalizer Dieses Gerät unterstützt eine Vielzahl von Equalizern und Soundeffekten. Drücken Sie die Taste EQ, um im Menü zur Equalizereinstellung zu gelangen.
  • Seite 15 SSID- wählen Die das gewünschte drahtlose Netzwerk aus.Suche- suchen Sie nach verfügbaren Netzwerken. Manuelle Netzwerk-Assistent Konfiguration- wählen Sie ein drahtloses Netzwerk mit DHCP aktiviert/deaktiviert aus Wählen Sie auf dem Radio PBC aus und drücken Sie die PBC Taste auf dem Gerät PBC-WLAN- aus, mit dem Sie sich verbinden möchten.
  • Seite 16 Aktualisierungen aus dem DAB/FM Automatisches Netzwerk oder keine Aktualisierung. Aktualisieren 12/24 Stunden Format Format einstellen Zeitzone auswählen. (Nur verfügbar, wenn die automatische Netzwerkaktualisierung Zeitzone einstellen aktiviert ist.) Sommer-Winterzeit auswählen. Nur verfügbar, wenn die automatische Sommer-/Winterzeit Netzwerkaktualisierung aktiviert ist.) Hinweis: Die voreingestellte automatische Zeitaktualisierung ist „Aktualisierung vom Netzwerk“.
  • Seite 17 Hinweis: Wenn Sie das System aus Werkseinstellungen zurücksetzen werden alle von Ihnen eingestellten Radiosender, Internet und voreingestellte DAB & FM Sender gelöscht. Software Update 1. Drücken Sie während des Systemeinstellungsmodus die Taste  , um „Software Update“ auszuwählen und drücken Sie zum Bestätigen die Taste SELECT.
  • Seite 18: Internet-Radio

    INTERNET-RADIO Dieses Gerät kann tausende Radiosender und Podcasts aus der ganzen Welt über die Internetbreitbandverbindung abspielen. Wenn Sie den Internet-Radio-Modus ausgewählt haben, verbindet sich das Radio mit dem Frontier Silicon Internet-Radio-Portal um eine Senderliste herunterzuladen. Wenn ein Sender einmal ausgewählt wurde, wird das Radio sich direkt mit diesem Sender verbinden.
  • Seite 19 Sie können speziell nach Sendern Ihres Landes suchen. Innerhalb dieses Rahmens können Sie Ihre Suche durch Lokal, „Land“ Genres weiter eingrenzen, oder sich alle Radiosender anzeigen lassen. Sie können Sender aus diversen Kategorien dieses Menüs auswählen: Ort, Genre, Beliebte Sender, Neue Sender. Sender Sie können auch durch die Verwendung von Schlüsselwörtern nach Sendern suchen.
  • Seite 20: Spotify Connect

    SPOTIFY CONNECT Verwende dein Smartphone, Tablet oder deinen Computer als Fernbedienung für Spotify. Auf spotify.com/connect erfährst du mehr. Lizenzen Die Spotify Software unterliegt den Nutzungsrechten von Drittanbietern, die auf folgender Seite eingesehen werden können: https://www.spotify.com/connect/third-party-licenses...
  • Seite 21: Bedienung Des Musikplayers

    BEDIENUNG DES MUSIKPLAYERS Der im Gerät integrierte Musikplayer ermöglicht es Ihnen, ungeschützte Audio Dateien (AAC, MP3, WMA, FLAC) abzuspielen, die auf einem mit dem Netzwerk verbundenen Computer gespeichert sind. Um die Musik vom Computer abzuspielen, müssen Sie auf dem Computer eine gemeinsame Datei oder eine Medienbibliothek erstellen.
  • Seite 22: Taste Funktion

    Funktion Taste Drücken, um die Wiedergabe zu pausieren oder die  / Wiedergabe fortzusetzen. Drücken, um den vorherigen Musiktitel zu überspringen.  Drücken und halten, um den vorherigen Musiktitel zurückzuspulen. Drücken, um den nächsten Musiktitel zu überspringen.  Drücken um halten, um den nächsten Musiktitel vorzuspulen.
  • Seite 23: Usb-Wiedergabe

    USB-WIEDERGABE Wenn ein USB-Speichermedium am Gerät angeschlossen ist, erscheint in der Anzeige "USB disk attached - open folder?". Die SELECT-Taste drücken USB playback und mit YES bestätigen. ODER USB disk attached - Open folder? Im Musikplayer-Modus Taste   drücken, um die USB-Wiedergabe auszuwählen und zur Auswahl SELECT drücken.
  • Seite 24: Dab-Radio

    DAB-RADIO Drücken Sie mehrfach die MODE Taste am Gerät oder die FM/DAB-Taste auf der Fernbedienung, um „DAB Radio“ auszuwählen. Das Gerät wird in den DAB-Modus wechseln und die automatische Suchfunktion starten. Während der Suche wird das Display „Suche…“ und einen Balken, der den Fortschritt und die bisher gefundenen Sender angibt, anzeigen.
  • Seite 25 DAB Anzeigeoptionen Jedes Mal, wenn Sie die Taste INFO auf der Fernbedienung oder auf Ihrem Gerät drücken, wird das Display die folgenden Anzeigeoptionen aufzeigen: DLS-Programmtyp-Ensemble/Frequenz-Signalfehler/-stärke- Übertragungsgeschwindigkeit/Codec/Sender-Datum. Löschen nicht länger verfügbarer Sender Sie haben die Möglichkeit, nicht länger verfügbare Sender zu löschen. 1.
  • Seite 26: Fm-Radio

    FM-RADIO Von DAB zu FM wechseln Um das Gerät von DAB in den FM-Modus zu wechseln, drücken Sie mehrfach die MODE Taste, bis FM angezeigt wird. Das Display wird Ihnen die Frequenz anzeigen. radio FM Radi o Automatische Suche Drücken und halten Sie die TUNING-Tasten, um die Suche nach einem Sender zu starten.
  • Seite 27: Audioeingang (Line In)

    3. Wählen Sie mit Taste  „Ja“ aus, um Mono zu hören oder wählen Sie „Nein“ aus, wenn das Gerät Mono oder Stereo selbst auswählen soll. 4. Bestätigen Sie Ihre Auswahl mit der Taste SELECT. AUDIOEINGANG (LINE IN) Sie können Musik von externen Quellen wiedergen. 1.
  • Seite 28: Bt-Verbindung

    BT-VERBINDUNG Dieses Gerät verfügt über eine BT-funktion und kann ein Signal im Radius von 8 Metern empfangen. Das Radio mit einem BT-Gerät verbinden, um Musik zu hören: 1. Drücken Sie zur Auswahl des BT-Modus mehrfach die Taste MODE. 2. Wenn das Radio nicht mit einem BT-Gerät verbunden ist, wird in der rechten Ecke des Displays das BT-Symbol aufblinken.
  • Seite 29: Net-Remote

    NET-REMOTE Das Gerät kann über Net-Remote von einem Smartphone oder Tablet mit iOS oder Androidsystem bedient werden. Durch den Download der App namens UNDOK können Sie alle Modi einsehen (Internet-Radio, Musik Wiedergabe, DAB und FM) und den gewünschten Modus auf Ihrem Tablet oder Smartphone auswählen.
  • Seite 30: Schlafmodus

    SCHLAFMODUS Diese Funktion ermöglicht es dem Gerät, nach einem voreingestellten Zeitraum von alleine in den Standby-Modus zu wechseln. 1. Um die Funktion zu aktivieren, drücken Sie mehrfach die Taste SLEEP. Bei jedem Drücken wird sich der Zeitraum, wie unten dargestellt, ändern: Sleep OFF ...
  • Seite 31: Weckfunktion

    WECKFUNKTION Wecker einstellen 1. Drücken Sie auf Ihrer Fernbedienung die Taste ALARM, das Display zeigt dann „Alarm (1 oder 2): Aus[hh:mm]“ an. 2. Drücken Sie Taste  , um Wecker Nummer 1 oder 2 auszuwählen und drücken Sie SELECT um die Einstellung der folgenden Parameter vorzunehmen.
  • Seite 32 Chal-Tec GmbH Wallstr. 16t 10179 Berlin www.chal-tec.com Die Spotify-Software unterliegt den Nutzungsrechten von Drittanbietern, die auf folgender Seite eingesehen werden können: https://www.spotify.com/connect/third-party-licenses Alle aufgeführten Marken sind Warenzeichen der jeweiligen Unternehmen. Fehler und Auslassungen ausgenommen und technischen Änderungen unterliegend. Unsere allgemeinen Geschäftsbedingungen finden Anwendung.
  • Seite 33: Hinweise Zur Entsorgung

    HINWEISE ZUR ENTSORGUNG Befindet sich die linke Abbildung (durchgestrichene Mülltonne auf Rädern) auf dem Produkt, gilt die Europäische Richtlinie 2012/19/EU. Diese Produkte dürfen nicht mit dem normalen Hausmüll entsorgt werden. Informieren Sie sich über die örtlichen Regelungen zur getrennten Sammlung elektrischer und elektronischer Gerätschaften.
  • Seite 35 Dear Customer, Congratulations on purchasing this equipment. Please read this manual carefully and take care of the following hints on installation and use to avoid technical damages. Any failure caused by ignoring the items and cautions mentioned in the operation and installation instructions are not covered by our warranty and any liability.
  • Seite 36: Technical Data

    TECHNICAL DATA Item number 10034063 10034064 100-240 V ~ 50/60 Hz , 1 A Mains Adaptor , 1 A USB jack FM Radio Frequency range 87,5 MHz - 108 MHz Frequency range 174-240 MHz...
  • Seite 37: Safety Instructions

    SAFETY INSTRUCTIONS Read all the instructions carefully before using the unit and keep them for future reference. • Check that the voltage marked on the rating label matches your mains voltage. • The unit must be placed on a flat stable surface and should not be subjected to vibrations.
  • Seite 38 Interference • Do not place the unit on or near appliances which may cause electromagnetic interference. If you do, it may adversely affect the operating performance of the unit, and cause a distorted sound. Supervision • Children should be supervised to ensure that they do not play with the unit.
  • Seite 39: Device Description

    DEVICE DESCRIPTION Front USB connection Display Earphone jack Play/Pause button SCROLL&SELECT dial 10 Skip back button MEMORY button Skip forward button MODE button 12 INFO button BACK button 13 VOLUME / dial MENU button Remote control Sensor Rear 15 Mains Connection Cable 19 Audio Output (optical) 16 WLAN Antenna 20 Audio Output (Coaxial)
  • Seite 40: Remote Control

    REMOTE CONTROL...
  • Seite 41 STANDBY button 15 BACK buttonSLEEP button INFO button 16 Navigate right button MENU button 17 button Navigate up button 18 VOLUME + button Navigate left button 19 TUNING button SELECT button 20 button VOLUME – button 21 MUTE button TUNING button 22 EQ button Skip back button 23 SNOOZE button...
  • Seite 42 Battery replacement for the remote control Press down on the compartment cover, and slide the cover off to open the compartment. Place the CR2032 battery in the remote control according to the polarity markings (“+” and “-”) inside the compartment and on the battery.
  • Seite 43: Connections

    CONNECTIONS 1. The audio input/output (analogue), optical out (digital) and coaxial out (digital) are available on the back of the unit to connect A/V amplifier or HiFi system. 2. Connect the rod antenna included in the supply to the antenna connection and extend it to the desired length.
  • Seite 44: Getting Started

    GETTING STARTED Powering ON/OFF 1. Press the Standby button on the unit or remote control to switch the unit 2. Press the Standbybutton on the unit or remote control to switch the unit back to standby mode. Selecting Modes Press the MODE button repeatedly on the unit or press the USB, FM/DAB, AUDIO IN, INTERNET, SPOTIFY button on the remote control to switch between Music player, DAB radio, FM radio, Line in, Internet radio and Spotify Connect modes.
  • Seite 45 3. Here it is possible to select which source (DAB/FM/Network/No update) the unit uses to obtain and update the time and date. If "Update from Network" selected, proceed to the next step to select time zone to ensure that the time is displayed correctly. And then select the "Daylight savings"...
  • Seite 46: System Settings

    SYSTEM SETTINGS Press the MENU button to display the menu, press the   buttons to select System settings and then press the SELECT button to confirm. Equalizer This system supports a variety of equalizers and sound effects. Press the EQ button to access the Equaliser menu Alternatively: During System settings mode, press the ...
  • Seite 47 setting and return back to the previous menu. Time/Date The Time/Date can be automatically set once it has been connected to the Internet, DAB+ or FM radio station with time/date information. You may also adjust the Time/Date manually. In System settings mode, press the  ...
  • Seite 48 Language 1. During System settings mode, press the / buttons to select Language and then press the SELECT button to confirm. 2. Press the / buttons to change the display language of your choice. 3. Press the SELECT button to confirm.. Factory Reset There may be times when you need to reset your unit back to the factory settings especially when you have moved house.
  • Seite 49: Backlight

    Backlight 1. During System settings mode, press the / buttons to select Backlight and then press the SELECT button to confirm. 2. For the other settings under Backlight, press the / buttons to select the following options and then press the SELECT button to confirm. High / Medium/ Low Operation Mode Timeout...
  • Seite 50: Internet-Radio

    INTERNET-RADIO This radio can play thousands of radio stations and podcasts from all over the world via a broadband internet connection. When Internet Radio mode is selected, the radio connects with the Frontier Silicon Internet radio portal to download a list of stations. Once a station is selected, the radio will connect directly to that station.
  • Seite 51 Select Get access code to obtain the code in order to register the radio with the Help portal (www.wifiradio-frontier.com), or to add this radio to an existing account. Preset Stations The preset Internet radio stations are stored in the radio and cannot be accessed from other radios.
  • Seite 52: Spotify Connect

    SPOTIFY CONNECT Use your phone, tablet or computer as a remote control for Spotify. Go to spotify.com/connect to learn how. Licenses The Spotify Software is subject to third party licenses found here: https://www.spotify.com/connect/third-party-licenses...
  • Seite 53: Music Player Operation

    MUSIC PLAYER OPERATION This function is for more advanced users. The built-in Music Player allows you to play unprotected audio files (AAC, MP3, WMA, FLAC) stored on a networked computer. To play music from the computer, you must setup a shared file or media library on the computer. Press the MODE button repeatedly to select Music Player mode.
  • Seite 54 Prune servers 1. During Music Player mode, press the  buttons, to select Prune servers and press the SELECT button toconfirm. 2. Press the   buttons to select YES to remove servers that are no longer available. Press the SELECT button to confirm, or select NO to cancel.
  • Seite 55: Usb Player Operation

    USB PLAYER OPERATION When a USB device is connected to the unit, the display shows “USB disk attached – Open folder?” (F.5), press the SELECT button to confirm YES. Alternatively: During Music Player mode, press the   buttons to select USB playback and press the SELECT button to confirm.
  • Seite 56: Dab

    Press the MODE button repeatedly or press the FM/DAB button on the remote control to select “DAB radio”. The unit will enter DAB mode and perform the auto scan function. During the scan the display will show “Scanning… ” together with a slide bar that indicates the progress of the scan and the amount of stations that have been found so far.
  • Seite 57 Prune Invalid You may remove all unavailable stations from the list. 1. During DAB mode, press the MENU button and press the   buttons to select Prune invalid and then press the SELECT button to confirm. 2. Press the  ...
  • Seite 58: Fm Operation

    FM OPERATION Switching from DAB to FM Mode To switch the unit to FM mode, press the MODE button repeatedly to switch radio to FM mode. The display will show the frequency. FM Radi o Auto Scan Press and hold the TUNINGbuttons to start searching for a station.. The search may not stop at a station with a very week signal..
  • Seite 59: Audio Input

    AUDIO INPUT You can play sound from an external device via the device. 1. Connect the external device to the Audio Input on the device through suitable RCA cable. 2. Press the MODE button repeatedly on the unit or press the AUDIO IN button on the remote to select Line in mode.
  • Seite 60: Bt Operation

    BT OPERATION The unit has a BT function that can receive a signal within 8 metres. Pairing the unit with a BT device to listen to music: 1. Press the MODE button repeatedly to select BT mode. 2. If the unit is not paired with any BT device, the right hand corner will show a flash the BT symbol.
  • Seite 61: Net-Remote

    NET-REMOTE The device gives a feature of NetRemote by smartphone or tablet in iOS or Android system. By downloading the app named UNDOK, you can view all the modes of Internet radio, Spotify, Music player, DAB and FM. And select the mode on your smartphone or tablet.
  • Seite 62: Sleep Setting

    SLEEP SETTING This function allows you to program the unit to turn to standby mode by itself after a set period of time. 1. To activate the sleep function, press the SLEEP button repeatedly. The time will change in the below sequence on every press: Sleep OFF ...
  • Seite 63: Alarm

    ALARM Setting the Alarm 1. Press the ALARM button on the remote control, the display shows “Alarm (1 or 2): Off [hh:mm]”. 2. Press the   buttons to select the Alarm number (1 or 2) and then press the SELECT button to start thesetting of the following parameters. For the following setting, press the ...
  • Seite 64 Chal-Tec GmbH Wallstr. 16 10179 Berlin, Germany www.chal-tec.com The Spotify software is subject to third party licenses found here: https://www.spotify.com/connect/third-party-licenses All listed brands are trademarks of their companies. Errors and omissions excepted, and subject to technical change. Our general terms of delivery and payment are applied.
  • Seite 65: Disposal Considerations

    DISPOSAL CONSIDERATIONS According to the European waste regulation 2012/19/EU this symbol on the product or on its packaging indicates that this product may not be treated as household waste. Instead it should be taken to the appropriate collection point for the recycling of electrical and electronic equipment.
  • Seite 69 Chère cliente, cher client, Toutes nos félicitations pour l’acquisition de ce nouvel appareil. Veuillez lire attentivement et res- pecter les instructions de ce mode d’emploi afin d’éviter d’éventuels dommages. Nous ne saurions être tenus pour responsables des dommages dus au non-respect des consignes et à la mauvaise utili- sation de l’appareil.
  • Seite 70: Fiche Technique

    FICHE TECHNIQUE Numéros d'article 10034063 10034064 100-240 V ~ 50/60 Hz , 1 A Alimentation de l'adaptateur secteur , 1 A Sortie USB Radio FM Plage de fréquences 87,5 MHz - 108 MHz Plage de fréquences 174-240 MHz...
  • Seite 71: Consignes De Sécurité

    CONSIGNES DE SÉCURITÉ Consignes générales de sécurité • Lisez attentivement toutes les instructions avant d’utiliser l’appareil et conservez le mode d'emploi pour vous y référer ultérieurement. • Utilisez uniquement la tension indiquée sur la plaque signalétique de l'appareil. Assurez-vous que votre prise de courant possède une mise à la terre.
  • Seite 72 Branchement sur secteur • Veillez à ne pas placer l'appareil sur le cordon d'alimentation, car son poids pourrait l'endommager et constituer un danger pour la sécurité. • Si le câble de connexion de l'appareil est endommagé, il doit être remplacé par le fabricant, le service après-vente ou une autre personne qualifiée pour éviter tout dommage.
  • Seite 73: Aperçu De L'appareil

    APERÇU DE L'APPAREIL Vorderseite Port USB Lecture /Pause Prise casque 10 Titre précédent Titre suivant Scroll /sélection Touche mémoire 12 Touche Info Mode 13 Volume / marche-arrêt Touche retour 14 Capteur IR Menu Ecran Rückseite 15 Prise d'alimentation 19 Sortie optique (numérique) 16 Antenne Wifi 20 Sortie coaxiale (numérique) 17 Sortie audio (analogique)
  • Seite 74: Télécommande

    TÉLÉCOMMANDE...
  • Seite 75 Marche/veille 13 Mode Info 14 Memory (mémoire) Menu 15 Retour Navigation dans le menu haut 16 Navigation dans le menu droite Navigation dans le menu 17 Navigation dans le menu bas gauche 18 Volume + Sélection 19 Recherche de station avant Volume - 20 Lecture / Pause Recherche de station arrière...
  • Seite 76 Remplacement de la pile de la télécommande Appuyez sur le tiroir du compartiment à piles et faites-le glisser pour l’ouvrir. Placez la pile bouton CR2032 suivant les marques de polarité ("+" et "-") dans le compartiment et sur la télécommande. Insérez le tiroir dans le compartiment, poussez-le doucement et faites-le glisser jusqu'à...
  • Seite 77: Branchement

    BRANCHEMENT Pour brancher l'appareil sur le secteur 1. À l'arrière de l'appareil se trouvent l'entrée et la sortie audio (analogique), la sortie optique (numérique) et la sortie coaxiale (numérique) pour la connexion à un amplificateur ou à une chaîne hi-fi. 2.
  • Seite 78: Mise En Marche

    MISE EN MARCHE Pour allumer ou éteindre l'appareil 1. Pour allumer la radio, appuyez sur la touche veille de l’appareil ou de la télécommande. 2. Appuyez sur la touche veille pour remettre l'appareil en mode veille. Choix du mode Appuyez plusieurs fois sur la touche MODE de l'appareil ou sur les touches USB, FM / DAB, AUDIO IN, Internet et Spofity pour basculer entre les modes Lecteur de musique, Radio DAB, Radio FM, Entrée de ligne, Radio Internet et Spotify Connect.
  • Seite 79 sélectionnez "Update from Network", passez à l'étape suivante pour définir le fuseau horaire afin d'afficher l'heure correctement. Sélectionnez ensuite "Daylight saving" [ON] ou [OFF] (heure d'été activée ou désactivée). 4. À l'étape suivante, définissez si le périphérique doit rester connecté à Internet ou non en mode veille.
  • Seite 80: Paramètres Système

    PARAMÈTRES SYSTÈME Appuyez sur la touche MENU pour afficher le menu, appuyez sur la touche , pour sélectionner les paramètres système et confirmez en appuyant  sur la touche SELECT. Egaliseur Cet appareil prend en charge une variété d’égaliseurs et d’effets sonores. Appuyez sur la touche EQ pour accéder au menu de réglage de l’égaliseur.
  • Seite 81 SSID - Sélectionnez le réseau sans fil souhaité Recherchez les réseaux disponibles. Assistant réseau Configuration manuelle - sélectionnez un réseau sans fil avec DHCP activé / désactivé Sur la radio, sélectionnez PBC et appuyez sur la touche PBC du périphérique auquel vous Configuration PBC-Wifi souhaitez vous connecter.
  • Seite 82 Mises à jour du réseau DAB / FM ou pas de Actualisation mise à jour. automatique Format 12/24 heures Réglage du format Sélectionnez le fuseau horaire. (Disponible Réglage du fuseau uniquement si la mise à jour automatique horaire par le réseau est activée.) Sélectionnez l'heure d'été-hiver.
  • Seite 83 Remarque : Si vous réinitialisez le système à partir des paramètres d'usine, toutes les stations de radio, stations Internet et les stations DAB & FM mémorisées que vous avez définies seront supprimées. Software Update 1. Dans les paramètres système, appuyez sur la touche  , pour choisir "Software Update"...
  • Seite 84: Radio Internet

    RADIO INTERNET Cet appareil peut lire des milliers de stations de radio et de podcasts du monde entier via la connexion Internet à large bande. Si vous avez sélectionné le mode radio Internet, la radio se connecte au portail Frontier Silicon Internet Radio pour télécharger une liste de stations.
  • Seite 85 Sélectionnez des podcasts parmi les catégories suivantes dans le menu podcast : Lieu, Genre. Vous pouvez également rechercher des épisodes spécifiques d'un podcast en saisissant des mots-clés. Sélectionnez l'option "Recevoir code d'accès" pour recevoir le code permettant d'enregistrer votre radio via le portail (www.wifiradio-frontier.com) ou ajoutez votre radio à...
  • Seite 86: Spotify Connect

    SPOTIFY CONNECT Avec Spotify Connect, vous pouvez utiliser l'application Spotify sur votre téléphone, votre tablette ou votre ordinateur pour contrôler la musique diffusée sur votre appareil. Vous pouvez téléphoner, jouer à des jeux et même éteindre votre téléphone - la musique continue de jouer. Licences Le logiciel Spotify est soumis aux droits d’utilisation de tiers, disponibles à...
  • Seite 87: Utilisation Du Lecteur De Musique

    UTILISATION DU LECTEUR DE MUSIQUE Le lecteur de musique intégré vous permet de lire des fichiers audio non protégés (AAC, MP3, WMA, FLAC) stockés sur un ordinateur connecté au réseau. Pour lire la musique à partir de l'ordinateur, vous devez créer un fichier partagé...
  • Seite 88: Touche Fonction

    Fonction Touche Appuyez sur pour suspendre ou reprendre la lecture.  / Appuyez sur pour sauter le titre précédent.  Maintenez pour revenir en arrière vers le titre précédent. Appuyez sur pour sauter le titre suivant. Maintenez  pour avancer rapidement vers le titre suivant. Mode répétition En mode lecteur de musique, appuyez sur la touche ...
  • Seite 89: Lecture Par Usb

    LECTURE PAR USB Si un support de stockage USB est connecté au périphérique, "Disque USB connecté - Ouvrir le dossier ?" Apparaît à l'écran. USB playback Appuyez sur la touche SELECT et confirmez avec YES. USB disk attached - Open folder? OU BIEN Appuyez sur la touche ...
  • Seite 90: Radio Dab

    RADIO DAB Appuyez plusieurs fois sur la touche MODE de l'appareil ou sur la touche FM / DAB de la télécommande pour sélectionner "Radio DAB". L'appareil passe en mode DAB et lance la fonction de recherche automatique. Pendant la recherche, l'écran affiche "Search ..." et une barre indiquant la progression et les stations trouvées jusqu'à...
  • Seite 91 Options d'affichage DAB Chaque fois que vous appuyez sur la touche INFO de la télécommande ou de l'appareil, l'écran affichera les options d'affichage suivantes : Type de programme DLS- Ensemble / signal d'erreur de fréquence / force et taux de transmission / codec / Date de la station.
  • Seite 92: Radio Fm

    RADIO FM Passer de DAB à FM Pour passer du mode DAB au mode FM, appuyez plusieurs fois sur le bouton MODE jusqu'à ce que FM s'affiche. L'écran vous affichera la fréquence. radio Recherche automatique FM Radi o Appuyez sur les boutons TUNING et maintenez-les enfoncés pour commencer à...
  • Seite 93: Lecture Via Aux

    stéréo. 4. Confirmez votre choix par un appui sur la touche SELECT. LECTURE VIA AUX À l'arrière de l'appareil se trouve une entrée audio qui peut être utilisée pour les signaux audio analogiques provenant d'autres sources. 1. Connectez un autre périphérique audio à l'entrée AUX via un câble AUX (non fourni).
  • Seite 94: Connexion Bt

    CONNEXION BT Cet appareil possède une fonction BT et peut recevoir un signal dans un rayon de 8 mètres. Connectez la radio à un appareil BT pour écouter de la musique: 1. Appuyez plusieurs fois sur la touche MODE pour sélectionner le mode 2.
  • Seite 95: Télécommande Net Remote

    TÉLÉCOMMANDE NET REMOTE Cet appareil peut être utilisé avec Net-Remote à partir d'un smartphone ou d'une tablette avec système iOS ou Android. En téléchargeant l'application UNDOK, vous pouvez voir tous les modes (radio Internet, lecture de musique, DAB et FM) et sélectionner le mode souhaité sur votre tablette ou votre smartphone.
  • Seite 96: Arrêt Automatique Programmable

    ARRÊT AUTOMATIQUE PROGRAMMABLE Cette fonction permet à l'appareil de passer automatiquement en mode veille après une durée prédéfinie. 1. Pour activer la fonction, appuyez plusieurs fois sur la touche SLEEP. Chaque appui modifie la durée comme indiqué ci-dessous: Sleep OFF  15 Minuten  30 Minuten  45 Minuten  60 Minuten  90 Minuten  120 Minuten 2.
  • Seite 97: Fonction Alarme

    FONCTION ALARME Réglage de l'alarme 1. Sur votre télécommande, appuyez sur la touche ALARM, l'écran affiche "Alarm (1 ou 2) : Arrêt [hh:mm]“. 2. Appuyez sur la touche  , pour choisir alarme 1 ou 2 , et appuyez sur SELECT pur prendre en compte le réglage de ce paramètre.
  • Seite 98 Chal-Tec GmbH Wallstr. 16t 10179 Berlin www.chal-tec.com Le logiciel Spotify est soumis aux droits d'utilisation de tiers, disponibles sur la page suivante : https://www.spotify.com/connect/third-party-licenses Alle aufgeführten Marken sind Warenzeichen der jeweiligen Unternehmen. Toutes les marques citées sont des marques de leurs sociétés respectives. Sauf erreurs et omissions et sous réserve de modifications techniques.
  • Seite 99: Informations Sur Le Recyclage

    INFORMATIONS SUR LE RECYCLAGE Vous trouverez sur le produit l’image ci-contre (une poubelle sur roues, barrée d‘une croix), ce qui indique que le produit se trouve soumis à la directive européenne 2012/19/UE. Renseignez-vous sur les dispositions en vigueur dans votre région concernant la collecte séparée des appareils électriques et électroniques.
  • Seite 101 Gentile Cliente, La ringraziamo per aver acquistato il dispositivo. La preghiamo di leggere attentamente le seguenti istruzioni per l’uso e di seguirle per evitare possibili danni tecnici. Non ci assumiamo alcuna respon- sabilità per danni scaturiti da una mancata osser- vazione delle avvertenze di sicurezza e da un uso improprio del dispositivo.
  • Seite 102: Dati Tecnici

    DATI TECNICI Numero articolo 10034063 10034064 100-240 V ~ 50/60 Hz , 1 A Alimentazione, alimentatoret , 1 A Uscita USB Radio FM Intervallo di frequenza 87,5 MHz - 108 MHz Intervallo di frequenza 174-240 MHz...
  • Seite 103: Avvertenze Di Sicurezza

    AVVERTENZE DI SICUREZZA Avvertenze di sicurezza generiche • Leggere attentamente tutte le avvertenze prima di utilizzare il dispositivo e conservare il manuale per future consultazioni. • Utilizzare solo tensione corrispondente a quella indicata sulla targhetta del dispositivo. Assicurarsi che la presa elettrica utilizzata sia dotata di messa a terra.
  • Seite 104 Allacciamento alla rete elettrica • Assicurarsi che il dispositivo non si trovi sopra al cavo di alimentazione, altrimenti il peso potrebbe danneggiarlo e rappresentare un rischio per la sicurezza. • Se il cavo di alimentazione è danneggiato, deve essere sostituito dal produttore, dal servizio di assistenza ai clienti o da una persona qualificata, in modo da evitare danni.
  • Seite 105: Descrizione Del Dispositivo

    DESCRIZIONE DEL DISPOSITIVO Lato anteriore Connessione USB Play/Pausa Connessione cuffie 10 Titolo precedente Titolo successivo Scorrere/Selezionare Memory 12 Info Modalità 13 Volume/On-Off Indietro 14 Ricevitore IR Menu Display Lato posteriore 15 Connessione 19 Uscita ottica (digitale) 16 Antenna Wi-Fi 20 Uscita coassiale (digitale) 17 Uscita audio (analogica) 21 Ingresso LAN 18 Ingresso audio (on/off)
  • Seite 106: Telecomando

    TELECOMANDO...
  • Seite 107 On/Standby 13 Modalità Info 14 Memory (memoria) Menu 15 Indietro Navigazione menu verso l’alto 16 Navigazione menu verso destra Navigazione menu verso il 17 Navigazione menu verso il basso basso Selezione 18 Volume+ Volume- 19 Ricerca emittenti successive Ricerca emittenti precedenti 20 Play/Pausa Titolo precedente 21 Muto...
  • Seite 108 Raggio di utilizzo del telecomando Premere il vassoio del vano della batteria e tirarlo fuori. Inserire una batteria CR2023 rispettando la corretta polarità (“+” e “-”) nel vano. Reinserire il vassoio nel vano, premere leggermente verso il basso fino al bloccaggio.
  • Seite 109: Collegamento

    COLLEGAMENTO Allacciamento del dispositivo alla rete elettrica 1. Sul retro si trovano l’ingresso e l’uscita audio (analogici), l’uscita ottica (digitale) e l’uscita coassiale (digitale) per collegare a un amplificatore o a un impianto Hi-Fi. 2. Collegare l’antenna ad asta inclusa in consegna ed estrarla fino alla lunghezza desiderata.
  • Seite 110: Messa In Funzione

    MESSA IN FUNZIONE Accendere/Spegnere il dispositivo 1. Premere Standby su dispositivo o telecomando per accendere la radio. 2. Premere nuovamente Standby per passare in modalità standby. Selezionare la modalità Premere più volte MODE sul dispositivo o i tasti USB, FM/DAB, AUDIO IN, Internet, Spotify per scorrere tra le modalità...
  • Seite 111 5. L’assistente di rete si avvia ed è possibile stabilire una connessione a Internet. Selezionare una rete Wi-Fi conosciuta. Selezionare se utilizzare WPS (premere il tasto) o saltare WPS (Skip WPS) per inserire la password con la tastiera. Questo manuale spiega le funzioni fondamentali per utilizzare il dispositivo. Tutti i passaggi di controllo descritti fanno riferimento al telecomando.
  • Seite 112: Impostazioni Di Sistema

    IMPOSTAZIONI DI SISTEMA Premere MENU per visualizzare il menu, i tasti  , um die System Einstellungen auszuwählen und drücken Sie zum Bestätigen die Taste SELECT. Equalizzatore Questo dispositivo supporta diversi equalizzatori ed effetti sonori. Premere EQ per raggiungere il menu dell’equalizzatore. In alternativa, è...
  • Seite 113 3. Premere BACK su dispositivo o telecomando per interrompere l’impostazione e tornare al punto del menu precedente. Ora/Data (Time/Date) Ora e data possono essere impostate automaticamente non appena il dispositivo è collegato a Internet o a un’emittente radio DAB/FM. Ora è...
  • Seite 114 2. Premere  , per mostrare la lingua selezionata. 3. Confermare con SELECT. Resettare alle impostazioni di fabbrica Può essere necessario riportare il dispositivo alle impostazioni di sistema, in particolare dopo un trasloco. Anche se ci sono problemi con la ricezione è possibile resettare il dispositivo alle impostazioni di fabbrica e riprovare.
  • Seite 115 Illuminazione di fondo 1. Nelle impostazioni di sistema, premere  , per selezionare “Illuminazione di fondo” e confermare con SELECT. 2. Per altre impostazioni sotto a “Illuminazione di fondo”, premere  , per selezionare le opzioni indicate nella tabella seguente. Confermare con SELECT.
  • Seite 116: Radio Internet

    RADIO INTERNET Questo dispositivo è in grado di riprodurre migliaia di emittenti e podcast da tutto il mondo grazie alla connessione a Internet. Se si seleziona la modalità Web Radio, la radio si connette con il portale web radio Frontier Silicon per scaricare una lista di emittenti.
  • Seite 117: Spotify Connect

    Selezionare podcast nel relativo menu dalle seguenti Aiuto categorie: località, genere. Possono anche essere utilizzate parole d’ordine per cercare determinati episodi di un podcast. Selezionare l’opzione “Ricevere codice di accesso” per ricevere il codice con cui registrare la radio tramite il portale (www.wifiradio-frontier.com) o inserire la radio in un account già...
  • Seite 118: Utilizzo Del Lettore Musicale

    UTILIZZO DEL LETTORE MUSICALE Il lettore musicale integrato nel dispositivo permette di riprodurre file audio non protetti (AAC, MP3, WMA, FLAC) salvati su un computer collegato con la rete. Per riprodurre la musica dal computer è necessario creare un file o una biblioteca musicale condivisa sul computer.
  • Seite 119 Riproduzione casuale In modalità lettore musicale, premere   uper selezionare “Riproduzione casuale” e premere SELECT per accendere/spegnere la modalità di riproduzione casuale. Cancellare il server 1. In modalità lettore musicale, premere  , per selezionare “Cancellare il server” e confermare con SELECT. 2.
  • Seite 121: Riproduzione Usb

    RIPRODUZIONE USB Se un supporto di memoria USB è collegato al dispositivo, sullo schermo compare “USB disk attached – open folder?”. Premere SELECT e confermare USB playback con YES. USB disk attached - Open folder? In modalità lettore musicale, premere  ...
  • Seite 122: Radio Dab

    RADIO DAB Premere più volte MODE sul dispositivo o FM/DAB sul telecomando per selezionare “Radio DAB”. Il dispositivo passa in modalità DAB e inizia la funzione di ricerca automatica. Durante la ricerca, il display mostra “Ricerca…” e mostra una barra che indica il progresso e le emittenti trovate fino a quel momento.(F.7) Terminata la ricerca, il dispositivo seleziona la prima emittente alfanumerica radio...
  • Seite 123 Opzioni per le indicazioni DAB Ogni volta che si preme INFO su telecomando o dispositivo, il dispositivo mostra le seguenti indicazioni: DLS - Tipo di programma - Ensemble/ Frequenza-Errore segnale/Intensità - Velocità di trasmissione/Codec/ Emittente – Data. Cancellare emittenti non più disponibili È...
  • Seite 124: Radio Fm

    RADIO FM Passare da DAB a FM Um das Gerät von DAB in den FM-Modus zu wechseln, drücken Sie mehrfach die MODE Taste, bis FM angezeigt wird. Das Display wird Ihnen die Frequenz anzeigen. radio FM Radi o Ricerca automatica Tenere premuti i tasti TUNING per iniziare la ricerca di un’emittente.
  • Seite 125: Ingresso Audio (Line-In)

    INGRESSO AUDIO (LINE-IN) È possibile riprodurre musica da fonti esterne. 1. Collegare il dispositivo esterno alle connessioni RCA sul retro. 2. Premere più volte MODE per passare in modalità Line-In. 3. Impostare il volume con la manopola sul dispositivo o con +/- sul telecomando.
  • Seite 126: Collegamento Bt

    COLLEGAMENTO BT Questo dispositivo è dotato di una funzione BT e può ricevere segnali nel raggio di 8 metri. Collegare la radio a un dispositivo BT per ascoltare musica:: 1. Premere più volte MODE per selezionare la modalità BT. 2. Se la radio non è collegata a un dispositivo BT, nell’angolo in alto a destra del display lampeggia il simbolo BT.
  • Seite 127: Net-Remote

    NET-REMOTE Il dispositivo può essere controllato da smartphone o tablet con iOS o Android tramite Net-Remote. Scaricando la app UNDOK è possibile vedere tutte le modalità (Web radio, Riproduzione musicale, DAB e FM) e selezionare quella desiderata da smartphone o tablet. Prima di utilizzare la app UNDOK, assicurarsi che smartphone/tablet siano collegati alla stessa rete Wi-Fi del dispositivo.
  • Seite 128: Modalità Sonno

    MODALITÀ SONNO Questa funzione permette di far passare il dispositivo in standby automaticamente dopo un periodo di tempo predefinito. 1. Per attivare la funzione, premere più volte SLEEP. Ogni volta che si preme il tasto, il tempo cambia in questo modo: Sleep OFF ...
  • Seite 129: Funzione Sveglia

    FUNZIONE SVEGLIA Impostare la sveglia 1. Premere ALARM sul telecomando e lo schermo mostra “Alarm (1 o 2): off[hh:mm]. 2. Premere  , per selezionare Sveglia 1 o 2 e confermare l’impostazione dei parametri con SELECT. Per le seguenti impostazioni, premere (PFEILE) e SELECT per confermare ...
  • Seite 130 Chal-Tec GmbH Wallstr. 16t 10179 Berlin www.chal-tec.com Il software Spotify è sottoposto ai diritti di utilizzo di parti terze, che posso- no essere visionati alla pagina web seguente: https://www.spotify.com/connect/third-party-licenses Tutti i marchi indicati sono marchi registrati delle rispettive aziende. Esclusi errori e omissioni e soggetto a modifiche tecniche. Si applicano le nostre condizioni contrattuali.
  • Seite 131: Avviso Di Smaltimento

    AVVISO DI SMALTIMENTO Se sul prodotto è presente la figura a sinistra (il bidone dei rifiuti con le ruote), si applica la direttiva europea 2012/19/ UE. Questi prodotti non possono essere smaltiti con i rifiuti normali. Informarsi sulle disposizioni vigenti per la raccolta di dispositivi elettrici ed elettronici.
  • Seite 133 Estimado cliente, Le felicitamos por la adquisición de este pro- ducto. Lea atentamente el siguiente manual y siga cuidadosamente las instrucciones de uso con el fin de evitar posibles daños. La empre- sa no se responsabiliza de los daños ocasiona- dos por un uso indebido del producto o por ha- ber desatendido las indicaciones de seguridad.
  • Seite 134: Datos Técnicos

    DATOS TÉCNICOS Número de artículo 10034063 10034064 100-240 V ~ 50/60 Hz , 1 A Suministro eléctrico de la fuente de alimentación , 1 A Salida USB Radio FM Rango de frecuencia 87,5 MHz - 108 MHz Rango de frecuencia 174-240 MHz...
  • Seite 135: Indicaciones De Seguridad

    INDICACIONES DE SEGURIDAD Advertencias generales de seguridad • Lea atentamente estas indicaciones antes de utilizar el aparato por primera vez y conserve este manual para consultas posteriores. • Utilice exclusivamente la tensión que aparece especificada en la placa técnica del aparato. Asegúrese de que la toma de corriente cuente con toma de tierra.
  • Seite 136 problema del aparato. Toma para suministro eléctrico • Asegúrese de que el aparato no se coloque sobre el cable de alimentación, pues el cable podría dañarse por soportar el peso y representar un riesgo para la seguridad. • Si el cable de conexión del aparato se daña, deberá ser sustituido por el fabricante, el servicio de atención al cliente o cualquier otra persona autorizada para evitar daños.
  • Seite 137: Visión General Del Aparato

    VISIÓN GENERAL DEL APARATO Parte delantera Conexión USB Reproducción/pausa Conexión para auriculares 10 Pista anterior Pista siguiente Navegar/seleccionar Botón memoria 12 Botón de info Modo 13 Volumen/on-off Botón atrás 14 Receptor IRStromanschluss Menú Display Parte trasera 15 Toma para cable de 19 Salida óptica (digital) alimentación 20 Salida coaxial (digital)
  • Seite 138: Mando A Distancia

    MANDO A DISTANCIA...
  • Seite 139 On/standby 14 Memory (memoria) Info 15 Atrás Menú 16 Navegación de menú a la derecha Navegación de menú hacia arriba 17 Navegación de menú hacia abajo Navegación de menú a la izquierda 18 Volumen + Selección 19 Búsqueda progresiva de emisoras Volumen - 20 Reproducción/pausa...
  • Seite 140 Cambiar pilas del mando a distancia Presione la tapa del compartimento y extráigala. Coloque la pila de botón CR2032 según las marcas de polaridad ("+" y "-") dentro del compartimento y en el mando a distancia. Vuelva a colocar la tapa, presionándola ligeramente hacia abajo y desplazándola hacia adentro hasta que encaje.
  • Seite 141: Conexión

    CONEXIÓN Conectar el aparato a la red eléctrica 1. En la parte trasera se encuentra la entrada y salida de audio (analógica), la salida óptica (digital) y la salida coaxial (digital) para conectarse a un amplificador o a un sistema HiFi. 2.
  • Seite 142: Puesta En Marcha

    PUESTA EN MARCHA Apagar/encender aparato 1. Para encender la radio, pulse el botón standby en el aparato o en el mando a distancia. 2. Para pasar el dispositivo de nuevo al modo standby, pulse de nuevo el botón Standby. Seleccionar modo Pulse varias veces el botón MODE en el aparato o los botones USB, FM/DAB, AUDIO IN, Internet, Spotify, para cambiar entre los modos Musicplayer, DABRadio, FM-Radio, Line In, Internetradio y Spotify Connect.
  • Seite 143 para seleccionar la zona horaria y visualizar la hora correcta. Seleccione a continuación "Daylight saving" [ON] o [OFF] (horario de verano on u off). 4. En el siguiente paso seleccione si el aparato debe seguir conectado a internet en modo standby o no. 5.
  • Seite 144: Ajustes Del Sistema

    AJUSTES DEL SISTEMA Pulse el botón MENU para mostrar el menú, pulse el botón  , para seleccionar los ajustes del sistema y pulse el botón SELECT para confirmar. Ecualizador Este aparato es compatible con una variedad de ecualizadores y efectos de sonido.
  • Seite 145 Le permite determinar si cuando el aparato esté en modo standby y cuando no esté en Conexión de red modo radio de red debe estar conectado o no a la red. 3.Pulse el botón BACK del aparato o del mando a distancia para cancelar los ajustes y para regresar al punto anterior del menú.
  • Seite 146 Actualización de la red DAB/FM o sin Actualización actualización. automática Formato 12/24 horas Seleccionar formato Seleccionar franja horaria. (Solo disponible Configurar franja si la actualización de red automática está horaria activada). Seleccionar horario de invierno/verano. (Solo disponible si la actualización de red Horario verano/invierno automática está...
  • Seite 147 Nota: Si restablece el sistema a los valores de fábrica, todas las emisoras de radio que ha sintonizado, las emisoras de internet y las emisoras DAB y FM se perderán. Actualización de software 1. Pulse el botón  , en modo ajustes del sistema para seleccionar "Software Update"...
  • Seite 148: Radio De Internet

    RADIO DE INTERNET Este aparato puede reproducir miles de emisoras de radio y podcasts de todo el mundo a través de la conexión a internet de banda ancha. Si ha seleccionado el modo de radio internet, la radio se conecta al portal de radio internet Frontier Silicon para descargar una lista de emisoras.
  • Seite 149: Spotify Connect

    Seleccione los Podcasts de las siguientes categorías en el menú de podcasts: Ubicación, género. Podcasts Introduciendo palabras clave, también puede buscar determinados episodios de un podcast. Seleccione la opción "Obtener código de acceso" para obtener el código con el que la radio se registre Ayuda en el portal (www.wifiradio-frontier.com) o añada la radio a una cuenta ya existente.
  • Seite 150: Uso Del Reproductor De Música

    USO DEL REPRODUCTOR DE MÚSICA El reproductor de música integrado en el aparato le permite reproducir archivos de audio no protegidos (AAC, MP3, WMA, FLAC) que están guardados en un ordenador conectado a la red. Para reproducir la música del ordenador, debe crear una biblioteca de medios o un archivo conjunto en el ordenador.
  • Seite 151 Botón Función Pulse para pausar la reproducción o para continuar con  / ella. Pulse para saltar a la pista anterior. Mantenga pulsado para  rebobinar en la pista anterior. Pulse para saltar a la pista siguiente. Mantenga pulsado  para avanzar en la siguiente pista.
  • Seite 152: Reproducción De Usb

    REPRODUCCIÓN DE USB Si hay un medio de almacenamiento USB conectado el aparato, aparece en pantalla "USB disk attached - open folder?". Pulse el botón SELECT y USB playback confirme con YES. USB disk attached - O BIEN Open folder? En modo de reproductor de música, pulse el botón ...
  • Seite 153: Radio Dab

    RADIO DAB Pulse varias veces el botón MODE en el aparato o FM/DAB en el mando a distancia para seleccionar "Radio DAB". El aparato cambia al modo DAB y se inicia la función de búsqueda automática. Durante la búsqueda, el display muestra "Buscando..." y una raya que indica el progreso y las emisoras encontradas hasta el momento.
  • Seite 154 Opciones de visualización DAB Cada vez que pulsa el botón INFO del mando a distancia o de su aparato, el display muestra las siguientes opciones de visualización: DLS-tipo de programa-Ensemble/Frecuencia-Error de señal/-intensidad de velocidad de transmisión/códec/fecha de emisora. Eliminar las emisoras que ya no están disponibles Tiene la opción de eliminar las emisoras que no se encuentran disponibles desde hace un tiempo.
  • Seite 155: Radio Fm

    RADIO FM Cambiar de DAB a FM Para cambiar el aparato del modo DAB a FM, pulse varias veces el botón MODE hasta que se muestre FM. El display le muestra la frecuencia. radio Búsqueda automática FM Radi o Mantenga pulsado el botón TUNING para iniciar la búsqueda de una emisora.
  • Seite 156: Entrada De Audio (Line In)

    ENTRADA DE AUDIO (LINE IN) Puede reproducir música de fuentes externas. 1. Conecte el dispositivo externo a la toma RCA de la parte trasera. 2. Pulse varias veces MODE en el aparato para acceder al modo Line-in. 3. Configure el volumen deseado con el regulador de volumen en el aparato o con los botones +/- en el mando a distancia.
  • Seite 157: Conexión Bt

    CONEXIÓN BT Este aparato dispone de una función BT y puede recibir una señal en el radio de 8 metros. Conectar la radio a un dispositivo BT para escuchar música: 1. Para seleccionar el modo BT, pulse varias veces el botón MODE. 2.
  • Seite 158: Net-Remote

    NET-REMOTE El aparato se puede controlar a través de Net-Remote a un smartphone o tablet con iOS o sistema Android. Descargando la App llamada UNDOK, puede visualizar todos los modos (radio internet, reproducción de música, DAB y FM) y seleccionar el modo que desee en su tablet o smartphone. Antes de utilizar la app UNDOK, debe asegurarse de que el smartphone/ tablet esté...
  • Seite 159: Modo Apagado Automático

    MODO APAGADO AUTOMÁTICO Esta función le permite cambiar el aparato a modo standby después de un periodo concreto de tiempo. 1. Para activar la función, pulse varis veces el botón SLEEP. Cada vez que pulse, el periodo se modificará de este modo: Sleep OFF ...
  • Seite 160: Función Alarma

    FUNCIÓN ALARMA Activar alarma 1. Pulse el botón ALARM en el mando a distancia, el display muestra a continuación "Alarm (1 o 2): desactivada [hh:mm]". 2. Pulse el botón  , para seleccionar la alarma 1 o 2 y pulse SELECT para ejecutar los siguientes parámetros de ajuste.
  • Seite 161 Chal-Tec GmbH Wallstr. 16t 10179 Berlin www.chal-tec.com El software de Spotify está sujeto a derechos de uso de otros proveedores, disponibles en la siguiente página: https://www.spotify.com/connect/third-party-licenses Todas las marcas indicadas son marcas registradas de la empresa correspondiente. Quedan excluidos errores y omisiones, el producto está...
  • Seite 162: Indicaciones Para La Retirada Del Aparato

    INDICACIONES PARA LA RETIRADA DEL APARATO Si el aparato lleva adherida la ilustración de la izquierda (el contenedor de basura tachado) entonces rige la normativa europea, directiva 2012/19/UE. Estos productos no pueden depositarse en los contenedores destinados a la basura común. Infórmese sobre las leyes territoriales que regulan la recogida separada de aparatos eléctricos y electrónicos.

Inhaltsverzeichnis