Herunterladen Inhalt Inhalt Diese Seite drucken

Werbung

Verfügbare Sprachen
  • DE

Verfügbare Sprachen

  • DEUTSCH, seite 1
Bestzeit
Mikrowelle
Microwave
Microondas
Micro-onde
Microonde
10034440

Werbung

Inhaltsverzeichnis
loading

Inhaltszusammenfassung für Klarstein 10034440

  • Seite 1 Bestzeit Mikrowelle Microwave Microondas Micro-onde Microonde 10034440...
  • Seite 3: Inhaltsverzeichnis

    Geräteübersicht und Bedienfeld 8 Bedienung 9 Reinigung und Pflege 12 Fehlerbehebung 13 Hinweise zur Entsorgung 14 Konformitätserklärung 14 TECHNISCHE DATEN Artikelnummer 10034440 Stromversorgung 220-240 V ~ 50/60 Hz Leistung 1000 W Volumen 25 L Abmessungen (H x B x T) 312 mm × 520 mm × 442 mm Gewicht 17.7 kg...
  • Seite 4: Sicherheitshinweise

    SICHERHEITSHINWEISE Lesen Sie sich alle Hinweise sorgfältig durch und bewahren Sie die Bedienungsanleitung zum Nachschlagen gut auf. Um die Gefahr eines Stromschlags bei einer Störung oder Fehlfunktion zu verringern, muss das Gerät an eine geerdete Steckdose angeschlossen werden. Schließen Sie das Gerät nur an Steckdosen an, die der angegeben Spannung des Geräts entsprechen.
  • Seite 5 Um den Drehteller vor Glasbruch zu schützen: • Lassen Sie den Drehteller abkühlen, bevor Sie ihn reinigen. • Stellen Sie kein heißes Essen oder heiße Behälter auf den kalten Drehteller. • Stellen Sie kein gefrorenes Essen oder gefrorene Behälter auf den heißen Drehteller. Allgemeine Sicherheitshinweise •...
  • Seite 6: Hinweise Zum Kochgeschirr

    HINWEISE ZUM KOCHGESCHIRR Wir raten Ihnen nur Behälter zu benutzen, die für die Mikrowelle geeignet sind. Dazu zählen Behälter aus hitzebeständiger Keramik, Glas und mikrowellentaugliche Plastikbehälter. Benutzen Sie zum Garen und Grillen keine Metallbehälter, da sie Funken schlagen können. Halten Sie sich beim Geschirr an die folgende Tabelle. Material Mikro Grill...
  • Seite 7: Kochtipps

    KOCHTIPPS Folgende Faktoren beeinflussen das Kochergebnis: Die Anordnung der Nahrungsmittel Legen Sie dickere Stück an den Rand des Kochgeschirrs, dünnere Stücke in die Mitte und verteilen Sie die Stücke gleichmäßig. Achten Sie darauf, dass die Stücke nicht übereinander liegen. Garzeit Beginnen Sie mit einer kurzen Garzeit.
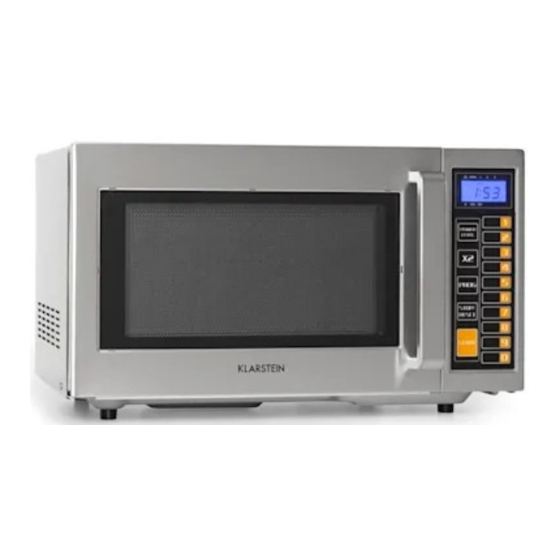
  • Seite 8: Geräteübersicht Und Bedienfeld

    GERÄTEÜBERSICHT UND BEDIENFELD Türverriegelung Bedienfeld Fenster • DISPLAY: Zeigt Garzeit, Leistung und die Benutzungsdauer an. • NUMMERNTASTEN: Werden verwendet, um die Garzeit einzustellen und mehrere Garprogramme zu speichern. • POWER LEVEL: Drücken Sie diese Taste mehrmals, um die Leistung einzustellen. •...
  • Seite 9: Bedienung

    BEDIENUNG Nachdem Sie den Stecker eingesteckt haben, ertönt ein Piepton und die Hintergrundbeleuchtung des Display geht an. Das Gerät befindet sich im Standby- Modus. Garzeit und Leistung einstellen 1. Drücken Sie mehrmals auf die Taste POWER LEVEL, um eine der 3 Leistungsstufen auszuwählen: Hoch (1x drücken), Mittel (2x drücken), Niedrig (3x drücken).
  • Seite 10 Sie können die Garzeiten, die unter den zehn Nummerntasten gespeicherte sind jederzeit überschreiben. Um beispielsweise ein Garprogramm zu speichern, das bis zu 3 aufeinander folgende Garzeiten mit unterschiedlichen Leistungsstufen enthalten kann, gehen Sie wie folgt vor: Beispiel: Ein Garprogramm einzustellen und auf Nummerntaste 1 zu speichern 1.
  • Seite 11 Sie können die Garzeiten, die unter den zehn Nummerntasten gespeicherte sind jederzeit überschreiben. Um ein Garprogramm zu überschreiben, gehen Sie wie folgt vor: 1. Drücken Sie im Standby-Modus auf die Taste PROG. 2. Drücken Sie dann auf die Taste X2. 3.
  • Seite 12: Reinigung Und Pflege

    REINIGUNG UND PFLEGE • Reinigen Sie den Ofen regelmäßig und entfernen Sie alle Essensrückstände. • Ziehen Sie vor der Reinigung immer den Stecker aus der Steckdose. • Tauchen Sie das Gerät nie komplett in Wasser oder andere Flüssigkeiten. • Unregelmäßige Reinigung führt zu Verschleiß und einer verkürzter Lebensdauer des Geräts.
  • Seite 13: Fehlerbehebung

    FEHLERBEHEBUNG Überprüfen Sie folgendes, bevor Sie sich an unseren Kundenservice wenden: Stellen Sie ein Tasse Wasser (150 ml) in die Mikrowelle und schließen Sie die Tür. Sobald die Tür sicher geschlossen ist, erlischt die Innenbeleuchtung. Schalten Sie die Mikrowelle ein und lassen Sie sie eine Minute lang laufen. •...
  • Seite 14: Hinweise Zur Entsorgung

    HINWEISE ZUR ENTSORGUNG Befindet sich die linke Abbildung (durchgestrichene Mülltonne auf Rädern) auf dem Produkt, gilt die Europäische Richtlinie 2012/19/EU. Diese Produkte dürfen nicht mit dem normalen Hausmüll entsorgt werden. Informieren Sie sich über die örtlichen Regelungen zur getrennten Sammlung elektrischer und elektronischer Gerätschaften.
  • Seite 15 Product Overview and Control Panel 20 Operation 21 Cleaning and Care 24 Troubleshooting 25 Hints on Disposal 26 Declaration of Conformity 26 TECHNICAL DATA item number 10034440 power supply 220-240 V ~ 50/60 Hz power 1000 W volume 25 L Dimensions (H x W x D) 312 mm ×...
  • Seite 16: Safety Instructions

    SAFETY INSTRUCTIONS Read all the safety and operating instructions carefully and retain them for future reference. Make sure the voltage in your living area corresponding to the one shown on the rating label of the appliance. And the wall socket is properly grounded. To reduce the risk of fire in the oven cavity: •...
  • Seite 17 To prevent the turntable from breaking: • Let the turntable cool down before cleaning. • Do not place hot foods or utensils on the cold turntable. • Do not place frozen foods or utensils on the hot turntable. General Instructions •...
  • Seite 18: Notes On The Cooking Utensils

    NOTES ON THE COOKING UTENSILS It is strongly recommended to use the containers which are suitable and safe for microwave cooking. Generally speaking, the containers which are made of heat- resistant ceramic, glass or plastic are suitable for microwave cooking. Never use the metal containers for microwave cooking and combination cooking as spark is likely to occur.
  • Seite 19: Cooking Tips

    COOKING TIPS The following factors may affect the cooking result: Food arrangement Place thicker areas towards outside of dish, the thinner part towards the centre and spread it evenly. Do not overlap if possible. Cooking time length Start cooking with a short time setting, evaluate it after it times out and extend it according to the actual need.
  • Seite 20: Product Overview And Control Panel

    PRODUCT OVERVIEW AND CONTROL PANEL Door safetx lock Control Panel Window • DISPLAY: Displays cooking time, power and usage time. • NUMBER KEYS: Used to set the cooking time and store several cooking programs. • POWER LEVEL: Press this button repeatedly to adjust the power.
  • Seite 21: Operation

    OPERATION After plugging in the connector, a beep will sound and the display backlight will turn on. The unit is in standby mode. Setting the cooking time and power 1. Press the POWER LEVEL button repeatedly to select one of the 3 power levels: High (press 1x), Medium (press 2x), Low (press 3x).
  • Seite 22 You can overwrite the cooking times stored under the ten number keys at any time. For example, to save a cooking program that can contain up to 3 consecutive cooking times with different power levels, proceed as follows: Example: Setting a cooking program and storing it on the number key 1 1.
  • Seite 23 You can overwrite the cooking times stored under the ten number keys at any time. To overwrite a cooking program, proceed as follows: 1. In standby mode, press the PROG key. 2. Then press the X2 key. 3. Press one of the NUMBER buttons. 4.
  • Seite 24: Cleaning And Care

    CLEANING AND CARE • The oven should be cleaned regularly and any food deposits removed. • Remove the power cord from the wall outlet before cleaning. Don‘t immerse the appliance in water or other fluids when cleaning. • Failure to maintain the oven in a clean condition could lead to deterioration of the surface that could adversely affect the life of the appliance and possibly result in a hazardous situation •...
  • Seite 25: Troubleshooting

    TROUBLESHOOTING Please check the following before contacting our customer service: Place a cup of water (150 ml) in the microwave and close the door. Once the door is securely closed, the interior lights will go out. Turn on the microwave and let it run for one minute.
  • Seite 26: Hints On Disposal

    HINTS ON DISPOSAL According to the European waste regulation 2012/19/EU this symbol on the product or on its packaging indicates that this product may not be treated as household waste. Instead it should be taken to the appropriate collection point for the recycling of electrical and electronic equipment.
  • Seite 27 Vista general del dispositivo y panel de control 32 Operación 33 Limpieza y cuidado 36 Resolución de problemas 37 Retirada del aparato 38 Declaración de conformidad 38 DATOS TÉCNICOS Número de artículo 10034440 Alimentación eléctrica 220-240 V ~ 50/60 Hz Potencia 1000 W Volumen 25 L Dimensiones (Al x An x Pr) 312 mm ×...
  • Seite 28: Indicaciones De Seguridad

    INDICACIONES DE SEGURIDAD Lea atentamente todas las indicaciones y conserve este manual para consultas posteriores. Para reducir el riesgo de una descarga eléctrica producido por una avería o un fallo en el funcionamiento, el aparato deberá conectarse a una toma de corriente con toma de tierra.
  • Seite 29 Para proteger el plato giratorio de roturas: • Deje que el plato giratorio se enfríe por completo antes de limpiarlo. • No coloque alimentos o recipientes muy calientes sobre el plato giratorio frío. • No coloque comida o recipientes congelados sobre el plato giratorio caliente. Advertencias generales de seguridad •...
  • Seite 30: Notas Sobre Los Utensilios De Cocina

    NOTAS SOBRE LOS UTENSILIOS DE COCINA Le aconsejamos que solamente utilice recipientes adecuados para el microondas. Entre ellos podrá elegir entre cerámica resistente al calor, cristal y recipientes de plástico aptos para microondas. No utilice recipientes de metal para cocinar ni gratinar, pues las ondas rebotarán en ellos.
  • Seite 31: Consejos De Cocción

    CONSEJOS DE COCCIÓN Los siguientes factores pueden influir en el resultado final de sus platos: Distribución de los alimentos Coloque los trozos más gruesos en el borde del plato y los más finos en el medio y distribúyalos de manera homogénea. Asegúrese de que unos trozos no se sobreponen a otros.
  • Seite 32: Vista General Del Dispositivo Y Panel De Control

    VISTA GENERAL DEL DISPOSITIVO Y PANEL DE CONTROL Cerradura de puerta Panel de control Ventana • PANTALLA: Muestra el tiempo de cocción, la potencia y el tiempo de uso. • TECLAS DE NÚMERO: sirven para ajustar el tiempo de cocción y memorizar varios programas de cocción. •...
  • Seite 33: Operación

    OPERACIÓN Después de enchufar el conector, sonará un pitido y se encenderá la luz de fondo de la pantalla. La unidad está en modo de espera. Ajuste del tiempo de cocción y de la potencia 1. Pulse el botón POWER LEVEL repetidamente para seleccionar uno de los 3 niveles de potencia: Alto (pulse 1x), Medio (pulse 2x), Bajo (pulse 3x).
  • Seite 34 Puede sobrescribir en cualquier momento los tiempos de cocción almacenados bajo las diez teclas numéricas. Por ejemplo, para guardar un programa de cocción que puede contener hasta 3 tiempos de cocción consecutivos con diferentes niveles de potencia, proceda de la siguiente manera: Ejemplo: Para ajustar un programa de cocción y memorizarlo en la tecla numérica 1.
  • Seite 35 Puede sobrescribir en cualquier momento los tiempos de cocción almacenados bajo las diez teclas numéricas. Para sobrescribir un programa de cocción, proceda de la siguiente manera: 1. En el modo de espera, pulse el botón PROG. 2. Pulse el botón X2. 3.
  • Seite 36: Limpieza Y Cuidado

    LIMPIEZA Y CUIDADO • Limpie el microondas regularmente y retire todos los restos de comida de su interior. • Antes de limpiar el microondas, desenchúfelo. • Nunca sumerja el aparato completamente en agua ni en ningún otro líquido. • Una limpieza deficiente puede reducir la vida útil del microondas. •...
  • Seite 37: Resolución De Problemas

    RESOLUCIÓN DE PROBLEMAS Responda a la siguientes preguntas antes de dirigirse a nuestro servicio de atención al cliente: Coloque una taza con agua (150 ml) en el microondas y cierre la puerta. Cuando la puerta esté completamente cerrada, la iluminación interior se apagará. Encienda el microondas y manténgalo en funcionamiento durante un minuto.
  • Seite 38: Retirada Del Aparato

    RETIRADA DEL APARATO Si el aparato lleva adherida la ilustración de la izquierda (el contenedor de basura tachado) entonces rige la normativa europea, directiva 2012/19/UE. Este producto no debe arrojarse a un contenedor de basura común. Infórmese sobre las leyes territoriales que regulan la recogida separada de aparatos eléctricos y electrónicos.
  • Seite 39: Fiche Technique

    Aperçu de l‘appareil et panneau de commande 44 Utilisation 45 Nettoyage et entretien 48 Résolution des problèmes 49 Informations sur le recyclage 50 Déclaration de conformité 50 FICHE TECHNIQUE Numéro d'article 10034440 Alimentation 220-240 V ~ 50/60 Hz Puissance 1000 W Capacité 25 L Dimensions (H x L x P) 312 mm ×...
  • Seite 40: Consignes De Sécurité

    CONSIGNES DE SÉCURITÉ Lisez attentivement toutes les consignes avant d’utiliser l’appareil et conservez le guide d’utilisation pour vous y référer ultérieurement. Pour réduire le risque d’électrocution en cas de défaillance technique ou de dysfonctionnement, l’appareil doit être relié à une prise de terre. Branchez l’appareil uniquement sur des prises fournissant la tension correspondant à...
  • Seite 41 Pour protéger le plateau tournant contre les risques d’éclatement du verre : • Laissez refroidir le plateau tournant avant de le nettoyer. • Ne posez aucun aliment ou récipient chaud sur le plateau tournant froid. • Ne posez aucun aliment ou récipient congelé sur le plateau tournant chaud. Consignes de sécurité...
  • Seite 42: Notes Sur Les Ustensiles De Cuisine

    NOTES SUR LES USTENSILES DE CUISINE Utiliser uniquement des récipients adaptés aux fours à micro-ondes. Utiliser des récipients en céramique résistante à la chaleur, des récipients en verre ou des récipients en plastique adaptés au four à micro-ondes. Ne pas utiliser de récipients métalliques pour la cuisson ou pour le gril : ils risquent de produire des étincelles.
  • Seite 43: Conseils Culinaires

    CONSEILS CULINAIRES Les facteurs suivants ont une influence sur le résultat de la cuisson. La disposition des aliments Placer les gros morceaux sur les bords du récipient et les morceaux plus fins au centre. Les disposer uniformément. Ne pas placer les aliments les uns sur les autres. Temps de cuisson Commencer avec un temps de cuisson court.
  • Seite 44: Aperçu De L'appareil Et Panneau De Commande

    APERÇU DE L‘APPAREIL ET PANNEAU DE COMMANDE Verrouillage de la porte Panneau de commande Fenêtre • ECRAN : indique le temps de cuisson, puissance et durée d‘utilisation. • TOUCHES NUMÉRIQUES : elles servent à régler le temps de cuisson et à enregistrer plusieurs programmes de cuisson.
  • Seite 45: Utilisation

    UTILISATION Lorsque vous branchez la fiche, un signal sonore retentit et le rétroéclairage de l‘écran s‘allume. L‘appareil se trouve en mode veille. Réglage du temps e cuisson et de la puissance 1. Appuyez plusieurs fois sur la touche POWER LEVEL pour choisir l‘un des 3 niveaux de puissance : élevé...
  • Seite 46 Vous pouvez modifier à tout moment les temps de cuisson enregistrés sous les dix touches numériques. Par exemple, pour enregistrer un programme de cuisson pouvant contenir jusqu‘à 3 temps de cuisson consécutifs avec différents niveaux de puissance, procédez comme suit : Exemple : pour régler un programme de cuisson et le mémoriser sur la touche numérique 1 1.
  • Seite 47: Contrôle Parental

    Vous pouvez modifier à tout moment les temps de cuisson enregistrés sous les dix touches numériques. Pour écraser un programme de cuisson, procédez comme suit : 1. En mode veille, appuyez sur la touche PROG. 2. Puis appuyez sur la touche X2. 3.
  • Seite 48: Nettoyage Et Entretien

    NETTOYAGE ET ENTRETIEN • Nettoyer le four régulièrement et retirer les résidus de nourriture. • Toujours débrancher l’appareil avant de le nettoyer. • Ne jamais plonger l’appareil dans de l’eau ou d’autres liquides. • L’appareil s’use plus vide et sa durée de vie est plus courte lorsqu’il n’est pas nettoyé régulièrement.
  • Seite 49: Résolution Des Problèmes

    RÉSOLUTION DES PROBLÈMES En cas de dysfonctionnements, veuillez suivre les indications suivantes avant d’appeler notre service client : Placer un verre d’eau (150 ml) dans le four à micro-ondes et fermer la porte. Dès que celle-ci est correctement fermée, la lumière de l’intérieur s’éteint. Mettre en marche l’appareil et le laisser fonctionner une minute.
  • Seite 50: Informations Sur Le Recyclage

    INFORMATIONS SUR LE RECYCLAGE Le pictogramme ci-contre apposé sur le produit signifie que la directive européenne 2012/19/UE s‘applique (poubelle à roues barrée d’une croix). Ces produits ne peuvent être jetés dans les poubelles domestiques courantes. Renseignez- vous concernant les règles appliquées pour la collecte d’appareils électriques et électroniques.
  • Seite 51 Panoramica del dispositivo e pannello di controllo 56 Funzionamento 57 Pulizia e manutenzione 60 Risoluzione dei problemi 61 Smaltimento 62 Dichiarazione di conformità 62 DATI TECNICI Numero articolo 10034440 Alimentazione 220-240 V ~ 50/60 Hz Potenza 1000 W Volume 25 L Dimensioni (A x L x P) 312 mm ×...
  • Seite 52: Avvertenze Di Sicurezza

    AVVERTENZE DI SICUREZZA Leggere attentamente tutte le istruzioni e conservare il manuale per consultazioni future. Per evitare il rischio di scosse elettriche in caso di malfunzionamento, collegare il dispositivo ad una presa dotata di messa a terra. Collegare il dispositivo solo ad una presa che corrisponde alla tensione indicata.
  • Seite 53 Evitare che il piatto girevole si rompa: • Lasciare raffreddare il piatto girevole prima di pulirlo. • Non poggiare piatti caldi o contenitori caldi sul piatto girevole freddo. • Non inserire alimenti congelati o contenitori congelati sulla piastra girevole calda. Avvertenze di sicurezza generali •...
  • Seite 54 NOTE SUGLI UTENSILI DA CUCINA Si consiglia di utilizzare solo contenitori adatti al microonde come contenitori in ceramica, in vetro e in plastica resistenti al calore. Non usare recipienti in metallo per cuocere e arrostire, poiché le scintille potrebbero causare incendi. Attenersi alle indicazioni contenute nella tabella sottostante: Materiale Micro...
  • Seite 55: Consigli Per Cucinare

    CONSIGLI PER CUCINARE I seguenti fattori possono influire negativamente sul risultato: La disposizione degli alimenti Collocare gli alimenti più grandi ai bordi del contenitore e quelli più piccoli nel mezzo e distribuirli in modo uniforme. Prestare attenzione a non sovrapporli l’uno all’altro. Tempo di cottura Iniziare con un tempo di cottura breve.
  • Seite 56 PANORAMICA DEL DISPOSITIVO E PANNELLO DI CONTROLLO Serratura della porta Pannello di controllo Finestre • DISPLAY: indica il tempo di cottura, la potenza e la durata dell‘uso. • PULSANTI NUMERO: utilizzati per impostare il tempo di cottura e salvare più programmi di cottura. •...
  • Seite 57 FUNZIONAMENTO Dopo aver effettuato il collegamento, verrà emesso un segnale acustico e la retroilluminazione del display si accenderà. Il dispositivo è in modalità standby. Imposta il tempo e la potenza di cottura 1. Premere ripetutamente il tasto POWER LEVEL per selezionare uno dei 3 livelli di potenza: Alto (premere 1x), Medio (premere 2x), Basso (premere 3x).
  • Seite 58 È possibile ignorare i tempi di cottura memorizzati nei dieci tasti numerici in qualsiasi momento. Ad esempio, per salvare un programma di cottura che può contenere fino a 3 tempi di cottura consecutivi con diversi livelli di potenza, procedere come segue: Esempio: per impostare un programma di cottura e salvarlo sul tasto numerico 1 1.
  • Seite 59 È possibile ignorare i tempi di cottura memorizzati nei dieci tasti numerici in qualsiasi momento. Per sovrascrivere un programma di cottura, procedere come segue: 1. In modalità Standby, premere il pulsante PROG. 2. Quindi premere il pulsante X2. 3. Premere uno dei tasti NUMERO. 4.
  • Seite 60: Pulizia E Manutenzione

    PULIZIA E MANUTENZIONE • Pulire regolarmente il microonde e rimuovere i residui di cibo. • Prima di effettuare la pulizia, staccare sempre la spina dalla presa. • Non immergere il dispositivo in acqua o in altri liquidi. • Una pulizia non regolare è causa di usura del microonde e riduce la sua durata. •...
  • Seite 61: Risoluzione Dei Problemi

    RISOLUZIONE DEI PROBLEMI Si prega di fare la seguente verifica prima di rivolgersi al nostro servizio clienti: Mettere una tazza d’acqua (150 ml) nel microonde e chiudere lo sportello. Non appena lo sportello è ben chiuso, la luce interna lampeggia. Accendere il microonde e lasciarlo in funzione per un minuto.
  • Seite 62: Smaltimento

    SMALTIMENTO Se sul prodotto è presente la figura a sinistra (il cassonetto dei rifiuti mobile sbarrato), si applica la direttiva europea 2012/19/UE. Questi prodotti non possono essere smaltiti con i rifiuti normali. Informarsi sulle disposizioni vigenti in merito alla raccolta separata di dispositivi elettrici ed elettronici. Non smaltire i vecchi dispositivi con i rifiuti domestici.

Inhaltsverzeichnis