Herunterladen Diese Seite drucken

Werbung

Verfügbare Sprachen
  • DE

Verfügbare Sprachen

  • DEUTSCH, seite 1
VICTORIA 20
Mikrowelle
Microwave
Microondas
Micro-onde
Microonde
10032591 10032592
www.klarstein.com

Werbung

loading

Inhaltszusammenfassung für Klarstein VICTORIA 20

  • Seite 1 VICTORIA 20 Mikrowelle Microwave Microondas Micro-onde Microonde 10032591 10032592 www.klarstein.com...
  • Seite 3 Sehr geehrter Kunde, wir gratulieren Ihnen zum Erwerb Ihres Gerätes. Lesen Sie die folgenden Hinweise sorgfältig durch und befolgen Sie diese, um möglichen Schäden vorzubeugen. Für Schäden, die durch Missachtung der Hinweise und unsachgemäßen Gebrauch entstehen, übernehmen wir keine Haftung. Scannen Sie den folgenden QR-Code, um Zugriff auf die aktuellste Bedienungsanleitung und weitere Informationen rund um das Produkt zu erhalten.
  • Seite 4 SICHERHEITSHINWEISE Allgemeine Sicherheitshinweise Befolgen Sie die folgenden Sicherheitshinweise, um die Gefahr von Brand, Stromschlag, Sach- und/oder Personenschäden oder übermäßiger Mikrowellenstrahlung während der Verwendung des Geräts zu minimieren: • Flüssigkeiten und andere Nahrungsmittel dürfen keinesfalls in verschlossenen Behältern erhitzt werden, da hierbei die Gefahr besteht, dass die Behälter explodieren.
  • Seite 5 • Achten Sie darauf, dass die Lebensmittel nicht überlaufen. • Verwenden Sie das Innere der Mikrowelle nicht zur Lagerung von Gegenständen. Lagern Sie keine Lebensmittel wie beispielsweise Brot, Kekse etc. in der Mikrowelle. • Entfernen Sie Drahtverschlüsse und Metallgriffe von Papp- oder Plastikbehältern, bevor Sie diese in die Mikrowelle stellen.
  • Seite 6 • Die Oberfl äche des Einbauschranks, in welchem sich die Mikrowelle befi ndet, kann sehr heiß werden. • Diese Mikrowelle ist dafür ausgelegt, Lebensmittel und Getränke zu erhitzen. Das Trocknen von Lebensmitteln oder Kleidung und das Erhitzen von Wärmekissen, Hausschuhen, Schwämmen, feuchter Kleidung und ähnlichem, kann zu Verletzungen und Feuer führen.
  • Seite 7 Wenn Sie ein längeres Kabel oder ein Verlängerungskabel verwenden möchten: • sollte die angegebene Spannung des Verlängerungskabels mindestens so hoch sein wie die Spannung des Geräts. • darf der Amperewerte des angeschlossenen Geräts den maximalen Amperewert des Netzkabels nicht überschreiten. •...
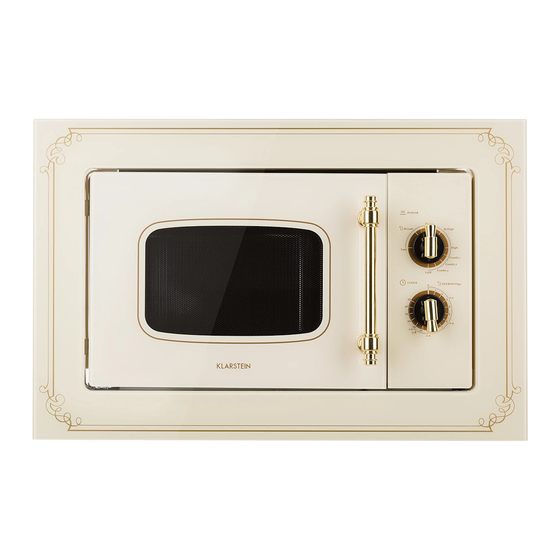
  • Seite 8 GERÄTEÜBERSICHT Grillgitter Kann nicht im Mikrowellenmodus verwendet werden und muss auf dem Glaseinsatz platziert werden. Bedienfeld Antrieb Drehring Glasteller Sichtfenster Tür Sicherheitsverriegelung...
  • Seite 9 Drehteller Erhebungen (in der Mitte der Unterseite) Glasteller Antrieb mit Aussparungen für den Glasteller Drehring HINWEISE ZUR INSTALLATION • Dieses Gerät darf ausschließlich im häuslichen Bereich verwendet werden. • Dieses Gerät darf nur eingebaut verwendet werden. Es darf nicht auf dem Tresen oder im Inneren eines Schranks platziert werden.
  • Seite 10 INSTALLATION - OPTION 1 (A) Abmessungen...
  • Seite 11 Hinweis: Die Halterung und die Schrankbodenschablone werden bei beiden Installationen benötigt.
  • Seite 12 (B) Vorbereitung des Schranks Lesen Sie die Anweisungen aus der Schrankbodenschablone durch und legen Sie diese auf die Bodenplatte des Schranks. Markieren Sie die Bodenplatte entsprechend der Markierungen „a“ auf der Schablone. Schraube A Klammer Mittellinie Entfernen Sie die Bodenplatte und fixieren Sie die Halterung mit der Schraube A.
  • Seite 13 (C) Installation der Mikrowelle Installieren Sie die Mikrowelle im Schrank. Vergewissern Sie sich, dass die Rückseite der Mikrowelle mit der Halterung fixiert wird. Verbiegen Sie das Netzstromkabel nicht und achten Sie darauf, dass dieses nicht zur Stolperfalle werden kann. Klammer Öffnen Sie die Tür und fixieren Sie die Mikrowelle mit Schraube B, in den Installationslöchern, am Schrank.
  • Seite 14 INSTALLATION - OPTION 2 (A) Abmessungen...
  • Seite 15 Hinweis: Die Halterung und die Schrankbodenschablone werden bei beiden Installationen benötigt.
  • Seite 16 (B) Vorbereitung des Schranks Lesen Sie die Anweisungen aus der Schrankbodenschablone durch und legen Sie diese auf die Bodenplatte des Schranks. Markieren Sie die Bodenplatte entsprechend der Markierungen „a“ auf der Schablone. Schraube A Klammer Mittellinie Entfernen Sie die Bodenplatte und fixieren Sie die Halterung mit der Schraube A.
  • Seite 17 (C) Installation der Mikrowelle Installieren Sie die Mikrowelle im Schrank. Vergewissern Sie sich, dass die Rückseite der Mikrowelle mit der Halterung fixiert wird. Verbiegen Sie das Netzstromkabel nicht und achten Sie darauf, dass dieses nicht zur Stolperfalle werden kann. Klammer...
  • Seite 18 Öffnen Sie die Tür und fixieren Sie die Mikrowelle mit Schraube B, in den Installationslöchern, am Schrank. Fixieren Sie anschließen die Plastikabdeckung an den Installationslöchern. Schraube B Installationsloch INSTALLATION DES DREHTELLERS 1. Platzieren Sie den Glaseinsatz niemals verkehrt herum in der Mikrowelle. Der Glaseinsatz sollte niemals beeinträchtigt werden.
  • Seite 19 BEDIENFELD UND EINSTELLUNGEN Leistung Zeit 1. Drehen Sie zum Einstellen der Leistung die Taste POWER auf die gewünschte Stufe. 2. Drehen Sie zum Einstellen der Zubereitungszeit die Taste TIMER auf die gewünschte Stufe. 3. Nachdem die Leistung und die Zubereitungszeit eingestellt wurden beginnt das Gerät den Betrieb automatisch.
  • Seite 20 Einstellungen und Anwendungsbereiche Funktion Leistung Anwendungsbereich 17 % Mikrowelle Auftauen von Lebensmitteln Med. Low (Defrost) 33 % Mikrowelle Suppe/ Eintopf aufwärmen, Weichmachen von Butter oder Auftauen Med. 55 % Mikrowelle Eintopf, Fisch Med. High 77 % Mikrowelle Reis, Fisch, Hühnchen, Hackfleisch High 100 % Mikrowelle Aufwärmen, Milch, Wasser kochen,...
  • Seite 21 HINWEISE ZUM KOCHGESCHIRR Materialien, die in der Mikrowelle verwendet werden können: Zubehör Anmerkungen Aluminiumfolie Nur zum Abdecken. Kleine, glatte Stücke können zum Abdecken von dünnen Fleisch- oder Geflügelstücken verwendet werden, um ein zerkochen zu vermeiden. Wenn sich die Folie zu nah an den Wänden der Mikrowelle befindet, kann es zu Funkenbildung kommen.
  • Seite 22 Zubehör Anmerkungen Papierhandtücher Zum Abdecken von Nahrungsmitteln, welche erneut aufgewärmt werden sollen und zur Absorption von Fett. Verwenden Sie diese nur unter Aufsicht für kurzzeitige Erwärmungsvorgänge. Pergamentpapier Verwenden Sie dieses als Abdeckung, um ein Spritzen zu vermeiden oder zum Umwickeln beim Dämpfen. Plastik Verwenden Sie nur mikrowellengeeignetes Plastik.
  • Seite 23 Materialien, die nicht in der Mikrowelle verwendet werden sollten: Zubehör Anmerkungen Aluminiumblech Kann zu Funkenbildung führen. Geben Sie die Lebensmittel in einen mikrowellengeeigneten Behälter. Nahrungsmittelbehälter Kann zu Funkenbildung führen. Geben Sie die mit Metallklammer Lebensmittel in einen mikrowellengeeigneten Behälter. Metallzubehör Metall schirmt die Lebensmittel von der oder Zubehör mit Mikrowellenenergie ab.
  • Seite 24 FEHLERSUCHE UND FEHLERBEHEBUNG Problem Mögliche Ursache Mögliche Lösung Die Mikrowelle Radio- und TV-Empfang können während der beeinträchtigt den TV- Verwendung der Mikrowelle beeinträchtigt werden. Dies Empfang ist ähnlich der Beeinträchtigung durch kleine elektrische Geräte wie Mixer, Staubsauge und Ventilatoren und vollkommen normal.
  • Seite 25 Problem Mögliche Ursache Mögliche Lösung Die Mikrowelle erhitzt Die Tür ist nicht richtig Schließen Sie die Tür richtig. sich nicht. geschlossen. Die Drehscheibe Schmutz hat sich Siehe Abschnitt „Reinigung macht während der unterhalb des und Pflege“, um schmutzige Verwendung der Glaseinsatzes Gerätebestandteile zu Mikrowelle seltsame...
  • Seite 26 SPEZIELLE ENTSORGUNGSHINWEISE FÜR VERBRAUCHER IN DEUTSCHLAND Entsorgen Sie Ihre Altgeräte fachgerecht. Dadurch wird gewährleistet, dass die Altgeräte umweltgerecht verwertet und negative Auswirkungen auf die Umwelt und menschliche Gesundheit vermieden werden. Bei der Entsorgung sind folgende Regeln zu beachten: • Jeder Verbraucher ist gesetzlich verpflichtet, Elektro- und Elektro- nikaltgeräte (Altgeräte) sowie Batterien und Akkus getrennt vom Hausmüll zu entsorgen.
  • Seite 27 • Bei einem Vertrieb unter Verwendung von Fernkommunikationsmitteln ist die unentgeltliche Abholung am Ort der Abgabe auf Elektro- und Elektronikgeräte der Kategorien 1, 2 und 4 gemäß § 2 Abs. 1 ElektroG, nämlich „Wärmeüberträger“, „Bildschirmgeräte“ (Oberfläche von mehr als 100 cm²) oder „Großgeräte“ (letztere mit mindestens einer äußeren Abmessung über 50 Zentimeter) beschränkt.
  • Seite 29 Dear Customer, Congratulations on purchasing this device. Please read the following instructions carefully and follow them to prevent possible damages. We assume no liability for damage caused by disregard of the instructions and improper use. Scan the QR code to get access to the latest user manual and more product information.
  • Seite 30 SAFETY INSTRUCTIONS General Instructions To reduce the risk of fire, electric shock, injury to persons or exposure to excessive microwave oven energy when using your appliance, follow basic precautions, including the following: • Warning: Liquids and other foods must not be heated in sealed containers since they are liable to explode.
  • Seite 31 • Do not overcook food. • Do not use the oven cavity for storage purposes. Do not store items, such as bread, cookies, etc. inside the oven. • Remove wire twist-ties and metal handles from paper or plastic containers/bags before placing them in the oven. •...
  • Seite 32 • Surface of a storage drawer can get hot. • The microwave oven is intended for heating food and beverages.Drying of food or clothing and heating of warming pads,slippers,sponges,damp cloth and similar may lead to risk of injury, ignition or fi re. Grounding Installation DANGER Electric Shock Hazard! Touching some of the internal...
  • Seite 33 If a long cord set or extension cord is used: • The marked electrical rating of the cord set or extension cord should be at least as great as the electrical rating of the appliance. • Note, that the total ampere ratings of the equipment plugged in should not exceed the ampere rating of the cord.
  • Seite 34 PRODUCT DESCRIPTION Grill Rack Only be used in grill function and be placed on the glass tray Control panel Turntable shaft Turntable ring assembly Glass tray Observation window Door assembly Safety interlock system...
  • Seite 35 Turntable Hub (underside) Glass tray Turntable shaft Turntable ring assembly NOTES ON INSTALLATION • This appliance is only intended for domestic use. • This oven is intended for built-in use only. It is not intended for counter-top use or for use inside a cupboard.
  • Seite 36 INSTALLATION - OPTION 1 (A) Dimensions...
  • Seite 37 Note: The bracket and bottom caninet template are needed when installing in both installations.
  • Seite 38 (B) Prepare the cabinet Read the instruction on the BOTTOM CABINET TEMPLATE, put the template on the bottom plane of cabinet. Make the marks on the bottom plane of cabinet according to marks “a“ of the template. Screw A Bracket Center line Remove the bottom cabinet template and fix the bracket with screw A.
  • Seite 39 (C) Install the oven Install the oven to the cabinet. Make sure the back of the oven is locked by bracket. Do not trap or kink the power cord. Bracket Open the door, fix the oven to the cabinet with Screw B, at the installation hole. Then fix the Trim-kit plastic cover to the installation hole.
  • Seite 40 INSTALLATION - OPTION 2 (A) Dimensions...
  • Seite 41 Note: The bracket and bottom caninet template are needed when installating in both installations.
  • Seite 42 (B) Preprepare the cabinet Read the instruction on the BOTTOM CANINET TEMPLATE, put the template on the bottom plane of cabinet. Make the marks on the bottom plane of cabinet according to marks “a“ of of the template. Screw A Bracket Center line Remove the bottom cabinet template and fix the bracket with screw A.
  • Seite 43 (C) Install the oven Install the oven to the cabinet. Make sure the back of the oven is locked by bracket. Do not trap or kink the power cord. Bracket...
  • Seite 44 Open the door, fix the oven to the cabinet with Screw B, at the installation hole. Screw B Installation hole TURNTABLE INSTALLATION 1. Never place the glass tray upside down. The glass tray should never be restricted. 2. Both glass tray and turntable ring assembly must always be used during cooking. 3.
  • Seite 45 CONTROL PANEL AND FEATURES Power TImer 1. To set cooking power by turning the power knob to desired level. 2. To set the time of cooking by turning the timer knob to desired time per your food cooking guide. 3. The microwave oven will automatically start cooking after power level and time are set. 4.
  • Seite 46 Settings and application areas Function Power Application areas 17 % Microwave Thawing food Med. Low (Defrost) 33 % Microwave Soup stew, soften butter or defrost Med. 55 % Microwave Stew, fish Med. High 77 % Microwave Rice, fish, chicken, ground meat High 100 % Microwave Reheat, milk, boil water, vegetables,...
  • Seite 47 NOTES ON COOKWARE Materials you can use in microwave oven: Utensils Remarks Aluminum foil Shielding only. Small smooth pieces can be used to cover thin parts of meat or poultry to prevent overcooking. Arcing can occur if foil is too close to oven walls. The foil should be at least 1 inch (2.5cm) away from oven walls.
  • Seite 48 Utensils Remarks Paper towels Use to cover food for reheating and absorbing fat. Use with supervision for a short-term cooking only. Parchment paper Use as a cover to prevent splattering or a wrap for steaming. Plastic Microwave-safe only. Follow the manufacturer’s instructions.
  • Seite 49 Materials to be avoided in microwave oven Utensils Remarks Aluminum tray May cause arcing. Transfer food into microwave-safe dish. Food carton with metal May cause arcing. Transfer food into microwave-safe dish. handle Metal or metal-trimmed Metal shields the food from microwave energy. Metal trim utensils may cause arcing.
  • Seite 50 TROUBLESHOOTING Problem Possible Cause Suggested Solution Microwave oven Radio and TV reception may be interfered when interfering TV microwave oven operating. It is similar to the reception. interference of small electrical appliances, like TV reception mixer, vacuum cleaner, and electric fan. It is normal.
  • Seite 51 Problem Possible Cause Suggested Solution Oven does not heat. Door not closed well. Close door well. Glass turntable makes Dirty roller rest and oven Refer to „Care and noise when microwave bottom. Cleaning“ to clean dirty oven operates. parts. DISPOSAL CONSIDERATIONS If there is a legal regulation for the disposal of electrical and electronic devices in your country, this symbol on the product or on the packaging indicates that this product must...
  • Seite 53 Estimado cliente: Le felicitamos por la adquisición de este producto. Lea atentamente el siguiente manual y siga cuidadosamente las instrucciones de uso con el fin de evitar posibles daños. La empresa no se responsabiliza de los daños ocasionados por un uso indebido del producto o por haber desatendido las indicaciones de seguridad.
  • Seite 54 INDICACIONES DE SEGURIDAD Advertencias generales de seguridad Siga las siguientes indicaciones de seguridad para minimizar el riesgo de incendio, descarga eléctrica, daños materiales y/o personales o una radiación excesiva por microondas durante la utilización del aparato: • Los líquidos y otros alimentos no deben calentarse en ningún caso en recipientes cerrados, pues existe el riesgo de explosión.
  • Seite 55 • Asegúrese de que los alimentos no rebosen. • No utilice el interior del microondas para guardar objetos. No guarde alimentos, como pan, galletas, etc. en el microondas. • Retire los cierres de hilo y asas metálicas de los recipientes de papel o plástico antes de introducirlos en el microondas.
  • Seite 56 • La superfi cie del armario donde se empotra el microondas puede alcanzar temperaturas muy elevadas. • Este microondas está concebido para calentar alimentos y bebidass. Secar alimentos o ropa o calentar bolsas de agua, zapatos, esponjas, ropa húmeda o similar puede provocar incendios y lesiones.
  • Seite 57 Si desea utilizar un cable más largo o un cable alargador: • la tensión indicada del cable de alimentación debe ser como mínimo igual a la tensión del aparato. • el valor en amperios del aparato conectado no supere el valor máximo de amperios de cable de alimentación.
  • Seite 58 DESCRIPCIÓN DEL APARATO Rejilla de grill No puede utilizarse en modo microondas y debe colocarse sobre el plato de cristal Panel de control Eje de transmisión Anilla giratoria Plato de cristal Ventana de visión Puerta Cierre de seguridad...
  • Seite 59 Plato giratorio Protuberancias (en el centro de la parte inferior) Plato de cristal Eje de transmisión con muescas para el plato de cristal Anilla giratoria INDICACIONES DE INSTALACIÓN • Este aparato debe emplearse exclusivamente en entornos domésticos. • Este aparato solo puede emplearse empotrado en una estructura. No debe colocarse en la encimera ni dentro de un armario.
  • Seite 60 INSTALACIÓN - OPCIÓN 1 (A) Dimensiones...
  • Seite 61 Advertencia: El soporte y la plantilla del mueble se necesitarán para ambas instalaciones.
  • Seite 62 (B) Preparación del mueble Lea las instrucciones en la plantilla del mueble y coloquéla sobre la base de este. Marque la base conforme a las marcas „a“ de la plantilla. Tornillo A Sujeción Línea central Retire la base y fije el soporte con el tornillo A. Tornillo A Sujeción...
  • Seite 63 (C) Instalación del microondas Instale el microondas en el mueble. Asegúrese de que la parte trasera del mismo se fije en el soporte. No doble el cable de alimentación y asegúrese de que no pueda provocar tropiezos. Sujeción Abra la puerta y fije el microondas con el tornillo B en los orificios de instalación al mueble.
  • Seite 64 INSTALACIÓN - OPCIÓN 2 (A) Dimensiones...
  • Seite 65 Advertencia: El soporte y la plantilla del mueble se necesitarán para ambas instalaciones.
  • Seite 66 (B) Preparación del mueble Lea las instrucciones en la plantilla del mueble y coloquéla sobre la base de este. Marque la base conforme a las marcas „a“ de la plantilla. Tornillo A Sujeción Línea central Retire la base y fije el soporte con el tornillo A. Tornillo A Sujeción...
  • Seite 67 (C) Instalación del microondas Instale el microondas en el mueble. Asegúrese de que la parte trasera del mismo se fije en el soporte. No doble el cable de alimentación y asegúrese de que no pueda provocar tropiezos. Sujeción...
  • Seite 68 Abra la puerta y fije el microondas con el tornillo B en los orificios de instalación al mueble. Fije a continuación la cubierta de plástico a los orificios de instalación. Tornillo B Orificios de instalación INSTALACIÓN DEL PLATO GIRATORIO 1. Nunca coloque la pieza de cristal al revés dentro del microondas. El plato nunca debe verse frenado.
  • Seite 69 PANEL DE CONTROL Y AJUSTES Potencia Tiempo 1. Para ajustar la potencia, gire el botón POWER hasta el nivel deseado. 2. Para ajustar el tiempo de preparación, gire el botón TIMER hasta el valor deseado. 3. Después de haber ajustado tiempo de preparación y potencia, el aparato comienza automáticamente a funcionar.
  • Seite 70 Ajustes y categorías de uso Función Potencia Categoría de uso 17 % microondas Descongelar alimentos Med. Low (Defrost) 33 % microondas Calentar sopa/ guisos, derretir mantequilla o descongelar Med. 55 % microondas Guisos, pescado Med. High 77 % microondas Arroz, pescado, pollo, carne picada High 100 % microondas Calentar, leche, hervir agua, verduras,...
  • Seite 71 INDICACIONES SOBRE LA BATERÍA DE COCINA Materiales que pueden utilizarse en el microondas: Accesorio Observaciones Papel de aluminio Solo para cubrir. Trozos pequeños y lisos para cubrir pedazos de carne o ave para evitar que se hagan demasiado. Si el papel de aluminio se acerca demasiado a las paredes del microondas, puede provocar chispas.
  • Seite 72 Accesorio Observaciones Servilletas de papel Para cubrir alimentos que deben recalentarse y para absorber la grasa. Utilícelas bajo supevisión y durante un periodo de calentamiento breve. Papel de pergamino Utilícelo como cubierta para evitar salpicaduras o para envolver a la hora de cocinar al vapor. Plástico Utilice solamente plástico apto para microondas.
  • Seite 73 Materiales que no pueden utilizarse en el microondas: Accesorio Observaciones Bandeja de aluminio Puede provocar formación de chispas. Coloque los ingredientes en un recipiente apto para microondas. Recipientes alimentarios Puede provocar formación de chispas. Coloque los con pinzas metálicas ingredientes en un recipiente apto para microondas. Accesorios metálicos o El metal evita que los alimentos adquieran la energía de accesorios con partes...
  • Seite 74 DETECCIÓN Y RESOLUCIÓN DE PROBLEMAS Problema Posible causa Posible solución El microondas La señal de radio y TV podrían verse afectadas distorsiona la señal durante el uso del microondas. Este hecho es similar de TV a la influencia de pequeños electrodoméstios, como batidoras, aspiradores y ventiladores, y es completamente normal.
  • Seite 75 Problema Posible causa Posible solución El microondas no se La puerta no está cerrada Cierre la puerta calienta. correctamente. correctamente. El plato giratorio hace Se ha acumulado Véase sección "Limpieza y ruidos extraños durante suciedad debajo del cuidado" para limpiar las el uso del microondas.
  • Seite 77 Chère cliente, cher client, Toutes nos félicitations pour l’acquisition de ce nouvel appareil. Veuillez lire attentivement et respecter les instructions de ce mode d’emploi afin d’éviter d’éventuels dommages. Le fabricant ne saurait être tenu pour responsable des dommages dus au non- respect des consignes de sécurité...
  • Seite 78 CONSIGNES DE SÉCURITÉ Consignes générales de sécurité Suivez ces consignes de sécurité pour minimiser les risques d‘incendie, d‘électrocution, de dommages matériels et/ou de blessures corporelles ou de rayonnement excessif des micro-ondes lors de l‘utilisation de l‘appareil : • Les liquides et autres aliments ne doivent jamais être chauffés dans des contenants scellés, car cela peut faire exploser les contenants.
  • Seite 79 • Assurez-vous que les aliments ne débordent pas. • N‘utilisez pas l‘intérieur du four à micro-ondes pour ranger des objets. Ne stockez pas d‘aliments comme du pain, des biscuits, etc. dans le micro-ondes. • Retirez les liens et les poignées métalliques des boîtes en carton ou en plastique avant de les placer dans le four à...
  • Seite 80 • La surface de la niche d‘encastrement où se trouve le four à micro- ondes peut devenir très chaude. • Ce four à micro-ondes est conçu pour chauffer les aliments et les boissons. Le séchage de la nourriture ou des vêtements et le chauffage des coussins chauffants, des pantoufl es, des éponges, des vêtements mouillés et autres peuvent provoquer des blessures et déclencher un incendie.
  • Seite 81 Si vous souhaitez utiliser un câble plus long ou une rallonge : • La tension indiquée sur la rallonge doit être au moins aussi élevée que celle de l’appareil. • L’ampérage de l’appareil branché ne doit pas dépasser la valeur maximale du câble rallonge.
  • Seite 82 APERÇU DE L‘APPAREIL Grille de barbecue Ne peut pas être utilisée en mode micro-ondes, et doit être placée sur le plateau en verre. Panneau de commande Entraînement Anneau tournant Plateau de verre Fenêtre de contrôle Porte Verrouillage de sécurité...
  • Seite 83 Plateau tournant Surélévation (au milieu du fond) Plateau de verre Entraînement avec évidements pour le plateau de verre Anneau tournant CONSEILS RELATIFS À L’INSTALLATION • Cet appareil ne doit être utilisé qu‘à la maison. • Cet appareil ne peut être utilisé que s‘il est encastré. Il ne doit pas être placé sur le comptoir ou dans un placard.
  • Seite 84 INSTALLATION - OPTION 1 (A) Dimensions...
  • Seite 85 Remarque : Le support et le gabarit du bas de l‘armoire sont requis pour les deux types d‘installation.
  • Seite 86 (B) Préparation de la niche Lisez les instructions du gabarit de la niche et placez-le sur le fond de la niche. Marquez la plaque de fond selon les marques „a“ sur le gabarit. Vis A Support Ligne centrale Retirez la plaque inférieure et fixez le support avec la vis A. Vis A Support...
  • Seite 87 (C) Installation du micro-ondes Installez le micro-ondes dans la niche. Assurez-vous que l‘arrière du micro- ondes est fixé au support. Ne pliez pas le câble d‘alimentation et assurez-vous qu‘il ne constitue pas un obstacle. Attache Ouvrez la porte et fixez le micro-ondes avec la vis B dans les trous d‘installation, sur la niche.
  • Seite 88 INSTALLATION - OPTION 2 (A) Dimensions...
  • Seite 89 Remarque : Le support et le gabarit du bas de l‘armoire sont requis pour les deux types d‘installation.
  • Seite 90 (B) Préparation de la niche Lisez les instructions du gabarit de la niche et placez-le sur le fond de la niche. Marquez la plaque de fond selon les marques „a“ sur le gabarit. Vis A Support Ligne centrale Retirez la plaque inférieure et fixer le support avec la vis A. Vis A Support...
  • Seite 91 (C) Installation du micro-ondes Installez le micro-ondes dans la niche. Assurez-vous que l‘arrière du micro- ondes est fixé au support. Ne pliez pas le câble d‘alimentation et assurez- vous qu‘il ne constitue pas un obstacle. Support...
  • Seite 92 Ouvrez la porte et fixez le micro-ondes dans la niche avec la vis B dans les trous d’installation. Terminez en fixant le cache plastique sur les trous d’installation,. Vis B Trou d‘installation INSTALLATION DU PLATEAU TOURNANT 1. Ne placez jamais le plateau en verre à l‘envers dans le four à micro-ondes. Le plateau en verre ne doit jamais être maltraité.
  • Seite 93 PANNEAU DE COMMANDE ET RÉGLAGES Puissance Durée 1. Pour régler la puissance, tournez le bouton POWER au niveau souhaité. 2. Tournez le bouton TIMER pour régler la durée de cuisson. 3. Une fois réglées la puissance et la durée de cuisson, l‘appareil démarre automatiquement.
  • Seite 94 Réglages et domaines d’utilisation Fonction Puissance Domaine d’utilisation micro-ondes à Décongélation d’aliments 17 % Med. Low (Defrost) micro-ondes à 33 % Pour réchauffer soupes/ ragoûts, Ramollir le beurre 100 % Mikrowelle Aufwärmen, Milch, Wasser kochen, ou décongeler Gemüse, Getränke Med. micro-ondes à...
  • Seite 95 CONSEILS SUR LES USTENSILES DE CUISSON Matériaux pouvant être utilisés dans le micro-ondes : Accessoire Remarques Papier aluminium Uniquement pour recouvrir. De petits morceaux peuvent être utilisés pour recouvrir de minces morceaux de viande ou de volaille et éviter la sur cuisson. Si le film est trop proche des parois du micro-ondes, des étincelles peuvent se produire.
  • Seite 96 Accessoires Remarques Essuie-tout Pour recouvrir les aliments à réchauffer et pour l'absorption des graisses. Utilisez-les uniquement sous surveillance et pour une durée de cuisson réduite. Papier sulfurisé Utilisez-le comme protection pour éviter les éclaboussures ou comme emballage pour les cuissons à la vapeur. Plastique Utilisez uniquement du plastique pour micro-ondes.
  • Seite 97 Matériaux à éviter dans le micro-ondes : Accessoire Remarques Plaque en aluminium Peut provoquer des étincelles. Placer la nourriture dans un récipient allant au micro-ondes. Contenants alimentaires Peut provoquer la formation d'étincelles. Mettez les avec fermeture en métal aliments dans un récipient compatible avec le micro- ondes.
  • Seite 98 IDENTIFICATION ET RÉSOLUTION DES PROBLÈMES Problème Cause possible Solution possible Le micro-ondes La réception de la radio et de la télévision peut être perturbe la réception affectée lors de l'utilisation du micro-ondes. Ceci est de la télévision. semblable aux petites interférences électriques causées par les appareils tels que les blenders, aspirateurs et ventilateurs, et est tout à...
  • Seite 99 Problème Cause possible Solution possible Le micro-ondes ne La porte est mal fermée. Fermez la porte chauffe pas. correctement. Le plateau tournant De la saleté s'est déposée Voir le paragraphe fait des bruits étranges sous le plateau de verre. "Nettoyage et entretien" lorsque le micro-ondes pour nettoyer les éléments fonctionne.
  • Seite 101 Gentile cliente, La ringraziamo per aver acquistato il dispositivo. La preghiamo di leggere attentamente le seguenti istruzioni per l’uso e di seguirle per evitare possibili danni tecnici. Non ci assumiamo alcuna responsabilità per danni scaturiti da una mancata osservazione delle avvertenze di sicurezza e da un uso improprio del dispositivo.
  • Seite 102 AVVERTENZE DI SICUREZZA Avvertenze generali di sicurezza Seguire le seguenti avvertenze di sicurezza per ridurre al minimo il rischio di incendi, scosse elettriche, danni a cose e/o a persone o eccessive radiazioni da microonde durante l‘uso: • I liquidi e gli alimenti non devono mai essere riscaldati in recipienti chiusi, poiché...
  • Seite 103 • Non cuocere eccessivamente gli alimenti. • Non utilizzare il microonde per conservare oggetti. Non conservare nel microonde alimenti come pane, biscotti, ecc. • Rimuovere le chiusure e le impugnature metalliche dai contenitori di cartone o di plastica prima di introdurli nel microonde. •...
  • Seite 104 • La superfi cie del mobile nel quale viene incassato il microonde può diventare molto calda. • Questo microonde è progettato per riscaldare alimenti e bevande. Non asciugare alimenti o indumenti, non riscaldare cuscini, pantofole, spugne, indumenti umidi e simili: pericolo di infortuni e incendi.
  • Seite 105 Se si desidera utilizzare un cavo più lungo o una prolunga: • La tensione indicata della prolunga deve essere almeno pari alla tensione dell´apparecchio. • L‘amperaggio dell´apparecchio collegato non deve superare l‘amperaggio massimo del cavo di alimentazione. • Il cavo più lungo deve essere posizionato in modo che non penda dal bordo del tavolo o sopra la mensola e in modo che i bambini piccoli non possano tirarlo.
  • Seite 106 DESCRIZIONE DEL PRODOTTO Griglia Non può essere utilizzata in modalità microonde e deve essere posizionata sul piatto in vetro. Pannello dei comandi Albero motore Anello rotante Piatto in vetro Finestra Sportello Blocco di sicurezza...
  • Seite 107 Piatto in vetro Perno (parte inferiore) Piatto in vetro Albero motore con cavitá per piatto in vetro Anello rotante NOTE PER L`INSTALLAZIONE • Questo apparecchio può essere utilizzato solo in un ambiente domestico. • Questo apparecchio può essere utilizzato solo incassato e non deve essere collocato sul piano cottura o all‘interno di un mobile.
  • Seite 108 INSTALLAZIONE – OPZIONE 1 (A) Dimensioni...
  • Seite 109 Nota: Il supporto e la sagoma per il fondo del mobile sono necessari per entrambe le installazioni.
  • Seite 110 (B) Preparazione del mobile Leggere le istruzioni riportate sulla sagoma per il fondo del mobile e posizionare la sagoma sul piano inferiore del mobile. Segnare il piano inferiore seguendo i segni „a“ sulla sagoma. Vite A Staffa Linea centrale Rimuovere il piano inferiore e fissare il supporto con la vite A. Vite A Staffa...
  • Seite 111 (C) Installazione del microonde Installare il microonde nel mobile. Assicurarsi che la parte posteriore del microonde sia fissata al supporto. Non piegare il cavo di alimentazione e assicurarsi che nessuno vi possa inciampare. Staffa Aprire lo sportello e fissare il microonde al mobile con la vite B nei fori di installazione.
  • Seite 112 INSTALLAZIONE – OPZIONE 2 (A) Dimensioni...
  • Seite 113 Nota: il supporto e la sagoma per il fondo del mobile sono necessari per entrambe le installazioni.
  • Seite 114 (B) Preparazione del mobile Leggere le istruzioni riportate sulla sagoma per il fondo del mobile e posizionare la sagoma sul piano inferiore. Segnare il piano inferiore seguendo i segni „a“ sulla sagoma. Vite A Staffa Linea centrale Rimuovere il piano inferiore e fissare il supporto con la vite A. Vite A Staffa...
  • Seite 115 (C) Installazione del microonde Installare il microonde nel mobile. Assicurarsi che la parte posteriore del microonde sia fissata al supporto. Non piegare il cavo di alimentazione e assicurarsi che nessuno vi possa inciampare. Staffa...
  • Seite 116 Aprire lo sportello e fissare il microonde con la vite B nei fori di installazione. Infine fissare il coperchio in plastica ai fori di installazione. Vite B Foro di installazione INSTALLAZIONE DEL PIATTO GIREVOLE 1. Non mettere mai il piatto in vetro capovolto nel microonde e non danneggiarlo. 2.
  • Seite 117 PANNELLO DEI COMANDI E IMPOSTAZIONI Potenza Tempo 1. Per impostare la potenza, ruotare il tasto POWER sul livello desiderato. 2. Per impostare il tempo di preparazione, ruotare il tasto TIMER sul livello desiderato. 3. Dopo aver impostato il tempo di potenza e di preparazione, l‘apparecchio si avvia automaticamente.
  • Seite 118 Impostazioni e utilizzo Funzione Potenza Utilizzo 17 % microonde Scongelare gli alimenti Med.Low (Defrost) 33 % microonde Riscaldare zuppa/contorno, ammorbidire il burro o scongelare Med. 55 % microonde Contorno, pesce Med. High 77 % microonde Riso, pesce, pollo, carne macinata High 100 % microonde Riscaldare, latte, bollire acqua,...
  • Seite 119 NOTE SULLE STOVIGLIE Materiali che possono essere utilizzati nel microonde Utensili Note Foglio in alluminio L´utilizzo è possibile per coprire pezzi sottili di carne o di pollo per evitare una cottura eccessiva. Se il foglio è troppo vicino alle pareti del forno a microonde, è possibile che si verifichi una scintilla.
  • Seite 120 Utensili Note Tovaglioli di carta Per coprire alimenti da riscaldare e per assorbire il grasso. Non lasciare il microonde incustodito durante il loro utilizzo e utilizzarli per poco tempo. Carta forno Utilizzarla per coprire ed evitare schizzi o per avvolgere gli alimenti in caso di cottura a vapore.
  • Seite 121 Materiali che non possono essere utilizzati nel microonde: Utensili Note Teglia in alluminio Può provocare scintille. Collocare gli alimenti in un contenitore idoneo al microonde. Contenitore per alimenti Può provocare scintille. Collocare gli alimenti in un con maniglie metalliche contenitore idoneo per il microonde. Utensili in metallo o con Il metallo protegge gli alimenti dall´energia del componenti in metallo...
  • Seite 122 RICERCA E RISOLUZIONE DEI PROBLEMI Problema Causa possibile Soluzione possibile Il microonde La ricezione di radio e TV può essere compromessa compromette la durante l'uso del microonde. Ciò avviene anche con ricezione TV. piccoli apparecchi elettrici come frullatore, aspirapolvere e ventilatori ed è normale. Luce del microonde si L´utilizzo del microonde a bassa potenza, comporta che affievolisce.
  • Seite 123 Problema Causa possibile Soluzione possibile Il microonde non si Lo sportello non è chiuso Chiudere correttamente lo riscalda. correttamente. sportello. Il piatto in vetro è Lo sporco si è accumulato Veder la sezione "Pulizia e rumoroso mentre sotto il piatto in vetro. manutenzione"...

Diese Anleitung auch für:

1003259110032592