Inhaltsverzeichnis
Werbung
Verfügbare Sprachen
Verfügbare Sprachen
Quicklinks
Werbung
Inhaltsverzeichnis

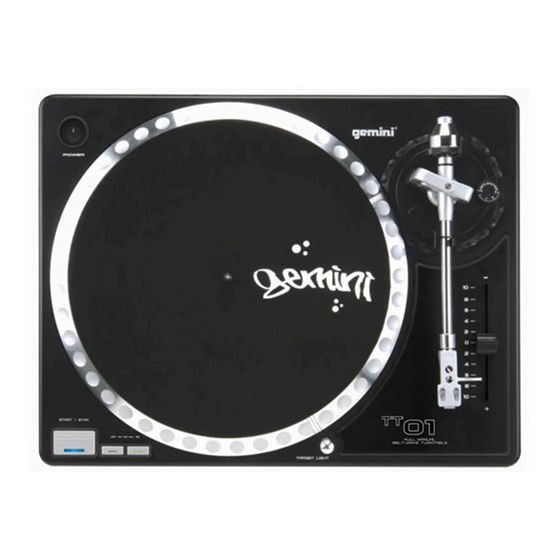
Inhaltszusammenfassung für Gemini TT-01MK II
- Seite 1 BELT-DRIVE STRAIGHT ARM TURNTABLE PLATTENSPIELER MITRIEMENANTRIEB UND GERADEM TONARM GIRADISCOS DE BRAZO RECTO TRACCIÓN POR CORREA PLA TINE VINYLE A VEC ENTRAÎNEMENTP AR COURROIE ETBRAS DROIT OPERATIONS MANUAL B E D I E N U N G S H A N D B U C H MANUAL DEL OPERADOR MANUEL D’INSTRUCTIONS...
- Seite 2 MULTI LANGUAGE INSTRUCTIONS ENGLISH.............................................PAGE 4 DEUTSCH............................................PAGE 6 ESPAÑOL............................................PAGE 8 FRANCAIS..........................................PAGE 10 PLEASE READ BEFORE USING APPLIANCE, IMPORTANT WARNING & SAFETY INSTRUCTIONS! CAUTION RISK OF ELECTRICAL SHOCK DO NOT OPEN! CAUTION: This product satisfies FCC regulations when shielded cables and connectors are used tion of antenna-discharge unit, connection to grounding electrodes, to connect the unit to other equipment.
- Seite 3 TT-01mkii...
-
Seite 4: Parts Checklist
ARE NO USER REPLACEABLE PARTS INSIDE. Please contact the HEADSHELL INSTALLATION: Gemini Service Department or your authorized dealer to speak to a qual- ified service technician. 1. Connect the lead wires to the cartridge terminals. For your conven- ience, the terminals of most cartridges are color-coded. - Seite 5 6. Re-float the TONE ARM (9) to ensure horizontal zero (0) balance. If 6. Push the START/STOP (17) button. The turntable PLATTER (2) will zero balance has not been maintained, repeat counterweight steps 3 - 5. start to spin. 7. After adjusting the horizontal zero (0) balance, turn the balanced 7.
-
Seite 6: Leistungsmerkmale
Riemen nicht fest um das Plattentellerchassis und die MOTORWELLE EINLEITUNG: (5) angelegt ist, muß er neu angelegt werden. Wir gratulieren Ihnen zum Kauf eines Gemini TT-01 MKII 1. Das Plattentellerchassis abnehmen, und den Riemen um den inneren Plattenspielers. Dieses hochentwickelte erstklassige Gerät enthält die Ring unter das Plattentellerchassis legen. -
Seite 7: Spezifikationen
5. Indem der TONE ARM (9) auf der ARM REST (13) festgeklemmt ist, BEDIENUNGSANWEISUNGEN: halten Sie das COUNTERWEIGHT (10) ruhig mit der Hand, während Sie GRUNDBETRIEB: den STYLUS PRESSURE RING (11) rotieren, bis sich die Ziffer “0” auf dem Ring mit der Mittellinie an der Hinterwelle des TONARMS (9) aus- 1. - Seite 8 2. Reponga el plato y haga girar el PLATO - PLATTER (2) hasta que se por correa Gemini TT-01MKII. Este tocadiscos de la más avanzada tec- vea el eje del motor; entonces, ponga los dedos en el orificio en la parte nología está...
-
Seite 9: Especificaciones
6. Flote de nuevo el BRAZO DE FONOCAPTOR (9) para asegurarse 3. Ponga el INTERRUPTOR DE ALIMENTACIÓN - POWER (15) en la que se haya obtenido el equilibro horizontal en cero (0). Si no se ha posición de “ENCENDIDO” (“ON”), en ese momento se encenderán las mantenido este equilibrio, repita los pasos de contrapeso 3 al 5. -
Seite 10: Caractéristiques
4. Protégez l’appareil contre les rayons directs du soleil, la chaleur, l’hu- L’UTILISATEUR À L’INTÉRIEUR. Prière de contacter le Service tech- midité et les saletés. nique de Gemini ou votre concessionnaire homologué pour parler à un technicien homologué. 5. Assurez une bonne ventilation pour l’appareil. -
Seite 11: Specifications
que le BRAS DE LECTURE (9) soit équilibré horizontalement. Ce MODE D’EMPLOI: moment se produit, et vous le verrez facilement, lorsque le BRAS DE FONCTIONNEMENT DE BASE: LECTURE (9) “flotte” librement. 1. Placez un disque sur le SLIPMAT (6) se trouvant sur le PLATTER 4. - Seite 12 NOTES (12)
- Seite 13 NOTES (13)
- Seite 14 60Hz Speed check gauge Carefully punch a hole in the center of this disc, Operate turntable at 0% without quartz lock. Place turntable close to any florescent lighting source. The outer ring should appear still at 33 rpm. The inner ring should appear still at 45rpm.
- Seite 15 50Hz Speed check gauge Carefully punch a hole in the center of this disc, Operate turntable at 0% without quartz lock. Place turntable close to any florescent lighting source. The outer ring should appear still at 33 rpm. The inner ring should appear still at 45rpm.
- Seite 16 Tél: + 33 1 69 79 97 70 • Fax: + 33 1 69 79 97 80 Germany • Gemini Sound Products GmbH • Liebigstr. 16, Haus B - 3.0G, 85757 Karlsfeld, Germany Tel: 08131 - 39171-0 • Fax: 08131 - 39171-9 UK •...


