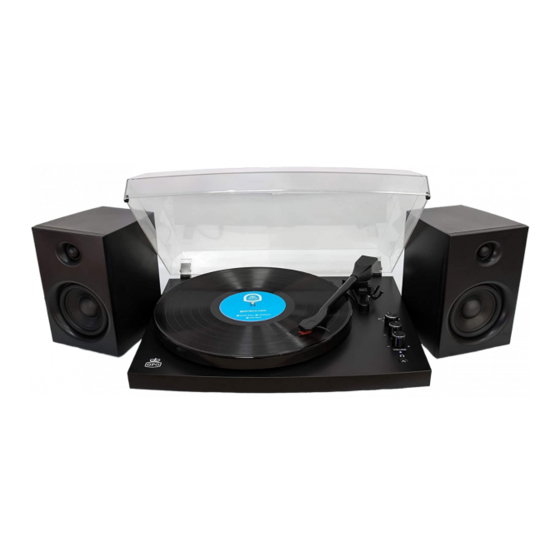
Herunterladen Inhalt Inhalt Diese Seite drucken

Werbung

Verfügbare Sprachen
  • DE

Verfügbare Sprachen

  • DEUTSCH, seite 22
USER MANUAL
V1 | AUG 2018

Werbung

Inhaltsverzeichnis
loading

Inhaltszusammenfassung für GPO Piccadilly

  • Seite 1 USER MANUAL V1 | AUG 2018...
  • Seite 3: Inhaltsverzeichnis

    Content English German French Dutch Spanish Italian...
  • Seite 5: English

    English...
  • Seite 6 WARNINGS • To reduce the risk of electric shock, do not expose this appliance to rain or moisture. • To reduce the risk of electric shock, do not open the cabinet. No user serviceable parts are inside. Refer servicing to qualified personnel. •...
  • Seite 7: Important Safety Instructions

    IMPORTANT SAFETY INSTRUCTIONS 1) Read these instructions. 2) Keep these instructions. 3) Heed all warnings. 4) Follow all instructions. 5) Do not use this apparatus near water. 6) Clean only with dry cloth. 7) Do not block any ventilation openings. Install in accordance with the manufacturer’s instructions.
  • Seite 8 COMPONENT IDENTIFICATIONS 1. Rotating shaft 9. 3.5Mm earphone jack 2. 45-Rpm adapter 10. Cartridge & stylus (needle) 2. Tone arm 11. Auto stop control switch 3. Tone arm lever 12. Auto rca output 4. Tone arm lock & rest 13. L&r speaker output terminals 5.
  • Seite 10 UNPACKING YOUR TURNTABLE 1. Carefully remove the turntable and accessories from the box. 2. Place the turntable on a flat, level surface and carefully open the lid. 3. Remove the white protective Stylus Cover by gently pulling it away from the TONE ARM (3) as shown below. 4.
  • Seite 11 POWER 1. Plug the supplied AC 100V~240V, 50/60Hz to DC 12V power adapter into the DC 12V INPUT (14) located on the rear of the turntable. 2. Insert the wall plug of the power adapter into an electrical wall outlet. 3.
  • Seite 12: Playing A Record

    PLAYING A RECORD 1. Turn the FUNCTION KNOB (6) to the correct speed for your record (33 ,45, or 78 RPM). 2. Place the record on the turntable, being careful to place the spindle directly in the record hole. We have included a 45-RPM ADAPTER (2) to use when playing 45- RPM records.
  • Seite 13 9. When finished listening, use the TONE ARM LEVER (4) to raise the TONEARM (3) and then place it back on the TONE ARM LOCK & REST (5). The record will automatically stop spinning. 10. If finished using the turntable, be sure to lock the TONE ARM LOCK &...
  • Seite 14: Connecting External Speakers

    CONNECTING EXTERNAL SPEAKERS Use the included Red & White RCA Cables to connect the turntable to an External Speaker or Stereo system. Simply plug the Red & White ends of the RCA Cable into the corresponding Red & White AUDIO OUTPUT JACKS (12) on the rear of the player.
  • Seite 15 REMOVING THE STYLUS (NEEDLE) NOTE: If not done correctly, separating the STYLUS from the ceramic CARTRIDGE can cause damage to the CARTRIDGE. If needed, please seek assistance from an experienced individual. 1. Lock the TONE ARM (3) on the TONE ARM LOCK & REST (5) by pushing the TONE ARM LOCK to the left 2.
  • Seite 16 INSTALLING A NEW STYLUS (NEEDLE) NOTE: Do not directly touch the STYLUS (NEEDLE) (10) during installation, or you may cause permanent damage to the STYLUS (10). 1. Hold the front tip of the Stylus Assembly with your thumb and index fingers and insert the rear edge of the Stylus Assembly on the CARTRIDGE as shown in Fig 5a.
  • Seite 17 TROUBLE SHOOTING MUSIC SOUNDS TOO SLOW OR TOO FAST • Check to confirm the FUNCTION SWITCH KNOB (6) is correctly set for the record being played (33, 45, or 78 RPM). RECORDS KEEP SKIPPING • Carefully look at the surface of the record under a strong light to see if there are any significant scratches or other damage to the record which will cause it to skip.
  • Seite 18 NO POWER • Make sure the AC 100V~240V, 50/60Hz to DC 12V power adapter is securely connected to the DC 12V INPUT (14) on the rear of the turntable as well as the wall outlet. • Make sure the electrical outlet is working by plugging in another device.
  • Seite 21: German

    German...
  • Seite 22: Warnhinweise

    WARNHINWEISE • Um die Gefahr eines elektrischen Schlages zu verringern, darf dieses Gerät weder Regen noch Feuchtigkeit ausgesetzt werden. • Um die Gefahr eines elektrischen Schlags zu verringern, darf das Gehäuse nicht geöffnet werden. Es befinden sich keine vom Benutzer zu wartenden Teile im Inneren.
  • Seite 23 9) Schützen Sie das Netzkabel gegen Einquetschen oder Abknicken, besonders in der Nähe von Steckern, Steckdosen und Kabeleingängen am Gerät. 10) Verwenden Sie nur vom Hersteller empfohlenes Zubehör. 11) Verwenden Sie nur Wagen, Ständer, Stative, Halter oder Tische, die vom Hersteller angegebenen oder mit dem Gerät verkauft werden.
  • Seite 24: Bedienelemente & Geräteteile

    BEDIENELEMENTE & GERÄTETEILE 1. Rotierneder dorn 9. 3,5-Mm-kopfhörerbuchse 2. 45-Rpm-adapter 10. Tonabnehmer & -nadel 3. Tonarm 11. Auto-stopp-schalter 4. Tonarm-hebel 12. Auto-cinch-ausgang 5. Tonarmsperre & - halterung 13. Lautsprecherausgänge (links & rechts) 6. Funktionsregler 14. Dc-buchse 7. Tonhöhenregler 15. Netzschschalter 8.
  • Seite 26: Auspacken Ihres Plattenspielers

    AUSPACKEN IHRES PLATTENSPIELERS 1. Entfernen Sie vorsichtig den Plattenspieler und das Zubehör aus der Verpackung. 2. Platzieren Sie den Plattenspieler auf einer flachen, ebenen Oberfläche, und öffnen Sie vorsichtig den Deckel. 3. Entfernen Sie die weiße Schutzabdeckung der Tonnadel, indem Sie sie vorsichtig vom TONARM (3) wegziehen, wie unten gezeigt.
  • Seite 27: Stromversorgung

    LAUTSPRECHER 1. Verbinden Sie den Lautsprecher vor der Benutzung mit dem Gerät. 2. Verwenden Sie das im Lieferumfang enthaltene rot-schwarze Lautsprecherkabel, um den Plattenspieler mit dem Lautsprecher zu verbinden. Schließen Sie einfach das rote bzw. schwarze Ende des Lautsprecherkabels an den entsprechenden roten bzw. schwarzen LAUTSPRECHERAUSGANG auf der Rückseite des Plattenspielers an.
  • Seite 28: Abspielen Einer Schallplatte

    LAUTSTÄRKE Die Lautstärke des Lautsprechers wird ebenfalls über den POWER-/ LAUTSTÄRKEREGLER (8) gesteuert. • Erhöhen der Lautstärke: Drehen Sie den POWER-/ LAUTSTÄRKEREGLER (8) im Uhrzeigersinn. • Verringern der Lautstärke: Drehen Sie den POWER-/ LAUTSTÄRKEREGLER (8) gegen den Uhrzeigersinn. Hinweis: Bitte schließen Sie die LINKEN & RECHTEN LAUTSPRECHER korrekt an, bevor Sie das Gerät benutzen.
  • Seite 29 5. Sie können den TONHÖHENREGLER (7) nach links oder rechts drehen, um die Drehgeschwindigkeit bei der Wiedergabe der Platte einzustellen. • VORSICHT: Sichern Sie den TONARM (3) immer mithilfe der TONARMSPERRE & -HALTERUNG (5), wenn der Plattenspieler nicht in Gebrauch ist oder bewegt wird. Andernfalls kann es zu Schäden am Tonabnehmer oder der Tonnadel kommen.
  • Seite 30: Auto Stopp

    DIE FUNKTION „BLUETOOTH EMPFANGEN“ 1. Wenn der FUNKTIONSREGLER (6) auf BT gestellt wird, blinkt die Power-LED blau und beginnt, sich mit Bluetooth-Geräten zu verbinden. Wenn die Bluetooth-Verbindung erfolgreich ist, hört die Power-LED auf zu blinken. 2. Wenn der FUNKTIONSREGLER (6) auf 33 & 45 & 78 gedreht wird, aktiviert sich die Wiedergabefunktion des Plattenspielers und die Bluetooth-Funktion wird deaktiviert.
  • Seite 31: Anschluss Externe Lautsprechern

    ANSCHLUSS EXTERNE LAUTSPRECHERN Verwenden Sie die im Lieferumfang enthaltenen rot-weißen Cinch- Kabel, um den Plattenspieler an einen externen Lautsprecher oder eine Stereoanlage anzuschließen. Schließen Sie einfach das rote bzw. weiße Ende des Cinch-Kabels an den entsprechenden roten bzw. weißen CINCH-AUSGANG (12) auf der Rückseite des Plattenspielers an.
  • Seite 32: Entnehmen Der Tonnadel

    ENTNEHMEN DER TONNADEL Hinweis: Bei falscher Vorgehensweise kann die Entnahme der TONNADEL aus dem keramischen TONABNEHMER Schäden am TONABNEHMER verursachen. Wenden Sie sich bitte ggf. an eine erfahrene Person. 1. Verriegeln Sie den TONARM (3) auf der TONARMSPERRE & -HALTERUNG (5), indem Sie die TONARMSPERRE nach links drücken.
  • Seite 33 ENTNEHMEN DER TONNADEL HINWEIS: Berühren Sie die TONNADEL nicht direkt während der Montage, da es sonst zu einer dauerhaften Beschädigung der TONNADEL (10) kommen kann. 1. Halten Sie die vordere Spitze des Nadelträgers mit Daumen und Zeigefinger, und schieben Sie die Hinterkante des Nadelträgers über den Tonabnehmer, wie in Fig.
  • Seite 34 EINE KORREKT POSITIONIERTE TONNADEL • Bei normalem Gebrauch sollte eine TONNADEL (10) ungefähr 50 - 60 Wiedergabestunden halten. Es wird empfohlen, die TONNADEL (10) zu ersetzen, sobald Sie eine Verschlechterung der Klangqualität bemerken. • Die Verwendung einer verschlissenen TONNADEL (10) kann Platten beschädigen.
  • Seite 35 • Wählen Sie eine andere Schallplatte, nachdem Sie sich vergewissert haben, dass diese sauber ist, um zu prüfen, ob Sie das gleiche Ergebnis erhalten. • Stellen Sie sicher, dass sich die TONNADEL (15) in der richtigen mittleren Position befindet. KEIN TON •...
  • Seite 37: French

    French...
  • Seite 38: Avertissements

    AVERTISSEMENTS • Pour limiter les risques d’électrocution, veillez à ne pas exposer cet appareil à la pluie ou à l’humidité. • Pour limiter les risques d’électrocution, n’ouvrez pas le boîtier de l’appareil. L’appareil ne contient aucun composant susceptible d’être réparé par l’utilisateur. Pour toute réparation, faites appel à un technicien qualifié.
  • Seite 39 9) Assurez-vous que personne ne puisse marcher ou tirer sur le cordon d’alimentation, en particulier au niveau des fiches de connexion, de la prise de courant et du point de sortie de l’appareil. 10) Utilisez uniquement les accessoires recommandés par le fabricant. 11) Utilisez uniquement le chariot, le pied, le trépied, le support ou la table recommandés par le fabricant ou fournis avec l’appareil.
  • Seite 40: Identification Des Composants

    IDENTIFICATION DES COMPOSANTS 1. Axe tournan 9. Prise casque 3,5 mm 2. Adaptateur 45 tr/min 10. Cellule de lecture et pointe 3. Bras de lecture de lecture (aiguille) d’arrêt automatique 11. Interrupteur de commande 4. Levier 12. Sortie audio rca 5.
  • Seite 42 DÉBALLAGE DE LA PLATINE 1. Sortez la platine et les accessoires de la boîte avec précaution. 2. Placez la platine sur une surface plane et ouvrez le couvercle avec précaution. 3. Retirez la protection blanche de la pointe de lecture en la détachant avec précaution du BRAS DE LECTURE (3), comme illustré...
  • Seite 43 ALIMENTATION 1. Branchez l’adaptateur d’alimentation 100 V~240 V CA, 50/60Hz dans la PRISE 12V CC (14) située à l’arrière de la platine. 2. Insérez la prise d’alimentation de l’adaptateur dans une prise de courant murale. 3. Positionnez le bouton POWER en position ON à l’arrière de la platine.
  • Seite 44: Lecture De Disques

    LECTURE DE DISQUES 1. Tournez le BOUTON DE FONCTION (6) pour choisir la vitesse adaptée à votre disque (33, 45 ou 78 tr/min). 2. Placez le disque sur la platine, en veillant à placer l’axe directement dans le trou du disque. Un ADAPTATEUR 45 TR/MIN (2) est fourni pour pouvoir lire les disques 45 tr/min.
  • Seite 45: Fonction Bluetooth

    7. Abaissez le BRAS DE LECTURE (3) à l’aide du LEVIER (4) jusqu’à ce que la POINTE DE LECTURE (10) touche le disque et commence à lire la musique. Assurez-vous que le LEVIER (4) est complètement abaissé. 8. Réglez le volume au niveau désiré en tournant le BOUTON DE RÉGLAGE DU VOLUME (8).
  • Seite 46: Arrêt Automatique

    ARRÊT AUTOMATIQUE La fonction ARRÊT AUTOMATIQUE permet à la platine d’arrêter automatiquement la lecture lorsque la POINTE DE LECTURE (15) atteint la fin du disque. • Pour ACTIVER la fonction ARRÊT AUTOMATIQUE : placez l’INTERRUPTEUR DE COMMANDE D’ARRÊT AUTOMATIQUE (11) sur AUTO.
  • Seite 47 CONNEXION DE LA PLATINE À UNE ENCEINTE EXTERNE OU UNE SOURCE STÉRÉO Utilisez les câbles RCA rouge et blanc fournis pour relier la platine à une enceinte externe ou à un système stéréo. Il suffit de brancher les extrémités du câble RCA rouge et blanc dans les SORTIES AUDIO (12) rouge et blanche correspondantes situées à...
  • Seite 48 RETRAIT DE LA POINTE DE LECTURE (AIGUILLE) REMARQUE : la séparation de la POINTE DE LECTURE de la CELLULE DE LECTURE peut endommager cette dernière si cela n’est pas correctement effectué. Si besoin, faites appel à un technicien expérimenté. 1. Bloquez le BRAS DE LECTURE (3) sur le SUPPORT D’APPUI (5) en poussant le DISPOSITIF DE VERROUILLAGE vers la gauche.
  • Seite 49 INSTALLATION DE LA NOUVELLE POINTE DE LECTURE (AIGUILLE) REMARQUE : ne touchez pas directement la POINTE DE LECTURE (AIGUILLE) (10) lors de l’installation ; vous pourriez l’endommager de façon permanente. 1. Maintenez la partie avant de l’ensemble de la pointe de lecture entre le pouce et l’index et insérez son bord arrière sur la CELLULE DE LECTURE comme illustré...
  • Seite 50: Résolution Des Problèmes

    POSITION CORRECTE DE LA POINTE DE LECTURE • Dans des conditions normales d’utilisation, une POINTE DE LECTURE (10) devrait fonctionner pendant environ 50 à 60 heures de lecture de disque. La POINTE DE LECTURE (10) devrait être remplacée dès les premiers signes de détérioration de la qualité du son.
  • Seite 51 • Choisissez un autre disque après avoir vérifié que le premier était propre afin de voir si vous obtenez le même résultat. • Vérifiez que la POINTE DE LECTURE (15) est bien dans la position centrale. LA PLATINE N’ÉMET AUCUN SON •...
  • Seite 53: Dutch

    Dutch...
  • Seite 54: Waarschuwingen

    WAARSCHUWINGEN • Om het gevaar van elektrische schokken te verminderen, dient u dit toestel niet aan regen of vocht bloot te stellen. • Om het gevaar van elektrische schokken te verminderen, dient u de behuizing niet te openen. Er zitten geen onderdelen in het toestel die door de gebruiker kunnen worden onderhouden.
  • Seite 55 9) Voorkom dat er op de voedingskabel gelopen wordt of dat deze knikt, met name in de buurt van stekkers, contacten en waar de kabel het toestel uitkomt. 10) Gebruik uitsluitend de door de fabrikant gespecificeerde hulpstukken/accessoires. 11) Gebruik het toestel uitsluitend in combinatie met een door de fabrikant gespecificeerd(e) of samen met het toestel verkocht(e) karretje, standaard, statief, bevestigingsbeugel of tafel.
  • Seite 56: Locatie Van De Onderdelen

    LOCATIE VAN DE ONDERDELEN 1. Roterende as 9. Oortelefoonaansluiting 3,5 mm 2. Adapter 45 omw./Min 10. Element & naald 2. Toonarm 11. Schakelaar automatisch stoppen 3. Toonarmhendel 12. Auto rca-uitgang 4. Toonarmvergrendeling 13. Uitgangsaansluitingen 5. Functieknop l&r-speaker - en steun 6.
  • Seite 58 UW DRAAITAFEL UITPAKKEN 1. Haal de draaitafel en de accessoires voorzichtig uit de doos. 2. Zet de draaitafel voorzichtig op een plat en vlak oppervlak en doe het deksel open. 3. Haal de witte beschermkap van de naald af door hem voorzichtig weg te trekken van de TOONARM (3) zoals hieronder wordt weergegeven.
  • Seite 59: Aanzetten

    AANZETTEN 1. Sluit de meegeleverde adapter (AC 100 ~240 V, 50/60 Hz naar DC 12V) aan op de INGANG 12V GELIJKSTROOM (14) aan de achterzijde van de draaitafel. 2. Steek de stekker van de adapter in een stopcontact. 3. Zet de AAN/UIT-KNOP aan de achterkant van de draaitafel op AAN. •...
  • Seite 60: Een Plaat Afspelen

    EEN PLAAT AFSPELEN 1. Zet de FUNCTIEKNOP (6) op het juiste toerental voor uw plaat (33 ,45 of 78 omw./min). 2. Leg de plaat zorgvuldig op de draaitafel en zorg ervoor dat de as precies in het gaatje in het midden van de plaat zit. •...
  • Seite 61: Automatisch Stoppen

    7. Laat de TOONARM (3) zakken met behulp van de TOONARMHENDEL (4) totdat de NAALD (10) contact maakt met de plaat en de muziek begint. Zorg dat de TOONARMHENDEL (4) volledig naar beneden zit. 8. Stel het volume af op het gewenste niveau door aan de VOLUMEKNOP (8) te draaien.
  • Seite 62: Luidsprekers Aansluiten

    • Zo zet u de functie “AUTOMATISCH STOPPEN” UIT: Zet de SCHAKELAAR AUTOMATISCH STOPPEN (11) in de stand HANDMATIG. • OPMERKING: Als u de HANDMATIGE stand gebruikt, zal de platenspeler nadat het einde van de plaat is bereikt blijven draaien totdat u zelf de TOONARM (3) optilt en weer in de TOONARMVERGRENDELING EN -STEUN (5) plaatst.
  • Seite 63 DE NAALD VERWIJDEREN OPMERKING: Als de NAALD niet op correcte wijze wordt losgemaakt van het keramische ELEMENT, kan het ELEMENT beschadigd raken. Vraag indien nodig iemand met ervaring om hulp. 1. Vergrendel de TOONARM (3) op de TOONARMVERGRENDELING EN -STEUN (5) door de TOONARMVERGRENDELING naar links te duwen.
  • Seite 64 DE NIEUWE NAALD PLAATSEN OPMERKING: Raak de NAALD (10) tijdens het plaatsen niet rechtstreeks aan, want daardoor kan de NAALD (10) permanent beschadigd raken. 1. Houd de voorzijde van de naaldeenheid met uw duim en wijsvinger vast en voer de achterzijde van de naaldeenheid in het ELEMENT zoals te zien is in afb 5a.
  • Seite 65: Problemen Oplossen

    PROBLEMEN OPLOSSEN MUZIEK KLINKT NIET GOED (TE HOOG OF TE LAAG TOERENTAL) • Controleer of de FUNCTIESCHAKELAAR (6) goed is ingesteld voor de plaat (33, 45 of 78 omw./min). NAALD VERSPRINGT STEEDS • Controleer aandachtig het oppervlak van de plaat bij goed licht om te zien of er misschien een kras op de plaat of andere schade te zien is waardoor de naald verspringt.
  • Seite 66 GEEN VOEDING • Zorg dat de adapter (AC 100 ~240 V, 50/60 Hz naar DC 12V) goed is aangesloten op de INGANG 12V GELIJKSTROOM (14) aan de achterzijde van de draaitafel en op het stopcontact. • Controleer of het stopcontact werkt door er een ander apparaat op aan te sluiten.
  • Seite 69: Spanish

    Spanish...
  • Seite 70: Instrucciones De Seguridad Importantes

    CAUCIÓN • Para reducir el riesgo de descarga eléctrica, no exponga este aparato a la lluvia o la humedad. • Para reducir el riesgo de descarga eléctrica, no abra la carcasa. No hay piezas que el usuario pueda reparar en el interior. Encargue su reparación a personal cualificado.
  • Seite 71 9) Proteja el cable de ALIMENTACIÓN para que nadie lo pise ni se perfore particularmente en los enchufes, la toma de corriente y el punto en que sale del aparato. 10) Use solamente los acoples/accesorios especificados por el fabricante. 11) Úselo solamente con el carro, pie, trípode, soporte o mesa especificados por el fabricante, o vendidos con el aparato.
  • Seite 72: Identificación De Los Componentes

    IDENTIFICACIÓN DE LOS COMPONENTES 1. Eje giratorio 9. Toma para auriculares de 3,5 mm 2. Adaptador de 45 rpm 10. Cartucho y aguja 2. Brazo de lectura 11. Interruptor de control 3. Palanca del brazo de lectura de detención automática 4.
  • Seite 74 DESEMBALAJE DEL TOCADISCOS 1. Extraiga con cuidado el tocadiscos y los accesorios de la caja. 2. Coloque el tocadiscos sobre una superficie plana y nivelada, y abra la tapa cuidadosamente. 3. Retire la cubierta protectora de la aguja blanca tirando suavemente de ella para separarla del BRAZO DE LECTURA (3) como se muestra a continuación.
  • Seite 75 conecte los otros extremos del cable del altavoz de color rojo y negro en los terminales correspondientes de color rojo y negro de la CLAVIJA DE ENTRADA DE AUDIO (16) en la parte posterior de los altavoces ALIMENTACIÓN 1. Enchufe el cable CA 100 V~240 V, 50/60 Hz suministrado al adaptador de corriente CC de 12 V en la ENTRADA CC 12 V (14) situada en la parte posterior del tocadiscos.
  • Seite 76: Reproducir Un Disco

    REPRODUCIR UN DISCO 1. Gire el MANDO DE FUNCIÓN (6) a la velocidad correcta para el disco que desea reproducir (33, 45 o 78 RPM). 2. Coloque el disco en el plato, con cuidado de que el eje quede directamente en el orificio del disco. •...
  • Seite 77 8. Ajuste el volumen al nivel deseado girando el MANDO DE VOLUMEN (8). 9. Cuando haya terminado, use la PALANCA DEL BRAZO DE LECTURA (4) para levantar el BRAZO DE LECTURA (3) y volver a colocarlo en el BLOQUEO Y APOYO DEL BRAZO DE LECTURA (5).
  • Seite 78: Conexión De Altavoces Externos

    • AVISO: al usar la configuración MANUAL, una vez finalizado el disco, el reproductor continuará girando hasta que levante el BRAZO DE LECTURA (3) y lo vuelva a colocar en el BLOQUEO Y APOYO DEL BRAZO DE LECTURA (5), lo que detendrá el giro. CONEXIÓN DE ALTAVOCES EXTERNOS Use los cables RCA de color rojo y blanco que se suministran para conectar el tocadiscos al sistema estéreo o a un altavoz externo.
  • Seite 79 RETIRAR LA AGUJA AVISO: si no se hace correctamente, separar la AGUJA del CARTUCHO cerámico puede dañar este. Si es necesario, busque la asistencia de un profesional. 1. Bloquee el BRAZO DE LECTURA (3) en el BLOQUEO Y APOYO DEL BRAZO DE LECTURA (5) presionando el BLOQUEO DEL BRAZO DE LECTURA hacia la izquierda 2.
  • Seite 80 INSTALAR UNA AGUJA NUEVA AVISO: no toque la AGUJA directamente (10) durante la instalación, o podría causar daños permanentes en la misma. 1. Sujete la punta delantera del conjunto de la aguja con los dedos pulgar e índice e inserte el extremo posterior del conjunto de la aguja en el CARTUCHO como se muestra en la Fig.
  • Seite 81: Localización De Defectos

    LOCALIZACIÓN DE DEFECTOS LA MÚSICA SUENA DEMASIADO LENTA O DEMASIADO RÁPIDA • Compruebe que el MANDO SELECTOR DE FUNCIÓN (6) está colocado correctamente según el disco que se está reproduciendo (33, 45 o 78 RPM). LOS DISCOS NO DEJAN DE SALTAR •...
  • Seite 82 NO HAY CORRIENTE • Asegúrese de que el a adaptador de corriente CA 100 V~240 V, 50/60 Hz a CC 12 V está debidamente enchufado en la ENTRADA CC de 12 V (14) en la parte posterior del tocadiscos, así como a la toma de la pared.
  • Seite 85: Italian

    Italian...
  • Seite 86: Importanti Istruzioni Di Sicurezza

    AVVERTENZE • Al fine di ridurre il rischio di scosse elettriche, non esporre l’apparecchio a pioggia o umidità. • Per ridurre il rischio di scosse elettriche, non aprire l’involucro. All’interno non sono presenti parti riparabili dall’utente. Per le riparazioni, rivolgersi a personale qualificato. •...
  • Seite 87 9) Proteggere il cavo di alimentazione per evitare che venga calpestato o strozzato, in particolare all’altezza delle spine, prese e nel punto di uscita dall’apparecchio. 10) Utilizzare unicamente dispositivi di collegamento/accessori specificati dal costruttore. 11) Utilizzare unicamente con il carrello, il supporto, il tripode, la staffa o il ripiano specificati dal costruttore o venduti con l’apparecchio.
  • Seite 88: Identificazione Dei Componenti

    IDENTIFICAZIONE DEI COMPONENTI 1. Alberino rotante 9. Presa per cuffie 3,5 mm 2. Adattatore 45 giri 10. Testina e puntina (ago) 2. Braccio 11. Interruttore di arresto automatico 3. Leva del braccio 12. Uscita audio rca 4. Blocco e supporto del braccio 13. Terminali di uscita altoparlante dx e sx 5.
  • Seite 90: Casse Acustiche

    DISIMBALLAGGIO DEL GIRADISCHI 1. Rimuovere con cura il giradischi e gli accessori dalla scatola. 2. Posizionare il giradischi su una superficie piana a livello e aprire il coperchio prestando la massima attenzione. 3. Rimuovere la protezione bianca della puntina tirandola delicatamente via dal BRACCIO (3) come mostrato sotto.
  • Seite 91 ALIMENTAZIONE 1. Inserire l’adattatore di alimentazione CA 100 V~240 V, 50/60 Hz per 12 V CC fornito nell’INGRESSO 12 V CC (14) ubicato sul retro del giradischi. 2. Inserire la spina dell’adattatore di alimentazione in una presa elettrica. 3. Premere il pulsante di accensione sul retro del giradischi. VOLUME Il volume degli altoparlanti viene regolato con la MANOPOLA DI ALIMENTAZIONE/VOLUME (8).
  • Seite 92: Riproduzione Di Un Disco

    RIPRODUZIONE DI UN DISCO 1. Girare la MANOPOLA DI FUNZIONE (6) per impostare la velocità corretta per il disco da riprodurre (33, 45 o 78 giri). 2. Posizionare il disco sul giradischi, facendo attenzione a inserire il perno direttamente nel foro del disco. •...
  • Seite 93 8. Regolare il volume al livello desiderato girando la MANOPOLA VOLUME (8). 9. Una volta terminato l’ascolto, usare la LEVA DEL BRACCIO (4) per sollevare il BRACCIO (3) e riposizionare sul BLOCCO E SUPPORTO DEL BRACCIO (5). Il disco cessa automaticamente di girare.
  • Seite 94: Arresto Automatico

    ARRESTO AUTOMATICO TL’ARRESTO AUTOMATICO consente al giradischi di cessare automaticamente la riproduzione quando la PUNTINA (15) raggiunge la fine del disco. • Per attivare la funzione ARRESTO AUTOMATICO: impostare l’INTERRUTTORE DI ARRESTO AUTOMATICO (11) su AUTOMATICO. • Per disattivare la funzione di ARRESTO AUTOMATICO: impostare l’INTERRUTTORE DI ARRESTO AUTOMATICO (11) su MANUALE.
  • Seite 95 CUFFIA Per usare delle cuffie con questo lettore, collegare una presa da 3,5 mm nella PRESA CUFFIE da 3,5 mm (9) situata sul retro del giradischi. • NOTA: quando le cuffie sono collegate, dagli altoparlanti incorporati non fuoriesce alcun suono. RIMOZIONE DELLA PUNTA (AGO) NOTA: se l’operazione non viene eseguita correttamente, la separazione della PUNTINA dalla TESTINA in ceramica può...
  • Seite 96 INSTALLAZIONE DELLA PUNTINA NUOVA (AGO) NOTA: non toccare direttamente la PUNTINA (AGO) (10) durante l’installazione per non arrecarvi danni permanenti. 1. Tenere l’estremità anteriore del gruppo della puntina fra pollice e indice e inserire la parte posteriore del gruppo della puntina sulla TESTINA (14) come mostrato alla fig.
  • Seite 97: Risoluzione Dei Problemi

    RISOLUZIONE DEI PROBLEMI LA MUSICA VIENE RIPRODOTTA TROPPO LENTAMENTE O TROPPO VELOCEMENTE • Verificare che la MANOPOLA FUNZIONE (6) sia impostata correttamente per il disco da riprodurre (33, 45 o 78 giri). IL DISCO SALTA • Osservare con attenzione la superficie del disco sotto una luce forte per escludere la presenza di graffi o altri danni che provochino i salti.
  • Seite 98 ASSENZA DI ALIMENTAZIONE • Assicurarsi che l’adattatore di alimentazione CA 100 V~240 V, 50/60 Hz a CC 12 V sia connesso bene nell’INGRESSO CC 12 V (14) sul retro del giradischi e nella presa di corrente. • Assicurarsi che la presa elettrica sia funzionante provando a inserire un altro dispositivo.
  • Seite 100 Hereby ProtelX, declares that this Hierbij verklaart ProtelX dat equipment (GPO Piccadilly) is dit apparaat (GPO Piccadilly) in compliance with the essential voldoet aan de essentiële eisen en requirements and other relevant andere relevante bepalingen van provisions of Directive, you can...

Inhaltsverzeichnis