Herunterladen Inhalt Inhalt Diese Seite drucken
Inhaltsverzeichnis

Werbung

Verfügbare Sprachen

Verfügbare Sprachen

Stand Fan
User Manual
EFS8000W
EN

Werbung

Inhaltsverzeichnis
loading

Inhaltszusammenfassung für Beko EFS8000W

  • Seite 1 Stand Fan User Manual EFS8000W...
  • Seite 2: Please Read This User Manual First

    Please read this user manual first! Dear Customer, Thank you for preferring a Beko product. We hope that you get the best results from your product which has been manufactured with high quality and state-of- the-art technology. Therefore, please read this entire user manual and all other accompanying documents carefully before using the product and keep it as a reference for future use.
  • Seite 3: Inhaltsverzeichnis

    CONTENTS 1 Safety instructions 2 Part figure 3 Assembly instructions 4 Grill & Fan blade assembly 5 Operating instructions 5.1 Remote controller (Fig. 8)................9 5.2 Control panel (Fig.
  • Seite 4: Safety Instructions

    Safety instructions Warning Read rules for safe operation and instructions carefully. •If the supply cord is damaged, it must be replaced by manufacturer or its service agent or a similarly qualified person in order to avoid a hazard. •To protect against the risk of electrical shock, do not immerse the unit, cord or plug in water or other liquid.
  • Seite 5: Rules For Safe Operation

    Safety instructions Rules for safe operation •Never insert fingers, pencils, or any other object through the grille when fan is running. •Disconnect fan when moving from one location to another. •Be sure fan is on a stable surface when operating to avoid overturning.
  • Seite 6: Part Figure

    Part figure Tighten Loosen Spinner 1. Front grill 11. Female terminals 2. Circlip 12. Column cover 3. Blade 13. Base 4. Plastic nut 14. Butterfly screws for fixed base 5. Rear grill 15. Pole 6. Shaft 16. Control part 7. Motor 17.
  • Seite 7: Assembly Instructions

    Assembly instructions 1. Take out the base tube, three butterfly screws for fixed base and the round base from the packing carton; 2. Insert the tube to the round base, be sure to make the positioning screw align with the base; 3.
  • Seite 8: Grill & Fan Blade Assembly

    Grill & Fan blade assembly 1. Unscrew the spinner clockwise (or take the spinner out from the bag) and the plastic nut counterclockwise to remove both of them. Fix the rear grill to the motor then tighten the plastic nut again.
  • Seite 9: Operating Instructions

    Operating instructions Plug in the power adapter, after a "beep" tone, the fan is on standby. 5.1 Remote controller (Fig. 8) Fig. 8 Fig. 9 1. Pro/timer 5. On/Off 2. Mode 6. Remote controller 3. OSC 7. Battery 4. Drive plate 8.
  • Seite 10: Control Panel (Fig. 10)

    Operating instructions If the temperature is lower than 20°C, the fan will stop working. If the temperature is higher than 20°C, the fan will work again. When you choice comfortable wind, the icon " " will be lighted and the IDM display "00".
  • Seite 11: Tilt Adjustment

    Operating instructions Fig. 10 5.3 Tilt adjustment To adjust the air flow upward or downward, push the guards lightly to the desired direction. 5.4 Height adjustment Lowing: lift up the head with a hand, unscrew the fastening knob counterclockwise with the other hand, slowly lower the head to an appropriate height, and tighten the knob clockwise.
  • Seite 12: Screen-Off Function

    Operating instructions 5.6 Screen-off function Press the “On/Off" button for three seconds, the screen will turn off and the fan is still running. Press any button (not include "On/Off” button), the screen will light up. Remote control does not have this feature. 5.7 Forced shutdown The fan will be turned off when there is no operation within 12 hours.
  • Seite 13: Other

    Other 6.1 Batteries instructions (Fig. 9) Batteries should be installed before using the remote control. It uses a 3 -volt button battery. 1. Open the battery cover; 2. Install a new battery, pay attention to the battery polarity (+ and -); 3.
  • Seite 14: Technical Data

    Other 6.6 Technical data Power supply: 220V-240V, 50Hz Technical and design modifications reserved. 14 / 16 EN Stand Fan / User Manual...
  • Seite 15 Note: Do not dispose of electrical appliances as unsorted municipal waste, use separate collection facilities. Contact your local government for information regarding the collection systems available. If electrical appliances are disposed of in landfills or dumps, hazardous substances can leak into the groundwater and get into the food chain, damaging your health and well-being.
  • Seite 16 www.beko.com...
  • Seite 17 Ventilateur sur pied Manuel de l’utilisateur EFS8000W...
  • Seite 18: Signification Des Symboles

    ! Cher client, Merci d’avoir choisi un produit Beko. Nous espérons que notre produit, fabriqué avec une technologie de qualité supérieure et de dernière génération, satisfera vos attentes. Par conséquent, veuillez lire attentivement ce manuel ainsi que tous les autres documents y afférents avant l’utilisation du produit.
  • Seite 19 Tables des matières 1 Consignes de sécurité 2 Schéma des pièces 3 Instructions de montage 4 Montage de l’hélice et de la grille du ventilateur 5 Notice technique d’utilisation 5.1 Télécommande (Fig. 8) ................9 5.2 Tableau de commande (Fig.
  • Seite 20: Consignes De Sécurité

    Consignes de sécurité Avertissement Veuillez lire attentivement les instructions et consignes de sécurité. •Si le cordon d’alimentation est endommagé, il doit être remplacé par le constructeur, une personne mandatée pour faire le SAV ou toute autre personne qualifiée afin d’éviter toute mise en danger. •Ne jamais immerger l’unité, le cordon ou la fiche dans de l’eau ni dans tout autre liquide afin d’éviter tout risque d’électrocution.
  • Seite 21 Consignes de sécurité - Essuyez la grille de protection de l’hélice ainsi que la surface du ventilateur à l’aide d’un chiffon légèrement humide. Consignes de sécurité •Ne tentez jamais d’introduire vos doigts, un crayon ou tout autre objet à travers la grille lorsque le ventilateur est en marche. •Débranchez le ventilateur lorsque vous le déplacez d’un endroit à...
  • Seite 22: Schéma Des Pièces

    Schéma des pièces Serrer Desserrer Dispositif de blocage 1. Grille avant 11. Bornes femelles 2. Cerclage 12. Cache de la colonne 3. Hélice 13. Socle 4. Écrou en plastique 14. Vis papillon pour le socle fixe 5. Grille arrière 15. Pied 6.
  • Seite 23: Instructions De Montage

    Instructions de montage 1. Sortez le pied, trois vis papillon pour le socle fixe ainsi que le socle rond du carton d’emballage ; 2. Insérez le pied dans le socle rond en vous assurant que la vis de positionnement est correctement alignée avec le socle ;...
  • Seite 24: Montage De L'hélice Et De La Grille Du Ventilateur

    Montage de l’hélice et de la grille du ventilateur 1. Retirez le dispositif de blocage en le dévissant dans le sens des aiguilles d’une montre (ou sortez-le du sac) et retirez l’écrou en plastique en le dévissant dans le sens inverse des aiguilles d’une montre. Fixez la grille arrière sur le moteur, puis resserrez l’écrou en plastique.
  • Seite 25: Notice Technique D'utilisation

    Notice technique d’utilisation Branchez l’adaptateur d’alimentation. Un bip retentit, indiquant que le ventilateur est en veille. 5.1 Télécommande (Fig. 8) Fig. 8 Fig. 9 1. Pro/Minuterie 5. Bouton On/Off (marche/arrêt) 2. Le bouton Mode (Mode) 6. Télécommande 3. OSC 7. Pile 4.
  • Seite 26 Notice technique d’utilisation Souffle confortable : La vitesse s’adapte intelligemment en fonction de la température de la pièce. Lorsque la température passe au-dessous de 20° C, le ventilateur s’arrête. Lorsque la température passe au-dessus de 20° C, le ventilateur se remet en marche. Lorsque vous sélectionnez le mode Souffle confortable, l’icône s’allume et l’écran IDM affiche «...
  • Seite 27: Tableau De Commande (Fig. 10)

    Notice technique d’utilisation 5.2 Tableau de commande (Fig. 10) • T ouche Marche/Arrêt Les touches de fonction du tableau sont identiques aux touches de la télécommande. • B outons de fonction 1. Lorsque le ventilateur est en marche, appuyez brièvement sur la touche de fonction afin d’alterner entre oscillation et immobilité.
  • Seite 28: Réglage De La Hauteur

    Notice technique d’utilisation 5.4 Réglage de la hauteur Abaissement : soulevez la tête du ventilateur d’une main et dévissez la vis de serrage de l’autre main, en tournant dans le sens inverse des aiguilles d’une montre. Abaissez doucement la tête à la hauteur appropriée, puis resserrez la vis dans le sens des aiguilles d’une montre.
  • Seite 29: Autres Instructions

    Autres instructions 6.1 Instructions relatives à la pile (Fig. 9) La pile doit être installée avant d’utiliser la télécommande. Cette télécommande nécessite une pile bouton de 3 volts. 1. Ouvrez le couvercle du compartiment à pile ; 2. Installez une nouvelle pile en veillant à respecter la bonne polarité (+ et -) ; 3.
  • Seite 30: Nettoyage

    Autres instructions 6.5 Nettoyage 1. Avant de le nettoyer, assurez-vous que l’appareil est bien débranché de sa source d’alimentation électrique. 2. Les composants en plastique doivent être nettoyés à l’aide d’un chiffon non pelucheux imprégné de savon doux. Retirez soigneusement tous les résidus de savon à l’aide d’un chiffon sec. 6.6 Données techniques Alimentation électrique : de 220 V à...
  • Seite 31 Remarque : Ne jetez pas les appareils électriques avec les déchets ménagers non triés. Déposez-les dans des infrastructures dédiées à la collecte sélective. Contactez votre administration locale pour obtenir des renseignements concernant les systèmes de collecte disponibles. Lorsque des appareils électriques sont jetés dans des décharges, des substances dangereuses peuvent s’infiltrer jusqu’aux eaux souterraines et contaminer la chaîne alimentaire, constituant ainsi un risque pour votre santé...
  • Seite 32 www.beko.com...
  • Seite 33 Ventilatore a piantana Manuale dell'utente EFS8000W...
  • Seite 34: Significato Dei Simboli

    Leggere prima il presente manuale! Gentile Cliente, grazie per aver scelto un prodotto Beko. Ci auguriamo che lei ottenga i migliori risultati dal suo prodotto, realizzato secondo elevati standard di qualità e con una tecnologia all' a vanguardia. Pertanto, legga attentamente tutto il manuale e tutti i documenti di accompagnamento, prima di utilizzare il prodotto, e li conservi per riferimento futuro.
  • Seite 35 SOMMARIO 1 Istruzioni per la sicurezza 2 Componenti 3 Istruzioni per il montaggio 4 Montaggio di griglia e ventola del ventilatore 5 Istruzioni di funzionamento 5.1 Telecomando (Fig. 8) ................9 5.2 Pannello di controllo (Fig.
  • Seite 36: Istruzioni Per La Sicurezza

    Istruzioni per la sicurezza Attenzione Leggere attentamente le regole e le istruzioni per il funzionamento sicuro. •Se il cavo di alimentazione è danneggiato, deve essere sostituito dal produttore, dal servizio di assistenza o da personale qualificato al fine di evitare rischi. •Per proteggersi dal rischio di scosse elettriche, non immergere l'unità, il cavo o la spina in acqua o altri liquidi.
  • Seite 37 Istruzioni per la sicurezza - Pulire l'involucro del ventilatore e la protezione della ventola con un panno leggermente inumidito. Regole per il funzionamento sicuro •Non inserire mai dita, matite o altri oggetti attraverso la griglia mentre la ventola è in movimento. •Scollegare il ventilatore quando lo si sposta da un luogo a un altro.
  • Seite 38: Componenti

    Componenti Avvitare Svitare Fermo 1. Griglia anteriore 11. Terminali femmina 2. Clip ad anello 12. Copertura della colonna 3. Pala 13. Base 4. Dado in plastica 14. Viti a farfalla per fissare la base 5. Griglia posteriore 15. Asta 6. Albero del motore 16.
  • Seite 39: Istruzioni Per Il Montaggio

    Istruzioni per il montaggio 1. Estrarre il tubo della base, le tre viti a farfalla per fissare la base, e la base rotonda dalla confezione di cartone; 2. Inserire il tubo nella base rotonda accertandosi di allineare le viti con la base; 3.
  • Seite 40: Montaggio Di Griglia E Ventola Del Ventilatore

    Montaggio di griglia e ventola del ventilatore 1. Svitare il fermo ruotando in senso orario (o estrarre il fermo dalla confezione) e il dado in plastica in senso antiorario per rimuoverli entrambi. Fissare la griglia posteriore al motore e quindi stringere nuovamente il dado in plastica.
  • Seite 41: Istruzioni Di Funzionamento

    Istruzioni di funzionamento Collegare l'alimentatore, quindi dopo un segnale acustico il ventilatore sarà in modalità standby. 5.1 Telecomando (Fig. 8) Fig. 8 Fig. 9 1. Pro/Timer 5. On/Off (Accensione/Spegnimento) 2. Mode (Modalità) 6. Telecomando 3. OSC 7. Batteria 4. Ghiera 8.
  • Seite 42: Pannello Di Controllo (Fig. 10)

    Istruzioni di funzionamento Comfort: la velocità di ventilazione viene modificata a seconda della temperatura dell'ambiente. Se la temperatura è inferiore a 20°C, il ventilatore si arresta. Se la temperatura è superiore a 20°C, il ventilatore continuerà a funzionare. Quando si seleziona la ventilazione Comfort , sul display verrà...
  • Seite 43: Regolazione Dell'inclinazione

    Istruzioni di funzionamento • T asti funzione 1. Durante il funzionamento, premere brevemente il tasto di funzione e il ventilatore passerà tra modalità di oscillazione e la modalità fissa; premere a lungo il pulsante per passare alla modalità timer. Fare riferimento alle istruzioni del pulsante PRO del telecomando (per annullare il timer, premere a lungo il tasto di funzione).
  • Seite 44: Regolazione Dell'angolazione

    Istruzioni di funzionamento antiorario con l' a ltra mano, quindi sollevare lentamente la testa del ventilatore all' a ltezza desiderata e successivamente stringere la manopola ruotando in senso orario. 5.5 Regolazione dell'angolazione Quando si regola l' a ngolazione, afferrare la protezione del ventilatore con le mani e girare la testa del ventilatore.
  • Seite 45: Istruzioni Supplementari

    Istruzioni supplementari 6.1 Batterie (Fig. 9) Le batterie devono essere installate prima di utilizzare il telecomando. Utilizzare batterie a bottone da 3 V. 1. Aprire il vano batterie; 2. Installare una nuova batteria facendo attenzione alla polarità corretta (+ e -); 3.
  • Seite 46: Dati Tecnici

    Istruzioni supplementari 6.6 Dati tecnici Alimentazione: 220V-240 V, 50 Hz Specifiche tecniche e design sono soggetti a modifiche senza preavviso. 14 / 16 IT Ventilatore a piantana / Manuale dell' u tente...
  • Seite 47 Nota: Non smaltire apparecchiature elettriche come rifiuti indifferenziati, ma servirsi di impianti per la raccolta appositi. Contattare l'ente territoriale preposto per informazioni concernenti i sistemi di raccolta disponibili. Se le apparecchiature elettriche sono smaltite in discariche, le sostanze pericolose possono penetrare nelle falde acquifere ed entrare nella catena alimentare, diventando un pericolo per la salute.
  • Seite 48 www.beko.com...
  • Seite 49 Standventilator Bedienungsanleitung EFS8000W...
  • Seite 50: Erläuterung Der Symbole

    Lesen Sie zunächst diese Bedienungsanleitung durch! Sehr geehrte Kunden und Kundinnen! Vielen Dank, dass Sie sich für ein Produkt von Beko entschieden haben. Wir hoffen, dass Ihnen dieses Produkt optimalen Nutzen bringen wird. Dieses hochwertige Produkt wurde mit modernster Technologie hergestellt. Lesen Sie die gesamte Bedienungsanleitung und alle anderen Begleitdokumente sorgfältig durch, bevor Sie...
  • Seite 51 INHALTSVERZEICHNIS 1 Sicherheitshinweise 2 Teileübersicht 3 Installationsanleitungen 4 Schutzgitter & Ventilatorflügel installieren 5 Gebrauchsanleitungen 5.1 Fernbedienung (Abb. 8)................9 5.2 Bedienfeld (Abb.
  • Seite 52: Sicherheitshinweise

    Sicherheitshinweise Warnung Lesen Sie die Hinweise für einen sicheren Gebrauch sowie alle Anleitungen sorgfältig durch. •Ein beschädigtes Netzkabel muss vom Hersteller, dessen Kundendienst oder einer ähnlich qualifizierten Fachkraft ersetzt werden, um Gefahrensituationen zu vermeiden. •Um Stromschläge zu vermeiden, dürfen weder das Produkt noch das Kabel oder der Stecker in Wasser oder andere Flüssigkeiten eingetaucht werden.
  • Seite 53: Anleitungen Für Den Sicheren Gebrauch

    Sicherheitshinweise - Die Abdeckung des Rotors darf für die Reinigung des Rotorblatts nicht abgenommen/geöffnet werden. - Wischen Sie das Gehäuse des Gebläses und die Abdeckung des Rotorblatts mit einem leicht angefeuchteten Lappen ab. Anleitungen für den sicheren Gebrauch •Stecken Sie während des Gebrauchs weder Finger noch Stifte oder andere Gegenstände durch die Schutzabdeckung.
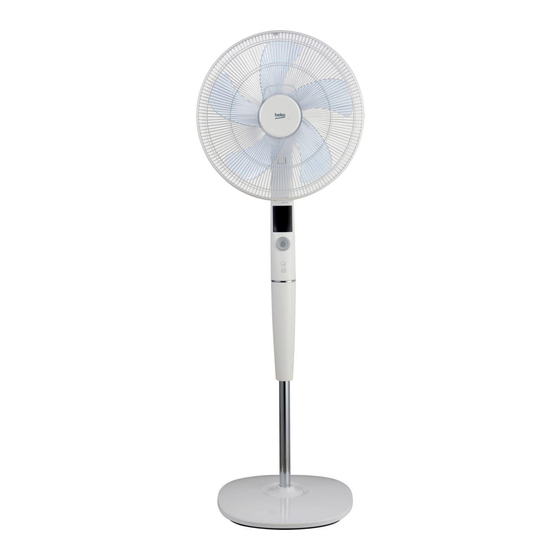
  • Seite 54: Teileübersicht

    Teileübersicht Festziehen Lösen Propellerhaube 1. Vorderes Schutzgitter 11. Anschlussbuchsen 2. Sicherungsclip 12. Rohrabdeckung 3. Flügel 13. Sockel 4. Kunststoffmutter 14. Flügelschrauben für die Befestigung des 5. Rückseitiges Schutzgitter Sockels 6. Schaft 15. Stange 7. Motor 16. Steuereinheit 8. Gehäuse 17. Display 9.
  • Seite 55: Installationsanleitungen

    Installationsanleitungen 1. Nehmen Sie das Standrohr, die drei Flügelschrauben für die Befestigung des Sockels und den runden Sockel aus der Verpackung. 2. Stecken Sie das Rohr in den Sockel; richten Sie die Positionsschraube mit dem Sockel aus. 3. Befestigen Sie die drei Flügelschrauben in den Löchern des Rohrs und drehen Sie diese fest. 4.
  • Seite 56: Schutzgitter & Ventilatorflügel Installieren

    Schutzgitter & Ventilatorflügel installieren 1. Drehen Sie die Propellerhaube im Uhrzeigersinn (oder nehmen Sie diese aus der Verpackung) und die Kunststoffmutter entgegen dem Uhrzeigersinn, um beide Teile zu entfernen. Befestigen Sie das rückseitige Schutzgitter am Motor und ziehen Sie dann die Kunststoffmutter wieder fest. (Abb. 5) 2.
  • Seite 57: Gebrauchsanleitungen

    Gebrauchsanleitungen Schließen Sie das Netzteil an. Es ertönt ein „Piepton“ und der Ventilator aktiviert den Standby-Modus. 5.1 Fernbedienung (Abb. 8) Abb. 8 Abb. 9 1. Pro-/Timer-Taste 5. On/Off (Ein/Aus) 2. Mode (Modus) 6. Fernbedienung 3. OSZILLATION 7. Batterie 4. Leistungsregler 8.
  • Seite 58: Bedienfeld (Abb. 10)

    Gebrauchsanleitungen Falls die Temperatur unter 20°C fällt, beendet der Ventilator den Betrieb. Bei Temperaturen über 20°C schaltet sich der Ventilator wieder ein. Wenn Sie diesen Modus auswählen, leuchtet das Icon und im Display erscheint die Anzeige „00“. Lautlos: Drücken Sie diese Taste, um den lautlosen Modus zu aktivieren. In diesem Modus ist die Lärmerzeugung minimal und die Lautlos-Anzeige“...
  • Seite 59: Neigungswinkel Einstellen

    Gebrauchsanleitungen • F unktionstaste 1. Drücken Sie die Funktionstaste während des Betriebs kurz, um die Oszillation zu aktivieren oder zu deaktivieren. Halten Sie die Taste gedrückt, um die Timer-Funktion aufzurufen; siehe Anleitungen für die PRO-Taste der Fernbedienung. (Halten Sie die Funktionstaste gedrückt, um den Timer zu deaktivieren.) 2.
  • Seite 60: Drehwinkel Einstellen

    Gebrauchsanleitungen 5.5 Drehwinkel einstellen Wenn Sie den Drehwinkel einstellen, fixieren Sie die Schutzabdeckungen mit den Händen und drehen Sie die Kopfeinheit nach hinten. Hinweis: Drehen Sie den Ventilator nicht mit Gewalt, um Schäden zu vermeiden. 5.6 Display ausschalten Halten Sie die „Ein/Aus“-Taste drei Sekunden lang gedrückt, um das Display auszuschalten. Das Gerät setzt den Betrieb fort.
  • Seite 61: Andere Funktionen

    Andere Funktionen 6.1 Hinweise für Batterien (Abb. 9) Installieren Sie die Batterien vor der Verwendung der Fernbedienung. Es wird eine 3V Batterie benötigt. 1. Öffnen Sie die Batteriefachabdeckung. 2. Legen Sie eine Batterie gemäß den Polaritätsmarkierungen (+ und -) ein. 3.
  • Seite 62: Reinigung

    Andere Funktionen 6.5 Reinigung 1. Trennen Sie das Gerät vor der Reinigung vom Netzstrom. 2. Reinigen Sie Kunststoffteile mit einem weichen Lappen, den Sie mit etwas Spülmittel anfeuchten. Entfernen Sie Spülmittelrückstände mit einem trockenen Lappen. 6.6 Technische Daten Stromversorgung: 220V-240V, 50Hz Änderungen der technischen Daten und am Design vorbehalten.
  • Seite 63: Entsorgung

    Entsorgung Hinweis: Entsorgen Sie elektrische Geräte nicht über den normalen Hausmüll, sondern getrennt an entsprechenden Sammelstellen. Wenden Sie sich an Ihre Behörde vor Ort, um nähere Informationen über verfügbare Sammelstellen zu erhalten. Falls elektrische Geräte auf Müllhalden oder Deponien entsorgt werden, können gefährliche Substanzen in das Grundwasser und in die Nahrungskette gelangen und dadurch Risiken für die Gesundheit und das Wohlbefinden verursachen.
  • Seite 64 www.beko.com...

Inhaltsverzeichnis