Inhaltsverzeichnis
Werbung
Verfügbare Sprachen
Verfügbare Sprachen
Quicklinks
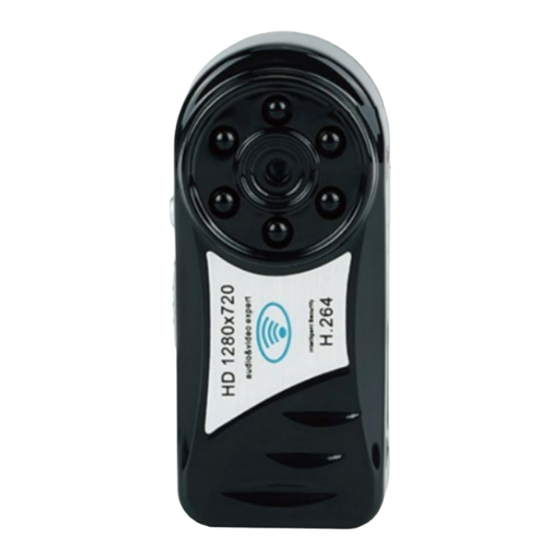
I. Product Overview
1. IR LEDs
2. Cameras Lens
3. Mode Button
4. Power Switch
II. What's in the Box
-1× Mini WIFI DV Camera
-1× USB Cable
-1× AC110-240V to DC5V Power Adapter
-1× Suction Cup Mount
-1× Card Reader
III. Get Camera Ready
3.1. Please make sure the camera is fully charged and the Micro SD card has been formatted
WIFI04S
User Guide
5. USB Port
6. Micro SD Card Slot
7. Blue/Red/Yellow Indicator Lights
Werbung
Inhaltsverzeichnis

Inhaltszusammenfassung für WISEUP SHOP WIFI04S
- Seite 1 WIFI04S User Guide I. Product Overview 5. USB Port 1. IR LEDs 6. Micro SD Card Slot 2. Cameras Lens 7. Blue/Red/Yellow Indicator Lights 3. Mode Button 4. Power Switch II. What’s in the Box -1× Mini WIFI DV Camera -1×...
-
Seite 2: Network Setup
already and is securely fitted into the camera’s SD card slot, or it will not work. We recommend that you use a SDHC Class 10 Micro SD card. 3.2. Slide the Power Switch to the ON position. When the blue indicator light goes out and the red one remains solid, it means the camera’s WIFI signal is ready. - Seite 3 [Note]: If the camera’s WIFI signal cannot be found or the camera cannot be enrolled to your phone after a long time, please recharge the camera or reset it (See VIII). 4.2.2. For Android users, launch the “Plug & Play” APP. For IOS users, run the “P2PCamView- er”...
- Seite 5 4.3. WAN Mode or Remote View Setup >> Please make sure the camera is successfully added to the APP in P2P (LAN) mode and it's online before you start. For Android: Step 1: Launch the “Plug & Play” APP. Tap the arrow icon on the “LAN”...
- Seite 6 Check if the WAN mode or remote view setup works! 1. Back to the WIFI or WLAN setting page on your phone or mobile device, exit your phone or mobile device from the current WIFI network, enroll your phone or mobile device in another WIFI hotspot, or you can turn off the WIFI or WLAN function, enable your mobile network data instead.
- Seite 7 V. Recording Video to Smartphone or Tablet PC >> Please make sure the camera is successfully added to the APP and it's online before you start.
- Seite 8 5.1. Launch the “Plug & Play” or “P2PCamviewer” APP. 5.2. Tap the camera icon to enter the live streaming screen. Click the Remote Video Recording Button to start or stop recording video. Click the Audio Button to record video with sound.
- Seite 9 5.3. Go back to the “WAN” or “LAN” page and tap “File” icon at the bottom of the screen to check out the video files or screenshots. [Note]: Video Resolution: 1280x720P Video Format: AVI, MOV...
- Seite 10 VI. Motion Detection Recording Setup >> Please make sure the camera is successfully added to the APP and it's online before you start. 6.1. Launch the “Plug & Play” or “P2PCamviewer” APP. 6.2. Set up motion detection recording function. For Android: Step 1: Tap the arrow icon on the “WAN”...
- Seite 11 6.3. When motion is detected, the camera will push an alarm message to your phone or mobile device and capture a video to the Micro SD card automatically. 6.4. The video files will be saved in the Micro SD card on your camera. Power off the camera, remove the Micro SD card and use the card reader provided to access the video footage.
- Seite 12 VII. Recording to Local Micro SD Card Continuously >> Please make sure the camera is successfully added to the APP and it's online before you start. 7.1. Follow the steps below to set up SD card recording. For Android: Step 1: Launch the “Plug & Play” APP. Step 2: On the “WAN”...
- Seite 13 7.2. Follow 5.5 to check out your video footage. [Note]: If “Format Micro SD card” appears on the “SD-Card setting” page, it means the Micro SD card has been read successfully. VIII. Changing WAN Login Password >> Make sure that the camera is added successfully to the APP in WAN mode and it’s online before you start.
- Seite 14 IX. Resetting to Factory Default Settings If for any reason, the camera stops working or isn’t working properly, a quick reset will restore it back to factory default settings. Operation: When the camera is powered on, press the Mode Button for 5 seconds to reset the camera to factory default settings.
-
Seite 15: Frequently Asked Questions
onds. X. Charging 10.1. Connect the camera to an outlet AC power supply using the power adapter and USB cable included. 10.2. It will take 1 hour to obtain a full charge. 10.3. The camera can record video up to 1 hour on a single charge. Frequently Asked Questions Q1: Why Camera WIFI signal is not appearing on my WIFI page? A1: There are 4 solutions to this question:... - Seite 16 A6: Please copy the video footage to your computer before playing them back. Q7: Is there any PC client software I can use on my PC computer? A7: Yes. PC client software supports windows and IOS operating system. Download link: http://www.wiseupshop.com/download?name=wifi04s&Submit=++++++++...
-
Seite 17: Was Ist In Der Box
WIFI04S Benutzerhandbuch I. Produktübersicht 5. USB-Anschluss 1. IR LEDs 6. Mikro-Sd-Einbauschlitz 2. Kameras Objektiv 7. Blau/Rot/Gelb Indikator Lichter 3. Modus-Taste 4. Netzschalter II. Was ist in der Box -1 × Mini WIFI DV Kamera -1 × USB-Kabel -1 × AC110-240V bis DC5V Netzteil -1 ×... -
Seite 18: Netzwerkeinrichtung
bereits formatiert wurde und sicher in den SD-Kartensteckplatz der Kamera eingepasst ist, oder es funktioniert nicht. Wir empfehlen Ihnen, eine SDHC Class 10 Micro SD Karte zu ver- wenden. 3.2 Schieben Sie den Netzschalter auf ON. Wenn die blaue Kontrollleuchte erlischt und die rote bleibt solide, bedeutet das, dass das WIFI-Signal der Kamera bereit ist. - Seite 19 [Hinweis]: Wenn das WIFI-Signal der Kamera nicht gefunden werden kann oder die Kamera nach langer Zeit nicht an Ihr Telefon angemeldet werden kann, laden Sie bitte die Kamera auf oder setzen Sie sie zurück (siehe VIII). 4.2.2. Für Android-Nutzer starten Sie die "Plug & Play" APP. Für IOS-Benutzer, führen Sie die "P2PCamViewer"...
- Seite 21 4.3 WAN-Modus oder Remote View Setup >> Bitte stellen Sie sicher, dass die Kamera erfolgreich in die APP im P2P (LAN) Modus aufge- nommen wird und es ist online, bevor Sie beginnen. Für Android: Schritt 1: Starten Sie die "Plug & Play" APP. Tippen Sie auf das Pfeilsymbol auf der Seite "LAN"...
- Seite 22 Überprüfen Sie, ob der WAN-Modus oder die Fernbedienung funktioniert! 1. Wechseln Sie auf die WIFI- oder WLAN-Einstellungsseite auf Ihrem Telefon oder Mobilgerät, verlassen Sie Ihr Telefon oder Mobilgerät aus dem aktuellen WIFI-Netzwerk, registrieren Sie Ihr Telefon oder Mobilgerät in einem anderen WIFI-Hotspot oder Sie können die WIFI- oder WLAN-Funktion deaktivieren , Aktivieren Sie stattdessen Ihre Mobilfunkdaten.
-
Seite 23: Aufnehmen Von Video Auf Smartphone Oder Tablet Pc
V. Aufnehmen von Video auf Smartphone oder Tablet PC >> Bitte stellen Sie sicher, dass die Kamera erfolgreich zur APP hinzugefügt wird und es ist online, bevor Sie beginnen. - Seite 24 5.1. Starten Sie die "Plug & Play" oder "P2PCamviewer" APP. 5.2. Tippen Sie auf das Kamerasymbol, um den Live-Streaming-Bildschirm aufzurufen. Klicken Sie auf die Schaltfläche Remote Video Recording , um das Aufnahmevideo zu starten oder zu beenden. Klicken Sie auf die Audio-Taste , um Video mit Ton aufzunehmen.
- Seite 25 5.3. Gehen Sie zurück zur Seite "WAN" oder "LAN" und tippen Sie auf "Datei" -Symbol am unteren Rand des Bildschirms, um die Videodateien oder Screenshots zu sehen. [Anmerkung]: Videoentschließung: 1280x720P Videoformat: AVI, MOV...
- Seite 26 VI. Motion Detection Recording Setup >> Bitte stellen Sie sicher, dass die Kamera erfolgreich zur APP hinzugefügt wird und es ist online, bevor Sie beginnen. 6.1. Starten Sie die "Plug & Play" oder "P2PCamviewer" APP. 6.2. Richten Sie die Bewegungserkennung ein. Für Android: Schritt 1: Tippen Sie auf das Pfeilsymbol auf der Seite "WAN"...
- Seite 27 6.3. Wenn die Bewegung erkannt wird, schaltet die Kamera eine Alarmmeldung an Ihr Telefon oder Mobilgerät und erfasst ein Video automatisch auf die Micro SD-Karte. 6.4 Die Videodateien werden auf der Micro SD-Karte auf Ihrer Kamera gespeichert. Schalten Sie die Kamera aus, entfernen Sie die Micro SD-Karte und verwenden Sie den Kartenleser, der für den Zugriff auf das Videomaterial vorgesehen ist.
-
Seite 28: Aufnehmen Der Lokalen Micro Sd Karte Kontinuierlich
[Anmerkung]: Videoentschließung: 1280x720P Videoformat: AVI, MOV VII. Aufnehmen der lokalen Micro SD Karte Kontinuierlich >> Bitte stellen Sie sicher, dass die Kamera erfolgreich zur APP hinzugefügt wird und es ist online, bevor Sie beginnen. 7.1. Gehen Sie wie folgt vor, um die SD-Kartenaufnahme einzurichten. Für Android: Schritt 1: Starten Sie die "Plug &... - Seite 29 7.2 Folgen Sie 5.5, um Ihr Videomaterial zu sehen. [Hinweis]: Wenn auf der Seite "SD-Card-Einstellung" die "Micro-SD-Karte formatieren" erscheint, bedeutet dies, dass die Micro SD-Karte erfolgreich gelesen wurde. VIII. WAN Login Passwort ändern >> Vergewissern Sie sich, dass die Kamera dem APP im WAN-Modus erfolgreich hinzugefügt wird und es ist online, bevor Sie beginnen.
-
Seite 30: Zurücksetzen Auf Werkseinstellungen
IX. Zurücksetzen auf Werkseinstellungen Wenn aus irgendeinem Grund die Kamera nicht mehr funktioniert oder nicht ordnungsgemäß funktioniert, wird ein schneller Reset wieder auf die Werkseinstellungen zurückgesetzt. Bedienung: Wenn die Kamera eingeschaltet ist, drücken Sie die Mode-Taste für 5 Sekunden, um die Kamera auf die Werkseinstellungen zurückzusetzen. Beide roten und blauen Kontroll- leuchten werden für ca. -
Seite 31: Häufig Gestellte Fragen
Sekunden automatisch auf die Werkseinstellungen. X. Aufladen 10.1. Schließen Sie die Kamera mit einem Netzadapter und einem USB-Kabel an eine Steck- dose an. 10.2 Es dauert 1 Stunde, um eine volle Ladung zu erhalten. 10.3. Die Kamera kann bis zu 1 Stunde Video auf einmal aufladen. Häufig Gestellte Fragen Q1: Warum wird das WIFI-Signal der Kamera nicht auf meiner WIFI-Seite angezeigt? A1: Es gibt 4 Lösungen für diese Frage:... - Seite 32 Q6: Warum zeigt das Videomaterial während der Wiedergabe auf meinem Computer einen Fuzzy-Bildschirm an? A6: Bitte kopiere das Videomaterial auf deinen Computer, bevor du sie wiedergibst. Q7: Gibt es eine PC-Client-Software, die ich auf meinem PC benutzen kann? A7: Ja. PC-Client-Software unterstützt Windows und IOS-Betriebssystem. Download-Link: Http://www.wiseupshop.com/download?name=wifi04s&Submit=++++++++...
-
Seite 33: Aperçu Du Produit
WIFI04S Mode d'emploi I. Aperçu du Produit 5. Port USB 1. LED IR 6. Emplacement pour Carte Micro SD 2. Appareil photo Objectif 7. Voyants lumineux Bleu/Rouge/Jaune 3. Bouton Mode 4. Interrupteur d'alimentation II. Qu'y a-t-il dans la boite -1 × Mini caméra WIFI DV -1 ×... -
Seite 34: Configuration Du Réseau
formatée et qu'elle est correctement installée dans la fente de la carte SD de la caméra ou qu'elle ne fonctionnera pas. Nous vous recommandons d'utiliser une carte SD SDHC de classe 10 Micro SD. 3.2. Faites glisser l'interrupteur d'alimentation sur la position ON. Lorsque le témoin lumineux bleu s'éteint et que le rouge reste solide, cela signifie que le signal WIFI de la caméra est prêt. - Seite 35 [Note]: Si le signal WIFI de la caméra ne peut pas être trouvé ou que la caméra ne peut pas être enregistré sur votre téléphone après une longue période, rechargez la caméra ou réinitialisez-le (voir VIII). 4.2.2. Pour les utilisateurs d'Android, lancez l'application "Plug & Play". Pour les utilisateurs d'IOS, exécutez l'application "P2PCamViewer".
- Seite 37 4.3. Mode WAN ou Configuration de la vue à distance >> Assurez-vous que la caméra a été ajouté avec succès à l'APP au mode P2P (LAN) et qu'il est en ligne avant de commencer. Pour Android: Étape 1: lancez l'application "Plug & Play". Appuyez sur l'icône de la flèche sur la page "LAN", puis accédez à...
- Seite 38 Vérifiez si le mode WAN ou la configuration de la vue à distance fonctionne! 1. Revenez à la page de configuration WIFI ou WLAN sur votre téléphone ou votre appareil mobile, quittez votre téléphone ou votre appareil mobile du réseau WIFI actuel, inscrivez votre téléphone ou votre appareil mobile dans un autre point d'accès WIFI ou vous pouvez éteindre la fonction WIFI ou WLAN , Permettez vos données de réseau mobile à...
- Seite 39 V. Enregistrement d'une vidéo sur un smartphone ou un PC tablette >> Assurez-vous que la caméra est ajouté avec succès à l'APP et qu'il est en ligne avant de...
- Seite 40 commencer. 5.1. Lancez l'application "Plug & Play" ou "P2PCamviewer". 5.2. Appuyez sur l'icône de la caméra pour accéder à l'écran en direct. Cliquez sur le bouton d'enregistrement vidéo à distance pour démarrer ou arrêter l'enregistrement vidéo. Cliquez sur le bouton Audio pour enregistrer la vidéo avec le son.
- Seite 41 5.3. Revenez à la page "WAN" ou "LAN" et appuyez sur l'icône "Fichier" en bas de l'écran pour vérifier les fichiers vidéo ou les captures d'écran. [Note]: Résolution vidéo: 1280x720P Format vidéo: AVI, MOV...
- Seite 42 VI. Configuration de l'enregistrement de détection de mouve- ment >> Assurez-vous que la caméra est ajouté avec succès à l'APP et qu'il est en ligne avant de commencer. 6.1. Lancez l'application "Plug & Play" ou "P2PCamviewer". 6.2. Configurer la fonction d'enregistrement de détection de mouvement. Pour Android: Étape 1: Appuyez sur l'icône de flèche sur la page "WAN"...
- Seite 43 Étape 3: appuyez sur "Terminé" pour confirmer le réglage de l'enregistrement de détection de mouvement. 6.3. Lorsque le mouvement est détecté, la caméra appuie un message d'alarme sur votre télé- phone ou votre appareil mobile et capture une vidéo sur la carte Micro SD automatiquement. 6.4.
- Seite 44 [Note]: Résolution vidéo: 1280x720P Format vidéo: AVI, MOV VII. Enregistrement en carte Micro SD locale en continu >> Assurez-vous que la caméra est ajouté avec succès à l'APP et qu'il est en ligne avant de commencer. 7.1. Suivez les étapes ci-dessous pour configurer l'enregistrement de la carte SD. Pour Android: Étape 1: lancez l'application "Plug &...
- Seite 45 7.2. Suivez les étapes 5.5 pour consulter vos images vidéo. [Note]: Si "Format Micro SD card" apparaît sur la page "Définition de la carte SD", cela signifie que la carte Micro SD a été lue avec succès. VIII. Modification du mot de passe de connexion WAN >>...
- Seite 46 IX. Réinitialisation des paramètres par défaut usine Si, pour quelque raison que ce soit, la caméra cesse de fonctionner ou ne fonctionne pas cor- rectement, une réinitialisation rapide la rétablira aux paramètres par défaut. Fonctionnement: Lorsque la caméra est sous tension, appuyez sur le bouton Mode pendant 5 secondes pour réinitialiser les paramètres par défaut de la caméra.
-
Seite 47: Questions Fréquemment Posées
tiquement en mode usine en 5 secondes. X. Charging 10.1. Connectez la caméra à une alimentation secteur de sortie à l'aide de l'adaptateur secteur et du câble USB inclus. 10.2. Il faudra 1 heure pour obtenir une charge complète. 10.3. La caméra peut enregistrer une vidéo jusqu'à 1 heure sur une seule charge. Questions Fréquemment Posées Q1: Pourquoi le signal WIFI de la caméra n'appartit-il pas sur ma page WIFI? A1: Il existe 4 solutions à... - Seite 48 A6: Copiez les images vidéo sur votre ordinateur avant de les lire. Q7: Existe-t-il un logiciel client PC que je peux utiliser sur mon ordinateur? A7: Oui. Le logiciel client PC prend en charge Windows et le système d'exploitation IOS. Lien de téléchargement: Http://www.wiseupshop.com/download?name=wifi04s&Submit=+++++++++...
-
Seite 49: Panoramica Del Prodotto
WIFI04S Guida Utente I. Panoramica del Prodotto 5. Porta USB 1. LED IR 6. Slot Micro SD Card 2. Obiettivi delle Telecamere 7. Luci di indicatore Blu /Rosso /Giallo 3. Pulsante Modalità 4. Interruttore di Alimentazione II. Cosa c'è nella Scatola -1 ×... -
Seite 50: Configurazione Di Rete
stata formattata e sia correttamente inserita nello slot SD della fotocamera, oppure non funzio- na. Si consiglia di utilizzare una scheda Micro SD SDHC Class 10. 3.2. Far scorrere l'interruttore di alimentazione in posizione ON. Quando la spia blu si spegne e quella rossa rimane solida, significa che il segnale WIFI della fotocamera è... - Seite 51 [Nota]: Se il segnale WIFI della fotocamera non può essere trovato o la fotocamera non può essere iscritta al telefono dopo un lungo periodo di tempo, ricaricare la fotocamera o ripristinarla (vedere VIII). 4.2.2. Per gli utenti Android, avviare APP "Plug & Play". Per gli utenti di IOS, eseguire l'APP di "P2PCamViewer".
- Seite 53 4.3. Modo WAN o impostazione Remote View >> Assicurarsi che la fotocamera sia stata aggiunta con successo alla modalità APP in modalità P2P (LAN) ed è online prima di iniziare. Per Android: Passaggio 1: Avviare APP "Plug & Play". Tocca l'icona della freccia nella pagina "LAN"...
- Seite 54 Controllare se funziona la modalità WAN o la visualizzazione remota! 1. Torna alla pagina di impostazione WIFI o WLAN sul telefono o sul dispositivo mobile uscire dal telefono o dal dispositivo mobile dalla rete WIFI corrente, iscrivi il tuo telefono o un dispositi- vo mobile in un altro punto di accesso WIFI oppure puoi disattivare la funzione WIFI o WLAN , Abiliti invece i dati della tua rete mobile.
- Seite 55 V. Registrazione di Video Su Smartphone o Tablet PC >> Assicurarsi che la fotocamera sia stata aggiunta con successo all'APP ed è online prima di iniziare.
- Seite 56 5.1. Avviare APP "Plug & Play" o "P2PCamviewer". 5.2. Tocca l'icona della fotocamera per accedere alla schermata di streaming in diretta. Fare clic sul pulsante di registrazione video remoto per avviare o interrompere la registrazione di video. Fare clic sul pulsante Audio per registrare video con audio.
- Seite 57 5.3. Tornare alla pagina "WAN" o "LAN" e toccare l'icona "File" in fondo alla schermata per con- trollare i file video o le schermate. [Nota]: Risoluzione video: 1280x720P Formato video: AVI, MOV...
- Seite 58 VI. Impostazione di Registrazione di Rilevamento di Movimento >> Assicurarsi che la fotocamera sia stata aggiunta con successo all'APP ed è online prima di iniziare. 6.1. Avviare APP "Plug & Play" o "P2PCamviewer". 6.2. Impostazione della funzione di registrazione del rilevamento del movimento. Per Android: Passaggio 1: Tocca l'icona della freccia nella pagina "WAN"...
- Seite 59 6.3. Quando viene rilevato il movimento, la fotocamera sposta un messaggio di allarme sul telefono o sul dispositivo mobile e acquisisce automaticamente un video sulla scheda Micro 6.4. I file video verranno salvati nella scheda Micro SD sulla fotocamera. Spegnere la fotocam- era, rimuovere la scheda Micro SD e utilizzare il lettore di schede fornito per accedere al filmato video.
- Seite 60 [Nota]: Risoluzione video: 1280x720P Formato video: AVI, MOV VII. Registrazione Continua della Scheda Micro SD Locale >> Assicurarsi che la fotocamera sia stata aggiunta con successo all'APP ed è online prima di iniziare. 7.1. Seguire i passaggi seguenti per impostare la registrazione della scheda SD. Per Android: Passaggio 1: Avviare APP "Plug &...
- Seite 61 7.2. Segui 5.5 per controllare il tuo video. [Nota]: se nella scheda "Impostazione scheda SD" viene visualizzato "Format Micro SD card", signifi- ca che la scheda Micro SD è stata letto correttamente. VIII. Modifica della Password di Accesso WAN >> Assicurarsi che la fotocamera sia stata aggiunta correttamente alla modalità APP in modal- ità...
-
Seite 62: Ripristino Delle Impostazioni Predefinite Di Fabbrica
IX. Ripristino delle Impostazioni Predefinite di Fabbrica Se per qualsiasi motivo la fotocamera smette di funzionare o non funziona correttamente, un reset rapido lo ripristinerà alle impostazioni predefinite di fabbrica. Funzionamento: Quando la fotocamera è accesa, premere il pulsante Mode per 5 secondi per ripristinare la fotocamera alle impostazioni predefinite. -
Seite 63: Domande Frequenti
impostazioni predefinite di fabbrica in 5 secondi. X. Carica 10.1. Collegare la fotocamera ad una presa di alimentazione AC utilizzando l'adattatore di alimentazione e il cavo USB incluso. 10.2. Ci vorrà 1 ora per ottenere una carica completa. 10.3. La fotocamera può registrare video fino a 1 ora su una sola carica. Domande Frequenti Q1: Perché... - Seite 64 A6: Si prega di copiare il filmato video al computer prima di riprodurli. Q7: C'è un software client PC che posso utilizzare sul mio computer PC? A7: Sì. Il software client PC supporta Windows e il sistema operativo IOS. Link per scaricare: http://www.wiseupshop.com/download?name=wifi04s&Submit=++++++++...
-
Seite 65: Descripción Del Producto
WIFI04S Guía del Usuario I. Descripción del Producto 5. Puerto USB 1. LEDs IR 6. Ranura para Tarjetas Micro SD 2. Lente de Cámara 7. Luz Indicadora Azul/Roja/Amarilla 3. Botón de Modo 4. Interruptor de Encendido II. Qué hay en la Caja -1 ×... -
Seite 66: Configuración De Red
esté formateada y esté bien instalada en la ranura para la tarjeta SD de la cámara, o no funcio- nará. Le recomendamos que utilice una tarjeta Micro SD de SDHC de clase 10. 3.2. Deslice el Interruptor de Encendido a la posición ON. Cuando la luz indicadora azul se apaga y la roja permanece sólida, significa que la señal WIFI de la cámara está... - Seite 67 [Nota]: Si no se puede encontrar la señal WIFI de la cámara o la cámara no se puede inscribir en el teléfono después de un tiempo largo, recargue la cámara o reseteela(consulte VIII). 4.2.2. Para los usuarios de Android, inicie la aplicación "Plug & Play". Para los usuarios de IOS, ejecute la aplicación "P2PCamViewer".
- Seite 69 4.3. Configuración de Modo WAN o Vista Remota >> Asegúrese de que la cámara se ha agregado correctamente a la APP en modo P2P (LAN) y está en línea antes de empezar. Para Android: Paso 1: Inicie la aplicación "Plug & Play". Toque el icono de flecha en la página "LAN"...
- Seite 70 ¡Compruebe si el modo WAN o la configuración de la vista remota funciona! 1. Vuelva a la página de configuración WIFI o WLAN en su teléfono o dispositivo móvil, salga de su teléfono o dispositivo móvil de la red WIFI actual, inscriba su teléfono o dispositivo móvil en otra zona Wi-Fi WIFI o puede desactivar la función WIFI o WLAN , y utiliza los datos de su red móvil 2.
- Seite 71 V. Grababar vídeo a un Teléfono Inteligente o Tablet PC >> Asegúrese de que la cámara se ha agregado correctamente a la APP y está en línea antes de comenzar.
- Seite 72 .1. Inicie la aplicación "Plug & Play" o "P2PCamviewer". 5.2. Toque el icono de la cámara para entrar en la pantalla de transmisión en vivo. Haga clic en el Botón de Grabación de Vídeo Remota para iniciar o detener la grabación de vídeo. Haga clic en el Botón de Audio para grabar vídeo con sonido.
- Seite 73 5.3. Vuelva a la página "WAN" o "LAN" y toque el icono "Archivo" en la parte inferior de la pan- talla para ver los archivos de vídeo o capturas de pantalla. [Nota]: Resolución de vídeo: 1280x720P Formato de vídeo: AVI, MOV...
- Seite 74 VI. Configuración de Grabación por Detección de Movimiento >> Asegúrese de que la cámara se ha agregado correctamente a la APP y está en línea antes de comenzar. 6.1. Inicie la aplicación "Plug & Play" o "P2PCamviewer". 6.2. Configurar la función de grabación por detección de movimiento. Para Android: Paso 1: Toque el icono de flecha en la página "WAN"...
- Seite 75 Schritt 3: Tippen Sie auf "Fertig", um die Einstellung der Bewegungserkennung zu bestätigen. 6.3. Cuando se detecta movimiento, la cámara empuja un mensaje de alarma a su teléfono o dispositivo móvil y captura un video a la tarjeta Micro SD automáticamente. 6.4.
- Seite 76 [Nota]: Resolución de vídeo: 1280x720P Formato de vídeo: AVI, MOV VII. Grabación Continua a La Tarjeta Micro SD Local >> Asegúrese de que la cámara se ha agregado correctamente a la APP y está en línea antes de comenzar. 7.1. Siga estos pasos para configurar la grabación de la tarjeta SD. Para Android: Paso 1: Inicie la aplicación "Plug &...
- Seite 77 7.2. Siga 5.5 para ver sus imágenes de video. [Nota]: Si aparece "Formatear Tarjeta Micro SD " en la página "Configuración de tarjeta SD", significa que la tarjeta Micro SD se ha leído correctamente. VIII. Cambio de la Contraseña de Inicio de Sesión WAN >>...
- Seite 78 IX. Resetea a las configuraciones predeterminados de fábrica Si por alguna razón, la cámara deja de funcionar o no funciona correctamente, un reseteo rápido volverá a los valores predeterminados de fábrica. Funcionamiento: Cuando la cámara esté encendida, presione el Botón de Modo durante 5 segundos para resetear la cámara a los configuraciones predeterminados de fábrica.
-
Seite 79: Preguntas Frecuentes
nará. La cámara se reiniciará automáticamente a los configuraciones predeterminados de fábrica en 5 segundos. X. Carga 10.1. Conecte la cámara a una fuente de alimentación de corriente de CA con el adaptador de corriente y el cable USB incluidos. 10.2. - Seite 80 A6: Por favor copie las imágenes de video en su computadora antes de reproducirlas. P7: ¿Hay algún software de cliente de PC que pueda utilizar en mi PC? A7: Sí. El software de cliente de PC admite Windows y el sistema operativo IOS. Enlace de descarga: Http://www.wiseupshop.com/download?name=wifi04s&Submit=++++++++...
- Seite 81 WIFI04S ユーザーガイド I. 製品の概要 5. USBポート 1.IR LED 6.マイクロSDカードスロッ ト 2.カメラのレンズ 7.青色/赤色/黄色のインジケータライト 3.モードボタン 4.電源スイッチ II.ボックスの内容 -1×ミニWIFI DVカメラ -1×USBケーブル -1×AC110-240V∼DC5V電源アダプタ -1×サクションカップマウント -1×カードリーダー III.カメラの準備をする 3.1. カメラが完全に充電され、 Micro SDカードが既にフォーマッ トされており、 カメラのSDカード...
- Seite 82 スロッ トにしっかりと固定されていることを確認してください。 SDHC Class 10 Micro SDカードを使 用することをお勧めします。 3.2. 電源スイッチをONの位置にスライドさせます。 青色のインジケータランプが消灯し、 赤色のラ ンプが点灯している場合は、 カメラのWIFI信号が準備完了であることを意味します。 3.3. カメラを7/24時間稼働させる必要がある場合は、 USBケーブルとDC 5V電源アダプタを使用し てコンセントのAC電源に接続します。 カメラがコンセントのAC電源に接続されると、 電源スイッチ がONの位置にあるかどうかにかかわらず、 赤色と黄色のインジケータランプが点灯して点灯しま す。 IV. ネッ トワーク設定 4.1. スマートフォンまたはタブレッ トPCにPlug&PlayまたはP2PCamViewer APPをインストールする あなたのApp StoreまたはGoogle Playにアクセスし、 「 9527」 を検索し、 Androidの携帯電話また はタブレッ トPCに 「Plug&Play」 、 iPhoneまたはiPadの 「P2PCamViewer」 をインストールします。 4.2.
- Seite 83 [注意] : カメラのWIFI信号が見つからないか、 長時間かけてカメラを携帯電話に登録できない場合は、 カ メラを充電するかリセッ トしてください (VIIIを参照) 。 4.2.2. Androidユーザーの方は、 「 Plug&Play」 APPを起動してください。 IOSユーザーの場合、 「 P2PCamViewer」 APPを実行します。 4.2.3. 画面の下部にある 「LAN」 または 「ローカルカメラ」 をタップします。 カメラは数秒でポップア ップします。 カメラに 「オンライン」 と表示されている場合は、 P2P (LAN) の設定が成功したことを 意味し、 P2P ( LAN) モードでビデオを確認または記録できます。 [注意] : このP2P ( LAN) モードでは、 10メートル (33フィート) のオープン範囲内でビデオをローカルで見る ことができます。...
- Seite 85 4.3. WANモードまたはリモートビューセッ トアップ >>起動する前に、 カメラがP2P ( LAN) モードで正常にAPPに追加され、 オンラインになっているこ とを確認してください。 Androidの場合 : ステップ1 : 「Plug&Play」 APPを起動します。 「LAN」 ページの矢印アイコンをタップし、 「 Wi-Fi」 ペー ジに移動します。 ステップ2 : 「Wi-Fi」 ページで 「Wi-Fiを使用する」 をオンにします。 ステップ3 : エリア内の利用可能なネッ トワークをタップしてタップし、 目的のWIFIホッ トスポッ トを 選択してカメラを登録します。 ステップ4 : 「OK」 をタップしてリモートビュー設定を完了すると、 カメラは自動的に再起動します。 ステップ5 :...
- Seite 86 WANモードまたはリモートビューの設定が機能しているかどうかを確 認してく ださい! 1.電話またはモバイルデバイスのWIFIまたはWLAN設定ページに戻り、 現在のWIFIネッ トワーク から携帯電話またはモバイルデバイスを終了するか、 電話またはモバイルデバイスを別のWIFIホ ッ トスポッ トに登録するか、 またはWIFIまたはWLAN機能をオフにできます代わりにモバイルネッ トワークデータを有効にしてください。 2. "Plug&Play"または "P2PCamviewer" APPを再度起動します。 3.画面下部の 「WAN」 または 「マイカメラ」 をタップします。 コードアイコンをタップすると、 カメラ の背面にあるQRコードが直接スキャンされます。 Android搭載端末の場合、 数秒でカメラがポッ プアップします。 IOSデバイスの場合、 カメラのUIDとパスワードが空白に記入され、 「 ログイン」 を タップしてカメラにログインします。 カメラに 「オンライン」 と表示されている場合は、 青色のインジ ケータランプは消灯し、 赤色のランプは消灯します。 リモートビュー設定が完了し、 カメラがWAN モードに入ったことを示します。...
- Seite 87 V.スマートフォンまたはタブレッ トPCへのビデオの録画 >>起動する前に、 カメラがAPPに正常に追加され、 オンラインになっていることを確認してくださ い。...
- Seite 88 5.1. 「Plug&Play」 または 「P2PCamviewer」 APPを起動します。 5.2. ライブストリーミング画面に入るには、 カメラアイコンをタップします。 リモートビデオ録画ボ タンをクリックして、 録画ビデオを開始または停止します。 オーディオボタンをクリックして、 サウン ド付きのビデオを録画します。...
- Seite 89 5.3. 「WAN」 または 「LAN」 ページに戻り、 画面の下部にある 「ファイル」 アイコンをタップして、 ビデ オファイルまたはスクリーンショッ トをチェックします。 [ノート] : ビデオ解像度 : 1280x720P ビデオフォーマッ ト : AVI、 MOV...
- Seite 90 VI. モーシ ョン検知録画設定 >>起動する前に、 カメラがAPPに正常に追加され、 オンラインになっていることを確認してくださ い。 6.1. 「Plug&Play」 または 「P2PCamviewer」 APPを起動します。 6.2. モーション検知録画機能を設定します。 Androidの場合 : ステップ1 : 「WAN」 または 「LAN」 ページの矢印アイコンをタップし、 「 アラーム設定」 を選択します。 ステップ2 : 「アラーム設定」 ページで、 「 モーション検知」 、 「 PIR」 、 「 Sdcard Record」 を有効にするこ とができます。 ステップ3 :...
- Seite 91 6.3. 動きが検出されると、 カメラは携帯電話やモバイルデバイスにアラームメッセージを送信し、 自動的にマイクロSDカードにビデオをキャプチャします。 6.4. ビデオファイルは、 カメラのMicro SDカードに保存されます。 カメラの電源を切って、 Micro SD カードを取り外し、 付属のカードリーダーを使用してビデオ映像にアクセスします。 すべてのビデ オファイルをPCのコンピュータにコピーしてから再生することをお勧めします。...
- Seite 92 [ノート] : ビデオ解像度 : 1280x720P ビデオフォーマッ ト : AVI、 MOV VII. ローカルマイクロSDカードへの連続録音 >>起動する前に、 カメラがAPPに正常に追加され、 オンラインになっていることを確認してくださ い。 7.1. SDカードの録音を設定するには、 以下の手順に従ってください。 Androidの場合 : ステップ1 : 「Plug&Play」 APPを起動します。 ステップ2 : 「WAN」 または 「LAN」 ページで矢印アイコンをタップし、 「 SDカード設定」 ページに移動 します。 手順3 : 「自動録画を開始する」 と 「音声録音」 を有効にしてから、 各ビデオクリップのファイルサイ ズを選択します。...
- Seite 93 7.2. あなたのビデオ映像をチェックするために5.5に従ってください。 [注意] : 「SDカード設定」 ページに 「Micro SDカードのフォーマッ ト」 と表示されている場合、 Micro SDカードが正常に読み取られたことを意味します。 VIII. WANログインパスワードの変更 >>起動する前に、 カメラがWANモードのAPPに正常に追加され、 オンラインになっていることを 確認してください。 8.1. 「WAN」 または 「マイカメラ」 ページで、 プラスアイコンまたは 「オプション」 をタップし、 「 ログイ ンパスワードの更新」 または 「ログインパスワードの変更」 を選択します。 8.2. 新しいパスワードを入力して確認します。 最後に、 [OK]または[完了]をクリックして変更を確定 します。...
- Seite 94 IX. 出荷時のデフォルト設定にリセッ トする 何らかの理由でカメラが動作しなくなった場合、 または正常に動作していない場合は、 クイックリ セッ トを実行すると工場出荷時の設定に戻ります。 操作 : カメラの電源が入ったら、 モードボタンを5秒間押して、 カメラを工場出荷時の設定にリセッ トします。 赤色と青色の両方のインジケータライトが約5秒間点灯してから30秒間交互に点滅する と、 赤色のランプが点灯している間は青色のインジケータが消灯します。 カメラは5秒後に工場出 荷時の設定に自動的に再起動します。...
- Seite 95 X. 充電 10.1. 付属の電源アダプタとUSBケーブルを使用して、 カメラをコンセントのAC電源に接続します。 10.2. フル充電をするには1時間かかります。 10.3. カメラは1回の充電で最大1時間のビデオを記録できます。 よく ある質問 Q1 : WIFIページにカメラのWIFI信号が表示されないのはなぜですか? A1 : この質問には4つの解決策があります : 1.カメラをリセッ トします (VIIIを参照) 。 2.携帯電話またはモバイルデバイスをカメラのWIFIホッ トスポッ ト範囲内に保ち、 WIFI信号ペー ジをリフレッシュします。 携帯電話またはモバイルデバイスのWIFI設定ページでホッ トスポッ トが 認識されるまでに最大2分かかる場合があります。 3.携帯電話やモバイルデバイスのWIFI機能をしばらくシャッ トダウンしてから、 再度オンにしてく ださい。 4.カメラの電源が切れていることを確認して、 付属のUSBケーブルと電源アダプタを使用してコン セントのAC電源に接続します。 Q2 : 「WAN」 または 「マイカメラ」 ページにログインした直後に、 カメラがオフラインで表示されるの はなぜですか?...
- Seite 96 Q6 : コンピュータで再生中にビデオフッテージがぼやけて表示されるのはなぜですか? A6 : 再生する前にビデオ映像をコンピュータにコピーしてください。 Q7 : PCコンピュータで使用できるPCクライアントソフ トウ ェアはありますか? A7 : はい。 PCクライアントソフトウェアは、 ウィンドウとIOSオペレーティングシステムをサポートし ています。 ダウンロードリンク : http://www.wiseupshop.com/download?name=wifi04s&Submit=++++++++++...