Herunterladen Inhalt Inhalt Diese Seite drucken
Inhaltsverzeichnis

Werbung

Verfügbare Sprachen
  • DE

Verfügbare Sprachen

  • DEUTSCH, seite 21
CENTRAL VACUUM SYSTEMS
OWNER'S MANUAL
Type E

Werbung

Inhaltsverzeichnis
loading

Inhaltszusammenfassung für Zanussi Z20

  • Seite 1 CENTRAL VACUUM SYSTEMS OWNER’S MANUAL Type E ZANUSSI...
  • Seite 2 English .................. 3 Español ................. 9 Français ................15 Deutsch ................21 Italiano ................. 27 Português................33 Get Living!
  • Seite 3: Inhaltsverzeichnis

    Important Safeguards ............3 CONTENTS General Information............... 4 Your central vacuum system package consists of the following items. Installation ................4 System Test ................5 How to use ................5 LED Indications ..............5 LCD Screen ................5 1- Vacuum Bag Bag Adaptor ................
  • Seite 4: General Information

    WARNING GENERAL INFORMATION The central vacuum is designed for dry pick-up of household dirt and dust. Avoid Non-observance of the safety directions may result in bodily harm. picking up hard or sharp objects with this system to prevent hose and plastic pipe damage or clogs.
  • Seite 5: System Test

    • Check each inlet valve for air leaks. 14:45 Refer to page 8 LCD Image Guide • Check each pipe connection for air leaks. ZANUSSI 22°C for more information. Refer to page 39 - Image 8 HOW TO USE CENTRAL VACUUM SYSTEM Refer to page 39 - Image 8 Your central vacuum system is controlled by a switch on your hose.
  • Seite 6: Bag Adaptor

    OVERLOAD PROTECTION Your Zanussi central vacuum will track the total running time of the system and The central vacuum system employs features that monitor the following operating notify you when it time for service. After the power unit has ran to its maximum levels: AC voltage, and current draw.
  • Seite 7: Filter Maintenance

    FILTER MAINTENANCE CLEAR BLOCKAGE IN PIPES Blockage in the hose The internal filter is permanent and self cleaning. However, if you have questions about your permanent self-cleaning Plug hose into any inlet valve. If there is no suction through the hose after filter, please contact your local authorized dealer/distributor.
  • Seite 8: Lcd Instruction Manual

    LCD INSTRUCTION MANUAL - READ THIS MANUAL THOROUGHLY BEFORE USE MAIN SCREEN System Run Time ZANUSSI 14:45 22°C The main screen is shown when the system is connected to an electrical This display shows you the overall number of hours that the power unit outlet.
  • Seite 9: Medidas De Precaución Importantes

    Medidas de precaución importantes..........9 CONTENIDO Información general ...............10 El sistema de aspiración centralizada viene con los siguientes componentes. Instalación..................10 Prueba del sistema .................11 Modo de uso ..................11 Indicaciones del LED..............11 Pantalla LCD ..................11 1- Bolsa de recolección Adaptador para bolsa ..............12 Válvula de servicio .................12 Protección contra recalentamiento ..........12 Codo adaptador de la bolsa en...
  • Seite 10: Información General

    INFORMACIÓN GENERAL DIMENSIONES DEL PRODUCTO La aspiradora centralizada está diseñada para aspirar elementos secos, como suciedad y Consulte la página , imagen 1 polvo domésticos. Evite aspirar objetos duros o afi lados para evitar obstrucciones o daños DESECHOS DE EQUIPOS ELÉCTRICOS Y en la manguera y las tuberías de plástico.
  • Seite 11: Prueba Del Sistema

    Esto encenderá la unidad de potencia y activará el fl ujo de aire. En la pantalla principal de la pantalla LCD, aparecerá el logo de Zanussi. Este logo puede desplazarse de lado a lado para evitar que la imagen quede grabada en la pantalla LCD.
  • Seite 12: Indicador De Mantenimiento

    El sistema de aspiración centralizada tiene funciones para supervisar los siguientes L’aspiratore centralizzato Zanussi calcola il tempo totale di funzionamento e avverte quando niveles operativos: la tensión de CA y el consumo de electricidad. Si la tensión es è il momento di una revisione. Una volta che l’unità di potenza ha raggiunto il limite inferior o superior a la tensión operativa normal, se consume mucha electricidad o el rotor...
  • Seite 13: Mantenimiento Del Fi Ltro

    • Inspeccione el interior de cada válvula de entrada por si hubiese obstrucciones en los contactos de baja tensión. Si no detecta ningún tipo de obstrucción, desconecte El fi ltro de Zanussi es permanente y se limpia automáticamente. Sin embargo, si tiene la aspiradora del tomacorriente y póngase en contacto con su proveedor/distribuidor alguna pregunta acerca del fi...
  • Seite 14: Manual De Instrucciones De La Pantalla Lcd

    MANUAL DE INSTRUCCIONES DE LA PANTALLA LCD - LEA BIEN ESTE MANUAL ANTES DE USARLO PANTALLA PRINCIPAL Tiempo de funcionamiento del sistema ZANUSSI 14:45 22°C La pantalla principal aparece cuando se conecta el sistema a un Esta pantalla le muestra la cantidad total de horas de funcionamiento de la tomacorrientes.
  • Seite 15: Mesures De Sécurité Importantes

    Mesures de sécurité importantes............15 CONTENU Informations générales ..............16 Votre ensemble de système central d'aspiration se compose des éléments suivants. Installation ..................16 Test du système ................17 Utilisation..................17 Indications par DEL ................17 Ecran LCD ..................17 1- Sac d'aspiration Adaptateur de sac ................18 Soupape de service ................18 Protection contre la surchauffe ............18 Adaptateur de sac à...
  • Seite 16: Informations Générales

    Pour obtenir rapidement des Votre SCA Zanussi ne nécessite pas de monter un silencieux. Votre SCA dispose d'un informations complètes sur l'entretien, reportez-vous toujours à ces numéros lorsque vous silencieux intégré.
  • Seite 17: Test Du Système

    Cela démarre l'unité d'alimentation et le fl ux d'air. Sur l'écran LCD principal, le logo Zanussi s'affi che. Ce logo peut défi ler d'un côté à l'autre pour éviter que l'image ne s'incruste dans l'affi chage LCD. Vous voyez le logo lorsque Lorsque vous avez terminé, mettez l'interrupteur du tuyau en position d'arrêt et retirez le...
  • Seite 18: Adaptateur De Sac

    EN COURS D'UTILISATION NAVIGATION AVEC L'ECRAN LCD 14:45 Voir le guide des pictogrammes 22°C à la page 20 pour plus d’information. Lorsque l'unité n'est pas utilisée, faites défi ler les fonctions de votre écran LCD pour voir le statut du réceptacle à poussière, la mesure du compteur du temps écoulé ou le dernier niveau de puissance enregistré.
  • Seite 19: Entretien Du Fi Ltre

    à basse tension. Si aucune obstruction visuelle ne peut être Le fi ltre exclusif d'Zanussi est permanent et autonettoyant. Cependant, si vous avez des détectée, débranchez le système de la prise électrique et contactez votre vendeur/ questions sur votre fi...
  • Seite 20: Guide D'utilisation De L'acl

    GUIDE D’UTILISATION DE L’ACL – LISEZ ATTENTIVEMENT CE GUIDE AVANT D’UTILISER L’APPAREIL ÉCRAN PRINCIPAL Téléphone et visage souriant ZANUSSI 14:45 22°C L’écran principal s’affi che lorsque le système est branché dans une prise Cet affi chage indique que le système N’a PAS rencontré de conditions d’erreur électrique.
  • Seite 21: Wichtige Sicherheitsvorkehrungen

    Wichtige Sicherheitshinweise............21 INHALT Allgemeine Hinweise ..............22 Lieferumfang des Zentralstaubsaugers: Installation ..................22 Anlagentest ..................23 Benutzung ..................23 Kontrollleuchten ................23 Bildschirmanzeige ................23 1- Staubbeutel Beuteladapter .................24 Saugdose an der Zentraleinheit ............24 Überhitzungsschutz ................24 90° Beuteladapter- Adapter für Abluft nach Überlastschutz................24 Rohrbogen außen Diagnose und Wartung ..............24 Filterwartung ..................25 Einlassstopfen Papierbeutelfi...
  • Seite 22: Allgemeine Hinweise

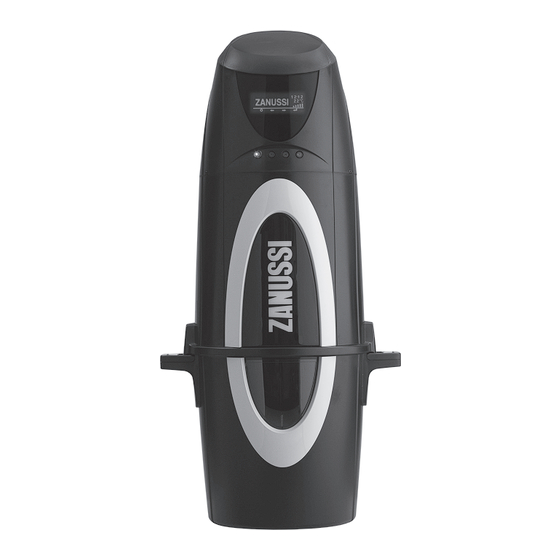
    • Stecken Sie den Netzstecker der Zentraleinheit in die Steckdose. TYPENSCHILD Dieser Zanussi Zentralstaubsauger benötigt keinen weiteren Schalldämpfer. Dieser Modell, Typ und Seriennummer fi nden Sie auf dem Typenschild, das sich auf der Zentralstaubsauber ist mit einem internen Schalldämpfer ausgestattet. Wenn Sie die Abluft Bedientafel oder auf der Motorhaube befi...
  • Seite 23: Anlagentest

    Der Zentralstaubsauber wird mit einem Schalter am Saugschlauch ein- und ausgeschaltet. Sie stecken den Saugschlauch einfach in eine Saugdose und schalten den Schalter ein. Die Im Hauptteil des Bildschirms ist das Zanussi-Logo zu sehen. Das Logo läuft seitlich Zentraleinheit läuft an und die Luft wird angesaugt.
  • Seite 24: Beuteladapter

    Weiterhin werden folgende Betriebszustände überwacht: Netzspannung und Strom. Bei zu hoher oder zu niedriger Betriebsspannung, zu hohem Strombedarf oder einem blockierten Ihr Zentralstaubsauger von Zanussi zeichnet die Gesamtlaufzeit der Anlage auf und zeigt an, Rotor kann der Zentralstaubsauber nicht betrieben werden. In diesem Fall blinkt die wann die nächste Wartung notwendig ist.
  • Seite 25: Filterwartung

    FILTERWARTUNG • Überprüfen Sie in jeder Saugdose, ob die Niederspannungskontakte frei sind. Sind die Der Zanussi-Filter ist ein permanenter, selbstreinigender Filter. Fragen zu diesem Filter Kontakte in Ordnung, ziehen Sie den Netzstecker des Staubsaugers aus der Steckdose. beantwortet Ihnen gern Ihr Vertragshändler.
  • Seite 26: Bildschirmanleitung

    BILDSCHIRMANLEITUNG – DIESE ANLEITUNG VOR GEBRAUCH LESEN HAUPTBILDSCHIRM Anlagenlaufzeit ZANUSSI 14:45 22°C Der Hauptbildschirm erscheint, sobald die Anlage mit einer Netzsteckdose Diese Anzeige führt die Gesamtbetriebsstundenzahl der Zentraleinheit auf. verbunden wird. Dieser Bildschirm wird bei Normalbetrieb und voller Anlagen- Sie zeigt, wie lange sie insgesamt mit der Anlage Staub gesaugt haben.
  • Seite 27: Importanti Misure Di Sicurezza

    Importanti misure di sicurezza............27 CONTENUTO Informazioni generali..............28 L'imballaggio del sistema aspirapolvere contiene i seguenti pezzi. Installazione ...................28 Test del sistema ................29 Istruzioni per l'uso .................29 Indicazioni LED ................29 Schermo LCD.................29 1- Sacchetto di aspirazione Riduttore per sacchetto..............30 Valvola accessoria ................30 Protezione da surriscaldamento .............30 Riduttore a gomito 90°...
  • Seite 28: Informazioni Generali

    • Collegare il sistema aspirapolvere centralizzato con il cavo di alimentazione in dotazione. Zanussi CVS non richiede l'assemblaggio di un silenziatore. Quest'ultimo è integrato Il modello, tipo e numero di serie sono indicati sulla targhetta di valutazione sul pannello di all'interno del sistema aspirapolvere centralizzato.
  • Seite 29: Test Del Sistema

    – Immagine 8 COME UTILIZZARE IL SISTEMA ASPIRAPOLVERE CENTRALIZZATO Sulla schermata principale dello schermo LCD apparirà il logo Zanussi. Il logo può scorrere Il sistema aspirapolvere centralizzato viene controllato tramite un interruttore presente sul da una parte all'altra dello schermo per evitare che l'immagine si fi ssi sul display LCD. Il tubo.
  • Seite 30: Riduttore Per Sacchetto

    Il sistema aspirapolvere centrale utilizza delle funzioni che monitorano i seguenti livelli di L’aspiratore centralizzato Zanussi calcola il tempo totale di funzionamento e avverte quando funzionamento: voltaggio CA e corrente assorbita. Se il voltaggio è inferiore o superiore allo è...
  • Seite 31: Manutenzione Del Fi Ltro

    • Controllare in ogni valvola di ingresso la presenza di ostruzioni sui contatti a basso voltaggio. Se non è visibile alcuna ostruzione, scollegare l'aspirapolvere dalla presa di Il fi ltro esclusivo di Zanussi è permanente e autopulente. Tuttavia, in caso di domande corrente e contattare il più vicino rivenditore/fornitore locale autorizzato.
  • Seite 32: Manuale Di Istruzioni Del Pannello Lcd

    MANUALE DI ISTRUZIONI DEL PANNELLO LCD - LEGGERE ATTENTAMENTE IL MANUALE PRIMA DELL’USO ZANUSSI 14:45 22°C SCHERMATA PRINCIPALE Icona del telefono e faccina sorridente La schermata principale viene visualizzata quando il sistema viene La schermata indica che il sistema NON ha riscontrato nessuna condizione...
  • Seite 33: Precauções Importantes

    Precauções importantes ..............33 CONTEÚDO Informação geral ................34 O seu sistema de aspiração central é constituído pelos seguintes acessórios. Instalação ..................34 Teste do sistema ................35 Como usar ..................35 Indicações das LED ................35 Ecrã LCD ..................35 1- Saco para o aspirador Adaptador para o saco..............36 Válvula utilitária ................36 Protecção contra sobreaquecimento..........36 Adaptador curvo de 90°...
  • Seite 34: Informação Geral

    • Ligue o seu SAC com o cabo eléctrico fornecido. CHAPA DE IDENTIFICAÇÃO O seu SAC Zanussi não requer a instalação de um silenciador. O seu SAC já tem um silenciador instalado internamente. No entanto, poderá querer expelir o ar para fora. Neste O modelo, tipo e números de série estão indicados na chapa de identifi...
  • Seite 35: Teste Do Sistema

    - Imagem 8 fl uxo de ar. No ecrã principal do LCD, surge o símbolo Zanussi. Este símbolo pode mover-se de um Quando termina, desligue o interruptor no tubo [off] e remova o tubo da válvula de entrada. lado para o outro para evitar que a imagem fi que queimada no Monitor LCD. O símbolo é...
  • Seite 36: Adaptador Para O Saco

    CA e a tomada de corrente<. Se a tensão for inferior ou superior à O seu sistema de aspiração central Zanussi controla o tempo de funcionamento total tensão operacional padrão, se a tomada de corrente for alta ou o rotor estiver bloqueado, a do sistema e alerta-o para a necessidade de assistência.
  • Seite 37: Manutenção Do Fi Ltro

    • Verifi que se algum dos contactos de baixa tensão no interior de cada válvula está O fi ltro exclusivo da Zanussi é permanente e auto-recuperável. No entanto, se tiver obstruído. Se não detectar obstrução visual, desligue o aspirador do receptáculo de perguntas sobre o seu fi...
  • Seite 38: Manual De Instruções Do Lcd

    MANUAL DE INSTRUÇÕES DO LCD – LEIA ESTA MANUAL ATENTAMENTE ANTES DE USAR ECRÃ PRINCIPAL Tempo de Funcionamento do Sistema ZANUSSI 14:45 22°C O ecrã principal surge quando ligar o sistema a uma tomada eléctrica. Este ecrã apresenta o número global de horas de funcionamento da Este é...
  • Seite 39: Images

    Min. 300 mm 100 mm 30 cm 10 cm 12’’ 4’’ 380 mm 38 cm 15’’ Min. 300 mm Min. 300 mm 30 cm 30 cm 12’’ 12’’ 1.032 mm 103,2 cm 40,5’’ Maximum 1,8 m (6’) from outlet Máximo 1,8 m (6 pies) del 495 mm tomacorrientes 49.5 cm...
  • Seite 40 Get Living! #460507 / 7/20/09 © 2009 Electrolux Home Care Products...

Diese Anleitung auch für:

Z25Z30Z40Z45

Inhaltsverzeichnis