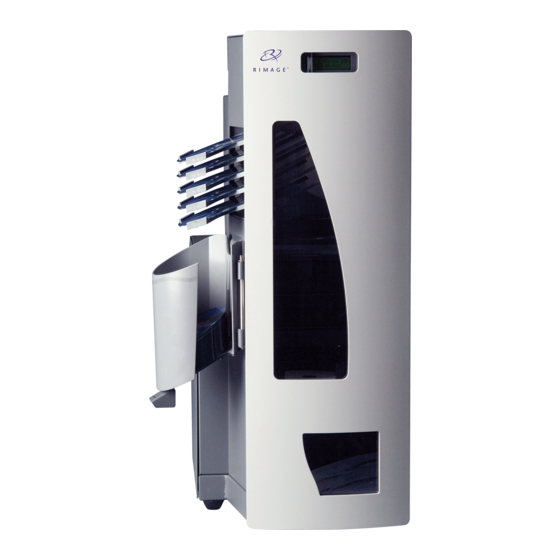
Rimage Professional 5100N Benutzerhandbuch
Computergesteuerte roboter-station mit einem rekorder
Inhaltsverzeichnis
Verfügbare Sprachen
Verfügbare Sprachen
Quicklinks
Rimage Professional
™
5100N and 5300N
User Guide
This manual provides the information needed to operate the Rimage Professional, identify
the parts, and configure the printing preferences. To set up and install your Rimage
Professional, refer to the Rimage Professional Setup and Installation Guide included with
your product.
Kapitel
Inhaltsverzeichnis

Verwandte Anleitungen für Rimage Professional 5100N

Inhaltszusammenfassung für Rimage Professional 5100N
- Seite 32 Rimage Professional ™ 5100N- und 5300N- Benutzerhandbuch...
- Seite 33 Hauptsitz: Rimage Corporation behält sich das Recht vor, jederzeit, ohne vorherige Ankündigung, Rimage Corporation die in diesem Dokument beschriebenen 7725 Washington Avenue South Geräte und Software zu verbessern. Rimage Minneapolis, MN 55439 Corporation behält sich das Recht vor, diese Veröffentlichung zu überarbeiten und von Zeit zu Zeit inhaltliche Änderungen...
- Seite 34 Technischer Support ....................4 Haftungsausschluss für die Aufzeichnungssoftware für optische Discs ....5 Informationen zu Sicherheit und Konformität.............5 Sicherheitsvorkehrungen ......................5 Informationen zur Konformität ....................6 Rimage Professional-Spezifikationen ................7 Ansicht und Bedienelemente des Professional ........9 Vorderansicht ......................9 Rückansicht ......................10 5100N ........................... 10 5300N ...........................
-
Seite 35: Einführung
Rimage Professional 5100N- und 5300N-Benutzerhandbuch Einführung Dieses Handbuch enthält Informationen zum Benutzen des Rimage Professional 5100N und des Rimage Professional 5300N sowie zum Identifizieren der Komponenten. Zur Einrichtung und Installation des 5100N und des 5300N siehe die im Lieferumfang Ihres Produkts enthaltene Einrichtungs- und Installationsanleitung. -
Seite 36: Über Das Produkt
Der Rimage 5100N und der Rimage 5300N sind Roboter-Stationen der Serie Rimage Professional. In diesem Dokument bezieht sich die Bezeichnung „Professional“ sowohl auf den Rimage 5100N als auch auf den Rimage 5300N. Auf Unterschiede zwischen den beiden Roboter-Stationen wird gesondert hingewiesen. - Seite 37 Rimage Professional 5100N- und 5300N-Benutzerhandbuch Wichtige Informationen In diesem Abschnitt finden Sie kundendienstspezifische Kontaktinformationen, Sicherheitshinweise und Warnungen sowie Produktdaten zum Rimage Professional. Supportinformationen USA, Asien/Pazifik, Mexiko/Lateinamerika Europa Rimage Corporation Rimage Europe GmbH 7725 Washington Avenue South Albert-Einstein-Str. 26 Minneapolis, MN 55439...
-
Seite 38: Wichtige Informationen
• Produktspezifikationen Technischer Support Support für den Rimage Professional erhalten Sie von Ihrem autorisierten Händler. Wichtig! Registrieren Sie Ihren Rimage Professional, damit Sie von Rimage über neue Upgrades informiert werden. Für Produkte mit Rimage-Software Version 8.2 oder höher wird die Registrierung über die Rimage-Website unter www.rimage.com/support/warranty-registration... -
Seite 39: Haftungsausschluss Für Die Aufzeichnungssoftware Für Optische Discs
Rimage Professional 5100N- und 5300N-Benutzerhandbuch Haftungsausschluss für die Aufzeichnungssoftware für optische Discs Dieses Produkt, diese Software oder diese Dokumentation wurde konzipiert, um Ihnen bei der Reproduktion von Material zu helfen, für das Sie das Copyright besitzen oder die Kopiererlaubnis vom Copyright-Eigentümer erhalten haben. Wenn Sie das Copyright nicht besitzen oder nicht die Kopiererlaubnis vom Copyright-Eigentümer erhalten haben,... -
Seite 40: Informationen Zur Konformität
Wichtige Informationen Informationen zur Konformität Produktname: Rimage Professional 5100N Rimage Professional 5300N Modell: RAS23E RAS22E Hinweis für USA HINWEIS: Dieses Gerät wurde getestet und entspricht den Grenzwerten für ein digitales Gerät der Klasse A gemäß Teil 15 der FCC-Bestimmungen. Diese Grenzwerte dienen dem angemessenen Schutz vor schädlichen Störungen beim Einsatz des Geräts in Gewerbegebieten. -
Seite 41: Rimage Professional-Spezifikationen
Rimage Professional 5100N- und 5300N-Benutzerhandbuch Rimage Professional-Spezifikationen Hinweise: • Die aktuellsten technischen Spezifikationen für Professional 5100N und 5300N finden Sie unter www.rimage.com/support Wählen Sie im Menü Support die Option: Professional Series (Professional-Serie) > Product Name (Produktname) > User Manuals (Benutzerhandbücher). - Seite 42 5300N Anforderungen Die entsprechenden Anforderungen an das Druckband entnehmen an das Druckband Sie dem Benutzerhandbuch des Everest-Druckers. Die erforderlichen Druckbänder sind in den Rimage Media Kits™ enthalten. Grafikdesign Die entsprechenden Grafikdesign-Anforderungen entnehmen Sie dem Benutzerhandbuch des Everest-Druckers. Temperatur und Luftfeuchtigkeit Betriebs temperatur 15,5 bis 26,7 °C...
-
Seite 43: Ansicht Und Bedienelemente Des Professional
Rimage Professional 5100N- und 5300N-Benutzerhandbuch Ansicht und Bedienelemente des Professional Vorderansicht Bedientaste Drehablagentaste Bediener- (nur 5300N) Display Greifarm Ausgabeablagen Rekorder (nur 5300N) Zweiter Rekorder Drucker (nur 5300N) Ausgabefach Eingabefach 2 (nur 5300N) Eingabefach 1 Netzschalter des integrierten PC 2000447_E... -
Seite 44: Rückansicht
Ansicht und Bedienelemente des Professional Rückansicht 5100N Drucker-USB-Kabel Druckerkabel Drucker- Seitenansicht links netzkabel Netzwerkan- schluss Festplattenlaufwerke Netzschalter Netzkabel 5300N Drucker-USB-Kabel Druckerkabel Druckernetzkabel Festplattenlaufwerke Abdeckung des Festplatten- laufwerks Netzwerkan- schluss Netzschalter Netzkabel 2000447_E... -
Seite 45: Komponenten
Ausführen von Gemini Utilities auf Seite 27. Hinweis: Das Caret-Zeichen „^“ oben rechts im Display weist darauf hin, dass die Rimage-Software mit dem System kommuniziert. Ausgabeablagen (nur 5300N) Der 5300N ist mit fünf Ausgabeablagen ausgestattet. Sobald eine Disc aufgezeichnet und bedruckt ist, befördert der Greifarm die Disc in das Ausgabefach oder in eine der Ausgabeablagen. -
Seite 46: Ausgabefach
Ansicht und Bedienelemente des Professional Ausgabefach Im Ausgabefach werden erfolgreich oder nicht erfolgreich fertig gestellte Discs aufbewahrt. Das Ausgabefach fasst bis zu 100 Discs. Hinweis: Entnehmen Sie beim Auffüllen der Eingabefächer stets die fertigen Discs aus dem Ausgabefach, damit es niemals voll wird. Zum Entnehmen der Discs aus dem Ausgabefach ziehen Sie die Verriegelung des Fachs nach vorn. -
Seite 47: Bedientaste
Rimage Professional 5100N- und 5300N-Benutzerhandbuch Bedientaste Mit der Bedientaste können Sie die Druckerschublade öffnen und schließen und den Professional in den Diagnosetestmodus versetzen. Die Bedientaste finden Sie hinter der vorderen Gehäusetür. Durch Drücken der Bedientaste öffnen Sie die Druckerschublade. Durch erneutes Drücken schließen Sie sie wieder. -
Seite 48: Inbetriebnahme Des Professional
PC auf der Vorderseite der Roboter-Station, um den Professional einzuschalten. Wenn der Professional die Initialisierung abgeschlossen hat, wird auf dem Bedienfeld [RIMAGE SYSTEM READY] (Rimage-System bereit) angezeigt. Hinweis: Die Initialisierung des Professional kann bis zu 5 Minuten dauern. Netzschalter... -
Seite 49: Einlegen Von Discs
Rimage Professional 5100N- und 5300N-Benutzerhandbuch Einlegen von Discs Jedes Eingabefach fasst bis zu 50 Discs. Verwenden Sie die in den Rimage Media Kits enthaltenen Discs, die im Thermoverfahren bedruckbar und mit dem Everest-Drucker kompatibel sind. Nähere Informationen hierzu entnehmen Sie dem Benutzerhandbuch des Rimage Everest-Druckers. - Seite 50 Inbetriebnahme des Professional Setzen Sie das Eingabefach 2 auf die Drehablage. Tipp: Bei korrektem Sitz weist die Griffplatte nach vorn und die Disc-Stützen in dieselbe Richtung wie die Laschen. Das Eingabefach passt in die Aussparungen unten an der Drehablage. Richtig Falsch Disc- Stütze...
-
Seite 51: Wartung Des Professional
Rimage Professional 5100N- und 5300N-Benutzerhandbuch Wartung des Professional Die Informationen in diesem Abschnitt helfen Ihnen, die optimale Funktionsfähigkeit des Professional zu erhalten. Warnung! Schalten Sie die Roboter-Station stets aus und ziehen Sie das Netzkabel ab, bevor Sie in den integrierten PC greifen. -
Seite 52: Wartungsplan
Wartung des Professional Wartungsplan Orientieren Sie sich bei der Durchführung präventiver Wartungsaufgaben an der folgenden Tabelle. Hinweis: Bei Verwendung des Systems an Orten mit hohem Staubaufkommen, etwa in Verkaufsräumen oder Lagern, muss die Wartung eventuell häufiger erfolgen. Voraussetzungen: Schalten Sie den Professional aus. Ziehen Sie das Netzkabel ab. -
Seite 53: Diagnosetests
Rimage Professional 5100N- und 5300N-Benutzerhandbuch Diagnosetests In diesem Abschnitt wird erläutert, wie Sie beim Rimage Professional Diagnosetests aufrufen, auswählen und durchführen können. Vor jedem Diagnosetest ist zunächst darauf zu achten, dass sich der Professional in keinem Fehlerzustand befindet. Aufrufen und Auswählen von Diagnosetests Aufrufen des Diagnosetestmodus Schalten Sie den Professional ein. -
Seite 54: Diagnosetest 3 - Kalibrierungsdiagnosetest
Wartung des Professional Diagnosetest 3 – Kalibrierungsdiagnosetest Bei diesem Test wird anhand einer Disc die Entfernung von der Greifarm- Ursprungsposition zur Oberseite der Greifarmsäule und danach zu den Eingabefächern kalibriert. Vergewissern Sie sich, dass sich die Roboter-Station im Diagnosetestmodus befindet, bevor Sie beginnen. -
Seite 55: Diagnosetest 6 - Sensoren
Rimage Professional 5100N- und 5300N-Benutzerhandbuch Diagnosetest 6 – Sensoren Bei diesem Test wird überprüft, ob die Sensoren der Roboter-Station ordnungsgemäß funktionieren. Die Roboter-Station verfügt über folgende Sensoren: • Ausgabeablagesensor in jedem Ausgabefach (nur 5300N) • Ausgabefachsensor • Disc-Präsenzsensor im Greifarm •... -
Seite 56: Ausgabefachsensor (Nur 5300N)
Wartung des Professional Ausgabefachsensor (nur 5300N) Bei diesem Test wird der Ausgabefachsensor überprüft, der sich oben am Ausgabefach befindet. Legen Sie eine Disc in das Ausgabefach. Der Sensor erzeugt einen Signalton und auf dem Bediener-Display wird durch [0] die Statusänderung angezeigt. Nehmen Sie die Disc aus dem Ausgabefach heraus. -
Seite 57: Diagnosetest Für Den Ausgabefach-Präsenzsensor (Nur 5300N)
Rimage Professional 5100N- und 5300N-Benutzerhandbuch Türöffnungssensor Bei diesem Test wird der Türöffnungssensor überprüft, der sich unten links am Rahmen des 5100N und des 5300N befindet. Öffnen Sie die vordere Gehäusetür. Der Sensor erzeugt einen Signalton und auf dem Bediener-Display wird durch [1] die Statusänderung angezeigt. -
Seite 58: Ausrichten Des Druckers
Wartung des Professional Ausrichten des Druckers Wenn Sie den Everest-Drucker installieren oder austauschen, müssen Sie ihn ggf. am Greifarm ausrichten. Benötigte Hilfsmittel: Schraubendreher Torx T25 Aufrufen des Diagnosetests für Rütteln und Heben Schalten Sie den Professional ein. Warten Sie, bis das System vollständig initialisiert ist. -
Seite 59: Überprüfen Der Disc-Ausrichtung
Rimage Professional 5100N- und 5300N-Benutzerhandbuch Überprüfen der Disc-Ausrichtung Beachten Sie den Abstand zwischen der Kante der Disc und den erhabenen Kanten der Druckerschublade (siehe Pfeile). Die Disc sollte mittig in der Druckerschublade liegen. • Wenn bei der Disc eine seitliche Ausrichtung erforderlich ist, fahren Sie mit Schritt 2 fort. - Seite 60 Wartung des Professional Führen Sie gegebenenfalls eine Ausrichtung nach vorn/hinten durch. Drehen Sie die Schraube für Druckerschublade die Ausrichtung vorn/hinten, bis der Abstand vorn zwischen der Kante der Disc und der erhabenen Kante des Disc-Halters 1,5 mm beträgt. Tipp: Zum Drehen der Schraube für die Ausrichtung vorn/hinten können Sie den Torx-...
-
Seite 61: Ausführen Von Gemini Utilities
Rimage Professional 5100N- und 5300N-Benutzerhandbuch Ausführen von Gemini Utilities Das Rimage Producer-Softwarepaket enthält u. a. die Anwendung Gemini Utilities, die zum Ändern des Anzeigenamens des Professional und zum Aktivieren des Signaltongebers dient. Hinweis: Sofern nicht anders angegeben, handelt es sich bei allen Windows- Navigationsangaben um Windows XP-Pfade. -
Seite 62: Ändern Des Anzeigenamens Der Roboter-Station
Ausführen von Gemini Utilities Ändern des Anzeigenamens der Roboter-Station Verwenden Sie Gemini Utilities, um den auf dem Bediener-Display angezeigten Namen einzugeben. Aktivieren Sie das Kontrollkästchen Override Name (Namen überschreiben). Deaktivieren Sie das Kontrollkästchen Use Computer Name (Computernamen verwenden). Geben Sie im Feld Display Name (Anzeigename) den neuen Namen ein. Wählen Sie Set DiscLab Params (DiscLab-Parameter festlegen) aus, um den Namen festzulegen. - Seite 125 Rimage Professional ™ 5100N および 5300N ユーザー ガイ ド...