Perry Electric 1TPTE011B Handbuch
Inhaltsverzeichnis
Verfügbare Sprachen
Verfügbare Sprachen
Quicklinks
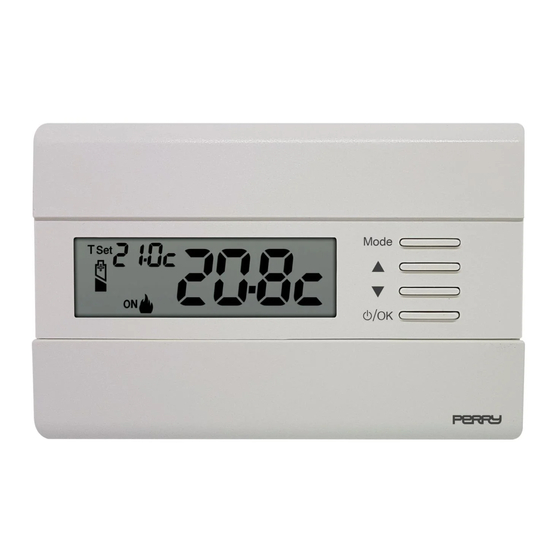
TERMOSTATO ELETTRONICO DIGITALE DA PARETE
IT
EN
WALL MOUNTING ELECTRONIC DIGITAL THERMOSTAT
FR
THERMOSTAT ELECTRONIQUE DIGITAL POUR MONTAGE EN SAILLIE
DE
ELEKTRONISCHER DIGITAL RAUMTHERMOSTAT WANDMONTAGE
TERMOSTATO ELECTRONICO DIGITAL DE SUPERFICIE
ES
PE - DETENN001
02/19
Mo de
OK
MODELLO/MODEL/MODELE/MODELL/MODELO:
Funzionamento Inverno / Estate
2 livelli di temperatura + antigelo
Winter and Summer mode
2 temperature levels + antifreeze
Fonctionnement Hiver ou Eté
2 niveaux de température + antigel
Betrieb Winter oder Sommer
2 Temperaturstufen + Frostschutz
Funcionamiento Invierno / Verano
2 niveles de temperatura + antihielo
3V dc
2x 1,5Vdc LR03 - AAA
(not included)
Kapitel
Inhaltsverzeichnis

Verwandte Anleitungen für Perry Electric 1TPTE011B


Inhaltszusammenfassung für Perry Electric 1TPTE011B
- Seite 1 TERMOSTATO ELETTRONICO DIGITALE DA PARETE WALL MOUNTING ELECTRONIC DIGITAL THERMOSTAT THERMOSTAT ELECTRONIQUE DIGITAL POUR MONTAGE EN SAILLIE ELEKTRONISCHER DIGITAL RAUMTHERMOSTAT WANDMONTAGE TERMOSTATO ELECTRONICO DIGITAL DE SUPERFICIE Funzionamento Inverno / Estate 2 livelli di temperatura + antigelo Winter and Summer mode 2 temperature levels + antifreeze Mo de Fonctionnement Hiver ou Eté...
- Seite 71 INHALT Deutsch 11 - KONFIGURATIONSMENÜ (Installateur) Seite 83 Seite 72 1 - TECHNISCHE DATEN 11.1 - Zugang zum Konfigurationsmenü Seite 83 2 - HINWEISE Seite 73 11.2 - Modus der Temperaturregelung Seite 83 3 - ERKLÄRUNG TASTEN Seite 74 11.2.1 - Auswahl des Modus für die Temperaturregelung 4 - ERKLÄRUNG DISPLAY Seite 74 (Schaltdifferenz on/off oder proportional)
-
Seite 72: Technische Daten
1 - TECHNISCHE DATEN Stromversorgung: N° 2 x 1,5V Alkalibatterien Typ AAA (LR03) Batterielebensdauer: mehr als 1 Jahr Lebensdauer ab Anzeige des blinkenden Symbols ''Batterien leer'': ca. 15 Tage Betriebsart, Abschaltung und Gerätetyp: 1 / B / U / Elektronisch Art des Ausgangs: potentialfreies Umschalt-Relais COM / NO / NG, max. -
Seite 73: Hinweise
HINWEISE! Das vorliegende Handbuch vor der Verwendung des Produkts aufmerksam lesen, da es wichtige Anweisungen bezüglich der Sicherheit, der Installation und des Betriebs enthält. Das Handbuch sorgfältig für das spätere Nachschlagen aufbewahren. Die Installation und der elektrische Anschluss des Thermo stats ü... -
Seite 74: Erklärung Tasten
3 - ERKLÄRUNG DER TASTEN Multifunktionstaste «Mode» die Bedeutung ist von der jeweils aktiven Funktion oder des aktiven Menüs abhängig: Mode bei kurzem Drücken Temperaturwechsel von Komfort zu NACHTABSENKUNG (Einsparung) und umgekehrt, bei langem Drücken (3 Sek.) Aufruf des Menüs, Back = Rückkehr zum vorherigen Eintrag, Ausstieg aus den Menüs Mode Taste... -
Seite 75: Installation
5 - INSTALLATION INSTALLATION DES GERÄTS: UNABHÄNGIG - FEST Die Raumthermostat ist vorzugsweise auf einer Höhe von 1,50 ÷ 1,60 m vom Boden zu installieren, entfernt von Wärmequellen, Lüftungswegen, Türen oder Fenstern und allem, was die Betriebstüchtigkeit beeinträchtigen könnte (Abb. 1 - Abb. 2). 5.1 - INSTALLATIONSBEISPIELE Installationsbeispiele in Heizungsanlagen mit Raumthermostat-Steuerung für: (Abb. -
Seite 76: Installation Des Thermostats
5 - INSTALLATION Abb. 5 5.2 - INSTALLATION DE RAUMTHERMOSTAT •Die Netzspannung von dem zu steuernden Gerät abschalten. •Die Grundplatte der Raumthermostat am Unterputzgehäuse (oder an der Wand) befestigen. Dazu die zwei passenden Bohrungen (Abb. 5) verwenden: A-A für rundes Unterputzgehäuse (Durchmesser 60 mm) mit Verschlusshaken für rundes oder quadratisches Unterputzgehäuse mit Schrauben für rechteckiges Unterputzgehäuse (3 Plätze) mit Schrauben Beachte... -
Seite 77: Elektrische Anschlüsse
5 - INSTALLATION 5.3 - ELEKTRISCHE ANSCHLÜSSE Raumthermostat Schalten Sie die Netzspannung von dem zu steuernden Gerät ab. Raumthermostat Die Kabel des zu steuernden Gerätes an die Klemmenleiste am Abb. 8 rückwärtigen Gehäuseteil de Raumthermostat anschließen Anschluss an einen (Abb. 8 oder 9). Durchlauferhitzer Klemme N°... -
Seite 78: Einschalten Der Raumthermostat
6 - EINSCHALTEN DE RAUMTHERMOSTAT Beim ersten Einsetzen der Batterien, führt d Raumthermostat einen Lampentest durch, aktiviert alle Segmente des Displays und zeigt für einige Sekunden die Version der installierten Software an. Der Raumthermostat ist betriebsbereit, und zeigt Folgendes auf dem Display an: die Betriebsart Winter «Heizung», den Sollwert der... -
Seite 79: Verwendung Des Raumthermostates
7 - VERWENDUNG DES RAUMTHERMOSTATES 7.3 - OFF bschaltung de Raumthermostat ) Diese Einstellung dient zum Unterbinden der Funktionen des Raumthermostat , wenn die Heizung oder Kühlung ausgeschaltet bleiben soll. 1 - Im Normalbetrieb de Raumthermostat , durch kurzes Drücken des Knopfs der Thermostat auf gestellt und «... -
Seite 80: Aufrufen Der Menüs
9 - AUFRUFEN DER MENÜS ü Mode Im Normalbetrieb de Raumthermostat wird durch Druck auf die Taste f r Sekunden das erste verfügbare Menü aufgerufen. Oder falls zuvor ein Geheimcode für Benutzer oder Installateur eingegeben wurde, die folgenden Schritte ausführen, um das jeweilige Menü... -
Seite 81: Benutzermenü
10 - BENUTZERMENÜ 10.1 - ÄNDERUNG ODER AUSSCHLUSS DES SOLLWERTS DER FROSTSCHUTZTEMPERATUR Im normalen Betriebszustand de Raumthermostat s , Zugriff auf die Menüs, in dem Sie 5 Sekunden lang gedrückt halten die Taste « Mode » Unter der Position SETTEMP Sollwert mit bestätigen. -
Seite 82: Menü Passwort Be (Benutzer)
10 - BENUTZERMENÜ 10.3 - MENÜ PASSWORT (BENUTZER) 10.3.1 - Eingabe des Benutzerpassworts In der Werkseinstellung wird kein Passwort eingestellt. Im normalen Betriebszustand de Raumthermostat Zugriff auf die Menüs, indem Sie 5 Sekunden lang gedrückt halten die Taste « Mode »... -
Seite 83: Konfigurationsmenü (Installateur)
11 - KONFIGURATIONSMENÜ (Installateur) 11.1 - ZUGANG ZUM KONFIGURATIONSMENÜ A C H T U N G : d e r Z u g a n g z u m Konfigurationsmenü sollte nur durch Installateur oder erfahrene Benutzer erfolgen da die Veränderung einiger Einstellungen den korrekten Betrieb der Anlage gefährden könnte. -
Seite 84: Proportionalen Regelung (Prop)
11 - KONFIGURATIONSMENÜ (Installateur) Alternativ zur thermischen Schaltdifferenz kann die Temperatur auf Art Übertemperatur aufgrund thermischer PROPORTIONALEN REGELUNG (PrOP) erfolgen; die Zyklusdauer Trägheit des Heizkörpers °C/°F kann zwischen 7 und 20 Minuten eingestellt werden (Werkseinstellung 10 Minuten). Mit diesem System kann die gewünschte Temperatur T SET konstanter gehalten werden, wodurch der Nutzer höheren Komfort empfindet und Energie gespart wird. -
Seite 85: Einstellung Der Hysterese Für Die Thermische Schaltdifferenz On-Off
11 - KONFIGURATIONSMENÜ (Installateur) 11.2.2 Einstellung der Hysterese für die thermische Schaltdifferenz ON-OFF Im normalen Betriebszustand de Raumthermostat , Zugriff auf d Menü, durch Gedrückthalten der Taste « Mode ». •Über die Menüfolge Set PROG -> Set REG , On:OF auswählen, dann die Taste OK drücken. -
Seite 86: Änderung Der Maßeinheit Für Die Temperatur
11 - KONFIGURATIONSMENÜ (Installateur) 11.3 ÄNDERUNG DER MAßEINHEIT FÜR DIE TEMPERATUR Raumthermostat ist werksseitig für die Anzeige der Temperatur in Grad Celsius eingestellt; mit dem folgenden Verfahren kann zur Skala in Fahrenheit oder umgekehrt gewechselt werden: Im normalen Betriebszustand de Raumthermostat s , Zugriff auf die Menüs, indem Sie 5 Sekunden lang gedrückt halten... -
Seite 87: Korrektur Der Erfassung Der Raumtemperatur
11 - KONFIGURATIONSMENÜ (Installateur) 11 - MENU PER LA CONFIGURAZIONE (installatore) 11. - KORREKTUR DER ERFASSUNG DER RAUMTEMPERATUR Sollte d Raumthermostat aus irgendeinem Grund an einer Stelle installiert werden, an der die gemessene Raumtemperatur beeinflusst werden kann (z. B. eine Außenwand, die im Winter durchschnittlich kälter und im Sommer wärmer als die restliche Wohnung ist), können am Gerät über 2 verschiedene Parameter sowohl die im Winterbetrieb... -
Seite 88: Sperre Max. Und Min. Temperatur-Sollwerte (Winter- Und Sommerbetrieb)
11 - KONFIGURATIONSMENÜ (Installateur) 11. - BLOCK MAX. und MIN. TEMPERATUR-SOLLWERTE (Winter- und Sommerbetrieb) In einigen besonderen Installationssituationen de Raumthermostat , wie etwa in öffentlichen Gebäuden, Hotels usw. könnte es vorteilhaft sein, die Sollwerte für die Temperaturstufen für die maximale und/oder minimale Temperatur zu begrenzen, um falsche Einstellungen durch unbefugtes Personal zu vermeiden (Energieeinsparung). -
Seite 89: Zyklus Gegen Verkalken
11 - KONFIGURATIONSMENÜ (Installateur) Allgemeine Regel Wenn die eingestellte Solltemperatur Set (Komfort) höher als de eingestellte obere Block sein sollte, wird diese Solltemperatur des Blockes angeglichen. Wenn die eingestellte Solltemperatur Set t oder t2 tiefer als de eingestellte unteren Block sein sollte, wird diese Solltemperatur des Blockes angeglichen. -
Seite 90: Kontrasteinstellung Des Displays
11 - KONFIGURATIONSMENÜ (Installateur) 11.7 - KONTRASTEINSTELLUNG DES DISPLAYS Für die Einstellung stehen 8 Stufen zur Verfügung. Werksseitig wird Stufe 6 eingestellt. Im normalen Betriebszustand d Raumthermostat die Taste Mode für Sek. drücken us der Menüfolge Set PROG -> unter Verwendung der Tasten den Eintrag CONTRAST Set . -
Seite 91: - Ändern Oder Annullieren Des Passworts
11 - KONFIGURATIONSMENÜ (Installateur) Das Passwort des Benutzers gemäß dem Beispiel eingeben •Unter Verwendung der Tasten vier Ziffern (Minuszeichen ausgeschlossen) für eine Zahl zwischen 0000 9999 eingeben, wobei diese oder einzeln durch Drücken der Taste «OK» zu bestätigen sind. Der Thermostat kehrt auf die Haupt-Bildschirmseite des normalen Betriebs zurück. Das Passwort «Benutzer»... -
Seite 92: Reset (Factory Set)
11 - KONFIGURATIONSMENÜ (Installateur) 11.9 - RESET (FACTORY SET) WICHTIG! Das Ausführung von (Reset) wird nur für den Installateur oder erfahrenen Benutzer empfohlen, da damit viele vorher durchgeführte Einstellungen und Programmierungen, auch in Abhängigkeit der Art der Anlage, verloren gehen. •Für den Vorgang: die Taste Mode für Sek. -
Seite 93: Informationen Zur Systemsoftware
11 - KONFIGURATIONSMENÜ (Installateur) 11.10 - INFORMATIONEN ZUR SYSTEMSOFTWARE Firmware Revision Aus dem normalen Betrieb de Raumthermostat die Taste Mode für Sek. Die Position Beispiel: wählen und mit OK bestätigen Set PROG ->, unter Verwendung der Tasten Eintrag INFO SW auswählen um Infos über die installierte Firmware zu erhalten.