Omnitronic TMC-01 Bedienungsanleitung
Usb midi controller

Verwandte Anleitungen für Omnitronic TMC-01


Inhaltszusammenfassung für Omnitronic TMC-01
- Seite 1 BEDIENUNGSANLEITUNG USER MANUAL TMC-01 USB MIDI CONTROLLER © Copyright Für weiteren Gebrauch aufbewahren! Nachdruck verboten! Keep this manual for future needs! Reproduction prohibited!
- Seite 2 2/46 00053491.DOC, Version 1.0...
-
Seite 3: Inhaltsverzeichnis
Inhaltsverzeichnis 1. EINFÜHRUNG ............................... 5 2. SICHERHEITSHINWEISE..........................5 3. BESTIMMUNGSGEMÄSSE VERWENDUNG ....................6 4. GERÄTEBESCHREIBUNG ........................... 7 4.1 Features ..............................7 4.2 Bedienelemente und Anschlüsse des Controllers ................... 8 5. VIRTUAL DJ LE............................12 5.1 Software installieren..........................13 5.2 Installation unter Windows ........................13 5.3 Installation unter Mac .......................... - Seite 4 11045040 This user manual is valid for the article numbers: 11045040 Das neueste Update dieser Bedienungsanleitung finden Sie im Internet unter: You can find the latest update of this user manual in the Internet under: www.omnitronic.com 4/46 00053491.DOC, Version 1.0...
-
Seite 5: Einführung
- sich die letzte Version der Anleitung im Internet herunter laden 1. EINFÜHRUNG Wir freuen uns, dass Sie sich für den OMNITRONIC TMC-01 entschieden haben. Wenn Sie nachfolgende Hinweise beachten, sind wir sicher, dass Sie lange Zeit Freude an Ihrem Kauf haben werden. -
Seite 6: Bestimmungsgemässe Verwendung
Fachhandel vorbehalten! 3. BESTIMMUNGSGEMÄSSE VERWENDUNG Der MIDI-Controller TMC-01 dient zur Steuerung von DJ-Software und wird mit der Software Virtual DJ 6 LE auf CD-ROM geliefert. Die Software simuliert einen Doppel-Audio-Player mit zugehörigem 2-Kanal- Mischpult und eine ganze Reihe von Funktionen, die genau auf die Anforderungen von DJs abgestimmt sind. -
Seite 7: Gerätebeschreibung
4. GERÄTEBESCHREIBUNG 4.1 Features MIDI-Controller inkl. Software Virtual DJ 6 LE • USB-MIDI-Controller für DJs – Abspielen, Mixen und Scratchen von digitalen Audiodateien wie Vinyl • Optimiert für die Steuerung der leistungsstarken MP3- und Video-Mixing-Software Virtual DJ • Auslieferung mit Virtual DJ 6 Limited Edition, Upgrade zum Vorzugspreis möglich •... -
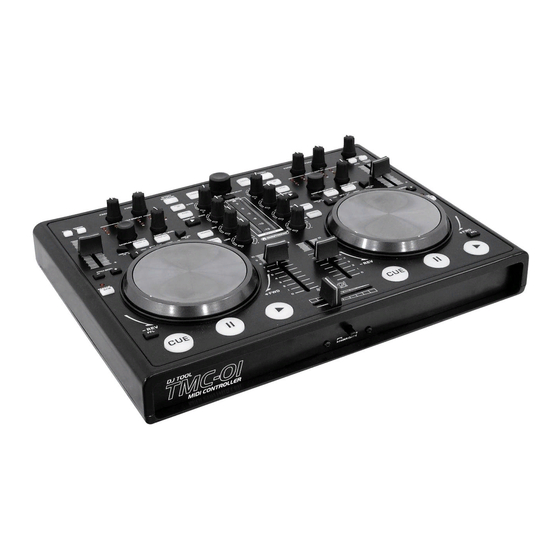
Seite 8: Bedienelemente Und Anschlüsse Des Controllers
Die im Folgenden beschriebenen Funktionen der Bedienelemente gelten für den Betrieb mit der im Lieferumfang enthaltenen DJ-Software Virtual DJ LE. Die Software ist optimal für die Zusammenarbeit mit dem TMC-01 abgestimmt. Wir empfehlen Ihnen die Bedienungsanleitung der Software zu lesen, die Sie mit der Installation erhalten, um alle Funktionen des Programms kennenzulernen. - Seite 9 Kanalfader Tasten PITCH BEND + und - Zum Einstellen der Lautstärke des Kanals. Die Funktion Pitch Bend erzeugt eine temporäre Veränderung der Wiedergabegeschwindigkeit. Solange Taste Sie die Tasten gedrückt halten, wird der Takt des Titels verlangsamt bzw. erhöht. Zum Starten der Wiedergabe und für Stottereffekte. Tasten HOT CUE 1-3 Taste Zum Speichern und Anwählen von bis zu drei Cue-...
- Seite 10 Track-Encoder Tasten LOOP IN, OUT und ADJ Drehen Sie den Regler, um durch die Laufwerke und Tasten Wiedergabe einer taktsynchronen Ordner des Computers zu navigieren. Drücken Sie den Endlosschleife: Encoder, um Unterverzeichnisse anzuwählen. • Taste IN: Bestimmt den Startpunkt einer Schleife. •...
- Seite 11 Betriebsanzeige POWER LED-Pegelanzeige L/R 6-fache LED-Anzeige Stereo-Mastersignals Tasten SEARCH und SCRATCH Bereich -13 dB bis +3 dB. Bestimmen den Betriebsmodus des Jogdials: Taste ENTER/FOLDER SELECT • Taste SEARCH: aktiviert/deaktiviert den schnellen Vor- und Rücklauf Zum Aktivieren des Navigationsbereichs nach dem •...
-
Seite 12: Virtual Dj Le
5. VIRTUAL DJ LE Die Oberfläche der Software ist wie der Controller auch in mehrere Sektionen unterteilt: am oberen Bildschirmrand befindet sich das Rhythmusfenster und der Zugriff auf das Einstellungsmenü. Darunter liegen rechts und links die beiden Decks, die in der Mitte von der Mixersektion getrennt sind. In der unteren Hälfte befindet sich der Naviagtionsbereich. -
Seite 13: Software Installieren
5.1 Software installieren Legen Sie die CD-ROM mit der Software in das CD-Laufwerk Ihres Computers ein. Nach dem Einlesevorgang startet die automatische Installationsroutine. Falls nicht, führen Sie die Datei "install_virtualdj-V6.exe" auf der CD-ROM aus. Folgen Sie nun den Anweisungen des Installations- programms. -
Seite 14: Installation Unter Mac
5.3 Installation unter Mac A. Starten Sie den Installationsvorgang mit B. Lesen Sie den Lizenzvertrag und klicken Sie Continue Continue C. Akzeptieren Sie den Lizenzvertrag mit Agree D. Starten Sie die Installation mit Install E. Geben Sie Ihr Benutzerpasswort ein F. -
Seite 15: Software Aktivieren
5.4 Software aktivieren 1. Starten Sie die Software und geben Sie die Seriennummer, die der CD-ROM beiliegt ein, um die Software zu aktivieren. 2. Die Auto-Update-Anzeige erscheint: Virtual DJ versucht jetzt eine Internetverbindung herzustellen, um nach einer aktualisierten Version des Programms zu suchen. 3. -
Seite 16: Upgrade Und Support
Schaltfläche CONFIG auf. 5.6 Controller mit einer anderen DJ-Software betreiben Jedem Drehregler, Rad, Fader und jeder Taste des TMC-01 ist eine eigene MIDI-Note (Note no.), MIDI- CC (Control Change)-Nummer (CC no.) sowie ein MIDI-Kanal zugewiesen. Jedes Mal wenn Sie einen Regler oder eine Taste betätigen, sendet der TMC-01 MIDI-Daten, die von Ihrer Musiksoftware... -
Seite 17: Controller Anschliessen
6. CONTROLLER ANSCHLIESSEN 1. Stellen Sie den Controller auf einer ebenen, waagerechten Fläche auf. 2. Stellen Sie den Wahlschalter für die Stromversorgung über die USB-Schnittstelle in die Position USB. 3. Verbinden Sie den USB-Anschluss des Controllers über das mitgelieferte USB-Verbindungskabel mit Ihrem Computer. -
Seite 18: Controller Konfigurieren
Informationen über weitere Anwendungsmöglichkeiten finden Sie in der Bedienungsanleitung der Software. 1. Rufen Sie mit der Schaltfläche CONFIG das Einstellungsmenü der Software auf und konfigurieren Sie das Programm im Register Soundkarten für den Betrieb mit dem TMC-01. 2. Abhängig von der Soundkarte Ihres Computers können im Feld Ausgänge verschiedene Einstellungen gewählt werden: Grundeinstellung SINGLE OUTPUT (ein Ausgangskanal), HEADPHONES (ein... -
Seite 19: Bedienung
7. BEDIENUNG Nachdem Sie Virtual DJ installiert und den Controller angeschlossen und konfiguriert haben, ist das System einsatzbereit. Im Folgenden ist beschrieben, wie Sie mit dem Controller die Software steuern. Die Software verfügt über zahlreiche weitere Funktionen. Eine vollständige Bedienungsanleitung in deutscher Sprache kann unter virtualdj.com heruntergeladen werden. -
Seite 20: Titel Abspielen
7.2 Titel abspielen TMC-01 Virtual DJ 1. Drücken Sie die Taste (blaue LED leuchtet auf), um die Wiedergabe ab dem Titelanfang (Zeitindex 00:00) zu starten oder klicken Sie die rechte Maustaste über der Taste , um den Titel ab dem ersten Bassschlag zu starten. -
Seite 21: Vorhören Der Decks
7.4 Vorhören der Decks Wenn die Soundkarte des Computers über die Software für die Vorhörfunktion konfiguriert wurde ( Abschnitt 6.1 Controller konfigurieren), können Sie jedes der Decks über einen Kopfhörer abhören, auch wenn der jeweilige Kanalfader zugezogen ist. Dadurch lässt sich z. B. ein Titel anspielen, ein Cue-Punkt setzen oder eine Endlosschleife einstellen, ohne dass das Publikum mithört. -
Seite 22: Wiedergabegeschwindigkeit Verändern
7.8 Wiedergabegeschwindigkeit verändern Die Geschwindigkeit lässt sich mit dem Pitch-Schieberegler um bis zu ±100 % ändern. 1. Der Einstellbereich für die Geschwindigkeit ist auf ±25 % voreingestellt. Durch mehrfaches Drücken der Taste PITCH kann der Einstellbereich geändert werden: ±100 %, ±6 %, ±12 % und wieder auf ±25 %. 2. -
Seite 23: Effektfunktionen
8. EFFEKTFUNKTIONEN 8.1 Effekte zuschalten 1. Wählen Sie durch wiederholtes Drücken der Taste EFFECT SELECTOR den gewünschten Effekt. Im Display des Decks wird der gewählte Effekt angezeigt. Effekt Backspin Flanger Beat Grid Flippin Double Brake Key Changer Echo Vocals+ Filter 2. -
Seite 24: Reinigung Und Wartung
9. REINIGUNG UND WARTUNG LEBENSGEFAHR! Vor Wartungsarbeiten unbedingt allpolig vom Netz trennen! Das Gerät sollte regelmäßig von Verunreinigungen wie Staub usw. gereinigt werden. Verwenden Sie zur Reinigung ein fusselfreies, angefeuchtetes Tuch. Auf keinen Fall Alkohol oder irgendwelche Lösungsmittel zur Reinigung verwenden! Im Geräteinneren befinden sich keine zu wartenden Teile.