Inhaltsverzeichnis
Werbung
Copyright Notice:
No part of this installation guide may be reproduced, transcribed, transmitted, or trans-
lated in any language, in any form or by any means, except duplication of documentation
by the purchaser for backup purpose, without written consent of ASRock Inc.
Products and corporate names appearing in this guide may or may not be registered
trademarks or copyrights of their respective companies, and are used only for identifica-
tion or explanation and to the owners' benefit, without intent to infringe.
Disclaimer:
Specifications and information contained in this guide are furnished for informational use
only and subject to change without notice, and should not be constructed as a commit-
ment by ASRock. ASRock assumes no responsibility for any errors or omissions that may
appear in this guide.
With respect to the contents of this guide, ASRock does not provide warranty of any kind,
either expressed or implied, including but not limited to the implied warranties or condi-
tions of merchantability or fitness for a particular purpose. In no event shall ASRock, its
directors, officers, employees, or agents be liable for any indirect, special, incidental, or
consequential damages (including damages for loss of profits, loss of business, loss of
data, interruption of business and the like), even if ASRock has been advised of the pos-
sibility of such damages arising from any defect or error in the guide or product.
This device complies with Part 15 of the FCC Rules. Operation is subject to the following
two conditions:
(1) this device may not cause harmful interference, and
(2) this device must accept any interference received, including interference that
may cause undesired operation.
CALIFORNIA, USA ONLY
The Lithium battery adopted on this motherboard contains Perchlorate, a toxic substance
controlled in Perchlorate Best Management Practices (BMP) regulations passed by the
California Legislature. When you discard the Lithium battery in California, USA, please
follow the related regulations in advance.
"Perchlorate Material-special handling may apply, see
www.dtsc.ca.gov/hazardouswaste/perchlorate"
ASRock Website: http://www.asrock.com
Published July 2013
Copyright © 2013 ASRock INC. All rights reserved.
1
ASRock X79 Extreme4 Motherboard
Werbung
Inhaltsverzeichnis

Verwandte Anleitungen für ASROCK X79 Extreme4


Inhaltszusammenfassung für ASROCK X79 Extreme4
- Seite 1 ASRock. ASRock assumes no responsibility for any errors or omissions that may appear in this guide. With respect to the contents of this guide, ASRock does not provide warranty of any kind, either expressed or implied, including but not limited to the implied warranties or condi- tions of merchantability or fitness for a particular purpose.
-
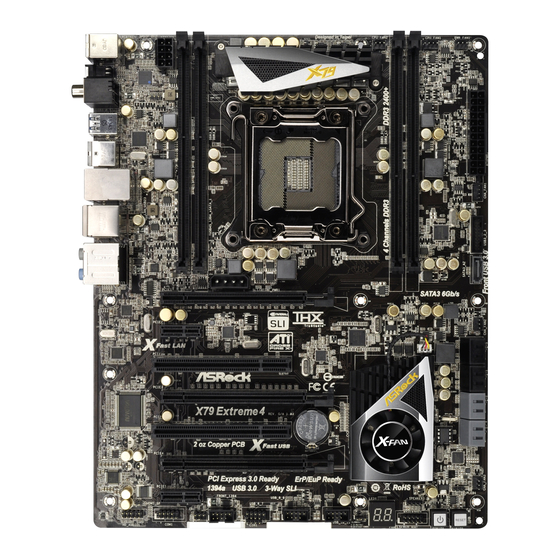
Seite 2: Motherboard-Layout
Chassis Fan Connector (CHA_FAN3) PCI Slot (PCI1, Black) Power LED Header (PLED1) PCI Express 2.0 x1 Slot (PCIE2, Black) Reset Switch (RSTBTN) PCI Express 3.0 x16 Slot (PCIE1, Black) Power Switch (PWRBTN) SLI / XFIRE Power Connector ASRock X79 Extreme4 Motherboard... - Seite 3 See the table below for connection details in accordance with the type of speaker you use. TABLE for Audio Output Connection Audio Output Channels Front Speaker Rear Speaker Central / Bass Side Speaker (No. 9) (No. 6) (No. 7) (No. 5) ASRock X79 Extreme4 Motherboard...
- Seite 4 “ok”. Choose “2CH”, “4CH”, “6CH”, or “8CH” and then you are allowed to select “Realtek HDA Primary output” to use Rear Speaker, Central/Bass, and Front Speaker, or select “Realtek HDA Audio 2nd output” to use front panel audio. *** eSATA3 connector supports SATA Gen3 in cable 1M. ASRock X79 Extreme4 Motherboard...
-
Seite 5: Package Contents
In case any modifications of this manual occur, the updated version will be available on ASRock website without further notice. You may find the latest VGA cards and CPU support lists on ASRock website as well. ASRock website http://www.asrock.com If you require technical support related to this motherboard, please visit our website for specific information about the model you are using. -
Seite 6: Specifications
- PCIE x1 Gigabit LAN 10/100/1000 Mb/s - Broadcom BCM57781 - Supports Wake-On-LAN - Supports Energy Efficient Ethernet 802.3az - Supports PXE Rear Panel I/O I/O Panel - 1 x PS/2 Mouse Port - 1 x PS/2 Keyboard Port ASRock X79 Extreme4 Motherboard... - Seite 7 - 1 x USB 3.0 header (supports 2 USB 3.0 ports) - 1 x Dr. Debug with LED Smart Switch - 1 x Clear CMOS Switch with LED - 1 x Power Switch with LED - 1 x Reset Switch with LED ASRock X79 Extreme4 Motherboard...
- Seite 8 / XP / XP 64-bit compliant (see CAUTION 17) Certifications - FCC, CE, WHQL - ErP/EuP Ready (ErP/EuP ready power supply is required) (see CAUTION 18) * For detailed product information, please visit our website: http://www.asrock.com ASRock X79 Extreme4 Motherboard...
- Seite 9 4GB for the reservation for system usage under Windows ® Vista / XP. For Windows OS with 64-bit CPU, there is no such limita- tion. You can use ASRock XFast RAM to utilize the memory that Win- ® dows cannot use. ®...
- Seite 10 Apple devices, it is also capable of Charging the BC 1.1 standard smart devices. Please refer to page 33 for details. 12. ASRock XFast RAM is a new function that is included into ASRock Ex- treme Tuning Utility (AXTU). It fully utilizes the memory space that cannot ®...
- Seite 11 13. ASRock X-FAN will be automatically activated only when the system rises to a certain temperature under heavy-loading or overclocking. Normally, ASRock X-FAN will remain deactivated to give users the quietest comput- ing experience. The target temperature and fan speed settings can be configured in the UEFI setup utility.
-
Seite 12: Cpu Installation
CPU surface is unclean or if there are any bent pins in the socket. Do not force to insert the CPU into the socket if above situation is found. Otherwise, the CPU will be seriously damaged. ASRock X79 Extreme4 Motherboard... - Seite 13 Step 2-1. Hold the CPU by the edge with the triangle mark(Pin 1) on your upper right corner. Step 2-2. Locate Pin1 and the two orientation key notches. orientation key notch alignment key Pin1 orientation key notch alignment key 2011-Pin CPU 2011-Pin Socket ASRock X79 Extreme4 Motherboard...
- Seite 14 Step 3-2. Press down the right load lever, and secure it with the load plate tab under the retention tab. Step 3-3. Press down the left load lever, and secure it with the load plate tab under the retention tab. ASRock X79 Extreme4 Motherboard...
- Seite 15 Step 5. Connect fan header with the CPU fan connector on the motherboard. Step 6. Secure excess cable with tie-wrap to ensure the cable does not interfere with fan operation or contact other components. ASRock X79 Extreme4 Motherboard...
- Seite 16 DIMM if you force the DIMM into the slot at incorrect orientation. Step 3. Firmly insert the DIMM into the slot until the retaining clips at both ends fully snap back in place and the DIMM is properly seated. ASRock X79 Extreme4 Motherboard...
- Seite 17 Step 4. Align the card connector with the slot and press firmly until the card is completely seated on the slot. Step 5. Fasten the card to the chassis with screws. Step 6. Replace the system cover. ASRock X79 Extreme4 Motherboard...
- Seite 18 PCIE1 slot and the other graphics card to PCIE3 slot. Make sure that the cards are properly seated on the slots. Step2. If required, connect the auxiliary power source to the PCI Express graph- ics cards. ASRock X79 Extreme4 Motherboard...
- Seite 19 Step3. Align and insert the ASRock SLI_Bridge_2S Card to the goldfingers on each graphics card. Make sure the ASRock SLI_Bridge_2S Card is firmly in place. ASRock SLI_Bridge_2S Card Step4. Connect a VGA cable or a DVI cable to the monitor connector or the DVI connector of the graphics card that is inserted to PCIE1 slot.
- Seite 20 Please make sure that both power connectors on the PCI Express graph- ics card are connected. Repeat this step on the three graphics cards. Step3. Align and insert ASRock 3-Way SLI-2S1S Bridge Card to the goldfingers on each graphics card. Make sure ASRock 3-Way SLI-2S1S Bridge Card is firmly in place.
- Seite 21 B. From the pop-up menu, select Set SLI and PhysX configuration. In Set PhysX GPU acceleration item, please select Enabled. In Select an SLI configuration item, please select Enable SLI. And click Apply. C. Reboot your system. D. You can freely enjoy the benefit of SLI feature. ASRock X79 Extreme4 Motherboard...
- Seite 22 Set PhysX GPU acceleration item, please select Enabled. In Select an SLI configuration item, please select Enable SLI. And click Apply. F. Reboot your system. G. You can freely enjoy the benefit of SLI or Quad SLI feature. ASRock X79 Extreme4 Motherboard...
- Seite 23 D. You can freely enjoy the benefit of 3-Way SLI feature. ® * SLI appearing here is a registered trademark of NVIDIA Technologies Inc., and is used only for identification or explanation and to the owners’ benefit, without intent to infringe. ASRock X79 Extreme4 Motherboard...
-
Seite 24: Operation
AMD graphics card manuals for detailed installation guide. Step 1. Insert one Radeon graphics card into PCIE1 slot and the other Radeon graphics card to PCIE3 slot. Make sure that the cards are properly seated on the slots. ASRock X79 Extreme4 Motherboard... - Seite 25 Connect the DVI monitor cable to the DVI connector on the Radeon graphics card on PCIE1 slot. (You may use the DVI to D-Sub adapter to convert the DVI connector to D-Sub interface, and then connect the D-Sub monitor cable to the DVI to D-Sub adapter.) ASRock X79 Extreme4 Motherboard...
- Seite 26 Connect the DVI monitor cable to the DVI connector on the Radeon graph- ics card on PCIE1 slot. (You may use the DVI to D-Sub adapter to convert the DVI connector to D-Sub interface, and then connect the D-Sub monitor cable to the DVI to D-Sub adapter.) ASRock X79 Extreme4 Motherboard...
- Seite 27 Double-click “ATI Catalyst Control Center”. Click “View”, select “CrossFi- ”, and then check the item “Enable CrossFireX ”. Select “2 GPUs” and click “Apply” (if you install two Radeon graphics cards). Select “3 GPUs” and click “OK” (if you install three Radeon graphics cards). ASRock X79 Extreme4 Motherboard...
- Seite 28 This motherboard supports Surround Display upgrade. With the external add-on PCI Express VGA cards, you can easily enjoy the benefits of Surround Display feature. For the detailed instruction, please refer to the document at the following path in the Support CD: ..\ Surround Display Information ASRock X79 Extreme4 Motherboard...
- Seite 29 The Multi-Angle CIR Receiver does not support Hot-Plug function. Please install it before you boot the system. * ASRock Smart Remote is only supported by some of ASRock motherboards. Please refer to ASRock website for the motherboard support list: http://www.asrock.com...
- Seite 30 No. 14 2. USB 2.0 port (USB6) header see p.2 No. 30 With ASRock XFast Charger feature, you can freely enjoy the quick charging convenience by installing the USB cable on these two ports. ASRock X79 Extreme4 Motherboard...
- Seite 31 Please be noted that the password, date, time, user default profile, 1394 GUID and MAC address will be cleared only if the CMOS battery is removed. The Clear CMOS Switch has the same function as the Clear CMOS jumper. ASRock X79 Extreme4 Motherboard...
- Seite 32 USB 2.0 Headers Besides six default USB 2.0 ports on the I/O panel, there (9-pin USB_6_7) are three USB 2.0 headers on (see p.2 No. 30) this motherboard. Each USB 2.0 header can support two USB 2.0 ports. ASRock X79 Extreme4 Motherboard...
- Seite 33 HDA to function correctly. Please follow the instruction in our manual and chassis manual to install your system. 2. If you use AC’97 audio panel, please install it to the front panel audio header as below: ASRock X79 Extreme4 Motherboard...
- Seite 34 LED, hard drive activity LED, speaker and etc. When connecting your chassis front panel module to this header, make sure the wire assignments and the pin assign-ments are matched correctly. ASRock X79 Extreme4 Motherboard...
- Seite 35 (see p.12 No. 7) (3-pin SB_FAN1) (see p.12 No. 12) CPU Fan Connectors Please connect the CPU fan cable to the connector and (4-pin CPU_FAN1) match the black wire to the (see p.12 No. 6) ground pin. ASRock X79 Extreme4 Motherboard...
- Seite 36 Though this motherboard provides 8-pin ATX 12V power connector, it can still work if you adopt a traditional 4-pin ATX 12V power supply. To use the 4-pin ATX power supply, please plug your power supply along with Pin 1 and Pin 5. 4-Pin ATX 12V Power Supply Installation ASRock X79 Extreme4 Motherboard...
- Seite 37 HDMI_SPDIF header, providing SPDIF audio output to HDMI (2-pin HDMI_SPDIF1) VGA card, allows the system to (see p.2 No. 35) connect HDMI Digital TV/ projector/LCD devices. Please connect the HDMI_SPDIF connector of HDMI VGA card to this header. ASRock X79 Extreme4 Motherboard...
-
Seite 38: Smart Switches
Reset Switch is a smart switch, allowing users to quickly reset (RSTBTN) the system. (see p.2 No. 22) Clear CMOS Switch Clear CMOS Switch is a smart switch, allowing users to quickly (CLRCBTN) clear the CMOS values. (see p.3 No. 17) ASRock X79 Extreme4 Motherboard... - Seite 39 CPU post-memory initialization is started 0x33 CPU post-memory initialization. Cache initialization 0x34 CPU post-memory initialization. Application Processor(s) (AP) initialization 0x35 CPU post-memory initialization. Boot Strap Processor (BSP) selection 0x36 CPU post-memory initialization. System Management Mode (SMM) initialization ASRock X79 Extreme4 Motherboard...
- Seite 40 Reserved for future AMI progress codes 0xF8 Recovery PPI is not available 0xF9 Recovery capsule is not found 0xFA Invalid recovery capsule 0xFB – 0xFF Reserved for future AMI error codes 0x60 DXE Core is started 0x61 NVRAM initialization ASRock X79 Extreme4 Motherboard...
- Seite 41 0x9C USB Detect 0x9D USB Enable 0x9E – 0x9F Reserved for future AMI codes 0xA0 IDE initialization is started 0xA1 IDE Reset 0xA2 IDE Detect 0xA3 IDE Enable 0xA4 SCSI initialization is started 0xA5 SCSI Reset ASRock X79 Extreme4 Motherboard...
- Seite 42 No Console Input Devices are found 0xD8 Invalid password 0xD9 Error loading Boot Option (LoadImage returned error) 0xDA Boot Option is failed (StartImage returned error) 0xDB Flash update is failed 0xDC Reset protocol is not available ASRock X79 Extreme4 Motherboard...
- Seite 43 Using SATA / SATA2 / SATA3 HDDs without NCQ function STEP 1: Set up UEFI. A. Enter UEFI SETUP UTILITY Advanced screen SATA Configuration. B. Set the option “SATA Mode” to [IDE]. ® STEP 2: Install Windows XP / XP 64-bit OS on your system. ASRock X79 Extreme4 Motherboard...
- Seite 44 PCI / PCIE buses are in the fixed mode so that FSB can operate under a more stable overclocking environment. Please refer to the warning on page 9 for the possible overclocking risk before you apply Untied Overclocking Technology. ASRock X79 Extreme4 Motherboard...
- Seite 45 It will display the Main Menu automatically if “AUTORUN” is enabled in your computer. If the Main Menu does not appear automatically, locate and double-click on the file “ASSETUP.EXE” from the BIN folder in the Support CD to display the menus. ASRock X79 Extreme4 Motherboard...
- Seite 46 1. Einführung Wir danken Ihnen für den Kauf des ASRock X79 Extreme4 Motherboard, ein zu- verlässiges Produkt, welches unter den ständigen, strengen Qualitätskontrollen von ASRock gefertigt wurde. Es bietet Ihnen exzellente Leistung und robustes Design, gemäß der Verpflichtung von ASRock zu Qualität und Halbarkeit. Diese Schnel- linstallationsanleitung führt in das Motherboard und die schrittweise Installation...
-
Seite 47: Spezifikationen
- 7.1 CH HD Audio mit dem Inhalt Schutz (Realtek ALC898 Audio Codec) - Premium Blu-ray-Audio-Unterstützung - PCIE x1 Gigabit LAN 10/100/1000 Mb/s - Broadcom BCM57781 - Unterstützt Wake-On-LAN - Unterstützt energieeffizientes Ethernet 802.3az - Unterstützt PXE ASRock X79 Extreme4 Motherboard... - Seite 48 - 1 x COM-Anschluss-Header - 1 x HDMI_SPDIF-Anschluss - 1 x IEEE 1394-Anschluss - 1 x Betriebs-LED-Header - CPU/Gehäuse/Strom/SB lüfter-Anschluss - 24-pin ATX-Netz-Header - 8-pin anschluss für 12V-ATX-Netzteil - SLI/XFIRE-Netz-Header - Anschluss für Audio auf der Gehäusevorderseite ASRock X79 Extreme4 Motherboard...
- Seite 49 Stromspannung Multianpassung CD d’assistance - Treiber, Dienstprogramme, Antivirussoftware (Probeversion), CyberLink MediaEspresso 6.5-Testversion Einzigartige - ASRock Extreme Tuning Utility (AXTU) (siehe VORSICHT 6) Eigenschaft - ASRock Sofortstart - ASRock Instant Flash (siehe VORSICHT 7) - ASRock APP Charger (siehe VORSICHT 8)
- Seite 50 Speicher zur Nutzung durch das System reserviert wird. Unter ® Windows OS mit 64-Bit-CPU besteht diese Einschränkung nicht. Sie ® können ASRock XFast RAM zur Nutzung des Speichers, den Windows nicht verwenden kann, einsetzen. ® Aktuell unterstützt der Intel Sandy Bridge-E-Sockel-2011-Prozessor PCIE 3.0 nicht;...
- Seite 51 APP Charger. Installieren Sie einfach den ASRock APP Charger-Treiber; dadurch lädt sich Ihr iPhone wesentlich schneller über einen Computer- auf – genaugenommen bis zu 40 % schneller als zuvor. Der ASRock APP Charger ermöglicht Ihnen die schnelle Aufladung mehrerer Apple-Geräte gleichzeitig;...
- Seite 52 Zusätzlich zu Apple-Geräten kann es auch intelligente Geräte mit dem BC 1.1-Standard aufladen. Hinweise finden Sie auf Seite 30. 12. ASRock XFast RAM ist eine neue Funktion, die beim ASRock Extreme Tuning Utility (AXTU) integriert ist. Sie ermöglicht die vollständige Nut- ®...
- Seite 53 Aktualisierung ein Stromausfall auftritt, setzt ASRock Crashless BIOS die BIOS-Aktualisierung automatisch fort, sobald die Stromversorgung wiederhergestellt ist. Bitte beachten Sie, dass alle BIOS-Dateien zuerst im Stammverzeichnis Ihres USB-Datenträgers platziert werden müssen. Diese Funktion wird nur von USB 2.0-Ports unterstützt. 15. Obwohl dieses Motherboard stufenlose Steuerung bietet, wird Over- clocking nicht empfohlen.
-
Seite 54: Einstellung Der Jumper
Sie zuerst das System hoch. Fahren Sie es dann vor der CMOS-Löschung herunter. Bitte beachten Sie, dass Kennwort, Datum, Uhrzeit, benutzerdefiniertes Profil, 1394 GUID und MAC-Adresse nur gelöscht werden, wenn die CMOS-Batterie entfernt wird. Der CMOS löschen-Schalter hat dieselbe Funktion wie der CMOS löschen-Jumper. ASRock X79 Extreme4 Motherboard... - Seite 55 Datenübertragungsrate bis 6,0 Gb/s. Serial ATA- (SATA-) SJedes Ende des SATA Datenkabel Datenkabels kann an die SATA / SATA2 / SATA3 Festplatte (Option) oder das SATA2 / SATA3 Verbindungsstück auf dieser Hauptplatine angeschlossen werden. ASRock X79 Extreme4 Motherboard...
- Seite 56 (siehe S.2 - No. 31) Anschluss für Audio auf Dieses Interface zu einem der Gehäusevorderseite Audio-Panel auf der Vorder seite Ihres Gehäuses, (9-Pin HD_AUDIO1) ermöglicht Ihnen eine bequeme (siehe S.2 - No. 36) Anschlussmöglichkeit und Kontrolle über Audio-Geräte. ASRock X79 Extreme4 Motherboard...
- Seite 57 Gehäuses. Die LED leuchtet, wenn das System in Betrieb ist. Die LED blinkt, wenn sich das System im Ruhezustand S1 befindet. Die LED schaltet sich aus, wenn sich das System in den Modi S3/S4 befindet oder ausgeschaltet ist (S5). ASRock X79 Extreme4 Motherboard...
- Seite 58 (siehe S.2 - No. 13) kann über UEFI oder AXTU gesteuert werden. CHA_FAN1-, (3-pin CHA_FAN3) CHA_FAN2- und CHA_FAN3- (siehe S.2 - No. 20) unterstützen Lüftersteuerung. SB_FAN1 unterstützt geräuscharmen Lüfter. (3-pin PWR_FAN1) (siehe S.2 - No. 7) ASRock X79 Extreme4 Motherboard...
- Seite 59 Sie den Stecker mit Pin 1 und Pin 13 ein. Installation eines 20-pol. ATX-Netzteils ATX 12V Anschluss Bitte schließen Sie an diesen Anschluss die ATX 12V (8-pin ATX12V1) Stromversorgung an. (siehe S.2 - No. 1) ASRock X79 Extreme4 Motherboard...
- Seite 60 (siehe S.2 - No. 32) IEEE-1394 Header (FRONT_1394) auf dieser Hauptplatine. Dieser IEEE-1394 Header kann einen IEEE-1394 Port unterstützen. COM-Anschluss-Header Dieser COM-Anschluss- Header wird verwendet, um (9-pin COM1) ein COM-Anschlussmodul zu (siehe S.2 - No. 34) unterstützen. ASRock X79 Extreme4 Motherboard...
- Seite 61 Schnellschalter, mit dem (RSTBTN) Benutzer das System schnell (siehe S.2 - No. 22) zurücksetzen können. CMOS löschen-Schalter Der CMOS löschen-Schalter ist ein Schnellschalter, mit dem (CLRCBTN) Benutzer die CMOS-Werte (siehe S.3 - No. 17) schnell löschen können. ASRock X79 Extreme4 Motherboard...
- Seite 62 ASSETUP.EXE im BIN-Verzeichnis der Support-CD, um die Menüs aufzurufen. Das Setup-Programm soll es Ihnen so leicht wie möglich machen. Es ist menüges- teuert, d.h. Sie können in den verschiedenen Untermenüs Ihre Auswahl treffen und die Programme werden dann automatisch installiert. ASRock X79 Extreme4 Motherboard...
-
Seite 63: Contenu Du Paquet
1. Introduction Merci pour votre achat d’une carte mère ASRock X79 Extreme4, une carte mère très fiable produite selon les critères de qualité rigoureux de ASRock. Elle offre des performances excellentes et une conception robuste conformément à l’engagement d’ASRock sur la qualité et la fiabilité au long terme. -
Seite 64: Spécifications
, 3-Way SLI et SLI Audio - 7,1 CH HD Audio avec protection de contenu (Realtek ALC898 Audio Codec) - Prise en charge de l’audio Premium Blu-ray - PCIE x1 Gigabit LAN 10/100/1000 Mb/s - Broadcom BCM57781 ASRock X79 Extreme4 Motherboard... - Seite 65 - 5 x connecteurs SATA3, prennent en charge un taux de transfert de données pouvant aller jusqu’à 6.0Go/s - 1 x En-tête du module infrarouge - 1 x Barrette pour module à infrarouges grand public - 1 x En-tête de port COM ASRock X79 Extreme4 Motherboard...
- Seite 66 - Utilitaire ASRock Extreme Tuning (AXTU) unique (voir ATTENTION 6) - ASRock l’Instant Boot - ASRock Instant Flash (voir ATTENTION 7) - Chargeur ASRock APP (voir ATTENTION 8) - ASRock XFast USB (voir ATTENTION 9) - ASRock XFast LAN (voir ATTENTION 10)
- Seite 67 (voir ATTENTION 15) - ASRock U-COP (voir ATTENTION 16) - Garde d’échec au démarrage (B.F.G.) - DEL veilleuse Surveillance - Détection de la température de l’UC système - Mesure de température de la carte mère - Tachéomètre ventilateur processeur/châssis/pouvoir/SB ventilateur - Ventilateur silencieux pour unité...
- Seite 68 ASRock Extreme Tuning Utility (AXTU). Site Web de ASRock : http://www.asrock.com O ASRock Instant Flash é um utilitário de flash do BIOS incorporado na memória Flash ROM. Esta prática ferramenta de actualização do BIOS permite-lhe actualizar o BIOS do sistema sem necessitar de entrar nos ®...
- Seite 69 USB. Les performances réelles dépendent des propriétés du périphérique. 10. ASRock XFast LAN fournit un accès Internet plus rapide, avec les avan- tages suivants. Priorisation d’application LAN : Vous pouvez configurer votre priorité d’application idéalement et/ou ajouter des nouveaux pro- grammes.
- Seite 70 être réglés via l’utilitaire de configuration UEFI. 14. ASRock Crashless BIOS permet aux utilisateurs de mettre à jour leur BIOS sans qu’ils aient à craindre un plantage ou une défaillance. Si l’alimentation venait à...
- Seite 71 CMOS. Veuillez noter que le mot de passe, la date, l’heure, le profil par défaut de l’utilisateur, 1394 GUID et l’adresse MAC seront effacés seulement si la batterie du CMOS est enlevée. Le commutateur Effacer CMOS présente la même fonction que le cavalier Effacer CMOS. ASRock X79 Extreme4 Motherboard...
- Seite 72 USB 2.0 par défaut sur le (USB_6_7 br.9) panneau E/S, il y a trois (voir p.2 No. 30) embases USB 2.0 sur cette carte mère. Chaque embase USB 2.0 peut prendre en charge 2 ports USB 2.0. ASRock X79 Extreme4 Motherboard...
- Seite 73 Connecteur audio panneau C’est une interface pour un câble avant audio en façade (HD_AUDIO1 br. 9) qui permet le branchement et (voir p.2 No. 36) le contrôle commodes de périphériques audio. ASRock X79 Extreme4 Motherboard...
- Seite 74 Ce voyant DEL est allumé lorsque le système est en marche. Le voyant DEL clignote lorsque le système est en mode veille S1. Le voyant DEL est éteint lorsque le système est en mode veille S3/ S4 ou lorsqu’il est éteint (S5). ASRock X79 Extreme4 Motherboard...
- Seite 75 (CHA_FAN3 br. 3) SB_FAN1 prend en charge la (voir p.2 No. 20) fonction ventilateur silencieux. (PWR_FAN1 br. 3) (voir p.2 No. 7) (SB_FAN1 br. 3) (voir p.2 No. 12) ASRock X79 Extreme4 Motherboard...
- Seite 76 ATX 12V, il peut toujours travailler si vous adoptez une approche traditionnelle à 4 broches ATX 12V alimentation. Pour utiliser l’alimentation des 4 broches ATX, branchez votre alimentation avec la broche 1 et la broche 5. 4-Installation d’alimentation à 4 broches ATX 12V ASRock X79 Extreme4 Motherboard...
- Seite 77 SPDIF vers la carte VGA HDMI, (voir p.2 No. 35) et permettant au système de se connecter au un téléviseur numérique HDMI /un projecteur / un périphérique LCD. Veuillez brancher le connecteur HDMI_SPDIF de la carte VGA HDMI sur ce connecteur. ASRock X79 Extreme4 Motherboard...
- Seite 78 à l’utilisateur de réinitia- liser rapidement le système. Interrupteur d’effacement de CMOS L’interrupteur d’effacement de CMOS est un interrupteur (CLRCBTN) (voir p.3 No. 17) rapide qui permet à l’utilisateur d’effacer rapidement les valeurs du CMOS. ASRock X79 Extreme4 Motherboard...
- Seite 79 CD-ROM. Le Menu principal s’affiche automatiquement si “AUTORUN” est activé dans votre ordinateur. Si le Menu principal n’apparaît pas automatiquement, locali- sez dans le CD technique le fichier “ASSETUP.EXE” dans le dossier BIN et double- cliquez dessus pour afficher les menus. ASRock X79 Extreme4 Motherboard...
-
Seite 80: Contenuto Della Confezione
1. Introduzione Grazie per aver scelto una scheda madre ASRock X79 Extreme4, una scheda madre affidabile prodotta secondo i severi criteri di qualità ASRock. Le prestazioni eccellenti e il design robusto si conformano all’impegno di ASRock nella ricerca della qualità e della resistenza. - Seite 81 - 7.1 CH HD Audio con protezioni contenuti (Realtek ALC898 Audio Codec) - Supporto audio Blu-ray Premium - PCIE x1 Gigabit LAN 10/100/1000 Mb/s - Broadcom BCM57781 - Supporta Wake-On-LAN - Supporto di Energy Efficient Ethernet 802.3az - Supporta PXE Pannello I/O Panel ASRock X79 Extreme4 Motherboard...
- Seite 82 - 8-pin connettore ATX 12V - Collettore alimentazione SLI/XFIRE - Connettore audio sul pannello frontale - 3 x Collettore USB 2.0 (supporta 6 porte USB 2.0) - 1 x Collettore USB 3.0 (supporta 2 porte USB 3.0) ASRock X79 Extreme4 Motherboard...
- Seite 83 - Driver, Utilità, Software AntiVirus (versione di prova), supporto CyberLink MediaEspresso 6.5 Trial Caratteristica - ASRock Extreme Tuning Utility (AXTU) (vedi ATTENZIONE 6) speciale - ASRock Instant Boot - ASRock Instant Flash (vedi ATTENZIONE 7) - Caricatore ASRock APP Charger (vedi ATTENZIONE 8)
- Seite 84 ® all’uso del sistema sotto Windows 7 / Vista / XP. Per Windows OS con CPU 64-bit, non c’è tale limitazione. Si può usare ASRock XFast RAM per ® fare uso della memoria che Windows non può utilizzare. ® Attualmente il processore Intel Socket 2011 Sandy Bridge-E non sup- porta PCIE 3.0, tuttavia questa scheda madre è...
- Seite 85 USB. Le prestazioni dipendono dalle proprietà del dispositivo. 10. ASRock XFast LAN offre un accesso a Internet più veloce, che compren- de i seguenti benefici. Priorità alle applicazioni LAN: è possibile configu- rare la priorità assegnata alle applicazioni in modo ideale e/o aggiungere...
- Seite 86 è possibile riconoscere con facilità quali dati si stanno trasferendo in streaming. 11. ASRock XFast Charger è la tecnologia migliore e più rapida per caricare i propri dispositivi mobili da PC. Grazie alla straordinaria porta USB di XFast Charger, gli utenti sono sicuri di poter godere di un’esperienza...
- Seite 87 EuP deve soddisfare lo standard secondo cui l’effi- cienza energetica in standby di 5 v è più alta del 50% con un consumo di corrente di 100 mA. Per la scelta di un’alimentatore predisposto EuP consigliamo di verificare ulteriori dettagli con il produttore. ASRock X79 Extreme4 Motherboard...
- Seite 88 CMOS. Notare che password, data, ore, profilo utente predefinito, 1394 GUID e indirizzo MAC saranno cancellati solo se è rimossa la batteria della CMOS. L’interruttore Clear CMOS (Cancella CMOS) ha la stessa funzione del jumper Clear CMOS. ASRock X79 Extreme4 Motherboard...
- Seite 89 Collettore USB 2.0 Oltre alle sei porte USB 2.0 predefinite nel pannello I/O, la (9-pin USB_6_7) scheda madre dispone di (vedi p.2 Nr. 30) tre intestazioni USB 2.0. Ciascuna intestazione USB 2.0 supporta due porte USB 2.0. ASRock X79 Extreme4 Motherboard...
- Seite 90 HI-FI, TV, ecc. Connettore audio sul È un’interfaccia per il cavo del pannello frontale pannello audio. Che consente connessione facile e controllo (9-pin HD_AUDIO1) dei dispositivi audio. (vedi p.2 Nr. 36) ASRock X79 Extreme4 Motherboard...
- Seite 91 Il LED è acceso quando il sistema è operativo. Il LED continua a lampeggiare quando il sistema è in stato di standby S1. Il LED è spento quando il sistema è in stato di sospensione /ibernazione S3/S4 oppure spento (S5). ASRock X79 Extreme4 Motherboard...
- Seite 92 (3-pin CHA_FAN2) CHA_FAN3 supportano la (vedi p.2 Nr. 13) funzione Fan Control. SB_FAN1 supporta la funzione Quiet Fan. (3-pin CHA_FAN3) (vedi p.2 Nr. 20) (3-pin PWR_FAN1) (vedi p.2 Nr. 7) (3-pin SB_FAN1) (vedi p.2 Nr. 12) ASRock X79 Extreme4 Motherboard...
- Seite 93 4-pin ATX 12V. Per usare tale fornitura elettrica 4-pin ATX 12V, prego collegare la presa elettrica al Pin 1 e Pin 5. Installazione elettrica 4-Pin ATX 12V ASRock X79 Extreme4 Motherboard...
- Seite 94 SPDIF su scheda (2-pin HDMI_SPDIF1) HDMI VGA, consente al (vedi p.2 Nr. 35) sistema di collegare dispositivi per TV digitale HDMI/proiettori/ LCD . Collegare il connettore HDMI_SPDIF della scheda VGA HDMI a questo header. ASRock X79 Extreme4 Motherboard...
- Seite 95 (vedi p.2 Nr. 22) rapidamente il sistema. Interruttore pulizia CMOS L’interruttore di pulizia CMOS è un interruttore rapido che (CLRCBTN) consente agli utenti di cancellare (vedi p.3 Nr. 17) velocemente i valori CMOS. ASRock X79 Extreme4 Motherboard...
- Seite 96 Inserire il CD di supporto nel lettore CD-ROM. Se la funzione “AUTORUN” è attivata nel computer, apparirà automaticamente il Menù principale. Se il Menù principale non appare automaticamente, posizionarsi sul file “ASSETUP.EXE” nel CESTINO del CD di supporto e cliccare due volte per visualizzare i menù. ASRock X79 Extreme4 Motherboard...
-
Seite 97: Contenido De La Caja
1. Introducción Gracias por su compra de ASRock X79 Extreme4 placa madre, una placa de con- fianza producida bajo el control de calidad estricto y persistente. La placa madre provee realización excelente con un diseño robusto conforme al compromiso de calidad y resistencia de ASRock. - Seite 98 - 7.1 CH HD Audio con Protección de Contenido (Realtek ALC898 Audio Codec) - Compatible con audio Blu-ray de alta calidad - PCIE x1 Gigabit LAN 10/100/1000 Mb/s - Realtek RTL8111E - Soporta Wake-On-LAN - Compatible con Ethernet 802.3az de bajo consumo energético ASRock X79 Extreme4 Motherboard...
- Seite 99 - 1 x Base de conexiones del módulo de infrarrojos para el consumidor - 1x En-tête de port COM - 1 x cabecera HDMI_SPDIF - 1 x cabecera IEEE 1394 - 1 x cabecera de indicador LED de encendido ASRock X79 Extreme4 Motherboard...
- Seite 100 CD de soport - Controladores, utilidades, software de antivirus (versión de prueba), Prueba de CyberLink MediaEspresso 6.5 Característica - ASRock Extreme Tuning Utility (AXTU) (vea ATENCIÓN 6) Única - ASRock Instant Boot - ASRock Instant Flash (vea ATENCIÓN 7) - ASRock APP Charger (vea ATENCIÓN 8) - ASRock XFast USB (vea ATENCIÓN 9)
- Seite 101 4GB para que el sistema pueda funcionar bajo Windows ® 7 / Vista / XP. Para equipos con Windows OS con CPU de 64-bit, no existe dicha limitación. Puede usar ASRock XFast RAM para utilizar la ® memoria que no puede usar Windows ASRock X79 Extreme4 Motherboard...
- Seite 102 . Gracias a esta utilidad, sólo necesitará pulsar <F6> durante la fase POST o pulsar <F2> para acceder al menú de configu- ración del BIOS y a la utilidad ASRock Instant Flash. Ejecute esta her- ramienta y guarde el archivo correspondiente al sistema BIOS nuevo en su unidad flash USB, unidad de disco flexible o disco duro para poder actualizar el BIOS con sólo pulsar un par de botones, sin necesidad de...
- Seite 103 11. XFast Charger de ASRock es la mejor tecnología y la más rápida para cargar dispositivos móviles a través de su PC. Con el magnífico puerto USB de XFast Charger, los usuarios disfrutarán con toda seguridad de una experiencia de carga rápida en cualquier momento.
- Seite 104 UEFI. 14. ASRock Crashless BIOS le permite a los usuarios actualizar su BIOS sin miedo de que ocurra un fallo. Si ocurre una interrupción en el suministro de energía durante el proceso de actualización del BIOS, ASRock Crash-...
- Seite 105 Tenga en cuenta que la contraseña, la fecha, la hora, el perfil predeterminado del usuario, el GUID 1394 y la dirección MAC solamente se borrará si la batería CMOS se quita. El conmutador Borrar CMOS tiene la misma función que el puente Borrar CMOS. ASRock X79 Extreme4 Motherboard...
- Seite 106 USB 2.0 predeterminados en el (9-pin USB_6_7) panel de E/S, hay tres bases (vea p.2, N. 30) de conexiones USB 2.0 en esta placa base. Cada una de estas bases de conexiones admite dos puertos USB 2.0. ASRock X79 Extreme4 Motherboard...
- Seite 107 TV, etc. Conector de audio de Este es una interface para panel frontal cable de audio de panel frontal que permite conexión y control (9-pin HD_AUDIO1) conveniente de apparatos de (vea p.2, N. 36) Audio. ASRock X79 Extreme4 Motherboard...
- Seite 108 El LED se enciende cuando el sistema esté en funcionamiento. El LED parpadea cuando el sistema se encuentre en estado de suspensión S1. El LED se apaga cuando el sistema se encuentre en estado de suspensión S3/S4 o se apaga (S5). ASRock X79 Extreme4 Motherboard...
- Seite 109 (vea p.2, N. 9) masa. CHA_FAN1, CHA_FAN2 y CHA_FAN3 admiten control (3-pin CHA_FAN2) de ventilador. SB_FAN1 admite (vea p.2, N. 13) ventilador silencioso. (3-pin CHA_FAN3) (vea p.2, N. 20) (3-pin PWR_FAN1) (vea p.2, N. 7) ASRock X79 Extreme4 Motherboard...
- Seite 110 Pins 1 y 13. Instalación de una Fuente de Alimentación ATX de 20 Pins Cabezal de alimentación ATX 12V Conecte la fuente de alimentación ATX 12V a su (8-pin ATX12V1) cabezal. (vea p.2, N. 1) ASRock X79 Extreme4 Motherboard...
- Seite 111 (HDMI_SPDIF1 de 2 pin) VGA HDMI, permite al sistema (vea p.2, N. 35) conectarse a dispositivos de TV Digital HDMI / proyectores / Dispositivos LCD. Conecte el conector HDMI_SPDIF de la tarjeta VGA HDMI a esta cabecera. ASRock X79 Extreme4 Motherboard...
- Seite 112 CMOS. Conmutador de borrado de memoria CMOS El conmutador de encendido es un conmutador rápido que (CLRCBTN) (vea p.3, N. 17) permite al usuario encender / apagar rápidamente el sistema. ASRock X79 Extreme4 Motherboard...
- Seite 113 Para iniciar la instalación, ponga el CD en el lector de CD y se des- plegará el Menú Principal automáticamente si «AUTORUN» está habilitado en su computadora. Si el Menú Principal no aparece automáticamente, localice y doble-pulse en el ar- chivo “ASSETUP.EXE” para iniciar la instalación. ASRock X79 Extreme4 Motherboard...
- Seite 114 1. Введение Благодарим вас за покупку материнской платы ASRock X79 Extreme4 надежной материнской платы, изготовленной в соответствии с постоянно предъявляемыми ASRock жесткими требованиями к качеству. Она обеспечивает превосходную производительность и отличается отличной конструкцией, которые отражают приверженность ASRock качеству и долговечности.
- Seite 115 - Поддержка PXE Разъемы ввода- I/O Panel вывода на задней - 1 x порт мыши PS/2 панели - 1 x порт клавиатуры PS/2 - 1 x порт Coaxial SPDIF Out - 1 x порт Optical SPDIF Out ASRock X79 Extreme4 Motherboard...
- Seite 116 - 1 x кнопка Clear CMOS со светодиодом переключение - 1 x кнопка Power Switch со светодиодом - 1 x кнопка Reset Switch со светодиодом BIOS - 64Mb AMI UEFI Legal BIOS с поддержкой rpaфичеckoro интеpфeйca ASRock X79 Extreme4 Motherboard...
- Seite 117 - ASRock XFast USB (см. ОСТОРОЖНО, пункт 9) - ASRock XFast LAN (см. ОСТОРОЖНО, пункт 10) - Зарядное устройство ASRock XFast (см. ОСТОРОЖНО, пункт 11) - ASRock XFast RAM (см. ОСТОРОЖНО, пункт 12) - ASRock X-FAN (см. ОСТОРОЖНО, пункт 13) - ASRock Crashless BIOS (см.
- Seite 118 стерео. Поддерживаются 2-, 4-, 6- и 8-канальный режимы вывода звука. Соответствующие схемы подключения описаны на стр. 3. Служебная программа ASRock Extreme Tuning Utility (AXTU) – это универсальное средство тонкой настройки различных функций системы с удобным и понятным интерфейсом, включающая разделы Hardware Monitor (Наблюдение...
- Seite 119 работать с программой ASRock Extreme Tuning Utility (AXTU), посетите наш сайт в Интернете. Адрес сайта ASRock: http://www.asrock.com ASRock Instant Flash – программа для прошивки BIOS, встроенная в Flash ROM. Данное средство для обновления BIOS умеет работать без входа в ®...
- Seite 120 использовать для зарядки стандартных интеллектуальных устройств BC 1.1. Подробная информация представлена на стр. 30. 12. ASRock XFast RAM – новая функция, входящая в состав утилиты ASRock Extreme Tuning Utility (AXTU). Благодаря ей, используется область памяти, использование которой не возможно на процессоре с...
- Seite 121 нужны соответствующие материнская плата и блок питания. Компания Intel предложила, что совместимый с EuP блок питания должен обеспечивать 50% эффективность линии питания 5V при потреблении 100 мА (в режиме ожидания). Сверьтесь с информацией производителей блоков питания, чтобы выбрать модель с поддержкой EuP. ASRock X79 Extreme4 Motherboard...
- Seite 122 затем завершить ее работу. Примите во внимание, что пароль, дата, время, профиль пользователя по умолчанию, идентификатор 1394 GUID и MAC-адрес будут очищены только тогда, когда будет извлечена из своего гнезда батарейка CMOS. Переключатель Clear CMOS работает так же, как перемычка Clear CMOS. ASRock X79 Extreme4 Motherboard...
- Seite 123 Колодка USB 2.0 Помимо шесть стандартных портов USB 2.0 на панели ввода- (9-контактный USB_6_7) вывода, на данной материнской (см. стр. 2, п. 30) плате предусмотрено три разъема USB 2.0. Каждый разъем USB 2.0 поддерживает два порта USB 2.0. ASRock X79 Extreme4 Motherboard...
- Seite 124 (см. стр. 2, п. 31) устройств, например, устройств HI-FI, телевизоров и т.д. Аудиоразъем передней Этот интерфейс предназначен панели для присоединения аудиокабеля передней панели, (9-контактный HD_AUDIO1) обеспечивающего удобное (см. cтр. 2, п. 36) подключение аудиоустройств и управление ими. ASRock X79 Extreme4 Motherboard...
- Seite 125 корпуса. Способ выключения системы с помощью кнопки питания можно настроить. RESET (кнопка сброса): Подключите к этим контактам кнопку сброса на передней панели корпуса. Нажмите кнопку сброса для перезагрузки компьютера, если компьютер «завис» и нормальную перезагрузку выполнить не удается. ASRock X79 Extreme4 Motherboard...
- Seite 126 (см. стр. 2, п. 9) заземления. CHA_FAN1, CHA_FAN2 и CHA_FAN3 поддерживают функцию (3-контактный CHA_FAN2) управления вентилятором. (см. стр. 2, п. 13) SB_FAN1 поддерживает бесшумный вентилятор. (3-контактный CHA_FAN3) (см. стр. 2, п. 20) (3-контактный PWR_FAN1) (см. стр. 2, п. 7) ASRock X79 Extreme4 Motherboard...
- Seite 127 ивает 24-штыревой разъем питания ATX, работа будет продолжаться, даже если адаптируется традиционный 20-штыревой разъем питания ATX. Для использования 20-штыревого разъема питания ATX вставьте источник питания вместе со штекером 1 и штекером 13. Установка 20-штыревого разъема питания ATX ASRock X79 Extreme4 Motherboard...
- Seite 128 имеются две группы контактов (см. стр. 2, п. 32) на материнской плате для подключения двух дополнительных портовIEEE 1394 каждая. Колодка COM-порта Данная колодка COM-порта позволяет подключить модуль (9-контактный COM1) порта COM. (см. стр. 2, п. 34) ASRock X79 Extreme4 Motherboard...
- Seite 129 (см. стр. 2, п. 23) систему. Reset Switch Кнопка Reset Switch позволяет (RSTBTN) быстро перезагрузить систему. (см. стр. 2, п. 22) Clear CMOS Switch Кнопка Clear CMOS Switch (CLRCBTN) позволяет быстро сбросить (см. стр. 3, п. 17) установки CMOS. ASRock X79 Extreme4 Motherboard...
- Seite 130 Если в вашем компьютере включена функция автозапуска (AUTORUN), то на экране автоматически появится главное меню компакт-диска (Main Menu). Если этого не произошло, найдите в папке BIN на компакт-диске поддержки файл ASSETUP.EXE и дважды щелкните на нем, чтобы открыть меню. ASRock X79 Extreme4 Motherboard...
- Seite 131 önceden haber verilmeksizin değişebilir. Bu belgede değişiklik yapılması durumun -da, güncelleştirilmiş sürüm ayrıca haber verilmeksizin ASRock web sitesinde sunulur. En son VGA kartlarını ve CPU destek listelerini de ASRock web sitesinde bulabilirsiniz. ASRock web sitesi http://www.asrock.com Bu anakartla ilgili teknik desteğe ihtiyacınız olursa, kullandığınız modele özel bilgiler için lütfen web sitemizi ziyaret edin.
- Seite 132 - PCIE x1 Gigabit LAN 10/100/1000 Mb/sn - Broadcom BCM57781 - LAN’da Uyan özelliğini destekler - Enerji Verimli Ethernet 802.3az desteği - PXE’yi destekler Arka Panel G/З Paneli G/З - 1 x PS/2 Fare Portu - 1 x PS/2 Klavye Portu ASRock X79 Extreme4 Motherboard...
- Seite 133 - 1 x USB 3.0 fiş (2 USB 3.0 portu destekler) - 1 x Dr. Debug (7 Segmentli Hata Ayıklama LED’i) Akıllı Anahtar - 1 x LED’li CMOS’u Temizleme Anahtarı - 1 x LED’li Güç Anahtarı - 1 x LED’li Sıfırlama Anahtarı ASRock X79 Extreme4 Motherboard...
- Seite 134 64-bit / XP / XP 64-bit uyumlu (bkz. DİKKAT 17) Sertifikalar - FCC, CE, WHQL - ErP/EuP Hazır (ErP/EuP hazır güç kaynağı gerekli) (bkz. DİKKAT 18) * Ayrıntılı ürün bilgileri için lütfen web sitemizi ziyaret edin: http://www.asrock.com ASRock X79 Extreme4 Motherboard...
- Seite 135 Düzgün bağlantı için sayfa 3'teki tabloyu kontrol edin. ASRock Extreme Tuning Utility (AXTU) hepsi bir arada bir araç olup kullanıcı ile dost bir arayüzde farklı sistem işlevlerinin ince ayarını yapmak için kullanılmakta olup buna Donanım Monitörü, Fan Kontrolü, Hız Aşırtma, OC DNA ve IES dahildir.
- Seite 136 Touch gibi Apple cihazlarınızı şarj etmek için daha hızlı ve daha özgür bir biçimde şarj etmek istiyorsanız, ASRock sizin için mükemmel bir çözüm hazırladı - ASRock APP Charger. Sadece APP Charger sürücünü kurarak, iPhone’unuzu bilgisayarınızdan daha çabuk ve eskisinden 40% daha hızlı...
- Seite 137 şimdiye kadar olmadığı kadar hızlandırırken önceden ziyaret edilen web sitelerinin yüklenme süresini kısaltır. Ayrıca Adobe Photoshop’ın hızını 5 kat arttırır. ASRock XFast RAM’in başka bir avantajı da, SSD veya HDD’lerinize erişim sıklığını azaltarak kullanım ömürlerini uzatması. 13. ASRock X-FAN, sadece aşırı yüklenme veya hız aşırtma altında belirli bir sıcaklığa ulaştığında otomatik olarak devreye sokulacaktır.
- Seite 138 CMOS temizleme işlemini gerçekleştirmeden önce kapatmanız gereklidir. Parola, tarih, saat, kullanıcı varsayılan profili, 1394 GUID ve MAC adresinin yalnızca CMOS pili çıkarıldığında temizleneceğini lütfen aklınızda bulundurunuz. CMOS Devresini Temizle, CMOS Ayarı'nı Temizle ile aynı işleve sahiptir. ASRock X79 Extreme4 Motherboard...
- Seite 139 G/Ç panelindeki varsayılan altı USB 2.0 portundan başka, (9-pinli USB_6_7) bu anakartta üç USB 2.0 fişi (bkz. s.2 No. 30) bulunur. Her USB 2.0 fişi iki USB 2.0 portunu destekler. (9-pinli USB_8_9) (bkz. s.2 No. 29) ASRock X79 Extreme4 Motherboard...
- Seite 140 A. Mic_IN'i (MIC) MIC2_L'ye bağlayın. B. Audio_R'yi (RIN) OUT2_R'ye ve Audio_L'yi (LIN) OUT2_L'ye bağlayın. C. Ground'u (GND) Ground'a (GND) bağlayın. D. MIC_RET ve OUT_RET yalnızca HD ses paneli içindir. Bunları AC’97 ses paneli için bağlamanız gerekmez. ASRock X79 Extreme4 Motherboard...
- Seite 141 çalışma LED’i, hoparlör vb. bulunur. Kasa ön panel modülünüzü bu bağlantıya bağlarken, kablo atamalarının ve pin atamalarının doğru biçimde eşleştirildiğinden emin olun. Kasa Hoparlörü Fişi Lütfen kasa hoparlörünü bu fişe bağlayın. (4-pinli SPEAKER1) (bkz. s.2 No. 24) ASRock X79 Extreme4 Motherboard...
- Seite 142 Bu anakart 4-Pinli CPU fan (Sessiz Fan) desteği sağlasa da, 3-Pinli CPU fan hızı kontrol işlevi olmadan bile hala başarılı bir şekilde çalışabilir. 3-Pinli CPU fanı bu konektördeki CPU fan konektörüne bağlamayı planlıyorsanız, lütfen Pin 1-3'e bağlayın. Pin 1-3 Bağlı 3-Pinli Fanı Takma ASRock X79 Extreme4 Motherboard...
- Seite 143 IEEE 1394 Fişi Bu anakartta G/Ç panelindeki bir varsayılan IEEE 1394 portu (9-pinli FRONT_1394) nun yanı sıra, bir IEEE 1394 fiş (bkz. s.2 No. 32) (FRONT_1394) de bulunur. Bu IEEE 1394 fişi bir IEEE 1394 portunu destekler. ASRock X79 Extreme4 Motherboard...
- Seite 144 Sıfırlama Anahtarı, kullanıcıların hızlı bir şekilde (RSTBTN) sistemi sıfırlamalarını (bkz. s.2 No.22) sağlayan akıllı bir anahtardır. CMOS'u Temizleme Anahtarı CMOS'u Temizleme Anahtarı, kullanıcıların hızlı bir şekilde (CLRSBTN) CMOS değerlerini (bkz. s.3 No.17) temizlemelerini sağlayan akıllı bir anahtardır. ASRock X79 Extreme4 Motherboard...
- Seite 145 Destek CD'sini kullanmaya başlamak için, CD'yi CDROM sürücünüze takın. Bilgisayarınızda "OTOMATİK KULLAN" özelliği etkinleştirilmişse, Ana Menüyü otomatik olarak görüntüler. Ana Menü otomatik olarak görüntülenmezse, menüleri görüntülemek için Destek CD'sinin “BIN” klasöründeki "ASSETUP.EXE" dosyasını bulun ve çift tıklatın. ASRock X79 Extreme4 Motherboard...
- Seite 146 1. 제품소개 ASRock 의 X79 Extreme4 메인 보드를 구매하여 주신것에 대하여 감사 드립니다 . 이 메인보드는 엄격한 품질관리 하에 생산되어진 신뢰성 있는 메인보드 입니다 . 이 제품은 고 품격 디자인과 함께 ASRock 의 우수한 품질과 최고의 안정성을 자랑하고 있습니다 . 이 빠른 설치 안내서에는 마더보드에 대한 설명과 단계별 설치 방법이 실...
- Seite 147 - PCIE x1 Gigabit LAN 10/100/1000 Mb/s - Broadcom BCM57781 - 웨이크 - 온 - 랜 지원 - 절전형 이더넷 802.3az 지원 - PXE 지원 후면판 I/O I/O Panel - 1 개 PS/2 마우스 포트 - 1 개 PS/2 키보드 포트 ASRock X79 Extreme4 Motherboard...
- Seite 148 - USB 2.0 헤더 3 개 (6 개의 추가 USB 2.0 포트를 지원하는 헤더 2 개 ) - USB 3.0 헤더 1 개 (2 개의 추가 USB 3.0 포트를 지원하는 헤더 2 개 ) - Dr. Debug (7 세그먼트 디버그 LED) 1 개 ASRock X79 Extreme4 Motherboard...
- Seite 149 - 드라이버 , 유틸리티 , 백신 소프트웨어 ( 시험판 ), CyberLink MediaEspresso 6.5 평가판 특점및 특성 - ASRock Extreme Tuning Utility (AXTU) ( 주의 6 참조 ) - ASRock Instant Boot - ASRock Instant Flash ( 주의 7 참조 ) - ASRock APP Charger ( 주의...
- Seite 150 ® 실제 메모리 크기는 4 GB 이하일 수 있습니다 . 64 비트 CPU 와 Windows ® 의 경우 그런 한계가 없습니다 . ASRock XFast RAM 을 사용하여 Windows 에서 사용할 수 없는 메모리를 이용할 수 있습니다 . ® 현재 Intel Socket 2011 Sandy Bridge-E 프로세서는...
- Seite 151 ASRock XFast USB 는 USB 스토리지 장치 성능을 높여줍니다 . 성능은 장치의 속성에 따라 다를 수 있습니다 . 10. ASRock XFast LAN 은 더 빠른 인터넷 접속과 아래와 같은 이점을 제공 합니다 . LAN 응용 프로그램 우선순위 결정 : 응용 프로그램 우선순위를...
- Seite 152 없는 메모리 공간을 사용합니다 . ASRock XFast RAM 은 이전에 방문했 던 웹사이트의 로딩 시간을 단축하며 웹 서핑을 이전보다 더 빠르게 합니 다 . 또한 Adobe Photoshop 속도를 5 배 증가 시킵니다 . ASRock XFast RAM 의 또 다른 장점은 SSD 또는 HDD 의 액세스 빈도를 줄여 수명을 확...
- Seite 153 삭제해야 하는 경우 먼저 시스템을 부팅하고 CMOS 를 종료하고 삭제 작업을 해 야 합니다 . CMOS 배터리를 제거할 경우에만 암호 , 날짜 , 시간 , 사용자 기본 프로파일 , 1394 GUID, MAC 주소가 삭제됩니다 . Clear CMOS Switch는 Clear CMOS 점퍼와 동일한 기능을 갖고 있습니다. ASRock X79 Extreme4 Motherboard...
- Seite 154 는 6 개의 기본 USB 2.0 포트 (9 핀 USB_6_7) 외에도 USB 2.0 헤더가 3 개 있 (2 페이지 , 30 번 항목 참조 ) 습니다 . 각각의 USB 2.0 헤더 는 2 개의 USB 2.0 포트를 지원 할 수 있습니다 . ASRock X79 Extreme4 Motherboard...
- Seite 155 (2 페이지 , 31 번 항목 참조 ) 될 수 있습니다 . 전면부 오디오 콘넥터 이 콘넥터는 오디오 장치를 편리하게 조절하고 연결할 수 (9 핀 HD_AUDIO1) 있는 전면 오디오 인터페이스 ( 2 페이지 , 36 번 항목 참조 ) 입니다 . ASRock X79 Extreme4 Motherboard...
- Seite 156 (S5) 상태에 있을 때는 LED 가 꺼져 있습니다 . HDLED( 하드 드라이브 동작 LED): 섀시 전면 패널의 하드 드라이브 동작 LED 에 연결합니다 . 하드 드라이 브가 데이터를 읽거나 쓰고 있을 때 LED 가 켜져 있습니다 . ASRock X79 Extreme4 Motherboard...
- Seite 157 (3 핀 CHA_FAN3) 가 조용합니다 . (2 페이지 , 20 번 항목 참조 ) (3 핀 PWR_FAN1) (2 페이지 , 7 번 항목 참조 ) (3 핀 SB_FAN1) (2 페이지 , 12 번 항목 참조 ) ASRock X79 Extreme4 Motherboard...
- Seite 158 ATX 12V 파워 콘넥터 ATX 12V 플러그가 달린 전원공급장치를 이 커넥터에 (8 핀 ATX12V1) 연결해야 충분한 전력을 (2 페이지 , 1 번 항목 참조 ) 공급할 수 있습니다 . 그러지 않을 경우 전원을 켤 수 없습니다 . ASRock X79 Extreme4 Motherboard...
- Seite 159 (2 핀 HDMI_SPDIF1) HDMI_SPDIF 헤더는 시스템 (2 페이지 , 35 번 항목 참조 ) 이 HDMI 디지털 TV/ 프로젝 터 /LCD 장치에 연결할 수 있 게 합니다 . HDMI VGA 카드의 HDMI_SPDIF 커넥터를 이 헤 더에 연결하십시오 . ASRock X79 Extreme4 Motherboard...
- Seite 160 (2 페이지 , 22 번 항목 참조 ) 할 수 있습니다 . CMOS 삭제 스위치 CMOS 삭제 스위치는 빠른 스위 (CLRCBTN) 치로서 , 사용자가 CMOS 값을 (3 페이지 , 17 번 항목 참조 ) 빠르게 삭제할 수 있습니다 . ASRock X79 Extreme4 Motherboard...
- Seite 161 메뉴를 모니터에 디스플레이 시켜 줄 것입니다 . 만일 자동으로 메인 메뉴가 나타나 지 않는다면 , 보조 CD 의 디스플레이 메뉴 안에 있는 BIN 폴더 ASSETUP.EXE 파일 을 더블 클릭하여 주시기 바랍니다 . (D: \ BIN \ ASSETUP.EXE, D: 는 CD-ROM 드라이브 ) ASRock X79 Extreme4 Motherboard...
- Seite 162 ASRock X79 Extreme4 クイックインストレーションガイド ASRock X79 Extreme4 サポート CD 4 x シリアル ATA (SATA) データケーブル(オプション) 1 x I/O パネルシールド 1 x ASRock SLI_Bridge_2S カード 1 x ASRock 3-Way SLI-2S1S Bridge カード ASRockからのお知らせ ... ® Windows 7 / 7 64-bit / Vista / Vista 64-bit でより良い性能を得るに...
- Seite 163 - Premium Blu-ray オーディオのサポー - PCIE x1 Gigabit LAN 10/100/1000 Mb/s - Realtek RTL8111E - Wake-On-LAN をサポート - Energy Efficient Ethernet 802.3az をサポート - PXE をサポート リアパネル I/O Panel - PS/2 マウスポート x 1 - PS/2 キーボードポート x 1 ASRock X79 Extreme4 Motherboard...
- Seite 164 - SLI/XFIRE 電源コネクター - フロントパネルオーディオコネクター - USB 2.0 ヘッダー (USB 2.0 用 6 ポートをサポート ) x 3 - USB 3.0 ヘッダー (USB 3.0 用 2 ポートをサポート ) x 1 - 1 x Dr. Debug (7- セグメント Debug LED) ASRock X79 Extreme4 Motherboard...
- Seite 165 - ASRock Extreme チューニングユーティリティ (AXTU) ( 注意 6 参照 ) - ASRock インスタントブート - ASRock Instant Flash ( 注意 7 参照 ) - ASRock APP ヱャージャー ( 注意 8 を参照 ) - ASRock XFast USB ( 注意 9 を参照 ) - ASRock XFast LAN ( 注意...
- Seite 166 対応しています。 PCIE 3.0 が有効かどうかは Intel 社の CPU に依存し ます。 将来の CPU のアップデートとリリースに関する情報は、Intel 社ウェ ブサイトを確認してください。 マイク入力の場合、このマザーボードはステレオとモノラルモードをど ちらもサポートします。オーディオ出力の場合、このマザーボードは 2 チャンネル、4 チャンネル、6 チャンネルと 8 チャンネルモードをサポー トします。正しい接続については、3 ページの表をチェックしてくださ い。 ASRock Extreme Tuning Utility (AXTU) は、 分かりやすいインターフェイ スでさまざまなシステム機能を微調整するオールインワンツールで、ハ ードウェアモニタ、ファンコントロール、オーバークロッキング、OC DNA、ES などを含んでいます。ハードウェアモニタでは、システムの 主要な読み込みを示します。ファンコントロールでは、調整するファン 速度と温度を示します。オーバークロッキングでは、CPU 周波数をオー バークロックして最適のシステムパフォーマンスを出すことができま す。OC DNA では、プロファイルとして OC 設定を保存し友人と共有す...
- Seite 167 んで、同じ OC 設定にすることが可能です。IES ( インテリジェントエネ ルギーサーバー ) では、電圧レギュレータにより、CPU コアがアイドル になっているときコンピュータの性能を犠牲にすることなく、多くの出 力位相を削減して効率性の向上を図ります。ASRock Extreme Tuning Utility (AXTU) の操作手順については、当社 Web サイトをご覧ください。 ASRock Web サイト :http://www.asrock.com ASRock Instant Flash は、Flash ROM(フラッシュ ROM)に組み込まれ ている BIOS フラッシュユーティリティです。この便利な BIOS 更新ツー ® ルにより、MS-DOS あるいは Windows のように最初にオペレーティン グシステムに入る必要なしに、システム BIOS を更新することができま...
- Seite 168 ASRock XFast RAM は、AXTU(ASRock Extreme Tuning Utility)を ® 含む新機能です。Windows オペレーティングシステム 32 ビット CPU の下 では使用できないメモリ空間を利用します。 ASRock XFast RAM は、以 前に訪れたウェブサイトの表示にかかる時間を短縮し、これまで以上に 迅速にネットサーフィンを行えるようにします。 また、Adobe Photoshop の処理速度を 5 倍に押し上げます。 ASRock XFast RAM の他 の利点は、お使いの SSD または HDD へのアクセスを減らして、それら の寿命を延ばすことです。 システムが過負荷またはオーバークロックにより、一定の温度を超えた 場合のみ、ASRock X-FAN は自動的にアクティブになります。 通常、 ASRock X-FAN はユーザーに最も静かなコンピュータエクスピアリアン スを提供するために非アクティブに保持されます。 目的温度と目的ス...
- Seite 169 抑える必要があります。EuP 規格を満たすには、EuP 対応マザーボード と EuP 対応電源が必要です。 Intel の提案に従い、EuP 対応電源装置は 規格を満たす必要があります、つまり 5v のスタンバイ電力効率は 100 mA の消費電流下で 50% 以上でなければなりません。 EuP 対応電源装 置を選択する場合、電 源装置製造元に詳細を確認するようにお勧めし ます。 ASRock X79 Extreme4 Motherboard...
- Seite 170 パ ス ワ ー ド、 日 付、 時 刻、 ユ ー ザ ー デ フ ォ ル ト の プ ロ フ ァ イ ル を 忘 れ ず に メ モ し て く だ さ い。 1394 GUID と MAC アドレスは、CMOS バッテリを取り外した場合のみ消去されます。 クリアCMOSスイッチには、クリアCMOSジャンパと同じ機能があり ます。 ASRock X79 Extreme4 Motherboard...
- Seite 171 I/O パネルには、デフォルトの 6 つの USB 2.0 ポート以外に、この (9 ピン USB_6_7) マザーボードに 3 つの USB 2.0 ページ2, アイテム 30 を参照 ヘッダが搭載されています。それ ぞれの USB 2.0 ヘッダは 2 つの USB 2.0 ポートをサポートできま す。 (9 ピン USB_8_9) ページ2, アイテム 29 を参照 ASRock X79 Extreme4 Motherboard...
- Seite 172 フロントオーディオパネルコネクタ このコネクタは、オーディオ機器 との便利な接続とコントロールを (9 ピン HD_AUDIO1) 可能にするフロンとオーディオパ ページ2, アイテム 36 を参照 ネルのためのインターフェイスで す。 ハイディフィニションオーディオはジャックセンシングをサポー トしますが、正しく機能するためにシャーシのパネルワイヤが HAD をサポートする必要があります。このマニュアルとシャー シのマニュアルの指示に従って、システムを取り付けてくださ い。 AC’97 オーディオパネルを使用する場合、次のように前面パ ネルのオーディオヘッダに取り付けてください。 Mic_IN (MIC) を MIC2_L に接続します。 Audio_R (RIN) を OUT2_R に、Audio_L (LIN) を OUT2_L に接続します。 ASRock X79 Extreme4 Motherboard...
- Seite 173 RESET ( リセットスイッヱ ): シャーシの前面パネルに付いているリセットスイッチに接続します。コ ンピュータがフリーズし、正常な再起動をしない場合は、リセットス イッチを押してコンピュータを再起動します。 PLED ( システム電源 LED): シャーシの前面パネルに付いている電源ステータスインジケータに接続 します。LED は、システムが動作しているときに点灯します。LED はシ ステムが S1 スリープ状態のときに点滅します。システムが S3 または S4 スリープ状態になるか、電源オフ (S5) になると、LED は消灯します。 HDLED ( ハードドライブアクティビティ LED): シャーシの前面パネルに付いているハードドライブアクティビティ LED に接続します。LED は、ハードドライブがデータの読み込みまたは書き 込み動作をしているときに点灯します。 前面パネルのデザインはシャーシによって異なります。前面パネルモ ジュールは、主に電源スイッチ、リセットスイッチ、電源 LED、ハード ASRock X79 Extreme4 Motherboard...
- Seite 174 (3 ピン CHA_FAN3) ます。 ページ2, アイテム 20 を参照 (3 ピン PWR_FAN1) ページ2, アイテム 7 を参照 (3 ピン SB_FAN1) ページ2, アイテム 12 を参照 CPU ファンコネクタ このコネクタには CPU ファケー ブルを接続します。黒いコードは (4 ピン CPU_FAN1) アースピンに接続してください。 ページ2, アイテム 6 を参照 ASRock X79 Extreme4 Motherboard...
- Seite 175 源を供給できるように、ATX 12V (8 ピン ATX12V1) プラグを備えたサワーサプライを ページ2, アイテム 1 を参照 接続する必要があることに注意し てください。接続に問題があると、 電源は正しく供給されません。 このマザーボードで 8-pin ATX 12V 電源コネクタが提供されたが、 従来の 4-pin ATX 12V 電源でも動作できます。 4-pin ATX 電源を使用する場合、電源を Pin 1 と Pin 5 とともに差し込んでください。 4-Pin ATX 12V 電源の取り付け ASRock X79 Extreme4 Motherboard...
- Seite 176 (9 ピン COM1) ページ2, アイテム 34 を参照 HDMI_SPDIF ヘッダ HDMI_SPDIF ヘッダは、SPDIF (2- ピン HDMI_SPDIF1) 音声出力を HDMI VGA カードに提 ページ2, アイテム 35 を参照 供し、システムで HDMI デジタル TV/ プロジェクタ /LCD デバイスに 接続できるようにします。HDMI VGA カードの HDMI_SPDIF コネク タを、このヘッダに接続してくださ い。 ASRock X79 Extreme4 Motherboard...
- Seite 177 行うことができます。 電源スイッチ 電源スイッチはクイックスイッチ (PWRBTN) で、システム電源のオン / オフを素 ページ2, アイテム 23 を参照 早く切り替えることができます。 リセットスイッヱ リセットスイッヱはクイックスイッ (RSTBTN) ヱで、システムを素早くリセットす ページ2, アイテム 22 を参照 ることができます。 クリア CMOS スイッヱ クリア CMOS スイッヱはクイックス (CLRCBTN) イッヱで、CMOS 値を素早くクリア ページ 3, アイテム 17 を参照 できます。 ASRock X79 Extreme4 Motherboard...
- Seite 178 7 / 7 64-bit / Vista / Vista 64-bit / XP / XP 64-bit といった様々なマイクロソフト ウインドウズ オペレーティングシステム をサポートします。マザーボードに付属しているサポート CD はマザーボードの特 徴を有効にするために必要なドライバやユーティリティを含んでいます。サポート CD を使用するには、CDROM ドライブに CD を挿入してください。AUTORUN 機能 が有効な場合、自動的にメインメニュウが立ち上がります。AUTORUN 機能が無効 な場合、サポート CD 内の BIN フォルダにある ASSETUP.EXE をダブルクリックする ことにより、メインメニュウが立ち上がります。 ASRock X79 Extreme4 Motherboard...
- Seite 179 1. 主板簡介 謝謝你采用了華擎 X79 Extreme4 主板 , 本主板由華擎嚴格制造 , 質量可靠 , 穩定性 好 , 能夠獲得卓越的性能。本安裝指南介紹了安裝主板的步驟。更加詳細的主板信息 可參看驅動光盤的用戶手冊。 由于主板規格和 BIOS 軟件將不斷升級 , 本手冊之相關內容變更恕不另 行通知。請留意華擎网站上公布的升級版本。你也可以在華擎網站找 到最新的顯卡和 CPU 支持表。 華擎网址:http://www.asrock.com 如果您需要與此主板有關的技術支持 , 請參觀我們的網站以了解您使用機 種的規格信息。 www.asrock.com/support/index.asp 1.1 包裝盒內物品 華擎 X79 Extreme4 主板 (ATX 規格 : 12.0 英吋 X 9.6 英吋 , 30.5 厘米 X 24.4 厘米 ) 華擎...
- Seite 180 - 支持 Energy Efficient Ethernet 802.3az - 支持 PXE Rear Panel I/O 界面 - 1 個 PS/2 鼠標接口 ( 后面板輸入 / - 1 個 PS/2 鍵盤接口 輸出接口 ) - 1 個同軸 SPDIF 輸出接口 - 1 個光纖 SPDIF 輸出接口 ASRock X79 Extreme4 Motherboard...
- Seite 181 - 1 x Dr. Debug (7 段調試 LED) 快速開關 - 1 個帶 LED 的 CMOS 數據清除開關 - 1 個帶 LED 的電源開關 - 1 個帶 LED 的復位開關 BIOS - 64Mb AMI UEFI Legal BIOS, 支持 GUI - 支持即插即用(Plug and Play,PnP) ASRock X79 Extreme4 Motherboard...
- Seite 182 PCH1.5V 電壓多功能調節器 支持光盤 - 驅動程序 , 工具軟件 , 殺毒軟件(測試版本 ),CyberLink MediaEspresso 6.5 試用版 獨家功能 - ASRock Extreme Tuning Utility (AXTU)(詳見警告 6) - 華擎即時開機功能 - 華擎 Instant Flash(見警告 7) - 華擎 APP Charger(見警告 8) - 華擎 XFast USB(見警告 9) - 華擎 XFast LAN(見警告 10)...
- Seite 183 Intel 的 CPU。有關未來 CPU 更新和發布情況的信息,請訪問 Intel 网 站。 5、 在麥克風輸入方面,這款主板支持立體聲和單聲道這兩種模式。在音頻輸 出方面,這款主板支持 2 聲道、4 聲道、6 聲道以及 8 聲道模式。請查閱 第 3 頁的表格瞭解正確的連接方式。 6、 ASRock Extreme Tuning Utility (AXTU) 是一個多合一的工具,可在用戶 友好的界面中微調不同的系統功能,包括硬件監控、風扇控制、超頻、O C DNA 和 IES。在 Hardware Monitor(硬件監控)中,顯示系統的主要參數。 在 Fan Control(風扇控制)中,顯示風扇速度和溫度,以便您進行調整。 在 Overclocking(超頻)中,您可以對 CPU 進行超頻,以优化系統性能。...
- Seite 184 11、 華擎 XFast Charger 是一項可讓您通過 PC 對移動設備進行充電的最快最 好的技術。通過 XFast Charger USB 接口,用戶可在任何時間享受快速充 電体驗。除了苹果設備外,該技術也可為符合 B C 1.1 標准的智能設備充 電。詳情請參考第 30 頁的說明。 12、ASRock XFast RAM 是 ASRock Extreme Tuning Utility (AXTU) 中加入 ® 的一項新功能。它能充分利用 Windows 操作系統 32-bit CPU 無法使用 的內存空間。ASRock XFast RAM 可縮短之前訪問過的网站的加載時間,...
- Seite 185 耗電量的規定。根據 E u P 的規定 , 一個完整系統在關機模式下的交流電總 消耗必須在 1.00W 以下。為滿足 EuP 標準 , 您需要同時具備支持 EuP 的主 ® 板和支持 EuP 的電源供應器。根據 Intel 的建議 , 支持 EuP 的電源供應器 必須滿足在 100m A 電流消耗時 ,5V s b 電源效率高于 50%。有關支持 E u P 的 電源供應器選擇方面的更多細節 , 我們建議您諮詢電源供應器的製作商。 ASRock X79 Extreme4 Motherboard...
- Seite 186 線帽將 C L R C M O S1 上的插針 2 和插針 3 短接 5 秒。但是,請勿在更新 B I O S 后 立即清除 C M O S。如果需要在更新 B I O S 后立即清除 C M O S,必須在執行 C M O S 清除操作之前,先啟動然后關閉系統。請注意,只有取出 C M O S 電池,密碼、 日期、時間、用戶默認配置文件、1394 GUID 和 MAC 地址才會被清除。 清除CMOS開關与清除CMOS跳線具有相同的功能。 ASRock X79 Extreme4 Motherboard...
- Seite 187 認 USB 2.0 接口之外,這款 (9 針 USB_6_7) 主板有三組 USB 2.0 接針。 ( 見第 2 頁第 30 項 ) 這組 USB 2.0 接針可以支持 兩個 USB 2.0 接口。 (9 針 USB_8_9) ( 見第 2 頁第 20 項 ) ASRock X79 Extreme4 Motherboard...
- Seite 188 A. 將 Mic_IN(MIC) 連接到 MIC2_L。 B. 將 Audio_R(RIN) 連接到 OUT2_R, 將 Audio_L(LIN) 連接到 OUT2_L。 C. 將 Ground(GND) 連接到 Ground(GND)。 D. MIC_RET 和 OUT_RET 僅用于 HD 音頻面板。您不必將它們連接到 AC’97 音頻面板。 E. 開啟前置麥克風。 ® 在 Windows XP / XP 64 位元操作系統中 : ASRock X79 Extreme4 Motherboard...
- Seite 189 ( 見第 2 頁第 24 項 ) 電源指示燈連接排針 請將機箱電源指示燈連接到 這一排針,以指示系統電源 (3 針 PLED1) 狀態。當系統正在運行時, ( 見第 2 頁第 21 項 ) LED 指示燈亮。在 S1 模式 下,LED 指示燈會不停閃 爍。在 S3/S4 或 S5 模式 ( 關 機 ) 下,LED 指示燈會熄滅。 ASRock X79 Extreme4 Motherboard...
- Seite 190 連接到此主板的 CPU 風扇接口 , 請將它連接到 Pin 1-3。 Pin 1-3 連接 3-Pin 風扇的安裝 (3 針 CPU_FAN2) ( 見第 2 頁第 4 項 ) ATX 電源接頭 請將 ATX 電源供應器連接到這 個接頭。 (24 針 ATXPWR1) ( 見第 2 頁第 8 項 ) ASRock X79 Extreme4 Motherboard...
- Seite 191 (9 針 FRONT_1394) 款主板有一組 IEEE 1394 接 ( 見第 2 頁第 32 項 ) 針。這組 IEEE 1394 接針可 以支持一個 IEEE 1394 接口。 串行接口連接器 這個 COM1 端口支持一個串行 接口的外設。 (9 針 COM1) ( 見第 2 頁第 34 項 ) ASRock X79 Extreme4 Motherboard...
- Seite 192 ( 見第 2 頁第 23 項 ) 復位開關 復位開關是一種快速開關 , 可 讓用戶快復位系 (RSTBTN) 統。 ( 見第 2 頁第 22 項 ) CMOS 數據清除開關 CMOS 數據清除開關是一種快 速開關 , 可讓用戶快速清除 (CLRCBTN) CMOS 中的數據。 ( 見第 3 頁第 17 項 ) ASRock X79 Extreme4 Motherboard...
- Seite 193 進行常規檢驗。如果你需要在開機自檢 ( P O S T ) 之后進入 B I O S 設置程序,請按下 <Ctrl>+<Alt>+<Delete> 鍵重新啟動電腦,或者按下系統面板上的重啟按鈕。有關 BIOS 設置的詳細信息,請查閱隨機支持光盤裡的用戶手冊 (PDF 文件 )。 3. 支持光盤信息 ® ® 本主板支持各種微軟視窗操作系統:Microsoft Windows 7/7 64 位元 /Vista Vista 64 位元 /XP/XP 64 位元。主板隨機支持光盤包含各種有助于提高主板效能的 必要驅動和實用程序。請將隨機支持光盤放入光驅裡,如果電腦的“自動運行”功能 已啟用,屏幕將會自動顯示主菜單。如果主菜單不能自動顯示,請查找支持光盤內 BIN 文件夾下的“ASSETUP.EXE”,并雙擊它,即可調出主菜單。 ASRock X79 Extreme4 Motherboard...
- Seite 194 明。 有害物質或元素 部件名稱 鉛 (Pb) 鎘 (Cd) 汞 (Hg) 六价鉻 (Cr(VI)) 多溴聯苯 (PBB) 多溴二苯醚 (PBDE) 印刷電路板 及電子組件 外部信號連 接頭及線材 O: 表示該有毒有害物質在該部件所有均質材料中的含量均在 SJ/T 11363-2006 標準規定 的限量要求以下。 X: 表示該有毒有害物質至少在該部件的某一均質材料中的含量超出 SJ/T 11363-2006 標準 規定的限量要求,然該部件仍符合歐盟指令 2002/95/EC 的規範。 備註 : 此產品所標示之環保使用年限,系指在一般正常使用狀況下。 ASRock X79 Extreme4 Motherboard...
- Seite 195 1. 主機板簡介 謝謝你採用了華擎 X79 Extreme4 主機板 , 本主機板由華擎嚴格製造 , 品質可靠 , 穩 定性好 , 能夠獲得卓越的性能。此快速安裝指南包括了主機板介紹和分步驟安裝指 導。您可以查看支持光碟裡的使用手冊了解更詳細的資料。 由於主機板規格和 BIOS 軟體將不斷更新 , 本手冊之相關內容變更恕不另 行通知。請留意華擎網站上公布的更新版本。你也可以在華擎網站找到最 新的顯示卡和 CPU 支援列表。 華擎網址:http://www.asrock.com 如果您需要與此主機板有關的技術支援 , 請參觀我們的網站以了解您使用 機種的規格訊息。 www.asrock.com/support/index.asp 1.1 包裝盒內物品 華擎 X79 Extreme4 主機板 (ATX 規格 : 12.0 英吋 x 9.6 英吋 , 30.5 公分 x 24.4 公分 ) 華擎...
- Seite 196 - PCIE x1 Gigabit LAN 10/100/1000 Mb/s - Realtek RTL8111E - 支援網路喚醒(Wake-On-LAN) - 支援 Energy Efficient Ethernet 802.3az - 支援 PXE Rear Panel I/O 界面 - 1 個 PS/2 滑鼠接口 ( 後背板輸入 / - 1 個 PS/2 鍵盤接口 ASRock X79 Extreme4 Motherboard...
- Seite 197 - 1 x USB 3.0 接頭 ( 可支援 2 個額外的 USB 3.0 接口 ) - 1 x Dr. Debug (7 段顯示器偵錯 LED) 快速開關 - 1 個 LED CMOS 數據清除開關 - 1 個 LED 電源開關 - 1 個 LED 重置開關 ASRock X79 Extreme4 Motherboard...
- Seite 198 電壓多功能調節 支援光碟 - 驅動程式 , 工具軟體 , 防毒軟體(試用版本 ),CyberLink MediaEspresso 6.5 試用版 獨家功能 - ASRock Extreme Tuning Utility (AXTU)(詳見警告 6) - 華擎即時開機功能 - 華擎 Instant Flash(見警告 7) - 華擎 APP Charger(見警告 8) - 華擎 XFast USB(見警告 9) - 華擎 XFast LAN(見警告 10)...
- Seite 199 ® 3、 由於作業系統的限制,在 Windows 7 / Vista / XP 下,供系統使用的 ® 實際記憶體容量可能小於 4GB。對於 Windows 作業系統搭配 64 位元 CPU 來說 , 不會存在這樣的限制。您可以透過 ASRock XFast RAM 來利用 ® Windows 無法使用的內存。 ® 4、 目前 Intel 2011 腳位 Sandy Bridge-E 處理器不支援 PCIE 3.0,但此 主機板已做好支援 PCIE 3.0 硬體的準備。是否能啟用 PCIE 3.0 取決於...
- Seite 200 過狀態窗口,您可以清楚地看到目前正在傳輸的是哪個數據流。 11、 ASRock XFast 充電器是兼具充電效率與速度的科技產品,可協助您透過電腦 為行動裝置充電。採用一流的 XFast 充電器 USB 連接埠,保證使用者隨時都 能體驗充電的極速快感。除了 Apple 設備外,同時也可為 BC1.1 標準智慧型 裝置充電。如需詳細資訊,請參閱第 30 頁。 12、 ASRock XFast RAM 是 ASRock Extreme Tuning Utility (AXTU) 中加入的 ® 一項新功能。它能充分利用 Windows 操作系統 32-bit CPU 無法使用的內 存空間。ASRock XFast RAM 可縮短之前訪問過的網站的讀取時間,從而加...
- Seite 201 必須在 1.00W 以下。為符合 EuP 標準 , 您需要同時具備支援 EuP 的主機板和 ® 支援 EuP 的電源供應器。根據 Intel 的建議 , 支援 EuP 的電源供應器必須 符合在 100mA 電流消耗時 ,5Vsb 電源效率高於 50%。有關支援 EuP 的電源供 應器選擇方面的詳情 , 我們建議您諮詢電源供應器的製造商。 ASRock X79 Extreme4 Motherboard...
- Seite 202 註: C L R C M O S1 可供您清除 C M O S 中的資料。若要清除及重設系統參數並恢復為預設設 定,請先關閉電腦電源,並從電源插座中拔下電源線,等待 15 秒鐘之後,使用跳 線帽使 CLRCMOS1 的 pin2 及 pin3 短路 5 秒的時間。但請勿於更新 BIOS 後立即清除 CMOS。如需於更新 BIOS 後立即清除 CMOS,您必須先開機再關機,然後再執行 CMOS 清除操作。請注意,只有在移除 C M O S 電池的情況下,密碼、日期、時間、使用者 預設設定檔、1394 GUID 及 MAC 位址才會清除。 Clear CMOS開關的功能與Clear CMOS跳線相同。 ASRock X79 Extreme4 Motherboard...
- Seite 203 除了位於 I/O 面板的六個 USB 2.0 接口之外,這款 (9 針 USB_6_7) 主機板有三組 USB 2.0 接 ( 見第 2 頁第 30 項 ) 針。每組 USB 2.0 接針可以 支援兩個 USB 2.0 接口。 (9 針 USB_8_9) ( 見第 2 頁第 29 項 ) ASRock X79 Extreme4 Motherboard...
- Seite 204 2. 如果您使用 AC’97 音效面板 , 請按照下面的步驟將它安裝到前面板音效接針 : A. 將 Mic_IN(MIC) 連接到 MIC2_L。 B. 將 Audio_R(RIN) 連接到 OUT2_R, 將 Audio_L(LIN) 連接到 OUT2_L。 C. 將 Ground(GND) 連接到 Ground(GND)。 D. MIC_RET 和 OUT_RET 僅用於 HD 音效面板。您不必將它們連接到 AC’97 音效面板。 E. 開啟前置麥克風。 ASRock X79 Extreme4 Motherboard...
- Seite 205 ( 見第 2 頁第 24 項 ) 電源指示燈接頭 請將機箱電源指示燈連接到 此接頭,以指示系統電源狀 (3 針 PLED1) 態。當系統正在運行時, ( 見第 2 頁第 21 項 ) LED 指示燈亮。在 S1 模式 下,LED 指示燈會不停閃 爍。在 S3/S4 或 S5 模式 ( 關 機 ) 下,LED 指示燈會熄滅。 ASRock X79 Extreme4 Motherboard...
- Seite 206 連接到此主板的 CPU 風扇接口 , 請將它連接到 Pin 1-3。 Pin 1-3 連接 3-Pin 風扇的安裝 (4 針 CPU_FAN1) ( 見第 2 頁第 4 項 ) ATX 電源接頭 請將 ATX 電源供應器連接到這 個接頭。 (24 針 ATXPWR1) ( 見第 2 頁第 8 項 ) ASRock X79 Extreme4 Motherboard...
- Seite 207 (9 針 FRONT_1394) 款主機板有一組 IEEE 1394 ( 見第 2 頁第 32 項 ) 接針。這組 IEEE 1394 接針 可支援一個 IEEE 1394 接口。 序列埠 這個序列埠 COM1 支援一個序 列埠的裝置。 (9 針 COM1) ( 見第 2 頁第 34 項 ) ASRock X79 Extreme4 Motherboard...
- Seite 208 ( 見第 2 頁第 23 項 ) 重置開關 重置開關是一種快速開關 , 可 讓用戶快重置系統。 (RSTBTN) ( 見第 2 頁第 22 項 ) CMOS 數據清除開關 CMOS 數據清除開關是一種快 速開關 , 可讓用戶快速清除 (CLRCBTN) CMOS 中的數據。 ( 見第 3 頁第 17 項 ) ASRock X79 Extreme4 Motherboard...
- Seite 209 運行需要時,測試和初始化元件。有關 B I O S 設置的詳細訊息,請查閱隨機支援光碟 裡的使用手冊 (PDF 文件 )。 3. 支援光碟訊息 ® ® ® 本主板支援各種微軟 Windows 操作系統:Microsoft Windows 7/7 64 位元 / Vista /Vista 64 位元 /XP/XP 64 位元。主板附帶的支援光碟包含各種有助於提高主 板效能的必要驅動和實用程式。請將隨機支援光碟放入光碟機裡,如果系統的“自動 運行”功能已啟用,銀幕將會自動顯示主菜單。如果主菜單不能自動顯示,請查閱支 援光碟內 BIN 文件夾下的 ASSETUP.EXE 文件並雙點它,即可調出主菜單。 ASRock X79 Extreme4 Motherboard...
- Seite 210 Dalam kondisi terjadinya modifikasi buku pedoman ini, versi baru akan diperlihatkan dalam website ASRock tanpa peringatan lebih. Anda dapat mendapatkan kartu- kartu yang paling baru dan daftar bantuan CPU pada website ASRock. Website ASRock http://www.asrock.com 1.1 Isi Paket Papan Induk X79 Extreme4 ASRock (Faktor Form ATX: 12.0-in x 9.6-in, 30.5 cm x 24.4 cm)
- Seite 211 - PCIE x1 Gigabit LAN 10/100/1000 Mb/s - Broadcom BCM57781 - Menggunakan Wake-On-LAN - Mendukung Energy Efficient Ethernet 802.3az - Mendukung PXE Papan Belakang I/O Panel - 1 x Port Mouse PS/2 - 1 x Port Keyboard PS/2 ASRock X79 Extreme4 Motherboard...
- Seite 212 - 3 x USB 2.0 header (menggunakan 6 port USB 2.0) - 1 x USB 3.0 header (menggunakan 2 port USB 3.0) - 1 x Dr. Debug Beralih - 1 x Clear CMOS LED - 1 x kuasa beralih LED ASRock X79 Extreme4 Motherboard...
- Seite 213 7 / 7 64-bit / Vista / Vista 64-bit / XP / XP 64-bit Sertifikasi - FCC, CE, WHQL - ErP/EuP Ready (memerlukan catu daya ErP/EuP ready) * Untuk informasi rinci, silakan kunjungi website kami: http://www.asrock.com ASRock X79 Extreme4 Motherboard...
- Seite 214 (“xxx” is the device which contains your Windows installation files. Normally it is an optical drive.) You can also press <F11> to launch boot menu at system POST and choose the item “UEFI:xxx“ to boot. ® 4. Start Windows installation. ASRock X79 Extreme4 Motherboard...
- Seite 215 XP(v10.6.0.1002)Z68.zip) and unzip the file into the USB flash disk. OR Please copy the file from ASRock motherboard support CD. (please copy the files under following directory: D:\ AMD64\Win7-64_Vista64_Intel_v10.6.0.100) 3. Create RAID array for you system. Please refer to "Intel RAID Installation Guide"...
- Seite 216 Microsoft 's suggested solution: A. Disable System Restore. a. Type “systempropertiesprotection” in the Start Menu. Then press "Enter". b. De-select Local Disks for System Restore. Then Click “Turn System Restore Off” to confirm. Then Press “Ok”. ASRock X79 Extreme4 Motherboard...
- Seite 217 B. Disable “Volume Shadow Copy” service. a. Type “computer management” in the Start Menu, then press “Enter”. b. Go to “Services and Applications>Services”; Then double click “Volume Shadow Copy”. ASRock X79 Extreme4 Motherboard...
- Seite 218 (This may take a long time; >30 mins.) C. Reboot your system. (It may take about 5 minutes to reboot.) ® D. Windows will install this hotfix then reboot by itself. E. Please start to install motherboard drivers and utilities. 6. Finish. ASRock X79 Extreme4 Motherboard...