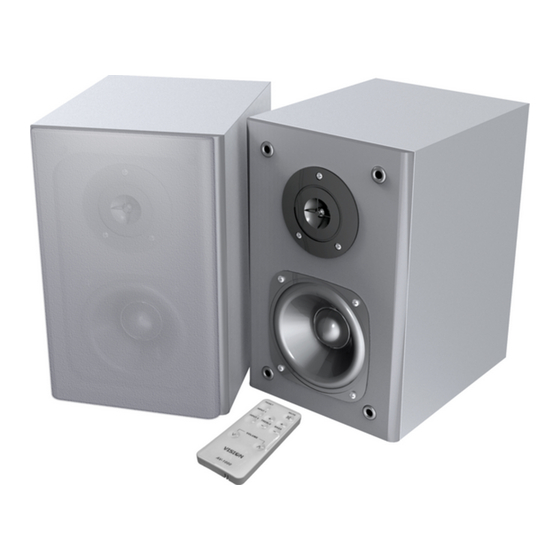
Vision AV-1000 Bedienungsanleitung
Aktivlautsprecher
Inhaltsverzeichnis
Verfügbare Sprachen
Verfügbare Sprachen
Quicklinks
AV-1000 ACTIVE SPEAKERS OWNERS MANUAL
GUIDE D'UTILISATION DES ENCEINTES ACTIVES AV-1000
MANUAL DEL USUARIO DE LOS ALTAVOCES ACTIVOS AV-1000
AV-1000 ACTIVE LUIDSPREKERS GEBRUIKERSHANDLEIDING
BEDIENUNGSANLEITUNG AV-1000 AKTIVLAUTSPRECHER
AV-1000 ACTIVE SPEAKERS MANUALE D''ISTRUZIONI
Ś
INSTRUKCJA OBSŁUGI GŁO
NIKÓW AKTYWNYCH AV-1000
MANUAL DE UTILIZADOR DAS COLUNAS ACTIVAS AV-1000
installation:innovation
Inhaltsverzeichnis
Fehlerbehebung

Verwandte Anleitungen für Vision AV-1000


Inhaltszusammenfassung für Vision AV-1000
-
Seite 27: Stromschlag-Gefahr Nicht Öffnen
Personen besteht. Vision ist ein Partnerunternehmen des TÜV SÜD Produktzertifizierungssystems. Hierbei wurden alle zertifizierungen vom TÜV bereitgestellt. Alle Geräte werden von Vision entworfen und in die EU eingeführt. Vision ist Eigentum von Computer 2000 Distribution Ltd., einem in England unter der Nummer 01691472 eingetragenen Unternehmen mit Niederlassung in Hampshire House, Wade Road, Basingstoke, Hampshire RG24 8NE. -
Seite 28: Sorgsamer Umgang Mit Dem Netzkabel
Wenn Sie einen ungewöhnlichen Geruch oder Rauchentwicklung bemerken, schalten Sie das Gerät umgehend aus und ziehen Sie den Netzstecker. Setzen Sie sich mit Ihrem Händler oder Vision in Verbindung. VERPACkUNG Heben Sie alle Verpackungsmaterialien auf. Sie werden zum Versand des Gerätes im Reparaturfall gebraucht. - Seite 29 AUFBAU EINGANGS-ANSCHLUSSkONSOLE MASTER-LAUTSPRECHER 1. LED-Stromanzeige 2. Lautstärkeregler 3. Netzschalter 4. „Eingang 1“ 3,5mm-Minianschlussbuchse 5. „Eingang 2“ 2-Phonoanschlussbuchse 6. Abgangsklemme Lautsprecher (zum passiven Lautsprecher) 7. IEC-320 C7-Netzanschlussbuchse...
-
Seite 30: Aufbau Fernbedienung
AUFBAU FERNBEDIENUNG 1. klangeinstellungen zurücksetzen 2. Eingangsauswahl 3. Lautstärke laut/leise 4. Stumm 5. Bass- und Höhenregler MONTAGEANLEITUNG Gehen Sie folgendermaßen vor, um das Gerät zu installieren: 11. Wählen Sie einen Standort. Die Lautsprecher sollten so aufgestellt werden, dass der Ton sich im Raum gleichmäßig ausbreiten kann. -
Seite 31: Fehlerbehebung
FEHLERBEHEBUNG Falls Ihre Anlage nicht ordnungsgemäß funktioniert, nehmen Sie bitte die folgenden Informationen zu Hilfe. Falls das Problem sich nicht beheben lässt, Stromstecker ziehen und unverzüglich den AV-Vertragshändler, bei dem der Verstärker gekauft wurde, kontaktieren. Problem Behebung Das Licht für die Stromanzeige Stromquelle und Netzkabel kontrollieren. -
Seite 32: Spezifikationen
SPEzIFIkATIONEN MITGELIEFERTES zUBEHÖR Stromversorgung: Integriertes 230 • 1 x Netzkabel mit 1,8 m Länge mit V-Netzteil Eurostecker an IEC-320 C7-kupplung • 1 x Netzkabel mit 1,8 m Länge mit GB- Technische Daten: Stecker an IEC-320 C7-kupplung Frequenzgang: 78Hz-20kHz • 2 x Halterungen Ausgangsimpedanz: 4 Ohm •...