Inhaltsverzeichnis
Werbung
Verfügbare Sprachen
Verfügbare Sprachen
Quicklinks
Owner's Manual
Bedienungsanleitung
Mode d'emploi
Manuale d'uso
Manual del usuario
Before using this unit, carefully read the sections entitled:
"USING THE UNIT SAFELY" (P. 3, 4) and "IMPORTANT
NOTES" (P. 5). These sections provide important information
concerning the proper operation of the unit. Additionally, in
order to feel assured that you have gained a good grasp of
every feature provided by your new unit, this manual should
be read in its entirety. The manual should be saved and kept
on hand as a convenient reference.
Copyright © 2001 ROLAND CORPORATION
All rights reserved. No part of this publication may be
reproduced in any form without the written permission of
ROLAND CORPORATION.
Werbung
Inhaltsverzeichnis
Fehlerbehebung

Verwandte Anleitungen für Edirol AudioCapture UA-1D

Inhaltszusammenfassung für Edirol AudioCapture UA-1D
- Seite 1 Owner’s Manual Bedienungsanleitung Mode d’emploi Manuale d’uso Manual del usuario Before using this unit, carefully read the sections entitled: “USING THE UNIT SAFELY” (P. 3, 4) and “IMPORTANT NOTES” (P. 5). These sections provide important information concerning the proper operation of the unit. Additionally, in order to feel assured that you have gained a good grasp of every feature provided by your new unit, this manual should be read in its entirety.
-
Seite 2: Federal Communications Commission Radio Frequency Interference Statement
For the USA DECLARATION OF CONFORMITY Compliance Information Statement Model Name : UA-1D Type of Equipment : USB Audio Interface Responsible Party : Edirol Corporation North America Address : 425 Sequoia Drive, Suite 114, Bellingham, WA 98226 Telephone : (360) 594-4276... -
Seite 3: Using The Unit Safely
Refer all • Dusty; or are servicing to your retailer, the nearest • Subject to high levels of vibration. EDIROL / Roland Service Center, or ....................an authorized EDIROL / Roland distributor, as listed on the "Information"... - Seite 4 • Immediately turn the power off, and request servicing by your retailer, the nearest EDIROL / Roland Service Center, or an authorized EDIROL / Roland distributor, as listed on the "Information" page when: • Objects have fallen into, or liquid has been spilled onto the unit;...
-
Seite 5: Important Notes
IMPORTANT NOTES 291a In addition to the items listed under “USING THE UNIT SAFELY” on page 3, please read and observe the following: Power Supply • Before connecting this unit to other devices, turn off the power to all units. This will help prevent malfunctions and/or damage to speakers or other devices. - Seite 6 IMPORTANT NOTES • Use a cable from Roland to make the connection. If using some other make of connection cable, please note the following precautions. • Some connection cables contain resistors. Do not use cables that incorporate resistors for connecting to this unit. The use of such cables can cause the sound level to be extremely low, or impossible to hear.
-
Seite 7: Inhaltsverzeichnis
Table of Contents USING THE UNIT SAFELY ................3 IMPORTANT NOTES ..................5 Table of Contents....................7 Introduction ....................... 8 Connections and driver installation (Windows)........... 10 Installing and Using the D-Out Smoother............. 19 Connections and driver installation (Macintosh)......... 22 About the digital input/output of the UA-1D ..........26 Troubleshooting.................... -
Seite 8: Introduction
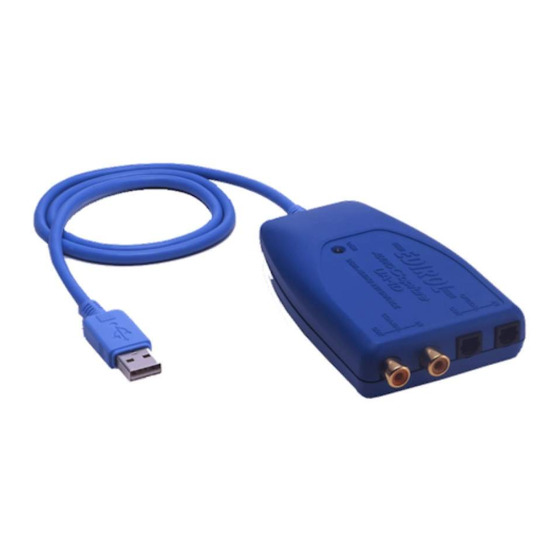
Introduction Contents of the Package The UA-1D package contains the following items. As soon as you open the package, please verify that all items are present. If any items are missing, please contact the dealer where you purchased the package. UA-1D USB Audio Interface fig.UA1A UA-1D Owner’s Manual (this document) -
Seite 9: Names And Functions
Introduction Names and Functions fig.UA1Afunc USB Cable Connect this cable to the USB connector of your computer. (600 mm length.) USB Indicator This indicator will light when the unit is connected to your computer and is ready to operate. Digital input connector (optical) Connect an optical cable here when you want to digitally input an audio signal from a device such as a CD/MD/DAT. -
Seite 10: Connections And Driver Installation (Windows)
Connections and driver installation (Windows) * If you are a Macintosh user, refer to p. 22. In order to use the UA-1D, you must first install the USB Composite Device driver, the USB Human Interface driver, and the USB Audio Device driver consecutively. These drivers are included with Windows. -
Seite 11: Windows Me Users
Connections and driver installation (Windows) Making connections and installing the driver Windows Me Users * If you are using a Windows 2000 machine, refer to p. 12, if Windows 98, refer to p. 12. Turn on the power of your computer and start up Windows, and use a USB cable to connect the UA-1D To prevent damage to your to your computer. -
Seite 12: Windows 98 Users
Connections and driver installation (Windows) Windows 2000 Users * If you are using a Windows Me machine, refer to p. 11, if Windows 98, refer to p. 12. Turn on the power of your computer and start up Windows. Use a USB cable to connect the UA-1D to your computer. - Seite 13 Connections and driver installation (Windows) fig.02-05.e A USB Composite Device If this dialog box does not will be detected appear, refer to Problems related to the USB driver automatically, and the Add (p. 28). New Hardware Wizard dialog box will appear. Click [Next].
- Seite 14 Connections and driver installation (Windows) If the Microsoft Windows CD-ROM is not inserted in the CD-ROM drive, the following dialog box may appear. If this occurs, insert the Microsoft Windows CD-ROM into the CD-ROM drive, and click [OK]. fig.02-09.e fig.02-10.e When installation of the USB Composite Device driver is finished, the...
- Seite 15 Connections and driver installation (Windows) fig.02-13.e Next, a USB Audio Device will be detected automatically, and the Add New Hardware Wizard dialog box will appear. Click [Next], and continue the installation using the very same procedure as in steps 3 – 6 (p. 13). fig.02-14.e When installation of the USB Audio Device driver...
- Seite 16 Connections and driver installation (Windows) Click the [Audio] tab. For the Playback item Preferred device, click . In the list that appears, click [USB Audio Device] to select it. Depending on your For the Recording item Preferred device, click system, “USB Audio In the list that appears, click [USB Audio Device] to Device”...
- Seite 17 Connections and driver installation (Windows) Volume Control settings The output volume of the UA-1D can be controlled by the Windows Volume Control. If Volume Control is not installed on your computer, use Add/ Remove Applications in Click the Windows [Start] button, and select the Control Panel to [Programs] - [Accessories] - [Entertainment] - install it.
- Seite 18 Connections and driver installation (Windows) When using your computer’s CD-ROM drive to play an audio CD, or when playing background music for games with the UA-1D. If using Windows Me: Select [Start] - [Settings] - [Control Panel]. In the [Control Panel], double-click the [System] icon to access the System Properties dialog box.
-
Seite 19: Installing And Using The D-Out Smoother
Installing and Using the D-Out Smoother When connecting the UA-1D to a Windows machine, you need to install the D-Out Smoother by following the instruction shown below. What is the D-Out Smoother? When audio is played back to a digital device such as MD or DAT connected to the digital output of the UA-1D, a certain amount of time is required for the audio output to be locked immediately after audio playback, so that there may be no... - Seite 20 Installing and Using the D-Out Smoother Starting the D-Out Smoother Connect the UA-1D to the USB connector of your computer. Click the Windows [Start] button, and in the [Programs] menu, click [D-Out Smoother]. The Setting dialog box will appear at the first time when you start up.
- Seite 21 Installing and Using the D-Out Smoother From the pull-down menu, select “USB Audio Device” and click [OK]. Click the [TEST] button, and check whether or not the test audio is heard. If the audio is heard, the D-Out Smoother is operating for that device.
-
Seite 22: Connections And Driver Installation (Macintosh)
Connections and driver installation (Macintosh) * If you are a Windows user, refer to p. 10. In order to use the UA-1D, you must first install a driver. UA- What is a driver? 1D uses a driver included with Mac OS. ->... - Seite 23 Connections and driver installation (Macintosh) Making connections and installing the driver Getting the unit to be recognized Turn on the power of your computer and start up MacOS. To prevent damage to your fig.03-02.e speakers, turn down the volume on any audio devices you may have From the Apple menu, connected.
- Seite 24 Connections and driver installation (Macintosh) Making the sound settings fig.03-05.e From the Apple menu, select [Control Panels] - [Sound] to open the Sound dialog. Click the [Speakers] tab. fig.03-06.e Turn down the volume on the UA-1D, and on your audio equipment, then click [Start Test].
- Seite 25 Connections and driver installation (Macintosh) fig.03-08.e Select [Input] from the If you don’t see USB Audio, you should close Sound dialog. Then, in the Sound dialog. Then, Choose a source for disconnect the UA-1D, and sound input:, choose USB wait about ten seconds. Then, try doing the Audio.
-
Seite 26: About The Digital Input/Output Of The Ua-1D
About the digital input/output of the UA-1D Input The UA-1D has two digital input connectors: OPTICAL IN and COAXIAL IN. However, it is not possible to use both OPTICAL IN and COAXIAL IN simultaneously. If signals are simultaneously input to both connectors, the signal applied to OPTICAL IN is given priority. - Seite 27 About the digital input/output of the UA-1D Sampling frequency Audio data is transferred between the UA-1D and computer at 16-bit resolution and 48 kHz sampling rates for output. 16- bit resolution and 32/44.1/48 kHz sampling rates are supported for input. About SCMS SCMS (Serial Copy Management System) is a function that protects the rights of the copyright owner by prohibiting second-generation or later copying via a digital...
-
Seite 28: Troubleshooting
Troubleshooting If an unexpected problem occurs while using the UA-1D, please read this chapter first. It provides numerous hints that will help you solve problems. The problems covered in the troubleshooting section are organized according to the operating system on which the problem might be encountered. Use the icon shown at the left of the title to find the information you need. - Seite 29 Troubleshooting • Does your computer or USB hub have sufficient power supply capacity? The UA-1D cannot be connected if insufficient power is supplied to it. Check whether one of the following cases apply. If you are using the UA-1D with a notebook computer that is running on its battery, operation may be unreliable with some models of computer.
- Seite 30 Troubleshooting The “Add New Hardware Wizard” dialog box appears even though you installed the drivers If your computer or USB hub has two or more USB connectors, connecting the UA-1D to a USB connector to which the UA-1D has never before been connected may cause the Add New Hardware Wizard dialog box will appear even though the drivers have already been installed.
- Seite 31 Troubleshooting • Is a digital device such as an MD connected to the digital output of the UA-1D? Depending on your application, playing audio with a digital device such as an MD connected to the digital output of the UA-1D may cause a certain amount of time to be required for the digital audio output to be locked immediately after playback, so that there will be no sound for one or two seconds.
- Seite 32 Troubleshooting Noise is heard when playing back audio • The graphic accelerator of your computer may cause noise to occur during audio playback. Use the following procedure to set graphic acceleration to “None.” In the Windows Control Panel, double-click [Display] to open the Display Properties dialog box, and click the [Settings] tab.
- Seite 33 Troubleshooting • Try making the following changes to the disk drive settings. The following settings may not exist on your computer. In the Windows Control Panel, double-click [System] to open the System Properties dialog box, and click the [Device Manager] tab. Double-click [Disk drives] to see the list of devices.
-
Seite 34: Noise Is Present In The Playback Or Recording
From the Apple menu, select [Apple System Profiler]. Click the [Devices and Volumes] tab. In the USB section, the screen will indicate “Audio (EDIROL UA-1D).” Click the arrow at the left of this text. The number displayed to the right of “Driver version” is the version of... - Seite 35 Troubleshooting A blank (silent) file is created when you record • Try setting the bit rate to “16bit.” If you are using Windows98 Second Edition, and your recording software is set to a bit rate of 8 bits, a blank file may be created, so that you may not be able to record effectively.
- Seite 36 Troubleshooting Deleting the USB Audio Device driver If re-installing the USB Audio Device driver If installation of the USB Audio Device driver was terminated before completion Use the following procedure to delete the driver that is already installed. * The explanation provided here is for an average Windows system. Depending on your computer, some of the folder names may be different.
-
Seite 37: Anschlüsse Und Treiberinstallation (Windows)
Anschlüsse und Treiberinstallation (Windows) * Wenn Sie ein Macintosh-Anwender sind, lesen Sie bitte S. 50. Bevor Sie das UA-1D benutzen können, müssen Sie zuerst die Treiber für das USB-Gerät, USB Human Interface sowie USB-Audiogerät installieren. Diese Treiber sind in Windows enthalten. -
Seite 38: Anschlüsse Und Treiberinstallation
Anschlüsse und Treiberinstallation (Windows) Anschlüsse und Treiberinstallation Windows Me-Anwender * Wenn Sie Windows 2000 verwenden, lesen Sie bitte S. 39, wenn Sie Windows 98 verwenden, lesen Sie bitte S. 39. Schalten Sie Ihren Computer ein und starten Sie Windows. Verwenden Sie ein USB-Kabel, um das Um Schäden an Ihren UA-1D mit Ihrem Computer zu verbinden. -
Seite 39: Windows 2000-Anwender
Anschlüsse und Treiberinstallation (Windows) Windows 2000-Anwender * Wenn Sie Windows Me verwenden, lesen Sie bitte S. 38, wenn Sie Windows 98 verwenden, lesen Sie bitte S. 39. Schalten Sie Ihren Computer ein und starten Sie Windows. Schließen Sie das UA-1D an Ihren Computer mit einem USB-Kabel an. - Seite 40 Anschlüsse und Treiberinstallation (Windows) fig.02-05.e Das Gerät USB- Wenn dieses Dialogfeld Verbundgerät wird nicht angezeigt wird, lesen Sie bitte Probleme in automatisch erkannt, und Verbindung mit dem das Dialogfeld Hardware- USB-Treiber (S. 56). Assistent wird angezeigt. Klicken Sie auf [Weiter]. fig.02-06.e Wenn in der Anzeige die Frage gestellt wird, “Wie...
- Seite 41 Anschlüsse und Treiberinstallation (Windows) Wenn sich die Microsoft Windows CD-ROM nicht im CD-ROM-Laufwerk befindet, wird eventuell folgendes Dialogfeld angezeigt. In diesem Fall legen Sie dieMicrosoft Windows CD-ROM in das CD-ROM-Laufwerk ein und klicken auf [OK]. fig.02-09.e fig.02-10.e Sobald die Installation des Treibers USB USB- Verbundgerät beendet ist, wird folgendes Dialogfeld...
-
Seite 42: Angabe Des Audioeingabe/Ausgabegeräts
Anschlüsse und Treiberinstallation (Windows) fig.02-13.e Als nächstes wird das USB-Audiogerät automatisch erkannt, und das Dialogfeld Hardware- Assistent wird angezeigt. Klicken Sie auf [Next] (Weiter), und setzen Sie die Installation wie in den Schritten 3 – 6 beschrieben fort (S. 40). fig.02-14.e Sobald die Installation des Treibers USB-Audiogerät... - Seite 43 Anschlüsse und Treiberinstallation (Windows) Win 2000 / Me Doppelklicken Sie in der Systemsteuerung auf das Symbol [Sounds und Multimedia], um das Dialogfeld Eigenschaften für Sounds und Multimedia zu öffnen. * Wenn Sie kein Symbol [Sounds und Multimedia] sehen, klicken Sie in der Systemsteuerung auf [Alle Optionen der Systemsteuerung anzeigen].
-
Seite 44: Einstellung Der Lautstärkeregelung
Anschlüsse und Treiberinstallation (Windows) Einstellung der Lautstärkeregelung Die Ausgabelautstärke des UA-1D kann mit der Lautstärkeregelung von Windows gesteuert werden. Wenn die Lautstärkeregelung auf Ihrem Computer nicht installiert ist, verwenden Sie Klicken Sie auf die Windows-Schaltfläche [Start] und das Symbol Software in der wählen Sie [Programme] - [Zubehör] - Systemsteuerung, um sie [Unterhaltungsmedien] - [Lautstärkeregelung], um... - Seite 45 Anschlüsse und Treiberinstallation (Windows) Wenn Sie das CD-ROM-Gerät Ihres Computers für das Abspielen einer Audio-CD verwenden oder wenn Sie Hintergrundmusik für Spiele mit dem UA-1D abspielen. Bei Verwendung von Windows Me: Wählen Sie [Start] - [Einstellungen] - [Systemsteuerung]. Doppelklicken Sie in der Systemsteuerung auf das Symbol [System], um das Dialogfeld Systemeigenschaften zu öffnen.
-
Seite 46: Installation Und Verwendung Des D-Out Smoother
Installation und Verwendung des D-Out Smoother Wenn Sie das UA-1D an einen Windows-Computer anschließen, müssen Sie den D-Out Smoother entsprechend den nachfolgenden Anweisungen installieren. Was ist der D-Out Smoother? Wenn Audio auf einem digitalen Gerät, wie z.B. einem MD-oder DAT-Gerät wiedergegeben wird, das an den Digitalausgang des UA-1D angeschlossen ist, wird eine bestimmte Zeitspanne für die Audioausgabe benötigt, da diese sofort nach der Audiowiedergabe gesperrt wird. - Seite 47 Installation und Verwendung des D-Out Smoother Nehmen Sie den Rest der Installation entsprechend den Instruktionen vor, die auf dem Bildschirm angezeigt werden. Wenn die Installation abgeschlossen ist, wird das Dialogfeld Setup Complete angezeigt. Klicken Sie auf [Finish]. Damit ist die Installation des D-Out Smoother abgeschlossen. Starten des D-Out Smoother Schließen Sie das UA-1D an den USB-Anschluss Ihres Computers an.
-
Seite 48: Verwendung Des D-Out Smoother
Installation und Verwendung des D-Out Smoother Verwendung des D-Out Smoother Der D-Out Smoother verfügt über einen “ON/OFF”-Schalter und eine Schaltfläche “TEST”. “ON/OFF”-Schalter Normalerweise lassen Sie diesen Schalter auf “ON” stehen, wenn Sie die Digitalausgabe des UA-1D verwenden. Stellen Sie den Schalter auf “OFF”, wenn Sie das UA-1D anschließen oder ausstecken. -
Seite 49: Löschen (Deinstallation) Des D-Out Smoother
Installation und Verwendung des D-Out Smoother Löschen (Deinstallation) des D-Out Smoother Der D-Out Smoother unterstützt die Windows-Funktion Eigenschaften von Software. Sie können wie folgt vorgehen, um das Programm zu entfernen, wenn es nicht Wenn Sie D-Out Smoother mehr benötigt wird. deinstallieren, sollten Sie zuerst [Register to Klicken Sie auf die Windows-Schaltfläche [Start] und... -
Seite 50: Anschlüsse Und Treiberinstallation (Macintosh)
Anschlüsse und Treiberinstallation (Macintosh) * Wenn Sie ein Windows-Anwender sind, lesen Sie bitte S. 37. Bevor Sie das UA-1D verwenden können, müssen Sie einen Was ist ein Treiber? Treiber installieren. UA-1D benutzt einen Treiber, der im -> S. 37 Mac OS enthalten ist. Bekannte Probleme: UA-1D •... -
Seite 51: Erkennung Des Geräts Veranlassen
Anschlüsse und Treiberinstallation (Macintosh) Anschlüsse und Treiberinstallation Erkennung des Geräts veranlassen Schalten Sie Ihren Computer ein und starten Sie Mac OS. Um Schäden an Ihren fig.03-02.e Lautsprechern zu vermeiden, drehen Sie die Lautstärkeregelung aller Wählen Sie im Menü angeschlossenen Apple die Option Audiogeräte zurück. -
Seite 52: Soundeinstellungen Vornehmen
Anschlüsse und Treiberinstallation (Macintosh) Soundeinstellungen vornehmen fig.03-05.e Wählen Sie im Menü Apple die Optionen [Control Panels] - [Sound], um den Dialog Sound zu öffnen. Klicken Sie auf die Registerkarte [Speakers]. fig.03-06.e Reduzieren Sie die Lautstärke des UA-1D und Ihrer Audiogeräte und klicken Sie anschließend auf [Start Test]. - Seite 53 Anschlüsse und Treiberinstallation (Macintosh) fig.03-08.e Wählen Sie [Input] im Wenn sie USB Audio nicht sehen, sollten Sie den Dialog Sound. Dialog Sound schließen. Anschließend wählen Sie Anschließend stecken Sie in Choose a source for das UA-1D aus und warten ca. zehn Sekunden. sound input: die Option Versuchen Sie danach, die USB Audio.
-
Seite 54: Informationen Zum Digitaleingang/Digitalausgang Des Ua-1D
Informationen zum Digitaleingang/ Digitalausgang des UA-1D Input Das UA-1D verfügt über zwei Digitaleingabe-Anschlüsse: OPTICAL IN und COAXIAL IN. Es ist jedoch nicht möglich, OPTICAL IN und COAXIAL IN gleichzeitig auszuwählen. Wenn Signale gleichzeitig in beide Anschlüsse eingegeben werden, erhält das Signal Priorität, das in OPTICAL IN eingespeist wird. - Seite 55 Informationen zum Digitaleingang/Digitalausgang des UA-1D Um das UA-1D verwenden zu können, um Audiodaten von Ihrem Computer abzuspielen, dürfen keine Audiosignale am Digitaleingabe-Anschluss eintreffen. Anders ausgedrückt, Sie dürfen entweder nichts mit dem Digitaleingabe-Anschluss verbinden oder Sie müssen das angeschlossene Gerät abschalten. Sampling-Frequenz Die Audiodaten werden zwischen dem UA-1D und dem Computer mit einer Auflösung von 16 Bit und mit...
-
Seite 56: Fehlerbehebung
Fehlerbehebung Wenn während der Verwendung des UA-1D unerwartete Fehler auftreten, lesen Sie bitte zunächst dieses Kapitel. Es enthält eine Fülle von Hinweisen, die Ihnen bei der Lösung der Probleme helfen werden. Die Probleme, die im Abschnitt Fehlerbehebung behandelt werden, sind nach den Betriebssystemen geordnet, unter denen das Problem eventuell auftreten kann. - Seite 57 Fehlerbehebung • Verfügt Ihr Computer oder USB-Hub über ausreichende Stromversorgungskapazität? Das UA-1D kann nicht angeschlossen werden, wenn es nicht mit ausreichend Spannung versorgt wird. Prüfen Sie, ob einer der folgenden Fälle zutrifft. Wenn Sie das UA-1D mit einem Notebook verwenden, das sich im Batteriebetrieb befindet, funktionieren einige Computermodelle möglicherweise unzuverlässig.
-
Seite 58: Treiber Wurden Nicht Vorschriftsmäßig Installiert
Fehlerbehebung Der Assistent für das Hinzufügen neuer Hardware wird angezeigt, obwohl Sie die Treiber installiert haben. Wenn Ihr Computer oder USB-Hub über zwei oder mehrere USB-Anschlüsse verfügt, kann der erste Anschluss des UA-1D an einen USB-Anschluss dazu führen, dass das Dialogfeld Hardware-Assistent angezeigt wird, obwohl die Treiber bereits installiert wurden. - Seite 59 Fehlerbehebung • Wurde ein Digitalgerät, wie z.B. ein MD-Gerät, an den Digitalausgang des UA-1D angeschlossen? Abhängig von Ihrer Anwendung kann das Abspielen von Sound mit einem digitalen Gerät, wie z.B. MD, das an den Digitalausgang des UA-1D angeschlossen ist, dazu führen, dass die Digitalaudioausgabe sofort nach der Wiedergabe einige Zeit lang gesperrt ist, so dass eine oder zwei Sekunden lang kein Sound erklingt.
-
Seite 60: Das Abspielen Von Sound Wird Von Rauschen Gestört
Fehlerbehebung Das Abspielen von Sound wird von Rauschen gestört • Der Grafikbeschleuniger Ihres Computers kann Rauschen während der Audiowiedergabe verursachen. Um die Hardwarebeschleunigung auf “Keine” einzustellen, gehen Sie wie folgt vor: Doppelklicken Sie in Windows in der Systemsteuerung auf [Anzeige], um das Dialogfeld Eigenschaften von Anzeige zu öffnen, und klicken Sie auf die Registerkarte [Einstellungen]. - Seite 61 Fehlerbehebung • Werden mehrere Anwendungen ausgeführt? Wenn Sie während der Wiedergabe mit mehreren Anwendungen arbeiten oder eine weitere Anwendung starten, wird die Wiedergabe eventuell auf bestimmten Computersystemen unterbrochen. Schließen Sie alle nicht benötigten Anwendungen und versuchen Sie es erneut. Wenn das Problem damit nicht gelöst wird, versuchen Sie, den Computer neu zu starten.
-
Seite 62: In Der Wiedergabe Oder Aufnahme Ist Rauschen Zu Hören
Fehlerbehebung Audiowiedergabe stoppt • Auf einigen Computern können die Energieverwaltungseinstellungen in der Systemsteuerung dazu führen, dass die Wiedergabe stoppt. Die Energieverwaltungseinstellungen, die angezeigt werden, wenn Sie auf Energieverwaltung klicken, sind je nach PC-System unterschiedlich. Ein Beispiel für die Einstellungen erhalten Sie untenstehend, aber Sie sollten zusätzlich im Handbuch Ihres Computers nachschlagen. -
Seite 63: Im Aufgenommenen Sound Ist Rauschen Zu Hören
Wählen Sie im Menü Apple die Option [Apple System Profiler]. Klicken Sie auf die Registerkarte [Devices and Volumes]. Der Bildschirm zeigt im USB-Abschnitt “Audio (EDIROL UA-1D)” an. Klicken Sie auf den Pfeil links von diesem Text. Die Nummer, die rechts von “Driver version” angezeigt wird, ist die Version des USB Audio-Treibers. -
Seite 64: Digitalaufnahme Nicht Möglich
Fehlerbehebung Digitalaufnahme nicht möglich • Wurde die Anwendung auf die gleiche Sampling-Frequenz eingestellt wie das Digitalgerät, das mit dem Digitaleingang-Anschluss verbunden ist? • Aufnahmen sind nicht mehr möglich, wenn Sie die Sampling-Frequenz (z.B. zwischen Digital Broadcast A-Modus und B-Modus) eines Geräts umschalten, während das Gerät mit den Digitaleingabe-Anschlüssen verbunden ist. -
Seite 65: Löschen Des Usb Audio Device-Treibers
Fehlerbehebung Löschen des USB Audio Device-Treibers Bei Neuinstallation des USB Audiogeräte-Treibers Wenn die Installation des USB Audiogeräte-Treibers vor Abschluss der Installation beendet wurde Gehen Sie wie folgt vor, um den Treiber zu löschen, der bereits installiert ist. * Die Erklärungen, die Sie an dieser Stelle finden, sind für ein durchschnittliches Windows-System vorgesehen. - Seite 66 Fehlerbehebung Wenn Sie Windows Me verwenden und angezeigt wird: Schließen Sie einfach die Systemeigenschaften. Trennen Sie das USB-Kabel von Ihrem Computer und starten Sie Windows neu.
-
Seite 67: Connexions Et Installation Des Pilotes (Windows)
Connexions et installation des pilotes (Windows) * Si vous possédez un Macintosh, reportez-vous à la p. 80. Pour utiliser l'UA-1D, vous devez d'abord installer consécutivement les pilotes Périphérique USB Composite, Périphérique d'interface utilisateur USB et Périphérique Audio USB. Ces pilotes sont inclus avec Windows. Si vous utilisez Windows 98, ce pilote est fourni sur le CD-ROM de Microsoft Windows, dont vous aurez besoin pendant l'installation. - Seite 68 Connexions et installation des pilotes (Windows) Etablissement des connexions et installation du pilote Utilisateurs de Windows Me * Si vous utilisez une machine Windows 2000, voir p. 69 ; pour Windows 98, voir p. 69. Mettez votre ordinateur sous tension, démarrez Windows et utilisez un câble USB pour connecter Pour éviter d'endommager l'UA-1D à...
- Seite 69 Connexions et installation des pilotes (Windows) Utilisateurs de Windows 2000 * Si vous utilisez une machine Windows Me, voir p. 68 ; pour Windows 98, voir p. 69. Mettez votre ordinateur sous tension et démarrez Windows. Utilisez un câble USB pour connecter l'UA-1D à votre ordinateur.
- Seite 70 Connexions et installation des pilotes (Windows) fig.02-05.e Un Périphérique USB Si cette boîte de dialogue Composite est détecté ne s'affiche pas, reportez- vous à la section automatiquement et la boîte Problèmes liés au pilote de dialogue de l'Assistant USB (p. 86). ajout de nouveau matériel s'affiche.
- Seite 71 Connexions et installation des pilotes (Windows) Si le CD-ROM de Microsoft Windows n'est pas inséré dans le lecteur de CD-ROM, la boîte de dialogue suivante peut s'afficher. Dans ce cas, insérez le CD-ROM de Microsoft Windows dans le lecteur de CD-ROM et cliquez sur [OK]. fig.02-09.e fig.02-10.e Une fois l'installation du...
- Seite 72 Connexions et installation des pilotes (Windows) fig.02-13.e Ensuite, le Périphérique Audio USB est détecté automatiquement et la boîte de dialogue Assistant ajout de nouveau matériel s'affiche. Cliquez sur [Suivant] et continuez l'installation en suivant exactement les procédures décrites aux étapes 3 – 6 (p. 70). fig.02-14.e Une fois l'installation du pilote Périphérique Audio...
- Seite 73 Connexions et installation des pilotes (Windows) Win 2000 / Me : Dans le Panneau de configuration, cliquez deux fois sur l'icône [Sons et Multimédia] pour ouvrir la boîte de dialogue Propriétés de Sons et multimédia. * Si vous ne trouvez pas l'icône [Sons et Multimédia], cliquez alors sur [Afficher toutes les options du Panneau de configuration] dans le Panneau de configuration.
- Seite 74 Connexions et installation des pilotes (Windows) Réglages du Contrôle du volume Le volume de sortie de l'UA-1D peut être contrôlé par le Contrôle du volume de Windows. Si le Contrôle du volume n'est pas installé sur votre ordinateur, utilisez Ajout/ Suppression Cliquez sur le bouton [Démarrer] de Windows, puis d'applications dans le...
- Seite 75 Connexions et installation des pilotes (Windows) Lorsque vous utilisez le lecteur de CD-ROM de votre ordinateur pour lire un CD audio ou pour lire la musique de fond des jeux avec l'UA-1D : Avec Windows Me : Sélectionnez [Démarrer] - [Paramètres] - [Panneau de configuration].
-
Seite 76: Installation Et Utilisation Du D-Out Smoother
Installation et utilisation du D-Out Smoother Si vous connectez l'UA-1D à une machine Windows, vous devez installer le D-Out Smoother en suivant la procédure ci-après. Présentation du D-Out Smoother Lorsque qu'un périphérique numérique tel qu'un MD ou un DAT est utilisé en lecture, connecté à la sortie numérique de l'UA-1D, le verrouillage de la sortie audio demande un certain temps après la lecture audio, ce qui peut provoquer un silence d'une ou deux secondes, ou fausser la tonalité... - Seite 77 Installation et utilisation du D-Out Smoother Lorsque l'installation est terminée, la boîte de dialogue Installation terminée apparaît. Cliquez sur [Terminer]. L'installation du D-Out Smoother est terminée. Démarrage du D-Out Smoother Connectez l'UA-1D au connecteur USB de votre ordinateur. Cliquez sur le bouton [Démarrer] de Windows et dans le menu [Programmes], cliquez sur [D-Out Smoother].
- Seite 78 Installation et utilisation du D-Out Smoother Utilisation du D-Out Smoother D-Out Smoother possède un interrupteur “ON/OFF” et un bouton “TEST”. Interrupteur “ON/OFF” Normalement, vous laissez cet interrupteur sur “ON” lorsque vous utilisez la sortie numérique de l'UA-1D. Mettez-le sur “OFF” lorsque vous connectez ou déconnectez l'UA-1D.
- Seite 79 Installation et utilisation du D-Out Smoother Suppression (désinstallation) du D-Out Smoother D-Out Smoother prend en charge la fonction Ajout/ Suppression de programmes de Windows. Vous pouvez utiliser la procédure suivante pour supprimer le programme lorsqu'il n'est plus nécessaire. Si vous désinstallez D-Out Smoother, vous devez Cliquez sur le bouton [Démarrer] de Windows, puis d'abord désélectionner...
-
Seite 80: Connexions Et Installation Des Pilotes (Macintosh)
Connexions et installation des pilotes (Macintosh) * Si vous possédez un PC sous Windows, reportez-vous p. 67. Pour pouvoir utiliser l'UA-1D, vous devez d'abord installer Qu'est-ce qu'un pilote ? un pilote. L'UA-1D utilise un pilote inclus dans le système -> p. 67 Mac OS. - Seite 81 Connexions et installation des pilotes (Macintosh) Etablissement des connexions et installation du pilote Reconnaissance de l'appareil Démarrez votre Macintosh. Pour éviter d'endommager fig.03-02.e vos haut-parleurs, baissez le volume sur les périphériques audio Dans le menu Apple, éventuellement connectés. sélectionnez [Informations système Apple].
-
Seite 82: Réglages Du Son
Connexions et installation des pilotes (Macintosh) Réglages du son fig.03-05.e Dans le menu Apple, sélectionnez [Tableaux de bord] - [Son] pour ouvrir la boîte de dialogue Son. Cliquez sur l'onglet [Enceintes]. fig.03-06.e Baissez le volume sur l'UA-1D et sur votre appareil audio, puis cliquez sur [Démarrer test]. - Seite 83 Connexions et installation des pilotes (Macintosh) fig.03-08.e Sélectionnez [Entrée] dans Si USB Audio n'est pas disponible, fermez la boîte la boîte de dialogue Son. de dialogue Son. Pour Choisissez un Déconnectez ensuite périphérique d'entrée l'UA-1D et attendez environ dix secondes. audio :, choisissez USB Recommencez l'opération, Audio.
-
Seite 84: A Propos Des Entrées Et Sorties Numériques De L'ua-1D
A propos des entrées et sorties numériques de l'UA-1D Entrée L'UA-1D est équipé de deux prises d'entrée numérique : OPTICAL IN et COAXIAL IN. Il n'est cependant pas possible d'utiliser les prises OPTICAL IN et COAXIAL IN simultanément. Si les signaux sont entrés simultanément sur les deux prises, celui envoyé... -
Seite 85: Fréquence D'échantillonnage
A propos des entrées et sorties numériques de l'UA-1D Fréquence d’échantillonnage Les données audio sont transférées entre l'UA-1D et l'ordinateur à une résolution de 16 bits et à des fréquences d'échantillonnage de 48 kHz en sortie. La résolution 16 bits et les fréquences d'échantillonnage de 32/44,1/48 kHz sont acceptées en entrée. -
Seite 86: En Cas De Problème
En cas de problème Si un problème inattendu se produit avec l'UA-1D, veuillez lire ce chapitre. Il offre de nombreux conseils pour vous aider. Les problèmes décrits dans cette section sont identifiés par système d'exploitation. Les icônes à gauche du titre vous indiquent les plate-formes concernées. - Seite 87 En cas de problème • Votre ordinateur ou votre répartiteur USB est-il suffisamment alimenté ? L'UA-1D ne peut être connecté s'il est insuffisamment alimenté. Vérifiez si l'un de ces cas s'applique. Si vous utilisez l'UA-1D avec un ordinateur portable fonctionnant sur sa batterie, le fonctionnement peut ne pas être fiable avec certains modèles d'ordinateurs.
-
Seite 88: Absence De Son
En cas de problème La boîte de dialogue “ Assistant ajout de nouveau matériel ” s'affiche même si vous avez installé les pilotes. Si votre ordinateur ou répartiteur USB dispose de plusieurs connecteurs USB, lorsque vous connectez l'UA-1D à un connecteur USB sur lequel il n'a jamais été connecté, la boîte de dialogue “Assistant ajout de nouveau matériel”... - Seite 89 En cas de problème • Un périphérique numérique comme un MiniDisc est-il connecté à la sortie numérique de l'UA-D ? Selon votre application, la lecture audio avec un périphérique numérique comme un MiniDisc connecté à la sortie numérique de l'UA-1D peut demander qu'un certain laps de temps soit alloué...
- Seite 90 En cas de problème La lecture audio comporte du bruit • La carte graphique de votre ordinateur peut provoquer du bruit lors de la lecture audio. Exécutez la procédure suivante pour régler l'accélération graphique sur “Aucune”. Dans le Panneau de configuration de Windows, cliquez deux fois sur [Affichage] pour ouvrir la boîte de dialogue [Propriétés d'affichage], puis cliquez sur l'onglet [Paramètres].
- Seite 91 En cas de problème • Avez-vous beaucoup d'applications fonctionnant en même temps ? Si vous utilisez beaucoup d'applications pendant la lecture ou si vous démarrez d'autres applications, la lecture peut s'interrompre en fonction de votre ordinateur. Quittez toutes les applications non utilisées et réessayez. Si cela ne résout pas le problème, redémarrez l'ordinateur.
- Seite 92 En cas de problème Arrêt de la lecture audio • Sur certains ordinateurs, les paramètres de Gestion de l'alimentation du Panneau de configuration peuvent provoquer l'arrêt de la lecture. Les Propriétés de la gestion de l'alimentation qui s'affichent lorsque vous cliquez deux fois sur Gestion de l'alimentation varient selon votre ordinateur.
- Seite 93 Dans le menu Apple, sélectionnez [Informations système Apple]. Cliquez sur l'onglet [Périphériques/Volumes]. Dans la section USB, l'écran indique “Audio (EDIROL UA-1D)”. Cliquez sur la flèche à gauche de ce texte. Le numéro affiché à droite de “Version du pilote” est la version du pilote audio USB.
- Seite 94 En cas de problème Impossible d'enregistrer en numérique • L'application est-elle réglée à la même fréquence d'échantillonnage que l'appareil numérique branché au connecteur de l'entrée numérique ? • L'enregistrement ne sera pas possible si vous changez la fréquence d'échantillonnage (par exemple, d'un mode de diffusion numérique A à...
- Seite 95 En cas de problème Suppression du pilote Périphérique Audio USB Si vous réinstallez le pilote Périphérique Audio USB Si l'installation du pilote Périphérique Audio USB s'est interrompue avant la fin Procédez comme suit pour supprimer le pilote déjà installé. * L'explication donnée ici concerne un système Windows standard. Selon votre ordinateur, les noms de certains dossiers peuvent être différents.
- Seite 96 En cas de problème Si aucune icône de périphérique compatible USB n'apparaît, ou si s'affiche pas : Fermez simplement Propriétés système. Si vous utilisez Windows Me et que est affiché : Fermez simplement Propriétés système. Débranchez le câble USB de votre ordinateur et redémarrez Windows.
-
Seite 97: Collegamenti E Installazione Del Driver (Windows)
Collegamenti e installazione del driver (Windows) * Per gli utenti Macintosh, fare riferimento a pag. 97. Per poter utilizzare l’UA-1D, è necessario installare prima il driver Periferica composita USB e successivamente nell’ordine il driver Interfaccia utente USB e il driver Periferica audio USB. - Seite 98 Collegamenti e installazione del driver (Windows) Collegamenti e installazione del driver Utenti Windows Me * Se si lavora in ambiente Windows 2000, fare riferimento alla sezione pag. 99, se Windows 98, fare riferimento alla sezione pag. 99. Accendere il computer e avviare Windows e utilizzare Per evitare di danneggiare un cavo USB per collegare l’UA-1D al computer.
- Seite 99 Collegamenti e installazione del driver (Windows) Utenti Windows 2000 * Se si lavora in ambiente Windows Me, fare riferimento alla sezione pag. 98, se Windows 98, fare riferimento alla sezione pag. 99. Accendere il computer e avviare Windows. Utilizzare un cavo USB per collegare l’UA-1D al computer. L’UA-1D è...
- Seite 100 Collegamenti e installazione del driver (Windows) fig. 02-05.e Il dispositivo Periferica Se questa finestra non composita USB viene appare, fare riferimento alla sezione Problemi rilevato automaticamente e relativi al driver USB appare la finestra di dialogo (pag. 116). Installazione guidata Nuovo hardware.
- Seite 101 Collegamenti e installazione del driver (Windows) Se il CD-ROM di Microsoft Windows non è presente nell’unità CD-ROM, potrebbe apparire la seguente finestra di dialogo. In questo caso, inserire il CD-ROM di Microsoft Windows nell’unità CD-ROM e fare clic su [OK]. fig.
- Seite 102 Collegamenti e installazione del driver (Windows) fig. 02-13.e Nella tappa successiva, il dispositivo Periferica audio USB viene rilevato automaticamente e appare la finestra di dialogo Installazione guidata Nuovo hardware. Fare clic su [Avanti] e continuare l’installazione seguendo la stessa procedura indicata ai passi 3 – 6 (p.100). fig.
- Seite 103 Collegamenti e installazione del driver (Windows) Win 2000 / Me: Nel Pannello di controllo, fare doppio clic sull’icona [Suoni e multimedia] per aprire la finestra Proprietà suoni e multimedia. * Se l’icona [Suoni e multimedia] non risulta visualizzata nel Pannello di controllo, fare clic su [visualizza tutte le opzioni del Pannello di controllo].
- Seite 104 Collegamenti e installazione del driver (Windows) Impostazioni Controllo volume Il volume dell’UA-1D può essere regolato tramite il Controllo volume di Windows. Se il Controllo volume non è installato sul computer, utilizzare Installazione applicazioni Fare clic sul pulsante [Start] in Windows e selezionare nel Pannello di controllo [Programmi] - [Accessori] - [Svago] - [Controllo per installarlo.
- Seite 105 Collegamenti e installazione del driver (Windows) Se si utilizza l’unità CD-ROM del computer per riprodurre un CD audio o se si riproduce musica di sottofondo per i giochi con l’UA-1D. Se si utilizza Windows Me: Selezionare [Start] - [Impostazioni] - [Pannello di controllo].
-
Seite 106: Installazione E Utilizzo Di D-Out Smoother
Installazione e utilizzo di D-Out Smoother Quando si collega l’UA-1D a un computer Windows, sarà necessario installare il programma D-Out Smoother seguendo la procedura sotto indicata. Descrizione di D-Out Smoother Quando dei dati audio sono riprodotti su un dispositivo digitale come un MD o DAT collegato all’uscita digitale dell’UA-1D, potrebbe trascorrere un certo intervallo di tempo prima che l’audio venga bloccato subito dopo la riproduzione e quindi per uno o due secondi l’audio potrebbe essere... - Seite 107 Installazione e utilizzo di D-Out Smoother Eseguire il resto dell’installazione seguendo le istruzioni visualizzate. Alla fine dell’installazione compare la finestra di dialogo Setup Complete. Fare clic su [Fine]. L’installazione di D-Out Smoother è giunta al termine. Avvio di D-Out Smoother Collegare l’UA-1D al connettore USB del computer.
- Seite 108 Installazione e utilizzo di D-Out Smoother Uso di D-Out Smoother D-Out Smoother è provvisto di un interruttore “ON/OFF” e di un pulsante “TEST”. Interruttore “ON/OFF” Generalmente viene lasciato in posizione “ON” quando si usa l’uscita digitale dell’UA-1D. Metterlo in posizione “OFF” in fase di collegamento o scollegamento dell’UA-1D.
- Seite 109 Installazione e utilizzo di D-Out Smoother Cancellazione (disinstallazione) di D-Out Smoother D-Out Smoother supporta la funzione Installazione applicazioni di Windows. Se necessario, è possibile seguire la procedura sotto indicata per rimuovere il programma. Prima di disinstallare D- Out Smoother, è In Windows, fare clic sul pulsante [Start] e in opportuno deselezionare [Impostazioni] scegliere [Pannello di controllo].
-
Seite 110: Collegamenti E Installazione Del Driver (Macintosh)
Collegamenti e installazione del driver (Macintosh) * Per gli utenti Windows, fare riferimento alla sezione pag. 97. Per poter utilizzare l’UA-1A, è necessario installare prima il Definizione di un driver driver. L'UA-1D utilizza un driver fornito con Mac OS. -> pag. 97 Problemi noti: UA-1D •... - Seite 111 Collegamenti e installazione del driver (Macintosh) Collegamenti e installazione del driver Riconoscimento dell’apparecchio Accendere il computer e avviare MacOS. Per evitare di danneggiare fig.03-02.e gli altoparlanti, ridurre al minimo il volume dei dispositivi audio Nel menu Apple eventualmente collegati. selezionare [Apple System Profiler].
- Seite 112 Collegamenti e installazione del driver (Macintosh) Impostazione dei parametri audio fig.03-05.e Nel menu Apple, selezionare [Control Panels] - [Sound] per aprire la finestra Sound. Fare clic sulla scheda [Speakers]. fig.03-06.e Abbassare al minimo il volume dell’UA-1D e degli apparecchi audio e fare clic su [Start Test].
- Seite 113 Collegamenti e installazione del driver (Macintosh) fig.03-08.e Selezionare la scheda Se l'USB Audio non è visualizzato, chiudere la [Input] nella finestra finestra Sound. Scollegare Sound. In Choose a poi l’UA-1D e attendere source for sound input:, circa dieci secondi. Riprendere quindi la scegliere USB Audio.
-
Seite 114: Informazioni Sulle Uscite E Sugli Ingressi Digitali Dell'ua-1D
Informazioni sulle uscite e sugli ingressi digitali dell’UA-1D Ingressi L’UA-1D è provvisto di due connettori di ingresso digitale: OPTICAL IN e COAXIAL IN. Non è tuttavia possibile utilizzare entrambi gli ingressi OPTICAL IN e COAXIAL IN contemporaneamente. Se i segnali vengono trasmessi contemporaneamente ai due connettori, il segnale OPTICAL IN sarà... -
Seite 115: Frequenza Di Campionamento
Informazioni sulle uscite e sugli ingressi digitali dell’UA-1D Per poter utilizzare l’UA-1D per riprodurre i dati audio provenienti dal computer, il connettore d’ingresso digitale non devericevere segnali in entrata. Bisogna quindi evitare di collegare dispositivi al connettore di ingresso digitale o altrimenti spegnere il dispositivo collegato. -
Seite 116: Ricerca E Soluzione Dei Problemi
Ricerca e soluzione dei problemi Se nell’usare l’UA-1D si dovessero incontrare dei problemi, leggere questo capitolo. Contiene numerosi suggerimenti che possono contribuire a risolvere il problema. I problemi esaminati in questa sezione sono organizzati in base al sistema operativo sul quale si possono verificare. L’icona a sinistra del titolo indica il sistema operativo interessato. - Seite 117 Ricerca e soluzione dei problemi • Il computer o l’hub USB è in grado di fornire la capacità di alimentazione sufficiente? L’UA-1D non potrà essere collegato se l’alimentazione è insufficiente. Verificare se ci si trova in una delle seguenti situazioni. Se l’UA-1D viene utilizzato con un computer portatile alimentato dalla batteria, per alcuni modelli di computer il funzionamento potrebbe essere discontinuo.
- Seite 118 Ricerca e soluzione dei problemi La finestra Installazione guidata Nuovo hardware appare anche se i driver sono già stati installati Se il computer utilizzato o l’hub USB sono equipaggiati di due o più connettori USB e l’UA-1D viene collegato a un connettore USB al quale non è mai stato collegato prima, potrebbe apparire la finestra di dialogo Installazione guidata Nuovo hardware anche se i driver sono già...
- Seite 119 Ricerca e soluzione dei problemi • Una periferica digitale come un MD è collegata all’uscita digitale dell’UA-1D? A seconda dell’applicazione, quando dei dati audio sono riprodotti su un dispositivo digitale come un MD collegato all’uscita digitale dell’UA-1D, potrebbe trascorrere un certo intervallo di tempo prima che l’audio venga bloccato subito dopo la riproduzione e quindi per uno o due secondi l’audio potrebbe essere interrotto.
- Seite 120 Ricerca e soluzione dei problemi La riproduzione audio è disturbata • Il disturbo durante la riproduzione audio potrebbe essere causato dall’acceleratore grafico del computer. Per impostare l'accelerazione grafica su “Nessuna”, attenersi alla seguente procedura: Nel Pannello di controllo di Windows, fare doppio clic su [Schermo] per aprire la finestra di dialogo Proprietà...
- Seite 121 Ricerca e soluzione dei problemi • Sono in corso di esecuzione molte applicazioni? Se durante la riproduzione sono attive molte applicazioni o se ne avvia un’altra, la riproduzione potrebbe interrompersi a seconda della configurazione del computer. Chiudere tutte le applicazioni non necessarie e riprovare. Se il problema persiste, provare a riavviare il computer.
- Seite 122 Ricerca e soluzione dei problemi La riproduzione audio si interrompe • Su alcuni computer le impostazioni relative al risparmio energia nel Panello di controllo potrebbero provocare l’interruzione della riproduzione audio. Le Proprietà di risparmio energia, visualizzate dopo aver fatto doppio clic su Risparmio energia, cambiano in base al computer utilizzato.
- Seite 123 Nel menu Apple selezionare [Apple System Profiler]. Fare clic sulla scheda [Devices and Volumes]. Nella sezione USB, la finestra visualizza “Audio (EDIROL UA-1D)”. Fare clic sulla freccia a sinistra. Il numero visualizzato a destra di “Driver version” corrisponde alla versione del driver audio USB.
- Seite 124 Ricerca e soluzione dei problemi Impossibile registrare digitalmente • L’applicazione è impostata sulla stessa frequenza di campionamento del dispositivo digitale collegato al connettore d’ingresso digitale? • La registrazione non sarà più possibile se la frequenza di campionamento di un dispositivo viene modificata (passando ad esempio dal modo di trasmissione digitale A a B) mentre questo rimane collegato ai connettori d’ingresso digitale.
- Seite 125 Ricerca e soluzione dei problemi Cancellazione del driver Periferica audio USB Reinstallazione del driver Periferica audio USB Se l’installazione del driver Periferica audio USB si è interrotta prima della fine Seguire la procedura di seguito indicata per cancellare il driver che è già stato installato. * La procedura di seguito illustrata è...
- Seite 126 Ricerca e soluzione dei problemi Se si utilizza Windows Me e è visualizzato: Chiudere Proprietà del sistema. Scollegare il cavo USB dal computer e riavviare Windows.
-
Seite 127: Instalación Del Controlador Y Conexiones (Windows)
Instalación del controlador y conexiones (Windows) * Si es usuario de Macintosh, consulte la pág. 140. Para utilizar el UA-1D, primero debe instalar el controlador Dispositivo USB Composite, el controlador Interfaz humana USB y el controlador Dispositivo de audio USB consecutivamente. - Seite 128 Instalación del controlador y conexiones (Windows) Realización de las conexiones e instalación del controlador Usuarios de Windows Me * Si utiliza un equipo con Windows 2000, consulte la pág. 129; si utiliza un equipo con Windows 98, consulte la pág. 129. Encienda el PC e inicie Windows, utilice un cable USB Para evitar causar daños a para conectar el UA-1D al sistema.
- Seite 129 Instalación del controlador y conexiones (Windows) Usuarios de Windows 2000 * Si utiliza un equipo con Windows Me, consulte la pág. 128; si utiliza un equipo con Windows 98, consulte la pág. 129. Encienda el PC e inicie Windows. Utilice un cable USB para conectar el UA-1D al PC. El PC reconocerá...
- Seite 130 Instalación del controlador y conexiones (Windows) fig.02-05.e Se detectará Si no aparece este cuadro automáticamente un de diálogo, consulte el Dispositivo USB apartado Problemas Composite y aparecerá el relacionados con el controlador USB cuadro de diálogo (pág. 146). Asistente para agregar nuevo hardware.
- Seite 131 Instalación del controlador y conexiones (Windows) Si no ha insertado el CD-ROM de Microsoft Windows en la unidad de CD-ROM, puede que aparezca el siguiente cuadro de diálogo. Si esto ocurre, inserte el CD-ROM de Microsoft Windows en la unidad de CD-ROM y haga clic en [Aceptar]. fig.02-09.e fig.02-10.e Cuando haya finalizado la...
- Seite 132 Instalación del controlador y conexiones (Windows) fig.02-13.e A continuación, se detectará automáticamente el Dispositivo de audio USB y aparecerá el cuadro de diálogo Asistente para agregar nuevo hardware. Haga clic en [Siguiente] y prosiga con la instalación siguiendo el procedimiento que se indica en los pasos 3 –...
- Seite 133 Instalación del controlador y conexiones (Windows) Win 2000 / Me: En Panel de control, haga doble clic en el icono [Sonidos y Multimedia] para abrir el cuadro de diálogo Propiedades de Sonido y Multimedia. * Si no encuentra el icono [Sonidos y Multimedia], vaya a Panel de control y haga clic en [Ver todas las opciones del Panel de control].
- Seite 134 Instalación del controlador y conexiones (Windows) Configuración del control de volumen El volumen de salida del UA-1D se puede controlar mediante el Control de volumen de Windows. Si no tiene instalada en su PC la opción Control de volumen, utilice la opción Agregar o quitar Haga clic en el botón [Inicio] de Windows y seleccione programas del Panel de...
- Seite 135 Instalación del controlador y conexiones (Windows) Cuando utilice la unidad de CD-ROM del PC para escuchar un CD de audio o cuando reproduzca música de fondo de juegos con el UA-1D. Si utiliza Windows Me: Seleccione [Inicio] - [Configuración] - [Panel de control]. En Panel de control, haga doble clic en el icono [Sistema] para acceder al cuadro de diálogo Propiedades del sistema.
-
Seite 136: Instalación Y Utilización Del D-Out Smoother
Instalación y utilización del D-Out Smoother Cuando conecte el UA-1D a un sistema Windows, debe instalar el D-Out Smoother siguiendo las instrucciones que se especifican a continuación. ¿Qué es el D-Out Smoother? Cuando se reproduce audio a través de un aparato digital como un MD o DAT que está... - Seite 137 Instalación y utilización del D-Out Smoother Efectúe el resto de la instalación según se le indica en las instrucciones que aparecen en pantalla. Cuando finaliza la instalación, aparece el cuadro de diálogo Setup Complete (Programa de instalación completo). Haga clic en [Finish] (Finalizar). Con esto finaliza la instalación del D-Out Smoother.
- Seite 138 Instalación y utilización del D-Out Smoother Utilización del D-Out Smoother El D-Out Smoother tiene un interruptor “ON/OFF” y un botón “TEST”. Interruptor “ON/OFF” Por lo general, debe dejar este interruptor en la posición “ON” (Activado) cuando utilice la salida digital del UA-1D. Dispóngalo en la posición “OFF”...
- Seite 139 Instalación y utilización del D-Out Smoother Eliminación (desinstalación) del D-Out Smoother El D-Out Smoother da soporte a la función Propiedades de agregar o quitar programas de Windows. Puede utilizar el siguiente procedimiento para quitar el programa si ya no lo necesita.
-
Seite 140: Instalación Del Controlador Y Conexiones (Macintosh)
Instalación del controlador y conexiones (Macintosh) * Si es usuario de Windows, consulte la pág. 127. Para poder utilizar la unidad UA-1D, primero debe instalar ¿Qué es un controlador? un controlador. El UA-1D utiliza un controlador que viene -> pág. 127 con el sistema operativo Mac. - Seite 141 Instalación del controlador y conexiones (Macintosh) Realización de las conexiones e instalación del controlador Preparando la unidad para su reconocimiento Encienda el PC e inicie el sistema operativo Mac. Para evitar causar daños a fig.03-02.e los altavoces, baje el volumen de todos los dispositivos de audio que En el menú...
-
Seite 142: Configuración Del Sonido
Instalación del controlador y conexiones (Macintosh) Configuración del sonido fig.03-05.e En el menú Apple, seleccione [Control Panels] - [Sound] para abrir el cuadro de diálogo Sound. Haga clic en la ficha [Speakers]. fig.03-06.e Apague el volumen del UA-1D y del equipo de audio y, a continuación, haga clic en [Start Test]. - Seite 143 Instalación del controlador y conexiones (Macintosh) fig.03-08.e Seleccione [Input] en el Si no ve la opción USB cuadro de diálogo Sound. Audio, debe cerrar el cuadro de diálogo Sound. A continuación, en A continuación, desconecte Choose a source for el UA-1D y espere unos sound input:, seleccione diez segundos.
-
Seite 144: Información Acerca De La Entrada/Salida Digital De La Unidad Ua-1D
Información acerca de la entrada/salida digital de la unidad UA-1D Input (Entrada) El UA-1D dispone de dos conectores de entrada digital: OPTICAL IN (entrada óptica) y COAXIAL IN(entrada coaxial). Sin embargo, OPTICAL IN y COAXIAL IN no pueden utilizarse simultáneamente. Si ambos conectores reciben señales de entrada simultáneamente, se da prioridad a la señal de la entrada OPTICAL IN. - Seite 145 Información acerca de la entrada/salida digital de la unidad UA-1D Si desea utilizar el UA-1D para reproducir datos de audio desde su PC, el conector de entrada digital no debe recibir ninguna señal de entrada . Dicho de otro modo, o no conecta nada al conector de entrada digital o bien apaga los dispositivos conectados.
-
Seite 146: Resolución De Problemas
Resolución de problemas Si sucede un problema inesperado mientras utiliza el UA-1D, antes de todo, lea este capítulo. Le ofrece numerosos consejos que le ayudarán a resolver los problemas que se le presenten. Los problemas que se recogen en el apartado de resolución de problemas se encuentran ordenados según el sistema operativo en el que puede ocurrir el problema. - Seite 147 Resolución de problemas • ¿El concentrador USB o el PC tienen suficiente capacidad de fuente de alimentación? El UA-1D no se puede conectar si no se le suministra suficiente electricidad. Compruebe si se produce alguno de los casos siguientes: Si utiliza la unidad UA-1D con un PC portátil que funcione con baterías, el funcionamiento puede no ser fiable con algunos modelos de PC.
- Seite 148 Resolución de problemas Aparecerá el cuadro de diálogo “Asistente para agregar nuevo Hardware” aunque haya instalado los controladores. Si el PC o el concentrador USB tienen dos o más conectores USB, si conecta la unidad UA-1D a un conector USB al que no se le haya conectado nunca, puede que aparezca el cuadro de diálogo Asistente para agregar nuevo hardware aunque los controladores ya hayan sido instalados.
- Seite 149 Resolución de problemas • ¿Está conectado un dispositivo digital como un MD a la salida digital de la unidad UA-1D? En función de la aplicación, la reproducción de audio con un dispositivo digital como un MD que se ha conectado a la salida digital de la unidad UA-1D puede ocasionar que se requiera un tiempo para que se bloquee la salida de audio digital inmediatamente después de la reproducción, de modo que no se escuchará...
- Seite 150 Resolución de problemas Se oye ruido al reproducir audio • El acelerador gráfico del PC puede provocar ruido durante la reproducción de audio. Utilice el procedimiento siguiente para establecer la aceleración gráfica en “Ninguna”. En el Panel de control de Windows, haga doble clic en [Pantalla] para abrir el cuadro de diálogo Propiedades de pantalla y haga clic en la ficha [Configuración].
- Seite 151 Resolución de problemas • ¿Se están ejecutando múltiples aplicaciones? Si utiliza múltiples aplicaciones durante una reproducción o inicia otra aplicación, puede que la reproducción se interrumpa dependiendo de su sistema. Salga de todas las aplicaciones que no utilice y vuelva a intentarlo. Si de este modo no soluciona el problema, inténtelo reiniciando el PC.
- Seite 152 Resolución de problemas La reproducción de audio se detiene • En algunos PC, la configuración de la Administración de energía del Panel de control puede ocasionar que se detenga la reproducción de audio. Las Propiedades de Administración de energía que se muestran cuando hace doble clic en Administración de energía variarán dependiendo del sistema de su PC.
- Seite 153 Desde el menú Apple, seleccione [Apple System Profiler]. Haga clic en la ficha [Devices and Volumes]. En la sección USB, la pantalla indicará “Audio (EDIROL UA-1D)”. Haga clic en la flecha que se encuentra a la izquierda del texto. El número que se muestra a la derecha de “Driver version” es la versión del controlador de audio USB.
- Seite 154 Resolución de problemas No se puede grabar digitalmente • ¿La aplicación está configurada en la misma frecuencia de sampling que el aparato digital conectado al conector de entrada digital? • La grabación no será posible si modifica la frecuencia de sampling (por ejemplo, entre el modo A y el modo B de transmisión digital) de un aparato mientras éste siga conectado a los conectores de entrada digital.
- Seite 155 Resolución de problemas Eliminación del controlador de dispositivo de audio USB Si vuelve a instalar el controlador de dispositivo de audio Si la instalación del controlador de dispositivo de audio USB se detuvo antes de acabar Utilice el siguiente procedimiento para eliminar el controlador que ya está...
- Seite 156 Resolución de problemas Si no hay ningún icono de dispositivo compatible USB o si no aparece el símbolo Sólo tiene que cerrar Propiedades del sistema. Si utiliza Windows Me y aparece el símbolo Sólo tiene que cerrar Propiedades del sistema. Desconecte el cable USB del PC y vuelva a iniciar Windows.
-
Seite 157: Specifications
Specifications UA-1D: USB Audio Interface Number of Audio Record/Playback Channels Record: 2 channels (stereo) Playback: 2 channels (stereo) Signal Processing PC interface: 16 bits Sampling Frequency Output: 48 kHz Input: 32/44.1/48 kHz * * During recording, this device does not support the changes in the sampling frequency that can be invoked by some digital devices (e.g., through the audio mode switching of a satellite receiver). - Seite 158 MEMO...
- Seite 159 Information When you need repair service, call your nearest EDIROL/Roland Service Center or authorized EDIROL/Roland distributor in your country as shown below. HONG KONG BRAZIL HUNGARY AUSTRALIA MIDDLE EAST Tom Lee Music Co., Ltd. Intermusica Ltd Roland Brasil Ltda EDIROL Australia Pty. Ltd.
- Seite 160 02785012 1*KG...