Inhaltsverzeichnis
Werbung
Verfügbare Sprachen
Verfügbare Sprachen
Werbung
Kapitel
Inhaltsverzeichnis
Fehlerbehebung

Verwandte Anleitungen für camping first Satmex 65 plus


Inhaltszusammenfassung für camping first Satmex 65 plus
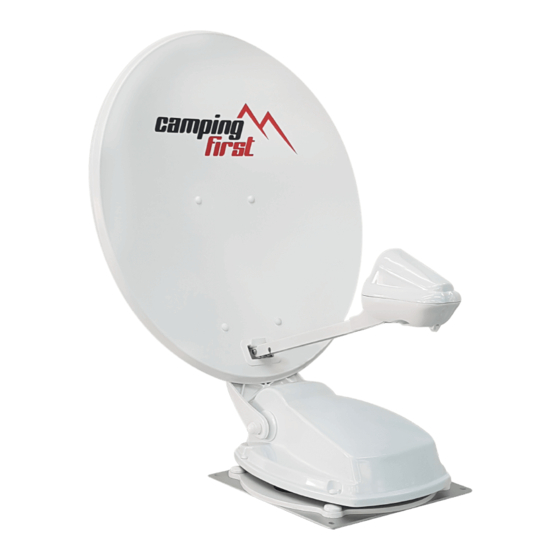
- Seite 1 Satmex 65 / 80 plus Bedienungsanleitung...
-
Seite 2: Inhaltsverzeichnis
10. Technische Daten ............... 21 – Antenneneinheit inkl. Spiegel – Dachdurchführung – Steuergerät – 2,5 m Motorsteuerkabel 11. Abmessungen – Bedienteil – 2,5 m RG6-U-6 LNB-Kabel 11.1 Satmex 65 plus ..............22 – Auflagefuß – Bedienungsanleitung 11.2 Satmex 80 plus ..............23 DEUTSCH DEUTSCH... -
Seite 3: Steuergerät Und Bedienteil
2. Steuergerät und Bedienteil 2. Steuergerät und Bedienteil 2.1 Steuergerät Vorderseite 2.3 Bedienteil 1. p: 1. I/O: Hauptschalter zur Stromversorgung. Wechselt hochwärts zu einem Satelliten. Standby-Taste und Taste zur Verbindung mit einem Mobilgerät via Bluetooth ® 2. q: Wechselt runterwärts zu einem Satelliten. 3. -
Seite 4: Montage Und Installation
2 mm Kleber zwischen Antennenfuß und Oberfläche befinden. Der Kleber ist nach max. 48 Stunden bei +18° C und einer relativen Luftfeuchte von 50% ausgehär- Satmex 65 plus: 45 cm tet. Sollte während der Montagezeit eine geringere Luftfeuchtigkeit herrschen, sprühen... -
Seite 5: Montage Der Dachdurchführung
3. Montage und Installation 3. Montage und Installation 3.3 Montage der Dachdurchführung 3.4 Anschluss der Verbindungskabel Falls keine vorhandene Dachdurchführung vorhanden ist, die genutzt werden kann, Verbindungen auf dem Dach: suchen Sie eine geeignete Stelle (am besten im Windschatten hinter der Antenne) 1. -
Seite 6: Vorbereitungen Der Inbetriebnahme
4. Vorbereitungen der Inbetriebnahme 4. Vorbereitungen der Inbetriebnahme Sollten Sie sich in Mitteleuropa befinden, sind in der Regel keine Skew-Einstellungen 4.1 Wahl des Standorts notwendig. Um die Skew-Einstellung anzupassen gehen Sie wie folgt vor: Objekte wie Bäume, Brücken und große Häuser, die sich im Einfallswinkel des Satelliten befinden, führen zu einem Verlust des Signals. -
Seite 7: Inbetriebnahme
5. Inbetriebnahme 6. Empfangsreichweite Satmex 65 plus Astra Hotbird 5.1 Das System in Betrieb nehmen Vergewissern Sie sich zunächst, dass alle Verbindungen zwischen Antenne, Steuerge- rät, Bedienteil und Receiver korrekt angeschlossen sind. 1. Schalten Sie das Steuergerät am Netzschalter ein. -
Seite 8: Steuergung Über Die App
7. Steuergung über die App 7. Steuergung über die App 7.1 Installation der App auf dem Mobilgerät 7.3 Erklärung der App Zunächst müssen Sie die App herunterladen. Diese finden Sie im AppStore und Google PlayStore unter folgendem Namen: SatmexRemote 7.2 Verbindung mit dem Steuergerät Bei der ersten Verwendung müssen Sie das Steuergerät mit dem Mobilge- rät koppeln. - Seite 9 7. Steuergung über die App 7. Steuergung über die App 9. Wählen Sie den Satelliten aus, indem Sie 11. Wenn Sie die App mit dem Steuergrät trennen möchten, drücken Sie dieses auf den Satellitennamen drücken. Die Satelliteninformationen werden an- Feld. Anschließend können Sie sich mit schließend unten aufgelistet.
-
Seite 10: Fehlerbehebung
8. Fehlerbehebung 8. Fehlerbehebung Während dem normalen Betrieb zeigen die LEDs des Bedienteils an, welcher Satellit Fehler 8 (LED 4): gerade gewählt ist. Aber bei einem Fehler haben diese eine besondere Bedeutung, wie Das LNB oder das LNB-Kabel ist nicht angeschlossen oder eines der beiden ist beschä- im Folgenden beschrieben. -
Seite 11: Firmware-Update
9. Firmware-Update 10. Technische Daten Von Zeit zu Zeit kommt es vor, dass die Firmware des Steuergerätes aktualisiert werden Satmex 65 plus Satmex 80 plus muss (z. B. bei einer Frequenzänderung des Satellitenbetreibers oder einer allgemeinen Spiegelgröße 65 cm 80 cm Verbesserung des Steuergerätes). - Seite 12 11. Abmessungen 11. Abmessungen 11.1 Satmex 65 plus 11.2 Satmex 80 plus 710 mm 850 mm 870 mm 1000 mm DEUTSCH DEUTSCH...
-
Seite 13: Konformitätsinformation
Gerät in Übereinstimmung mit den grundlegenden Anforderungen und den übrigen einschlägigen Bestimmungen der Richtlinien 2014/30/EU (EMV), 2014/35/EU (LVD) und 2014/53/EU (RED) befindet: Camping first Satmex 65 plus (Artikel-Nr. 600113) Camping first Satmex 80 plus (Artikel-Nr. 600114) Die Konformitätserklärung zu diesem Produkt liegt der Firma vor: New Line Trading UG (haftungsbeschränkt) - Seite 14 Version 1.0 Satmex 65 / 80 plus New Line Trading UG (haftungsbeschränkt) Nelkenweg 23 D-98617 Obermaßfeld-Grimmenthal user manual Technische Änderungen, Druckfehler und Irrtümer vorbehalten.
- Seite 15 9.2 Update via Smartphone or Tablet ........20 – Control panel – 2.5 m RG6-U-6 LNB cable – Support foot – User manual 10. Specifications ................21 11. Dimensions 11.1 Satmex 65 plus ..............22 11.2 Satmex 80 plus ..............23 ENGLISH ENGLISH...
-
Seite 16: Control Unit Front View
2. Control unit and control panel 2. Control unit and control panel 2.1 Control unit front view 2.3 Control panel 1. p: 1. I/O: Main switch for power supply. Switches up to a satellite. Standby button and key for connection to a mobile device via Bluetooth ®... -
Seite 17: Mounting And Installation
Satmex 65 plus: 45 cm Satmex 80 plus: 60 cm 4. Remove the possibly leaked adhesive immediately with a spatula or similar and clean the contaminated surfaces with the cleaner and a fleece cloth. -
Seite 18: Mountung The Roof Passage
3. Mounting and installation 3. Mounting and installation 3.3 Mounting the roof passage 3.4 Connecting the connecting cables If there is no existing roof lead-through that can be used, look for a suitable place (pre- Connections on the roof: ferably in the slipstream behind the antenna) on the vehicle roof. Make sure that water 1. -
Seite 19: Preparations For Start-Up
4. Preparations for start-up 4. Preparations for start-up If you are in Central Europe, no skew settings are usually necessary. To adjust the skew 4.1 Choice of location setting, proceed as follows: Objects such as trees, bridges and large houses located at the satellite‘s angle of in- cidence cause the signal to be lost. -
Seite 20: Start-Up
5. Start-up 6. Footprint Satmex 65 plus Astra Hotbird 5.1 Put the system into operation First make sure that all connections between antenna, control unit, control unit and receiver are connected correctly. 1. Switch on the control unit at the mains switch. -
Seite 21: Control Via The App
7. Control via the App 7. Control via the App 7.1 Installing the App on the Mobile Device 7.3 Declaration of the App First you have to download the app. You can find it in the AppStore and Google PlayStore under the following name: SatmexRemote 7.2 Connection to the control unit The first time you use it, you must pair the control device with the mobile... - Seite 22 7. Control via the App 7. Control via the App 9. Select the satellite by pressing the sa- 11. If you want to separate the app with the control device, press this field. You can tellite name. The satellite information is then listed below.
-
Seite 23: Troubleshooting
8. Troubleshooting 8. Troubleshooting During normal operation, the LEDs on the control panel indicate which satellite is cur- Error 9 (LED 1 + LED 4): rently selected. But in case of an error they have a special meaning, as described below. Smartsearch antenna board, sensor board or GPS card is not connected or damaged. -
Seite 24: Firmware-Update
10. Specifications From time to time it may be necessary to update the firmware of the control unit (e.g. Satmex 65 plus Satmex 80 plus in case of a frequency change of the satellite operator or a general improvement of the... - Seite 25 11. Dimensions 11. Dimensions 11.1 Satmex 65 plus 11.2 Satmex 80 plus 710 mm 850 mm 870 mm 1000 mm ENGLISH ENGLISH...
- Seite 26 Directives 2014/30/EU (EMC), 2014/35/EU (LVD) and 2014/53/EU (RED): Camping first Satmex 65 plus (Article-No. 600113) Camping first Satmex 80 plus (Article-No. 600114) The declaration of conformity for this product is available to the company: New Line Trading UG (haftungsbeschränkt)
- Seite 27 Version 1.0 New Line Trading UG (haftungsbeschränkt) Nelkenweg 23 D-98617 Obermaßfeld-Grimmenthal Technische Änderungen, Druckfehler und Irrtümer vorbehalten.