Inhaltsverzeichnis
Werbung
Verfügbare Sprachen
Verfügbare Sprachen
Quicklinks
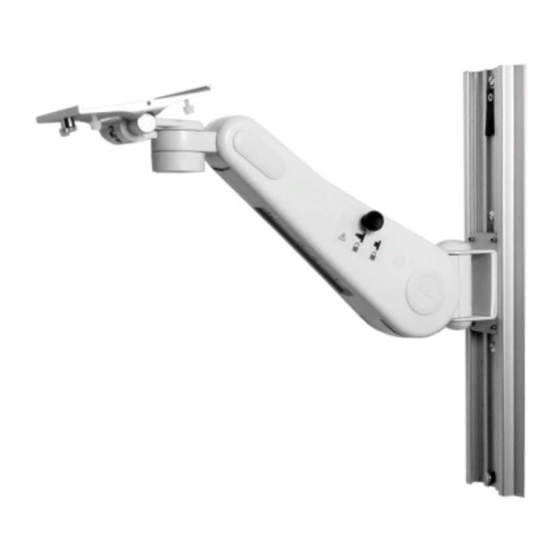
Mindray V Series VHM Wall Mount
Installation & Operation Manual
The purpose of this manual is to describe general installation, operation, and adjustment procedures for the Mindray V
Series VHM Wall Mount. Please read this manual before installing or using this product.
Table of Contents
1.0. Installation, Operation, and Maintenance Warnings..........................................................................................2
2.0 Installing the VHM Arm in the Channel.................................................................................................................3
3.0 Mounting the Instrument on the VHM Arm...........................................................................................................4
4.0 Operating and Adjusting the VHM Arm.................................................................................................................4
5.0 Cable Management..................................................................................................................................................9
6.0 Routine Maintenance...............................................................................................................................................9
7.0 Cleaning the Mounting Assembly..........................................................................................................................9
8.0 Trouble shooting the VHM arm ............................................................................................................................10
DU-MND-0013-01 Rev A 9/28/10 GCX Corp. Page 1 of 10
Werbung
Kapitel
Inhaltsverzeichnis
Fehlerbehebung

Verwandte Anleitungen für GCX VHM


Inhaltszusammenfassung für GCX VHM
-
Seite 1: Inhaltsverzeichnis
Installation & Operation Manual The purpose of this manual is to describe general installation, operation, and adjustment procedures for the Mindray V Series VHM Wall Mount. Please read this manual before installing or using this product. Table of Contents 1.0. Installation, Operation, and Maintenance Warnings..................2 2.0 Installing the VHM Arm in the Channel.........................3... -
Seite 2: Installation, Operation, And Maintenance Warnings
Failure to periodically inspect and adjust the Arm as instructed may result in damage to equipment or injury. If properly maintained, the VHM Arm should function properly for 5 to 10 years. If you are unable to adjust the arm or require service, contact GCX technical support at 800-228-2555. - Seite 3 2.1 VHM Arm with Spring Lock This type of VHM Arm is designed for use with transport monitors only. The Locking Knob is installed at the factory. Ensure Locking Knob is in locked position before attempting to mount Arm in channel.
- Seite 4 Arm. Use caution while performing this procedure. The VHM Arm must be adjusted to counterbalance the mounted instrument throughout the Arm’s vertical range of motion. When properly counterbalanced, the VHM Arm will maintain its height without engagement of the Height Locking Knob.
- Seite 5 • Do not attempt to adjust height without device(s) mounted on Arm. • Stand to the side of the VHM Arm and mounted instrument and use caution when disengaging the Height Locking Knob. The total mounted load may have changed due to the addition or removal of equipment (other than primary instrument) while the Height Locking Knob was engaged.
-
Seite 6: Positioning Vhm Arm In Channel
Simultaneously, push up or pull down the opposite end of the Arm immediately in front of the Slide and move to desired height. 4.3.4. Tighten four (4) Set Screws to secure position in Channel. DU-MND–0013-01 Rev A 9/28/10 GCX Corp. Page 6 of 10... - Seite 7 Set Screws (4) 4.4 Pivoting the VHM Arm and Adjusting Pivot Tension 4.4.1. To pivot Arm at Channel, simply push on side of Arm. 4.4.2. To adjust pivot tension, remove upper and lower bolt caps from Pivot Bolt. Using the 1/2" [13mm] socket wrench provided and a 1/2'' [13mm] box or open-end wrench, tighten or loosen Pivot Bolt and Hex Nut to desired tension.
- Seite 8 Wrench. 4.6.2. To tilt mounted instrument, simply push or pull instrument. Warning: Tilt tension screws must be torqued to a minimum of 35 in-lbs [4.0 N-m]. Tilt Adjustment Screws (2) DU-MND–0013-01 Rev A 9/28/10 GCX Corp. Page 8 of 10...
-
Seite 9: Cable Management
Dry the arm thoroughly after cleaning. CAUTION: GCX makes no claims regarding the efficacy of the listed chemicals or processes as a means for controlling infection. Consult your hospital’s infection control officer or epidemiologist. To clean or sterilize mounted instruments or accessory equipment, refer to the specific instructions delivered with those products. -
Seite 10: Troubleshooting The Vhm Arm
Weight of mounted instrument (load) not compatible with Load Rating of Arm. Counterbalance Bolt difficult to Arm not locked in a horizontal Reposition Arm and lock in adjust. position. horizontal position. DU-MND–0013-01 Rev A 9/28/10 GCX Corp. Page 10 of 10... - Seite 11 Wandhalterung VHM für Mindray V Serie Installations- und Bedienungsanleitung Ziel dieser Anleitung ist die Beschreibung der allgemeinen Verfahren zur Installation, Bedienung und Einstellung der Wandhalterung VHM für die Mindray V Serie. Bitte lesen Sie diese Anleitung durch, bevor Sie dieses Produkt installieren oder verwenden. Inhaltsverzeichnis 1.0 Warnhinweise zu Installation, Bedienung und Wartung........................2...
-
Seite 12: Warnhinweise Zu Installation, Bedienung Und Wartung
Widerstand und nicht zu leicht schwenken lassen. Falls erforderlich, kann der Schwenkwiderstand entsprechend Abschnitt 4.5 eingestellt werden. Fassen Sie den Arm an, und schwenken Sie ihn am Gelenk an der GCX-Profilschiene seitlich hin und her. Der Arm sollte sich mit einem gewissen Widerstand und nicht zu leicht schwenken lassen. Falls erforderlich, kann der Schwenkwiderstand entsprechend Abschnitt 4.4 eingestellt werden. -
Seite 13: Installation Der Wandhalterung Vhm An Der Profilschiene
Traglast Loslassen 2.2 Stützen Sie den Trägerarm mit einer Hand an der Unterseite ab, setzen Sie den Schlitten oben in die GCX- Profilschiene ein (s. Abb. unten links), und schieben Sie den Arm an die gewünschte Einbauposition. 2.3 Ziehen Sie mit dem mitgelieferten 1/8"-Sechskantstiftschlüssel die vier (4) Feststellschrauben im Schlitten fest, um den Arm zu fixieren (s. -
Seite 14: Befestigung Des Gerätes Am Vhm-Arm
Bewegungsumfang des Arms kompensiert wird. Wenn die Gewichtskompensation richtig eingestellt ist, hält das Gerät am VHM-Arm seine vertikale Position, ohne dass der Höhenfeststellknopf in der Sperrposition ist. Da die Geräte unterschiedlich schwer sein können, muss diese Einstellung für eine optimale Funktion üblicherweise angepasst werden. -
Seite 15: Einstellung Der Höhe Des Angebrachten Gerätes
• Nehmen Sie die Höheneinstellung nur vor, wenn ein oder mehrere Geräte am Arm angebracht sind. • Stehen Sie neben dem VHM-Arm und dem angebrachten Gerät, und gehen Sie vorsichtig vor, wenn Sie den Höhenfeststellknopf lösen. Das Gesamtlastgewicht hat sich eventuell seit dem letzten Lösen des Feststellknopfes durch Hinzufügen oder Entfernen zusätzlicher Geräte... -
Seite 16: Positionierung Des Vhm-Arms In Der Profilschiene
4.3 Positionierung des VHM-Arms in der Profilschiene Vorsicht: Entfernen Sie den Arm nicht aus der GCX-Profilschiene, während ein Gerät am Arm angebracht ist. 4.3.1 Fixieren Sie den Arm mit dem Höhenfeststellknopf in der höchsten vertikalen Position. -
Seite 17: Schwenkverstellung Des Vhm-Arms Und Einstellung Des Schwenkwiderstands
(13 mm) und einem 1/2"-Ring- oder Maulschlüssel (13 mm) fester anziehen oder lockern. Setzen Sie die Abdeckungen an beiden Enden der Einstellschraube wieder auf. 1/2"-Ringschlüssel (13 mm) oder Steckschlüssel 1/2"-Steckschlüssel (13 mm) DU-MND–0013-01 Rev. A 28.09.10 GCX Corp. Seite 7 von 10... -
Seite 18: Schwenkverstellung Des Angebrachten Gerätes Und Einstellung Des Schwenkwiderstands
4.6.2 Um das angebrachte Gerät zu neigen, drücken oder ziehen Sie einfach an dem Gerät. Warnung: Die Neigungswiderstand-Einstellschrauben müssen mit einem Drehmoment von mindestens 35 in-lbs (4,0 Nm) festgezogen werden. Neigungswiderstand- Einstellschrauben (2) DU-MND–0013-01 Rev. A 28.09.10 GCX Corp. Seite 8 von 10... -
Seite 19: Kabelmanagement
Wischen Sie Reinigungsmittel vom Arm sofort mit einem wasserbefeuchteten Tuch ab. Trocknen Sie den Arm nach der Reinigung gründlich. VORSICHT: GCX erhebt keine Ansprüche in Bezug auf die Wirksamkeit der aufgeführten chemischen Stoffe oder Verfahren zur Kontrolle von Infektionen. Für Informationen dazu wenden Sie sich bitte an den für Infektionskontrolle verantwortlichen Mitarbeiter oder Epidemiologen in Ihrem Krankenhaus. -
Seite 20: Problemlösung Für Den Vhm-Arm
Tragfähigkeit des Arms. Die Gewichtskompensations- Der Arm ist nicht in horizontaler Position Fixieren Sie den Arm in einer horizontalen Einstellschraube lässt sich nur fixiert. Position. schwer einstellen. DU-MND–0013-01 Rev. A 28.09.10 GCX Corp. Seite 10 von 10... - Seite 21 Manuel de pose et d'utilisation L'objet de ce manuel est de décrire les procédures générales de pose, d'utilisation et de réglage du support mural VHM Mindray série V. Veiller à lire ce manuel avant de poser ou d'utiliser ce produit. Table des matières 1.0 Avertissements concernant la pose, l'utilisation et l'entretien ..................2...
-
Seite 22: Avertissements Concernant La Pose, L'utilisation Et L'entretien
à la pose et à l'utilisation du bras VHM. • Si le bras VHM est monté au mur, vérifier que le rail a été posé et approuvé en conformité avec le guide d'installation du rail. - Seite 23 2.1 Bras VHM avec loquet à ressort Ce type de bras VHM est conçu pour être utilisé exclusivement avec des moniteurs de transport. Le bouton de blocage est installé en usine. S'assurer que le bouton de blocage est en position verrouillée avant de poser le bras dans le rail.
- Seite 24 Faire preuve de précaution pour effectuer cette procédure. Le bras VHM doit être réglé de manière à compenser le poids de l'appareil monté sur l'ensemble de la course verticale du bras. Lorsqu'il est correctement équilibré, le bras VHM doit maintenir sa hauteur sans que le bouton de blocage en hauteur soit engagé.
- Seite 25 • Ne pas tenter de régler la hauteur sans appareil monté sur le bras. • Se tenir sur le côté du bras VHM et de l'appareil monté et faire preuve de précaution lors du dégagement du bouton de blocage en hauteur. La charge montée totale peut avoir changé en raison de l'ajout ou de l'enlèvement de matériel (autre que l'appareil principal) pendant que le bouton de blocage...
- Seite 26 4.3.4. Serrer les quatre (4) vis de calage pour bloquer la coulisse dans le rail. DU-MND–0013-01 Rév A 28/09/10 GCX Corp. Page 6 / 10...
- Seite 27 Vis de calage (4) 4.4 Pivotement du bras VHM et réglage de la tension de pivot 4.4.1. Pour faire pivoter le bras au niveau du rail, il suffit de la pousser par le côté. 4.4.2. Pour régler la tension de pivot, déposer les capuchons supérieur et inférieur du boulon de pivot. À l'aide de la clé à...
- Seite 28 4.6.2. Pour changer l'inclinaison de l'appareil monté, il suffit de le pousser ou le tirer. Avertissement : Les vis de tension d'inclinaison doivent être serrées à un couple de 4,0 Nm [35 po-lb] minimum. Vis de réglage d'inclinaison (2) DU-MND–0013-01 Rév A 28/09/10 GCX Corp. Page 8 / 10...
-
Seite 29: Gestion Des Câbles
Bien sécher le bras après l'avoir nettoyé. ATTENTION : GCX n'affirme aucunement que les produits ou procédés indiqués sont des moyens de prévention des infections. Consulter le responsable de la prévention des infections ou l'épidémiologiste de l'hôpital. Pour nettoyer ou stériliser les appareils ou le matériel accessoire montés, consulter les instructions fournies avec ces produits particuliers. -
Seite 30: Dépannage Du Bras Vhm
Boulon de contrepoids difficile à Le bras n'est pas bloqué en Remettre le bras en place et le régler. position horizontale. bloquer en position horizontale. DU-MND–0013-01 Rév A 28/09/10 GCX Corp. Page 10 / 10... - Seite 31 Manual de uso e instalación La finalidad del presente manual es la descripción de los procedimientos generales de instalación, uso y ajuste de la Ménsula para pared VHM Mindray Serie V. Lea este manual antes de instalar o utilizar este producto.
-
Seite 32: Advertencias De Instalación, Uso Y Mantenimiento
Advertencias • No sitúe el brazo VHM o el dispositivo montado por encima de un paciente. Tenga en cuenta que el brazo VHM permite gran diversidad de movimientos arriba y abajo y de un lado a otro. Tenga en cuenta tanto el dispositivo que vaya a montar como la proximidad del conjunto a otros equipos, al personal hospitalario y al paciente. - Seite 33 2.1 Brazo VHM con cierre de muelle Este tipo de brazo VHM está diseñado para ser utilizado únicamente para monitores de transporte. La perilla de bloqueo se monta en fábrica. Asegúrese de que la perilla esté en posición de bloqueo antes de intentar montar el brazo en la canaleta.
-
Seite 34: Funcionamiento Y Ajuste Del Brazo Vhm
Es preciso ajustar el brazo VHM para contrarrestar el dispositivo montado en toda la extensión del movimiento vertical del brazo. Una vez equilibrado, el brazo VHM mantendrá la altura sin necesidad de fijar la perilla de bloqueo en altura. Puesto que el peso de los dispositivos varía, suele ser necesario realizar ajustes para un mejor rendimiento. - Seite 35 • No intente ajustar la altura sin que exista un dispositivo montado sobre el brazo. • Colóquese a un lado del brazo VHM y del dispositivo montado y tenga cuidado al soltar la perilla de bloqueo en altura. La carga total del montaje puede haber variado debido a la incorporación o retirada de equipos (que no sean el dispositivo principal) mientras estaba fija la...
- Seite 36 4.3.4. Apriete los cuatro (4) tornillos de fijación para asegurar la posición deseada en la canaleta. DU-MND–0013-01 Rev A 9/28/10 GCX Corp. Página 6 de 10...
- Seite 37 Tornillos de fijación (4) 4.4 Articulación del brazo VHM y ajuste de la tensión de la articulación 4.4.1. Para accionar la articulación del brazo en la canaleta sólo se tiene que empujar en el costado del brazo. 4.4.2. Para ajustar la tensión de la articulación, retire los tapones de las tuercas superior e inferior del pasador de la articulación.
- Seite 38 4.6.2. Para inclinar el dispositivo montado, sólo tiene que empujar o tirar de él. Aviso: Los tornillos de ajuste de la tensión de inclinación deben apretarse con un par mínimo de 4,0 N-m [35 lbs/pulg.]. Tornillos de ajuste de inclinación(2) DU-MND–0013-01 Rev A 9/28/10 GCX Corp. Página 8 de 10...
-
Seite 39: Gestión De Cables
Seque el brazo por completo después de haberlo limpiado. PRECAUCIÓN: GCX no asegura la eficacia de los productos químicos o los métodos enumerados como medio de control de infecciones. Consulte con el especialista en control de infecciones del hospital o con el epidemiólogo. -
Seite 40: Identificación Y Solución De Problemas
Resulta difícil ajustar la tuerca de El brazo no está bloqueado en Vuelva a colocar el brazo y fíjelo contrapeso. posición horizontal. en posición horizontal. DU-MND–0013-01 Rev A 9/28/10 GCX Corp. Página 10 de 10... - Seite 41 Supporto murale VHM serie Mindray V Manuale di installazione e uso Questo manuale descrive le operazioni generali di installazione, uso e regolazione sel supporto murale VHM serie Mindray V. Leggere questo manuale prima di installare o usare questo prodotto.. Indice 1.0.
-
Seite 42: Avvertenze Di Installazione, Uso E Manutenzione
VHM prima dell'installazione e dell'uso. • Se il braccio VHM è montato a parete, verificare che la guida sia stata installata correttamente e sia stata approvata ai sensi delle relative istruzioni di installazione. - Seite 43 2.1 Braccio VHM con bloccaggio a molla Questo tipo di braccio VHM è destinato solo all'uso con monitor trasportabili. Il pomello di bloccaggio è installato in fabbrica. Accertarsi che il pomello di bloccaggio sia bloccato in posizione prima di provare a montare il braccio nella guida.
- Seite 44 Fare attenzione nell'eseguire questa operazione. Il braccio VHM può essere regolato in modo da bilanciare il peso della strumentazione montata per tutta l'escursione verticale del braccio stesso. Quando è correttamente bilanciato, il braccio VHM mantiene la sua altezza senza bisogno di inserire il relativo pomello di bloccaggio.
- Seite 45 • Quando si disinserisce il pomello di bloccaggio dell'altezza, tenersi in piedi a lato del braccio VHM e della strumentazione montata. Il carico totale montato può essere cambiato a causa dell'aggiunta o della rimozione di apparecchiature (aggiuntive alla strumentazione principale) mentre il pomello di bloccaggio era inserito. Una cambiamento del carico totale può...
- Seite 46 Contemporaneamente, spingere in alto o tirare in basso l'estremità opposta del braccio immediatamente prima del carrello e spostarla nella posizione desiderata. 4.3.4. Serrare le 4 (quattro) viti di fissaggio per bloccare la posizione del braccio nella guida. DU-MND–0013-01 Rev A 9/28/10 GCX Corp. Pagina 6 di 10...
- Seite 47 Viti di fissaggio 4.4 Articolazione del braccio VHM e regolazione della tensione di articolazione 4.4.1. Per articolare il braccio nella guida, basta spingere un lato del braccio 4.4.2. Per regolare la tensione di articolazione, rimuovere i tappi superiore e inferiore del bullone di regolazione della tensione di articolazione.
- Seite 48 4.6.2. Per inclinare la strumentazione montata, basta tirarla o spingerla. Avvertenza: serrare le viti della tensione di inclinazione a una coppia minima di 4,0 N-m (35 in-lb). Viti di regolaz. tensione di inclinazione (2) DU-MND–0013-01 Rev A 9/28/10 GCX Corp. Pagina 8 di 10...
-
Seite 49: Organizzazione Dei Cavi
Asciugare bene il braccio dopo la pulizia. ATTENZIONE: la GCX non entra nel merito dell'efficacia delle sostanze chimiche o dei procedimenti indicati come mezzi di controllo delle infezioni. Per questo, rivolgersi all'epidemiologo o al responsabile del controllo delle infezioni ospedaliere. -
Seite 50: Soluzione Dei Problemi Del Braccio Vhm
È difficile regolare il bullone di Il braccio non è bloccato in Riposizionare il braccio e regolazione del contrappeso. posizione orizzontale. bloccarlo in posizione orizzontale. DU-MND–0013-01 Rev A 9/28/10 GCX Corp. Pagina 10 di 10...