strapex STP 62 Betriebsanleitung
Inhaltsverzeichnis
Verfügbare Sprachen
Verfügbare Sprachen
Vor dem Gebrauch des
Gerätes die Betriebs-
anleitung aufmerksam
lesen.
Before using the tool,
read the operating
instructions carefully.
Avant l'utilisation de
l'appareil, consultez
soigneusement le
mode d'emploi.
Prima d'utilizzare
l'apparecchio, leggere
attentamante le istruzi-
oni per l'uso.
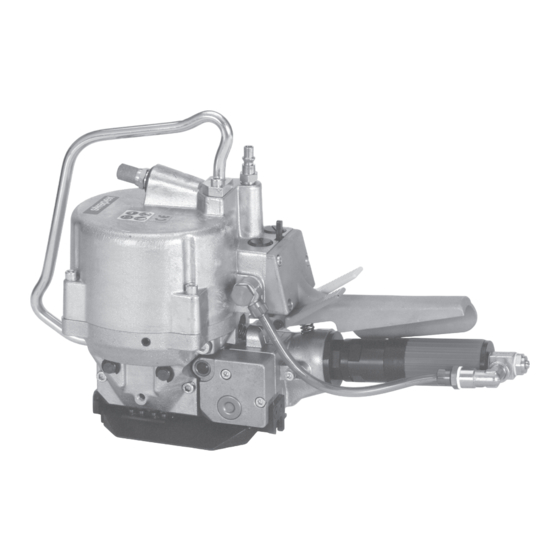
STP 62
Pneumatisches Handgerät zum Umreifen mit Stahlband
Pneumatic hand tool for steel strapping
Appareil pneumatique pour le cerclage par feuillard d'acier
Apparecchio pneumatica per reggiare con reggetta
BETRIEBSANLEITUNG
OPERATING INSTRUCTIONS
MODE D'EMPLOI
ISTRUZIONI PER L'USO
05.11
Originalbetriebsanleitung
Translation of original manual
Traduction du mode d'emploi original
Traduzione dall'originale
Ab Serie-Nr. 100
From serie no 100
A partir du no de série 100
A partire dal no. di serie 100
DEUTSCH
ENGLISH
FRANÇAIS
ITALIANO
3
13
23
33
Kapitel
Inhaltsverzeichnis

Verwandte Anleitungen für strapex STP 62


Inhaltszusammenfassung für strapex STP 62
- Seite 1 Prima d’utilizzare l’apparecchio, leggere attentamante le istruzi- oni per l’uso. STP 62 Pneumatisches Handgerät zum Umreifen mit Stahlband Ab Serie-Nr. 100 Pneumatic hand tool for steel strapping From serie no 100 Appareil pneumatique pour le cerclage par feuillard d‘acier A partir du no de série 100...
-
Seite 2: Konformitätserklärung
+1 800 779 380 Telefon +31 30 248 03 11 Wir erklären in alleiniger Verantwortung, dass das sales@iwdstrapping.com.au sales@strapex.nl Gerät STP 62, auf welches sich diese Erklärung Belgien Norwegen bezieht, mit den geltenden Bestimmungen der Richt- Strapex Sprl Strapex / Josef Kihlberg AS linie des Rates vom 17. -
Seite 3: Inhaltsverzeichnis
Strapex STP 62 INHALTSVERZEICHNIS TECHNISCHE DATEN Seite 1 Technische Daten Gewicht 9,7 kg 2 Allgemeines 2.1 Hinweis zum Umweltschutz Abmessung Länge 310 mm 3 Sicherheitsvorschriften Breite 105 mm 4 Beschreibung Höhe 240 mm 4.1 Aufbau Spannkraft Bis ca. 4000 N 4.2 Funktionsprinzip... -
Seite 4: Allgemeines
Strapex STP 62 ALLGEMEINES Diese Betriebsanleitung soll das Kennenlernen des Gerätes und den bestimmungsgemässen Einsatz VORSICHT! erleichtern. Die Betriebsanleitung enthält wichtige Hinweise, wie das Gerät sicher, sachgerecht und wirt- Wird verwendet bei Ge- schaftlich einzusetzen ist. Das Einhalten der Hinweise fahren für Leben... -
Seite 5: Sicherheitsvorschriften
Strapex STP 62 SICHERHEITSVORSCHRIFTEN Informieren Sie sich! Keine Gas- oder Druck- Vor dem Gebrauch des luftflaschen verwenden! Gerätes die Betriebsan- jklsfjklsdj Das Gerät darf nicht an lksdfjkl jkljsdllkjjkljsd fkljjklkjkljsdafj asdfjklkjjkljklj leitung sorgfältig lesen. eine Gas- oder Druckluft- ksldafkjkljkl jkljklkljsdafjlkj jkljjkljklkljljlk flasche angeschlossen Schützen Sie sich! -
Seite 6: Beschreibung
Strapex STP 62 BESCHREIBUNG 4.1 AUFBAU 1 Luftanschluss 2 Klinke (Spannvorgang unterbrechen) 3 Gelbe Taste (Verschliessen) 4 Grüne Taste (Spannen) 5 Handgriff 6 Druckluftmotor 7 Druckreduzierventil 8 Spannrad 9 Matrize 10 Grundplatte 11 Verschliesszangen 12 Aufhängebügel Fig. 1 4.2 FUNKTIONSPRINZIP –... -
Seite 7: Inbetriebnahme
Strapex STP 62 INBETRIEBNAHME 5.1 AUFHÄNGEN DES GERÄTES Horizontal Das Gerät ist mit einem Aufhängebügel (3/1) ausge- stattet. Der Aufhängebügel ist so konstruiert, dass das Gerät horizontal oder vertikal an einem Federzug aufgehängt werden kann. Als Option ist ein Universalbügel erhältlich, der zusätzlich eine seitliche Aufhängung des Gerätes... -
Seite 8: Bedienung
Strapex STP 62 BEDIENUNG 6.1 BEDIENUNG DES GERÄTES – Band von der Rolle abziehen und satt um das Umreifungsgut legen. Band ca. 30 cm vor dem Bandanfang mit der linken Hand fassen. – Gerät mit der rechten Hand am Griff fassen und den Motor bis zum Anschlag hochziehen. -
Seite 9: Verschlusskontrolle
Strapex STP 62 Verschliessen – Mit dem Daumen der rechten Hand die gelbe Taste (7/1) betätigen, bis das Band abgeschnitten ist. Fig. 7 – Gerät mit der rechten Hand am Griff fassen und den Motor bis zum Anschlag hochziehen und das Gerät nach hinten rechts von der Umreifung weg- schwenken. -
Seite 10: Wartung Und Instandsetzung
Strapex STP 62 WARTUNG UND INSTANDSETZUNG 7.1 SPANNKRAFT/SPANNGESCHWINDIGKEIT EINSTELLEN – Luftdruck am Druckreduzierventil der Wartungein- heit auf 5–6 bar einstellen. – Mit Schraubenzieher Drosselschraube (10/1) des Druckluftmotors so einstellen, dass bei gewünsch- ter Bandspannung der Druckluftmotor zum Still- stand kommt. Dabei ist darauf zu achten, dass die Bänder einwandfrei gekerbt und das obere Band... -
Seite 11: Spannrad Ersetzen
Strapex STP 62 7.4 SPANNRAD ERSETZEN Dreht das Spannrad durch, bevor die ge- wünschte Bandspannung erreicht ist, muss das Spannrad ersetzt werden (Voraussetzung: Spiel richtig eingestellt, siehe Kapitel 7.2). Ausbau – Gerät von Luftanschluss trennen. – Eine Senkschraube (13/1) entfernen. -
Seite 12: Abschneidmesser, Matrize Und Stempel Ersetzen
Strapex STP 62 7.6 ABSCHNEIDMESSER, MATRIZE UND STEMPEL ERSETZEN Ausbau – Gerät von Luftanschluss trennen. – Zwei Zylinderschrauben (15/9), Anschlagplatte (15/10) und Bandhalteklinke (15/8) entfernen. – Vier Zylinderschrauben (15/6) entfernen. – Grundplatte (15/5) vom Gehäuseteil entfernen. – Zwei Zylinderschrauben (15/3) lösen und Matrize (15/2) entfernen und ersetzen.