Inhaltsverzeichnis
Werbung
Verfügbare Sprachen
Verfügbare Sprachen
Quicklinks
USER MANUAL - BEDIENUNGSANLEITUNG
EVO 3i MOTORIZED TREADMILL
GB
EVO 3i MOTORISIERTES LAUFBAND
DE
MODELNUMBER MODELNUMMER: EVO 3i
MAX USER WEIGHT - MAX. BENUTZERGEWICHT: 180kg (400 lbs.)
SERVICENUMMER: 0800/1150119
SERVICEPHONE. 0800 0972100
SERIENNUMMER- SERIALNUMBER (on the frame – auf dem Rahmen):
Werbung
Inhaltsverzeichnis
Fehlerbehebung

Verwandte Anleitungen für Smooth Fitness EVO 3i


Inhaltszusammenfassung für Smooth Fitness EVO 3i
- Seite 1 USER MANUAL - BEDIENUNGSANLEITUNG EVO 3i MOTORIZED TREADMILL EVO 3i MOTORISIERTES LAUFBAND MODELNUMBER MODELNUMMER: EVO 3i MAX USER WEIGHT - MAX. BENUTZERGEWICHT: 180kg (400 lbs.) SERVICENUMMER: 0800/1150119 SERVICEPHONE. 0800 0972100 SERIENNUMMER- SERIALNUMBER (on the frame – auf dem Rahmen):...
-
Seite 2: Index - Inhaltsverzeichnis
EVO 3i motorized treadmill - EVO 3i motorisiertes Laufband INDEX – INHALTSVERZEICHNIS 1. English P. 3 2. Deutsch P.35... - Seite 3 EVO 3i motorized treadmill PRECAUTIONS Precautions: WARNING: To reduce the risk of burns, fire, electric shock, or injury to persons, read the following important precautions and information before operating the treadmill. It is the responsibility of the owner to ensure that all users of this treadmill are adequately informed of all warnings and precautions.
-
Seite 4: Power Requirements
EVO 3i motorized treadmill POWER REQUIREMENTS Power Requirements: IMPROPER CONNECTION OF THE EQUIPMENT GROUNDING CONNECTOR CAN RESULT IN A RISK OF AN ELECTRIC SHOCK. CHECK WITH A QUALIFIED ELECTRICIAN OR SERVICE MAN IF YOU ARE IN DOUBT AS TO WHETHER THE PRODUCT IS PROPERLY GROUNDED. DO NOT MODIFY THE PLUG PROVIDED WITH THE PRODUCT, IF IT WILL NOT FIT THE OUTLET;... - Seite 5 EVO 3i motorized treadmill PREASSEMBLY Open the boxes: You are now ready to open the boxes of your new equipment. Make sure to inventory all of the parts that are included in the boxes. Check the Hardware Comparison Chart for a full count of the number of parts included for this product to be assembled properly.
- Seite 6 EVO 3i motorized treadmill HARDWARE COMPARISON CHART Hardware chart: For your convenience, we have identified the hardware used in the assembly of this product. This chart is provided to help you identify those items that may be unfamiliar to you.
-
Seite 7: Parts List
EVO 3i motorized treadmill PARTS LIST Description Qty. Order No. Description Qty. Order No. Computer EVO3i-01 Motor Control Board EVO3i-30 Safety Key EVO3i-02 M10 x 60mm Bolt EVO3i-31 M6 x 55mm Allen Head Bolt EVO3i-03 Bushing EVO3i-32 Console Support Tube... - Seite 8 EVO 3i motorized treadmill PARTS LIST Description Qty. Order No. Description Qty. Order No. Elevation Support Tube M10 x 63mm Hex Head Bolt EVO3i-59 EVO3i-89 Cover - Left Elevation Support Tube M8 Nylon Nut EVO3i-60 EVO3i-90 Cover - Right EVO3i-...
-
Seite 9: Parts Diagram
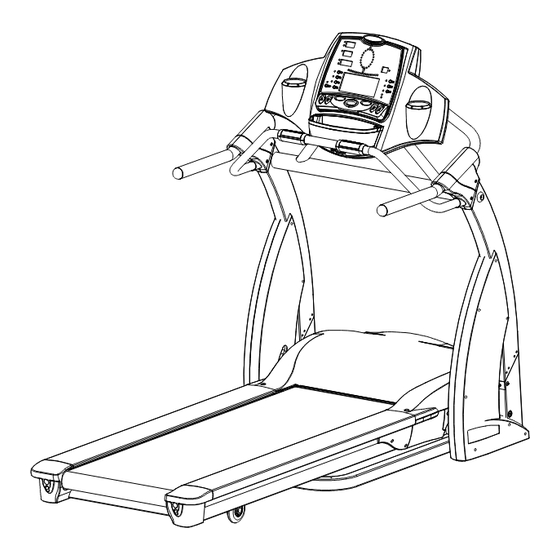
EVO 3i motorized treadmill PARTS DIAGRAM A MAJORITY OF THE PARTS SHOWN HERE HAVE BEEN PREASSEMBLED AT THE FACTORY. www.smoothfitness.co.uk... - Seite 10 EVO 3i motorized treadmill PARTS DIAGRAM A MAJORITY OF THE PARTS SHOWN HERE HAVE BEEN PREASSEMBLED AT THE FACTORY. www.smoothfitness.co.uk...
- Seite 11 EVO 3i motorized treadmill ASSEMBLY STEP 1: Remove your treadmill from the carton and place it on the floor in an open area as shown in FIG-1. Secure the Computer (1) to the Console Tube (102) using four M6 x 55mm Allen Head Bolts (3).
- Seite 12 EVO 3i motorized treadmill ASSEMBLY STEP 2: Make sure to connect the wires from the Left Upright (17) to the Base Frame (24). Next insert the Left and Right Uprights (17 and 18) into the Base Frame (24) and secure with four M8 x 15mm Bolts (19)
- Seite 13 EVO 3i motorized treadmill ASSEMBLY STEP 3: Attach one Upright Cover (96) to the Left upright (17) and secure with one M6 x 12mm Screw (97).Repeat this procedure on the Right Upright (18). www.smoothfitness.co.uk...
- Seite 14 EVO 3i motorized treadmill ASSEMBLY STEP 4: Attach the Console Support Tube (4) to the Console Tube (102),Left Upright (17) and Right Upright (18). Secure using one M6 x 15mm Allen Head Bolt (16)),two Metal Caps (98) and two M8 x 95mm Screws (18).
- Seite 15 EVO 3i motorized treadmill ASSEMBLY STEP 5: Attach the Upright Plastic Shroud – Left #1 (36) and Upright Plastic Shroud – Left #2 (37) to the Left Upright (17) and secure with five 4 x 12mm Screws (10), four 4 x 19mm Screws (11) and four 12x5.5x1.5mm Washers (116).
- Seite 16 EVO 3i motorized treadmill ASSEMBLY STEP 6: Attach one Handlebar (12) to the Left Upright (17). Secure using two M8 x 55mm Bolts(5). Repeat this procedure on the Right Upright (18). www.smoothfitness.co.uk...
- Seite 17 EVO 3i motorized treadmill ASSEMBLY STEP 7: First make sure to attach the Sensor Wires (14) as shown in FIG2. Attach the Hand Pulse Tube (100) to the Left and Right Uprights (17 and 18) and secure using two M6 x 12mm...
- Seite 18 EVO 3i motorized treadmill ASSEMBLY STEP 8: Attach the Handlebar Rear End Cap – Left #1 (6) and Handlebar Rear End Cap – Left #2 (7) to the Left Upright (17) Secure using two Fixing Plastics (104) . Repeat the procedure on the Right Upright four 4 x 12mm Screws (10) (18) to attach the Handlebar Rear End Cap –...
-
Seite 19: Transport Instructions
EVO 3i motorized treadmill TRANSPORT INSTRUCTIONS HOW TO TRANSPORT YOUR TREADMILL: Carefully lift the treadmill up slightly from the rear and roll it to a desired position. Follow the instructions on the STABILIZER ADJUSTMENT page in this manual to level the frame to the floor. -
Seite 20: Level Adjustment
EVO 3i motorized treadmill LEVEL ADJUSTMENT LEVEL ADJUSTMENT: Uneven flooring could cause the SPRING KNOBS not to engage and thus prevent the EVO3i from inclining. To adjust the levellers follow these instructions: You will need someone to help you with this procedure, as you will need to tip the treadmill on its side. -
Seite 21: Computer Operation
EVO 3i motorized treadmill COMPUTER OPERATION SAFETY KEY ENTER INCLINE UP/DOWN PRESET PROGRAMS TIME/DISTANCE PULSE CALORIES/CALORIES PER HOUR INCLINE LEVEL/AGE SPEED DISPLAY PRESET PROGRAMS SPEED UP/DOWN START STOP POWER ON – Set the POWER SWITCH, located on the bottom of the left handle bar upright tube, to ON and insert the SAFETY KEY. - Seite 22 EVO 3i motorized treadmill COMPUTER OPERATION 3 SECOND ALERT – To ensure that you are well prepared before the belt starts moving, every time you press the START button to start the belt the SPEED window will countdown 3 seconds with the LED showing “3-2-1” before the belt starts moving.
- Seite 23 EVO 3i motorized treadmill COMPUTER OPERATION 20 MINUTE RUN – Minimum speed 5.0MPH/8.0KPH, maximum speed 8.1MPH/13.0KPH. When the treadmill is in POWER ON status, press the 20 MINUTES PROGRAM BUTTON then press the START button to start. The TIME will display “20:00” and count down, and the other display counts up until the treadmill stops.
- Seite 24 EVO 3i motorized treadmill COMPUTER OPERATION 60 MINUTE WALK – Minimum speed 1.9MPH/3.0KPH, maximum speed 5MPH/8KPH. When the treadmill is in POWER ON status, press the 60 MINUTES WALK PROGRAM button, and then press the START button to start. The TIME will display “60:00” and count down, and the other display counts up until the treadmill stops. The program speed changes according to the pre-set data.
-
Seite 25: Emergency Stop Button
EVO 3i motorized treadmill EMERGENCY STOP BUTTON – n case of emergency you can press the EMERGENCY STOP button to stop the treadmill immediately. To resume operation, make sure to reinsert the safety key. The safety key is located below the stop button. -
Seite 26: Maintenance
EVO 3i motorized treadmill MAINTENANCE HOW TO MAINTAIN THE EVO 3i TREADMILL : Proper maintenance is very important to ensure your treadmill is always in top working condition. Improper maintenance could cause damage or shorten the life of your treadmill and exceed the LIMITED WARRANTY coverage. - Seite 27 EVO 3i motorized treadmill MAINTENANCE CLEANING : Routine cleaning of your treadmill will extend the product's life. • Warning : To prevent electrical shock, be sure the power to the treadmill is OFF and the power cord is unplugged from the wall electrical outlet before attempting any cleaning or maintenance.
-
Seite 28: Warranty
WARRANTY Read and follow the Assembly-instructions and the User’s-Manual before using this product. Warranty Coverage: Smooth Fitness warrants to the original owner that each new product to be free from defects in workmanship and material. This warranty is limited on home use only. - Seite 29 EVO 3i motorized treadmill IMPORTANT STEPS Warning : Before using this product, please consult your personal physician for a complete physical examination. Frequent and strenuous exercise should be approved by your doctor first. If any discomfort should result from your use of this product, stop exercising and consult your doctor.
-
Seite 30: Target Heart Rate
EVO 3i motorized treadmill TARGET HEART RATE Finding your pulse : To make sure your heart is beating in its target zone, you’ll need to know how to monitor your heart rate. The easiest way is to feel the pulse in the carotid artery on either side of your neck, between the windpipe and the large neck muscles. Count the number of beats in ten seconds, and then multiply that number by six. - Seite 31 EVO 3i motorized treadmill MUSCLE CHART Targeted muscle groups : The exercise routine that is performed on this product will develop primarily lower body muscle groups. These muscle groups are shown in gray color on the chart below. Shoulder muscles...
- Seite 32 EVO 3i motorized treadmill STRETCHING ROUTINE Warm up and cool down : A successful exercise program consists of a warm-up, aerobic exercise, and a cool-down. Do the entire program at least two and preferably three times a week, resting for a day between workouts. After several months, you can increase your workouts to four or five times per week.
- Seite 33 EVO 3i motorized treadmill STRETCHING ROUTINE Hamstring Stretch: Sit with your right leg extended. Rest the sole of your left foot against your right inner thigh. Stretch toward your toe as far as possible. Hold for 15 counts. Relax and then repeat with left leg extended.
-
Seite 34: Troubleshooting
EVO 3i motorized treadmill TROUBLESHOOTING Troubleshooting NOTE : Do not touch any internal electric wires without consulting the manufacturer. Treadmill will not start : 1. Make sure the power cord is plugged into a surge protector, the surge protector is plugged into a properly grounded outlet and the surge protector is turned on (refer to the Power Requirements section in this manual). -
Seite 35: Sicherheitshinweise
EVO 3i motorisiertes Laufband SICHERHEITSHINWEISE ACHTUNG : Um die Gefahr von Verbrennungen, Feuer, elektrischen Schlägen und sonstigen Verletzungen zu reduzieren, lesen Sie bitte die folgenden wichtigen Sicherheitshinweise und Informationen, bevor Sie das Laufband benutzen. Es liegt in der Verantwortung des Eigentümers sicher zu stellen, dass alle Benutzer dieses Laufbands hinreichend über alle Sicherheitshinweise und Gefahren informiert wurden. - Seite 36 EVO 3i motorisiertes Laufband STROMVERSORGUNG FEHLENDE ODER FEHLERHAFTE ERDUNG IHRES GERÄETS ERHÖEHT DAS RISIKO EINES ELEKTRISCHEN SCHLAGES. FALLS SIE ZWEIFEL HABEN, ZIEHEN SIE BITTE EINEN QUALIFIZIERTEN ELEKTRIKER ZU RATE UND LASSEN ÜEBERPRUEFEN OB DAS GERÄET SACHGEMÄESS GEERDET IST. NEHMEN SIE KEINE EINGRIFFE AN DEN MITGELIEFERTEN NETZKABELN VOR.
- Seite 37 EVO 3i motorisiertes Laufband VORBEREITUNG Öffnen Sie die Kartonagen: Nun können Sie die Kartonagen mit dem neuen Equipment öffnen. Verschaffen Sie sich einen Überblick über alle Teile die Sie in den Kartonagen finden. Vergleichen Sie diese mit der Einzelteil-Übersichtsliste um sicherzustellen, dass alle Teile in richtiger Anzahl vorhanden sind.
- Seite 38 EVO 3i motorisiertes Laufband ERSATZTEILISTE AUFBAUSET: Zu Ihrer Unterstützung haben wir hier alle Bauteile aufgeführt die zum Aufbau dieses Produkts benötigt werden. Diese Übersicht soll Ihnen dabei helfen Einzelteile zu identifizieren, die Sie nicht zuordnen können. Anz. M6 x 55mm Schraube...
- Seite 39 EVO 3i motorisiertes Laufband ERSATZTEILLISTE Beschreibung Menge Bestellnummer Beschreibung Menge Bestellnummer Computer EVO3i-01 Controller Motor EVO3i-30 M10 x 60mm Sicherheitsschlüssel EVO3i-02 EVO3i-31 Schraube M6 x 55mm Schraube EVO3i-03 Lager EVO3i-32 Querträger EVO3i-04 N/A (nicht belegt) Controller M8 x 55mm Schraube...
- Seite 40 EVO 3i motorisiertes Laufband ERSATZTEILLISTE Beschreibung Menge Bestellnummer Beschreibung Menge Bestellnummer M10 x 63mm Abdeckung Rahmen EVO3i-59 EVO3i-89 Schraube Neigungsverstellung, Abdeckung Rahmen Mutter, selbstsichernd EVO3i-60 EVO3i-90 Neigungsverstellung, Rahmen Beilegscheibe EVO3i-61 EVO3i- Neigungsverstellung Motorenabdeckung, Dämpfer EVO3i-62 EVO3i-92 untere M8 x 135mm...
-
Seite 41: Explosionszeichnung
EVO 3i motorisiertes Laufband EXPLOSIONSZEICHNUNG EIN GROSSTEIL DER HIER ABGEBILDETEN TEILE IST BEREITS VORMONTIERT www.smoothfitness.de... -
Seite 42: Explosionszeichung
EVO 3i motorisiertes Laufband EXPLOSIONSZEICHUNG EIN GROSSTEIL DER HIER ABGEBILDETEN TEILE IST BEREITS VORMONTIERT www.smoothfitness.de... - Seite 43 EVO 3i motorisiertes Laufband AUFBAU Schritt 1 : Nehmen Sie das Laufband aus dem Karton und platzieren Sie es auf dem Boden siehe Abb. 1 Befestigen Sie den Computer (1) auf dem Haltebügel, hinterer (102) mit vier M6 x 55mm Schrauben (3).
- Seite 44 EVO 3i motorisiertes Laufband AUFBAU Schritt 2 : Bitte achten Sie darauf die Kabel im linken Ständer (17) mit den Kabeln im Grundrahmen (24) zu verbinden. Befestigen Sie danach den linken und rechten Ständer (17 and 18) im Grundrahmen (24). Benutzen Sie hierzu vier M8 x 15mm Schrauben (19).
- Seite 45 EVO 3i motorisiertes Laufband AUFBAU Schritt 3 : Montieren Sie die Kunststoffscheibe (96) am linken Ständer (17) und befestigen Sie diese mit einer M6 x 12mm Schraube (97). Wiederholen Sie diesen Vorgang mit dem rechten Ständer (18) www.smoothfitness.de...
- Seite 46 EVO 3i motorisiertes Laufband AUFBAU Schritt 4 : Montieren Sie den Querträger (4) am Haltebügel, hinterer (102), Ständer links (17) and Ständer Rechts (18). Befestigen Sie diesen mit einer M6 x 15mm Schraube (16), zwei Metallringen (98) and zwei M8 x 95mm Schrauben (18).
- Seite 47 EVO 3i motorisiertes Laufband AUFBAU Schritt 5 : Montieren Sie die Seitenverkleidung links #1 (36) und die Seitenverkleidung links #2 (37) am Ständer links (17) und befestigen Sie diesen mit fünf 4 x 12mm Schrauben (10), vier 4 x 19mm Schrauben (11) und vier 12x5.5x1.5mm Beilegscheiben (116).
- Seite 48 EVO 3i motorisiertes Laufband AUFBAU Schritt 6 : Montieren Sie den Haltebügel links (12) am Ständer, links (17). Befestigen Sie diesen mit zwei M8 x 55mm Schrauben (5). Wiederholen Sie den Vorgang mit dem Ständer, rechts (18). www.smoothfitness.de...
- Seite 49 EVO 3i motorisiertes Laufband AUFBAU Schritt 7 : Zuerst müssen die Kabel der Handpulssensoren (14) verbunden werden wie in ABB 2. Montieren Sie den Haltebügel, vorderer (100) and den Ständern links und rechts (17 and 18) und befestigen Sie diesen mit zwei M6 x 12mm Schrauben (97).
- Seite 50 EVO 3i motorisiertes Laufband AUFBAU Schritt 8 : Montieren Sie die Haltebügelabdeckung links #1 (6) und die Haltebügelabdeckung links #2 (7) am Ständer links (17). Befestigen Sie diesen mit zwei Gehäusefixierungen (104) und . Wiederholen vier 4 x 12mm Schrauben (10) Sie den Vorgang mit dem Ständer rechts (18) bringen Sie die Haltebügelabdeckung rechts #1 (8) und die...
- Seite 51 EVO 3i motorisiertes Laufband TRANSPORTHINWEIS Heben Sie das Laufband vorsichtig von hinten an und rollen Sie es an den gewünschten Platz. Um das Laufband so zu justieren dass es eben auf dem Boden steht, folgen Sie bitte den Stabilisierungshinweisen in dieser Anleitung.
- Seite 52 EVO 3i motorisiertes Laufband STABILISIERUNG Ein unebener Untergrund könnte zur Folge haben dass die Federknöpfe nicht einrasten und somit der Neigungsmechanismus nicht funktionsfähig ist. Folgen die diesen Anweisungen um die Verstellschrauben zu justieren: Lassen Sie sich hierbei von einer zweiten Person behilflich sein, da das Laufband zur Seite geneigt werden muss.
-
Seite 53: Computeranleitung
EVO 3i motorisiertes Laufband COMPUTERANLEITUNG SICHERHEITSSCHLÜSSEL ENTER NEIGUNG AUF/AB VORGESPEICHERTE PROGRAMME ZEIT/STRECKE) PULS KALORIEN/KALORIEN PRO STUNDE NEIGUNGSGRAD/ALTER GESCHWINDIGKEIT VORGESPEICHERTE PROGRAMME GESCHWINDIGKEIT AUF/AB START STOP EINSCHALTEN – Der Netzschalter befindet sich unten am linken Ständer, schalten Sie diesen ein und geben Sie den Sicherheitsschlüssel in die dafür vorgesehene Öffnung am Computer. - Seite 54 EVO 3i motorisiertes Laufband COMPUTERANLEITUNG SIGNALTÖNE – Nach dem drücken der START Taste werden auf Geschwindigkeitsanzeige (SPEED) drei Sekunden begleitet von Signaltönen heruntergezählt, damit der Nutzer sich auf das Anlaufen des Bandes vorbereiten kann. PAUSE/STOP – Während des Trainings können Sie pausieren, indem Sie die STOP Taste einmal betätigen. Alle Anzeigen bleiben bei den letzten Werten stehen.
- Seite 55 EVO 3i motorisiertes Laufband COMPUTER ANLEITUNG 20 MINUTEN LAUFEN (20 MINUTE RUN) – Minimalgeschwindigkeit 5.0MPH/8.0KPH, Maximalgeschwindigkeit 8.1MPH/13.0KPH. Wenn das Laufband eingeschaltet ist kann das Programm “20 Minuten Laufen“ durch drücken der entsprechenden Taste gewählt werden. Durch drücken von START beginnt das Programm. Auf der Zeitanzeige erscheint “20:00”. Dieser Wert wird nach unten gezählt alle anderen Werte zählen aufwärts bis das Programm beendet ist.
- Seite 56 EVO 3i motorisiertes Laufband COMPUTER ANLEITUNG 60 MINUTEN GEHEN (60 MINUTE WALK) – Minimalgeschwindigkeit 1.9MPH/3.0KPH, Maximalgeschwindigkeit 5MPH/8KPH . Wenn das Laufband eingeschaltet ist kann das Programm “60 Minuten Gehen“ durch drücken der entsprechenden Taste gewählt werden. Durch drücken der START Taste beginnt das Programm. Auf der Zeitanzeige erscheint “60:00”. Dieser Wert wird nach unten gezählt und alle anderen Werte zählen aufwärts bis das Programm beendet ist.
- Seite 57 EVO 3i motorisiertes Laufband NOTFALL STOP – Im Notfall kann das Laufband durch drücken der NOTFALL STOP Taste (EMERGENCY STOP) sofort angehalten werden. Um den Betrieb fortzusetzen muss der Sicherheitsschlüssel wieder eingesteckt werden. Der Sicherheitschlüssel befindet sich unterhalb der STOP Taste.
- Seite 58 EVO 3i motorisiertes Laufband INSTANDHALTUNG Wie warte ich mein EVO 3i Laufband : Eine regelmäßige Wartung ist sehr wichtig, um sicher zu stellen, dass Ihr Laufband immer bestens funktioniert. Unsachgemäße Wartung kann Schäden nach sich ziehen und die Lebenszeit Ihres Laufbandes verkürzen.
- Seite 59 EVO 3i motorisiertes Laufband INSTANDHALTUNG REINIGUNG : Ein regelmäßiges Säubern des Laufbands kann die Lebensdauer des Gerätes erhöhen. • Warnung : Um elektrischen Schlägen vorzubeugen, überprüfen Sie ob der Netzstecker des Gerätes gezogen ist bevor Sie mit der Reinigung beginnen.
-
Seite 60: Garantie
TEILE. DIE HAFTUNG VON SMOOTH FITNESS BESCHRÄNKT SICH AUSSCHLIESSLICH AUF DIE OBEN GENANNTEN LEISTUNGEN SOWEIT NICHT VOM GESETZGEBER ANDERS GEREGELT. Für Hilfe beim Aufbau, oder um Ersatzteile zu bestellen, kontaktieren Sie bitte das Smooth Fitness Service Center unter Tel. 0800/1150119. Um den Vorgang zu erleichtern halten Sie bitte die folgenden Informationen bereit: •... - Seite 61 EVO 3i motorisiertes Laufband WICHTIGE SCHRITTE Warnung : Bevor Sie dieses Produkt benutzen, sollten Sie sich von Ihrem Hausarzt gründlich untersuchen lassen. Regelmäßiges und anstrengendes Training sollte erst von Ihrem Arzt genehmigt werden. Sollten sich durch das Training mit diesem Produkt irgendwelche Probleme einstellen, hören Sie mit dem Training auf und suchen Sie Ihren Arzt auf.
- Seite 62 EVO 3i motorisiertes Laufband ZIELPULS Puls : Um sicher zu sein, dass Ihr Herz in Ihrem Zielpuls schlägt, sollten Sie mehr darüber erfahren wie Sie Ihren Puls beobachten und messen können. Die einfachste Art seinen Puls zu fühlen, ist an der linken und rechten Halsseite, zwischen Luftröhre und Halsmuskeln die Halsschlagader zu ertasten.
- Seite 63 EVO 3i motorisiertes Laufband MUSKELUEBERSICHT Beanspruchte Muskelgruppen : Das Trainingsprogramm dieses Produkts ist vornehmlich auf die unteren Muskelgruppen des Körpers ausgerichtet. Diese Muskelgruppen sind in der folgenden Übersicht grau hinterlegt. Schultermuskeln Brustmuskeln Bizepsmuskeln Unterleibsmuskeln Unterarmmuskeln Gluteus Maximus Wadenmuskeln Trapezmuskeln Trizeps Rückenmuskeln...
- Seite 64 EVO 3i motorisiertes Laufband DEHNÜBUNGEN Warm up and cool down : Aufwärmen und Abwärmen : Eine erfolgreiche Trainingseinheit besteht aus dem Aufwärmen, Aerobic-Übungen, und dem Abkühlen. Machen Sie das komplette Programm mindestens 2–3 Mal die Woche, mit jeweils einem Tag Pause zwischen den Trainingstagen. Nach einigen Monaten können Sie Ihr Training auf 4–5 Mal die Woche erhöhen.
- Seite 65 EVO 3i motorisiertes Laufband DEHNÜBUNGEN Oberschenkel dehnen: Setzen Sie sich hin und strecken Sie Ihr rechtes Bein aus. Legen Sie die Sohle Ihres linken Fußes an die Innenseite Ihres rechten Oberschenkels. Versuchen Sie nun die Zehen Ihres rechten Fußes zu berühren. Halten Sie die weiteste Stellung für 15 Zähler.
-
Seite 66: Problembehandlung
EVO 3i motorisiertes Laufband PROBLEMBEHANDLUNG Troubleshooting Problembehandlung: BEACHTEN : Berühren Sie niemals die interne Verkabelung des Geräts ohne vorher den Hersteller konsultiert zu haben. Das Laufband startet nicht : 1. Sorgen Sie dafür dass für das Gerät in eine Überspannungsschutzsteckdose verwendet wird. Prüfen Sie ob die Überspannungsschutzsteckdose an einer in einer geerdete Steckdose angeschlossen ist und die Überspannungssteckdose... - Seite 67 Sport Basixx GmbH- Smooth Fitness Industriestraße 11 95336 Mainleus Germany Phone toll free: 0800-09 72 100 or +49 911 376574731 Email: info@smoothfitness.co.uk Website: www.smoothfitness.co.uk Sport Basixx GmbH- Smooth Fitness Industriestraße 11 95336 Mainleus Germany kostenlose Hotline: 0800-1150119 oder +49 911 376574732 Email: info@smoothfitness.de...