Herunterladen Diese Seite drucken

Werbung

Verfügbare Sprachen

Verfügbare Sprachen

PO Box 80 · 86651 Monheim/Germany
Phone: +49 9091 502-0
Fax: +49 9091 502-458
hama@hama.de
http://www.hama.com
All listed brands are trademarks of the corresponding companies. Errors and omissions excepted,
and subject to technical changes. Our general terms of delivery and payment are applied.

Werbung

loading

Inhaltszusammenfassung für Hama 00053145

  • Seite 1 PO Box 80 · 86651 Monheim/Germany Phone: +49 9091 502-0 Fax: +49 9091 502-458 hama@hama.de http://www.hama.com All listed brands are trademarks of the corresponding companies. Errors and omissions excepted, and subject to technical changes. Our general terms of delivery and payment are applied.
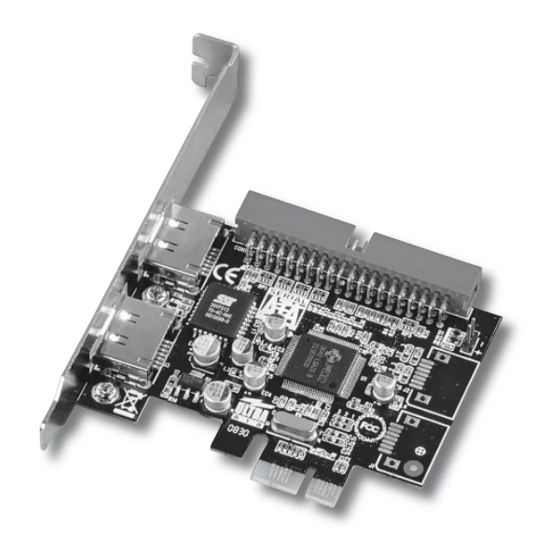
  • Seite 2 C O M P U T E R IDE & eSATA RAID Karte, PCIe Raid Card, PCIe 00053145...
  • Seite 3 d Bedienungsanleitung Packungsinhalt: • Schließen Sie Ihre internen ATA/IDE Geräte z.B. Festplatten 1x ATA & eSATA Raid Controller, PCIe oder IDE-CD-ROM Laufwerke an den Internen ATA/IDE 1x Diese gedruckte Installationsanleitung Anschluss an. 1x Treiber CD-ROM • Schließen Sie das Gehäuse Ihres Computers und verbinden Sie Ihn wieder mit der Stromversorgung.
  • Seite 4 Manche Hersteller bieten spezielle RAID Versionen ihrer Bestätigen Sie die Abfrage „Save to Disk & Exit (Y/N)? mit Festplatten an, wir empfehlen die Verwendung solcher der „ENTER“ Taste für Ja bzw. durch drücken der speziellen Festplatten, da diese ab Werk auf die speziellen Z Taste, um das Bios des Controllers zu verlassen.
  • Seite 5 7. Standardmäßig wird automatisch die maximale Kapazität 5. Stellen Sie mithilfe der Pfeiltasten „auf“ und „ab“ voreingestellt. Wollen Sie eine niedrigere Kapazität nutzen, das RAID-Level auf „01-Stripe+Mirror“ (Spiegelung und so geben Sie diese Größe in das Feld mit der Bezeichnung Zusammenschaltung) ein und betätigen danach die Size: ein.
  • Seite 6 1. Fahren Sie nachdem ordnungsgemäßen Einbau der Karte 4. Löschen Sie nun den RAID Verbund, indem Sie auf die den Rechner wieder hoch. Taste DEL oder ENTF betätigen. 2. Sobald das Bios des Controllers beim Hochfahren 5. Es erscheint eine Sicherheitsabfrage, ob Sie wirklich angezeigt wird, drücken Sie die Tasten STRG+J, um in sicher sind den RAID Verbund löschen zu wollen.
  • Seite 7 Um die defekte Festplatte auszutauschen und anschließend das Kopieren Sie danach von der beiliegenden Treiber CD-ROM RAID System wieder neu aufzubauen, gehen Sie wie folgt vor. den kompletten Inhalt des Verzeichnisses Treiber\Vista_ 7\32Bit\Floppy auf dem USB Speicherstick oder auf die 1.
  • Seite 8 g Operating Instruction 4. Beginnen Sie nach Abschluss des erfolgreichen 9. Der Treiber wurde nun von der Diskette eingelesen, und Kopiervorganges mit der Installation Ihres Betriebssystems, wird zur Überprüfung den installierten Treiber wie in dessen Anleitung beschrieben. nochmals angezeigt „(Windows XP/2003 x64) RAID/AHCI 5.
  • Seite 9 Benutzer) aus. Danach klicken Sie bitte auf → Weiter. Für Windows Vista und 7 in der 64-Bit Version: (Sollten Sie zuvor das Autostart Menu der Hama CD-ROM angezeigt bekommen, so beenden Sie dieses.) 1. Installieren Sie zuerst die Hardware, wie in diesem 4.
  • Seite 10 Optionen die zweite: Software von einer Liste oder bestimmten Quelle installieren (für fortgeschrittene Benutzer) aus. Danach klicken Sie bitte auf → Weiter. (Sollten Sie zuvor das Autostart Menu der Hama CD-ROM angezeigt bekommen, so beenden Sie dieses.) 4. Im nächsten Schritt „Wählen Sie die Such- und Installationsoptionen“...
  • Seite 11 Supportinformationen: Bei defekten Produkten wenden Sie sich bitte an Ihren Händler oder der Hama Produktberatung: Support Hotline – Hama Produktberatung: Tel. +49 (0) 90 91 / 502 – 115 Fax. +49 (0) 90 91 / 502 – 272 e-mail: mailto:produktberatung@hama.de Produktinformationen oder neue Treiber finden Sie im Internet...
  • Seite 12 g Operating Instruction g Operating Instruction Package contents: Slot plate 1x ATA & eSATA RAID controller, PCIe PCIe Card 1x these printed installation instructions 1x driver CD-ROM Controller specifications • Supports PCIe specification 1.0 • Supports serial ATA II hard drives with a max. transfer rate of 3.0 Gbit/s on the eSATA ports PCIe Slot •...
  • Seite 13 d Bedienungsanleitung A disadvantage of this RAID version is that a malfunction in one A disadvantage of this RAID version is that, on the one hand, hard drive means all the data of all volumes are lost. the entire data capacity of the respective hard drives cannot be used, and on the other hand, the data throughput is decreased To set up a RAID 0 hard drive array, proceed as follows: because of the doubled (redundant) data storage.
  • Seite 14 g Operating Instruction A disadvantage is that you need at least four hard drives and A disadvantage of this is that, in the event of the malfunction you can only make use of 50% of the entire storage capacity. of one hard drive, you lose all the data on this drive. Also, the maximum data throughput is restricted to the slowest hard drive To set up a RAID 0+1 array, proceed as follows: in this array.
  • Seite 15 d Bedienungsanleitung 6. As a last step, select the menu item “Save and Exit Setup” 7. In the controller BIOS, select the option “Rebuild Mirror and then press ENTER. Again answer the query, “Save to Drive” (rebuild hard drive in RAID array 1 or 0+1) and press Disk &...
  • Seite 16 g Operating Instruction For Windows Vista and 7 in the 64-bit version: 4. Once the copying process has been successfully completed, begin installing Windows XP. 1. Insert the enclosed driver CD-ROM into your drive. 5. During the Windows XP setup program, press F6 as soon as 2.
  • Seite 17 → Next. The following entry must appear without a yellow advanced users)”. Click → Next. (If the autostart menu of exclamation mark. the Hama CD-ROM is displayed first, exit it.) 4. In the next step, “Select search and installation options”, Storage controllers: select the following options: •...
  • Seite 18 Internet to search for a suitable driver with Windows Update. Select the option → “No, not this time” Contact your dealer or Hama Product Consulting if you have a and click→ Next to continue installation. faulty product: 3.
  • Seite 19 f Mode d‘emploi Contenu de l‘emballage : • Fixez la carte au boîtier à l’aide d'une vis appropriée. 1 contrôleur ATA & eSATA Raid, PCIe • Raccordez vos appareils ATA/IDE internes (disques durs 1 exemplaire de la présente notice d’installation ou lecteurs IDE-CD-ROM, etc.) à...
  • Seite 20 Certains fabricants proposent des versions spéciales 10. En dernière étape, sélectionnez l’option de menu « Save « RAID » de leurs disques durs ; nous vous en conseillons and Exit Setup » (sauvegarder et quitter la configuration), l’utilisation, car ces disques durs ont été conçus en fonction puis appuyez sur la touche «...
  • Seite 21 d Bedienungsanleitung Procédez de la manière suivante afin configurer une grappe 6. Sélectionnez les disques durs que vous souhaitez RAID 0+1 : intégrer (si uniquement deux disques durs sont connectés au contrôleur, ils sont sélectionnés automatiquement) à 1. Redémarrez votre ordinateur après avoir installé l’aide des touches fléchées «...
  • Seite 22 g Operating Instruction JBOD (concaténation de plusieurs disques durs) Confirmez à nouveau votre sélection à l’aide de la touche ENTER pour Oui, afin de quitter le bios Remarque : Au moins deux disques durs sont requis pour du contrôleur. l’alternative JBOD. Utilisez de préférence deux disques durs 10.
  • Seite 23 d Bedienungsanleitung 1. Dès l’apparition du bios du contrôleur, après le 11. En dernière étape, sélectionnez l’option de menu « Save démarrage, appuyez sur les touches CRTL+J afin and Exit Setup » (sauvegarder et quitter la configuration), d’accéder au bios de la carte. puis appuyez sur la touche «...
  • Seite 24 g Operating Instruction Pour Windows Vista et 7 édition 64 bits : 4. Après avoir copié les données, lancez l’installation de votre système d’exploitation Windows XP. 1. Insérez le CD-ROM pilote fourni dans votre lecteur. 5. Pendant le programme de configuration Windows XP, 2.
  • Seite 25 d Bedienungsanleitung Dans notre cas, le bon pilote s’appelle « (Windows Contrôleur de mémoire : XP/2003) RAID/AHCI Driver for Jmicron • Contrôleur JMicron JMB36X JMB36X Controller » ; confirmez votre sélection à l’aide de la touche ENTER. Remarque : nous vous recommandons instamment d’installer 9.
  • Seite 26 (avancé). Cliquez sur → Suivant d’exploitation Windows. (fermez la fenêtre d’autodémarrage du CD-ROM de Hama 2. Dès que le chargement de Windows est terminé, dans le cas où celle-ci apparaît).
  • Seite 27 Support technique : En cas de produit défectueux, veuillez vous adresser à votre revendeur ou au département de conseil produits de Hama : Assistance – Conseil produits Hama : Tél. +49 (0) 90 91 / 502 – 115 Fax +49 (0) 90 91 / 502 –...
  • Seite 28 g Operating Instruction d Hinweis zum Umweltschutz: Ab dem Zeitpunkt der Umsetzung der europäischen Richtlinien 2002/96/EG und 2006/66/EG in nationales Recht gilt folgendes: Elektrische und elektronische Geräte sowie Batterien dürfen nicht mit dem Hausmüll entsorgt werden. Der Verbraucher ist gesetzlich verpflichtet, elektrische und elektronische Geräte sowie Batterien am Ende ihrer Lebensdauer an den dafür eingerichteten, öffentlichen Sammelstellen oder an die Verkaufsstelle zurückzugeben.
  • Seite 29 d Bedienungsanleitung Wskazówki dotyczące ochrony środowiska: Od czasu wprowadzenia europejskiej dyrektywy 2002/96/EU i 2006/66/EU do prawa narodowego obowiązują następujące ustalenia: Urządzeń elektrycznych, elektronicznych oraz baterii jednorazowych nie należy wyrzucać razem z codziennymi odpadami domowymi! Użytkownik zobowiązany prawnie do odniesienia zepsutych, zniszczonych lub niepotrzebnych urządzeń elektrycznych i elektronicznych do punktu zbiórki lub do sprzedawcy.
  • Seite 30 g Operating Instruction...