Herunterladen Inhalt Inhalt Diese Seite drucken
Inhaltsverzeichnis

Werbung

Verfügbare Sprachen
  • DE

Verfügbare Sprachen

  • DEUTSCH, seite 39
36040 SOSSANO (Vicenza) Italia - Via Seccalegno, 29
Tel. (+39) 0444/788000 - Fax (+39) 0444/788020 - e-mail: info@fort-it.com
IT
USO E MANUTENZIONE
EN
USE AND MAINTENANCE
FR
EMPLOI ET ENTRETIEN
FORT Srl UNIPERSONALE
Motocoltivatore
CENTAURO
180 SUPER
DE
ES
PT
®
con traduzioni delle istruzioni originali
GEBRAUCH UND WARTUNG
USO Y MANUTENCION
USO E MANUTENCÃO
Ver. B
Ver. B
ISTRUZIONI ORIGINALI

Werbung

Inhaltsverzeichnis
loading

Inhaltszusammenfassung für Fort CENTAURO

  • Seite 1 ® FORT Srl UNIPERSONALE 36040 SOSSANO (Vicenza) Italia - Via Seccalegno, 29 Tel. (+39) 0444/788000 - Fax (+39) 0444/788020 - e-mail: info@fort-it.com Motocoltivatore CENTAURO Ver. B 180 SUPER Ver. B ISTRUZIONI ORIGINALI con traduzioni delle istruzioni originali USO E MANUTENZIONE...
  • Seite 2 11 22 16 15 14 9 Fig. 1...
  • Seite 3 Fig. 2 Fig. 3...
  • Seite 4 Fig. 4 Fig. 5...
  • Seite 5 1,16 12,4 2,38 5,28 2,92 12,8 2,46 6,11 14,85 2,86 6,95 Fig. 6 Fig. 7 Fig. 8...
  • Seite 6 Fig. 9 Fig. 10 Fig. 11 Fig. 12...
  • Seite 7 Fig. 14 Fig. 13 Fig. 16 Fig. 15 USO E MANUTENZIONE ....8 GEBRAUCH UND WARTUNG ..39 USE AND MAINTENANCE ..... 18 USO Y MANUTENCION ....50 EMPLOI ET ENTRETIEN ....28 USO E MANUTENCÃO ....61 2011 - All rights reserved. - Ganze oder auch teilweise Vervielfältigung des Textes oder der illustrationen verboten. 2011 - Tutti i diritti riservati.
  • Seite 8: Inhaltsverzeichnis

    ITALIANO INDICE SEZIONE 1 Descrizione e caratteristiche della SEZIONE 1. Descrizione e caratteristiche della macchina macchina Premessa ..........8 1.1 PREMESSA Garanzia ..........8 1.2.1 Esclusioni dalla garanzia ......8 Questo libretto riporta le istruzioni per l’uso e la Descrizione della macchina ..... 9 manutenzione del motocoltivatore.
  • Seite 9: Descrizione Della Macchina

    ITALIANO 1.3 DESCRIZIONE DELLA MACCHINA Il motocoltivatore è dotato di: - Marchio “CE” Il Motocoltivatore è una macchina marcata «CE» - Dichiarazione “CE” di conformità; in conformità con le norme dell’Unione Europea - Libretto d’istruzioni d’uso del motore; riportate nella direttiva 2006/42/CE, 2004/108/CE, - Libretto d’istruzioni d’uso della macchina;...
  • Seite 10: Caratteristiche Tecniche

    ITALIANO Il numero di matricola macchina, da citare sempre 1.3.4 DIMENSIONI nella richiesta di pezzi di ricambio, è posto sulla Vedere fig. 2. parte destra del carter cambio in prossimità del- DIMENSIONI (con ruote 5.00 - 10) in mm. l’attacco del motore (1 fig. 9). 1210 1.3.3 CARATTERISTICHE TECNICHE 1960...
  • Seite 11: Livello Vibrazioni

    ITALIANO 1.3.7 LIVELLO VIBRAZIONI Si consiglia quindi di leggere molto attentamente questo manuale ed in particolare le norme di sicu- Il livello delle vibrazioni é stato rilevato con mac- rezza, facendo molta attenzione a quelle opera- china in funzione a 3060 g/1’ (85% del regime no- zioni che possono risultare particolarmente peri- minale di 3600 g/1’), ed è...
  • Seite 12: Ecologia Ed Inquinamento

    ITALIANO - I capelli lunghi devono essere raccolti . logazione solo per macchine abbinate a - Si raccomanda d’indossare scarpe adegua- rimorchietto- ruote motrici ed equipaggiate con te; è vietato operare scalzi, con sandali o cia- motore LOMBARDINI 3LD 510. batte.
  • Seite 13: Prima Dell' Uso

    ITALIANO SEZIONE 3 6) Verificare che il montaggio delle ruote sia corretto, e che la freccia stampigliata sui Uso della macchina fianchi dei pneumatici, corrisponda al sen- so di avanzamento della macchina in caso 3.1 PRIMA DELL’ USO contrario invertirle. Quando la macchina viene imballata con i vari componenti smontati, è...
  • Seite 14: Verifiche Preliminari

    ITALIANO Accessori come: seggiolino di trasferimento, Dopo aver allontanato eventuali persone, o ani- carrello botte, vanno collegati al motocoltiva- mali presenti nel raggio d’azione della macchina, tore in corrispondenza dell’attacco (4) fig. 11, procedere con l’avviamento del motocoltivatore, mentre il rimorchio trainato va collegato solo operando nel seguente modo (Fig.1): all’attacco (5) fig.
  • Seite 15: Dopo L'avviamento

    ITALIANO 3.2.3 DOPO L’AVVIAMENTO da facilitare l’inserimento degli ingranaggi. - Per interrompere l’avanzamento tirare la leva fri- - Lasciare scaldare il motore al minimo per qual- zione e portare il cambio in folle, agendo sulla che minuto. leva di selezione marce (16). - Durante le prime ore di lavoro, non utilizzare la macchina al massimo delle prestazioni.
  • Seite 16: Freni

    ITALIANO 3.6 FRENI cato alla P.T.O durante il funzionamento, non sia di pericolo per eventuali persone o animali. Il motocoltivatore è dotato di freni a tamburo sulle - Prima di agire sulle leve cambio (14) e P.T.O. due ruote con comandi indipendenti alle stegole (16), tirare a fondo la leva frizione (11 fig.1).
  • Seite 17: Manutenzione

    ITALIANO co, nella quantità di 5 Kg e verificare il livello SEZIONE 4 raggiunto (vedi cap. specifico). MANUTENZIONE ORDINARIA Usare OLIO tipo SAE 20 - 40. - Ad operazione ultimata, rimettere il tappo nel foro 4.1 MANUTENZIONE di carico (7 fig.11). Vengono di seguito descritte le varie operazioni di manutenzione e regolazione.
  • Seite 18: Foreword

    ENGLISH TABLE OF CONTENTES SECTION 1 Description and specifications of the SECTION 1: Description and specifications of the machine machine Foreword ..........18 Warranty ..........18 1.1 FOREWORD 1.2.1 Warranty exclusions ......18 This instruction manual describes the instructions Description of the machine ....19 to be followed for the use and the maintenance of 1.3.1 Interchangeable attachments and the motor hoe.
  • Seite 19: Description Of The Machine

    ENGLISH 1.3 DESCRIPTION OF THE MACHINE The motor hoe is equipped with: - EC brand The Motor hoe is a machine «EC» marked in com- - EC declaration of conformity pliance with the regulations of the European Un- - engine handbook ion listed in the Directive 2006/42/EC, 2004/108/ - instruction manual of the machine EC, as described in the declaration of conformity...
  • Seite 20: Technical Specifications

    ENGLISH 1.3.4 OVERALL DIMENSIONS The code no. of the machine, which shall always be quoted when spare parts are ordered, is shown Please make reference to fig.2. on the right side of the gearbox casing near the engine connector (1 fig. 9). DIMENSIONS (with wheels 5.00 - 10) in mm.
  • Seite 21: Vibrations Level

    ENGLISH Therefore, we suggest to read this manual very 1.3.7 VIBRATIONS LEVEL carefully and especially to read the safety regula- The vibrations level was taken while the machine tions, by paying attention to those operations which was running at 3060 rpm (85% of the rated speed are particularly dangerous.
  • Seite 22: Ecology And Pollution

    ENGLISH Never lock the differential before turning or when 2.3 ECOLOGY AND POLLUTION the fourth gear is engaged. 2.5 MAINTENANCE OPERATIONS - Keep the lubricants out of the children’s reach. UNDER SAFETY CONDITIONS Read the warnings and the precautions marked on the containers of the lubricants carefully.
  • Seite 23: Adjustment Of The Tracks

    ENGLISH Before using the machine, adjust the height of the Check that the wheels are assembled in the handlebars and position them according to the type correct direction. Otherwise exchange them. of attachment. 3.1.3 ASSEMBLY: LOWER P.T.O. LEVER, Adjustment of height: SLOW/FAST GEAR LEVER AND GEAR Loosen the screw (7 fig.
  • Seite 24: Start-Up

    ENGLISH automatic winding which allows to pull the rope - Make sure that the clutch travel is correct (please but which, when the engine starts, is discon- make reference to par. 4.1.3 - Adjustment of the nected to avoid jerks and recoils to the operator. clutch control).
  • Seite 25: Reverse Movement

    ENGLISH N.B. In order not to damage the machine, we In order to engage the gears and to move the suggest to lock the differential only when the machine forward, carry out the following opera- clutch is pulled and the wheels are not moving. tions (fig.
  • Seite 26: Stopping Of The Engine

    ENGLISH SECTION 4 - DIRECTION OF ROTATION: Counterclockwise (looking at the P.T.O. front). Routine maintenance - 26 UNI 220 CONNECTING SPLINED SHAFT The synchronized speed must be selected only 4.1 MAINTENANCE when the trailer with driving wheels is connected. We here below describe the maintenance and adjustment operations.
  • Seite 27: Adjustment Of The Clutch Control

    ENGLISH 4.1.3 ADJUSTMENT OF THE CLUTCH CONTROL (fig. 1) Check the travel of the clutch lever (11) periodi- cally. When it is excessive, i.e. when the lever is near the end of its travel, adjust it as follows: - Loosen the nut and the lock nut (18). - Act on the adjusting screw (17) until the travel is about 7-8 mm.
  • Seite 28: Section 1: Description Et Caractéristiques De La Machine 1.1 Preliminaire

    FRANÇAIS TABLE DES MATIERES SECTION 1 Description et caractéristiques SECTION 1: Description et caractéristiques de la de la machine machine Preliminaire ........... 28 Garantie ..........28 1.1 PRELIMINAIRE 1.2.1 Exclusions de la garantie ...... 28 Ce livret contient les instructions pour l’utilisation Description de la machine .....
  • Seite 29: Description De La Machine

    FRANÇAIS - Si, les instructions indiquées dans ce livret ne brayage. sont pas respectées. 20) Levier du frein de la roue gauche. 21) Levier du frein de la roue droite. 1.3 DESCRIPTION DE LA MACHINE Le motoculteur est équipé de: - Symbole «CE».
  • Seite 30: Caracteristiques Techniques

    FRANÇAIS MACHINE. Chaque machine est livrée avec une Mancherons de pilotage: réglables en hauteur plaque d’identification (Fig. 1) qui indique: et latéralement. Réversibles A - Marque, nom et adresse du Constructeur. de 180°. B - Marquage «CE». Dimensions des roues:- 5.00 x 12 - 6.50/80 x 12 C - Modèle de la machine.
  • Seite 31: Niveau Sonore

    FRANÇAIS N.B. Contrôler périodiquement la pression de l’emballage peuvent être recyclés, et que donc, gonflage des pneumatiques qui doit toujours après leur utilisation, ils doivent être donnés aux être maintenue à 2,2 bars. centres de récupération spécifiques en accord avec les lois en vigueur dans le pays de destina- 1.3.6 NIVEAU SONORE tion de la machine.
  • Seite 32: Habillement

    FRANÇAIS vent toujours être bien évidentes, propres et 2.4 UTILISATION EN SECURITE elle doivent être remplacées si elles deviennent illisibles. 1) Avant de commencer à opérer, lire attentive- - Il est absolument interdit d’actionner ou de faire ment le livret d’instructions (ce symbole est actionner la machine par un tiers qui n’a pas lu placé...
  • Seite 33: Avant L'utilisation

    FRANÇAIS chine dans son ensemble et des dispositifs de les utiliser, veuillez les régler en hauteur et les po- protection. sitionner en fonction de l’outillage qui sera appli- - Périodiquement vérifier le serrage et la tenue qué. des vis, des écrous et des éventuels raccords. RÉGLAGE EN HAUTEUR: - Respecter la conformité...
  • Seite 34: Montage Du Levier Enclenchement P.t.o. Inferieur, Levier De Selection Des Vitesses Lentes Rapides, Levier De Selection Des Vitesses

    FRANÇAIS - Soulever la machine (consulter le 1.4 «dépla- branchés à la fixation représentée sur la fig.15. cement de la machine»). - Enlever les boulons de fixation. (1). N.B. L’application sur le motoculteur d’outilla- - Changer la position au disque interne (3). ges interchangeables non conformes aux nor- - Remettre les boulons et les fixer à...
  • Seite 35: Mise En Service Par Coup Sec Avec Enroulement Automatique

    0) éteint. jusqu’à ce que vous sentiez une certaine résis- 1) éclairage des feux de position. tance. A ce point, tirer avec un coup fort et dé- 2) éclairage des codes. cisif. Le moteur est équipé d’une mise en route 3) éclairage des phares.
  • Seite 36: Marche Arriere

    FRANÇAIS 3.4.1 MARCHE ARRIERE 3.6 FREINS En travail avec accessoires frontales (par ex. barre Le motoculteur est équipé de freins à tambour sur ème faucheuse, brosse, fraise à neige etc.) 2 vitesse les deux roues avec des commandes indépendan- (V fig. 10) NE PEUT PAS être utilisé en marche tes sur les mancherons (levier 20 et 21 fig.
  • Seite 37: Arret Du Moteur

    FRANÇAIS Toutes les sélections relatives à la boite de vites- tion, en agissant sur le dispositif approprié (18) ses et aux deux prises de force, doivent être ef- afin d’éviter le collage de l’embrayage même. fectuées de la façon suivante (fig. 12) : - Veuillez vous assurer que le mouvement de l’outil appliqué...
  • Seite 38: Reglage De La Commande De L'embrayage

    FRANÇAIS - Soulever la machine et la bloquer (consulter le 4.3 DEMANTELEMENT chapitre spécifique) de façon à insérer sous le En cas de démantèlement de la machine, procé- carter de la boite de vitesses un bac pour la ré- der à la récupération des différents composants, cupération de l’huile.
  • Seite 39: Abschnitt 1: Beschreibung Und Charakteristik Der Maschine 1.1 Vorwort

    DEUTSCH INHALTSVERZEICHNIS ABSCHNITT 1 Beschreibung und Charakteristik ABSCHNITT 1: Beschreibung und charakteristik der Maschine der maschine Vorwort ..........39 1.1 VORWORT Garantie ..........39 1.2.1 Von der garantie ausgeschlossen ..39 Diese Bedienungsanleitung enthält die Anweisun- Beschreibung der maschine ....40 gen zum Gebrauch und zur Wartung des Motor- 1.3.1 Austauschbare zubehörteile und optionals 40 kultivators.
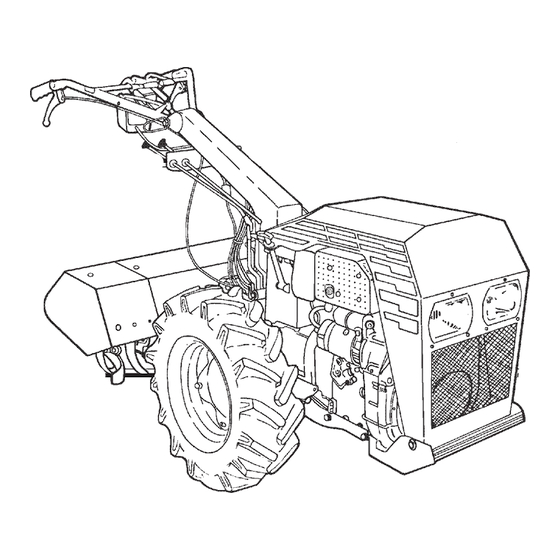
  • Seite 40: Beschreibung Der Maschine

    DEUTSCH raturen, die ohne Genehmigung der Hersteller- 14) Einrückhebel untere Zapfwelle; firma vorgenommen wurden, oder aufgrund der 15) Ganghebel (langsam - schnell); Montage anderer als der Original-Ersatzteile die 16) Schalthebel; Maschine Veränderungen aufweist und der Scha- 17) Einstellschraube für den Kupplungshub; den auf diese Veränderungen zurückzuführen ist;...
  • Seite 41: Kennzeichnung

    DEUTSCH - Geflanschte Bewässerungspumpe; Sicherheitsvorrichtungen: - Tankwagen; - Motorstop mit Kupplung kombi- - Pumpe zur Bewässerung durch Berieselung oder niert. Beregnung; - Sicherheitsvorrichtung zum Aus- - Zapfwelle, synchronisiert mit den Antriebsrädern kuppeln der Fräse im Rückwärts- des Anhängers gang. - Sicherheitsvorrichtung zum Ab- 1.3.2 KENNZEICHNUNG schalten der Fräse im Rückwärts- gang.
  • Seite 42: Schallpegel

    DEUTSCH 3) Die Muttern zur Befestigung der Räder teilwei- rückhebel der unteren Zapfwelle (14 Abb.1), dem se lockern. ‘Langsam-Schnellganghebel’ (15 Abb.1) und dem 4) Die Maschine anheben (siehe Kap. 1.4 «Be- Gangwählerhebel (16 Abb.1) geliefert werden. wegung der Maschine»); Zur Montage wird auf die noch folgenden spezifi- 5) Die Muttern vollständig abschrauben und den schen Abschnitte verwiesen.
  • Seite 43: Sicherheitssignale

    DEUTSCH Sie lehnt außerdem jede Verantwortung für 2.3 UMWELTSCHUTZ UND Schäden ab, die durch unsachgemäße Benut- VERSCHMUTZUNGSGEFAHR zung der Maschine oder durch ohne Genehmi- gung durchgeführte Abänderungen entstehen. - Die Schmiermittel außerhalb der Reichweite von 2.1 SICHERHEITSSIGNALE (Fig. 3) Kindern aufbewahren. Die auf den Behältern der Schmiermittel angegebenen Warnungen und Vorsichtsmaßnahmen aufmerksam lesen.
  • Seite 44: Sichere Wartung

    Flammen fern- wieder lösen. bleiben. Eventuell ausgetretenen Treibstoff so- ° fort abtrocknen, bevor die Maschine angelas- DREHUNG DER FÜHRUNGSSTERZE UM 180 sen wird. Den Treibstoff und die Schmiermittel (Abb. 4) an hierfür geeigneten Orten, zu denen Nicht- Um austauschbare Geräte zur vorderseitigen An-...
  • Seite 45: Einstellung Der Spurweite

    DEUTSCH 2) Die Stangen (14, 15 und 16) aus ihren Sitzen 3.1.4 WECHSEL DER AUSTAUSCHBAREN ziehen und so verschieben, daß sie nicht be- GERÄTE (Abb. 13) hindern. Zum Wechsel der austauschbaren Geräte müs- 3) Den Hebel (12 Abb. 1) ganz nach unten drük- sen die beiden Muttern (5), die das Zubehörteil ken und die Stütze der Sterze im entgegen mit dem Abtrieb (4) verbinden, abgeschraubt und...
  • Seite 46: Start

    DEUTSCH für die Bedienungsperson Zerrungen und Ge- genstöße zu vermeiden. 3) Die Schnur loslassen, während sie sich wieder ACHTUNG. Der Motor enthält kein Schmieröl. aufwickelt. Vor Anlassen ist es erforderlich, die Hinweise Falls der Motor nicht starten sollte, den Vorgang der Bedienungsanleitung zu konsulieren und wiederholen.
  • Seite 47: Vorschub - Einlegen Der Gänge

    DEUTSCH trollampen vorhanden, die folgendem entsprechen: den Ganghebel ‘LANGSAM-SCHNELL’ (15) zie- 4) Kontrollampe Batterieaufladung hen oder verstellen. 5) Kontrollampe Lichteinschaltung - Je nach Position den Gangschaltungshebel (16) 6) Kontrollampe Öldruck Motor ziehen oder drücken, bis der gewünschte Gang eingelegt ist. Das entsprechende Piktogramm 3.4 VORSCHUB - EINLEGEN DER Abb.
  • Seite 48: Abtrieb

    DEUTSCH Bei stationärem Motorkultivator geschieht der Zapf- - Nach Beendigung Zapfwelle (16) auf Leerlauf wellenantrieb durch Einstellung des LANGSAM- stellen unter Berücksichtigung des oben be- SCHNELL-Hebels (15 Abb. 12) in Leerlaufstellung schriebenen Vorgangs. (N); daraufhin wird der Wahlhebel (16 Abb.12), wie - Möglichst den Betrieb der unteren Zapfwelle im vorher beschrieben, betätigt.
  • Seite 49: Motor

    DEUTSCH 4.1.3 EINSTELLUNG DER KUPPLUNGSSTEUERUNG (Fig. 1) Von Zeit zu Zeit den Spielraum des Kupplungs- Die Wartungs-, Einstellungs- und Arbeits- hebels (11) überprüfen. Falls dieser sich als zu vorbereitungs-Arbeiten müssen bei abge- groß erweist, muß bei Hebelstellung in der Nähe schaltetem Motor und befestigter Maschine des Anschlags die Einstellung wie folgt vorgenom- vorgenommen werden.
  • Seite 50: Seccion 1: Descripción Y Características De La Máquina 1.1 Premisa

    ESPAÑOL INDICE SECCION 1 Descripción y características SECCION 1: Descripción y características de la de la máquina máquina Premisa ..........50 Garantia ..........50 1.1 PREMISA 1.2.1 Exclusiones de la garantia ....50 Este manual, incluye la instrucciones de empleo y Descripcion de la maquina ....
  • Seite 51: Descripcion De La Maquina

    ESPAÑOL de piezas de recambio no originales, la máqui- 18) Dispositivo bloqueo embrague. Permite el na ha sufrido variaciones y el daño es imputa- bloqueo de la palanca del embrague. ble a tales variaciones. 20) Palanca freno rueda izquierda - Si no se han respetado las instrucciones pre- 21) Palanca freno rueda derecha.
  • Seite 52: Caracteristicas Tecnicas

    ESPAÑOL pada con una placa de identificación (Fig. 1) que Presión de hinchado ruedas: 2,2 bar. incluye: Frenos: - de tambor con mando indepen- A - Marca, nombre y dirección del Construc- diente para cada rueda (por tor; encargo). B - Marca «CE»; Grupo binadora rotativa: C - Modelo de la máquina;...
  • Seite 53: Nivel Vibraciones

    ESPAÑOL Motore Lombardini 6LD 400 (diesel) porte, camión o remolque, utilizar rampas y pla- con silenciador del escape, dibujo 9996.952.0 nos inclinados adecuados al peso de la máquina - Nivel de presión acústica (LpAm)dB ..92,3 y al operador que la acompaña. - Nivel de potencia acústica (LwA) dB ..
  • Seite 54: Vestido

    ESPAÑOL 3) Nivel acústico elevado, usar los auriculares de los dispositivos de control y sus funciones. protección. - Antes de poner en funcionamiento la máquina, 4) Peligro de quemaduras. Evitar tocar las partes controlar la perfecta integridad de los dispositi- calientes del motor.
  • Seite 55: Antes Del Uso

    ESPAÑOL sonal calificado y siguiendo las indicaciones in- las manceras hacia la derecha o la izquierda has- cluidas en este libro. ta que coincida el orificio con el perno de bloqueo. - Los aprovisionamientos de carburante y de acei- Luego soltar la palanca (12 fig 1). te se efectuarán exclusivamente con el motor apagado y no demasiado caliente.
  • Seite 56: Montaje: Palanca Embrague P.t.o. Inferior, Palanca Selección Marchas Lentas Veloces, Palanca Selección Marchas

    ESPAÑOL 3.1.3 MONTAJE: PALANCA EMBRAGUE - Antes de empezar el trabajo, controlar que to- dos los tornillos estén bien apretados, especial- P.T.O. INFERIOR, PALANCA mente los del grupo binadora rotativa. SELECCIÓN MARCHAS LENTAS - Comprobar que el montaje de las ruedas sea VELOCES, PALANCA SELECCIÓN correcto y que la flecha estampada en los lados MARCHAS (fig.
  • Seite 57: Arranque Electrico

    ESPAÑOL A este punto tirar con un tirón fuerte y decidido. 5) espía encendido luces. El motor está equipado con arranque de tirón 6) espía presión aceite motor. de tipo autoarrollable que permite tirar la cuer- da pero que en el momento en que el motor 3.4 AVANCE - INTRODUCCION arranca se desconecta para evitar tirones y MARCHAS...
  • Seite 58: Bloqueo Diferencial

    ESPAÑOL - Tirar la palanca de embrague marcha atrás (12). Soltar gradualmente la palanca del embrague y acelerar. ATENCIÓN: Si la velocidad de rotación es de - Para interrumpir el avance en marcha atrás, ti- 3000 r.p.m. o de 740 r.p.m., el sentido de rota- rar a fondo de la palanca embrague (11) y po- ción de la P.T.O.
  • Seite 59: Parada Del Motor

    ESPAÑOL aceite motor. Controlar además, y eventualmen- te limpiar, el filtro del aire del motor. Pasadas las primeras 50 horas de trabajo, sustituir el aceite ATENCIÓN!: El motocultor dispone de un dis- del motor; sucesivamente consultar el manual del positivo de seguridad que impide la introduc- motor y proceder según sus indicaciones.
  • Seite 60: Regulacion Mando Acelerador

    ESPAÑOL de aproximadamente 7-8 mm. - Acabada la regulación fijar nuevamente la tuer- ca y la contratuerca (19). 4.1.4 REGULACION MANDO ACELERADOR Para eventuales regulaciones del acelerador se prohibe absolutamente modificar los límites im- puestos por el constructor, en la eventualidad, di- rigirse a un Centro de Asistencia autorizado.
  • Seite 61: Secção N 1: Descrição E Características Da Máquina 1.1 Introdução

    PORTOGUES INDICE SECÇÃO Nº 1 Descrição e características da máquina SECÇÃO N 1: Descrição e características da máquina Introdução ..........61 1.1 INTRODUÇÃO Garantia ..........61 1.2.1 Exclusões da garantia ......61 Este manual contém as instruções para o uso e a Descrição da maquina ......
  • Seite 62: Descrição Da Maquina

    PORTOGUES por causa da montagem de peças de recâmbio 16) Alavanca de marchas. não originais, a máquina tenha sofrido uma va- 17) Parafuso de regulação do percurso da riação e o dano seja imputável a tais variações; embraiagem; - Não tenham sido respeitadas as instruções pre- 18) Dispositivo de bloqueio da embraiagem.
  • Seite 63: Identificação

    PORTOGUES desengate da fresa na marcha- 1.3.2 IDENTIFICAÇÃO atrás. MOTOR. Para a identificação do motor é neces- - dispositivo de segurança de sário referir-se ao manual de instruções do motor, desengate da fresa na marcha- confrontando com os dados indicados na placa atrás.
  • Seite 64: Nível Sonoro

    PORTOGUES recicláveis, e por este motivo, devem ser entregues, N.B. Controlar periódicamente a pressão de ar depois do uso, a apropriados centros de colheitas dos pneus de modo a mantê-la sempre com a de acôrdo com as leis antipoluição em vigor no país pressão de 2.2 bar.
  • Seite 65: Vestuário

    PORTOGUES Os decalques relativos a segurança, devem ser 2.4 USO COM SEGURANÇA sempre bem evidentes, limpos e substituídos no caso em que fiquem ilegíveis: 1) Antes de começar o trabalho, leia atenciosa- - É absolutamente proibido ligar ou fazer ligar a mente o manual de instruções (este simbolo máquina a pessoas que não leram e memori- foi colocado na capa do manual de instruções).
  • Seite 66: Antes Do Uso

    PORTOGUES REGULAÇÃO NA ALTURA: - Verificar periódicamente a fixagem e a deten- Afrouxar o parafuso com alavanca (7 fig.1), regu- ção dos parafusos, das porcas e das eventuais lar as hastes na altura desejada e então bloquear extensões. bem com o mesmo parafuso com alavanca. - Respeitar a conformidade dos óleos e dos lu- brificantes aconselhados.
  • Seite 67: Montagem: Alavanca De Engate Da P.t.o. Inferior, Alavanca De Mudança De Marchas Lentas E Velozes, Alavanca De Mudanças De Marchas

    PORTOGUES 3.1.5 VERIFICAÇÕES PRELIMINARES 2) Mudando a posição do disco interno (3). 3) Virar de cabeça pra baixo a parte externa da - Verificar que a caixa de câmbio haja óleo e con- roda (4) em respeito ao disco interno (3). Veri- trolar o justo nível (ver secção 4.1.2 Manuten- ficar que o sentido de montagem da roda seja ção máquina 7 fig.
  • Seite 68: Ignição Eléctrica

    PORTOGUES 1) acendimento luz de posição. parágrafo 3.2 IGNIÇÃO: 2) acendimento farol baixo 1) Levantar a capota de protecção do motor (8 3) acendimento farol alto fig.14). No painel são presentes, além do mais, sinais de 2) Puxar a corda de ignição (9 fig.14) até que esta assinalação que correspondem a: encontre uma certa resistência.
  • Seite 69: Blocagem Do Diferencial

    PORTOGUES da alavanca (15 fig.12) LENTAS-VELOZES - Puxar bem no fundo a alavanca da embraiagem (11). posicionando em ponto morto (N) e para o - Puxar ou empurrar a alavanca das marchas seleccionamento se utiliza sempre a mesma ala- “LENTAS-VELOZES” (15) de acordo com a vanca (16 fig.12) como é...
  • Seite 70: Bloqueio Do Motor

    PORTOGUES 4.1.1 MOTOR ca da P.T.O. (16) na posição de ponto morto, seguindo o procedimento mencionado acima. Ver o manual de instruções especifico do motor. - Evitar de fazer com que a P.T.O. inferior funcio- Indicativamente em cada 8 horas de trabalho, ne em vazio quando não for necessário.
  • Seite 71: Regulação Do Comando Da Embreagem

    PORTOGUES 4.1.3 REGULAÇÃO DO COMANDO DA EMBREAGEM (Fig. 1) Periódicamente controlar o jogo da alavanca da embreagem (11). No caso em que resulte exces- sivo, com a alavanca perto ao final do percurso, proceder a sua regulação no seguinte modo: - Afrouxar a porca e a contraporca (19).
  • Seite 72: Dichiarazione Di Conformita

    DICHIARAZIONE DI CONFORMITÀ - DECLARATION OF CONFORMITY - DECLARATION DE CONFORMITE - KONFORMITÄTSERKLÄRUNG - DECLARACIÓN DE CONFORMIDAD - DECLARAÇÃO DE CONFORMIDADE FORT Srl Unipersonale Via Seccalegno, 29 - Sossano (Vicenza) Italia (Costruttore - Manufacturer - Costructeur - Konstrukteur - Constructor - Construtor) DICHIARIAMO assumendone la piena responsabilità, che la macchina sottoindicata è...

Diese Anleitung auch für:

180 super

Inhaltsverzeichnis