LichtLogistik LED Support SlimPixx-System Bedienungsanleitung
Verfügbare Sprachen
Verfügbare Sprachen
Quicklinks

Inhaltszusammenfassung für LichtLogistik LED Support SlimPixx-System
- Seite 1 Manual | SlimPixx-System Bedienungsanleitung | SlimPixx-System...
- Seite 2 Information and specifications in this document are subject to change without notice. LichtLogistik LED Support GmbH assumes no responsibility or liability for any errors or inaccuracies that may appear in this manual. Trademarks used in this text: „LichtLogistik LED Support GmbH" and „SlimPixx“ are registered trademarks.
- Seite 3 Manual | Notice Bedienungsanleitung | Allgemeines Important Safety Information Wichtige Sicherheitshinweise In diesem Handbuch sind Anweisungen zum Schutz vor Feuer, Instructions pertaining to continued protection against fire, electric shock, Stromschlag und Verletzungen von Personen zu finden. and injury to persons are found throughout this manual. Bitte lesen Sie alle Anweisungen vor der Montage und Betrieb des Please read all instructions prior to assembling, mounting, Systems.
-
Seite 4: Unpacking
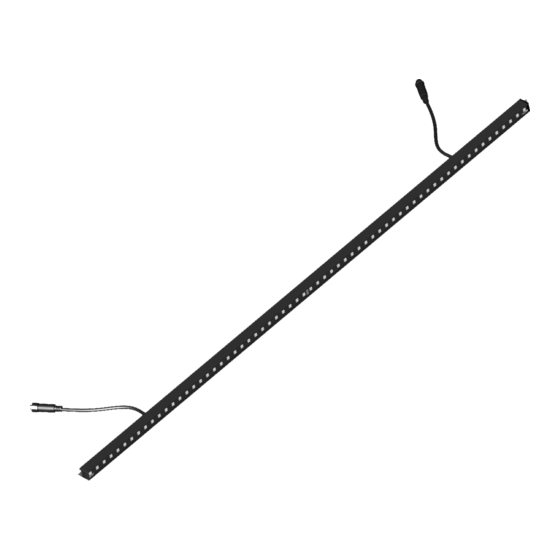
Manual | Unpacking Bedienungsanleitung | Auspacken Unpacking You will receive your new „SlimPixx“-System in the following parts: SlimPixx-Sticks Power Supply | LED Controller Neutrik True1 Power cable 4pin LED connection cable Connect your SlimPixx LED-Sticks as you need it for your installation. Plug in the LED connection cable in your SlimPixx-controller and the first SlimPixx-stick of your installation. - Seite 5 Manual | Specs Bedienungsanleitung | Spezifikationen Spezifikationen SlimPixx-Stick: Specifications SlimPixx-stick: LED / IC Typ: SMD5050 / SK6812 LED / IC Typ: SMD5050 / SK6812 Abdeckung: Blackface, optional: Clearcover oder Rundcover Cover: Blackface optional: clearcover or roundcover IP-Schutzart: IP65 IP Rating: IP65 Abstrahlwinkel: 120°...
- Seite 7 Manual | Setup Connections Bedienungsanleitung | Anschlussdiagramm Anschließen des SlimPixx-Systems Ihr SlimPixx-System bietet Ihnen diverse Kombinationsmöglichkeiten hinsichtlich der Anzahl und Ausgänge der SlimPixx. Die Limitierungen liegen in der Leistung des Netzteils (max. 400W/ 16,6A), den Kanälen der Steuerplatine (4096 Kanäle) und der maximalen Stückzahl von 15 Stück SlimPixx-Sticks á 1m je SlimPixx-Controller.
-
Seite 8: Allgemein
Bedienungsanleitung | Anschlussdiagramm General The SlimPixx-system will only work in one direction. Input/ Output attending to original connectors. Any attempt of using gender changers will harm your system. It is not possible to use Y-signal dividers. This will harm the SPI Signal. - Seite 9 Manual | Turn on Bedienungsanleitung | Inbetriebnahme Turn on your SlimPixx-system Connect your SlimPixx-sticks to the controller and the controller to main voltage. The SlimPixx-sticks should now run a rainbow test pattern on 50% brightness. You can change this in the controller software menu afterwards.
- Seite 10 Manual | Turn on Bedienungsanleitung | Inbetriebnahme Inbetriebnahme Ihres SlimPixx-Systems: Verbinden Sie Ihre SlimPixx-Sticks mit dem SlimPixx-Controller. Schließen Sie den Controller mittels Neutrik-Kabel an 230VAC Netzspannung an. Ihre LEDs sollten nun ein Regenbogen-Testprogramm bei 50% Helligkeit zeigen. Dies kann zu einem späteren Zeitpunkt unter den Controllereinstellungen geändert werden.
- Seite 11 Manual | Controller Software Bedienungsanleitung | Controller Software Setup your controller To setup your controller with correct IP- and ArtNet address connect your PC/ Mac to the ArtNetIn of the Controller. The controller has P 192.168.0.98, Subnet 255.255.255.0, Gateway 192,168.0.1 After a reset on the controller by pressing the reset button, you also get back to this adress.
- Seite 12 Manual | Controller Software Bedienungsanleitung | Controllersoftware Einrichten Ihres Controllers Um Ihren SlimPixx-Controller zu konfigurieren, verbinden Sie diesen über Netzwerk mit Ihrem PC/ MAC. Der Controller besitzt folgende Adresse: IP 192.168.0.98, Subnet 255.255.255.0, Gateway 192,168.0.1. Sollten Sie Ihren Controller mittels Resetbutton auf Werkseinstellung zurücksetzen, wird der Controller wieder auf diese Adresse eingestellt.
- Seite 13 Manual | Controller Software Bedienungsanleitung | Controllersoftware Setup your controller/ ArtNet-outputs To configure your ArtNet outputs according to your programming software or lighting desk, open the „ART-NET“ window. In here you can change your controllers name, and set the Net, Subnet and universes of your system. Any help in configuring ART-NET please go to https://artisticlicence.com/WebSiteMaster/User%20Guides/art-net.pdf Please confirm your settings with „submit“...
- Seite 14 Manual | Controller Software Bedienungsanleitung | Controller Software Einrichten Ihres Controllers/ ArtNet-Ausgänge Um den Controller passend zu Ihren ArtNet-Einstellungen auf Ihrer Software oder Ihrem Lichtpult einzurichten, wechseln Sie bitte auf das Fenster „ART-NET“. Hier können Sie die Nets und Subnets, sowie die Ausgangsuniversen anpassen. Wenn Sie Hilfe beim Einrichten Ihres ArtNet-Systems brauchen, empfehlen wir Ihnen, sich auf der ArtNet-Seite zu informieren.
- Seite 24 Die SlimPixx-Sticks flackern, stocken oder ruckeln. Das SlimPixx-System ist für die Anwendung bei großen Matrizen konzipiert und deshalb mit einem internen Sync ausgestattet. SlimPixx benötigt daher komplette ArtNet-Datenpakete. Stellen Sie sicher, dass das von Ihnen gewählte Softwaresystem auch wirklich komplette Datenpakete und nicht nur ArtNet- Wertänderungen verschickt.