Herunterladen Inhalt Inhalt Diese Seite drucken
Medion LIFE P43005 Bedienungsanleitung
Vorschau ausblenden Andere Handbücher für LIFE P43005:
Inhaltsverzeichnis

Werbung

Verfügbare Sprachen
  • DE

Verfügbare Sprachen

  • DEUTSCH, seite 413
ES
Medion Service Center
Visonic S.A.
c/ Miguel Faraday, 6
Parque Empresarial "La Carpetania",
N-IV Km. 13
28906 Getafe, Madrid
España
Hotline: 902196437
Fax: 914604772
E-Mail: service-spain@medion.com
www.medion.es
PL
Medion Service Center
Infolinia konsumenta
(telefon stacjonarny i komórkowy): 022 / 397 4335
E-Mail: service-poland@medion.com
www.medion.pl
PT
Medion Service Center
Visonic S.A.
c/ Miguel Faraday, 6
Parque Empresarial "La Carpetania",
N-IV Km. 13
28906 Getafe, Madrid
Espanha
Hotline: 808 202 789
Fax: (+34) 91 460 4772
E-Mail: service-portugal@medion.com
www.medion.com/portugal/
Cámara digital de diseño de 14,0 MP
Câmara digital Design 14,0 MP
Nowoczesny aparat cyfrowy 14.0 Mpix
14.0 MP Design Digitalcamera
14.0 MP Design Digitalkamera
®
®
MEDION
LIFE
P43005 (MD 86295)
Manual de instrucciones
Manual de instrução
Instrukcja obs³ugi
Instruction manual
Bedienungsanleitung

Werbung

Inhaltsverzeichnis

Fehlerbehebung

loading

Inhaltszusammenfassung für Medion LIFE P43005

  • Seite 1 14.0 MP Design Digitalcamera 14.0 MP Design Digitalkamera ® ® MEDION LIFE P43005 (MD 86295) Medion Service Center Medion Service Center Visonic S.A. Visonic S.A. c/ Miguel Faraday, 6 c/ Miguel Faraday, 6 Parque Empresarial "La Carpetania", Parque Empresarial "La Carpetania", N-IV Km.
  • Seite 2: Esquema Del Aparato

    Esquema del aparato Parte frontal 1. Flash 2. Indicativo del disparador automático/luz Si parpadea: Disparador automático encendido 3. Lente de la cámara con portaobjetivo 4. Micrófono...
  • Seite 3 Parte posterior 5. Pantalla LCD 6. Conmutador del zoom: ; Seleccionar ampliación o reducción : Tecla del menú: activación del menú : Función/ Papelera En el modo de reproducción: Activar el diálogo Borrar 9. LED de funcionamiento...
  • Seite 4 10. Interruptor de cuatro posiciones con las siguientes funciones: Confirmar selección En el modo de Rastreo de rostro grabación: encendido / apagado En el modo de Inicio/pausa de la reproducción: reproducción En el modo de Giro de la imagen hasta reproducción de 90°...
  • Seite 5 En el modo de Seleccionar el flash grabación: En el modo de Mostrar la siguiente reproducción: grabación Reproducción de vídeos: Encender o apagar el avance rápido En el menú Abrir el submenú o seleccionar la configuración En el modo de Conectar macro para grabación: primer plano...
  • Seite 6 Parte superior 12. Disparador pulsar ligeramente: enfocar pulsar con fuerza: activar 13. Encender o apagar la cámara 14. Altavoz Parte inferior 15. Compartimento de batería o tarjeta SD 16. Trípode...
  • Seite 7 Vista lateral 17. Miniconexión USB 18. Orificio para la correa de transporte...
  • Seite 8: Inhaltsverzeichnis

    Índice Esquema del aparato ............1 Índice ................. 7 Instrucciones de seguridad ..........10 Puesta en funcionamiento ..........19   Contenido ................19   Carga de las baterías en el cargador ......... 20   Inserción de la batería .............. 22  ...
  • Seite 9 Primera grabación ............38   Configurar el modo de grabación ..........38   Consejos para hacer buenas fotos ........... 38   Toma de fotografías..............39   Grabación de videoclips ............44   Grabación de clips de sonido ........... 45   Uso del menú...
  • Seite 10 Conexión a televisión y ordenadores ......... 89   Mostrar grabaciones en un televisor ........89   Imprimir grabaciones en una impresora de fotografías .... 90   Transferencia de datos a un ordenador ........91   Ajuste de un cable USB ............91  ...
  • Seite 11: Instrucciones De Seguridad

    Instrucciones de seguridad Sobre las presentes instrucciones Antes de la puesta en marcha del aparato, lea atentamente las presentes advertencias de seguridad. Preste atención a las advertencias que aparecen en el propio aparato y en las instrucciones de funcionamiento. Guarde las instrucciones siempre a mano. Si vende o cede el aparato a otra persona, no olvide incluir este manual y la tarjeta de garantía junto al aparato.
  • Seite 12 ¡PRECAUCIÓN! Siga la recomendación para evitar daños y lesiones. ¡ATENCIÓN! Siga la recomendación para evitar daños materiales. ¡RECOMENDACIÓN! Información adicional sobre el uso del aparato. ¡RECOMENDACIÓN! Siga la recomendación del manual de utilización. Punto de enumeración / Información sobre los ...
  • Seite 13: Uso Apropiado

    Uso apropiado  El aparato está diseñado para grabar imágenes en formato digital.  No utilice el dispositivo en ambientes de calor o frío extremo.  El dispositivo no está diseñado para funcionar en condiciones extremas. Daños para niños y personas con limitaciones para el uso del aparato Este aparato no está...
  • Seite 14 Avisos Para evitar lesiones, tenga en cuenta al utilizar del producto las siguientes instrucciones:  No dispare el flash cerca de los ojos. Si lo hace, puede dañar los ojos de la persona fotografiada.  Mantenga al menos a un metro de distancia de los niños si utiliza el flash.
  • Seite 15 Recomendaciones sobre la batería Puede utilizar la cámara con la batería de iones de litio incluida. Recargue la batería sólo en el cargador de baterías suministrado. Tenga en cuenta las siguientes orientaciones generales sobre el manejo de la batería:  Mantenga la batería fuera del alcance de los niños.
  • Seite 16 limpia la zona en cuestión y acuda inmediatamente a un médico.  No tire la batería al fuego, no la cortocircuite ni la desarme.  No exponga la batería al calor excesivo, como por el sol, el fuego o similares. ...
  • Seite 17 Medidas de precauciones Tenga en cuenta las siguientes precauciones para evitar daños a la cámara y mantenerla siempre en perfecto estado:  Guardar en un lugar seco Esta cámara no es resistente al agua y, por lo tanto, no funciona correctamente cuando se sumerge en agua o cuando entran líquidos en su interior.
  • Seite 18  Evitar las fuertes variaciones de temperatura Si lleva el aparato rápidamente de un ambiente frío a uno caliente, o al revés, puede condensarse agua en el aparato, lo cual puede provocar problemas en el funcionamiento o daños al aparato. No utilice el aparato hasta que la temperatura del mismo sea la misma que la temperatura ambiente.
  • Seite 19 No trate nunca de reparar usted mismo el aparato ni de abrirlo. Existe peligro de cortocircuito eléctrico. En caso de fallo en el funcionamiento del aparato, diríjase al Centro de Atención al Cliente de Medion o a otro taller especializado para evitar el peligro.
  • Seite 20: Puesta En Funcionamiento

    Puesta en funcionamiento Contenido Compruebe que el suministro está completo, y, si no fuera este el caso, avísenos dentro de un plazo de 14 días después de la compra. Con el producto comprado, recibirá:   Cámara Correa de mano ...
  • Seite 21: Carga De Las Baterías En El Cargador

    Carga de las baterías en el cargador En el cargador suministrado puede cargar únicamente baterías de litio suministradas.  ¡Atención! ¡No intente jamás recargar pilas normales! ¡Existe peligro de explosión!  Utilice sólo el cargador suministrado para cargar las baterías. ...
  • Seite 22  Conecte el cargador a un enchufe de 230 V ~ 50 Hz.  La luz de carga se ilumina de color naranja.  El tiempo de carga es de aproximadamente dos horas. Si la batería está llena, la luz de carga se ilumina de color verde. ...
  • Seite 23: Inserción De La Batería

    Inserción de la batería Para el funcionamiento de la cámara, se necesita la batería de litio incluida en el paquete.  Apague la cámara.  Deslice el cierre del compartimento de la batería en el sentido de la flecha. Se abrirá el compartimento de la batería. ...
  • Seite 24: Inserción Y Extracción De Tarjetas Sd

     Cierre el compartimiento de la batería y deslice el cierre a su posición original. ¡ATENCIÓN! El funcionamiento de la batería se reduce en ambientes fríos (-10°C o temperaturas inferiores). Caliente la batería (por ejemplo, en el bolsillo de la ropa que lleve puesta) antes de utilizarla en ambientes fríos.
  • Seite 25 Inserción de la tarjeta  Apague la cámara.  Deslice la tapa del compartimento de la batería hacia el exterior para abrir la bandeja.  Inserte la tarjeta con los contactos hacia abajo en la ranura para tarjetas.  Cierre el compartimiento de la batería y deslice el dispositivo de cierre de nuevo a su posición original.
  • Seite 26: Colocación De La Correa De Mano

     Para retirar la tarjeta, púlsela brevemente hacia abajo para desbloquearla. Saldrá una parte de la tarjeta para que pueda extraerla. Colocación de la correa de mano Para manejar mejor la cámara y por motivos de seguridad, ajústese la correa de mano. Haga un lazo como se indica en la imagen por el orificio.
  • Seite 27: Primeros Pasos

    Primeros pasos Encender la cámara POWER  Pulse la tecla de durante uno o dos segundos para encender la cámara. El objetivo se extiende, el indicativo de funcionamiento se ilumina de color verde y se enciende la pantalla. La cámara estará en el modo de grabación.
  • Seite 28: Apagar La Cámara

    Apagar la cámara POWER  Pulse la tecla de un poco más de tiempo para apagar la cámara. Función de ahorro de energía Si no se utiliza la cámara durante 60 segundos, apáguela. También puede ajustar el apagado automático tras tres o cinco minutos; ver página 72.
  • Seite 29: Ajuste Del Idioma Y De La Fecha Y Hora

    Ajuste del idioma y de la fecha y hora Antes de utilizar la cámara por primera vez, debe configurar la fecha y hora actuales y el idioma que desea para el menú. Ambas configuraciones se realizan en el menú „Configuraciones “ : ...
  • Seite 30 Ajuste de fecha y hora  Seleccione en el menú „Configuraciones“ con ayuda de las teclas de dirección la entrada „Fecha/Hora“ y pulse Se abrirá el menú de configuración. Junto a la fecha y la hora, puede configurar el formato de la fecha.
  • Seite 31: Modo De Grabación Y Reproducción

    La configuración de la hora permanece guardada en la batería interna. Sin embargo, se pierde si se retira la batería de la cámara más de 48 horas. Modo de grabación y reproducción Al encender el aparato, está activo el modo de grabación. Puede hacer fotos directamente.
  • Seite 32: Indicativos En Pantalla

    Indicativos en pantalla Indicativos en pantalla para la grabación En el modo de grabación, tiene los siguientes indicativos disponibles en pantalla: 1. Puede establecer diferentes 2. Ajuste del flash tipos de grabación (tecla 3. Disparador automático 4. Configuración del zoom );...
  • Seite 33 5. Grabaciones aún 15. Campo de enfoque disponibles (con la 16. Muestra la velocidad de resolución actual) obturación 6. Estado de la batería 17. Ajuste de la apertura 7. Punto de almacenamiento 18. Aviso: ¡Peligro! (memoria interna o tarjeta) 19. Configuración de macro 8.
  • Seite 34: Indicativos En Pantalla Para La Reproducción De Fotografía

    Indicativos en pantalla para la reproducción de fotografía En el modo de reproducción, tiene disponibles los siguientes indicativos: 1. Indicativo de modo 6. Estado de la batería (grabación o reproducción) 7. Lugar de almacenamiento 2. La imagen está protegida (memoria interna o tarjeta) 3.
  • Seite 35: Indicativos En Pantalla Para Reproducción De Vídeo

    Indicativos en pantalla para reproducción de vídeo En el modo de reproducción de videoclips, tiene disponibles los siguientes indicativos: 1. Indicativo de modo 9. Resolución (grabación o reproducción) 10. Configuración del volumen 2. La imagen está protegida 11. Duración del vídeo 3.
  • Seite 36: Indicativos En Pantalla Para La Reproducción De Sonido

    Indicativos en pantalla para la reproducción de sonido En el modo de reproducción de grabaciones de sonido, tiene disponibles los siguientes indicativos: 1. Indicativo de modo 7. Información de grabación (grabación o reproducción) (fecha y hora) 2. La imagen está protegida 8.
  • Seite 37: Activar Y Desactivar Los Indicativos En Pantalla

    Activar y desactivar los indicativos en pantalla DISP Pulsando repetidamente la tecla , puede activar, desactivar y modificar los indicativos en pantalla. En el modo de grabación Con los indicativos más Con todos los indicativos importantes Con las líneas de división para Sin indicativos dividir fácilmente la imagen ¡RECOMENDACIÓN!
  • Seite 38 En el modo de reproducción Sin indicativos Con todos los Con los indicativos indicativos más importantes Los indicativos en pantalla no pueden ser modificados:  Durante la grabación o reproducción de grabaciones de imagen o sonido;  Durante una vista de diapositivas o de imágenes en miniatura; ...
  • Seite 39: Primera Grabación

    Primera grabación Configurar el modo de grabación Cuando encienda la cámara, se activará automáticamente el modo de grabación. En el nivel básico, se ilumina en la parte superior Auto izquierda de la pantalla , que indica que está activo en modo de grabación.
  • Seite 40: Toma De Fotografías

    Toma de fotografías  Para ver la imagen en pantalla, pulse el botón del disparador un poco hacia abajo. Los caracteres amarillos de la imagen se iluminan de color rojo y el indicador de encendido parpadea si el enfoque automático no puede enfocar.
  • Seite 41 Uso del estabilizador El estabilizador le permite realizar mejores grabaciones en condiciones con poca luz, reduciendo el riesgo de inestabilidad.  Pulse la tecla . Se abrirá el menú.  Seleccione la función estabilizador y ábrala pulsando la tecla del flash . ...
  • Seite 42 Flash desactivado en todo momento El flash sólo se activa en los modos individual y disparador automático. No puede utilizarse para secuencias de imágenes ni para grabaciones de vídeo. Al utilizar el flash, aumenta el uso de la batería. Si la batería está casi vacía con rapidez, el flash necesitará...
  • Seite 43 Zoom – aumentar o reducir La cámara dispone de un zoom digital y de un zoom óptico. El zoom óptico puede activarse con la configuración de la lente y el zoom digital se activa en el menú de configuración.  Pulse el regulador del zoom en la dirección –...
  • Seite 44 Configuración del modo de enfoque Con esta función, puede definir el tipo de enfoque si hace una foto o graba un vídeo.  Pulse la tecla macro varias veces hasta que aparezca el símbolo del modo de enfoque deseado bajo la pantalla LCD. La cámara dispone de diferentes modos de enfoque: Normal Con el enfoque normal, el campo de enfoque comienza a los 40...
  • Seite 45: Grabación De Videoclips

    Grabación de videoclips  Gire el selector de elección de modo en la posición  Pulse el disparador para iniciar la grabación. En la pantalla, aparecerá el tiempo de la grabación. T – W  Con la tecla de zoom puede modificar la imagen en pantalla.
  • Seite 46: Grabación De Clips De Sonido

    Grabación de clips de sonido El micrófono se encuentra en la parte posterior de la cámara a la izquierda debajo de la lente. Tenga cuidado de no tocar el micrófono durante la grabación.  Seleccione en „Menú de grabación“ en la configuración „Modo de grabación “...
  • Seite 47: Uso Del Menú De Funciones

    Uso del menú de funciones El menú de función le permite ajustar las configuraciones más importantes de la grabación con facilidad. En la barra del menú, a la izquierda, se muestran las funciones disponibles para la configuración de la cámara. En la barra inferior, se muestran las diferentes configuraciones de las diferentes funciones.
  • Seite 48 Mi modo Aquí se incluye una lista con los cinco últimos modos de grabación utilizados. Cada modo de grabación tiene opciones diferentes para la configuración. Si cambia el modo de grabación con las teclas , cambiará las opciones de configuración correspondientes. Resolución - Fotos La resolución determina esencialmente la calidad de la imagen.
  • Seite 49 Calidad (compresión) La compresión de los datos determina la calidad de los mismos. Cuanto mayor sea la calidad, más espacio necesitará la grabación en la memoria. Ajuste Significado Superfino Calidad superior. Fino Calidad media. Normal Calidad normal. Corrector de la iluminación (EV) Con el corrector de los valores de la iluminación (EV = „Exposure Value“...
  • Seite 50 Balance de blancos El balance de blancos puede corregir ciertas condiciones de iluminación. Ajuste Significado Balance de blancos El balance de blancos se ajusta autom. de forma automática. Ideal para las grabaciones en Luz diurna plena luz del día. Ideal para las grabaciones con Nublado cielos nublados, crepúsculo o sombra.
  • Seite 51 Ajuste Significado para las que desea fijar el balance de blancos, en un papel blanco o en un objeto similar y haga una fotografía de prueba. La imagen izquierda muestra el balance de blancos anterior, la intermedia muestra el balance de blancos seleccionado y la imagen derecha muestra el siguiente balance de blancos posible.
  • Seite 52 Medición – Medición de la luz Con esta función se puede determinar en qué campo debe medirse la luz para la grabación de fotografías o vídeos. Ajuste Significado Selecciona una exposición basándose Multi en lecturas de múltiples en el campo de la grabación.
  • Seite 53 Efecto de color Puede utilizar efectos fotográficos en los modos de grabación y reproducción para darles a las grabaciones diferentes tonos o efectos artísticos. Ajuste Significado Normal No crea ningún efecto fotográfico. Vívido La imagen se mostrará con el tono del color más claro con el mayor contraste y con la mayor saturación.
  • Seite 54 Tamaño del vídeo (resolución, vídeos) La configuración del tamaño del vídeo sólo está disponible para la grabación de videoclips. Ajuste Tamaño en Calidad de la imagen píxel 1280 x 720 HDTV (sólo posible con tarjetas SDHC- clase 6) 640 x 480 Gran calidad 320 x 240 Normal...
  • Seite 55: Utilizar El Menú De Grabación

    Pre-grabación La configuración sólo está disponible para la grabación de videoclips. Con la pre-grabación, la cámara guarda los tres segundos previos al momento en el que usted pulsa el disparador.  Seleccione “ON” para activar la grabación de los tres segundos previos.
  • Seite 56: Ver/Escuchar Las Grabaciones

    Ver/escuchar las grabaciones Reproducción de grabaciones individuales Puede reproducir las últimas grabaciones realizadas en el modo de visualización una tras otra.  Ponga el selector de modo en para activar el modo de reproducción. En la pantalla aparece la última grabación realizada y tiene los siguientes indicadores disponibles: Foto Vídeo...
  • Seite 57: Reproducción De Grabaciones En Miniatura

    Reproducción de grabaciones en miniatura  Pulse en el modo de reproducción la tecla de zoom en la dirección para que aparezca una pequeña vista previa.  Con las teclas de la dirección puede seleccionar el archivo que desee.  Pulse la tecla para que se muestre la grabación en la pantalla completa.
  • Seite 58  Con las teclas de dirección puede elegir un archivo determinado.  Pulse la tecla para mostrar la grabación en pantalla completa.  Pulse la tecla zoom en la dirección para salir del modo de calendario. Hacer zoom en fotos En las fotos puede ver secciones de fotografías individuales.
  • Seite 59: Reproducción De Vídeo, Grabaciones De Sonido O Avisos De Voz58

    Reproducción de vídeo, grabaciones de sonido o avisos de voz  Seleccione la grabación deseada.  Pulse la tecla para iniciar la reproducción. Al reproducir videoclips, pulse las teclas para iniciar un avance o retroceso rápidos.  Pulse la tecla de zoom en la dirección para aumentar el volumen.
  • Seite 60: Borrar Grabaciones

    Crear una impresión de pantalla de videoclips Durante la reproducción de un videoclip, pulse la tecla para detener la reproducción. Pulse el botón del disparador para guardar la imagen se muestra como una captura de pantalla. En pantalla aparecerá el icono del disparador La cámara pone fin automáticamente a la reproducción y cambia al modo de visualización.
  • Seite 61  Pulse la tecla y confirme la consulta. Para cancelar la función, seleccione la entrada „Cancelar“ y confirme una vez más con  En la pantalla se mostrará la siguiente grabación. ¡RECOMENDACIÓN! Los archivos protegidos no se pueden eliminar. En ese caso, aparecerá...
  • Seite 62: Los Menús

    Los menús Navegar en los menús Si desea abrir el menú de reproducción, tiene que desplazar el selector de modo a la posición  Pulse la tecla para abrir los menús.  Seleccione con las teclas de dirección la configuración que desea modificar.
  • Seite 63: El Menú De Grabación

    El menú de grabación Ajuste Significado Modo Grabación Aquí puede elegir los diferentes modos de grabación. Modo operativo Aquí puede ajustar el disparador automático o seleccionar la secuencia de imágenes. 10 seg. – La fotografía será tomada diez segundos después de pulsar el disparador. 2 seg.
  • Seite 64 Ajuste Significado Área AF Aquí puede seleccionar el campo de enfoque automático (AF). Panorámico – Se enfocará a una zona amplia. Centro – Se enfocará al centro. Nitidez Aquí puede hacer que aparezcan los detalles de una imagen con mayor o menor nitidez. Alto –...
  • Seite 65 Ajuste Significado Zoom digital Aquí puede elegir el zoom digital para algunas formas de funcionamiento. Zoom Int. – Aumenta y optimiza la imagen digital Zoom Est. – Aumenta el tamaño de todas las imágenes hasta cinco veces pero empeora la calidad de la imagen.
  • Seite 66: Modo De Grabación

    Modo de grabación En algunas formas de grabación o motivos puede utilizar los modos de grabación preconfigurados. Así no tiene que ocuparse de la configuración manual. Una vez realizada su selección, el modo seleccionado (a excepción del modo de grabación de voz) se añade a „Mi modo “ en el menú de funciones en el primer puesto.
  • Seite 67 Símbolo Ajuste Significado Escena Inteligente La cámara analiza las condiciones de la grabación y selecciona automáticamente el modo de escena adecuado. Retrato Establece el fondo borroso y se enfoca en el centro. Paisaje Ideal para paisajes anchos. Puesta de sol Refuerza el tono rojo para grabar las puestas de sol.
  • Seite 68 Símbolo Ajuste Significado Fuegos artificiales Reduce la velocidad de obturación para grabar los fuegos artificiales. Nieve Ideal para grabar en la playa o en nieve. Deportes Ideal para fotos con personas u objetos en movimiento. Fiesta Ideal para grabaciones de interiores y de fiestas.
  • Seite 69 Símbolo Ajuste Significado Comida Aumenta la saturación de color. Edificios Elimina el borde (contorno) del objeto fotografiado más destacado. Texto Refuerza el contraste de blanco y negro Follaje Esta función refuerza la saturación de color de los tonos verdes. Subasta Optimiza la imagen para la reproducción de plataformas de Internet (subastas), como por...
  • Seite 70 Símbolo Ajuste Significado Detec parpadeo La cámara reconoce si los ojos del motivo que se fotografía se cerraron al hacer la foto y permite elegir si desea guardar o no la imagen. Compos previa Esta función toma una imagen como orientación temporal. Pulse el disparador al máximo hacia abajo una vez indicado a la persona que desea fotografiar el punto de...
  • Seite 71 Símbolo Ajuste Significado Autorretrato Esta función ajusta el zoom de gran angular. Si se reconoce un rostro, se activa automáticamente el AF y se escucha una señal sonora. La cámara comienza la cuenta atrás dos segundos y hace la foto. Esta función controla la dinámica de una fotografía aumentando el brillo y el contraste.
  • Seite 72 Uso del modo „Captura sonrisa” El modo „Capturar sonrisa” hace fotos automáticamente en cuanto reconoce una sonrisa. Para activar el modo „Capturar sonrisa”, siga los pasos siguientes  Seleccione en el modo de grabación la función  Enfoque la cámara hacia el motivo. ...
  • Seite 73: El Menú De Configuración

    El menú de configuración Ajuste Significado Sonidos Aquí puede apagar el sonido de inicio o elegir entre tres tonos, encender el sonido de la señal y el sonido del disparo así como ajustar el volumen de todos los tonos. Eco. energía Ahorro de energía Para ahorrar carga de la batería, la cámara se apaga tras un periodo de tiempo determinado.
  • Seite 74 Ajuste Significado N. archivo Numeración de archivos Aquí puede crear una numeración de los archivos. Serie: Los archivos se numerarán a partir de 0001. Resetear: La numeración comienza de nuevo por 001. Esta función es útil, por ejemplo, tras cambiar la tarjeta de memoria. Salida TV Con el cable de TV adjunto, se transfieren imágenes al televisor.
  • Seite 75 Ajuste Significado Kit de Memoria Aquí puede organizar datos en una memoria interna. Formatear: Formatea la memoria actual, esto es, la tarjeta de memoria o la memoria interna. Con este proceso, se borrarán todas las grabaciones. ¡RECOMENDACIÓN! Si formatea la memoria, se borrarán todos los archivos que tenga guardados en ella.
  • Seite 76 Ajuste Significado Resta. todo Aquí puede volver a las configuraciones individuales de fábrica. Confirme en ese caso la pregunta con „Sí“. No se modificarán las siguientes configuraciones: Fecha / hora Idioma Salida TV...
  • Seite 77: El Menú De Reproducción

    El menú de reproducción Ajuste Significado Pres. diapos. Puede mostrar imágenes (sólo fotos) como muestra de diapositivas. Borrar Con esta función, puede borrar archivos que ya no necesite en una memoria interna o en la tarjeta de memoria. Dispone de las siguientes posibilidades: Individual: Borrar una grabación Sólo voz: Borrar la grabación de voz de una imagen...
  • Seite 78 Ajuste Significado Correc. Ojos Aquí puede corregir grabaciones de imágenes Rojos que no han sido grabadas con el flash previo. Puede guardar el archivo corregido con otro nombre o sobre el archivo original. Nota de voz Puede registrar una anotación de voz para las fotos que tome (ver página 81).
  • Seite 79 Ajuste Significado Redimensionar Puede reducir la resolución de las fotos y reducir así el tamaño de los archivos. Puede guardar los archivos corregidos con otro nombre o sobre el archivo original. No puede modificarse la resolución de las fotografías en VGA. Img.
  • Seite 80 Ajuste Significado DPOF DPOF es el acrónimo de „Digital Print Order Format“ (formato de pedido de impresión digital). Aquí puede determinar la configuración de la impresión de las imágenes si desea imprimir imágenes de un estudio fotográfico o en una impresora compatible con DPOF.
  • Seite 81 Ajuste Significado Desdibujado El desenfoque radial es un efecto que radial desenfoca el centro de la imagen.  Con las teclas puede seleccionar el nivel e desenfoque radial.  Pulse para guardar la imagen. Mostrar diapositivas Puede hacer que se muestren las diapositivas. ...
  • Seite 82 Proteger / bloquear o borrar un archivo individual  Seleccione en el submenú „Borrar“ o „Proteger“ un archivo que se reproducirá en la pantalla individualmente.  Seleccione con las teclas una imagen.  Seleccione „Proteger“ / „Bloquear“ o „Borrar" y el archivo deseado para que se muestren en pantalla.
  • Seite 83 Proteger / bloquear o borrar todos los archivos  Seleccione en el submenú „Borrar“ o „Proteger“ proteger todo/bloquear todo o borrar todo. Aparecerá un mensaje de confirmación.  Elija “Si”. Pulsando la tecla protege, bloquea o borra todos los archivos. ¡RECOMENDACIÓN! Si hay introducida una tarjeta de memoria, sólo podrá...
  • Seite 84 Corregir ojos rojos Esta función sirve para reducir el efecto de ojos rojos en las fotografías. Esta función sólo está disponible en las fotografías. La corrección de los ojos rojos puede utilizarse varias veces en una misma imagen. Sin embargo, con ello se reduce poco a poco la calidad de la imagen.
  • Seite 85 Grabar avisos de voz  Seleccione en el modo de reproducción la fotografía deseada. ¡RECOMENDACIÓN! Si una foto ya tiene un aviso de voz, aparecerá el símbolo correspondiente.  Abra en el modo de reproducción el submenú „Nota de voz”. En la pantalla aparecerá...
  • Seite 86 Modo de color Tiene a su disposición los siguientes efectos: Símbolo Ajuste Significado Normal No se añadirá ningún efecto. Sepia La imagen se mostrará con un tono sepia nostálgico. B y N La imagen se mostrará en blanco y negro. Negativo La imagen se mostrará...
  • Seite 87  Seleccione con las teclas el efecto deseado. El efecto correspondiente será utilizado en la vista previa de las imágenes y se mostrará.  Pulse para guardar el nuevo archivo la tecla Cortar fotografías Imagen ampliada Indicativo en cuatro sentidos Tamaño cortado El campo cortado Superficie de la imagen...
  • Seite 88  Tras finalizar la función, aparece una selección de menú. Elija entre: Sobreesc.: Los nuevos archivos se guardarán sobre los antiguos. Guardar como: Los nuevos archivos se guardarán con otros nombres sin crear archivos antiguos. Cancelar: Se interrumpirá la función. ...
  • Seite 89 Modificar el tamaño  Seleccione en el modo de reproducción la imagen deseada.  Abra en el modo de reproducción el submenú „Redimensionar” para modificarlo. En la pantalla aparece el menú de selección.  Seleccione una de las siguientes resoluciones y pulse la tecla 8M, 5M, 3M o VGA.
  • Seite 90: Conexión A Televisión Y Ordenadores

    Conexión a televisión y ordenadores Mostrar grabaciones en un televisor Puede reproducir grabaciones de la cámara en un televisor.  Apague la cámara y el televisor.  Conecte el cable del televisor incluido en el paquete a la conexión USB de la cámara y a la entrada de vídeo (amarilla) y entrada de audio (blanco) del televisor.
  • Seite 91: Imprimir Grabaciones En Una Impresora De Fotografías

    Imprimir grabaciones en una impresora de fotografías Puede imprimir fotos directamente con PictBridge en una impresora de fotografías compatible con PictBridge.  Conecte la impresora y la cámara con el cable USB adjunto.  Encienda la cámara y la impresora. La cámara es reconocida como aparato USB y conectada.
  • Seite 92: Transferencia De Datos A Un Ordenador

    Transferencia de datos a un ordenador Puede transferir datos a un ordenador. Sistemas operativos soportados:  Windows XP  Windows Vista  Windows 7 Ajuste de un cable USB  Apague la cámara.  Conecte el cable USB entregado con el ordenador encendido a la conexión USB de la cámara y a una conexión USB en el PC.
  • Seite 93 En otras versiones de Windows, abra el explorador Windows o haga doble clic en el „Escritorio de trabajo“ (en Vista: „Mi PC“).  Haga doble clic en el símbolo del soporte para la cámara.  Vaya a la carpeta „DCIM“ y las demás contenidas en la carpeta para mostrar los archivos (*.jpg = Fotos;...
  • Seite 94: Estándar De Memoria Dcf

    Estándar de memoria DCF Las grabaciones en la cámara se administran de acuerdo con el estándar DCF llamada en la cámara (guardado, nombrado, etc.; DCF = Design Rule for Camera File System, Normas de Diseño para sistema de archivos de cámara). Las grabaciones en tarjetas de memoria de otras cámaras DCF se pueden reproducir en su cámara.
  • Seite 95: Estructura De La Carpeta En La Memoria

    Estructura de la carpeta en la memoria La cámara almacena las imágenes grabadas, vídeos y archivos de audio en tres diferentes carpetas en la memoria interna o tarjeta de memoria. Los siguientes directorios se crean automáticamente: DICAM .: Todas las imágenes, vídeos y archivos de audio se guardan en esta carpeta.
  • Seite 96: Instalación Del Software

    Instalación del software En el CD adjunto se encuentra „Impresión de medios“, un programa para la edición de imágenes  Introduzca el CD en el lector de CD-ROM del ordenador.  Normalmente, el CD será reconocido automáticamente y reproducido. En caso contrario, elija en el explorador Windows >...
  • Seite 97: Capacidad De Memoria

    Capacidad de memoria Tamaño de la tarjeta de memoria 1 GB 2 GB 14 M 1250 1041 2083 1223 2466 4778 9557 La tabla indica el número de la imagen que puede guardar con una resolución determinada (como por ejemplo, 5 M) en una tarjeta de memoria con el tamaña determinado (como por ejemplo, 128 MB).
  • Seite 98: Resolución De Fallos

    Resolución de fallos Si la cámara no funciona correctamente, compruebe los puntos siguientes. Si el problema persiste, póngase en contacto con el Servicio de atención al cliente de MEDION. La cámara no se enciende. La batería no está bien puesta.
  • Seite 99 La imagen no es nítida. La cámara se ha movido durante la grabación. El motivo está fuera del encuadre de la cámara. Utilice el modo macro para las grabaciones a corta distancia. La imagen no se muestra en pantalla. Se ha introducido una tarjeta SD que no tiene fotos almacenadas en modo DCF.
  • Seite 100 No se muestran grabaciones guardadas en otra tarjeta de memoria. Las imágenes de tarjetas de memoria de otras cámaras se mostrarán si la otra cámara también utiliza el sistema de memoria DCF. Las grabaciones no pueden ser transferidas al ordenador con el cable USB.
  • Seite 101: Cuidado Y Mantenimiento

    Cuidado y mantenimiento Limpie la carcasa, la lente y la pantalla de la forma siguiente: Limpie la carcasa de la cámara con un paño suave y seco. No utilice disolventes ni productos de limpieza que contengan aceite. De hacerlo, podría dañar la cámara. Para limpiar la lente o la pantalla, retire el polvo en primer lugar con un paño.
  • Seite 102: Eliminación

    Eliminación Embalaje La cámara digital se entrega en un embalaje para protegerla de los posibles daños del transporte. El embalaje está hecho con materias primas y puede ser reciclado o reutilizado. Aparato No tire bajo ningún concepto el aparato al final de su vida útil a la basura doméstica normal.
  • Seite 103: Especificaciones Técnicas

    Especificaciones técnicas Píxel: 14 Mega Píxel CCD Apertura: F = 3,3 ~ 5,9 Velocidad de obturación: 1/2000 ~ 15 s Distancia focal: f = 5,0 mm ~ 25 mm Zoom óptico: 5 – aumentos Zoom digital: 5 – aumentos Monitor LCD: Pantalla LCD 6,86 cm / 2,7"...
  • Seite 104: Visão Geral Do Aparelho

    Visão geral do aparelho Parte frontal 1. Flash 2. Indicação para temporizador de disparo /Lâmpada intermitente: temporizador de disparo ligado 3. Lente da câmara com objectiva 4. Microfone...
  • Seite 105 Parte de trás 5. Ecrã LCD 6. Comutador de zoom: T / W; Aumentar ou diminuir selecção 7. M: Tecla de menu: aceder ao menu : Função/reciclagem No modo de reprodução: Aceder à caixa de diálogo de eliminação 9. LED de funcionamento...
  • Seite 106 10. O interruptor com quatro opções possui as seguintes funções: Confirmar selecção No modo de captação: Detecção de rosto activo/desactivo No modo de reprodução: Iniciar /interromper reprodução No modo de reprodução Rodar imagem 90° de fotografias No menu Ir para cima no menu/ submenu DISP No modo de captação Mostrar/Ocultar...
  • Seite 107 No modo de captação: Seleccionar tipo de flash No modo de reprodução: visualizar a captação seguinte Reprodução de vídeos: Ligar ou desligar avanço rápido No menu Abrir submenu ou seleccionar configuração No modo de captação: Activar macro para captações realizadas ao perto No modo de reprodução: Visualizar captação...
  • Seite 108 Parte superior 12. Activador Premir brevemente: Determinar área de foco 13. Ligar ou desligar câmara 14. Estabilizador de imagens Parte inferior 15. Suporte do tripé 16. Tampa do compartimento de cartões/pilhas...
  • Seite 109 Lado 17. Ligação mini – USB 18. Ilhó para a pega...
  • Seite 110 Índice   Visão geral do aparelho ........... 1 Índice ................. 7 Instruções de segurança ..........10 Colocação em funcionamento .......... 19   Material fornecido ..............19   Carregar pilhas no carregador ..........20   Inserir pilhas ................22   Inserir e retirar cartões SD ............23  ...
  • Seite 111 Primeira captação ............38   Configurar modo de captação ..........38   Dicas para uma boa captação de imagem ....... 38   Elaborar fotografia ..............39   Captar vídeos ................44   Captar áudio ................45   Utilizar menu de funções ............46  ...
  • Seite 112 Ligação à televisão e ao computador ......... 89   Visualizar captações de imagem num televisor ......89   Imprimir fotografias numa impressora de fotografias ....90   Transferir dados para um computador ........91   Inserir cabo USB ............... 91  ...
  • Seite 113: Instruções De Segurança

    Instruções de segurança Objectivo destas instruções Leia as indicações de segurança com atenção antes de colocar em funcionamento. Tenha em atenção os avisos que constam no aparelho e no manual de instruções. Guarde sempre o manual de instruções ao seu alcance. Ao vender ou entregar este aparelho deve entregar igualmente estas instruções e o certificado de garantia.
  • Seite 114 CUIDADO! Tenha em atenção as instruções de forma a evitar ferimentos e danos materiais! ATENÇÃO! Tenha em atenção as instruções de forma a evitar danos materiais! NOTA! Informação mais detalhada para a utilização do aparelho. NOTA! Tenha em atenção as indicações do manual de instruções! CUIDADO! Aviso de perigo de choque eléctrico!
  • Seite 115: Utilização Conforme As Disposições Das Normas

    Utilização conforme as disposições das normas  O aparelho é adequado para tirar fotografias em formato digital.  Não utilize o aparelho em condições de calor ou frio extremos.  O aparelho não é adequado para funcionamento em condições extremas. ...
  • Seite 116 PERIGO! Mantenha igualmente o material de embalagem fora do alcance das crianças. Existe o perigo de asfixia! Avisos Para evitar ferimentos, na utilização do produto tenha em atenção os seguintes avisos:  Não utilize o flash a uma curta distância dos olhos. Neste caso, os olhos da pessoa fotografada ficam afectados.
  • Seite 117  A câmara e o carregador não devem ser expostos a gotas ou salpicos de água. Não coloque objectos com líquidos (por ex. vasos) sobre o aparelho. Indicações sobre as pilhas Pode operar a sua câmara com as pilhas fornecidas. Carregue as pilhas no carregador de pilhas fornecido.
  • Seite 118  Evite o contacto com a pele, olhos e mucosas. Se entrar em contacto com o ácido da pilha lave imediata e abundantemente o local afectado com água e, em seguida, contacte um médico.  Não coloque as pilhas no fogo, não as curte-circuite e não as desmonte.
  • Seite 119: Cuidados A Ter

    Cuidados a ter Tenha em atenção as seguintes medidas preventivas de forma a evitar danos na sua câmara e a mantê-la sempre em perfeitas condições:  Guardar em local seco Esta câmara não é impermeável, logo não funciona em perfeitas condições quando mergulhada em água ou quando líquidos penetram no interior da mesma.
  • Seite 120 condensada no aparelho, que pode causar avarias no funcionamento ou danos. Para colocar o aparelho em funcionamento, aguarde até que a sua temperatura atinja a temperatura ambiente. A utilização de uma bolsa de transporte ou de plástico oferece protecção limitada contra oscilações de temperatura.
  • Seite 121 Nunca efectuar reparações individualmente CUIDADO! Nunca tente abrir ou reparar o aparelho sozinho. Existe o perigo de choque eléctrico!  Em caso de avaria, contacte o centro de assistência Medion ou um outro representante autorizado de modo a evitar potenciais perigos...
  • Seite 122: Colocação Em Funcionamento

    Colocação em funcionamento Material fornecido Verifique se a entrega está completa e informe-nos dentro de um período de 14 dias após a aquisição, caso não esteja. O produto adquirido inclui:   Câmara Cabo AV   Cartão de memória SD de 2 Alça de mão ...
  • Seite 123: Carregar Pilhas No Carregador

    Carregar pilhas no carregador No carregador fornecido podem ser carregadas apenas as baterias de íon de lítio fornecidas.  ATENÇÃO! Nunca tente recarregar pilhas normais. Existe o perigo de explosão!  Utilize apenas o carregador fornecido para o carregamento das baterias.
  • Seite 124  Empurre a bateria contra a resistência das molas de contacto. Tenha em atenção de que a bateria deve estar por baixo da guia.  Agora pressione a bateria para baixo. A bateria deve tocar no fundo da base de carregamento. ...
  • Seite 125: Inserir Pilhas

    Inserir pilhas Para operar a câmara é necessária a bateria de iões de lítio fornecida.  Se necessário, desligue a câmara.  Empurre o compartimento da bateria no sentido da seta. O compartimento das pilhas abre-se.  Insira a bateria no compartimento da mesma de forma a que os contactos da bateria toquem nos contactos do compartimento.
  • Seite 126: Inserir E Retirar Cartões Sd

     Feche novamente o compartimento. ATENÇÃO! A carga da bateria diminui em ambientes frios (-10°C ou mais frio). Aqueça a bateria (por ex. nos bolsos da sua roupa), antes de a utilizar em ambientes frios. Inserir e retirar cartões SD Se não estiver inserido nenhum cartão, as gravações são guardadas na memória interna.
  • Seite 127 Inserir cartão  Desligue a câmara.  Empurre o compartimento das pilhas no sentido da seta. O compartimento das pilhas abre-se.  Insira o cartão na ranhura de cartões com os contactos virados para baixo até este encaixar.  Feche novamente o compartimento. ...
  • Seite 128: Colocar Alça De Mão

    Colocar alça de mão Fixe a alça de mão para um melhor manuseamento da câmara e por razões de segurança. Passe a correia através do ilhó como é exibido na imagem.  Puxe a outra extremidade da alça de mão através da correia do cordão mais fino e aperte a alça.
  • Seite 129: Primeiros Passos

    Primeiros passos Ligar câmara  Para ligar a câmara prima a tecla POWER durante 1 ou 2 segundos. A objectiva avança, a indicação de funcionamento acende-se a verde e o ecrã liga-se. A câmara encontra-se no modo de captação. NOTA! Se a câmara não se ligar, verifique se a pilha está...
  • Seite 130: Desligar A Câmara

    Desligar a câmara  Mantenha a tecla POWER premida durante alguns segundos para desligar a câmara. Função de economia de energia Se a câmara não for utilizada durante 60 segundos, desliga-se. Também pode definir o temporizador automático para 3 ou 5 minutos;...
  • Seite 131: Definir Idioma E Data/Hora

    Definir idioma e Data/Hora Antes de utilizar a câmara pela primeira vez, deve configurar o idioma do menu desejado, a data e a hora actuais. Ambas as configurações são efectuadas no menu Configurações  Prima a tecla M com a câmara ligada para abrir o menu. ...
  • Seite 132 Definir data e hora  Seleccione no menu Configurações com as teclas a entrada Data e hora e prima SET. O direccionais menu de configurações abre-se. Para além da data e da hora também pode configurar o formato da data. Existem as seguintes opções: AA/MM/DD (Ano/Mês/Dia);...
  • Seite 133: Modo De Captação E Reprodução

     Prima SET, para confirmar os valores definidos. A data e a hora podem ser indicados no modo de reprodução. Estas informações não são impressas. A configuração de hora fica memorizada na pilha interna. No entanto, é perdida se a bateria for removida da câmara mais de 48 horas.
  • Seite 134: Indicações Do Ecrã

    Indicações do ecrã Indicações do ecrã para a captação No modo de captação estão disponíveis as seguintes indicações do ecrã: 1. Pode configurar diferentes 3. Mecanismo de disparo tipos de captação (Tecla automático 4. Configuração de zoom ); O tipo de captação 5.
  • Seite 135 6. Estado da pilha 16. Exibe a velocidade do 7. Local de memória (memória obturador interna IN ou cartão) 17. Configuração de 8. Datador visualização 9. Exposição automática 18. Aviso: Perigo de imagens activada tremidas! 10. Estabilizador de imagem 19. Configuração macro ligado 20.
  • Seite 136: Indicações Do Ecrã Para A Reprodução De Fotografias

    Indicações do ecrã para a reprodução de fotografias No modo de reprodução estão disponíveis as seguintes indicações do ecrã: 1. Indicação de modo 6. Estado da pilha (Captação ou reprodução) 7. Local de memória (memória interna "IN" ou cartão) 2. A imagem é protegida 3.
  • Seite 137: Indicações Do Ecrã Para A Reprodução De Vídeo

    Indicações do ecrã para a reprodução de vídeo No modo de reprodução para vídeo são possíveis as seguintes indicação do ecrã: 1. Indicação de modo 8. Informações de captação (Captação ou reprodução) 9. Resolução 2. A imagem é protegida 10. Regular o volume de som 3.
  • Seite 138: Indicações Do Ecrã Para A Reprodução De Som

    Indicações do ecrã para a reprodução de som No modo de reprodução para captação de voz são possíveis as seguintes indicação do ecrã: 1. Indicação de modo 7. Informações sobre a (Captação ou reprodução) captação (Data e hora) 2. A imagem é protegida 8.
  • Seite 139: Ligar/Desligar Indicações De Ecrã

    Ligar/desligar indicações de ecrã Ao premir repetidamente a tecla DISP pode ligar, desligar e alterar as indicações do ecrã. No modo de captação Com as indicações mais Com todas as indicações importantes Com grelha de enquadramento Sem indicações de imagem para distribuir mais facilmente a imagem NOTA! As indicações no ecrã...
  • Seite 140 No modo de reprodução Com todas as Sem indicações Com as indicações indicações mais importantes Após a última vez que premir a tecla DISP é exibida uma ajuda para as funções das teclas no modo de reprodução. As indicações no ecrã não podem ser alteradas: ...
  • Seite 141: Primeira Captação

    Primeira captação Configurar modo de captação Se a câmara estiver ligada, o modo de captação fica activo automaticamente. No estado de base é exibido na parte superior esquerda do ecrã Auto, para o modo de captação Automático. Consulte mais informações sobre os modos de captação e símbolos na página 66.
  • Seite 142: Elaborar Fotografia

    Elaborar fotografia  Se vê a imagem no ecrã, inicialmente não prima por completo o activador. Os símbolos de fotografia amarelos aparecem a vermelho e a indicação de funcionamento pisca se o foco automático não conseguir focar. São exibidos os valores da velocidade do obturador, do diafragma e o valor de ISO, caso seja definido um valor de ISO.
  • Seite 143 NOTA! Active o modo de macro ao premir a tecla , para captações realizadas ao perto. Utilizar estabilizador O estabilizador possibilita melhores captações em piores condições luminosas e o risco de captações tremidas é reduzido.  Prima a tecla M. O menu abre-se. ...
  • Seite 144 "Slow Sync“: O flash é sincronizado com o menor tempo do obturador. Flash sempre desligado O flash funciona no modo temporizador de disparo ou no modo normal. Não pode ser utilizado para disparo contínuo e para a captação de vídeo. Ao utilizar o flash o consumo de pilha aumenta.
  • Seite 145 Se utilizar o zoom óptico encontra a marca na parte esquerda da barra. Se premir T novamente, o zoom digital é activado automaticamente. Pode continuar a aumentar em cinco níveis. Para isso, o zoom digital deve estar ligado no menu de configuração! O zoom digital não está...
  • Seite 146 Macro Este modo adequa-se especialmente para captações realizadas. Neste modo pode capturar pormenores através de um foco fixo e focalizar o motivo também a curtas distâncias. PF Multifocus Quando o multifocus está activo, a câmara foca com precisão cada objecto. INF Infinito Na configuração Infinito a câmara foca objectos especialmente distantes.
  • Seite 147: Captar Vídeos

    Captar vídeos  Empurre o interruptor de selecção de modo para a posição  Prima o activador para iniciar a captação. O tempo de captação é exibido no ecrã.  Com a tecla de zoom W – T pode alterar a secção de imagem.
  • Seite 148: Captar Áudio

    Captar áudio O microfone encontra-se à esquerda na parte dianteira da câmara, por baixo da lente. Tenha em atenção que não deve tocar no microfone durante a captação.  Seleccione no "Menu de captação" na configuração "Modo Gravação“ a entrada Gravação de voz ...
  • Seite 149: Utilizar Menu De Funções

    Utilizar menu de funções O menu de funções permite efectuar rapidamente configurações essenciais para uma captação. Na barra de menu sã exibidas as funções disponíveis para configurar a câmara. Na barra inferior são exibidas as configurações possíveis da respectiva função. ...
  • Seite 150 O meu modo Neste modo estão listados os últimos cinco modos de captação utilizados. Cada modo de captação possui outras opções de configuração. Se alterar o modo de captação com as teclas ou , as correspondentes opções de configuração alteram-se. Resolução - Fotografias A resolução determina essencialmente a qualidade das imagens.
  • Seite 151 Qualidade (compressão) Determine a compressão dos dados captados através da qualidade. Quanto maior for a qualidade, mais posição de memória necessita a captação. Configuração Significado Elevada Qualidade elevada Qualidade média Normal Qualidade normal Corrector de exposição (EV) Com o corrector do valor de exposição (EV = Exposure Value) pode ajustar, sem configuração, as imagens que estiverem muito claras ou muito escuras.
  • Seite 152 quando utilizar o flash. Seleccione, em seguida, a configuração automática. Equilíbrio de brancos O equilíbrio de brancos pode corrigir determinadas condições luminosas. Configuração Significado Reprodução O equilíbrio de brancos é Equilíbrio de brancos adaptado automaticamente. Adequada para captações de Luz diurna luz diurna clara.
  • Seite 153 Configuração Significado NOTA! Para encontrar a configuração correcta, aponte a câmara abaixo das condições luminosas, para as quais deseja configurar um equilíbrio de brancos, sobre uma folha de papel branco ou um objecto semelhante, e capte uma imagem de teste. A imagem esquerda exibe o equilíbrio de brancos anterior, a do meio exibe o equilíbrio seleccionado e a imagem da direita exibe o próximo equilíbrio de brancos possível.
  • Seite 154 ISO (Sensibilidade da luz) Esta configuração altera a sensibilidade da luz do sensor. Um valor superior aumenta a sensibilidade da luz, mas também resulta em ruídos mais elevados os quais podem ser negativos para a qualidade de imagem. Ajuste o valor de ISO de acordo com as circunstâncias de captação, o mais baixo possível.
  • Seite 155 Medição – Medição de flash Com esta função pode definir, em qual área a medição da luz deve ocorrer para a captação de fotografias ou vídeo. Configuração Significado Selecciona uma exposição vários locais na área de captação Múltipla em consequência dos resultados de medição.
  • Seite 156 Efeito de cor Pode utilizar o efeito de fotografias no modo de captação e reprodução para conferir diferentes tons ou efeitos artísticos às captações. Configuração Significado Normal Nenhum efeito de fotografia configurado. Cores vivas A imagem é apresentada para realçar as cores luminosas com maior contraste e maior saturação.
  • Seite 157 Tamanho do vídeo (Resolução - Vídeos) A configuração Tamanho de Vídeo está disponível apenas para a captação de vídeos. Configuração Tamanho Qualidade de imagem em Pixéis 1280 x 720 HDTV (Apenas possível com cartões SDHC- Classe 6) 640 x 480 Qualidade elevada 320 x 240 Normal...
  • Seite 158: Utilizar Menu De Captação

    Pre Rec (Vídeo) A configuração “Pre Rec” permite-lhe um pré-captação de 3 seg. Se esta configuração não estiver activa, a câmara estabelece 3 seg. antes do accionamento do activador. Utilizar menu de captação Também pode seleccionar as configurações através do menu de captação.
  • Seite 159: Visualizar/Ouvir Captações

    Visualizar/ouvir captações Reproduzir captações individuais Pode reproduzir as últimas captações efectuadas uma após a outra no modo de visualização.  Empurre o interruptor de selecção de modo para , de forma a activar o modo de activação. A última captação efectuada é exibida no ecrã; São possíveis as seguintes visualizações dependendo do tipo: Fotografia Vídeo...
  • Seite 160: Reproduzir Captações Como Miniaturas

    Reproduzir captações como miniaturas  Prima a tecla de zoom na direcção W, no menu de reprodução para visualizar até nove pré-visualizações pequenas.  Com as teclas direccionais pode seleccionar o ficheiro desejado.  Prima a tecla SET para visualizar a captação como ecrã completo.
  • Seite 161  Prima a tecla SET para visualizar a captação como ecrã completo.  Prima a tecla de zoom na direcção T, para abandonar o modo de calendário. Ampliar fotografias Na captação de fotografias pode visualizar secções de imagem individuais.  Ao premir várias vezes a tecla na direcção T na visualização de ecrã...
  • Seite 162: Reproduzir Vídeo / Áudio/ Memorando De Voz

    Reproduzir vídeo / áudio/ memorando de voz  Seleccione a captação desejada.  SET, para iniciar a reprodução. Na reprodução de vídeos prima as teclas ou , para iniciar um avanço ou retrocesso rápido.  Prima a tecla de zoom na direcção T, para aumentar o volume.
  • Seite 163: Eliminar Captações

    Criar Screenshot de um vídeo Prima a tecla , durante a reprodução de um vídeo para parar a reprodução.  Prima o activador para memorizar a imagem exibida como Screenshot. O símbolo do activador é exibido no ecrã. A câmara terminar automaticamente a reprodução e altera para o modo de visualização.
  • Seite 164  No ecrã surge a consulta "Eliminar". Seleccione com as teclas a entrada "Eliminar".  Prima a tecla SET e confirme a consulta. Pata interromper a função, seleccione a entrada "Cancelar" e confirme com SET.  É exibida a captação seguinte no ecrã. NOTA! Os ficheiros protegidos não podem ser eliminados;...
  • Seite 165: Os Menus

    Os menus Navegar no menu Se desejar abrir o menu de reprodução, empurre o interruptor de selecção de modo para a posição  Prima a tecla , para abrir o menu.  Seleccione com as teclas direccionais a configuração que deseja alterar. ...
  • Seite 166: O Menu De Captação

    O menu de captação Configuração Significado Modo Gravação Aqui pode seleccionar diferentes modos de captação Modo de disparo Aqui pode configurar o temporizador de disparo e seleccionar o disparo contínuo. 10 seg. – A imagem é captada 10 segundos após premir o activador. 2 seg.
  • Seite 167 Configuração Significado Aqui pode ligar ou desligar a exposição automática. Área foc auto Aqui pode seleccionar a área de focagem automática (AF). Larga – É focalizada uma área ampla. Centro – É focalizado o meio. Nitidez Aqui pode apresentar os detalhes de uma imagem de forma mais nítida ou suave.
  • Seite 168 Configuração Significado Ampl digital Aqui pode seleccionar o zoom digital para alguns tipos de funcionamento. Ampl Intelect – Aumenta digitalmente a imagem de modo e de forma optimizada Ampl Padrão – Aumenta todos os tamanhos de imagem até 5 vezes, no entanto diminui a qualidade de imagem.
  • Seite 169: Modo De Gravação

    Modo de gravação Para determinadas situações de captação ou motivos pode utilizar modos de captação pré-definidos. Assim evita a configuração manual. Após ter efectuado a sua selecção, o modo seleccionado (com excepção do modo de memorando de voz) é adicionado à posição mais à...
  • Seite 170 Símbolo Configuração Significado Retrato O fundo fica desfocado e foca o centro. Paisagem Adequado para paisagens amplas. Pôr-do-sol Os tons de vermelho são intensificados para a captação de pores-do-sol. Contraluz A configuração "Medição“ adapta-se à contra-luz. Crianças Adequado para a captação de pessoas em movimento.
  • Seite 171 Símbolo Configuração Significado Desporto Adequado para criar imagens com movimentos rápidos. Festa Adequado para tirar fotografias em interiores e em festas. Luz de velas Tira fotografias com luz quente. Retrato Noct. Adequado para fotografias de retracto com um fundo escuro. Pele Cria imagens com transições suaves e cores suaves.
  • Seite 172 Símbolo Configuração Significado Texto Aumenta o contraste preto e branco Folhagem Esta função aumenta a saturação dos tons de verde. Leilão Optimiza a imagem para a reprodução em plataformas da Internet (Leilões), por ex. resolução em VGA (consultar página 94). Existem 4 modelos diferentes à...
  • Seite 173 Símbolo Configuração Significado Pré-Composição Esta função capta uma imagem como orientação temporária. Prima por completo o activador, após ter ajustado a pessoa que será fotografada no ponto de referência. Retrato de Amor Esta função utiliza a detecção de rosto para a captação de rostos automaticamente, para, desta forma, não necessitar do apoio de imagens de retracto de terceiros.
  • Seite 174 Símbolo Configuração Significado Esta função aumenta a amplitude dinâmica de uma imagem através de valores de contraste e luminosidade elevados. Prior. Abertura Com esta função pode determinar o valor do diafragma. Prior Obturador Com esta função pode determinar a velocidade do obturador. Exposição Manual Com esta função pode definir a velocidade do obturador e o valor do diafragma.
  • Seite 175 Utilizar o modo "Capturar sorrisos” O modo "Capturar sorrisos" capta automaticamente fotografias assim que reconhecer um sorriso. Como activar o modo "Capturar sorrisos"  Seleccione a função no modo de captação.  Foque a câmara no motivo.  Assim que for reconhecido um sorriso, a câmara inicia a captação da fotografia.
  • Seite 176: O Menu De Configuração

    O menu de configuração Configuração Significado Sons Aqui pode desligar o som inicial ou seleccionar entre 3 sons, ligar o sinal sonoro e o som do activador, assim como configurar o volume para todos os sons. Poup. energia Poupar energia Para poupar a carga da pilha, a câmara desliga- se automaticamente após o tempo seleccionado.
  • Seite 177 Configuração Significado Idioma Pode seleccionar o idioma do menu. (Consultar página 28) N.º do ficheiro Numeração do ficheiro Aqui pode configurar a numeração dos ficheiros. Série: Os ficheiros são numerados consecutivamente a partir de 0001. Repor: Repõe a numeração em 0001. Esta função é...
  • Seite 178 Configuração Significado Kit Memória Aqui pode organizar os dados na memória interna. Formatar: Formata a memória actual, isto é, cartão de memória ou memória interna. Desta forma são eliminadas todas as captações. NOTA! Se formatar a memória, todos os dados memorizados serão eliminados.
  • Seite 179: O Menu De Reprodução

    O menu de reprodução Configuração Significado Apres Pode percorrer as captações de imagem (apenas Diapositiva fotografias) como apresentação de diapositivos. (Consultar página 80) Eliminar Com esta função pode eliminar ficheiros, que já não são necessários, da memória interna ou do cartão de memória (consultar página 80).
  • Seite 180 Configuração Significado Proteger Com esta função protege as captações contra eliminações involuntárias. (Consultar página 80). Existem as seguintes opções: Individual: Proteger uma captação Multi: Proteger as várias captações, que seleccionar na vista de miniaturas. Bloq. tudo: Proteger todas as captações. Desbloq.
  • Seite 181 Configuração Significado Cortar Com esta função pode seleccionar uma secção de imagem e recortar a imagem neste tamanho. A parte que não é visível no ecrã é eliminada (consultar página 86). Pode memorizar os ficheiros corrigidos com um novo nome ou substituir o ficheiro original. Redimendionar Pode baixar a resolução das fotografias e, desta forma, reduzir o tamanho do ficheiro (consultar...
  • Seite 182 Configuração Significado DPOF DPOF refere-se a "Digital Print Order Format“. Pode determinar os ajustes de impressão para imagens, se quiser imprimir as imagens através de um estúdio de fotografia ou numa impressora compatível com DPOF. Com uma impressora compatível com DPOF pode imprimir directamente as imagens, sem as transferir primeiro para o computador.
  • Seite 183 Mostrar apresentação de diapositivos Pode percorrer as fotografias como uma apresentação de diapositivos.  Seleccione a entrada Apres Diapositiva no menu de reprodução. O menu abre-se. Estão à sua disposição as seguintes configurações:  Seleccione o intervalo no qual as imagens devem ser visualizadas (1, 3, 5 ou 10 segundos).
  • Seite 184  Ao premir a tecla SET protege/desbloqueia ou elimina o ficheiro e retorna ao modo de reprodução. Proteger /desbloquear ou eliminar vários ficheiros (Múltiplas)  Seleccione o sub-item "Multi" no submenu "Eliminar" ou "Proteger"; As imagens são visualizadas na vista de miniaturas no ecrã.
  • Seite 185 Proteger/desbloquear ou eliminar ficheiros  Seleccione "Bloq. tudo/Desbloq tudo" ou "Tudo" no submenu "Eliminar" ou "Proteger". É exibida uma mensagem de confirmação.  Seleccione Sim. Ao premir a tecla SET protege, desbloqueia ou elimina todos os ficheiros. NOTA! Se estiver inserido um cartão de memória, pode apagar os ficheiros existentes no cartão.
  • Seite 186 Como activar o Corrector de olhos vermelhos:  Seleccione a imagem no modo de reprodução.  Abra o submenu "Correcção Olho Verm." no menu de reprodução. No ecrã são exibidos a pré-visualização de imagens e o menu de olhos vermelhos. ...
  • Seite 187 Captar memorando de voz  Seleccione a fotografia desejada no modo de reprodução. NOTA! Se a fotografia já possuir um memorando de voz, é exibido o símbolo de memorando de voz.  Abra o submenu "Memo de voz” no menu de reprodução. No ecrã...
  • Seite 188 Modo de cor Estão disponíveis os seguintes efeitos: Símbolo Configuração Significado Normal Não é adicionado nenhum efeito de fotografia. Sépia A imagem é apresentada em tons de castanho nostálgicos. P & B A imagem é apresentada a preto e branco. Negativo A imagem é...
  • Seite 189 O respectivo efeito é aplicado à pré-visualização de imagens e exibido de acordo.  Prima a tecla SET para memorizar o novo ficheiro. Recortar a fotografia Imagem ampliada Visualização em 4 direcções Tamanho do corte A posição ao redor da área do corte Campo da imagem ...
  • Seite 190 Sobrescrever: O novo ficheiro é memorizado e o anterior é substituído. Guardar como: O novo ficheiro é memorizado com outro nome, sem substituir o anterior ficheiro. Cancelar: A função é cancelada.  Prima a tecla SET para memorizar/ cancelar as alterações.
  • Seite 191 Alterar tamanho  Seleccione a fotografia desejada no modo de reprodução.  Abra o submenu "Redimensionar" no menu de reprodução. O menu de selecção é exibido no ecrã.  Seleccione uma das seguintes resoluções e prima a tecla SET: 8M, 5M, 3M ou VGA. NOTA! As resoluções disponíveis podem variar de acordo com o tamanho original da imagem.
  • Seite 192: Ligação À Televisão E Ao Computador

    Ligação à televisão e ao computador Visualizar captações de imagem num televisor Pode reproduzir as captações da câmara numa televisão.  Desligue a câmara e a televisão.  Ligue o cabo TV fornecido à ligação USB da câmara e à entrada de vídeo (amarelo) e à...
  • Seite 193: Imprimir Fotografias Numa Impressora De Fotografias

    Imprimir fotografias numa impressora de fotografias Pode imprimir as suas captações pelo software PictBridge directamente para uma impressora de fotografias compatível com software PictBridge.  Ligue a impressora e a câmara através do cabo USB fornecido.  Ligue a câmara e a impressora de fotografias.
  • Seite 194: Transferir Dados Para Um Computador

    Transferir dados para um computador Pode gravar as captações num computador. Sistema operativo suportado:  Windows XP  Windows Vista  Windows 7 Inserir cabo USB  Desligue a câmara.  Ligue o cabo USB fornecido, com o computador ligado, à ligação USB da câmara e uma ligação USB ao computador.
  • Seite 195 Nas outras versões do Windows abra o Windows Explorer ou clique duas vezes no "ambiente de trabalho“ (no Vista: "Computador").  Clique duas vezes no símbolo do dispositivo para a câmara.  Navegue até à pasta "DCIM“ e, se necessário, até à pasta existente nesta, para visualizar os ficheiros (*.jpg = Fotografias;...
  • Seite 196: Memorização De Acordo Com O Padrão Dcf

    Memorização de acordo com o padrão DCF As captações da sua câmara são geridas de acordo com o padrão DCF (memorização, designação etc.; DCF = Design Rule for Camera File System). As gravações nos cartões de memória de outras câmaras DCF podem ser reproduzidas na sua câmara. Ranhura do cartão Se o seu computador dispuser de uma ranhura de cartões ou estiver ligado um dispositivo de leitura de cartões e as captações...
  • Seite 197: Estrutura De Pastas Na Memória

    Estrutura de pastas na memória A câmara memoriza as imagens captadas, ficheiros de vídeo e de áudio em três directórios diferentes na memória interna ou no cartão de memória. São elaborados automaticamente os seguintes directórios: DICAM.: Nesta pasta são memorizadas todas as imagens captadas, ficheiros de vídeo e áudio.
  • Seite 198: Instalar O Software

    Podem ser criadas no máximo 999 pastas. Se for feita mais uma captação, surge o aviso de erro ("O directório não pode ser criado“). Neste caso proceda da seguinte forma:  Insira um novo cartão de memória.  Reponha o número do ficheiro no menu Configurações entrada "N.º...
  • Seite 199: Capacidade De Memória

    Capacidade de memória Tamanho do cartão de memória 1 GB 2 GB 1250 1041 2083 1223 2466 4778 9557 A tabela fornece a quantidade de imagens que pode memorizar numa resolução seleccionada (por ex. 5 M) num cartão de memória com o tamanho indicado (por ex. 128 MB).
  • Seite 200: Identificação De Falhas

    Identificação de falhas Se a câmara não funcionar em perfeitas condições, verifique os seguintes pontos. Se o problema persistir, contacte a assistência técnica da MEDION. A câmara não liga. A pilha está inserida de forma incorrecta. A pilha está vazia. Carregue-a.
  • Seite 201 A imagem está desfocada. A câmara foi movimentada durante a captação. O motivo encontra-se fora do âmbito de regulação da câmara. Utilize o modo de macro para captações realizadas ao perto. A imagem não é exibida no ecrã. Foi inserido um cartão SD que possui imagens captadas por outra câmara, mas não no modo DCF.
  • Seite 202 As captações não são transferidas para o computador através do cabo USB. A câmara não está ligada. Na ligação pela primeira vez da câmara ao computador não foi encontrado nenhum hardware novo. A ligação USB do computador está desactivada no BIOS. Active a porta no BIOS do computador.
  • Seite 203: Manutenção E Cuidados

    Manutenção e cuidados Limpe o corpo da máquina, a lente e o ecrã da seguinte forma: Limpe o corpo da câmara com um pano macio e húmido. Não utilize nenhum diluente ou produtos de limpeza que contenham óleo. Deste modo a câmara pode ficar danificada. Para limpar a lente ou o ecrã, remova primeiro o pó...
  • Seite 204: Eliminação Como Resíduo

    Eliminação como resíduo Embalagem A sua câmara digital encontra-se protegida numa embalagem contra danos de transporte; As embalagens são matérias primas e podem ser reutilizadas ou colocado no ciclo de reciclagem. Aparelho Nunca colocar o aparelho no lixo doméstico, no final do tempo de vida.
  • Seite 205: Dados Técnicos

    Dados técnicos Pixéis: 14 Mega Pixéis CCD Diafragma: F = 3,3 ~ 5,9 Velocidade do obturador: 1/2000 ~ 15 s Distância focal: f = 5,0 mm ~ 25 mm Zoom óptico: Zoom digital: Ecrã LCD: Ecrã LCD de 6,86 cm / 2,7" Formato dos ficheiros: JPEG (EXIF 2.2), DPOF, AVI, WAV Resoluções máx.:...
  • Seite 206: Widok Urządzenia

    Widok urządzenia Przód 1. Lampa błyskowa 2. Wskaźnik samowyzwalacza/lampy miga: Samowyzwalacz włączony 3. Soczewka aparatu z obiektywem 4. Mikrofon...
  • Seite 207 Tył 5. Wyświetlacz LCD 6. Kompensator zoom: ; powiększanie lub pomniejszanie wybranego obszaru : Przycisk menu: Wywoływanie menu : Funkcja/Kosz: 9. Dioda LED trybu...
  • Seite 208 10. 4 drożny przełącznik obsługujący następujące funkcje: Przyciski nawigacji W trybie nagrywania: Śledzenie twarzy wł./wył. W trybie odtwarzania: Rozpoczęcie/Przerwanie odtwarzania W trybie odtwarzania Każdorazowe zdjęć naciśnięcie przycisku powoduje obrócenie obrazu o 90° W menu Przechodzenie do góry w obrębie menu/podmenu DISP W trybie nagrywania Wyświetlanie/Zakrywanie...
  • Seite 209 W trybie nagrywania: Wybór typu lampy błyskowej W trybie odtwarzania: Wyświetlanie następnego nagrania Odtwarzanie filmów: Włączanie lub wyłączanie szybkiego ruchu W menu Otwieranie podmenu lub wybór ustawienia W trybie nagrywania: Włączanie makro przy nagrywaniu z bliska W trybie odtwarzania: Wyświetlanie poprzedniego nagrania Odtwarzanie filmów: Włączanie lub wyłączanie...
  • Seite 210 Góra 12. Krótkie naciśnięcie wyzwalacza: Ustawianie zakresu ostrości 13. Włączanie lub wyłączanie aparatu 14. Głośnik Dół 15. Pokrywa przegródki na akumulator/kartę pamięci SD 16. Gniazdo statywu...
  • Seite 211 17. Gniazdo mini USB 18. Pętelka do paska do przenoszenia...
  • Seite 212 Spis treści   Widok urządzenia ..............1   Spis treści ................7   Wskazówki dotyczące bezpieczeństwa ........10   Informacje dotyczące niniejszej instrukcji obsługi ....10 Symbole oraz słowa sygnalizujące użyte w niniejszej instrukcji   obsługi ................10   Użytkowanie zgodne z przeznaczeniem ......12 Niebezpieczeństwo dla dzieci i osób o ograniczonej zdolności  ...
  • Seite 213   Ustawienia czasu oraz daty/godziny ........29   Tryb nagrywania i odtwarzania ........... 31   Wskaźniki wyświetlacza ............32   Wskaźniki na wyświetlaczu dla nagrywania ......32   Wskaźniki na wyświetlaczu w trybie odtwarzania zdjęć ..34   Wskaźniki na wyświetlaczu w trybie odtwarzania wideo ..35  ...
  • Seite 214   Tryb nagrywania ............... 68   Menu ustawień ..............75   Menu odtwarzania ............79   Podłączenie do TV i PC ............93   Wyświetlanie nagrań na odbiorniku TV ........ 93   Wydruk nagrań na drukarce do zdjęć ........94  ...
  • Seite 215: Wskazówki Dotyczące Bezpieczeństwa

    Wskazówki dotyczące bezpieczeństwa Informacje dotyczące niniejszej instrukcji obsługi Przed przystąpieniem do użytkowania urządzenia przeczytać uważnie wskazówki dotyczące bezpieczeństwa. Przestrzegać ostrzeżeń umieszczonych na samym urządzeniu i zawartych w instrukcji obsługi. Przechowywać instrukcję obsługi w takim miejscu, aby zawsze była pod ręką. W przypadku sprzedaży urządzenia lub jego przekazania osobie trzeciej należy do niego koniecznie dołączyć...
  • Seite 216 OSTRZEŻENIE! Ostrzeżenie przed możliwym zagrożeniem życia i/lub ciężkimi, nieodwracalnymi obrażeniami! PRZESTROGA! Przestrzegać wskazówek, aby uniknąć obrażeń i uszkodzenia mienia. UWAGA! Przestrzegać wskazówek, aby uniknąć uszkodzenia mienia. WSKAZÓWKA! Dalsze informacje dotyczące użytkowania urządzenia. WSKAZÓWKA! Przestrzegać wskazówek zawartych w instrukcji obsługi! Punkt oznaczony kropką / Informacje o wypadkach ...
  • Seite 217: Użytkowanie Zgodne Z Przeznaczeniem

    Użytkowanie zgodne z przeznaczeniem  Urządzenie przeznaczone jest do wykonywania zdjęć w formacie cyfrowym.  Urządzenia nie można używać w ekstremalnie wysokich lub niskich temperaturach.  Urządzenie nie nadaje się do użytku w ekstremalnych warunkach.  Urządzenie jest przeznaczone wyłącznie do użytku prywatnego, nie należy go natomiast wykorzystywać...
  • Seite 218: Ostrzeżenia

    Przechowywać urządzenie wraz z akcesoriami w miejscu niedostępnym dla dzieci. NIEBEZPIECZEŃSTWO! Przechowywać opakowania foliowe poza zasięgiem dzieci. Zachodzi niebezpieczeństwo uduszenia! Ostrzeżenia Aby uniknąć obrażeń, podczas korzystania z produktu należy przestrzegać następujących ostrzeżeń:  Nie włączać lampy błyskowej w niewielkiej odległości od oczu. W takim przypadku może dojść...
  • Seite 219: Wskazówki Dotyczące Akumulatora

     Jeżeli nie korzysta się z ładowarki do baterii, należy ją odłączyć od zasilania.  Gniazdko musi się znajdować w pobliżu urządzenia i musi być łatwo dostępne.  Jeżeli urządzenie ma pozostać nieużywane przez dłuższy okres czasu, należy z niego wyjąć baterie, aby uniknąć ich wycieku.
  • Seite 220 OSTRZEŻENIE! Nieumiejętna wymiana akumulatorów grozi wybuchem. Akumulatory należy wymieniać wyłącznie na nowe tego samego lub rownorzędnego typu.  Przed włożeniem akumulatora należy się upewnić, czy styki na urządzeniu i na akumulatorze są czyste, a w razie potrzeby je wyczyścić.  Należy wkładać...
  • Seite 221: Środki Ostrożności

     Nigdy nie wystawiać baterii na działanie nadmiernie wysokich temperatur, bezpośredniego promieniowania słonecznego, ognia itp.  Jeżeli urządzenie ma pozostać nieużywane przez dłuższy czas, należy z niego wyjąć akumulatory.  Natychmiast wyjąć z urządzenia akumulator, z którego wyciekł elektrolit. Oczyścić styki przed włożeniem nowej baterii akumulatorowej.
  • Seite 222  Przechowywać z dala od wilgoci, soli i kurzu – Po użyciu aparatu na plaży lub nad morzem należy zetrzeć sól i kurz lekko zwilżoną miękką szmatką. Następnie dokładnie osuszyć aparat.  Trzymać z dala od silnych pól magnetycznych Nigdy nie przybliżać...
  • Seite 223 urządzenia. Podczas noszenia aparatu owinąć pasek do przenoszenia wokół nadgarstka.  Nie wyjmować akumulatora podczas przetwarzania danych podczas zapisu lub usuwania danych z kart pamięci odłączenie zasilania może spowodować utratę danych lub ustawień wewnętrznych lub uszkodzenie pamięci.  Obchodzić się ostrożnie z soczewką i wszystkimi ruchomymi częściami.
  • Seite 224: Nigdy Nie Próbować Samodzielnie Naprawiać Urządzenia

    Nigdy nie próbować samodzielnie naprawiać urządzenia OSTRZEŻENIE! Pod żadnym pozorem nie próbować samodzielnie otwierać lub naprawiać urządzenia. Istnieje niebezpieczeństwo porażenia prądem! Aby uniknąć niebezpieczeństwa, w przypadku awarii zwrócić się do serwisu firmy Medion lub do innego kompetentnego warsztatu specjalistycznego.
  • Seite 225: Uruchamianie

    Uruchamianie Zakres dostawy Proszę sprawdzić, czy zestaw jest kompletny, a w przypadku wykryciu braku jakiegokolwiek elementu, proszę nas o tym powiadomić w ciągu 14 dni od daty zakupu. Nabyty przez Państwa zestaw składa się z następujących elementów:   Aparat Futerał...
  • Seite 226: Ładowanie Akumulatora W Ładowarce

    Ładowanie akumulatora w ładowarce W dołączonej ładowarce można ładować tylko akumulatory litowo jonowe dostarczone wraz z urządzeniem.  UWAGA! Nigdy nie próbuj ponownie ładować normalnych baterii. Grozi to wybuchem!  Do ładowania akumulatora należy używać wyłącznie dostarczonej ładowarki.  Nie zakrywać ładowarki żadnymi przedmiotami (gazetami, obrusami, zasłonami itp.), aby uniknąć...
  • Seite 227  Przesunąć akumulator do oporu do przodu ku sprężynom stykowym . Należy przy tym uważać, aby akumulator znajdował się pod prowadnicą .  Teraz należy wcisnąć akumulator w dół. Akumulator musi się stykać z dnem ładowarki .  Podłączyć dostarczony kabel sieciowy do ładowarki oraz do gniazdka zasilania, w którym płynie prąd o napięciu 230 V ~ 50 Hz.
  • Seite 228: Włożyć Akumulator

    Włożyć akumulator. Aby móc korzystać z aparatu należy do niego włożyć dostarczony akumulator litowo jonowy.  Wyłączyć w tym celu aparat.  Przesunąć pokrywę przegródki akumulatora w kierunku wskazywanym przez strzałkę. Przegródka akumulatora otworzy się.  Włożyć akumulator do przegródki tak, aby styki akumulatora przylegały do styków w przegródce.
  • Seite 229: Wkładanie I Wyjmowanie Kart Pamięci Sd

     Zamknąć pokrywę przegródki akumulatora. UWAGA! W zimnym otoczeniu (temp. 10°C lub niższa) moc akumulatora ulega zmniejszeniu. Przed użyciem akumulatora w zimnym otoczeniu należy go ogrzać (np. w kieszeni ubrania). Wkładanie i wyjmowanie kart pamięci SD Jeżeli do urządzenia nie jest włożona żadna karta, nagrania zostaną...
  • Seite 230 Wkładanie karty  Wyłączyć aparat.  Przesunąć pokrywę przegródki akumulatora w kierunku wskazywanym przez strzałkę. Przegródka akumulatora otworzy się.  Włożyć kartę tak, jak pokazano na przegródce.  Zamknąć przegródkę akumulatora i przesunąć ponownie pokrywę w położenie wyjściowe.
  • Seite 231: Przymocowanie Pętli Na Nadgarstek

     Aby wyjąć kartę pamięci, należy ją krótko nacisnąć w dół, aby się odblokowała. Karta lekko się wysunie, co umożliwi jej wyjęcie z aparatu. Przymocowanie pętli na nadgarstek Aby ułatwić trzymanie aparatu oraz ze względów bezpieczeństwa należy przymocować do niego pętlę do zaczepiania na nadgarstku.
  • Seite 232: Pierwsze Kroki

    Pierwsze kroki Włączanie aparatu POWER  Nacisnąć przycisk i przytrzymać go przez 1 2 sekundy, aby włączyć aparat. Obiektyw zostaje odsłonięty, wskaźnik trybu pracy świeci na zielono, a wyświetlacz włącza się. Aparat znajduje się w trybie nagrywania. WSKAZÓWKA! Jeżeli aparat się nie włącza, należy sprawdzić, czy baterie akumulatorowe są...
  • Seite 233: Wyłączanie Aparatu

    Wyłączanie aparatu POWER  Przytrzymać przycisk wciśnięty nieco dłużej, aby wyłączyć aparat. Funkcja oszczędzania energii Gdy aparat pozostaje nieużywany przez 60 sekund, wyłącza się automatycznie. Czas automatycznego wyłączenia można ustawić na 3 lub 5 minut; patrz strona 75. Funkcja oszczędzania prądu jest nieaktywna: ...
  • Seite 234: Ustawienia Czasu Oraz Daty/Godziny

    Ustawienia czasu oraz daty/godziny Przed pierwszym użyciem aparatu należy ustawić aktualną datę i godzinę oraz żądany język menu. Oba ustawienia należy skonfigurować w menu „USTAWIENIA”  Przy włączonym aparacie nacisnąć przycisk , aby otworzyć menu. wybrać menu „USTAWIENIA”  Za pomocą przycisku Ustawianie języka ...
  • Seite 235 Ustawienia daty i godziny  Wybrać w menu „USTAWIENIA” za pomocą przycisków pozycję „Data i czas” i nacisnąć kierunkowych przycisk . Otworzy się menu ustawień. Oprócz daty i godziny można również ustawić format daty. Do wyboru są następujące opcje: RR/MM/DD (Rok/Miesiąc/Dzień);...
  • Seite 236: Tryb Nagrywania I Odtwarzania

    Data i godzina ustawiona na aparacie wyświetlane są tylko w trybie odtwarzania. Dane te nie zostają wydrukowane na zdjęciu. Ustawienie czasu zostaje zapisane w baterii wewnętrznej. Jednak w przypadku wyjęcia akumulatora z aparatu na ponad 48 godzin zostanie ono utracone. Tryb nagrywania i odtwarzania Po włączeniu urządzenia aktywny jest tryb nagrywania: Umożliwia on bezpośrednie wykonywanie zdjęć.
  • Seite 237: Wskaźniki Wyświetlacza

    Wskaźniki wyświetlacza Wskaźniki na wyświetlaczu dla nagrywania W trybie nagrywania na wyświetlaczu mogą się pojawić następujące wskaźniki: 1. Istnieje możliwość wyświetlany jest aktualny ustawiania różnych tryb nagrywania. sposobów nagrywania 2. Ustawienie lampy błyskowej (przycisk ); tu 3. Samowyzwalacz...
  • Seite 238 4. Ustawienie powiększanie 14. Ustawienie ISO 5. Dostępne nagrania (przy 15. Zakres ostrości aktualnej rozdzielczości) 16. Prędkość migawki 6. Status akumulatora 17. Ustawienie przesłony 7. Wybór pamięci (pamięć 18. Ostrzeżenie: wewnętrzna IN lub karta Niebezpieczeństwo drgania pamięci) aparatu! 8. Stempel czasowy 19.
  • Seite 239: Wskaźniki Na Wyświetlaczu W Trybie Odtwarzania Zdjęć

    Wskaźniki na wyświetlaczu w trybie odtwarzania zdjęć W trybie odtwarzania na wyświetlaczu mogą się pojawić następujące wskaźniki: 1. Wskaźnik trybu 6. Status akumulatora (nagrywanie lub 7. Wybór pamięci (pamięć odtwarzanie) wewnętrzna „IN” lub karta 2. Obraz jest zabezpieczony pamięci) 3. Nagrywanie dźwięku 8.
  • Seite 240: Wskaźniki Na Wyświetlaczu W Trybie Odtwarzania Wideo

    Wskaźniki na wyświetlaczu w trybie odtwarzania wideo W trybie odtwarzania wideoklipów na wyświetlaczu mogą się pojawić następujące wskaźniki: 1. Wskaźnik trybu 8. Informacje dot. nagrania (nagrywanie lub 9. Rozdzielczość odtwarzanie) 10. Ustawienie poziomu 2. Obraz jest zabezpieczony głośności 3. Nagranie wideo 11.
  • Seite 241: Wskaźniki Na Wyświetlaczu W Trybie Odtwarzania Dźwięku

    Wskaźniki na wyświetlaczu w trybie odtwarzania dźwięku W trybie odtwarzania dźwięku na wyświetlaczu mogą się pojawić następujące wskaźniki: 1. Wskaźnik trybu 7. Informacje dot. nagrania (nagrywanie lub (Data i godzina) odtwarzanie) 8. Ustawienie poziomu 2. Obraz jest zabezpieczony głośności 3. Sterowanie nagrywaniem 9.
  • Seite 242: Włączanie I Wyłączanie Wskaźników Na Wyświetlaczu

    Włączanie i wyłączanie wskaźników na wyświetlaczu DISP Naciskając kilkukrotnie przycisk , można włączyć, wyłączyć lub zmieniać wskaźniki na wyświetlaczu. W trybie nagrywania Z najważniejszymi wskaźnikami Ze wszystkimi wskaźnikami Z liniami dzielącymi zdjęcia w Bez wskaźników celu ułatwienia podziału zdjęć DISP Po ostatnim naciśnięciu przycisku w trybie nagrywania pojawi się...
  • Seite 243 W trybie odtwarzania Ze wszystkimi Bez wskaźników Z najważniejszymi wskaźnikami wskaźnikami Po ostatnim naciśnięciu przycisku DISP w trybie odtwarzania pojawi się pomoc związana z funkcjami przycisków. Wskaźników na wyświetlaczu nie można zmienić:  Podczas nagrywania i odtwarzania klipów audio i wideo; ...
  • Seite 244: Pierwsze Nagrywanie

    Pierwsze nagrywanie Ustawianie trybu nagrywania Po włączeniu aparatu zostaje automatycznie uruchomiony tryb nagrywania. W stanie podstawowym u góry po lewej stronie wyświetlacza pojawia się symbol Auto oznaczający automatyczny tryb nagrywania. Więcej informacji na temat trybów nagrywania oraz symboli znaleźć można na stronie 68. Jeżeli zamiast trybu nagrywania włączył...
  • Seite 245: Robienie Zdjęć

     Aby tworzyć udane klipy wideo, należy powoli przesuwać aparat. Zbyt szybkie przesuwanie aparatu powoduje nieostre i rozmazane nagrania wideo. Robienie zdjęć  Gdy na wyświetlaczu można zobaczyć obraz, należy nacisnąć wyzwalacz nieco w dół. Żółte znaki „wycięcia” obrazu zmienią kolor na czerwony, a gdy funkcja „Autofokus”...
  • Seite 246 W menu funkcji można wybrać różne ustawienia nagrywania, patrz strona 47. WSKAZÓWKA! Włączyć tryb makro poprzez naciśnięcie przycisku aby wykonywać nagrania z bliska. Użycie stabilizatora Stabilizator umożliwia uzyskanie nagrań lepszej jakości przy złych warunkach oświetlenia. Poprzez szybszą obsługę migawki unika się...
  • Seite 247 Poprzez kilkukrotne naciśnięcie symbolu błyskawicy można wybrać następujące ustawienia lampy błyskowej: AUTO: Lampa błyskowa będzie się uruchamiać automatycznie, gdy warunki nagrywania wymagać będą dodatkowego oświetlenia. Z wcześniejszym błyskiem flesza przed właściwym błyskiem; aby uniknąć efektu czerwonych oczu. Aparat rozpoznaje jasność obiektów i uruchamia lampę...
  • Seite 248 Zoom – powiększanie lub pomniejszanie Aparat wyposażony jest w optyczną i cyfrową funkcję powiększenia (zoom). Powiększenie optyczne uzyskuje się poprzez ustawienie soczewki, natomiast powiększenie cyfrowe uruchamia się poprzez menu ustawień.  Nacisnąć regulator powiększenia w kierunku – . Pojawi się pasek odzwierciedlający ustawienie powiększenia : Obraz zostaje pomniejszony („szeroki kąt”);...
  • Seite 249 WSKAZÓWKA! W przypadku zoomu cyfrowego powiększony wycinek obrazu powiększany jest poprzez interpolację; jakość obrazu może na tym nieco ucierpieć. Ustawianie trybu ogniska Za pomocą tej funkcji można określić typ ogniska podczas rejestracji zdjęć lub wideoklipów.  Naciskać przycisk Makro , dopóki u dołu po lewej stronie wyświetlacza LCD nie pojawi się...
  • Seite 250: Nagrywanie Wideoklipów

    INF Nieskończoność Przy ustawieniu trybu nieskończoności aparat ustawia ostrość na szczególnie oddalone obiekty. Nagrywanie wideoklipów  Ustawić przełącznik wyboru trybu na pozycję  Nacisnąć wyzwalacz, aby rozpocząć nagrywanie. Na wyświetlaczu pojawi się czas nagrania.  Za pomocą przycisku funkcji zoom –...
  • Seite 251: Nagrywanie Klipów Audio

    Nagrywanie klipów audio Mikrofon znajduje się z przodu aparatu, po lewej stronie, pod soczewką. Uważać, aby podczas nagrywania nie dotykać mikrofonu.  Wybrać w menu nagrywania, w ustawieniach Tryb Rejestrowanie, pozycję nagrywania mowy  Nacisnąć wyzwalacz, aby rozpocząć nagrywanie. Na wyświetlaczu pojawi się...
  • Seite 252: Korzystanie Z Menu Funkcji

    Korzystanie z menu funkcji Menu funkcji umożliwia szybką zmianę podstawowych ustawień nagrania. Na liście menu po lewej stronie pokazane są dostępne funkcje do ustawiania aparatu. Na dolnych paskach pokazane są możliwe ustawienia dla każdej funkcji.  Nacisnąć przycisk , aby otworzyć menu. ...
  • Seite 253 Rozdzielczość Zdjęcia Od rozdzielczości uzależniona jest w dużym stopniu jakość zdjęcia. Im wyższa rozdzielczość, tym więcej miejsca w pamięci zajmuje nagranie. Najwyższe rozdzielczości zalecane są przede wszystkim w przypadku dużych wydruków (powyżej DIN A4). Ustawienie Liczba pikseli 14 M 4320 x 3240 4320 x 2880 3264 x 2448 2592 x 1944...
  • Seite 254 Jakość (Kompresja) Za pomocą ustawienia jakości określa się stopień kompresji nagranych danych. Im wyższa jakość, tym więcej miejsca w pamięci zajmują nagrania. Ustawienie Znaczenie Bardzo wysoka Najwyższa jakość. Wysoka Średnia jakość. Standardowa Standardowa jakość. Korekta naświetlenia (EV) Poprzez korektę wartości naświetlenia (EV = Exposure Value) można dostosować...
  • Seite 255 gdy chce się użyć lampy błyskowej. Należy wówczas wybrać ustawienie automatyczne. Balans bieli Balans bieli może skorygować określone warunki oświetlenia. Ustawienie Znaczenie Autom. Balans Balans bieli zostaje dostosowany bieli automatycznie. To ustawienie jest odpowiednie dla Światło dzienne nagrań wykonywanych przy jasnym świetle dziennym.
  • Seite 256 Ustawienie Znaczenie Służy do precyzyjnego dopasowania lub jeżeli źródła światła nie można sklasyfikować. Aby znaleźć prawidłowe Zdefiniowane ustawienie, należy regulować przez aparat w warunkach użytkownika oświetleniowych, dla których chce się ustawić balans bieli, na kartce białego papieru lub na podobnym przedmiocie i wykonać...
  • Seite 257 ISO (Czułość światła) To ustawienie zmienia czułość światła czujnika. Wyższa wartość zwiększa czułość światła, prowadzi jednak również do podwyższonych zakłóceń, które mogą negatywnie wpływać na jakość obrazu. Z tego powodu wartość ISO należy ustawić stosownie do warunków nagrywania na możliwie najniższą wartość.
  • Seite 258 Pomiar – Procedura pomiaru światła Za pomocą tej funkcji można określić, w jakim zakresie pomiaru światła należy wykonywać zdjęcia lub nagrania wideo. Ustawienie Znaczenie Wybiera oświetlenie na podstawie Multi wyników pomiarów w wielu miejscach w zakresie nagrania. Światło jest mierzone w całym zakresie nagrania, Centralny jednak wartości zbliżają...
  • Seite 259 Efekt koloru Z efektów fotograficznych można korzystać w trybie nagrywania i odtwarzania, aby nadać nagraniom różne tonacje lub efekty artystyczne. Ustawienie Znaczenie Normalne Brak ustawionego efektu fotograficznego. Żywe Obraz będzie wyświetlany w tonacji jaskrawych kolorów z wyższym kontrastem i wyższym nasyceniem.
  • Seite 260 Rozmiary wideoklipu (Rozdzielczość – wideo) Ustawienie rozmiarów wideoklipu jest dostępne tylko w trybie nagrywania wideo. Ustawienie Liczba Jakość obrazu pikseli 1280 x 720 HDTV (Dostępne tylko dla karty pamięci SDHC klasy 6) 640 x 480 Wysoka jakość 320 x 240 Standardowa 640 x 480 Jakość...
  • Seite 261: Korzystanie Z Menu Nagrywania

    Pre Rec (Wideo) Ustawienie „Pre Rec” umożliwia wykonanie 3 sekundowego nagrania wstępnego. Jeżeli to ustawienie jest aktywne, aparat rozpoczyna nagrywanie na 3 sekundy przed naciśnięciem wyzwalacza. Korzystanie z menu nagrywania Ustawienia dla nagrywania można również wybierać w menu nagrywania. Więcej informacji dotyczącej poruszania się po menu i różnych ustawieniach znaleźć...
  • Seite 262: Wyświetlanie/Słuchanie Nagrań

    Wyświetlanie/słuchanie nagrań Odtwarzanie pojedynczych nagrań Ostatnio wykonane nagrania można odtworzyć po kolei w trybie wyświetlania.  Przesunąć przełącznik wyboru trybu w położenie , aby włączyć tryb odtwarzania. Na wyświetlaczu pojawi się ostatnio wykonane nagranie, w zależności od trybu mogą być wyświetlane następujące wskaźniki: Zdjęcie Wideo Nagranie mowy...
  • Seite 263: Odtwarzanie Nagrań Jako Miniatur

    Odtwarzanie nagrań jako miniatur  Nacisnąć w trybie odtwarzania przycisk powiększenia w kierunku W, aby wyświetlić do dziewięciu małych zdjęć w trybie podglądu.  Za pomocą przycisku kierunku można wybrać żądany plik.  Nacisnąć przycisk , aby wyświetlić nagranie na pełnym ekranie.
  • Seite 264 Tryb kalendarza  Nacisnąć dwukrotnie w trybie odtwarzania przycisk powiększenia w kierunku , aby włączyć tryb kalendarza. Na ekranie pojawi się pierwszy plik (zdjęcie, plik video lub audio) nagrany w danym dniu.  Za pomocą przycisku kierunku można wybrać żądany plik. ...
  • Seite 265: Odtwarzanie Klipów Wideo / Audio / Wiadomości Głosowych

    Odtwarzanie klipów wideo / audio / wiadomości głosowych  Wybrać żądane nagranie.  Nacisnąć przycisk , aby rozpocząć odtwarzanie. W przypadku odtwarzanie wideoklipu nacisnąć przyciski lub , aby rozpocząć szybkie przewijanie do przodu lub do tyłu.  Nacisnąć przycisk powiększenia w kierunku aby zwiększyć...
  • Seite 266 Tworzenie zrzutu ekranu wideoklipu Podczas odtwarzania wideoklipu należy nacisnąć przycisk , aby zatrzymać odtwarzanie. Nacisnąć wyzwalacz, aby zapisać pokazywany obraz jako zrzut ekranu. Na ekranie wyświetli się symbol wyzwalacza Aparat zakończy automatycznie odtwarzanie i przejdzie w tryb nagrywania. WSKAZÓWKA! Ta funkcja jest dostępna tylko wtedy, gdy w pamięci jest wystarczająco dużo wolnej przestrzeni, w przeciwnym wypadku symbol wyzwalacza nie pojawia się.
  • Seite 267: Usuwanie Nagrania

    Usuwanie nagrania Nagrania można usuwać w trybie odtwarzania lub poprzez menu odtwarzania (patrz strona 79). Najszybszym sposobem usunięcia pojedynczego nagrania jest naciśnięcie przycisku w trybie odtwarzania.  Wybrać w trybie odtwarzania nagranie i nacisnąć przycisk  Na wyświetlaczu pojawia się pytanie „Usunąć?”. Za pomocą przycisku wybrać...
  • Seite 268: Menu

    Menu Nawigacja w obrębie menu Aby otworzyć menu odtwarzania, należy przesunąć przełącznik wyboru trybu w położenie  Nacisnąć przycisk , aby otworzyć menu.  Wybrać za pomocą przycisku kierunku ustawienie, które chce się zmienić.  Nacisnąć przycisk , aby otworzyć odpowiednie podmenu. ...
  • Seite 269: Menu Nagrywania

    Menu nagrywania Ustawienie Znaczenie Tryb Tu można wybrać różne tryby nagrywania. Rejestrowanie Tryb napędu Tu można ustawić samowyzwalacz lub wybrać sekwencję zdjęć. 10 s – Zdjęcie zostanie wykonane w 10 sekund po naciśnięciu wyzwalacza. 2 s – Zdjęcie zostanie wykonane w 2 sekundy po naciśnięciu wyzwalacza.
  • Seite 270 Ustawienie Znaczenie Tu można włączyć lub wyłączyć automatyczne naświetlanie. Obszar AF Tu można wybrać zakres automatycznego ogniska (AF). Szeroki – Zostanie ustawiona ostrość dla szerokiego zakresu. Centralny – Zostanie ustawiona ostrość dla średniego zakresu. Ostrość Tu można ustawić żądany poziom ostrości obrazu.
  • Seite 271 Ustawienie Znaczenie Kontrast Tu można wybrać poziom kontrastu. Wysoki – zwiększa kontrast. Normalny – Pozwala uzyskać normalny kontrast. Niski – zmniejsza kontrast. Zoom cyfrowy Tu można wybrać dla niektórych trybów pracy powiększenie cyfrowe. Intelig. Zoom – zoptymalizowany pod kątem powiększania obrazów cyfrowych Standard.
  • Seite 272 Ustawienie Znaczenie Stabilizator Ta funkcja pozwala uniknąć zamazanych zdjęć spowodowanych przez drżenie aparatu.
  • Seite 273: Tryb Nagrywania

    Tryb nagrywania Dla określonych sytuacji nagrywania lub motywów można zastosować ustawione wstępnie tryby nagrywania. W ten sposób można sobie zaoszczędzić ręcznego ustawiania. Po dokonaniu wyboru wybrany tryb (za wyjątkiem nagrań głosowych) zostanie dodany do opcji „Mój tryb” w menu funkcji na czołowej pozycji.
  • Seite 274 Symbol Ustawienie Znaczenie Inteligentna Aparat analizuje warunki nagrywania i scena przełącza się automatycznie na stosowny tryb sceny. Portret Ustawia nieostre tło z ostrym obrazem na środku. Krajobraz Nadaje się do fotografowania oddalonych elementów krajobrazu. Zachód słońca Wzmacnia czerwone odcienie przy fotografowaniu zachodu słońca.
  • Seite 275 Symbol Ustawienie Znaczenie Śnieg Nadaje się do wykonywania zdjęć na plaży i na śniegu. Sport Nadaje się do wykonywania zdjęć przy szybkich ruchach. Przyjęcie Nadaje się do wykonywania zdjęć w pomieszczeniach i na przyjęciach. Świece Pozwala uzyskać efekt ciepłego światła na zdjęciach. Nocny portret Nadaje się...
  • Seite 276 Symbol Ustawienie Znaczenie Budynek Pozwala uzyskać wyraźniejsze kontury fotografowanych przedmiotów. Tekst Zwiększa kontrast pomiędzy czernią a bielą. Liście Ta funkcja wzmacnia nasycenie koloru dla tonów zielonych. Aukcja Optymalizuje obrazy, które mają być odtwarzane na platformach internetowych (aukcje), np. rozdzielczość w trybie VGA. (Patrz strona 98.
  • Seite 277 Symbol Ustawienie Znaczenie Komp. Wstępna Ta funkcja nagrywa obraz jako tymczasową orientację. Wcisnąć do końca wyzwalacz po ustawieniu fotografowanej osoby na punkcie odniesienia. Portret romant. Ta funkcja wykorzystuje opcję rozpoznawania twarzy do automatycznego fotografowania twarzy, umożliwiając w ten sposób wykonywanie zdjęć portretowych bez pomocy osób trzecich.
  • Seite 278 Symbol Ustawienie Znaczenie Autoportret Ta funkcja ustawia powiększenie na szeroki kąt. Gdy zostaje rozpoznana twarz, włącza się automatycznie lampka AF i rozlega się sygnał dźwiękowy. Aparat rozpoczyna 2 sekundowe odliczanie czasu, po czym wykonuje zdjęcie. Ta funkcja zwiększa zakres dynamiki zdjęcia poprzez podwyższone wartości jasności i kontrastu.
  • Seite 279 Wykonywanie zdjęć w trybie „chwytania uśmiechu” Tryb „Wykryw. Uśmiechu” automatycznie robi zdjęcie, gdy rozpozna uśmiech. Tryb „Wykryw. Uśmiechu” uruchamia się w następujący sposób:  Wybrać w trybie nagrywania funkcję  Ustawić ostrość aparatu na wybranym motywie.  Gdy aparat rozpozna uśmiechniętą twarz, rozpocznie wykonywanie zdjęcia.
  • Seite 280: Menu Ustawień

    Menu ustawień Ustawienie Znaczenie Dźwięki Tu można wyłączyć dźwięk startowy lub wybrać do 3 dźwięków, dźwięk sygnału oraz dźwięk przy włączaniu wyzwalacza, jak również ustawić poziom głośności dla wszystkich dźwięków. Oszcz. Oszczędzanie prądu energy. Aby chronić akumulator przed przedwczesnym rozładowaniem, aparat wyłącza się automatycznie po upływie ustawionego czasu.
  • Seite 281 Ustawienie Znaczenie Język Tu można wybrać język menu. (patrz strona 29) Nr pliku Numerowanie plików Tu można ustawić numerowanie plików. Ciągłe: Pliki są kolejno numerowane począwszy od numeru 0001. Resetuje: Resetuje numerację do 0001. Ta funkcja jest przydatna np. po wymianie karty pamięci.
  • Seite 282 Ustawienie Znaczenie Narzędzia dla Tu można zorganizować dane zapisane w pamięci pamięci wewnętrznej. Format: Formatuje aktualną pamięć, czyli kartę pamięci lub pamięć wewnętrzną. Wszystkie nagrania zostają wówczas usunięte. WSKAZÓWKA! Podczas formatowania pamięci wszystkie zapisane w niej dane zostają utracone. Należy się upewnić, że w pamięci lub na karcie SD nie znajdują...
  • Seite 283 Ustawienie Znaczenie Resetuj Tu można przywrócić wartości fabryczne wszystkich ustawień. W tym wypadku należy potwierdzić pytanie słowem "Tak". Następujące ustawienia nie zostaną zresetowane: Data i czas Język Wyjście TV...
  • Seite 284: Menu Odtwarzania

    Menu odtwarzania Ustawienie Znaczenie Pokaz slajdów Ta opcja umożliwia wyświetlanie obrazów (tylko zdjęć) w trybie pokazu slajdów. (patrz strona 84) Usuń Jeżeli skorzysta się z tej funkcji, nie będzie możliwe usunięcie plików zapisanych w pamięci wewnętrznej lub na karcie pamięci (patrz strona 84).
  • Seite 285 Ustawienie Znaczenie Zabezpiecz Ta funkcja zabezpiecza nagrania przed przypadkowym usunięciem. (patrz strona 85) Do wyboru są następujące opcje: Pojedyncze: Pozwala zabezpieczyć przed usunięciem jedno nagranie. Wiele: Pozwala zabezpieczyć przed usunięciem więcej nagrań, które wybiera się spośród wyświetlanych miniatur. Zabl. wszyst: Pozwala zabezpieczyć wszystkie nagrania.
  • Seite 286 Ustawienie Znaczenie Notatka Dla każdego wykonanego zdjęcia można zapisać głosowa wiadomość głosową. (patrz strona 88) Maksymalny czas wiadomości głosowej wynosi 30 sekund. Na wyświetlaczu pokazywany jest pozostały czas. Jeżeli dla wybranego zdjęcia istnieje już wcześniejsza wiadomość głosowa, zostanie ona nadpisana. Tryb kolorów W dostępnych nagraniach zdjęć...
  • Seite 287 Ustawienie Znaczenie Obraz Tu można wybrać obraz startowy, który będzie startowy wyświetlany na ekranie po włączeniu aparatu. Wybrać jedną z następujących opcji: System: Wyświetlony zostanie standardowy obraz dla systemu. Mój obraz: Wyświetlane jest wybrane zdjęcie. Wył.: Nie jest wyświetlane żadne zdjęcie. ...
  • Seite 288 Ustawienie Znaczenie DPOF Skrót DPOF oznacza „Digital Print Order Format“. Tu można określić ustawienia druku, jeżeli chce się wydrukować zdjęcia z zakładu fotograficznego lub drukarki kompatybilnej z DPOF. Za pomocą drukarki kompatybilnej z DPOF można bezpośrednio drukować zdjęcia, bez konieczności ich wcześniejszego przeniesienia na komputer.
  • Seite 289 Ustawienie Znaczenie Rozmaz. Funkcja obrazu nieostrego to efekt, dzięki promieniste któremu środek obrazu jest nieostry. Wybrać poziom nieostrego obrazu za pomocą przycisku Nacisnąć przycisk , aby zapisać zdjęcie. Pokaz slajdów Ta opcja umożliwia wyświetlanie zdjęć w trybie pokazu slajdów.  Wybrać w menu odtwarzania pozycję „Pokaz slajdów”. Otworzy się...
  • Seite 290 Zabezpieczenie/odblokowanie lub usunięcie pojedynczego pliku  Wybrać w podmenu „Usuń” lub „Zabezpiecz” aby wybrać pojedyncze obrazy, które mają być pokazywane na wyświetlaczu.  Wybrać obraz za pomocą przycisku lub .  Zaznaczyć opcję „Zabezpiecz“/“Odblokować“ lub „Usuń“, gdy tylko na ekranie pojawi się żądany plik. ...
  • Seite 291  Wybrać opcję TAK i nacisnąć przycisk , aby zabezpieczyć lub usunąć pliki. Aparat powróci do trybu odtwarzania. Zabezpieczenie/odblokowanie lub usunięcie wszystkich plików  Wybrać w podmenu „Usuń” lub „Zabezpiecz”;. „Zabezpieczyć wszystkie?”/”Odblokować wszystkie?” lub „Usunąć wszystkie?”. Pojawi się komunikat potwierdzający. ...
  • Seite 292 Korekta efektu czerwonych oczu Ta funkcja służy do redukowania efektu czerwonych oczu na zdjęciu. Ta funkcja dostępna jest tylko dla zdjęć. Korekta efektu czerwonych oczu może zostać zastosowana wielokrotnie na jednym zdjęciu, jednak powoduje stopniowe pogorszenie jakości obrazu. Opcję korekty efektu czerwonych oczu uruchamia się w następujący sposób: ...
  • Seite 293 Nagrywanie notatki głosowej  Wybrać w trybie odtwarzania żądane zdjęcie. WSKAZÓWKA! Jeżeli zdjęcie zawiera już notatkę głosową, pojawi się symbol notatki głosowej.  Otworzyć w menu odtwarzania podmenu „Notatka głosowa”. Na wyświetlaczu pojawi się podgląd zdjęcia oraz menu wyboru. i wybrać opcję Start, aby rozpocząć ...
  • Seite 294 Tryb koloru Do dyspozycji są następujące efekty: Symbol Ustawienie Znaczenie Normalne Nie zostaje dodany żaden efekt zdjęcia. Sepia Zdjęcie jest wyświetlane w nostalgicznych odcieniach brązu. Cz.-b. Zdjęcie jest wyświetlane w kolorze czarno białym. Negatyw Zdjęcie jest wyświetlane z odwróconymi wartościami tonów. Mozaika Zdjęcie jest wyświetlane jako mozaika.
  • Seite 295  Efekt zostanie każdorazowo zastosowany na podglądzie zdjęcia i zostanie odpowiednio wyświetlony.  Nacisnąć przycisk , aby zapisać nowy plik. Przycinanie zdjęcia Powiększony obraz Wskaźniki 4 kier. Przycięta wielkość Prz. pozycja zakresu przycięcia Powierzchnia zdjęcia  Wybrać w trybie odtwarzania żądane zdjęcie. ...
  • Seite 296  Po zakończeniu funkcji pojawi się wybór menu. Wybrać jedną z następujących opcji: Zastąp: Nowy plik zostanie zapisany poprzez nadpisanie starego. Zapisz Jako: Nowy plik zostanie zapisany pod inną nazwą, bez zastępowania starego pliku. Anuluj: Funkcja zostanie anulowana.  Nacisnąć przycisk , aby zapisać/anulować...
  • Seite 297 Zmiana wielkości  Wybrać w trybie odtwarzania żądane zdjęcie.  Otworzyć w menu odtwarzania podmenu „Zmień rozmiar”. Na wyświetlaczu pojawia się menu wyboru.  Wybrać jedną z następujących rozdzielczości i nacisnąć : 8M, 5M, 3M lub VGA. przycisk WSKAZÓWKA! Dostępne rozdzielczości mogą się różnić w zależności od rozmiaru oryginalnych zdjęć.
  • Seite 298: Podłączenie Do Tv I Pc

    Podłączenie do TV i PC Wyświetlanie nagrań na odbiorniku TV Nagrania zrealizowane przy pomocy aparatu można odtwarzać na odbiorniku TV.  Wyłączyć aparat i odbiornik TV.  Podłączyć dostarczony kabel TV do gniazda USB w aparacie i do wejścia wideo (żółte) oraz wejścia audio (białe) na telewizorze.
  • Seite 299: Wydruk Nagrań Na Drukarce Do Zdjęć

    Wydruk nagrań na drukarce do zdjęć Technologia PictBridge umożliwia bezpośrednie drukowanie zdjęć na drukarce do zdjęć kompatybilnej ze standardem PictBridge.  Podłączyć aparat do drukarki przy pomocy dostarczonego kabla USB.  Włączyć aparat oraz drukarkę do zdjęć. Aparat rozpozna podłączone urządzenie USB.
  • Seite 300: Przenoszenie Danych Na Komputer

    Przenoszenie danych na komputer Nagrania można przenieść na komputer. Obsługiwane są następujące systemy operacyjne:  Windows XP  Windows Vista  Windows 7 Podłączanie kabla USB  Wyłączyć aparat.  Podłączyć dostarczony kabel USB do włączonego komputera za pomocą złącza USB aparatu i złącza USB na komputerze.
  • Seite 301 W systemach operacyjnych Windows XP, Windows Vista oraz Windows 7 możliwy jest natychmiastowy dostęp do zawartości pamięci aparatu. W pozostałych wersjach systemu Windows należy otworzyć przeglądarkę Windows Explorer lub dwukrotnie kliknąć opcję „Mój komputer” (W systemie Windows Vista: „Komputer”).  Dwukrotnie kliknąć symbol nośnika dla aparatu. ...
  • Seite 302: Standard Zapisu Dcf

    Standard zapisu DCF Nagrania na aparacie wykonywane są zgodnie z tak zwanym standardem DCF (zapisywane, nazywane itp.; DCF = Design Rule for Camera File System). Na aparacie można odtwarzać nagrania zapisane na kartach pamięci innych aparatów DCF. Czytnik kart Jeżeli komputer podłączony jest do czytnika kart, a na karcie pamięci zapisane zostały nagrania, można je skopiować...
  • Seite 303: Struktura Katalogów W Pamięci

    Struktura katalogów w pamięci Aparat zapisuje nagrane obrazy, wideoklipy oraz pliki audio w trzech różnych katalogach w pamięci wewnętrznej lub na karcie pamięci. Poniższe katalogi tworzone są automatycznie: DICAM .: Wszystkie nagrane zdjęcia, pliki wideo oraz audio zapisywane są w tym katalogu. Wyjątkiem są pliki, które nagrane zostały w trybie aukcji lub w trybie jakości dla sieci.
  • Seite 304: Instalacja Oprogramowania

    Nie należy próbować zmieniać katalogów i plików w strukturze katalogów aparatu (np. zmieniać nazwę itp.). Mogłoby to spowodować zniszczenie plików. Instalacja oprogramowania Na dołączonym dysku CD znajduje się program do obróbki zdjęć o nazwie „Media Impression“.  Włożyć do napędu CR ROM komputera dysk CD. ...
  • Seite 305: Pojemność Pamięci

    Pojemność pamięci Pojemność karty pamięci 1 GB 2 GB 14 M 1250 1041 2083 1223 2466 4778 9557 W tabeli podano liczbę zdjęć, które można zapisać z wybraną rozdzielczością (np. 5 M) na karcie pamięci o podanej pojemności (np. 128 MB). Rzeczywista liczba zdjęć, które można zapisać...
  • Seite 306: Wyszukiwanie Usterek

    Wyszukiwanie usterek Jeżeli aparat nie działa sprawnie, należy sprawdzić poniższe punkty. Jeżeli problem utrzymuje się, należy się zwrócić do serwisu firmy MEDION. Aparat nie włącza się. Akumulatory są nieprawidłowo włożone. Akumulatory są wyczerpane. Należy je naładować. Klapa przegródki akumulatora nie została całkowicie zamknięta.
  • Seite 307 Obraz jest nieostry. Aparat został poruszany podczas robienia zdjęcia. Motyw znajduje się poza ustawionym zakresem aparatu. Do ujęć robionych z bliska należy używać trybu makro. Obraz nie jest pokazywany na wyświetlaczu. Do aparatu włożono kartę pamięci SD, na której na innej aparacie nagrano obrazy w trybie niekompatybilnym z DCF.
  • Seite 308 Nagrania nie mogą być przeniesione na komputer przy pomocy kabla USB Aparat nie jest włączona. Przy pierwszym podłączeniu aparatu do komputera nie został znaleziony nowy sprzęt Gniazdo USB komputera zostało wyłączone w systemie BIOS. Ustawić port jako aktywny w systemie BIOS komputera. W tym celu należy się...
  • Seite 309: Konserwacja I Czyszczenie

    Konserwacja i czyszczenie Czyścić obudowę, obiektyw i wyświetlacz w następujący sposób: Do czyszczenia obudowy aparatu należy używać tylko suchej, miękkiej ściereczki. Nie używać żadnego rozcieńczalnika lub środka czyszczącego zawierającego olej. Mogłoby to spowodować uszkodzenie aparatu. Aby oczyścić soczewkę lub wyświetlacz, usuń najpierw kurz szczoteczką...
  • Seite 310: Utylizacja

    Utylizacja Opakowanie Aby uniknąć uszkodzeń podczas transportu aparat cyfrowy zabezpieczony jest opakowaniem. Opakowania są surowcami, które mogą zostać ponownie wykorzystane lub poddane recyklingowi. Urządzenie Po zakończeniu eksploatacji pod żadnym pozorem nie należy wyrzucać urządzenia razem z normalnymi odpadami domowymi. Należy je zutylizować w sposób przyjazny dla środowiska na miejscowym składowisku odpadów.
  • Seite 311: Dane Techniczne

    Dane techniczne Liczba pikseli: 14megapikseli CCD Przysłona: F = 3,3 ~ 5,9 Prędkość migawki: 1/2000 ~ 15 s Odległość ogniska: f = 5,0 mm ~ 25 mm Powiększenie optyczne: 5 krotne Powiększenie cyfrowe: 5 krotne Monitor LCD: Wyświetlacz LCD 6,86 cm / 2,7 calowy Formaty plików: JPEG (EXIF 2.2), DPOF, AVI, WAV Maks.
  • Seite 312: Device Overview

    Device overview Front 1. Flash 2. Display for the delay device / auto-focus light flash: autotimer switched on 3. Camera lens 4. Microphone...
  • Seite 313 Back 5. Display 6. T / W: zoom control; enlarge or reduce the selection 7. M: Menu button: call up the menu 8. Fn/: Function / recycle bin In the Replay mode : Call up the Delete dialogue 9. Operating display; shines green or flashes according to the type of operation...
  • Seite 314 10. 4-way switch with the following functions: SET Confirm the selection In the Recording Face recognition mode on / mode: In the Replay mode: Start/stop replay Replaying pictures: Turn the image by 90° each time In the menu Move up in the Menus/sub- menus DISP In the Recording Fade OSD information on /...
  • Seite 315 In Recording mode: Select the type of flash In the Replay mode: Display the next photo Replaying videos: Switch fast forward on or off In the menu Open a sub-menu or select a setting In Recording mode: Switch on the macro for close photos and videos In Replay mode: Display the previous photo...
  • Seite 316 Base 15. Battery / SD card compartment 16. Tripod socket Page 17. USB connection for the USB cable and the AV cable supplied with the camera 18. Hand loop eye...
  • Seite 317 Table of contents   Device overview ............1   Table of contents ............6   Safety information ............9   Bringing the device into operation ........18   Scope of supply ..............18   Charging the battery in the charging device ......19  ...
  • Seite 318   Making the first recordings ..........37   Setting the Recording mode ............ 37   Tips for good image recordings ..........37   Making photos ................ 38   Making video clips ..............43   Recording audio clips .............. 44   Using the Functions menu ............
  • Seite 319   Connect to a TV and a PC ..........86   Display recordings on a television device ........ 86   Printing photos on a photographic printer ......87   Transferring data to a Computer ..........88   DCF memory standard ............89  ...
  • Seite 320: Safety Information

    Safety information About this introduction Read through the safety information attentively before bringing the device into operation. Pay attention to the warnings on the device and in the Operating Instructions. Always keep the Operating Instructions close to hand. Hand over this introduction and the guarantee card as well under all circumstances, if you sell or pass on the device.
  • Seite 321 CAUTION! Pay attention to the information to avoid injury and material damage! ATTENTION! Pay attention to the information to avoid material damage! INFORMATION! Further information about using the device. INFORMATION! Pay attention to the information in the Operating Instructions! Listing point / Information about events during ...
  • Seite 322: Correct Use

    Correct use  The device is suitable for taking pictures in the digital format.  Do not operate the device in either extreme heat or extreme cold.  The device is not suitable for operation in extreme conditions.  The device is only intended for private use and not for commercial purposes.
  • Seite 323 DANGER! Also keep the packaging film away from children. There is the danger of suffocation. Warnings Please pay attention to the following warnings when using the product, to avoid injury:  Do not trigger the flash too close to the eyes. The eyes of the person photographed could be damaged in this case.
  • Seite 324: Battery Information

     The camera and the power pack must not be subjected to drops of water or spray. Do not place any objects filled with liquid (e.g. vases) on the device either. Battery information You can use your camera with the lithium-ion battery supplied with it.
  • Seite 325  Store the battery in a cool dry place. Direct strong heat can damage the battery. Do not subject the device to any strong sources of heat for this reason.  Avoid contact of the battery with the skin, the eyes and the mucous membranes.
  • Seite 326: Precautionary Measures

    Precautionary measures Please pay attention to the following precautionary measures, to avoid damage to your camera and to always keep it in a perfect state.  Storing it in dry place This camera is not watertight and will not function perfectly for this reason if it has been submerged in water or if liquids have reached the inside of the camera.
  • Seite 327  Avoid strong oscillations in the temperature. Condensation, which can lead to malfunctions and damage to the device, can form in and on the device, if you take it from a cold environment to warm environment or in the opposite direction quickly.
  • Seite 328 Do not attempt to open or repair the device yourself under any circumstances. There will be the danger of an electric shock! Contact the Medion Service Center or a different suitable specialist workshop in the case of a fault, to avoid danger.
  • Seite 329: Bringing The Device Into Operation

    Bringing the device into operation Scope of supply Please check the completeness of the supply and inform us within 14 days after the purchase, if the supply is not complete. You will have received the following with the product purchased by you: ...
  • Seite 330: Charging The Battery In The Charging Device

    Charging the battery in the charging device You can only charge the lithium-ion battery supplied with the device in the battery charging device supplied with the camera.  ATTENTION! Never attempt to recharge normal batteries. There will be the danger of explosion. ...
  • Seite 331  Connect the mains cable supplied with the device to the charging device and to a 230 V ~ 50 Hz socket. The charging light will shine orange.  The charging time is approx. two hours. The charging light will shine red during the charging process.
  • Seite 332: Inserting The Battery

    Inserting the battery The lithium-ion battery supplied with the device is needed to operate the camera.  Switch the camera off, if necessary.  Push the closer of the battery compartment in the direction of the arrow. The battery compartment will open. ...
  • Seite 333: Inserting And Removing Sd Cards

    ATTENTION! The battery performance is reduced in a cold environment (- 10°C or colder). Warm the battery (in your pocket, for example) before using it in a cold environment. Inserting and removing SD cards The photos will be stored on the internal memory if no card has been inserted.
  • Seite 334 Inserting the card  Switch the camera off.  Push the cover of the battery compartment outwards as shown above, to open the compartment.  Push the card into the card slot with the contacts below.  Close the battery compartment and push the closer back to its starting position.
  • Seite 335: Attaching The Carrying Loop

    Attaching the carrying loop Attach the carrying loop for better handling of the camera and for safety reasons. Take the loop through the eye as shown in the illustration.  Pull the other end of the carrying loop through the thin cord and pull the carrying loop tight.
  • Seite 336: First Steps

    First steps Switching on the camera Press the POWER button for 1 to 2 seconds to switch on the camera. The lens will protrude, the operating display will shine green and the display will switch on. The camera will be in the recording mode.
  • Seite 337: Switching Off The Camera

    Switching off the camera  Hold the ON / OFF button pressed down somewhat longer to switch off the camera. Energy-saving function The camera will switch off if it has not been used for 60 seconds. You can also set the automatic switching-off period to 3 or 5 minutes;...
  • Seite 338: Setting The Language And The Date / Time

    Setting the language and the date / time You should set the menu language required and the current date and time before using the camera for the first time. Both settings are made in the settings menu  Press the M button when the camera is switched on, to open the menus.
  • Seite 339 Setting the date and the time Date & Time  Select the entry in the settings menu with the direction keys and press SET. The settings menu will open. You will also be able to set the date format, as well as the date and the time.
  • Seite 340: Recording And Replay Modes

     Press SET at the end, to confirm the values set. The date and the time can only be displayed by the camera in the Replay mode. This information will not be printed. The Time setting will remain stored by the internal battery. However, it will be lost if the battery is removed from the camera for more than 48 hours.
  • Seite 341: Display Symbols

    Display symbols Display symbols for recording The following display symbols are possible in the Recording mode You will be able to set Flash setting different types of Automatic release / recording (Fn button); image sequence the current type of Zoom setting recording will be shown Residual (in the case of here.
  • Seite 342 Battery status 15. Focus range Storage location 16. Shows the shutter speed (internal memory or 17. Aperture setting card) 18. Warning information: Date stamp danger of vibration Automatic lighting 19. Macro setting switched on 20. Lighting setting 10. Image stabilizer 21.
  • Seite 343: Display Symbols For Replay

    Display symbols for replay The following display symbols are possible in the Replay mode: Display of the mode Storage location (Recording or Replay) (internal memory or The image is protected card) Sound recording Recording information Key allocation DPOF activated Current recording / total 10.
  • Seite 344: Display Symbols For Video Replay

    Display symbols for video replay The following display symbols are possible in the Replay mode for video clips: Shows the Storage location mode(Recording or (internal memory or Replay) card) The image is protected Recording information Video recording Resolution Replay management 10.
  • Seite 345: Display Symbols For Sound Replay

    Display symbols for sound replay The following display symbols are possible in the Replay mode for sound recordings: Shows the mode Recording information (Recording or Replay) (Date and Time) The image is protected Volume setting Recording management Audio length Current recording / total 10.
  • Seite 346: Switching The Display Symbols On And Off

    Switching the display symbols on and off You can switch the display symbols on and off, and change them, by pressing the DISP button repeatedly. In the Recording mode With the most important With all symbols symbols Without symbols With image division lines for the easier division of the image Press the DISP button twice in succession in the respective mode, to have the button placing displayed.
  • Seite 347 In the Replay mode Without symbols With all symbols With the most important symbols Help about the key functions in the Replay mode will appear after the DISP key has been pressed for the last time. The display symbols cannot be changed: ...
  • Seite 348: Making The First Recordings

    Making the first recordings Setting the Recording mode The Recording mode is automatically active if the camera is switched on. Auto, for the Automatic Recording mode, will appear at upper left in the display in the basic status. You will find more about the Recording modes and the symbols on Page 63.
  • Seite 349: Making Photos

    Making photos  Press the release button down slightly initially, when you see the image on the display. The green image outline marks will appear red and the operating display will flash if the auto-focus cannot focus. The values for the shutter speed, the screen and the ISO value will appear, if an ISO value has been set.
  • Seite 350 Using the image stabilizer The stabilizer enables better recordings in poor light conditions. Blurred images or too dark images are avoided by faster shutter times.  Press the M key. The Menu will open.  Select the Stabilizer function and open it by pressing the Flash key.
  • Seite 351 The flash will only work in the Individual release and Automatic release mode. It cannot be used in the case of image sequences or for video recordings. The consumption of the battery will be increased by the use of the flash.
  • Seite 352 Zoom – enlarge or reduce The camera has an optical and a digital zoom. The optical zoom will be reached by setting the lens appropriately; the digital zoom will be activated through the Settings menu.  Press the W – T key. The bar depicting the Zoom setting will appear.
  • Seite 353 Setting the Focus mode You can define the type of focus with this function, if you are taking a photo or making a video.  Press the Macro button repeatedly, until the symbol of the required Focus mode is displayed below left in the LCD. Your camera offers four different Focus modes: Normal The focussing range begins at 40 cm.
  • Seite 354: Making Video Clips

    Making video clips  Push the Mode Selection switch to  Press the release button to start the recording. The recording bar will appear in the display.  You will be able to change the subject area with the T – W zoom controls.
  • Seite 355: Recording Audio Clips

    Recording audio clips The microphone is located on the front of the camera, to the left below the lens. Make sure that you do not touch the microphone during a recording.  Select the speech recording entry under the Recording mode setting in the Recording menu.
  • Seite 356: Using The Functions Menu

    Using the Functions menu The Functions menu enables the significant settings for a recording to be made quickly. The available functions for setting the camera will be displayed in the Menu strip on the left. The possible settings of the respective function will be displayed on the lower bar.
  • Seite 357 My mode The six Recording modes used most recently will be listed here. Each Recording mode has different setting options. The setting options will change accordingly if you change the Recording mode with the button or the button. Resolution - photos The resolution determines the quality of the image significantly.
  • Seite 358 Quality (compression) You will determine the compression of the data recorded with the quality. The higher the quality the more memory space the recordings will need. Setting Meaning Super-fine Highest quality. Fine Medium quality. Normal Normal quality. Light correction (EV) You can adjust images that would be too light or too dark without a setting by correcting the light value (EV = Exposure Value).
  • Seite 359 White balance The white balance is able to correct certain light conditions. Setting Meaning The white balance will be adjusted Auto automatically. Suitable for shooting in light Daylight daylight. Suitable for shooting in the case of Cloudy a cloudy sky, twilight or shadow. Suitable for shooting in the light of Tungsten a light bulb.
  • Seite 360 The left image will show the previous white balance, the central one will show the currently selected white balance and the right image will show the next possible white balance. ISO (Sensitivity to light) This setting changes the sensitivity to light according to the lightness of the image.
  • Seite 361 Measurement – Light measuring process You can determine the area in which the light measurement for shooting a photo or a video should take place with this function. Setting Meaning Selects lighting on the basis of the Multi measured results of several points in the shooting area.
  • Seite 362 Colour effect You can use the photo effects to give shots different tones or artistic effects in the Recording and Replay Modes. Setting Meaning Normal No effect set. Vivid The image will be represented with higher contrast and higher saturation to emphasize the bright colours.
  • Seite 363 Video size (resolution - videos) The Video Size setting is only available for recording video clips. Setting Size in pixels Image quality 1280 x 720 HDTV (only possible with SDHC cards from Class 6) 640 x 480 High quality 320 x 240 Normal 640 x 480 Web quality...
  • Seite 364: Using The Recording Menu

    Using the Recording menu You can also select the settings for the recording through the Recording menu. You can take more precise information about navigation in the menus and the different settings from the chapter on Page 61.
  • Seite 365: Seeing / Hearing Recordings

    Seeing / hearing recordings Replaying recordings individually You can replay the recordings made most recently after each other in the Display mode.  Push the Mode Selection switch to , to activate the Replay mode. The most recently made photo or recording will appear on the display;...
  • Seite 366: Representing Photos As Miniatures

    Representing photos as miniatures  Press the Zoom button W in the Replay mode, in order to display up the nine small preview images.  You can select a required file with the buttons or the direction buttons.  Press the SET button to display the photo as an entire image. ...
  • Seite 367  Press the SET key to display the recording as an entire image.  Press the Zoom key in the in the T direction, in order to leave the Calendar mode. Zooming in photos You will be able to see individual subject areas in the case of photos.
  • Seite 368: Replaying Video / Audio Clips / Speech Notes

    Replaying video / audio clips / speech notes  Select the required recording.  Press the SET button, to start the replay. Press the button or the button during the replay of video clips, to start fast forward or a fast rewind. ...
  • Seite 369 Making a screenshot of a video clip Press the button during the replay of a videoclip to stop the replay.  Press the release button to store the image shown as a screenshot. The release symbol will appear on the display. ...
  • Seite 370: Deleting Recordings

    Deleting recordings You can delete recordings in the Replay mode or by means of the Replay menu (see Page 74). You will delete an individual recording most quickly with the button, in the Replay mode.  Select the photo or recording in Replay mode and press the button.
  • Seite 371: The Menus

    The Menus Navigating within the Menus Push the Mode Selection button to if you wish to open the Replay menu.  Press the button to open the Menus.  Select the required Menu, recording / replay or setting with the button or the button.
  • Seite 372 The Recording menu Setting Meaning Scene Mode You can select the different Recording modes here. Drive Mode You can set the release button or select the image sequence here. 10 sec. – The image will be taken 10 seconds after pressing the release button. 2 sec.
  • Seite 373 Setting Meaning AF Area You can select the auto-focus (AF) range here. Wide – A wide area will be set sharply. Center – The centre will be set sharply. Sharpness You can have the details of an image appear sharper or softer here. High –...
  • Seite 374 Setting Meaning Digital zoom You can select the digital zoom for some types of operation here. Intelligent Zoom – Enlarges the image digitally and optimizes it. Standard Zoom – Enlarges all image sizes up to 12 times, but it leads to deterioration in the image quality.
  • Seite 375: Recording Mode

    Recording mode You can use the pre-set Recording mode for certain recording situations or subjects. You will save yourself the manual setting through this. The selected mode will be added at the first position in the Functions menu in the case of ‘My Mode’ (with the exception of the Speech Recording mode).
  • Seite 376 Symbol Setting Meaning Intelligent Scene The camera will analyse the recording conditions and will change to the appropriate Intelligent Scene mode automatically. Portrait Sets the background as less sharp and focuses on the centre. Landscape Suitable for wide landscape details. Sunset Reinforces the red colour tones to record sunsets.
  • Seite 377 Symbol Setting Meaning Snow Suitable for beach and snow shots. Sports Suitable for creating images with fast movements. Party Suitable for internal shots and parties. Candlelight Creates shots in a warm light. Night Portrait Suitable for portrait shots with a dark background.
  • Seite 378 Symbol Setting Meaning Building Emphasizes the surround (contour) of the object photographed more strongly. Text Reinforces the black-white contrast Foliage This function increases the colour saturation of green tones. Auction Optimizes the images for reproduction on Internet platforms (auctions), e. g. resolution in VGA The images will be stored in the ‘_AUCT’...
  • Seite 379 Symbol Setting Meaning Blink Detection The camera will perceive whether the eyes of your subject were close during the shot and will give the choice whether the images should be stored. Pre-Composition This function will take an image as a temporary orientation.
  • Seite 380 Symbol Setting Meaning Self Portrait This function sets the zoom to wide angle. The AF will be activated automatically and a signal will sound if a face has been recognised. The camera will start a 2-second countdown and then take the picture.
  • Seite 381 Symbol Setting Meaning Voice REC Record an audio clip. Using the ‘Smile Capture’ mode Capture’ mode will take photos automatically as soon as ‘Smile it perceives a smile. Capture’ mode in this way: You will activate the ‘Smile  Select the function in the Recording mode.
  • Seite 382: The Settings Menu

    The Settings menu Setting Meaning Sounds You can switch off the starting sound, select between 3 tones, switch off the signal sound and the tone at release and set the volume for all sounds here. Power Save Save electricity The camera will switch off automatically after the selected time, to save battery charge.
  • Seite 383 Setting Meaning Language You can select the language of the Menus here. (See Page 27) File Numbering File numbering You can set the numbering of the files here. Series: The file will be numbered consecutively from 0001. Reset: Sets the numbering back to 0001. For example, this function makes sense after a change of the memory card.
  • Seite 384 Setting Meaning Memory Kit You can organize the data on the internal memory here. Format: Formats the current memory, i.e. the memory card or the internal memory. All recordings will be deleted during this. INFORMATION! All the data stored on the memory will be deleted if you format it.
  • Seite 385: The Replay Menu

    The Replay menu Setting Meaning Slide Show You will only be able to have the images taken (only photos) run as a slide show.(See Page 78) Delete You will be able to delete files on the internal memory or on the memory card no longer needed with this function (see Page 78).
  • Seite 386 Setting Meaning Red-eye You can correct images that have not been Correction taken with pre-flash here (See Page 80). You will be able to store the corrected file under a new name or to overwrite the original file. Voice Memo You can store a speech note for each photo taken.
  • Seite 387 Setting Meaning Resize You will be able to lower the resolution of photos and to reduce the size of the file by this (see Page 85). You will be able to store the corrected file under a new name or to overwrite the original file. The resolution of photos in VGA cannot be changed.
  • Seite 388 Setting Meaning DPOF DPOF stands for ‘Digital Print Order Format’. You can determine printer settings for images here, if you want to have images output by a Fotostudio or DPOF-compatible printer. You will be able to print the images directly with a DPOF-compatible printer, without transferring them to the computer beforehand.
  • Seite 389 Showing a slide show You can let the photos and video clips (the starting image) as a slide show.  Select the Slide show entry in the Replay menu. The "Slide Show" menu will open. The following settings will be available: ...
  • Seite 390  You will protect / unlock or delete the file and will return to the Replay mode by pressing the SET button. Protect / unlock or delete several files Mulit  Select in the sub-menu; the images will be shown in the miniature view on the display.
  • Seite 391 INFORMATION! You will only be able to delete the files present on the memory card if one has been inserted. You will not be able to delete the files present on the memory card if it has been blocked. A deleted file cannot be recreated. Proceed carefully when deleting files for this reason.
  • Seite 392 Recording a speech note  Select the required photo in the Replay mode. INFORMATION! The speech note symbol will appear if the photo already has a speech note. Voice Memo  Open the sub-menu in the Replay menu. The image preview and a selection menu will appear on the display.
  • Seite 393 Colour Mode The following effects are available: Symbol Setting Meaning Normal No photographic effect will be added. Sepia The image will be represented in nostalgic brown shades. B & W The image will be represented in black and white. Negative The image will be represented in reversed shade values.
  • Seite 394  Select the required effect with the button or the button. The respective effect will be used on the image preview and shown accordingly.  Press the SET button to store the new file. Adjusting photos to size Enlarged Image Direction pointer Precisely adjusted size The approximate position of...
  • Seite 395  You will be able to enlarge the image further with the zoom control in the T direction or reduce it in size again if it is in the W direction.  A selection menu will appear after the end of the function. Select between: Overwrite: The new file will be stored by overwriting the old file.
  • Seite 396 Changing the size  Select the required photo in the Replay menu. Resize  Open the sub-menu in the Replay menu. The selection menu will appear on the display.  Select one of the following resolutions and press the SET button: 8M, 5M, or VGA.
  • Seite 397: Connect To A Tv And A Pc

    Connect to a TV and a PC Display recordings on a television device You can replay the photos or video clips on a television device.  Switch the camera and the television device off.  Connect the TV cable supplied with the camera to the USB connection of the camera and the video output (yellow) and audio output (white) of...
  • Seite 398: Printing Photos On A Photographic Printer

    Printing photos on a photographic printer You will be able to print your photos directly on a PictBridge- compatible photographic printer, by means of PictBridge.  Connect the printer to the camera with the USB cable supplied with the device. ...
  • Seite 399: Transferring Data To A Computer

    Transferring data to a Computer You will be able to transfer the recordings to a computer. Operating systems supported:  Windows XP  Windows Vista  Windows 7 Using the USB cable  Switch the camera off.  Connect the USB cable supplied with the camera to the USB connection of the camera and a USB connection on the PC, when the...
  • Seite 400: Dcf Memory Standard

    Open Windows Explorer or double-click on ‘Workplace’ (under Vista: ‘Computer’) under different versions of Windows.  Double-click on the media symbol for the camera.  Navigate to the ‘DCIM’ directory and to the directory contained in it, if necessary, to display the files *.jpg = Photos; *.avi = sound recordings;...
  • Seite 401: Card Drive

    Card drive You will, of course, be able copy recordings to the PC through a card drive or a card-reading device connected to your PC, if your PC has this facility and you have stored the recordings on the memory card. The card reader will also be recognized as a removeable data medium in the Windows workplace (or in ‘Computer’...
  • Seite 402: Directory Structure In The Memory

    Directory structure in the memory The camera will store the recorded images, videos and audio files in three different directories on the internal memory or the memory card. The following directories will be created automatically: DICAM.: All the recorded images, videos and audio files will be stored in this directory.
  • Seite 403: Installing Software

     Set back the file number in the ‘Settings’ menu ‘File Numbering’ entry. The file numbering will begin again at 0001 in the DSCI1000 directory. Do not attempt to change (rename, etc.) the directories and files in the directory structure of the camera. You can destroy the files through this.
  • Seite 404: Storage Capacity

    Storage capacity Size of the memory card 1 GB 2 GB 14 M 1250 1041 2083 1223 2466 4778 9557 The Table gives the number of images that you can store on a memory card with the given size (e.g. 128 MB) at a selected resolution (e.
  • Seite 405: Troubleshooting

    Troubleshooting Check the following points if the camera does not function perfectly. Please contact the MEDION Service if the problem continues to exist. The camera cannot be switched on. The battery is inserted incorrectly. The battery is empty. Recharge it.
  • Seite 406 The picture is blurred. The camera was moved while the picture was being taken. The subject was located outside the setting range of the camera. Use the Macro mode for close photos if necessary. The picture is not shown on the display. An SD card that has recorded pictures in a non-DCF mode on a different camera has been inserted.
  • Seite 407 The photos cannot be transferred to the PC through the USB cable. The camera is not switched on. No hardware was found at the first connection of the camera to the PC The USB connection of the PC is deactivated in the BIOS. Activate the respective port in the BIOS of the PCs.
  • Seite 408: Maintenance And Care

    Maintenance and care Clean the casing, the lens and the display as follows: Clean the camera casing with a soft, dry cloth. Do not use any thinning agents or cleaning substances that contain oil. The camera can be damaged by them. Remove dust first with a lens brush to clean the lens or the display.
  • Seite 409: Disposal

    Disposal Packaging Your digital camera is in packaging to protect it against damage in transport. Packaging consists of raw materials and can be reused or supplied to the recycling circuit. Device Do not throw the device into the normal household waste after the end of its useful life under any circumstances.
  • Seite 410: Technical Data

    Technical Data Pixels: 14 Mega CCD pixels Aperture: F = 3.3 ~ 5.9 Shutter speed: 1 / 2000 ~15 sec. Focussing range: f = 5.0 mm ~ 25 mm Optical zoom: 5 times Digital zoom: 5 times LCD monitor: 6,86 cm / 2.7 " LC - Display File format: JPEG (EXIF 2.2), DPOF, AVI, WAV Max.
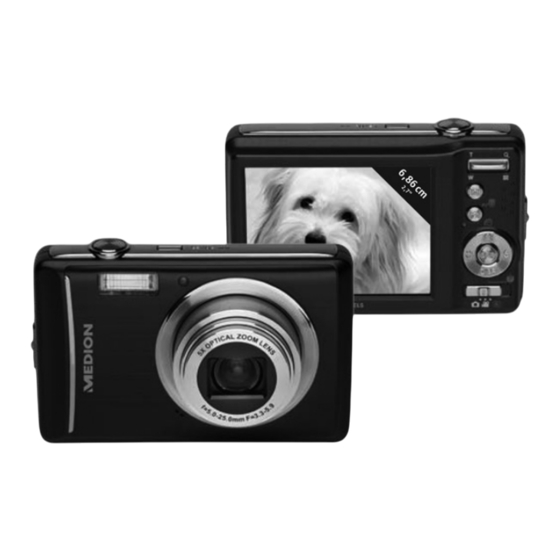
  • Seite 412: Geräteübersicht

    Geräteübersicht Vorderseite 1. Blitz 2. Anzeige für Selbstauslöser/Lampe blinkt: Selbstauslöser eingeschaltet 3. Kameralinse mit Objektivtubus 4. Mikrofon...
  • Seite 413 Rückseite 5. LC-Display : Zoomtasten; Auswahl vergrößern oder verkleinern : Menütaste: das Menü aufrufen : Funktion/Papierkorb Im Wiedergabemodus: Löschen-Dialog aufrufen 9. Betriebsanzeige, leuchtet oder blinkt je nach Betriebsart grün...
  • Seite 414 10. 4-Wege-Schalter mit den nachstehenden Funktionen: Auswahl bestätigen Im Aufnahmemodus: Gesichtsverfolgung an / Wiedergabe starten / Wiedergabemodus: unterbrechen Im Foto Bild um jeweils 90° drehen Wiedergabemodus Im Menü In den Menüs/Untermenüs nach oben gehen DISP Im Aufnahmemodus OSD Informationen Ein- / Ausblenden, DISPLAY Legende OSD Informationen Ein- /...
  • Seite 415 Im Aufnahmemodus: Blitzart wählen nächste Aufnahme anzeigen Wiedergabemodus: Wiedergabe von Schnellen Vorlauf ein- oder Videos: ausschalten Im Menü Untermenü öffnen oder Einstellung auswählen Im Aufnahmemodus: Für Nahaufnahmen Makro zuschalten vorherige Aufnahme Wiedergabemodus: anzeigen Wiedergabe von Schnellen Rücklauf ein- oder Videos: ausschalten Im Menü...
  • Seite 416 Oberseite 12. Auslöser kurz Drücken: Fokusbereich festlegen 13. Kamera ein- oder ausschalten 14. Lautsprecher Unterseite 15. Akku- / SD- Kartenfachabdeckung 16. Stativhalterung...
  • Seite 417 Seite 17. USB Anschluss 18. Öse für die Trageschlaufe...
  • Seite 418 Inhaltsverzeichnis Geräteübersicht ............. 1 Inhaltsverzeichnis ............7 Sicherheitshinweise ............10 Inbetriebnahme ............19   Lieferumfang ................19   Akku im Ladegerät aufladen ............. 20   Akku einsetzen ................. 22   SD-Karten einsetzen und herausnehmen ......... 23 Erste Schritte .............. 26  ...
  • Seite 419 Erste Aufnahmen machen ..........38   Aufnahmemodus einstellen ............. 38   Tipps für gute Bildaufnahmen ..........38   Foto erstellen ................39   Videoclips aufnehmen ............. 44   Audioclips aufnehmen ............. 46   Funktionsmenü verwenden ............. 47   Aufnahmemenü verwenden ............ 55 Aufnahmen ansehen/hören ..........
  • Seite 420 Anschluss an TV und PC ..........91   Aufnahmen auf einem Fernsehgerät anzeigen ......91   Aufnahmen auf einem Fotodrucker ausdrucken ....... 92   Kamera an einen Computer anschließen ........93   DCF-Speicherstandard ............. 95   Kartenlaufwerk................. 95   Ordnerstruktur im Speicher ............. 96  ...
  • Seite 421: Sicherheitshinweise

    Sicherheitshinweise Zu dieser Anleitung Lesen Sie vor Inbetriebnahme die Sicherheitshinweise aufmerksam durch. Beachten Sie die Warnungen auf dem Gerät und in der Bedienungsanleitung. Bewahren Sie die Bedienungsanleitung immer in Reichweite auf. Wenn Sie das Gerät verkaufen oder weiter geben, händigen Sie unbedingt auch diese Anleitung und die Garantiekarte aus.
  • Seite 422 VORSICHT! Hinweise beachten, um Verletzungen und Sachschäden zu vermeiden! ACHTUNG! Hinweise beachten, um Sachschäden zu vermeiden! HINWEIS! Weiterführende Information für den Gebrauch des Geräts. HINWEIS! Hinweise in der Bedienungsanleitung beachten! Aufzählungspunkt / Information über Ereignisse  während der Bedienung Auszuführende Handlungsanweisung ...
  • Seite 423: Bestimmungsgemäßer Gebrauch

    Bestimmungsgemäßer Gebrauch  Das Gerät ist für Aufnahmen von Bildern im Digitalformat geeignet.  Betreiben Sie das Gerät weder bei extremer Hitze oder Kälte.  Das Gerät ist nicht für den Betrieb bei extremen Bedingungen geeignet.  Das Gerät ist nur für den privaten Gebrauch bestimmt und nicht zur gewerblichen Nutzung geeignet.
  • Seite 424 GEFAHR! Halten Sie auch die Verpackungsfolien von Kindern fern. Es besteht Erstickungsgefahr! Warnungen Um Verletzungen zu vermeiden, beachten Sie bitte beim Gebrauch des Produkts die folgenden Warnungen:  Lösen Sie den Blitz nicht in zu kurzem Abstand von den Augen aus.
  • Seite 425  Wenn Sie die Kamera über einen längeren Zeitraum hinweg nicht benutzen, nehmen Sie den Akku heraus, um ein Auslaufen zu verhindern.  Die Kamera und das Netzteil dürfen weder Tropf- noch Spritzwasser ausgesetzt werden. Stellen Sie auch keine mit Flüssigkeit gefüllten Gegenstände (z.
  • Seite 426  Prüfen Sie vor dem Einlegen des Akkus, ob die Kontakte im Gerät und am Akku sauber sind, und reinigen Sie sie gegebenenfalls.  Legen Sie grundsätzlich nur den mitgelieferten Akku ein.  Achten Sie beim Einlegen des Akkus auf die Polarität (+/–). ...
  • Seite 427: Vorsichtsmaßnahmen

    Vorsichtsmaßnahmen Beachten Sie bitte die folgenden Vorsichtsmaßnahmen, um Schäden an Ihrer Kamera zu vermeiden und sie stets in einwandfreiem Zustand zu halten:  Trocken lagern Diese Kamera ist nicht wasserdicht und funktioniert daher nicht einwandfrei, wenn sie ins Wasser getaucht wird oder wenn Flüssigkeiten in das Innere der Kamera gelangen.
  • Seite 428  Starke Temperaturschwankungen vermeiden Wenn Sie das Gerät schnell aus einer kalten Umgebung in eine warme Umgebung oder umgekehrt bringen, kann sich im und am Gerät Kondenswasser bilden, das zu Funktionsstörungen und Schäden am Gerät führen kann. Warten Sie mit der Inbetriebnahme, bis sich die Temperatur des Gerätes an die Umgebungstemperatur angeglichen hat.
  • Seite 429: Niemals Selbst Reparieren

    WARNUNG! Versuchen Sie auf keinen Fall, das Gerät selbst zu öffnen oder zu reparieren. Es besteht die Gefahr des elektrischen Schlags! Wenden Sie sich im Störungsfall an das Medion Service Center oder eine andere geeignete Fachwerkstatt, um Gefährdungen zu vermeiden.
  • Seite 430: Inbetriebnahme

    Inbetriebnahme Lieferumfang Bitte überprüfen Sie die Vollständigkeit der Lieferung und benachrichtigen Sie uns innerhalb von 14 Tagen nach dem Kauf, falls die Lieferung nicht komplett ist. Mit dem von Ihnen erworbenen Produkt haben Sie erhalten:   Kamera Tasche  ...
  • Seite 431: Akku Im Ladegerät Aufladen

    Akku im Ladegerät aufladen Im mitgelieferten Akkuladegerät können Sie nur den mitgelieferten Lithium-Ionen-Akku aufladen.  ACHTUNG! Versuchen Sie niemals, normale Batterien wieder aufzuladen. Es besteht Explosionsgefahr!  Verwenden Sie nur das mitgelieferte Ladegerät zum Aufladen des Akkus.  Bedecken Sie das Ladegerät nicht mit Gegenständen (Zeitschriften, Tischdecken, Vorhänge usw.), um einen Wärmestau zu verhindern.
  • Seite 432  Schieben Sie den Akku gegen den Widerstand der Feder- kontakte nach vorn. Achten Sie darauf, dass der Akku unter der Führung liegt.  Drücken Sie nun den Akku nach unten. Der Akku muss den Boden der Ladeschale berühren.  Schließen Sie das mitgelieferte Netzkabel an das Ladegerät und an eine Steckdose 230 V ~ 50 Hz an.
  • Seite 433: Akku Einsetzen

    Akku einsetzen Zum Betrieb der Kamera wird der mitgelieferte Lithium-Ionen-Akku benötigt.  Schalten Sie ggf. die Kamera aus.  Schieben Sie den Schließer des Akkufachs in Pfeilrichtung auf. Das Akkufach öffnet sich.  Stecken Sie den Akku so in das Akkufach, dass die Kontakte des Akkus an den Kontakten im Akkufach anliegen.
  • Seite 434: Sd-Karten Einsetzen Und Herausnehmen

     Schließen Sie das Akkufach und schieben Sie den Schließer wieder in seine Ausgangsposition. ACHTUNG! Die Akkuleistung ist in kalten Umgebungen reduziert (-10°C oder kälter). Wärmen Sie den Akku auf (z. B. in der Tasche Ihrer Kleidung), bevor Sie ihn in kalten Umgebungen verwenden.
  • Seite 435 Karte einsetzen  Schalten Sie die Kamera aus.  Schieben Sie die Abdeckung des Akkufachs nach außen, um das Fach zu öffnen.  Stecken Sie die Karte mit den Kontakten unten in den Kartenschacht, bis sie einrastet.  Schließen Sie das Akkufach und schieben Sie den Schieber wieder in seine Ausgangsposition.
  • Seite 436: Handschlaufe Anbringen

     Um die Karte zu entnehmen, drücken Sie die Karte kurz nach unten, um sie zu entriegeln. Die Karte wird ein Stück heraus geschoben und kann entnommen werden. Handschlaufe anbringen Befestigen Sie zur besseren Handhabung der Kamera und aus Sicherheitsgründen die Handschlaufe. Führen Sie die Schlaufe wie in der Abbildung dargestellt durch die Öse.
  • Seite 437: Erste Schritte

    Erste Schritte Kamera einschalten POWER  Drücken Sie die Taste für 1 bis 2 Sekunden, um die Kamera einzuschalten. Das Objektiv fährt heraus, die Betriebsanzeige leuchtet grün und das Display schaltet ein. Die Kamera befindet sich im Aufnahmemodus. HINWEIS! Wenn sich die Kamera nicht einschaltet, überprüfen Sie, ob die Akkus richtig eingelegt und/oder geladen sind.
  • Seite 438: Kamera Ausschalten

    Kamera ausschalten POWER  Halten Sie die Taste etwas länger gedrückt, um die Kamera auszuschalten. Energiesparfunktion Wird die Kamera für 60 Sekunden nicht benutzt, schaltet sich die Kamera aus. Sie können die automatische Ausschaltzeit auch auf 3 oder 5 Minuten stellen; siehe dazu Seite 74. Die Energiesparfunktion ist nicht aktiv: ...
  • Seite 439: Sprache Und Datum/Zeit Einstellen

    Sprache und Datum/Zeit einstellen Bevor Sie die Kamera zum ersten Mal verwenden, sollten Sie die gewünschte Menüsprache, das aktuelle Datum und die aktuelle Zeit einstellen. Beide Einstellungen werden im Menü Einstellungen vorgenommen:  Drücken Sie bei eingeschalteter Kamera die Taste , um die Menüs zu öffnen.
  • Seite 440 Datum und Uhrzeit einstellen  Wählen Sie im Menü Einstellungen mit den Richtungstasten Datum/Zeit oder den Eintrag und drücken Sie . Das Einstellungsmenü öffnet sich. Neben Datum und Uhrzeit können Sie auch das Datumsformat einstellen. Sie haben folgende Möglichkeiten: JJ/MM/TT (Jahr/Monat/Tag), MM/TT/JJ (Monat/Tag/Jahr),...
  • Seite 441: Aufnahme- Und Wiedergabemodus

     Drücken Sie , um die festgelegten Werte zu bestätigen. Datum und Uhrzeit können von der Kamera nur im Wiedergabemodus angezeigt werden. Diese Angaben werden nicht gedruckt. Die Zeiteinstellung bleibt über die interne Batterie gespeichert. Sie geht jedoch verloren, wenn der Akku für mehr als 48 Stunden aus der Kamera entfernt wird.
  • Seite 442: Displayanzeigen

    Displayanzeigen Displayanzeigen für die Aufnahme Im Aufnahmemodus sind folgende Displayanzeigen möglich: 1. Sie können verschiedene 2. Blitzeinstellung Aufnahmearten einstellen 3. Selbstauslöser 4. Zoomeinstellung (Taste ); die aktuelle Aufnahmeart wird hier angezeigt.
  • Seite 443 5. Noch verfügbare 15. Fokusbereich Aufnahmen (bei aktueller 16. Zeigt die Auflösung) Verschlussgeschwindigkeit 6. Akkustatus 17. Blendeneinstellung 7. Speicherort (interner 18. Warnhinweis: Speicher IN oder Karte) Verwacklungsgefahr! 8. Datumsstempel 19. Makroeinstellung 9. Automatische Belichtung 20. Belichtungseinstellung eingeschaltet 21. Gesichtserkennung 10. Bildstabilisator 22.
  • Seite 444: Displayanzeigen Für Die Foto-Wiedergabe

    Displayanzeigen für die Foto-Wiedergabe Im Wiedergabemodus sind folgende Displayanzeigen möglich: 1. Anzeige des Modus 6. Akkustatus (Aufnahme oder 7. Speicherort interner Wiedergabe) Speicher (Kamerasymbol) 2. Das Bild ist geschützt oder Karte 3. Tonaufnahme 8. Aufnahmeinformationen 4. Tastenbelegung 9. DPOF aktiviert 5.
  • Seite 445: Displayanzeigen Für Die Video-Wiedergabe

    Displayanzeigen für die Video-Wiedergabe Im Wiedergabemodus für Videoclips sind folgende Displayanzeigen möglich: 1. Anzeige des Modus 7. Speicherort interner (Aufnahme oder Speicher (Kamerasymbol) Wiedergabe) oder Karte 2. Das Bild ist geschützt 8. Aufnahmeinformationen 3. Videoaufnahme 9. Auflösung 4. Aufnahmesteuerung 10. Lautstärkeeinstellung 5.
  • Seite 446: Displayanzeigen Für Die Ton-Wiedergabe

    Displayanzeigen für die Ton-Wiedergabe Im Wiedergabemodus für Tonaufnahmen sind folgende Displayanzeigen möglich: 1. Anzeige des Modus 6. Speicherort (interner (Aufnahme oder Speicher „IN“ oder Karte) Wiedergabe) 7. Aufnahmeinformationen 2. Das Bild ist geschützt (Datum und Uhrzeit) 3. Aufnahmesteuerung 8. Lautstärkeeinstellung 4.
  • Seite 447: Displayanzeigen Ein- Und Ausschalten

    Displayanzeigen ein- und ausschalten DISP Durch wiederholtes drücken der Taste können Sie die Displayanzeigen ein-, ausschalten und verändern. Im Aufnahmemodus Mit den wichtigsten Anzeigen Mit allen Anzeigen Ohne Anzeigen Mit Bildeinteilungslinien zum leichteren Einteilen des Bildes DISP Nach dem letzten Drücken der Taste erscheint eine Hilfe zu den Tastenfunktionen im Aufnahmemodus.
  • Seite 448 Im Wiedergabemodus Ohne Anzeigen Mit allen Anzeigen Mit den wichtigsten Anzeigen DISP Nach dem letzten Drücken der Taste erscheint eine Hilfe zu den Tastenfunktionen im Wiedergabemodus. Die Displayanzeigen können nicht geändert werden:  während der Aufnahme und Wiedergabe von Audio- und Videoclips;...
  • Seite 449: Erste Aufnahmen Machen

    Erste Aufnahmen machen Aufnahmemodus einstellen Wenn die Kamera eingeschaltet wird, ist automatisch der Aufnahmemodus aktiv. Im Grundzustand erscheint links oben im Auto Display , für den Aufnahmemodus Automatisch. Mehr zu den Aufnahmemodi und den Symbolen erfahren Sie auf Seite 66. Ist nicht der Aufnahme-, sondern der Wiedergabemodus aktiv, schieben Sie den Regler in den gewünschten Aufnahmemodus.
  • Seite 450: Foto Erstellen

     Um gute Videoclips zu erstellen, schwenken Sie die Kamera langsam. Wenn Sie zu schnell schwenken, werden Videoaufnahmen unscharf und verschwommen. Foto erstellen  Wenn Sie das Bild auf dem Display sehen können, drücken Sie den Auslöser zunächst ein wenig nach unten. Die gelben Bildausschnittszeichen erscheinen rot und die Betriebsanzeige blinkt, wenn der Autofokus nicht fokussieren kann.
  • Seite 451 Über das Funktionsmenü können Sie verschiedene Einstellungen zur Aufnahme vornehmen, siehe Seite 47. HINWEIS! Aktivieren sie den Makromodus durch Druck auf die – Taste, um Nahaufnahmen zu erstellen. Stabilisator verwenden Der Stabilisator ermöglicht bessere Aufnahmen bei schlechten Lichtbedingungen. Durch schnellere Verschlusszeiten werden verwackelte oder zu dunkle Bilder vermieden.
  • Seite 452 Blitz verwenden Wenn das Licht für das Foto nicht ausreicht, kann der integrierte Blitz für das erforderliche zusätzliche Licht sorgen. Durch wiederholtes Drücken der Blitz-Taste wählen Sie folgende Blitzeinstellungen: AUTO: Der Blitz wird automatisch aktiviert, wenn die Aufnahmebedingungen eine zusätzliche Beleuchtung erfordern.
  • Seite 453 Zoom – vergrößern oder verkleinern Die Kamera verfügt über einen optischen und einen digitalen Zoom. Der optische Zoom wird durch Einstellung der Linse erreicht, der digitale Zoom wird durch das Einstellungsmenü aktiviert.  Drücken Sie die Taste – . Es erscheint der Balken der die Zoom-Einstellung wiedergibt.
  • Seite 454 Fokusmodus einstellen Mit dieser Funktion können Sie den Fokustyp definieren, wenn Sie ein Foto oder ein Video aufnehmen.  Drücken Sie die Makro-Taste wiederholt, bis das Symbol des gewünschten Fokusmodus links unten im LCD angezeigt wird. Ihre Kamera bietet vier verschiedene Fokusmodi: Normal Bei normalem Fokus beginnt der Fokusbereich bei 40 cm.
  • Seite 455: Videoclips Aufnehmen

    Videoclips aufnehmen  Schieben Sie den Moduswahlschalter auf die Position  Drücken Sie den Auslöser, um die Aufnahme zu starten. Im Display erscheint die Aufnahmezeit. T – W  Mit der Zoom-Taste können Sie den Bildausschnitt verändern.  Drücken Sie die Taste , wenn Sie die Aufnahme anhalten wollen.
  • Seite 456 HINWEISE! Das digitale Zoom ist für die Aufnahme von Videoclips nicht verfügbar. Während die Zoom-Taste gedrückt ist, wird kein Ton aufgenommen. Während der Videoaufnahme ist gleichzeitig das Mikrofon aktiv, und der Ton wird mit aufgenommen. Die Videoaufnahmen werden mit Ton als AVI-Datei gespeichert.
  • Seite 457: Audioclips Aufnehmen

    Audioclips aufnehmen Das Mikrofon befindet sich an der Vorderseite der Kamera links unterhalb der Linse. Achten Sie darauf, dass Sie das Mikrofon während der Aufnahme nicht berühren.  Wählen Sie im „Aufnahmemenü“ unter der Einstellung „Aufnahmemodus“ den Eintrag Sprachaufnahme  Drücken Sie den Auslöser, um die Aufnahme zu starten. Im Display erscheint der Aufnahmebalken.
  • Seite 458: Funktionsmenü Verwenden

    Funktionsmenü verwenden Das Funktionsmenü ermöglicht es, die wesentlichen Einstellungen für eine Aufnahme schnell vorzunehmen. In der Menüleiste, links, werden die verfügbaren Funktionen zum Einstellen der Kamera angezeigt. Im unteren Balken werden die möglichen Einstellungen der jeweiligen Funktion angezeigt. , um das Menü zu öffnen. Auf 1.
  • Seite 459 Mein Modus Hier werden die fünf zuletzt verwendeten Aufnahmemodi aufgelistet. Jeder Aufnahmemodus hat andere Einstelloptionen. Wenn Sie mit den Tasten oder den Aufnahmemodus wechseln, verändern sich die Einstellungsoptionen entsprechend. Auflösung - Fotos Die Auflösung bestimmt im Wesentlichen die Qualität des Bildes. Je höher die Auflösung, desto mehr Speicher benötigt eine Aufnahme.
  • Seite 460 Qualität (Kompression) Mit der Qualität bestimmen Sie die Komprimierung der aufgenommenen Daten. Je höher die Qualität ist, desto mehr Speicherplatz benötigen die Aufnahmen. Einstellung Bedeutung Superfein Höchste Qualität. Fein Mittlere Qualität. Normal Normale Qualität. Belichtungskorrektur (OEV) Durch Korrektur des Belichtungswerts (EV = Exposure Value) können Sie Bilder anpassen, die ohne Einstellung zu hell oder zu dunkel würden.
  • Seite 461 Weißabgleich Der Weißabgleich kann bestimmte Lichtverhältnisse korrigieren. Einstellung Bedeutung Autom. Der Weißabgleich wird Weißabgleich automatisch angepasst. Geeignet für Aufnahmen bei Tageslicht hellem Tageslicht. Geeignet für Aufnahmen bei Wolkig bewölktem Himmel, Dämmerung oder Schatten. Geeignet für Aufnahmen bei Glühbirne Glühlampenlicht. Geeignet für Aufnahmen bei Neon H.
  • Seite 462 Einstellung Bedeutung einstellen wollen, auf ein weißes Blatt Papier oder ein ähnliches Objekt, und nehmen Sie ein Probebild auf. Das linke Bild zeigt den vorhergehenden Weißabgleich an, das mittlere zeigt den aktuell gewählten Weißabgleich an und das rechte Bild zeigt den nächsten möglichen Weißabgleich an. ISO (Lichtempfindlichkeit) Diese Einstellung verändert die Lichtempfindlichkeit entsprechend der Helligkeit des Bildmotivs.
  • Seite 463 Messung – Lichtmessverfahren Mit dieser Funktion können Sie bestimmen, in welchem Bereich die Lichtmessung für die Foto- oder Videoaufnahmen erfolgen soll. Einstellung Bedeutung Wählt eine Belichtung aufgrund Mehrfach der Messergebnisse an mehreren Stellen im Aufnahmebereich. Das Licht des gesamten Aufnahmebereich wird gemessen, Mitte jedoch kommt den Werten nahe der Mitte höhere Gewichtung zu.
  • Seite 464 Farb-Effekt Die Fotoeffekte können Sie im Aufnahme- und im Wiedergabemodus verwenden, um Aufnahmen verschiedene Tönungen oder künstlerische Effekte zu geben. Einstellung Bedeutung Normal Kein Fotoeffekt eingestellt. Lebendig Das Bild wird zur Betonung der leuchtenden Farben mit höherem Kontrast und höherer Sättigung dargestellt.
  • Seite 465 Videogröße (Auflösung - Videos) Die Einstellung Videogröße ist nur für die Aufnahme von Videoclips verfügbar. Einstellung Größe in Bildqualität Pixel 1280 x 720 HDTV (Nur mit SDHC-Karten ab Klasse 6 möglich) 640 x 480 Hohe Qualität 320 x 240 Normal 640 x 480 Web Qualität Qualität zur Darstellung über...
  • Seite 466: Aufnahmemenü Verwenden

    Pre Rec (Video) Die Einstellung “Pre Rec” ermöglicht Ihnen eine 3 Sek. Vor- Aufnahme. Ist diese Einstellung aktiviert, nimmt die Kamera 3 Sek. vor Betätigung des Auslösers auf. Aufnahmemenü verwenden Sie können die Einstellungen für die Aufnahmen auch über das Aufnahmemenü...
  • Seite 467: Aufnahmen Ansehen/Hören

    Aufnahmen ansehen/hören Aufnahmen einzeln wiedergeben Sie können die zuletzt gemachten Aufnahmen im Anzeigemodus nach einander wiedergeben.  Schieben Sie den Moduswahlschalter auf , um den Wiedergabemodus zu aktivieren. Auf dem Display erscheint die zuletzt gemachte Aufnahme, je nach Art sind folgende Anzeigen möglich: Foto Video Sprachaufnahme...
  • Seite 468: Aufnahmen Als Miniaturen Wiedergeben

    Aufnahmen als Miniaturen wiedergeben  Drücken Sie im Wiedergabe-Modus die Zoom-Taste , um bis zu neun kleine Vorschaubilder anzuzeigen.  Mit den Richtungstasten oder oder können Sie eine gewünschte Datei wählen.  Drücken Sie die Taste um die Aufnahme als Vollbild anzuzeigen.
  • Seite 469  Mit den Richtungstasten oder oder können Sie eine gewünschte Datei wählen.  Drücken Sie die Taste um die Aufnahme als Vollbild anzuzeigen.  Drücken Sie die Zoom-Taste in Richtung , um den Kalendermodus zu verlassen. In Fotos zoomen Bei Fotoaufnahmen können Sie sich einzelne Bildausschnitte ansehen.
  • Seite 470: Video- / Audioclips / Sprachnotizen Wiedergeben

    Video- / Audioclips / Sprachnotizen wiedergeben  Wählen Sie die gewünschte Aufnahme aus.  Drücken Sie die Taste , um die Wiedergabe zu starten. Bei der Wiedergabe von Videoclips, drücken Sie die Tasten oder , um einen schnellen Vor- oder Rücklauf zu starten. ...
  • Seite 471: Aufnahmen Löschen

    Screenshot eines Videoclips erstellen Während der Wiedergabe eines Videoclips drücken Sie die Taste , um die Wiedergabe anzuhalten.  Drücken Sie den Auslöser, um das gezeigte Bild als Screenshot zu speichern. Auf dem Display erscheint das Auslöser- Symbol . Die Kamera beendet automatisch die Wiedergabe und wechselt in den Anzeigemodus.
  • Seite 472  Auf dem Display erscheint die Abfrage „Löschen“. Wählen Sie mit den Tasten oder den Eintrag „Löschen”.  Drücken Sie die Taste und bestätigen Sie die Abfrage. Um die Funktion abzubrechen, wählen Sie den Eintrag „Abbrechen“ aus und bestätigen wiederum mit ...
  • Seite 473: Die Menüs

    Die Menüs In den Menüs navigieren Wenn Sie das Wiedergabemenü öffnen möchten, schieben Sie den Moduswahlschalter auf die Position  Drücken Sie im die Taste , um die Menüs zu öffnen.  Wählen Sie mit den Richtungstasten oder Einstellung, die Sie ändern möchten. ...
  • Seite 474: Das Aufnahmemenü

    Das Aufnahmemenü Einstellung Bedeutung Aufnahmemodus Hier können Sie die unterschiedlichen Aufnahmemodi wählen. Betriebsart Hier können Sie den Selbstauslöser einstellen oder die Bildfolge wählen. 10 sek. – Das Bild wird 10 Sekunden nach Drücken des Auslösers aufgenommen. 2 sek. - Das Bild wird 2 Sekunden nach Drücken des Auslösers aufgenommen.
  • Seite 475 Einstellung Bedeutung Autom.-BEL. Hier können Sie die automatische Belichtung ein- oder ausschalten. AF-Bereich Hier können Sie den Autofokus (AF)-Bereich wählen. Breit – Ein breiter Bereich wird scharf gestellt. Mitte – Die Mitte wird scharf gestellt. Schärfe Hier können Sie die Details eines Bildes schärfer oder weicher erscheinen lassen.
  • Seite 476 Einstellung Bedeutung Digitalzoom Hier können Sie für einige Betriebsarten den Digitalzoom wählen. Intellig. Zoom – Vergrößert das Bild digital und optimiert Standard-Zoom – Vergrößert alle Bildgrößen bis zum 5-fachen, führt aber zu einer Verschlechterung der Bildqualität. – Nur den opt. Zoom verwenden. Datumsaufdr.
  • Seite 477: Aufnahmemodus

    Aufnahmemodus Für bestimmte Aufnahmesituationen oder Motive können Sie voreingestellte Aufnahmemodi verwenden. Sie ersparen sich dadurch die manuelle Einstellung. Nachdem Sie Ihre Auswahl getroffen haben, wird der ausgewählte Modus (mit Ausnahme des Sprachaufnahmemodus) bei „Mein Modus“ im Funktionsmenü an vorderster Stelle hinzugefügt. Folgende Aufnahmemodi sind verfügbar: Symbol Einstellung...
  • Seite 478 Symbol Einstellung Bedeutung Angep. Szene Die Kamera analysiert die Aufnahmebedinungen und schaltet automatisch den passenden Szenemodus um. Portrait Stellt den Hintergrund unschärfer und fokussiert auf das Zentrum. Landschaft Geeignet für weite Landschaftsausschnitte. Sonnenuntergang Verstärkt den roten Farbton zur Aufnahme von Sonnenuntergängen.
  • Seite 479 Symbol Einstellung Bedeutung Feuerwerk Reduziert die Verschlussgeschwindigkeit, um das Feuerwerk aufzunehmen. Schnee Geeignet für Strand- und Schneeaufnahmen. Sport Geeignet um Bilder bei mit schnellen Bewegungen zu erzeugen. Party Geeignet für Innenaufnahmen und Partys. Kerzenlicht Erzeugt Aufnahmen in warmem Licht. Nachtsz.- Portr. Geeignet für Portraitaufnahmen mit dunklem Hintergrund.
  • Seite 480 Symbol Einstellung Bedeutung Lebensmittel Erhöht die Farbsättigung. Gebäude Hebt die Umrandung (Kontur) des fotografierten Gegenstands stärker hervor. Text Verstärkt den Schwarz-Weiß- Kontrast Laub Diese Funktion verstärkt die Farbsättigung von grünen Farbtönen. Auktion Optimiert die Bilder zur Wieder- gabe in Internetplattformen (Auktionen), z.
  • Seite 481 Symbol Einstellung Bedeutung Blinzelerkennung Die Kamera erkennt, ob die Augen Ihres Motives bei der Aufnahme geschlossen waren und lässt Ihnen die Wahl, ob das Bild gespeichert werden soll. Vorlage-Gestaltung Diese Funktion nimmt ein Bild als vorübergehende Orientierung auf. Drücken Sie den Auslöser vollständig herunter, nachdem Sie die Person, die fotografiert werden...
  • Seite 482 Symbol Einstellung Bedeutung Romantikportrait Diese Funktion nutzt die Gesichtserkennung zur automatischen Erfassung von Gesichtern, um auf diese Weise ohne Unterstützung dritter Portraitbilder anzufertigen. Werden mehr als zwei Gesichter erkannt, wird automatisch der Auto Focus aktiviert. Die Kamera beginnt mit dem Countdown und nimmt das Foto nach Ablauf von zwei Sekunden auf.
  • Seite 483 Symbol Einstellung Bedeutung Diese Funktion steigert den Dynamikumfang eines Bildes durch erhöhte Helligkeits- und Kontrastwerte. Blendeneinst. Mit dieser Funktion können Sie den Blendenwert festlegen. Verschlusseinst. Mit dieser Funktion können Sie die Verschlussgeschwindigkeit festlegen. Man. Belichtung Mit dieser Funktion können Sie die Verschlussgeschwindigkeit und den Blendenwert einstellen.
  • Seite 484 Verwenden des „Lächeln einfangen”-Modus einfangen”-Modus nimmt automatisch Fotos auf, „Lächeln sobald er ein Lächeln erkennt. einfangen”-Modus So aktivieren Sie den „Lächeln  Wählen Sie im Aufnahmemodus die Funktion aus.  Fokussieren Sie die Kamera auf das Motiv.  Sobald ein Lächeln erkannt wurde, beginnt die Kamera mit der Aufnahme des Fotos.
  • Seite 485: Das Einstellungsmenü

    Das Einstellungsmenü Einstellung Bedeutung Sounds Hier können Sie den Start-Ton ausschalten oder unter 3 Tönen wählen, den Signalton und den Ton beim Auslösen einschalten, sowie die Lautstärke für alle Töne einstellen. Stromsparen Strom sparen Um Akkuladung zu sparen, schaltet sich die Kamera automatisch nach der gewählten Zeit aus.
  • Seite 486 Einstellung Bedeutung Datum / Zeit Hier können Sie das Datum, die Uhrzeit einstellen und das Anzeigeformat wählen. (Siehe Seite 28) Sprache Hier können Sie die Sprache des Menüs wählen. (siehe Seite 28) Dateinr. Dateinummerierung Hier können Sie die Nummerierung der Dateien einstellen.
  • Seite 487 Einstellung Bedeutung Speicher-Hilfsmittel Hier können Sie die Daten auf dem internen Speicher organisieren. Formatieren: Formatiert den aktuellen Speicher, d.h. Speicherkarte oder internen Speicher. Dabei werden alle Aufnahmen gelöscht. HINWEIS! Wenn Sie den Speicher formatieren, werden alle darin gespeicherten Daten gelöscht. Stellen Sie sicher, dass sich keine wichtigen Daten mehr im Speicher oder auf der SD Karte befinden.
  • Seite 488 Einstellung Bedeutung Alles zurücks. Hier können Sie alle individuellen Einstellungen auf die Werkseinstellungen zurücksetzen. Bestätigen Sie in diesem Fall die Abfrage mit „Ja“. Folgende Einstellungen werden nicht zurückgesetzt: Datum/Zeit Sprache TV-Ausgabe...
  • Seite 489: Das Wiedergabemenü

    Das Wiedergabemenü Einstellung Bedeutung Diashow Sie können die Bildaufnahmen (nur Fotos) als Diashow ablaufen lassen. (siehe Seite 82) Löschen Mit dieser Funktion können Sie nicht mehr benötigte Dateien auf dem internen Speicher oder der Speicherkarte löschen (siehe Seite 83). Sie haben folgende Möglichkeiten: Einzeln: Eine Aufnahme löschen Stimme: Sprachaufnahme eines Bildes löschen Multi: Mehrere Aufnahmen löschen, die Sie in...
  • Seite 490 Einstellung Bedeutung Rote-Augen- Bildaufnahmen die nicht mit Vorblitz Korrektur aufgenommen wurden, können Sie hier korrigieren. (siehe Seite 85). Die korrigierte Datei können Sie unter einem neuen Namen speichern oder die Originaldatei überschreiben. Sprachnotiz Sie können zu jedem aufgenommenen Foto eine Sprachnotiz speichern. (siehe Seite 86) Die maximale Dauer der Sprachnotiz beträgt 30 Sekunden.
  • Seite 491 Einstellung Bedeutung Größe ändern Sie können die Auflösung von Fotos heruntersetzen und dadurch die Datei verkleinern (siehe Seite 90). Die korrigierte Datei können Sie unter einem neuen Namen speichern oder die Originaldatei überschreiben. Die Auflösung von Fotos in VGA kann nicht verändert werden.
  • Seite 492 Einstellung Bedeutung DPOF DPOF steht für „Digital Print Order Format“. Sie können hier Druckeinstellungen für Bilder festlegen, wenn Sie die Bilder von einem Fotostudio oder einem DPOF-kompatiblen Drucker ausgeben lassen wollen. Mit einem DPOF-kompatiblen Drucker können Sie die Bilder direkt ausdrucken, ohne sie vorher auf den Computer zu übertragen.
  • Seite 493 Einstellung Bedeutung Rad. Der radiale Weichzeichner ist ein Effekt, der Weichzeichner um die Bildmitte unscharf zeichnet.  Mit den Tasten oder wählen Sie die Weichzeichnerstufe.  Drücken Sie um das Bild abzuspeichern. Diashow zeigen Sie können die Fotos als Diashow ablaufen lassen. ...
  • Seite 494 Schützen / entsperren oder löschen einer einzelnen Datei  Wählen Sie im Untermenü „Löschen“ oder „Schützen“ Einzeln aus; die Bilder werden auf dem Display einzeln angezeigt.  Wählen Sie mit den Tasten oder ein Bild aus.  Wählen Sie „Schützen“ / „Entsperren“ oder „Löschen", sobald die gewünschte Datei auf dem Bildschirm angezeigt wird.
  • Seite 495  Wählen Sie Ja und drücken Sie die Taste , um die Dateien zu schützen oder zu löschen. Die Kamera kehrt in den Wiedergabemodus zurück. Schützen/entsperren oder löschen aller Dateien  Wählen Sie im Untermenü „Löschen“ oder „Schützen“; „Alle schützen?/Alle entsperren“...
  • Seite 496 Rote Augen korrigieren Diese Funktion dient der Reduzierung des Rote-Augen-Effekts auf Fotos. Diese Funktion ist nur bei Fotos verfügbar. Die Rote-Augen- Korrektur kann bei einem Bild mehrmals angewendet werden; allerdings verschlechtert sich dadurch eventuell auch stufenweise die Bildqualität. So aktivieren Sie die Rote-Augen-Korrektur: ...
  • Seite 497 Sprachnotiz aufnehmen  Wählen Sie im Wiedergabemodus das gewünschte Foto aus. HINWEIS! Wenn das Foto bereits eine Sprachnotiz enthält, erscheint das Sprachnotizsymbol.  Öffnen Sie im Wiedergabemenü das Untermenü „Sprachnotiz”. Auf dem Display erscheinen die Bildvorschau und ein Auswahlmenü. Start ...
  • Seite 498 Farbmodus Folgende Effekte stehen zur Verfügung: Symbol Einstellung Bedeutung Normal Es wird kein Fotoeffekt hinzugefügt. Sepia Das Bild wird in nostalgischen Brauntönen dargestellt. Das Bild wird schwarz-weiß dargestellt. Negativ Das Bild wird in umgekehrten Tonwerten dargestellt. Mosaik Das Bild wird als Mosaik dargestellt. Das Bild bekommt einen Rot-Ton.
  • Seite 499 Der jeweilige Effekt wird auf die Bildvorschau angewendet und entsprechend angezeigt.  Drücken Sie zum Speichern der neuen Datei die Taste Foto zuschneiden Vergrößertes Bild 4—Wege-anzeige Zugeschnittene Größe Die ugf. Position des Zuschneidebereichs Bildfläche  Wählen Sie im Wiedergabemodus das gewünschte Foto. ...
  • Seite 500  Drücken Sie die Zoomtaste in Richtung , um das Bild zu vergrößern oder in Richtung , um das Bild zu verkleinern.  Nach Beendigung der Funktion erscheint eine Menüauswahl. Wählen Sie zwischen: Überschreiben: Die neue Datei wird gespeichert, indem sie die alte überschreibt.
  • Seite 501 Größe ändern  Wählen Sie im Wiedergabemodus das gewünschte Foto.  Öffnen sie im Menü Wiedergabe das Untermenü „Größe ändern” ändern. Auf dem Display erscheint das Auswahlmenü.  Wählen Sie eine der folgenden Auflösungen und drücken Sie die Taste oder VGA. HINWEIS! Die verfügbaren Auflösungen können je nach Originalgröße des Bildes variieren.
  • Seite 502: Anschluss An Tv Und Pc

    Anschluss an TV und PC Aufnahmen auf einem Fernsehgerät anzeigen Sie können die Aufnahmen der Kamera auf einem Fernsehgerät wiedergeben.  Schalten Sie Kamera und Fernsehgerät aus.  Verbinden Sie das mitgelieferte TV- Kabel mit dem USB-Anschluss der Kamera und dem Videoeingang (gelb) und Audioeingang (weiß) des Fernsehgeräts.
  • Seite 503: Aufnahmen Auf Einem Fotodrucker Ausdrucken

    Aufnahmen auf einem Fotodrucker ausdrucken Sie können Ihre Aufnahmen über PictBridge direkt auf einem PictBridge-kompatiblen Fotodrucker ausdrucken.  Verbinden Sie Drucker und Kamera mit dem mitgelieferten USB-Kabel.  Schalten Sie die Kamera und den Fotodrucker ein. Die Kamera erkennt, dass ein USB Gerät angeschlossen wurde.
  • Seite 504: Kamera An Einen Computer Anschließen

    Kamera an einen Computer anschließen Sie können die Aufnahmen auf einen Computer überspielen und den Akku in der Kamera über den USB-Anschluss des Computers laden. Unterstützte Betriebssysteme:  Windows XP  Windows Vista  Windows 7 USB-Kabel einsetzen  Schalten Sie die Kamera aus. ...
  • Seite 505 Unter Windows XP, Windows Vista und Windows 7 können Sie sofort auf den Inhalt des Kameraspeichers zugreifen. Unter anderen Windows-Versionen öffnen Sie den Windows Explorer oder doppelklicken Sie auf „Arbeitsplatz“ (unter Vista: „Computer“).  Doppelklicken Sie auf das Mediensymbol für die Kamera. ...
  • Seite 506: Dcf-Speicherstandard

    DCF-Speicherstandard Die Aufnahmen auf Ihrer Kamera werden nach dem so genannten DCF-Standard auf der Kamera verwaltet (gespeichert, benannt etc.; DCF = Design Rule for Camera File System). Aufnahmen auf Speicherkarten anderer DCF-Kameras können auf Ihrer Kamera wiedergegeben werden. Kartenlaufwerk Wenn Ihr PC über ein Kartenlaufwerk verfügt oder ein Kartenlesegerät angeschlossen ist und Sie die Aufnahmen auf der Speicherkarte...
  • Seite 507: Ordnerstruktur Im Speicher

    Ordnerstruktur im Speicher Die Kamera speichert die aufgenommenen Bilder, Videos und Audiodateien in drei verschiedenen Verzeichnissen auf dem internen Speicher oder der Speicherkarte. Folgende Verzeichnisse werden automatisch erstellt: DICAM .: Alle aufgenommenen Bilder, Videos und Audiodateien werden in diesem Ordner gespeichert. Ausgenommen sind Dateien, die im Auktions- oder Internet-Qualität-Modus aufgenommen werden.
  • Seite 508: Software Installieren

    kann nicht erstellt werden“). In diesem Fall gehen Sie folgendermaßen vor:  Setzen Sie eine neue Speicherkarte ein.  Setzen Sie die Dateinummern im Menü Einstellungen Eintrag „Dateinr.“ zurück. Die Dateizählung beginnt wieder bei 0001 im Ordner DSCI1000. Versuchen Sie nicht, die Ordner und Dateien in der Kamera eigenen Verzeichnisstruktur zu ändern (umzubenennen etc.).
  • Seite 509: Speicherkapazität

    Speicherkapazität Größe der Speicherkarte 1 GB 2 GB 14 M 1250 1041 2083 1223 2466 4778 9557 Die Tabelle gibt die Anzahl der Bilder an, die Sie bei einer gewählten Auflösung (z. B. 5 M) auf einer Speicherkarte mit der angegeben Größe (z.
  • Seite 510: Fehlersuche

    Fehlersuche Wenn die Kamera nicht einwandfrei funktioniert, überprüfen Sie die folgenden Punkte. Wenn das Problem bestehen bleibt, wenden Sie sich bitte an den MEDION-Service. Die Kamera lässt sich nicht einschalten. Der Akku ist falsch eingelegt. Der Akku ist leer. Laden Sie ihn auf.
  • Seite 511 Das Bild ist unscharf. Die Kamera wurde während der Aufnahme bewegt. Das Motiv befand sich außerhalb des Einstellbereichs der Kamera. Verwenden Sie ggf. den Makromodus für Nahaufnahmen. Das Bild wird nicht auf dem Display angezeigt. Es wurde eine SD-Karte eingelegt, die auf einer anderen Kamera Bilder im Nicht-DCF-Modus aufgenommen hat.
  • Seite 512 Aufnahmen auf anderen Speicherkarten werden nicht angezeigt. Die Aufnahmen auf Speicherkarten anderer Kameras werden angezeigt, wenn die andere Kamera ebenfalls das DCF- Speichersystem verwendet. Die Aufnahmen können über das USB-Kabel nicht auf den PC übertragen werden. Die Kamera ist nicht eingeschaltet. Beim erstmaligen Anschluss der Kamera an den PC wird keine neue Hardware gefunden Der USB-Anschluss des PCs ist im BIOS deaktiviert.
  • Seite 513: Wartung Und Pflege

    Wartung und Pflege Reinigen Sie das Gehäuse, die Linse und das Display folgendermaßen: Reinigen Sie das Kameragehäuse mit einem weichen, trockenen Tuch. Verwenden Sie keine Verdünner oder Reinigungsmittel, die Öl enthalten. Dadurch kann die Kamera beschädigt werden. Um die Linse oder das Display zu reinigen, entfernen Sie den Staub zuerst mit einer Linsenbürste.
  • Seite 514: Entsorgung

    Entsorgung Verpackung Ihre Digitalkamera befindet sich zum Schutz vor Trans- portschäden in einer Verpackung, Verpackungen sind Rohmaterialien und können wiederverwertet werden oder dem Recycling-Kreislauf zugeführt werden. Gerät Werfen Sie das Gerät am Ende seiner Lebenszeit keines- falls in den normalen Hausmüll. Entsorgen Sie es umwelt- gerecht über eine örtliche Sammelstelle für Altgeräte.
  • Seite 515: Technische Daten

    Technische Daten Pixel: 14 Mega Pixel CCD Blende: F = 3,3 ~ 5,9 Verschlussgeschwindigkeit: 1/2000 ~ 15 s Brennweite: f = 5,0 mm ~ 25 mm Optischer Zoom: 5 –fach Digitaler Zoom: 5 –fach LCD Monitor: 6,86 cm / 2.7 " LC - Display Dateiformat: JPEG (EXIF 2.2), DPOF, AVI, WAV Max.

Diese Anleitung auch für:

Md 86295

Inhaltsverzeichnis