Herunterladen Inhalt Inhalt Diese Seite drucken

Werbung

Verfügbare Sprachen
  • DE

Verfügbare Sprachen

  • DEUTSCH, seite 27
INSTALLATION GUIDE
AXIS P3363-VE Network Camera
AXIS P3364-VE Network Camera
AXIS P3364-LVE Network Camera

Werbung

Inhaltsverzeichnis
loading

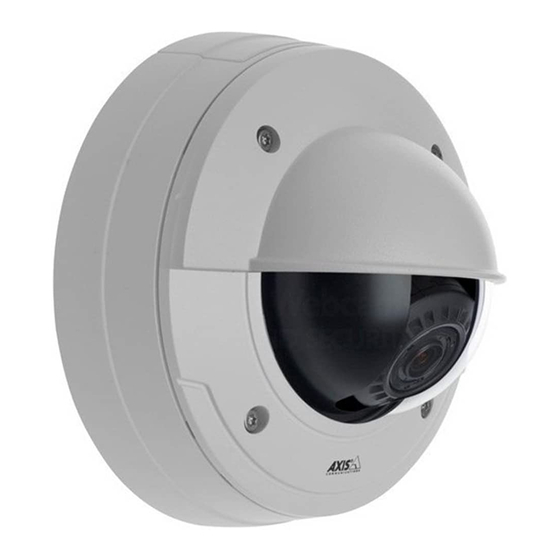
Inhaltszusammenfassung für Axis Communications P3363-VE

  • Seite 1 INSTALLATION GUIDE AXIS P3363-VE Network Camera AXIS P3364-VE Network Camera AXIS P3364-LVE Network Camera...
  • Seite 2 Axis Communications AB makes no warranty of any when the equipment is operated in a commercial environment. kind with regard to the material contained within this...
  • Seite 3 Safeguards Please read through this Installation Guide carefully before installing the Axis product. Keep the Installation Guide for further reference. • Store the Axis product in a dry and ventilated environment. • Avoid exposing the Axis product to vibration, shocks or heavy pressure. Do not install the product on unstable brackets, unstable or vibrating surfaces or walls, since this could cause damage to the product.
  • Seite 4: Battery Replacement

    Battery Replacement This Axis product uses a 3.0 V CR2032 lithium battery as the power supply for its internal real-time clock (RTC). Under normal conditions this battery will last for a minimum of 5 years. Low battery power affects the operation of the RTC, causing it to reset at every power-up. A log message will appear when the battery needs replacing.
  • Seite 5: Package Contents

    AXIS P33-VE Network Cameras Installation Guide Page 5 AXIS P3363-VE/P3364-VE/P3364-LVE Network Camera Installation Guide Follow these instructions to install the network camera 1. “Package contents” on page 5 2. “Hardware overview” on page 6 3. “Install the hardware” on page 7 4.
  • Seite 6: Hardware Overview

    P3363-VE/AXIS P3364-VE/AXIS P3364-LVE) and IR illumination (AXIS P3364-LVE), both of which will not work if configured otherwise. Dimension (HxW) AXIS P3363-VE/AXIS P3364-VE/AXIS P3364-LVE = 110 x 179 x 179 mm (4.33 x 7.05 x 7.05") Weight AXIS P3363-VE/AXIS P3364-VE = 1.5 kg (3.2 lb.)
  • Seite 7: Install The Hardware

    Bottom part Replace clear/smoked dome cover (optional) AXIS P3363-VE/AXIS P3364-VE is supplied with an optional dome. To replace the dome cover: 1. Loosen the 4 screws under the dome cover that hold the dome in place. 2. Transfer the gasket from the old dome to the new.
  • Seite 8: Route The Cables

    8. Re-attach the top part of the cable shield by tightening the two screws. Note: The AXIS P3363-VE/P3364-VE/P3364-LVE can also be fitted with a metal conduit for protecting the cabling when cables are routed along the wall.
  • Seite 9 5. Attach the two M4x8 20 screws to the camera for greater stability. These screws are only necessary to secure against heavy shocks and vibrations. Note: The AXIS P3363-VE/P3364-VE/P3364-LVE can also be fit- ted with a metal conduit for protecting the cabling when cables are routed along the wall.
  • Seite 10 Page 10 AXIS P33-VE Network Cameras Installation Guide Access the video stream Use the tools provided on the Installation and Management Software CD to assign an IP address, set the password and access the video stream. This information is also available from the support pages on www.axis.com/techsup Adjust the Lens Open the Live View page in the web interface and make the following adjustments to the camera:...
  • Seite 11 AXIS P33-VE Network Cameras Installation Guide Page 11 Complete the installation Black protective shield 1. Rotate the black protective shield inside the dome cover so it is aligned with the camera’s position (not applicable to AXIS P3364-LVE). 2. If required, attach the weather shield to the camera before you attach the dome cover (not applicable to AXIS P3364-LVE).
  • Seite 12 Page 12 AXIS P33-VE Network Cameras Installation Guide Unit connectors Network connector - RJ-45 Ethernet connector. Supports Power over Ethernet. The product shall be connected using a shielded network cable (STP). All cables connecting the product to the network switch shall be shielded (STP) and intended for their specific use. Make sure that the network switch is properly grounded.
  • Seite 13: Led Indicators

    AXIS P33-VE Network Cameras Installation Guide Page 13 The following connection diagram gives an example of how to connect an auxiliary device to the AXIS P3363-VE/P3364-VE/P3364-LVE. E.g. push button 3.3V max. 50mA LED indicators Color Indication Network Green Steady for connection to a 100 Mbit/s network. Flashes for network activity.
  • Seite 14: Resetting To The Factory Default Settings

    Page 14 AXIS P33-VE Network Cameras Installation Guide Resetting to the Factory Default Settings This will reset all parameters, including the IP address, to the factory default settings: 1. Disconnect power from the camera. 2. Press and hold the Control button and reconnect power (see “Hardware overview” on page 6). 3.
  • Seite 15: Mesures De Sécurité

    Mesures de sécurité Lisez attentivement le présent Guide d'installation avant d'installer le produit Axis. Conservez le Guide d'installation pour une utilisation ultérieure. • Conservez le produit Axis dans un environnement sec et aéré. • Évitez d'exposer le produit Axis aux vibrations, aux chocs ou à une forte pression. N'installez pas le produit sur un support instable, ou des surfaces ou des murs instables ou vibrants, car cela pourrait l'endommager.
  • Seite 16: Remplacement Des Piles

    Remplacement des piles Ce produit Axis nécessite une pile au lithium CR2032 de 3,0 V pour l'alimentation de son horloge en temps réel interne. Dans des conditions normales d'utilisation, cette pile est censée durer au moins 5 ans. Si la pile est faible, le fonctionnement de l'horloge en temps réel peut être affecté et entraîner sa réinitialisation à...
  • Seite 17: Contenu De L'emballage

    Guide d’installation des Caméra réseau AXIS P33-VE Page 17 AXIS P3363-VE/P3364-VE/P3364-LVE Guide d’installation de la caméra réseau Procédez comme suit pour installer la caméra réseau. 1. « Contenu de l’emballage » à la page 17 2. « Présentation du matériel » à la page 18 3.
  • Seite 18: Présentation Du Matériel

    P3364-LVE), ces deux fonctions ne marchant pas si configuré différemment. Dimensions (H x l) AXIS P3363-VE, AXIS P3364-VE, AXIS P3364-LVE = 110 x 179 x 179 mm (4,33 x 7,05 x 7,05") Poids AXIS P3363-VE, AXIS P3364-VE = 1,5 kg...
  • Seite 19: Installation Du Matériel

    Partie inférieure Remplacement de la bulle de dôme fumée ou non fumée (facultatif) Les caméras AXIS P3363-VE et AXIS P3364-VE sont livrées avec un dôme facultatif. Pour remplacer la bulle du dôme : 1. Sous la bulle du dôme, dévissez les 4 vis qui maintiennent le dôme en place.
  • Seite 20: Acheminement Des Câbles

    8. Fixez à nouveau la partie supérieure du blindage de câble en resserrant les deux vis. Remarque : Les caméras AXIS P3363-VE/P3364-VE/P3364-LVE peuvent également être dotées d’un tube métallique pour protéger le câblage lors de l’acheminement des câbles le long du mur.
  • Seite 21 Ces vis sont uniquement nécessaires pour protéger l’unité contre les vibrations et les chocs importants. Remarque : Les caméras AXIS P3363-VE/P3364-VE/P3364-LVE peuvent également être dotées d’un tube métallique servant à protéger le câblage lors d’un acheminement des câbles le long du mur.
  • Seite 22: Réglage De L'objectif

    Page 22 Caméra réseau AXIS P33-VE Guide d’installation Accéder au flux vidéo Utilisez les outils fournis dans le CD d’installation contenant les logiciels de gestion vidéo pour attribuer une adresse IP, définir le mot de passe et accéder au flux vidéo. Ces informations sont également disponibles sur les pages de support en ligne à...
  • Seite 23: Fin De L'installation

    Guide d’installation des Caméra réseau AXIS P33-VE Page 23 Fin de l’installation Écran protecteur noir 1. Tournez l’écran protecteur noir à l’intérieur de la bulle du dôme afin de l’aligner avec la position de la caméra (non applicable pour l’AXIS P3364-LVE).
  • Seite 24 Page 24 Caméra réseau AXIS P33-VE Guide d’installation Connecteur pour terminaux E/S : Utilisé dans le cadre d’applications telles que la détection de mouvements, le déclenchement d’événements, l’enregistrement à intervalles et les notifications d’alarmes. En plus d’une alimentation auxiliaire et d’une broche GND, il assure l’interface avec : Broche 4 Broche 2 Broche 3...
  • Seite 25: Voyants Lumineux

    Guide d’installation des Caméra réseau AXIS P33-VE Page 25 Le schéma de câblage suivant fournit un exemple de connexion d’un périphérique auxiliaire à la caméra AXIS P3363-VE/P3364-VE/P3364-LVE. E.g. push button 3.3V max. 50mA Voyants lumineux Voyant Couleur Indication Réseau Vert Continu en cas de connexion à...
  • Seite 26: Plus D'informations

    Page 26 Caméra réseau AXIS P33-VE Guide d’installation Rétablissement des paramètres d’usine par défaut Procédez comme suit pour rétablir les paramètres par défaut définis en usine et réinitialiser l’adresse IP : 1. Mettez la caméra hors tension. 2. Maintenez le bouton de commande enfoncé et remettez la caméra sous tension (voir «...
  • Seite 27: Sicherheitsvorkehrungen

    Sicherheitsvorkehrungen Bitte lesen Sie diese Installationsanleitung sorgfältig durch, bevor Sie mit der Installation des Axis Produkts beginnen. Halten Sie die Installationsanleitung bereit, falls Sie darauf zurückgreifen müssen. • Lagern Sie das Axis-Produkt in einer trockenen und belüfteten Umgebung. • Setzen Sie das Axis Produkt keinen Vibrationen, Erschütterungen oder starkem Druck aus. Installieren Sie das Produkt nicht an instabilen Halterungen oder instabilen oder vibrierenden Oberflächen oder Mauern, da dadurch das Produkt beschädigt werden könnte.
  • Seite 28: Reinigung Der Kuppelabdeckung

    Batteriewechsel Dieses Axis-Produkt ist mit einer 3,0 V CR2032 Lithium-Batterie als Stromversorgung für die interne Echtzeituhr (RTC) ausgestattet. Unter normalen Bedingungen hält die Batterie mindestens 5 Jahre. Bei entladener Batterie ist der Betrieb der Echtzeituhr nicht mehr ausreichend gewährleistet, so dass die Uhr bei jedem Systemstart zurückgesetzt wird. Sie erhalten eine Protokollnachricht, wenn ein Batteriewechsel erforderlich ist.
  • Seite 29: Inhalt Des Produktpakets

    AXIS P33-VE Netzwerk-Kameras Installationsanleitung Seite 29 AXIS P3363-VE/P3364-VE/P3364-LVE Installationsanleitung für die Netzwerk-Kamera Führen Sie zur Installation der Netzwerk-Kamera die folgenden Schritte aus: 1. „Inhalt des Produktpakets“ auf Seite 29 2. „Hardwareübersicht“ auf Seite 30 3. „Installation der Hardware“ auf Seite 31 4.
  • Seite 30: Hardwareübersicht

    P3364-LVE) aktiviert werden können. Beide Komponenten funktionieren nicht, wenn eine andere Konfiguration eingestellt ist. Abmessungen (H x B) AXIS P3363-VE/AXIS P3364-VE/AXIS P3364-LVE = 110 x 179 x 179 mm Gewicht AXIS P3363-VE/AXIS P3364-VE = 1,5 kg AXIS P3364-LVE = 1,5 kg...
  • Seite 31: Installation Der Hardware

    Teil unterer Teil Austauschen der klaren/getönten Kuppelabdeckung (optional) Die AXIS P3363-VE/AXIS P3364-VE wird mit einer optionalen Kuppel geliefert. So tauschen Sie die Kuppelabdeckung aus: 1. Lösen Sie die vier Schrauben unter der Kuppelabdeckung, die die Kuppel an ihrer Position halten.
  • Seite 32: Ziehen Der Kabel

    8. Bringen Sie den oberen Teil der Kabelabdeckung wieder an, indem Sie die beiden Schrauben anziehen. Hinweis: Die AXIS P3363-VE/P3364-VE/P3364-LVE kann auch mit einer Kabelführung aus Metall zum Schutz der Kabel ausgestattet werden, wenn die Kabel an der Wand entlang geführt werden.
  • Seite 33: Installieren Der Kameraeinheit

    5. Bringen Sie die beiden M4x8 20-Schrauben an der Kamera an, um die Stabilität zu erhöhen. Diese Schrauben sind nur zum Schutz vor starken Erschütterungen und Vibrationen erforderlich. Hinweis: Die AXIS P3363-VE/P3364-VE/P3364-LVE kann auch mit einer Kabelführung aus Metall zum Schutz der Kabel ausgestattet werden, wenn die Kabel an der Wand entlang geführt werden.
  • Seite 34: Zugriff Auf Den Video Stream

    Seite 34 AXIS P33-VE Netzwerk-Kameras Installationsanleitung Zugriff auf den Video Stream Verwenden Sie die Werkzeuge auf der Installations- und Management-Software CD, um IP-Adressen zuzuweisen, das Passwort festzulegen und auf den Videostream zuzugreifen. Sie finden diese Informationen auch auf den Support-Seiten unter www.axis.com/techsup Anpassen des Objektivs Öffnen Sie die Seite Live View Markierung...
  • Seite 35: Installation Abschließen

    AXIS P33-VE Netzwerk-Kameras Installationsanleitung Seite 35 Installation abschließen Schwarzes Schutzschild 1. Bringen Sie die schwarze Schutzabdeckung in der Kuppelabdeckung durch Drehen in Übereinstimmung mit der Kameraposition (gilt nicht für AXIS P3364-LVE). 2. Befestigen Sie bei Bedarf den Wetterschutz an der Kamera, bevor Sie die Kuppelabdeckung anbringen (gilt nicht für AXIS P3364-LVE).
  • Seite 36 Seite 36 AXIS P33-VE Netzwerk-Kameras Installationsanleitung SDHC-Speicherkarteneinschub – Die SD-Speicherkarte kann zur lokalen Aufzeichnung mit Wechselmedien verwendet werden. E/A-Anschluss - Wird z. B. für Bewegungserkennung, Ereignisauslösung, Zeitrafferaufnahmen, Alarmbenachrichtigungen usw. verwendet. Zusätzlich zu den Anschlüssen für die Zusatzstromversorgung und Masse fungiert er als Schnittstelle für: Anschluss 4 Anschluss 2...
  • Seite 37: Led-Anzeigen

    AXIS P33-VE Netzwerk-Kameras Installationsanleitung Seite 37 Das folgende Anschlussschaltbild zeigt ein Beispiel für den Anschluss eines Zusatzgeräts an den AXIS P3363-VE/P3364-VE/P3364-LVE. E.g. push button 3.3V max. 50mA LED-Anzeigen Farbe Bedeutung Netzwerk Grün Leuchtet dauerhaft bei Verbindung mit einem 100-MBit/s-Netzwerk. Blinkt bei Netzwerkaktivität.
  • Seite 38: Wiederherstellen Der Werkseitigen Standardeinstellungen

    Seite 38 AXIS P33-VE Netzwerk-Kameras Installationsanleitung Wiederherstellen der werkseitigen Standardeinstellungen Gehen Sie wie folgt vor, um sämtliche Parameter einschließlich der IP-Adresse auf die werkseitigen Standardeinstellungen zurückzusetzen: 1. Trennen Sie die Kamera von der Stromversorgung. 2. Halten Sie die Steuertaste gedrückt und stellen Sie die Stromversorgung wieder her (weitere Informationen hierzu finden Sie unter „Hardwareübersicht“...
  • Seite 39 Sicurezza Leggere attentamente questa Guida all'installazione prima di installare un prodotto Axis. Conservare la Guida all'installazione per ulteriori riferimenti. • Conservare il prodotto Axis in un ambiente asciutto e ben ventilato. • Evitare di esporre il prodotto Axis alle vibrazioni, agli urti o a forte pressione. Non installare il prodotto su staffe instabili, superfici o pareti instabili o vibranti, poiché...
  • Seite 40: Sostituzione Della Batteria

    Sostituzione della batteria Questo prodotto Axis utilizza una batteria al litio CR2032 da 3.0 V per alimentare il real-time clock (RTC) interno. In normali condizioni questa batteria ha una durata di almeno 5 anni. La batteria scarica influisce sul funzionamento dell'RTC, che viene reimpostato ad ogni accensione. Un messaggio di registro apparirà...
  • Seite 41: Contenuto Della Confezione

    Guida all'installazione di telecamera di rete serie AXIS P33 Pagina 41 AXIS P3363-VE/P3364-VE/P3364-LVE Guida all'installazione della telecamera di rete Per installare la telecamera di rete, attenersi alla seguente procedura 1. “Contenuto della confezione” alla pagina 41 2. “Panoramica dell'hardware” alla pagina 42 3.
  • Seite 42: Panoramica Dell'hardware

    (AXIS P3363-VE/AXIS P3364-VE/AXIS P3364-LVE) e l'illuminazione IR (AXIS P3364-LVE), entrambe le funzioni non si abiliteranno se configurato diversamente. Dimensioni (HxL) AXIS P3363-VE/AXIS P3364-VE/AXIS P3364-LVE = 110 x 179 x 179 mm Peso AXIS P3363-VE/AXIS P3364-VE = 1,5 kg...
  • Seite 43: Installazione Dell'hardware

    Sezione inferiore Sostituzione della copertura a cupola trasparente/oscurata (facoltativo) La telecamera AXIS P3363-VE/AXIS P3364-VE viene fornita con una cupola opzionale. Per sostituire la copertura a cupola: 1. Allentare le 4 viti che fissano la cupola in posizione sotto la copertura a cupola.
  • Seite 44: Installazione Dei Cavi

    8. Rimontare la parte superiore della schermatura del cavo serrando le due viti. Nota: La telecamera AXIS P3363-VE/P3364-VE/P3364-LVE può essere munita di un tubo protettivo in metallo per proteggere i cavi nel caso in cui vengano fatti passare lungo la parete.
  • Seite 45: Installazione Della Telecamera

    Queste viti sono necessarie solo per proteggere la telecamera da urti e vibrazioni molto forti. Nota: La telecamera AXIS P3363-VE/P3364-VE/P3364-LVE può essere munita di un tubo protettivo in metallo per proteggere i cavi in caso di installazione lungo la parete.
  • Seite 46: Regolazione Dell'obiettivo

    Pagina 46 telecamera di rete serie AXIS P33 Guida all'installazione Accesso al flusso video Utilizzare gli strumenti software forniti nel CD d’Installazione e Gestione per assegnare indirizzi IP, impostare password e accedere al flusso video. È anche possibile consultare la pagina www.axis.com/techsup per reperire gli stessi.
  • Seite 47 Guida all'installazione di telecamera di rete serie AXIS P33 Pagina 47 Completare l’installazione Schermo protettivo nero 1. Ruotare lo schermo di protezione nero all'interno della copertura a cupola in modo che sia allineato con la posizione della telecamera (non applicabile per AXIS P3364-LVE). 2.
  • Seite 48 Pagina 48 telecamera di rete serie AXIS P33 Guida all'installazione Uscita audio. Uscita audio che può essere connessa a un sistema di indirizzo pubblico (PA) oppure a un altoparlante con amplificatore integrato. È possibile collegare un paio di cuffie. Per l'uscita audio è...
  • Seite 49: Indicatori Led

    Guida all'installazione di telecamera di rete serie AXIS P33 Pagina 49 Il seguente schema dei collegamenti mostra come collegare un dispositivo ausiliario alla telecamera AXIS P3363-VE/P3364-VE/P3364-LVE. E.g. push button 3.3V max. 50mA Indicatori LED Colore Indicazione Rete Verde Luce fissa: connessione di rete a 100 Mbit/s. Luce lampeggiante: attività di rete.
  • Seite 50: Ripristino Delle Impostazioni Predefinite

    Pagina 50 telecamera di rete serie AXIS P33 Guida all'installazione Ripristino delle impostazioni predefinite Questa procedura consentirà di ripristinare le impostazioni predefinite per tutti i parametri, incluso l'indirizzo IP. 1. Scollegare l'alimentazione dalla telecamera. 2. Tenere premuto il pulsante Control e ricollegare il cavo di alimentazione (vedere “Panoramica dell'hardware”...
  • Seite 51: Medidas Preventivas

    Medidas preventivas Lea detenidamente esta Guía de instalación antes de instalar el producto Axis. Guarde la Guía de instalación para poder consultarla en el futuro. • Guarde el producto Axis en un entorno seco y ventilado. • Evite exponer el producto Axis a vibraciones, golpes o presiones excesivas. No instale el producto en soportes inestables ni en superficies o paredes inestables o con vibraciones, ya que esto podría dañarlo.
  • Seite 52: Sustitución De La Batería

    Sustitución de la batería Este producto Axis utiliza una batería de litio CR2032 3.0 de 3,0 V como fuente de alimentación para su reloj de tiempo real interno (RTC). En condiciones normales, esta batería durará un mínimo de 5 años. Cuando la batería tiene poca carga, el funcionamiento del RTC se puede ver afectado, ya que esto puede hacer que se reinicie cada vez que se encienda.
  • Seite 53: Contenido Del Paquete

    Guía de instalación de las Cámaras de red AXIS P33-VE Página 53 Guía de instalación de la cámara de red AXIS P3363-VE/P3364-VE/P3364-LVE Siga estas instrucciones para instalar la cámara de red 1. “Contenido del paquete” en la página 53 2. “Presentación del hardware” en la página 54 3.
  • Seite 54: Presentación Del Hardware

    (AXISP3363-VE/AXIS P3364-VE/AXIS P3364-LVE) y a la iluminación IR (AXIS P3364-LVE), no funcionarán si la pestaña no estuviera en esa posición. Dimensiones (Alt. x Anch.) AXIS P3363-VE/AXIS P3364-VE/AXIS P3364-LVE= 110 x 179 x 179 mm Peso AXIS P3363-VE/AXIS P3364-VE= 1,5 kg...
  • Seite 55: Instalación Del Hardware

    Pieza superior Pieza inferior Sustitución de la cubierta de domo clara/ahumada (opcional) La cámara AXIS P3363-VE/AXIS P3364-VE se suministra con un domo opcional. Para sustituir la cubierta del domo: 1. Afloje los 4 tornillos bajo la cubierta que sostiene al domo.
  • Seite 56 8. Vuelva a acoplar la parte superior de la protección de cables apretando los dos tornillos. Nota: La cámara AXIS P3363-VE/P3364-VE/P3364-LVE también se puede instalar con un conducto metálico para proteger el cableado cuando los cables se guíen a lo largo de la pared.
  • Seite 57 Estos tornillos solo son necesarios para proteger la cámara frente a impactos y vibraciones fuertes. Nota: La cámara AXIS P3363-VE/P3364-VE/P3364-LVE también se puede instalar con un conducto metálico para proteger el cableado cuando los cables se guíen a lo largo de la pared.
  • Seite 58: Ajuste Del Objetivo

    Página 58 Guía de instalación de las Cámaras de red AXIS P33-VE Acceso al flujo de video Utilice las herramientas incluidas en el CD de Software de Instalación y Gestión para asignar una dirección IP, establecer la contraseña y acceder al flujo de video. Esta información también está disponible en las páginas de asistencia técnica en www.axis.com/techsup Ajuste del objetivo Abra la página Live View en la interfaz...
  • Seite 59: Finalización De La Instalación

    Guía de instalación de las Cámaras de red AXIS P33-VE Página 59 Finalización de la instalación Revestimiento de protección negro 1. Gire el revestimiento de protección negro del interior de la cubierta del domo para que coincida con la posición de la cámara (no procede para el modelo AXIS P3364-LVE).
  • Seite 60 Página 60 Guía de instalación de las Cámaras de red AXIS P33-VE Conector del terminal de E/S: se utiliza en aplicaciones como detección de movimiento, activación de eventos, grabación de secuencias y notificaciones de alarma. Además de un pin de alimentación auxiliar y un pin de conexión a tierra GND, proporciona a la interfaz la conexión de: Pin4 Pin2...
  • Seite 61: Indicadores Led

    Guía de instalación de las Cámaras de red AXIS P33-VE Página 61 El diagrama de conexiones siguiente ofrece un ejemplo de cómo conectar un dispositivo auxiliar a la cámara AXIS P3363-VE/P3364-VE/P3364-LVE. E.g. push button 3.3V max. 50mA Indicadores LED Color Indicación...
  • Seite 62: Más Información

    Página 62 Guía de instalación de las Cámaras de red AXIS P33-VE Restablecimiento de los valores iniciales Mediante esta operación se restablecerá la configuración predeterminada original de todos los parámetros, incluida la dirección IP: 1. Desconecte la alimentación de la cámara. 2.
  • Seite 64 Ver. 3.1 Installation Guide Printed: June 2014 AXIS P3363-VE/P3364-VE/P3364-LVE Part No. 58280 © Axis Communications AB, 2012-2014...

Diese Anleitung auch für:

P3364-veP3364-lve

Inhaltsverzeichnis