Herunterladen Inhalt Inhalt Diese Seite drucken

Werbung

Verfügbare Sprachen
  • DE

Verfügbare Sprachen

  • DEUTSCH, seite 39
Domonial CMI/PMI/CAI
Quick Guide for Installers
Guide pratique de l'installateur
Guía rápida para los instaladores
Kurzanleitung für Installateure
Snelle gids voor installateurs
Guida rapida per gli installatori

Werbung

Inhaltsverzeichnis
loading

Inhaltszusammenfassung für Honeywell Domonial CMI

  • Seite 1 Domonial CMI/PMI/CAI Quick Guide for Installers Guide pratique de l’installateur Guía rápida para los instaladores Kurzanleitung für Installateure Snelle gids voor installateurs Guida rapida per gli installatori...
  • Seite 2 English...
  • Seite 3: The Led Indicators

    English 1. Introduction The Domonial CMI is a wireless control panel with a built-in siren, digital communicator and audio verification system. The radio link between the various components of the system allows easy installation without the need for much cabling. This version can be used with the “HF” (except CLB800HF) and the “M”...
  • Seite 4 English Introduction LED layout for the EN version (version K and later) State/LED Arm/Disarm Fault Area System Fault Tamper Fault Intruder Fault Colour Green Green Yellow 1.3 The Transmitter Function The Domonial CMI800++ panel is equipped with a digital transmitter for sending information to the following, via PSTN, GSM (GESEM835IS, GPRS800***, ETH800 expansion card) or ADSL : ►...
  • Seite 5: Mounting The Control Panel

    Mounting English 2. Mounting the Control Panel WARNING: ELECTRIC SHOCK HAZARD Any work inside the control panel must be carried out by qualified personnel Before opening the panel, first disconnect the mains supply from the fuse switch. After opening the panel, disconnect the telephone line before operation, The label with mains information is located on the external left side of the panel base.
  • Seite 6 English Mounting 2.2 Cabling Use the base to mark the holes for mounting (but do not use it as a drilling template). The cover must remain open for programming. Inside the control panel SELV >> << LEDs Take the cover off the unit by pushing in the locking clip with a screwdriver and simultaneously lifting the cover.
  • Seite 7 Mounting English Pass all cables (PSTN, mains, wired extensions) into the panel but do not connect them. The power supply cable must be secured with cable ties (close to J1) and these must be installed using the tool specified by the Lugs for cable tie manufacturer.
  • Seite 8 English Mounting Connect the telephone line using the stocko connector (included) and a 6mm single-wire telephone cable. Terminals are marked “L1, L2” for Input and “P1, P2” for Output. The telephone line interface has built-in voltage surge protection >> and line failure detection. <<...
  • Seite 9: System Configuration

    Configuration English 3. System Configuration Operation of the System The Domonial alarm system allows the surveillance of three different areas per site: ► Area A = the perimeter or ground floor ► Area B = the rest of the house ►...
  • Seite 10 Configuration English 3. Up to 4 radio sirens, as well as the panel’s integrated sounder. A radio siren emits an intrusion alarm signal which can be configured for sound level, duration and delay. For the panel’s integrated siren, the beep and fire siren sound levels can be configured. The general parameters for entry and exit delays are programmable for each area, from 0 to 90 seconds * The configuration of Area C depends upon the general parameters ‘Annex arming linked to Total’...
  • Seite 11 Programming English 4. Programming with the TCU Keypad ote that because the TCU is used for programming, the life of the battery will be reduced. A new battery should be inserted before handover to the end user if programming takes longer than one hour. Press within 30 seconds Hold down for 3 seconds SELECT LANGUAGE...
  • Seite 12: General Parameters

    English Programming Trigger a registration message by pressing the tamper or the relevant buttons on the device. VIEW DEVICE The serial number, type and radio level appear on the TCU screen. ----------------- Press OK to display the Modify Device screen. LBL “XDevice Lbl”...
  • Seite 13: Testing The Installation

    Programming English 4.4 Saving or Cancelling Modifications DO OT FORGET TO SAVE YOUR CO FIGURATIO !! Note that after saving a configuration, if all the panel LEDs light in succession, one or more parameters has been set with an incorrect value. The installation cannot be completed until this has been corrected.
  • Seite 14: Product Specifications

    English Programming Walk Testing the Installation Activate each sensor to check proper reception by the panel: the sensor serial number is displayed with the radio level of the reception by the panel. This test can also be used with other radio devices to check proper registering and radio reception on the panel RADIO SCAN 1-REGISTER...
  • Seite 15: Contenu De L'emballage

    Français 1. Introduction Domonial CMI est une centrale d’alarme sans fil intégrant une sirène, un transmetteur digital téléphonique avec écoute/interphonie. La liaison radio entre les différents éléments du système permet de s’affranchir de la plupart des câbles, facilitant ainsi l’installation. Cette version peut être utilisée avec les gammes de périphériques «...
  • Seite 16 Français Introduction Disposition des voyants LED dans la version EN (version K et ultérieure) État/LED Marche/Arrêt Défaut zone Défaut Défaut Autoprotection Défaut intrusion système Couleur Vert Vert Jaune Rouge Rouge 1.3 La fonction transmetteur La centrale Domonial CMI800++ est équipée d’un transmetteur numérique permettant d’envoyer, via PSTN, GSM (cartes d’extension GESEM835IS, GPRS800*** et ETH800) ou par ADSL, des informations vers les destinations suivantes : Un téléphone (PSTN, GSM Vocal).
  • Seite 17 Français Montage 2. Montage de la centrale d’alarme AVERTISSEMENT : RISQUE D’ÉLECTROCUTION Toute intervention à l’intérieur de la centrale d’alarme doit être effectuée par une personne qualifiée. Avant d’ouvrir la centrale, coupez l’alimentation secteur. Après avoir ouvert la centrale, débranchez la ligne téléphonique avant utilisation, L’étiquette mentionnant les informations relatives au secteur se trouve sur le côté...
  • Seite 18: Montage

    Montage Français 2.2 Câblage Utilisez le socle de la centrale pour marquer les orifices de montage (ne l’utilisez pas comme gabarit de perçage). Le capot doit rester ouvert pour la programmation. L’intérieur de la centrale d’alarme SELV >> << LEDs Ôtez le capot en appuyant sur le clip de verrouillage à...
  • Seite 19 Français Montage Passez tous les câbles (RTC, secteur, postes téléphoniques supplémentaires) dans la centrale mais ne les connectez-pas. Le câble secteur doit être maintenu par des colliers auto- verrouillants (barrrette de fixation près de J1). Les colliers Barrettes de fixation pour auto-verrouillants doivent être montés à...
  • Seite 20 Français Montage Connectez la ligne téléphonique à l’aide du connecteur Stocko (fourni) et d’un câble téléphonique monoconducteur de 6 mm. Les bornes sont marqués « L1, L2 » pour l’entrée et « P1, P2 » pour la sortie. >> L’interface de ligne téléphonique intègre une protection contre les <<...
  • Seite 21: Configuration Du Système

    Français Configuration 3. Configuration du système Fonctionnement du système Le système d’alarme Domonial permet la surveillance de trois zones différentes par site : Zone A = la périmétrie ou le rez-de-chaussée Zone B = le reste de la maison Une zone C* en option : Configuration liée : une seconde zone périmétrique ou le garage : Configuration autonome : le bureau ou le magasin.
  • Seite 22 Configuration Français 3. Jusqu’à 4 sirènes radio, avec la sirène intégrée de la centrale. Une sirène radio émet un signal d’intrusion dont le niveau sonore, la durée et le déclenchement peuvent être configurés. En ce qui concerne la sirène intégrée de la centrale, les niveaux sonores des bips et de la sirène incendie peuvent être configurés.
  • Seite 23 Français Programmation 4. Programmation à partir du clavier TCU otez que l’autonomie de la pile sera réduite lors de l’utilisation du TCU pour la programmation. Si la programmation dure plus d’une heure, une nouvelle pile devra être insérée avant la remise à l’utilisateur final.
  • Seite 24: Paramètres Généraux

    Programmation Français Déclenchez un message d’enregistrement en appuyant sur le contact CHOIX PÉRIPH d’autoprotection ou sur les boutons adéquats du périphérique. ——————— Le numéro de série, le type et le niveau radio s’affichent sur l’écran TCU. LBL « XDevice Lbl » Appuyez sur OK pour faire apparaître l’écran Modifier périphériques.
  • Seite 25: Test De L'installation

    Français Programmation 4.4 Enregistrement ou annulation des modifications ’OUBLIEZ PAS DE SAUVEGARDER VOTRE CO FIGURATIO ! Notez qu’après avoir enregistré une configuration, si un ou plusieurs paramètres ont été définis avec une valeur incorrecte, tous les voyants LED de la centrale s’allument les uns après les autres.
  • Seite 26: Caractéristiques Du Produit

    Programmation Français Test de fonctionnement de l’installation Activez chaque détecteur afin de vérifier que la réception s’effectue correctement au niveau de la centrale : le numéro de série du détecteur est affiché avec le niveau radio de la réception par la centrale. Ce test peut également être utilisé...
  • Seite 27: Contenido De La Caja

    Introducción 1. Introducción Domonial CMI es un panel de control vía radio equipado con una sirena integrada, un comunicador digital y un sistema de verificación por audio. El enlace por radio entre los distintos componentes del sistema permite una instalación muy sencilla, que no requiere un cableado complejo. Esta versión puede utilizarse tanto con los periféricos “HF”...
  • Seite 28 Español Introducción Disposición de los LED en la versión EN (versión K y posteriores) Estado/LED Armado/ Fallo área Fallo del Fallo protección Fallo de Desarmado sistema antisabotaje intrusión Color Verde Verde Amarillo Rojo Rojo 1.3 Función del transmisor Un transmisor digital incorporado al panel Domonial CMI800STD permite enviar datos, usando las redes RTB, GSM (tarjetas de ampliación GESEM835IS, GPRS800***, ETH800) o ADSL, a los siguientes destinos: Un teléfono (RTB, GSM voz).
  • Seite 29 Montaje Español 2. Montaje del panel de control CUIDADO: Riesgo de descarga eléctrica Sólo el personal cualificado debe realizar modificaciones dentro del panel de control. Antes de abrir el panel, corte el suministro de energía eléctrica del interruptor con fusible. Después de abrir el panel, desconecte la línea telefónica antes de utilizarla.
  • Seite 30: Montaje

    Español Montaje 2.2 Cableado Utilice la base para marcar los orificios para el montaje, pero no la utilice como plantilla para taladrar. La cubierta debe permanecer abierta durante la programación. Interior del panel de control SELV >> << LEDs Retire la cubierta de la unidad empujando el clip de enganche con un destornillador y, simultáneamente, levantando la cubierta.
  • Seite 31 Montaje Español Haga pasar todos los cables (RTB, alimentación, tomas telefónicas adicionales) por el panel, pero no los conecte. El cable de alimentación eléctrica se debe sujetar mediante sujetacables, cerca del terminal J1. Para instalar los sujetacables, se debe utilizar la herramienta especificada por el fabricante Orejetas para respectivo.
  • Seite 32 Español Montaje Conecte la línea telefónica utilizando el conector Stocko suministrado y un cable telefónico unipolar de 6 mm. Los terminales están marcados “L1, L2” para la entrada y “P1, P2” para la salida. >> La interfaz de la línea telefónica incorpora una protección contra <<...
  • Seite 33: Configuración Del Sistema

    Configuración Español 3. Configuración del sistema Funcionamiento del sistema El sistema de alarma Domonial permite vigilar tres áreas diferentes por instalación: Área A = perímetro o planta baja Área B = el resto de la casa Un área C opcional*: Configuración asociada: área del segundo perímetro o el garaje.
  • Seite 34 Español Configuración 3. Hasta 4 sirenas radio, así como el zumbador integrado del panel. Una sirena radio emite un pitido de alarma de intrusión cuyos nivel sonoro, duración y retraso se pueden configurar. Para el zumbador integrado del panel, se pueden configurar el pitido y los niveles sonoros de la sirena contra incendios.
  • Seite 35 Español Programación 4. Programación desde el teclado de la TCU Observe que la autonomía de la batería puede verse reducida si la programación se efectúa con el TCU. Si la programación dura más de una hora, debe remplazar la batería por una nueva antes de dar el TCU al usuario final.
  • Seite 36: Configurar La Fecha Y La Hora

    Español Programación Active una alarma pulsando el botón de antisabotaje o los botones adecuados del dispositivo. OPCION PERIFÉRICO El número de serie, el tipo y el nivel de radio aparecen en la pantalla del TCU. ————————- Pulse en OK para abrir la pantalla Modificar periférico. ETIQ “XDevice Lbl”...
  • Seite 37: Comprobar La Instalación

    Programación Español 4.4 Guardar o cancelar las modificaciones ¡ O OLVIDE GUARDAR SU CO FIGURACIÓ ! Observe que, si después de haber guardado una configuración, todos los LED del panel se iluminan en una sucesión, significa que uno o varios parámetros se han configurado con un valor incorrecto.
  • Seite 38: Características Del Producto

    Español Programación Comprobar la instalación test de paseo Active cada sensor para verificar que el panel lo recibe correctamente: aparece el número de serie del sensor, junto al nivel de radio con el que el panel recibe la señal. Esta prueba también se puede utilizar con otros periféricos de radio para verificar que se han registrado correctamente en el panel, y para comprobar el nivel de recepción radio.
  • Seite 39: Der Lieferumfang

    Einführung Deutsch 1. Einführung Domonial CMI ist eine Funk-Alarmzentrale mit eingebauter Sirene, digitaler Kommunikationseinheit und Audioüberwachung. Die Funkverbindung zwischen den verschiedenen Komponenten der Anlage erleichtert die Installation, da ein Großteil der Verkabelung wegfällt. Diese Version kann mit Geräten bzw. Bedienteilen der Serien „HF“...
  • Seite 40: Die Übertragungsfunktion

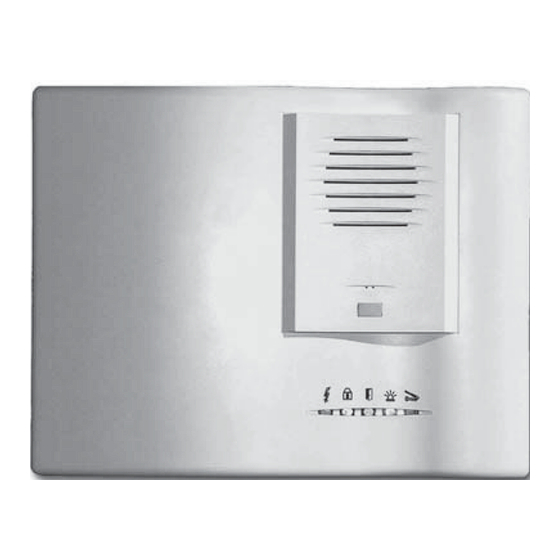
    Deutsch Einführung LED-Layout der EN Version (Version K und höher) Status/ Scharf- / Störungs- Anlagestörung Störung - Störung - Einbruch Unscharfschaltung bereich Sabotage Farbe Grün Grün Gelb 1.3 Die Übertragungsfunktion Die Domonial CMI800++ Funkzentrale ist mit einem digitalen Sender ausgestattet. Er sendet Informationen über PSTN (öffentliches analoges Fernsprechnetz), GSM (GESEM835IS, GPRS800***, ETH800 Erweiterungskarte) oder ADSL an: ►...
  • Seite 41: Installation Der Alarmzentrale

    Installation Deutsch 2. Installation der Alarmzentrale WARNUNG: STROMSCHLAGRISIKO Reparaturen innerhalb der Alarmanlage müssen von qualifizierten Fachkräften durchgeführt werden: Vor dem Öffnen der Alarmzentrale das Gerät spannungslos schalten. Netzstecker ziehen, Sicherung in der Unterverteilung ausschalten. Nach dem Öffnen der Alarmzentrale, die Telefonleitung vor der Inbetriebnahme trennen. Das Etikett mit den Informationen über die Stromversorgung befindet sich außen links auf der Rückwand der Alarmzentrale.
  • Seite 42: Installation

    Deutsch Installation 2.2 Verkabelung Verwenden Sie das Gehäuseunterteil zur Markierung der Bohrungen (aber nicht als Bohrschablone). Während der Programmierung muss die Abdeckung geöffnet bleiben. Innenansicht der Funkzentrale SELV >> << LEDs Die Abdeckung abnehmen: Dazu den Verschlussclip mit einem Schraubendreher eindrücken und gleichzeitig die Abdeckung abheben.
  • Seite 43 Installation Deutsch Alle Kabel (PSTN, Stromversorgung, drahtgebundene Nebenstellen) in die Zentrale einführen, ohne sie anzuschließen. Das Netzstromkabel muss mit Kabelbindern (bei J1) befestigt werden. Die Kabelbinder müssen mit dem vom Klemmen zur Kabelbinderhersteller angegebenen Werkzeug angebracht werden. Befestigung der >> Drähte <<...
  • Seite 44: Zusätzliche Steckverbinder

    Deutsch Installation Schließen Sie die Telefonleitung mit Hilfe des mitgelieferten Stocko Steckverbinders und eines einadrigen 6-mm-Telefonkabels an. Die mit “L1, L2” gekennzeichneten Kontakte dienen als Eingang, “P1, P2” als Ausgang. >> Die Telefonleitungsschnittstelle ist mit einen eingebauten << Überspannungsschutz und einer automatischen Erkennung einer Leitungsstörung ausgestattet.
  • Seite 45 Konfiguration Deutsch 3. Anlagenkonfiguration Bedienung der Anlage Mit der Domonial Alarmanlage können an jedem Standort drei verschiedene Bereiche überwacht werden: ► Bereich A = der Perimeter oder das Erdgeschoß ► Bereich B = der Rest des Hauses ► Ein optionaler Bereich C*: Verknüpfte Konfiguration: der zweite Perimeter oder die Garage Autonome Konfiguration: das Studio oder Geschäft Jedem Bereich kann ein oder mehrere Melder mit Verzögerung zugeordnet werden, damit die Alarmauslösung...
  • Seite 46 Deutsch Konfiguration 3. Bis zu vier Funksirenen sowie die in die Zentrale eingebaute Sirene Eine Funksirene gibt ein Einbruchalarmsignal aus, dessen Lautstärke, Dauer und Verzögerung konfiguriert werden kann. Für die in die Zentrale eingebaute Sirene kann die Lautstärke des Summertons und der Feuersirene konfiguriert werden.
  • Seite 47: Registrierung Der Peripheriegeräte

    Programmierung Deutsch 4. Programmierung mit dem TCU-Bedienteil Bitte beachten, dass die Verwendung des TCU für die Programmierung dessen Batterielebenszeit verkürzt. Wenn die Programmierung mehr als eine Stunde dauert, sollte die Batterie ersetzt werden, bevor das Gerät dem Endbenutzer übergeben wird. 3 Sekunden lang Innerhalb von 30 gedrückt halten...
  • Seite 48: Allgemeine Parameter

    Deutsch Programmierung Lösen Sie eine Registrierungsmeldung aus, indem Sie auf die Sabotage- oder die entsprechenden Tasten auf dem Gerät drücken. WÄHL TEILN Die Seriennummer, der Typ und die Funkfrequenz werden auf dem TCU —————— Display angezeigt. BEZEICH. “XDevice Lbl” OK drücken, um den Bildschirm “Gerät ändern” anzuzeigen. TYP “XX”...
  • Seite 49: Speichern Oder Abbrechen Von Änderungen

    Programmierung Deutsch 4.4 Speichern oder Abbrechen von Änderungen ICHT VERGESSE , DIE KO FIGURATIO ZU SPEICHER ! Bitte beachten: Wenn nach dem Speichern einer Konfiguration alle LEDs der Zentrale nacheinander leuchten, wurde für einen oder mehrere Parameter ein falscher Wert festgelegt. Die Installation kann erst abgeschlossen werden, nachdem der Fehler behoben wurde.
  • Seite 50: Lauftest Der Installation

    Deutsch Programmierung Lauftest der Installation Jeden Melder aktivieren, um den ordnungsgemäßen Empfäng der Signale durch die Zentrale zu überprüfen: Die Seriennummer des Melders wird auf der Zentrale zusammen mit der Funkempfangsstärke angezeigt. Dieser Test kann auch mit anderen Funkgeräten durchgeführt werden, um die ordnungsgemäße Registrierung und den korrekten Funkempfang auf der Zentrale sicherzustellen.
  • Seite 51: De Inhoud Van De Doos

    Nederlands 1. Inleiding De Domonial CMI is een draadloos bedieningspaneel met ingebouwde sirene, digitale communicator en audioverificatiesysteem. De radioverbinding tussen de verschillende componenten van het systeem vergemakkelijkt de installatie. Er is vrijwel geen bekabeling nodig. Deze versie kan worden gebruikt met de apparaatreeksen “HF”...
  • Seite 52 Nederlands Inleiding LED’s voor de EN-versie (versie K en hoger) Status/ In-/ Storingsgebied Systeemstoring Storing door Storing door uitschakeling sabotage inbraak Kleur Groen Groen Geel Rood Rood 1.3 De zenderfunctie Het Domonial CMI800++-paneel is uitgerust met een digitale zender om informatie te verzenden naar de volgende apparaten via PSTN, GSM (GESEM835IS, GPRS800***, ETH800-uitbreidingskaart) of ADSL : ►...
  • Seite 53 Montage Nederlands 2. Het bedieningspaneel monteren WAARSCHUWING: GEVAAR VOOR ELEKTRISCHE SCHOK Alle werkzaamheden in de behuizing van het bedieningspaneel moeten uitegevoerd worden door bevoegd personeel: Ontkoppel eerst de netvoeding met de gezekerde schakelaar voordat u het paneel opent. Ontkoppel nadat u het paneel hebt geopend de telefoonlijn voordat u het apparaat in werking stelt. Het label met informatie over de voeding bevindt zich op de linkerbuitenzijde van de basisplaat van het paneel.
  • Seite 54 Nederlands Montage 2.2 Bekabeling Gebruik de basisplaat om de montagegaten te markeren (maar gebruik dit niet als boorsjabloon). Het deksel moet open blijven voor de programmering. In het bedieningspaneel SELV >> << LEDs Haal het deksel van de eenheid door de bevestigingsklem in te drukken met een schroevendraaier en tegelijkertijd het deksel op te heffen.
  • Seite 55 Montage Nederlands Breng alle kabels (PSTN, netvoeding, draadaansluitingen) in het paneel, maar sluit ze niet aan. De voedingskabel moet worden bevestigd met kabelbinders (dicht bij J1). De kabelbinders moeten worden gemonteerd met behulp Kabelschoenen van het gereedschap dat is opgegeven door de producent. voor het beveiligen >>...
  • Seite 56 Nederlands Montage Sluit de telefoonlijn aan met behulp van de “Stocko”-stekker (meegeleverd) en een 6mm telefoonkabel met aders met een vaste kern. De contactklemmen zijn gemarkeerd als “L1, L2” voor de ingang >> en “P1, P2” voor de uitgang. << De telefoonlijn-interface is uitgerust met een ingebouwde piekspanningsbeveiliging en uitvaldetectie van de telefoonlijn.
  • Seite 57 Configuratie Nederlands 3. Systeemconfiguratie Werking van het systeem Met het Domonial alarmsysteem kunt u drie verschillende zones superviseren per locatie: ► Zone A = de omtrek of de benedenverdieping ► Zone B = de rest van het huis ► Een optionele zone C*: Gekoppelde zone: de tweede omtrekzone of de garage.
  • Seite 58 Nederlands Configuratie 3. Tot 4 radiosirenes en de interne sirene. Een radiosirene geeft een inbraakalarmsignaal af waarvoor het geluidsniveau, de duur en de vertraging kan worden bepaald. Voor de interne sirene van het paneel, kunnen het geluidsniveau van de pieptoon- en brandsirene worden ingesteld. De algemene parameters voor ingangs- en uitgangsvertragingen kunnen voor elke zone worden geprogrammeerd van 0 tot 90 seconden.
  • Seite 59 Programmeren Nederlands 4. Programmeren met het TCU-bediendeel Merk op dat, omdat de TCU wordt gebruikt om te programmeren, de levensduur van de accu wordt beperkt. Er moet een nieuwe accu worden geplaatst vóór de overhandiging aan de eindgebruiker als het programmeren meer dan een uur duurt. Houd 3 seconden ingedrukt Druk binnen 30 seconden KEUS TAAL...
  • Seite 60: Datum En Tijd Instellen

    Nederlands Programmeren Activeer een registratieboodschap door op de sabotageknop of de relevante knoppen op het apparaat te drukken. SELECTEER MODULE Het serienummer, het type en het radioniveau verschijnen op het TCU-scherm. —————————— Druk op OK om het scherm Modify Device (apparaat wijzigen) weer te geven. LABEL “XDevice Lbl”...
  • Seite 61: De Installatie Testen

    Programmeren Nederlands 4.4 Wijzigingen opslaan of annuleren VERGEET UW CO FIGURATIE IET OP TE SLAA !! Merk op dat als alle LED-lampjes van het paneel achtereenvolgens oplichten nadat u een configuratie hebt opgeslagen, één of meer parameters zijn ingesteld met een onjuiste waarde. De installatie kan niet worden voltooid tot dit is opgelost.
  • Seite 62: Productinformatie

    Nederlands Programmeren Een looptest uitvoeren op de installatie Activeer elke sensor om de correcte ontvangst door het paneel te controleren: het serienummer van de sensor wordt weergegeven samen met het radioniveau van de ontvangst door het paneel. U kunt deze test ook gebruiken in combinatie met andere radioapparatuur om de correcte registratie en radio- ontvangst te controleren op het paneel.
  • Seite 63: Contenuto Della Scatola

    Italiano 1. Introduzione Domonial CMI è una centrale di controllo wireless con sirena integrata, comunicatore digitale e sistema di verifica audio. Il collegamento radio fra i vari componenti del sistema consente una facile installazione, senza richiedere molto cablaggio. Questa versione può essere utilizzata con le gamme di dispositivi “HF” (eccetto CLB800HF) e “M”...
  • Seite 64 Italiano Introduzione Impostazione dei LED per la versione EN (versione K e posteriori) Stato/LED Inserire/Disinserire Zona difetto Difetto sistema Difetto Difetto tamper intrusione Colore Verde Verde Giallo Rosso Rosso 1.3 La funzione trasmittente La centrale Domonial CMI800++ è dotata di una trasmittente digitale per l’invio di informazioni, tramite PSTN, GSM (scheda di espansione GESEM835IS, GPRS800***, ETH800) o ADSL, ai ricettori seguenti: ►...
  • Seite 65 Montaggio Italiano 2. Montaggio della centrale di controllo AVVERTENZA: PERICOLO DI SHOC ELETTRICO Qualsiasi intervento all’interno della centrale di controllo deve essere effettuato da personale qualificato Prima di aprire la centrale, scollegare l’alimentazione di rete dall’interruttore a fusibile. Dopo aver aperto la centrale, scollegare la linea telefonica prima di intervenire, L’etichetta con le informazioni sull’alimentazione di rete è...
  • Seite 66 Italiano Montaggio 2.2. Cablaggio Utilizzare la base per segnare i fori per il montaggio (ma non utilizzarla come sagoma per forare). Il coperchio deve rimanere aperto per la programmazione. All’interno della centrale di SELV controllo >> << LEDs Togliere il coperchio dall’unità, spingendo sul gancio di chiusura con un cacciavite e sollevando simultaneamente il coperchio.
  • Seite 67 Montaggio Italiano Introdurre tutti i cavi (PSTN, rete, estensioni cablate) nella centrale, ma senza collegarli. Il cavo dell'alimentazione elettrica deve essere sicurizzato tramite collari di fissaggio (vicino a J1). I collari di serraggio devono Morsetti essere installati utilizzando l'attrezzo speciale specificato dal per fissare >>...
  • Seite 68 Italiano Montaggio Collegare la linea telefonica utilizzando il connettore Stocko (fornito) e un cavo telefonico ad un singolo filo di 6mm. I terminali sono segnati “L1, L2” per l’entrata e “P1, P2” per l’uscita. >> L’interfaccia della linea telefonica è dotata di protezione contro le <<...
  • Seite 69: Configurazione Del Sistema

    Configurazione Italiano 3. Configurazione del sistema Funzionamento del sistema Il sistema di allarme Domonial consente di sorvegliare tre differenti zone per sito: ► Zona A = il perimetro o il pianterreno ► Zona B = il resto della casa ► Una zona C* opzionale: Configurazione collegata: la zona secondo perimetro o il garage.
  • Seite 70 Italiano Configurazione 3. Fino a 4 radiosirene e l’avvertitore acustico della centrale integrato. Una radiosirena emette un segnale di allarme intrusione che può essere configurato per il volume, la durata e il ritardo. Per la sirena integrata nella centrale, si può configurare il volume della sirena antincendio e dell’avvertitore acustico. I parametri generali per i ritardi di ingresso e uscita sono programmabili per ogni zona, da 0 a 90 secondi.
  • Seite 71 Programmazione Italiano Programmazione tramite la tastiera TCU otare che se la TCU è utilizzata per la programmazione, la durata della batteria sarà ridotta. Una nuova batteria deve essere inserita prima della consegna all’utente finale, se la programmazione dura oltre un’ora. Bloccare per 3 secondi Premere entro 30 secondi SCELTA LINGUA...
  • Seite 72: Regolazione Della Data E Dell'ora

    Italiano Programmazione Attivare un messaggio di registrazione premendo il tamper o i pulsanti pertinenti sul dispositivo. SCELTO PERIFE Il numero di serie, il tipo e il livello radio appaiono sullo schermo TCU. ——————— Premere OK per visualizzare lo schermo Modifica Dispositivo. DESC “XDevice Lbl”...
  • Seite 73 Programmazione Italiano 4.4 Salvare o annullare le modifiche O DIME TICARE DI SALVARE LA CO FIGURAZIO E! Notare che dopo aver salvato la configurazione, se tutti i LED della centrale si accendono successivamente, uno o più parametri sono stati impostati con un valore errato. L’impianto non può...
  • Seite 74 Italiano Programmazione Prova walk dell’impianto Attiva ciascun sensore per verificare che la centrale riceve i segnali in modo corretto: il numero di serie del sensore è visualizzato con il livello della radioricezione della centrale. Questa prova può essere utilizzata anche con altri radiodispositivi per verificare la registrazione e la radioricezione nella centrale 1-REGISTRARE SCANSIONE RF...
  • Seite 76 Tel.: +33 (0)4 92 94 29 50 Fax: +33 (0)4 92 94 29 60 EKZ008100B 10/2007 © Honeywell International Inc. Honeywell reserves the right to modify the characteristics of this product at any time, in the interests of the product and user.

Diese Anleitung auch für:

Domonial pmiDomonial cai

Inhaltsverzeichnis