Herunterladen Inhalt Inhalt Diese Seite drucken
Klarstein 10032963 Bedienungsanleitung
Vorschau ausblenden Andere Handbücher für 10032963:

Werbung

Verfügbare Sprachen
  • DE

Verfügbare Sprachen

  • DEUTSCH, seite 1
Weinkühlschrank
Wine Cooler
Vinoteca
Cave à vin
Frigorifero per vino
10032963

Werbung

Inhaltsverzeichnis
loading

Inhaltszusammenfassung für Klarstein 10032963

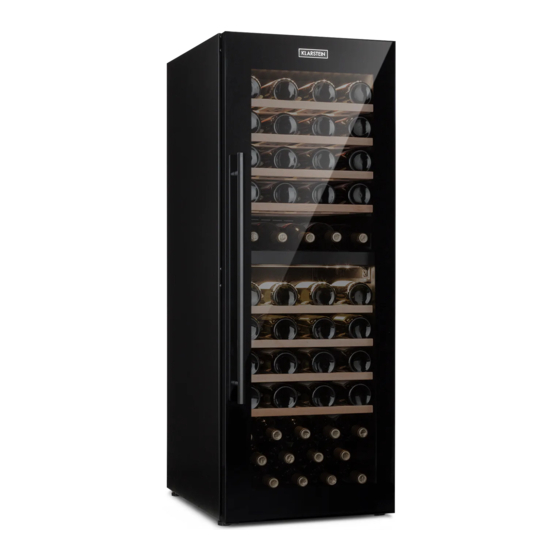
  • Seite 1 Weinkühlschrank Wine Cooler Vinoteca Cave à vin Frigorifero per vino 10032963...
  • Seite 3: Inhaltsverzeichnis

    Italiano 43 Display und Tastenfunktionen 8 Wartung und Modifikationen 9 Fehlersuche und Fehlerbehebung 1 1 Hinweise zur Entsorgung 12 TECHNISCHE DATEN Artikelnummer 10032963 Stromversorgung 220-240 V ~ 50/60 Hz KONFORMITÄTSERKLÄRUNG Hersteller: Chal-Tec GmbH, Wallstraße 16, 10179 Berlin, Deutschland. Dieses Produkt entspricht den folgenden Europäischen...
  • Seite 4: Sicherheitshinweise

    SICHERHEITSHINWEISE • Verändern Sie das Gerät nicht und versuchen Sie es nicht selbst zu reparieren. Für Schäden, die durch Missachtung der Hinweise und unsachgemäßen Gebrauch entstehen, übernehmen wir keine Haftung. • Überprüfen Sie nach dem Auspacken das Gerät auf eventuelle Transportschäden. Wenn Sie Beschädigungen bemerken, schließen Sie das Gerät nicht an den Stromkreis an, sondern wenden Sie sich an Ihren Händler.
  • Seite 5: Installation

    INSTALLATION Vor dem ersten Betrieb Lassen Sie das Gerät vor dem ersten Betrieb 24 Stunden lang stehen, damit sich das Kühlmittel verteilen kann. Lassen Sie die Tür in dieser Zeit offen, damit sich produktionsbedingter Geruch verflüchtigen kann. Hinweis: Alle Modelle ohne Frontbelüftung bzw. Belüftungsschlitze an der Front sind keine Einbaugeräte und müssen frei stehen.
  • Seite 6: Inbetriebnahme

    INBETRIEBNAHME Stecken Sie den Stecker in die Steckdose und schalten Sie das Gerät ein, indem sie die POWER-Taste einige Sekunden gedrückt halten. Wenn die das Gerät zum ersten Mal (oder nach längerer Zeit wieder) benutzen, gibt es eine Differenz zwischen der von Ihnen eingestellten Temperatur und der Temperatur, die im Display angezeigt wird.
  • Seite 7: Temperatureinstellungen

    Kühlschranktypen Bitte beachten Sie, dass es je nach Beladung und Einstellungen ca. 24 Stunden dauert, bis der Weinkühlschrank die eingestellte Temperatur erreicht. Während dieser Zeit scheint sich die LED-Anzeige unregelmäßig zu verändern. Das ist normal und dieser Vorgang tritt immer dann ein, wenn eine Einstellung geändert wird oder wenn große Menge Weinflaschen neu hinzugefügt wird.
  • Seite 8: Display Und Tastenfunktionen

    DISPLAY UND TASTENFUNKTIONEN Power-Taste (ein/aus) Drücken Sie die Taste 3 Sekunden lang, um das Gerät auszuschalten. Im Display (4) wird ein digitaler Countdown angezeigt: 3, 2, 1. Drücken Sie die Taste erneut, das Gerät schaltet sich wieder ein. Taste zum erhöhen der Temperatur der oberen Zone Drücken Sie mehrmals kurz auf die Taste.
  • Seite 9 Türaufhängung umdrehen Öffnen Sie die Tür bis zum Anschlag. Benutzen Sie ein kleines Messer (2) und entfernen Sie die Nägel an der Blende, wie auf Bild 1 dargestellt. Halten Sie die Tüpr fest und entfernen Sie oben und unten die Begrenzungsschrauben mit einem Schraubenzieher (3), wie auf Bild 2 dargestellt.
  • Seite 10: Wartung Und Modifikationen

    WARTUNG UND MODIFIKATIONEN Abtauen Das Gerät ist mit eine Auto-Abtauen-Funktion ausgestattet. Wenn das Gerät läuft werden die gefrorenen Oberflächen automatisch abgetaut. Das entstehende Tauwasser fließt automatisch ab und landet in einem Auffangbehälter, der sich der Rückseite des Geräts in der Nähe des Kompressors befindet. Durch die Hitze des Kompressors verdampft das Wasser.
  • Seite 11: Fehlersuche Und Fehlerbehebung

    Installation des Türgriffs Nehmen Sie den Griff aus dem Schrank heraus und nehmen Sie dann vier 4*35 Schrauben aus der Zubehörtasche. Ziehen Sie die Türdichtung etwas zur Seite und setzen Sie die Schrauben innen an die Tür. Richten Sie den Griff an den Löchern außen an der Tür aus und ziehen Sie die Schrauben mit einem Kreuzschlitzschraubenzieher fest.
  • Seite 12: Hinweise Zur Entsorgung

    Problem Mögliche Ursache und Lösungsansatz Das Gerät Die Raumtemperatur ist höher als sonst. geht häufig Es befinden sich viele Flaschen im Gerät. an und aus. Die Tür wurde zu oft geöffnet. Die Tür ist nicht richtig zu. Die Temperatur ist nicht richtig eingestellt. Die Türdichtung dichtet nicht richtig.
  • Seite 13 Display and Button Functions 18 Maintenance and Modifications 19 Troubleshooting  21 Hints on Disposal 22 TECHNICAL DATA Item number 10032963 Power supply 220-240 V ~ 50/60 Hz DECLARATION OF CONFORMITY Producer: Chal-Tec GmbH, Wallstraße 16, 10179 Berlin, Germany. This product is conform to the following European...
  • Seite 14: Safety Instructions

    SAFETY INSTRUCTIONS • Do not disassemble, modify or any other way alter the device. Any of the aforementioned actions shall be construed as an alteration as set forth herein. • After unpacking, check the device for possible damage incurred during transport. If you notice any damage, do not connect the device to the circuit, but contact your dealer.
  • Seite 15 INSTALLATION Before first Use Allow 24 hours before switching on the wine cellar. During this time we recommend that you leave the door open to clear any residual odors. Note: All models without front venting (air opening) are strictly for free standing only.
  • Seite 16: Getting Started

    GETTING STARTED Plug in and switch on the cellar by pressing on the power button for a few seconds. When you use the wine cellar for the first time (or restart the wine cellar after having it shut off for a long time), there will be a few degrees variance between the temperature you have selected and the one indicated on the LED readout.
  • Seite 17 Types of Regulation Please note that depending on the loading and settings chosen it takes about 24 hours for the wine cellar to see the temperature stabilizing. During this time LED seems to move erratically in particular,It is normal and this process occurs whenever the setting is modified and/or whenever a large amount of bottles are added to the cellar.
  • Seite 18 DISPLAY AND BUTTON FUNCTIONS ON/OFF the power button Press the button 3 seconds to power off. Window digital countdown displays 3, 2, 1. Press again, the power turns on. Upper zone temperature setting up button Press one time, window (4) the set value will increase 1 degree Celsius in the original setting temperature, the setting range according to customer requirements.
  • Seite 19: Maintenance And Modifications

    MAINTENANCE AND MODIFICATIONS Defrosting Your wine cellar is designed with “Auto-cycle” defrost system. During “Off-cycle” the refrigerated surfaces of the wine cellar defrost automatically. Defrost water from the wine cellar storage compartment drains automatically and part of it goes into a drainage container, which is located at the back of the wine cellar next to the compressor.
  • Seite 20 Reversibility of the door Put the cabinet on open operation place, the door opened to the maximum angle. Use small knife (2) to take off the decorative nail (1) on opposite side (Drawing 1). Hold the door, use six angle screwdriver (3) to screw out the door shaft core (4) from the two ends of the top of the door.
  • Seite 21 Handle Installation Method Take out handle from cabinet, then take out four pcs 4*35 screws from accessory bag. Pull open door seal from the side of door, then insert screws into the 2 handle holes on side of door, then put the screws alignment the hole of handle , tighten the screws by Phillips screwdriver then compress the door seal...
  • Seite 22: Hints On Disposal

    Problem Possible Cause and Suggested Solution Turns on and The room temperature is hotter than normal. off frequently. A large amount of contents has been added to the Wine cellar. The door is opened too often. The door is not closed completely. The temperature control is not set correctly.
  • Seite 23: Fiche Technique

    Écran et fonctions des touches 28 Maintenance et modifications 30 Identification et résolution des problèmes 31 Informations sur le recyclage 32 FICHE TECHNIQUE Numéro d’article 10032963 Alimentation 220-240 V ~ 50/60 Hz DÉCLARATION DE CONFORMITÉ Fabricant: Chal-Tec GmbH, Wallstraße 16, 10179 Berlin, Allemagne. Ce produit est conforme aux directives européennes...
  • Seite 24: Consignes De Sécurité

    CONSIGNES DE SÉCURITÉ • Ne modifiez pas l‘appareil et n‘essayez pas de le réparer vous-même. Nous ne saurions être tenus pour responsables des dommages causés par le non-respect des instructions et une utilisation inappropriée. • Après le déballage, vérifiez que l‘appareil n‘est pas endommagé. Si vous remarquez des dommages, ne branchez pas l‘appareil mais consultez votre revendeur.
  • Seite 25 INSTALLATION Avant la première utilisation Avant d‘utiliser pour la première fois, laissez l‘appareil reposer pendant 24 heures pour permettre au liquide de refroidissement de se répartir. Laissez la porte ouverte pendant ce temps pour permettre à l‘odeur liée à la production en usine de s‘évaporer. Remarque : tous les modèles non équipés d‘aération en façade ou de fentes de ventilation sont des appareils non encastrables et doivent être installés en pose libre.
  • Seite 26: Mise En Marche

    MISE EN MARCHE Branchez la fiche dans la prise et allumez l‘appareil en maintenant le bouton POWER pendant quelques secondes. Lorsque vous utilisez l‘appareil pour la première fois (ou après une longue période), il y a une différence entre la température que vous avez réglée et la température affichée à...
  • Seite 27 Types de réfrigérateurs Veuillez noter que, selon la charge et les paramètres, il faut environ 24 heures à la cave à vin pour atteindre la température de réglage. Pendant ce temps, l‘affichage LED semble changer irrégulièrement. Ceci est normal et ce processus se produit chaque fois qu‘un réglage est modifié...
  • Seite 28 ÉCRAN ET FONCTIONS DES TOUCHES Touche Power (marche/arrêt) Appuyez sur le bouton pendant 3 secondes pour éteindre l'appareil. L'affichage (4) montre un compte à rebours numérique: 3, 2, 1. Appuyez à nouveau sur le bouton, l'appareil se rallume. Bouton pour augmenter la température de la zone supérieure Appuyez brièvement plusieurs fois sur le bouton.
  • Seite 29 Modification du sens d‘ouverture de la porte Ouvrez la porte jusqu‘en butée. Utilisez un petit couteau (2) et retirez les pointes du panneau comme illustré sur la figure 1. Tenez fermement la porte et retirez les vis de butée en haut et en bas de la porte avec un tournevis (3) comme indiqué...
  • Seite 30: Maintenance Et Modifications

    MAINTENANCE ET MODIFICATIONS Dégivrage L‘appareil est équipé d‘une fonction de dégivrage automatique. Lorsque l‘appareil est en marche, les surfaces gelées sont automatiquement décongelées. L‘eau de condensation qui en résulte s‘évacue automatiquement et finit dans un récipient de collecte situé à l‘arrière de l‘unité, à proximité du compresseur. La chaleur du compresseur évapore l‘eau.
  • Seite 31 Installation de la poignée de porte Retirez la poignée du réfrigérateur, puis prenez les quatre vis 4 * 35 de la pochette d‘accessoires. Tirez légèrement le joint de la porte vers le côté et placez les vis à l‘intérieur de la porte.
  • Seite 32: Informations Sur Le Recyclage

    Problème Cause possible et solution L'appareil La température ambiante s'est élevée. s'éteint et L'appareil contient beaucoup de bouteilles. redémarre fréquemment. La porte a été ouverte trop souvent. La porte est mal fermée. La température est mal réglée. Le joint de porte n‘est plus étanche. Vibrations Vérifiez si l'appareil est bien vertical.
  • Seite 33: Datos Técnicos

    Mantenimiento y modificaciones 40 Detección y resolución de problemas 41 Indicaciones para la retirada del aparato 42 DATOS TÉCNICOS Número de artículo 10032963 Suministro eléctrico 220-240 V ~ 50/60 Hz DECLARACIÓN DE CONFORMIDAD Fabricante: Chal-Tec GmbH, Wallstraße 16, 10179 Berlín, Alemania.
  • Seite 34: Indicaciones De Seguridad

    INDICACIONES DE SEGURIDAD • No intente reparar el aparato usted mismo ni lo abra. La empresa no se responsabiliza de los daños ocasionados por un uso indebido del producto o por haber desatendido las indicaciones de seguridad. • Compruebe el aparato tras desembalarlo para detectar posibles daños durante el transporte.
  • Seite 35 INSTALACIÓN Antes del primer uso Deje el aparato en posición vertical durante 24 horas antes de ponerlo en marcha por primera vez para que el líquido refrigerante pueda distribuirse correctamente. Deje la puerta abierta durante este periodo para que los olores del proceso de fabricación desaparezcan.
  • Seite 36: Puesta En Funcionamiento

    PUESTA EN FUNCIONAMIENTO Conecte el enchufe a la toma de corriente y encienda el aparato pulsando el botón POWER algunos segundos. Si utiliza el aparato por primera vez (o lo utiliza después de un periodo prolongado de tiempo), existe una diferencia entre la temperatura que ha seleccionado y la temperatura que aparece en el display.
  • Seite 37 Tipos de vinotecas Tenga en cuenta que en función de la carga y los ajustes, se necesitarán unas 24 horas hasta que la vinoteca alcance la temperatura seleccionada. Durante este tiempo, es posible que los indicadores LED cambien de manera irregular. Se trata de un fenómeno normal y este proceso siempre se produce si ha cambiado un ajuste o si ha añadido una gran cantidad de botellas de vino.
  • Seite 38 DISPLAY Y BOTONES DE FUNCIÓN Botón power (encendido/apagado) Mantenga pulsado el botón 3 segundos para apagar el aparato. En el display (4) se muestra una cuenta atrás digital: 3, 2, 1. Pulse de nuevo el botón para volver a encender el aparato. Botón para aumentar la temperatura de la zona superior Pulse varias veces el botón.
  • Seite 39 Cambiar la orientación de apertura de la puerta Abra la puerta hasta el tope. Utilice un cuchillo pequeño (2) y retire la espiga de la bisagra tal y como se representa en la imagen 1. Sujete la puerta y retire los tornillos de tope inferior y superior con un destornillador (3) como se representa en la imagen 2.
  • Seite 40: Mantenimiento Y Modificaciones

    MANTENIMIENTO Y MODIFICACIONES Descongelar El aparato está equipado con una función de descongelación automática. Cuando el aparato funciona, la superficie congelada se descongela automáticamente. El agua congelada fluye automáticamente hasta caer en un recipiente colector situado en la parte trasera del aparato cerca del compresor. A través del calor del compresor, el agua se evapora.
  • Seite 41: Detección Y Resolución De Problemas

    Instalación del asa de la puerta Extraiga el asa de la balda y coja 4 tornillos de tipo 4x35 de la bolsa de accesorios. Aparte un poco la junta de la puerta y coloque los tornillos sobre la puerta. Oriente el asa para que se alinee con los orificios de la puerta y apriete los tornillos con un destornillador de estrella.
  • Seite 42: Indicaciones Para La Retirada Del Aparato

    Problema Posible causa y solución El aparato se La temperatura ambiente es superior a la habitual. enciende y se Hay demasiadas botellas dentro del aparato. apaga con frecuencia. La puerta se abre con demasiada frecuencia. La puerta no se ha cerrado correctamente. La temperatura no se ha ajustado correctamente.
  • Seite 43: Dati Tecnici

    Display e funzioni dei tasti 48 Riparazione e modifiche 50 Ricerca e risoluzione dei problemi 51 Smaltimento 52 DATI TECNICI Articolo numero 10032963 Potenza 220-240 V ~ 50/60 Hz DICHIARAZIONE DI CONFORMITÁ Produttore: Chal-Tec GmbH, Wallstraße 16, 10179 Berlino, Germania.
  • Seite 44: Avvertenze Di Sicurezza

    AVVERTENZE DI SICUREZZA • Non modificare il dispositivo e non cercare di ripararlo da soli. Per danni causati dall‘inosservanza delle istruzioni o dall‘uso improprio, non ci assumiamo alcuna responsabilità. • Dopo aver disimballato, controllare che il dispositivo non abbia subito possibili danni durante il trasporto.
  • Seite 45: Prima Dell'utilizzo

    INSTALLAZIONE Prima dell´utilizzo Lasciare riposare l‘unità per 24 ore prima dell´utilizzo, in modo che il liquido di raffreddamento possa distribuirsi. Lascia la porta aperta durante questo tempo in modo che l‘odore legato alla produzione possa volatilizzarsi. Nota: tutti i modelli senza ventilazione frontale o fessure di ventilazione sul fronte non sono alcun pezzo da montaggio e devono stare liberi.
  • Seite 46: Messa In Funzione

    MESSA IN FUNZIONE Collegare la spina alla presa e accendere il dispositivo tenendo premuto il pulsante POWER per alcuni secondi. Se il dispositivo viene utilizzato per la prima volta (o dopo un lungo tempo), c´è una differenza tra la temperatura impostata e quella visualizzata sul display.
  • Seite 47 Tipi di frigorifero Si prega di considerare che secondo il carico e le impostazioni, la durata è di circa 24 ore, finché venga raggiunta la temperatura del frigorifero impostata. Durante questo tempo si vede cambiare il display a LED in modo irregolare. Questo è...
  • Seite 48 DISPLAY E FUNZIONI DEI TASTI Tasto Power (on/off) Premere il tasto per 3 secondi per spegnere il dispositivo. Nel Display (4) viene mostrato un contdown alla rovescia: tre, 2, 1. Premere il pulsante nuovamente e il dispositivo si accende di nuovo. Tasto per aumentare della temperatura della zona superiore.
  • Seite 49 Invertire il lato di apertura dello sportello Aprire la porta finché si arresta. Utilizzare un piccolo coltello (2) e rimuovere i chiodi del pannello come descritto nella figura 1. Tenere saldamente ferma la porta e rimuovere sopra e sotto le viti di limite con un cacciavite (3), come mostrato nella figura 2.
  • Seite 50: Riparazione E Modifiche

    RIPARAZIONE E MODIFICHE Sbrinamento Il dispositivo è dotato di una funzione di sbrinamento automatico. Quando l‘unità è in funzione, le superfici congelate vengono automaticamente sbrinate. L‘acqua di condensa risultante è scaricata automaticamente e finisce in una presa situata sul retro dell‘unità...
  • Seite 51: Installazione Della Maniglia

    Installazione della maniglia Prendere la maniglia dall‘armadio e poi prendere quattro viti 4*35 dal taschino degli accessori. Estrarre leggermente sul lato la guarnizione della porta e mettere le viti sulla parte interna della porta. Allineare la maniglia sui fori nella parte esterna della porta e serrare nuovamente le viti con un cacciavite a croce.
  • Seite 52: Smaltimento

    Problema Causa e possibile soluzione Il dispositivo La temperatura ambientale é piú alta del solito. si spegne e Ci sono troppe bottiglie nel dispositivo. si accende in continuazione La porta è stata aperta troppe volte. La porta non è ben chiusa. La temperatura non è...

Inhaltsverzeichnis