Herunterladen Inhalt Inhalt Diese Seite drucken
Candy FCXE818XWIFI Bedienungsanleitung
Vorschau ausblenden Andere Handbücher für FCXE818XWIFI:
Inhaltsverzeichnis

Werbung

Verfügbare Sprachen
  • DE

Verfügbare Sprachen

  • DEUTSCH, seite 55
• FCXE818XWIFI
• FCXM625
USER INSTRUCTIONS
OVENS
NOTICE D'EMPLOI ET D'INSTALLATION
DES FOURS ENCASTRABLES
MANUALE D'ISTRUZIONI
FORNO
INSTRUCCIONES DE USO
HORNOS EMPOTRABLES
BEDIENUNGSANLEITUNG
BACKOFEN
KULLANIM KILAVUZU
FIRINLAR
POKYNY PRO UŽIVATELE
TROUBY
CANDY HOOVER GROUP S.R.L. • Via Privata Eden Fumagalli • 20047 Brugherio Milano Italy
GB
02
FR
15
IT
29
ES
42
DE
55
TR
68
CZ
81

Werbung

Inhaltsverzeichnis
loading

Inhaltszusammenfassung für Candy FCXE818XWIFI

  • Seite 1 USER INSTRUCTIONS OVENS NOTICE D'EMPLOI ET D'INSTALLATION DES FOURS ENCASTRABLES MANUALE D’ISTRUZIONI FORNO INSTRUCCIONES DE USO HORNOS EMPOTRABLES BEDIENUNGSANLEITUNG BACKOFEN KULLANIM KILAVUZU FIRINLAR POKYNY PRO UŽIVATELE TROUBY CANDY HOOVER GROUP S.R.L. • Via Privata Eden Fumagalli • 20047 Brugherio Milano Italy...
  • Seite 2: Safety Indications

    Safety Indications • WARNING: the appliance and accessible parts become hot during use. Be careful not to touch any hot parts. •WARNING: the accessible parts can become hot when the grill is in use. Children should be kept at a safe distance. •WARNING: ensure that the appliance is switched off before replacing the bulb, to avoid the possibility of electric shocks.
  • Seite 3 •Only use the meat probe recommended for this oven. •Do not use a steam cleaner. •Put the plug into a socket equipped with a third contact which corresponds to the earth and which must be connected and in operation. For models without a plug, attach a standard plug to the cable that is able to bear the load indicated on the tag.
  • Seite 4: Inhaltsverzeichnis

    Summary General Instructions 1.1 Safety indications 1.2 Electrical safety 1.3 Recommendations 1.4 Installation 1.5 Waste management 1.6 Conformity declaration 2.1 Overview Product Description 2.2 Accessories 2.3 First use Use of the Oven 3.1 Display description 3.2 Cooking modes Oven Cleaning and Maintenance 4.1 General notes on cleaning 4.2 Maintenance •...
  • Seite 5: General Instructions

    1. General Instructions We thank you for choosing one of our products. For the best results with your oven, you should read this manual carefully and retain it for future reference. Before installing the oven, take note of the serial number so that you can give it to customer service staff if any repairs are required.
  • Seite 6: Recommendations

    NOTE: As the oven could require maintenance work, it is advisable to keep another wall socket available so that the oven can be connected to this if it is removed from the space in which it is installed. The power cable must only be substituted by technical service staff or by technicians with equivalent qualifications.
  • Seite 7: Product Description

    2. Product Description 2.1 Overview 1. Control panel 2. Shelf positions (lateral wire grid if included) 3. Metal grill 4. Drip pan 5. Fan (behind the steel plate) 6. Meat probe 7. Oven door 2.2 Accessories (According to model) Led vision Metal grill Holds baking trays and plates.
  • Seite 8: First Use

    2.3 First Use PRELIMINARY CLEANING Clean the oven before using for the first time. Wipe over external surfaces with a damp soft cloth. Wash all accessories and wipe inside the oven with a solution of hot water and washing up liquid. Set the empty oven to the maximum temperature and leave on for about 1 hour, this will remove any lingering smells of newness.
  • Seite 9 HOW TO FUNCTION HOW TO ACTIVATE WHAT IT DOES WHY IT IS NEEDED DEACTIVATE •To modify cooking before When a cooking programme When the cooking time has NB: can only be set with an the set time, press EXTRA t e r m i n a t e s , t h e o v e n f i n i s h e d , t h e o v e n active cooking programme.
  • Seite 10: Language Setting

    For detailed information about HOW TO CONNECT your simply-Fi appliance and HOW TO USE it at its best, go to http://www.candysimplyfi.com or visit the dedicated simply-Fi Customer Service website http://simplyfiservice.candy-hoover.com LANGUAGE SETTING The language can be set when Grill the oven is switched off by pressing the Extra and Select Oven box buttons simultaneously and for 3".
  • Seite 11: Cooking Modes

    3.2 Cooking Modes Function T °C T °C Function (Depends on the oven model) Dial range default LAMP: Turns on the oven light. DEFROST: When the dial is set to this position. The fan circulates air at room 40 ÷ 40 temperature around the frozen food so that it defrosts in a few minutes without the protein content of the food being changed or altered.
  • Seite 12: General Notes On Cleaning

    4. Oven cleaning and maintenance 4.1 General notes on cleaning The lifecycle of the appliance can be extended through regular cleaning. Wait for the oven to cool before carrying out manual cleaning operations. Never use abrasive detergents, steel wool or sharp objects for cleaning, so as to not irreparably damage the enamelled parts.
  • Seite 13: Removal And Cleaning Of The Glass Door

    REMOVAL AND CLEANING OF THE GLASS DOOR 1. Open the oven door. 2.3.4. Lock the hinges, remove the screws and remove the upper metal cover by pulling it upwards. 5.6. Remove the glass, carefully extracting it from the oven door (NB: in pyrolytic ovens, also remove the second and third glass (if present)).
  • Seite 14: Faq

    5. Troubleshooting 5.1 FAQ PROBLEM POSSIBLE CAUSE SOLUTION The oven does not heat up The clock is not set Set the clock The oven does not heat up The child lock is on Deactivate the child lock A cooking function and Ensure that the necessary The oven does not heat up temperature has not been set...
  • Seite 15: Conseils De Securite

    Conseils De Securite • ATTENTION: l'appareil et les parties accessibles deviennent chauds pendant l'utilisation. Veillez à ne pas toucher les élements chauffants. • MISE EN GARDE: les parties accessibles peuvent devenir chaudes lorsque le gril est en cours d'utilisation. Les enfants doivent être maintenus à une distance de sécurité.
  • Seite 16 •Le four doit être éteint avant le démontage des accessoires. Après nettoyage, remonter les accessoires en suivant les instructions. • Utilisez uniquement la sonde thermique recommandée pour ce four. • Ne pas utiliser un nettoyeur à vapeur. • Brancher la fiche dans une prise de courant équipée d’un troisième contact correspondant à...
  • Seite 17 SOMMAIRE Instructions Générales 1.1 Indications de sécurité 1.2 Sécurité électrique 1.3 Recommandations 1.4 Installation 1.5 La gestion des déchets et la protection de l'environnement 1.6 Déclaration de conformité Description du produit 2.1 Vue d'ensemble 2.2 Accessoires 2.3 Première utilisation Utilisation du Four 3.1 Description de l'affichage 3.2 Mode de cuisson Nettoyage du four et...
  • Seite 18: Instructions Générales

    1. Instructions générales Nous vous remercions d'avoir choisi un de nos produits. Pour obtenir les meilleurs résultats avec votre four, vous devez lire attentivement ce manuel et le conserver pour toute consultation ultérieure. Avant d'installer le four, notez le numéro de série, il vous sera demandé par le support technique si des réparations sont nécessaires.
  • Seite 19: Recommandations

    ATTENTION Faire vérifier la continuité de la terre de l’installation avant de procéder au raccordement. Le fabricant décline toute responsabilité en cas d'accidents ou d'autres problèmes qui pourraient survenir à l'usage d'un appareil non relié à la terre, ou relié à une terre dont la continuité serait défectueuse. REMARQUE: Le four peut nécessiter une opération de S.A.V.
  • Seite 20: Déclaration De Conformité

    ÉCONOMIE ET RESPECT DE L'ENVIRONNEMENT Lorsque cela est possible, éviter le préchauffage du four et éviter de le faire tourner à vide. N'ouvrez la porte du four que lorsque cela est nécessaire, car il y a des déperditions de chaleur à chaque fois qu'il est ouvert.
  • Seite 21: Led Vision

    Les avantages : Led vision -Visibilité optimales des plats -Durée de vie prolongée -Consommation énergétique extrêmement basse '' -95'' par rapport au système traditionnel d'éclairage du four « les appareils dotés de LED blanches de classe 1M selon la norme IEC 60825 1:1993 + A1:1997 + A2: 2001 (équivalent a la norme EN 60825-1 :1994 + A1:2002+A2:2001 ) la puissance maximale lumineuse émise est 459nm...
  • Seite 22 POURQUOI QUELS COMMENT LE FONCTION PRINCIPALE FONCTION COMMENT L'UTILISER BESOINS ? DESACTIVER N B : c e d i s p o s i t i f e s t Pour modifier le temps de Quand le programmme de Lors que le temps de cuisson fonctionnel une fois que le cuisson, appuyez deux fois cuisson prend fin, le four...
  • Seite 23 -L'icône s'illumine pendant une seconde et s'éteint pendant 3 secondes : Le four est en mode lecture. CANDY SIMPLY-FI: Pour obtenir des informations détaillées sur la manière de CONNECTER vos appareils et de les UTILISER au mieux, rendez-vous sur http://www.candysimplyfi.com ou visitez le site support dédié aux consommateurs http://simplyfiservice.candy-hoover.com FR 23...
  • Seite 24 CHOIX DE LA LANGUE Une fois que le four Grill est éteint , il est possible de définir la langue de Cavité votre choix. Il faut appuyer de manière Pyro simultanée sur le bouton EXTRA, SELECT pendant 3 secondes. La langue actuelle s'affiche Tournebroche sur l'écran, et il est possible de la changer en Décongélation...
  • Seite 25: Mode De Cuisson

    3.2 Mode de cuisson T °C T °C Bouton de Fonction (selon modèle) par défaut range sélection L'ampoule: Allumage de l’éclairage du four Décongélation: fonctionnement de la turbine de cuisson qui brasse l'air dans 40 ÷ 40 l'enceinte du four. Idéale pour réaliser une décongélation avant une cuisson. Chaleur brassée: fonction recommandée pour les volailles, les pâtisseries, les poissons, les légumes...
  • Seite 26: Entretien

    4. Nettoyage du four et maintenance 4.1 Remarques générales sur le nettoyage Le cycle de vie de l'appareil peut être étendu grâce à un nettoyage régulier. Attendez le refroidissement du four avant de procéder à des opérations de nettoyage manuel. Ne jamais utiliser de détergents abrasifs, de laine d'acier ou d'objets pointus pour le nettoyage, l'émail serait irrémédiablement abîmé.
  • Seite 27: Retrait Et Nettoyage Des Vitres

    RETRAIT ET NETTOYAGE DES VITRES 1. Ouvrez la porte du four. 2.3.4. Bloquer les charnières, enlever les vis et retirez le couvercle métallique supérieur en le tirant vers le haut. 5.6. Retirez le verre, l'extraire soigneusement de la porte du four (NB: dans les fours de pyrolyse, retirez également les deuxième et troisième verre (le cas échéant)).
  • Seite 28: Faq

    5. Dépannage 5.1 FAQ PROBLEMES CAUSE POSSIBLE SOLUTION Réglez l'horloge Le four ne chauffe pas L'horloge n'est pas réglée La sécurité enfant est Le four ne chauffe pas Désactivez la sécurité enfant activée Assurez-vous que les Les réglages nécessaires paramètres nécessaires Le four ne chauffe pas ne sont pas imposés sont corrects...
  • Seite 29: Indicazioni Di Sicurezza

    Indicazioni di Sicurezza •ATTENZIONE: l’apparecchio e le parti accessibili diventano calde durante l’uso. Prestare attenzione a non toccare le parti calde. •ATTENZIONE: le parti accessibili possono diventare calde quando il grill è in uso. I bambini dovrebbero essere tenuti a distanza. •ATTENZIONE: assicurarsi che l’apparecchio sia spento prima di sostituire la lampada per evitare la possibilità...
  • Seite 30 •Inserire la spina in una presa di corrente munita di un terzo contatto corrispondente alla presa di terra, che deve essere collegata in modo efficiente. Per i modelli sprovvisti di spina, montare sul cavo una spina normalizzata che sia in grado di sopportare il carico indicato in targa. Il conduttore di messa a terra è...
  • Seite 31 Sommario Avvertenze Generali 1.1 Suggerimenti sulla sicurezza 1.2 Sicurezza elettrica 1.3 Raccomandazioni 1.4 Installazione 1.5 Gestione dei rifiuti 1.6 Dichiarazione di conformità Descrizione del Prodotto 2.1 Panoramica 2.2 Accessori 2.3 Primo utilizzo 3.1 Descrizione del display Utilizzo del Forno 3.2 Modalità di cottura Pulizia e Manutenzione del Forno 4.1.Note generiche di pulizia 4.2 Manutenzione...
  • Seite 32: Avvertenze Generali

    1. Avvertenze Generali Vi ringraziamo per aver scelto uno dei nostri prodotti. Per utilizzare il forno in modo ottimale è consigliabile leggere con attenzione questo manuale e conservarlo con cura per ogni ulteriore consultazione. Prima di installare il forno, prendere nota del numero di serie in modo da poterlo comunicare al personale del servizio di assistenza in caso di richiesta di intervento.
  • Seite 33: Raccomandazioni

    messa a terra con una continuità difettosa. NOTA: poiché il forno potrebbe richiedere interventi di assistenza, è consigliabile prevedere la disponibilità di un’ulteriore presa a muro a cui collegare il forno dopo che è stato rimosso dallo spazio in cui è stato installato. Il cavo di alimentazione deve essere sostituito solo dal personale dell’assistenza tecnica o da tecnici con qualifiche analoghe.
  • Seite 34: Dichiarazione Di Conformità

    1.6 Dichiarazione di conformità Tutti i componenti di questo elettrodomestico destinati a venire a contatto con gli alimenti sono conformi con le disposizioni della Direttiva CEE 89/109. Apponendo la marcatura su questo prodotto, dichiariamo, sotto la nostra responsabilità, di ottemperare a tutti i requisiti relativi alla tutela di sicurezza, salute e ambiente previsti dalla legislazione europea in essere per questo prodotto.
  • Seite 35: Primo Utilizzo

    - Ottima visibilità - Illuminazione di lunga durata - Consumi ultra-ridotti, Consuma il 95% in meno rispetto ai sistemi tradizionali «Elettrodomestico con luci LED bianche di classe 1M, conforme a IEC 60825- 1:1993 + A1: 1997 + A2: 2001 (equivalente allo standard EN 60825-1: 1994 + A1: 2002 + A2: 2001);...
  • Seite 36: Come Funziona

    FUNZIONE COME ATTIVARE COME DISATTIVARE COME FUNZIONA COSA SERVE Nota: l'impostazione è • Per modificare la cottura When a cooking programme Quando il tempo di cottura è possibile solo con un p r i m a d e l t e m p o t e r m i n a t e s , t h e o v e n terminato, il forno si spegne programma di cottura attivo.
  • Seite 37: Impostazione Delle Lingue

    Per informazioni dettagliate su COME CONNETTERE il tuo elettrodomestico simply-Fi e su COME USARLO al meglio, vai su http://www.candysimplyfi.com o visita il sito dedicato al Servizio Clienti simply-Fi http://simplyfiservice.candy-hoover.com IMPOSTAZIONE DELLE LINGUE La lingua può essere impostata quando il forno è spento premendo...
  • Seite 38: Modalità Di Cottura

    3.2 Modalità di cottura Manopola T° preim- Intervallo Funzione (a seconda del modello) commuta- postata di T° tore LAMPADA: accende la luce interna. SCONGELAMENTO: questa posizione permette di far circolare l’aria a 40 ÷ 40 temperatura ambiente intorno al cibo surgelato facendolo così scongelare in 50 ÷...
  • Seite 39: Pulizia E Manutenzione Del Forno

    4. Pulizia e manutenzione del forno 4.1 Note generiche di pulizia La vita di servizio dell’apparecchio si allunga se questo viene pulito ad intervalli regolari. Attendere che il forno si raffreddi prima di effettuare le operazioni di pulizia manuali. Non utilizzare mai detergenti abrasivi, pagliette di ferro o oggetti appuntiti per lapulizia, per non danneggiare in modo irreparabile le parti smaltate.Utilizzare solo acqua, sapone o detergenti a base di candeggina (ammoniaca).
  • Seite 40: Rimozione E Pulizia Della Porta In Vetro

    RIMOZIONE E PULIZIA DELLA PORTA IN VETRO 1. Aprile la porta del forno. 2.3.4. Bloccare le cerniere, rimuovere le viti e rimuovere la copertura metallica superiore tirandola verso l’alto. 5.6. Rimuovere il vetro, estraendolo con molta cura, dalla controporta del forno (NB: nei forni pirolitici, rimuovere anche il secondo e terzo vetro (se presente)).
  • Seite 41: Risoluzione Dei Problemi

    5. Risoluzione dei Problemi 5.1 FAQ PROBLEMA POSSIBILE CAUSA SOLUZIONE Il forno non si scalda L’orologio non è impostato Impostare l’orologio Il forno non si scalda Il blocco bambini è attivo Disattivare il blocco bambini Le regolazioni necessarie Assicurarsi che le impostazioni Il forno non si scalda necessarie siano corrette non sono impostate...
  • Seite 42: Indicaciones De Seguridad

    Indicaciones de seguridad •ATENCIÓN: el aparato y las piezas accesibles se calientan durante el uso. Tenga cuidado de no tocar las piezas calientes. •ATENCIÓN: las piezas accesibles pueden calentarse cuando la resistencia está en uso. Mantenga el aparato fuera del alcance de los niños.
  • Seite 43 •No utilice limpiadores de vapor. •Enchufe el conector a una toma de corriente provista de toma de tierra, que debe estar correctamente conectada. Para los modelos que no dispongan de conector, montar en el cable uno normalizado capaz de soportar la carga indicada en la ficha técnica. El conductor de toma de tierra se caracteriza por los colores amarillo y verde.
  • Seite 44 Resumen Advertencias generales 1.1 Recomendaciones de seguridad 1.2 Seguridad eléctrica 1.3 Recomendaciones 1.4 Instalación 1.5 Gestión de residuos 1.6 Declaración de conformidad 2.1 Descripción general Descripción del producto 2.2 Accesorios 2.3 Primer uso 3.1 Descripción de la pantalla Utilización del horno 3.2 Modalidades de cocción Limpieza y mantenimiento 4.1 Notas genéricas de limpieza...
  • Seite 45: Advertencias Generales

    1. Advertencias Generales Le agradecemos que haya elegido uno de nuestros productos. Para utilizar el horno de forma óptima es aconsejable leer con atención este manual y conservarlo para poder consultarlo en el futuro. Antes de instalar el horno, anote el número de serie para poder facilitárselo al personal del servicio de asistencia técnica en caso de solicitar su intervención.
  • Seite 46: Ahorrar Y Respetar El Medio Ambiente

    NOTA: puesto que el horno podría requerir la intervención del servicio de asistencia, es aconsejable prever la disponibilidad de otro enchufe de pared al que conectar el horno después de extraerlo del espacio donde se ha instalado. El cable de alimentación debe sustituirse únicamente por personal de asistencia técnica o por técnicos con una cualificación análoga.
  • Seite 47: Descripción Del Producto

    1.6 Consejos De Cumplimiento En este equipo, las piezas que se prevé que puedan estar en contacto con los alimentos, cumplen las regulaciones de la CEE indicadas en la directiva 89/109. Al mostrar el logo marcado en este producto, declaramos, bajo nuestra propia responsabilidad, el cumplimiento de todos los requisitos europeos en términos de seguridad, salud y medio ambiente, establecidos en la legislación de este producto.
  • Seite 48: Primer Uso

    Ventajas: “Los hornos con luz blanca LED Clase 1M segun el IEC Este sistema, ademas de proporcionar una 60825- 1:1991 + A1:1997 + A2:2001n(equivalente a iluminacion excelente dentro del horno, dura mas la EN 60825-1:1994 +A1:2002 + A2:2001); la que la bombilla tradicional, tiene un mantenimiento potencia maxima de luz emitida es 459nm<150uW.
  • Seite 49 FUNCIóN CóMO SE ACTIVA CóMO SE DESACTIVA QUÉ HACE PARA QUÉ SIRVE Nota: sólo puede •Para modificar la cocción Cuando finaliza el programa Cuando se cumple el tiempo de TIEMPO configurar con un programa antes tiempo de cocción, el horno se cocción, el horno se apaga de cocción activo.
  • Seite 50: Configuración Del Idioma

    CANDY SIMPLY-FI: Para información detallada sobre CÓMO CONECTAR tu electrodoméstico simply-Fi y CÓMO SACARLE el mejor partido, ves a http://www.candysimplyfi.com o visita la Web Atención al cliente http://simplyfiservice.candy-hoover.com Grill CONFIGURACIÓN DEL IDIOMA El idioma se Puede Cavidad del horno configurar cuando el horno se apaga pulsando los Piro botones Extra y Select simultáneamente durante 3".
  • Seite 51 3.2 Modalidades de cocción Mando Rango T°C FUNCIÓN ( dependiendo del modelo selector establecida de T°C LAMPARA: Conecta la luz interior DESCONGELACIÓN: Funcionamiento de la turbina de cocción que hace circular el aire dentro del espacio del horno. Ideal para realizar una descongelación 40 ÷...
  • Seite 52: Limpieza Y Mantenimiento Del Horno

    4. Limpieza y mantenimiento del horno 4.1 Notas genéricas de limpieza La vida útil del aparato se prolonga si se limpia a intervalos regulares. Espere a que el horno se enfríe antes de llevar a cabo las operaciones de limpieza manuales. No utilice nunca detergentes abrasivos, estropajos metálicos ni objetos puntiagudos para la limpieza con el fin de no dañar de forma irreparable las piezas esmaltadas.
  • Seite 53 EXTRACCIÓN Y LIMPIEZA DE LA PUERTA DE VIDRIO 1. Abra la puerta del horno. 2.3.4. Bloquee las bisagras, desenrosque los tornillos y extraiga la cubierta metálica superior tirando hacia arriba. 5.6. Extraiga el vidrio con mucho cuidado de la contrapuerta del horno (N. B.: si se trata de un horno pirolítico, extraiga también el segundo y el tercer vidrio si los hubiera).
  • Seite 54: Solución De Problemas

    5. Solución de problemas 5.1 Preguntas más frecuentes PROBLEMA CAUSA POSIBLE SOLUCIÓN El reloj no está en hora Configure el reloj El horno no se calienta El bloqueo infantil está Desactive el bloqueo infantil El horno no se calienta activado Asegúrese de que los ajustes Los ajustes necesarios no El horno no se calienta...
  • Seite 55: Sicherheitshinweise

    Sicherheitshinweise • WARNUNG: Das Gerät und zugängliche Teile können während des Betriebs heiß werden. Darauf achten, dass keine heißen Bestandteile berührt werden. •WARNUNG: Der Grill und zugängliche Teile können während des Betriebs heiß werden. Kinder nicht in die Nähe des Geräts gelangen lassen.
  • Seite 56 •Ofen vor dem Herausnehmen der Zubehörteile ausschalten und diese nach der Reinigung entsprechend der Anweisung wieder einsetzen. •Nur den für diesen Ofen empfohlenen Kerntemperaturfühler verwenden. •Keinen Dampfreiniger verwenden. •Den Stecker in eine geerdete, betriebsfähige Steckdose stecken. Bei Geräten ohne Stecker, einen Standardstecker am Kabel befestigen, der für die auf dem Siegel angegebene Ladung geeignet ist.
  • Seite 57 Zusammenfassung Allgemeine Anweisungen Sicherheitshinweise Elektrische Sicherheit Empfehlungen Installation Abfallentsorgung Konformitätserklärung Übersicht Produktbeschreibung Zubehör Inbetriebnahme Betrieb des Backofens Beschreibung der Anzeige Funktionen zum Garen Reinigung und Wartung des Allgemeine Reinigungshinweise Backofens Wartung • Entfernen und Reinigen der Führungsschienen • Entfernen Des Backofenfensters •...
  • Seite 58: Allgemeine Anweisungen

    1. Allgemeine Anweisungen Vielen Dank, dass Sie sich für eins unserer Produkte entschieden haben. Damit Sie lange Freude mit Ihrem Backofen haben, sollten Sie diese Bedienungsanleitung sorgfältig durchlesen und zum Nachschlagen in der Zukunft aufbewahren. Notieren Sie sich vor dem Anschließen des Backofens die Seriennummer, sodass Sie diese im Reparaturfall an den Kundendienst weitergeben können.
  • Seite 59: Empfehlungen

    HINWEIS: Für eine eventuelle Wartung des Ofens ist die Zugänglichkeit einer zweiten Wandsteckdose von Vorteil, sodass er an diese angeschlossen werden kann, wenn er ausgebaut werden muss. Das Stromkabel darf nur von qualifizierten Kundendiensttechnikern oder Elektrikern ausgetauscht werden. 1.3 Empfehlungen Es empfiehlt sich, den Backofen nach jeder Verwendung grob zu reinigen.
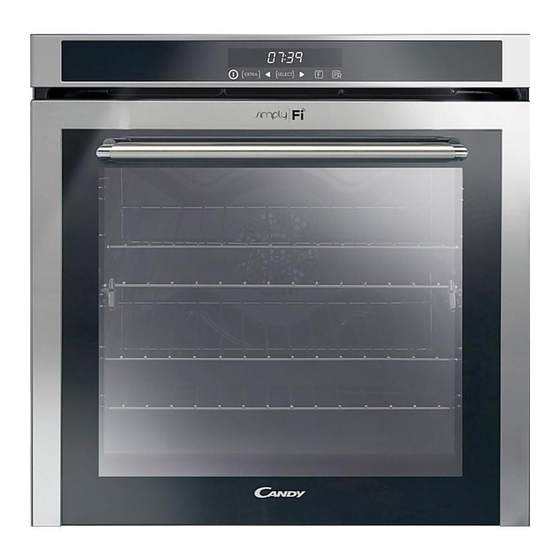
  • Seite 60: Produktbeschreibung

    2. Produktbeschreibung 2.1 Übersicht 1. Bedienfeld 2. Führungsschienen (seitlicher Metallrost, falls enthalten) 3. Backrost 4. Fettpfanne/Backblech 5. Lüfter (hinter der Stahlabdeckung) 6. Kerntemperaturfühler 7. Backofentür 2.2 Zubehör Backrost Led vision Hält Auflauf- und Backformen. Das ist ein Beleuchtungssystem, dass die traditionelle Gluhbirne ersetzt.
  • Seite 61: Erste Reinigung

    2.3 Erste Inbetriebnahme ERSTE REINIGUNG Den Backofen vor der ersten Inbetriebnahme reinigen. Die Außenflächen mit einem feuchten, weichen Tuch abwischen. Alle Zubehörteile spülen und den Backofen innen mit warmem Spülwasser auswischen. Den leeren Backofen auf die Höchsttemperatur einstellen und etwa eine Stunde lang anlassen, damit der neue Geruch verfliegt.
  • Seite 62: Funktion

    FUNKTION VERWENDUNG DEAKTIVIEREN FUNKTIONSWEISE VERWENDUNGSZWECK Hinweis: Kann Erreicht ein Garprogramm Erreicht die Garzeit das Ende, •Um die Garzeit vor dem zusammen einem das Ende, schaltet sich der wird der Backofen automatisch eingestellten Ende zu ändern, aktiven Garprogramm Backofen ausgeschaltet drücken Sie zweimal EXTRA eingestellt werden.
  • Seite 63: Spracheinstellung

    - Symbol blinkt, drei Sekunden an, eine Sekunde aus: Der Backofen versucht, sich mit Ihrem WLAN-Router zu verbinden. - Symbol blinkt, eine Sekunde an, drei Sekunden aus: Der Backofen befindet sich im Lesemodus. CANDY SIMPLY-FI: Weitere Informationen zum ANSCHLUSS und zur optimalen NUTZUNG Ihres Candy simplyFi- Gerätes finden Sie unter http://www.candysimplyfi.com oder auf der speziell hierfür eingerichteten simplyFi-Serviceinternetseite http://simplyfiservice.candy-hoover.com...
  • Seite 64: Funktionen Zum Garen

    3.2 Funktionen zum Garen T °C T °C Funktion Funktion (je nach Backofenmodell) Bereich standard LAMPE: Schaltet das Licht im Backofen an. AUFTAUEN: Wenn die Auswahl auf diese Funktion eingestellt wird. Der Ventilator wälzt die Luft bei Raumtemperatur um, sodass das Tiefkühlprodukt innerhalb 40 ÷...
  • Seite 65: Reinigung Und Wartung Des Backofens

    4. Reinigung und Wartung des Backofens 4.1 Allgemeine Reinigungshinweise Die Lebensdauer des Geräts lässt sich durch eine regelmäßige Reinigung verlängern. Den Ofen vor der Reinigung abkühlen lassen. Keine Scheuermittel, Stahlwolle oder scharfkantige Gegenstände für die Reinigung verwenden, um die Emaillebeschichtung nicht zu beschädigen. Nur Wasser, Spülmittel oder Reinigungsmittel mit Bleiche (Ammoniak) verwenden.
  • Seite 66: Entfernen Und Reinigen Der Glastür

    ENTFERNEN UND REINIGEN DER GLASTÜR 1. Die Backofentür öffnen. 2.3.4. Scharniere sperren, Schrauben entfernen und die obere Metallkappe nach oben abziehen. 5.6. Die Glasscheibe vorsichtig aus der Ofentür ziehen (Hinweis: Bei Backöfen mit Pyrolyse- Reinigungsfunktion auch die zweite (falls vorhanden) und dritte Scheibe herausnehmen). 7.
  • Seite 67: Häufig Gestellte Fragen

    5. Fehlerbehebung 5.1 HÄUFIG GESTELLTE FRAGEN STÖRUNG MÖGLICHE URSACHE LÖSUNG Der Backofen wird nicht heiß. Die Uhr ist nicht eingestellt. Uhr einstellen. Die Kindersicherung ist Der Backofen wird nicht heiß. Kindersicherung deaktivieren. eingeschaltet. Garfunktion und Temperatur Prüfen, ob die nötigen Der Backofen wird nicht heiß.
  • Seite 68: Güvenlik Uyarıları

    Güvenlik uyarıları • UYARI: Bu cihaz ve erişilebilir parçaları kullanım sırasında ısınır. Isınmış parçalara dokunmaktan kaçınınız. UYARI: Izgara kullanılırken erişilebilir yüzeyler çok sıcak olabilir. Çocukların güvenli bir mesafede tutulması gereklidir. • UYARI: Elektrik çarpması ihtimalini önlemek için ampulü değiştirmeden önce cihazın kapalı olduğundan emin olun. •...
  • Seite 69 • Sadece bu fırın için önerilen sıcaklık probunu kullanın. • Buharlı temizleyici kullanmayın. • Fişi toprak bağlantısına sahip olan ve kullanım sırasında topraklama bağlantısını sağlayan üçüncü bir ucu bulunan bir prize takın. Fişi olmayan modeller için, kabloya etikette belirtilen yükü taşımaya yeterli kapasitede standart bir fiş...
  • Seite 70 Özet Genel Açıklamalar 1.1 Güvenlik ipuçları 1.2 Elektriksel güvenlik 1.3 Tavsiyeler 1.4 Kurulum 1.5 Atık yönetimi 1.6 Uygunluk beyanı Ürün Açıklaması 2.1 Genel bakış 2.2 Aksesuarlar 2.3 İlk kullanım Fırının Temizlenmesi ve Bakımı 3.1 Gösterge açıklamaları 3.2 Pişirme modları Fırının Temizlenmesi ve Bakımı 4.1 Temizleme hakkında genel notlar 4.2 Bakım •...
  • Seite 71: Genel Açıklamalar

    1. Genel Açıklamalar Ürünlerimizden birini tercih ettiğiniz için teşekkür ederiz. Fırınınızdan en iyi sonuçları almak için bu kılavuzu dikkatle okuyun ve daha sonra başvurmak için saklayın. Fırının montajından önce, herhangi bir onarım gerekmesi halinde müşteri hizmetleri personeline vermek üzere seri numarasını...
  • Seite 72 çıkabilecek her türlü kaza veya zararda imalatçı herhangi bir sorumluluk kabul etmemektedir. NOT: fırında bazı bakım işlemleri yapılması gerektiğinden, montajın yapılmış olduğu alandan çıkarılması halinde fırının bağlanabileceği başka bir prizin yakınlarda bulunması tavsiye edilir. Elektrik kablosunun sadece teknik servis personeli ya da eşdeğer niteliklere sahip teknisyenler tarafından değiştirilmesi gereklidir.
  • Seite 73: Uygunluk Beyanı

    Birçok ülkede, büyük WEEE'ler için şehir içinde toplama noktaları bulunmaktadır. Yeni bir cihaz satın aldığınızda, eski cihazın satın alınan cihazla aynı tipte olması ve aynı işlevlere sahip olması durumunda eski cihazı ücretsiz olarak bire bir kabul etmesi gereken satıcıya iade edebilirsiniz. ENERJİ...
  • Seite 74: İlk Kullanım

    Led vision Avantajları: Bu sistem, fırın icinde mükemmel aydınlatma sağlamanın yanı sıra, klasik ampullerden daha uzun süre dayanır, kullanımı ve bakımı daha kolaydır ve her şeyden önemlisi, enerji tasarrufu sağlar. -Optimum görüş -Uzun ömürlü aydınlatma -Çok düşük enerji tüketimi; klasik yüksek aydınlatma Klasik “elektrik ampulünün”...
  • Seite 75 NASIL DEVRE DIŞI İŞLEV NASIL KULLANILIR NE YAPAR NEDEN GEREKLİDİR BIRAKILIR Bir pişirme programının Not: sadece aktif bir pişirme • Ayarlanan süre dolmadan Pişirme süresi dolduğu zaman sonuna gelindiğinde fırın fırın otomatik olarak kapanır ve programı ile ayarlanabilir. önce pişirme süresini kapanır ve işlev yapan tek tuş...
  • Seite 76 - Simge 3 saniye yanık ve 1 saniye sönük kalıyor: fırın Wi-Fi yönlendiricinize bağlanmaya çalışmaktadır. - Simge 1 saniye yanık ve 3 saniye sönük kalıyor: fırın sadece okuma modundadır. CANDY SIMPLY-FI: NASIL bağlanmak hakkında ayrıntılı bilgi için sade bir şekilde-Fi cihazı ve nasıl kullanmak için de en iyisi,...
  • Seite 77: Buz Çözme

    3.2 Pişirme Modları Fonksiyon Varsayılan Sıcaklık Fonksiyon (Fırın modeline bağlıdır) ikonu sıcaklık °C aralığı °C LAMBA: Fırın lambasını yakar. BUZ ÇÖZME: Düğme bu konuma alındığı zaman fan oda sıcaklığında havayı donmuş gıdanın etrafında dolaştırır, böylece gıdanın protein içeriği 40 ÷ 40 değişmeden birkaç...
  • Seite 78 4. Fırının Temizlenmesi ve Bakımı 4.1 Temizleme hakkında genel notlar Düzenli temizlik ile cihazın kullanım ömrü uzatılabilir. Elle temizlik işlemlerini yapmadan önce fırının soğumasını bekleyin. Temizlik için asla aşındırıcı deterjanlar, çelik tel veya keskin nesneler kullanmayın, aksi takdirde emaye parçalarda onarılamaz hasarlar oluşabilir. Sadece su, sabun veya ağartıcı bazlı deterjanlar (amonyak) kullanın.
  • Seite 79 CAMIN SÖKÜLMESİ VE TEMİZLENMESİ 1. Fırının kapağını açın. 2.3.4. Menteşeleri kilitleyin, vidaları çıkarın ve yukarı doğru çekerek üst metal kapağı çıkarın. 5.6. Camı dikkatli bir şekilde fırın kapağından çekerek çıkarın (Not: pirolitik fırınlarda ikinci ve üçüncü camı (eğer varsa) da çıkarın). 7.
  • Seite 80: Sorun Giderme

    5. Sorun Giderme 5.1 Sorun giderme SORUN ÇÖZÜMÜ OLASI NEDENİ Fırın ısınmıyor Saati ayarlayın Saat ayarlanmamış Fırın ısınmıyor Çocuk kilidini devre dışı bırakın Çocuk kilidi devrede Bir pişirme işlevi ya da sıcaklık Gerekli ayarların doğru Fırın ısınmıyor ayarlanmamış olduğunu kontrol edin Yoğuşma tabakasını...
  • Seite 81: Bezpečnostní Pokyny

    Bezpečnostní pokyny • VAROVÁNÍ: spotřebič a přístupné díly jsou během používání horké. Buďte opatrní a nedotý k ejte se horkých součástí. •VAROVÁNÍ: pokud se používá gril, přístupné díly jsou horké. Nenechte děti přiblížit se ke spotřebiči. •VAROVÁNÍ: aby nedošlo k úrazu elektrický m proudem, před vý m ěnou žárovky zkontrolujte, že je spotřebič...
  • Seite 82 •Používejte pouze takovou sondu do masa, která je doporučena pro tuto troubu. •Nepoužívejte parní čistič. •Zasuňte zástrčku do zásuvky opatřené třetím kontaktem, který odpovídá uzemnění a který musí být zapojený a funkční. U modelů bez zástrčky připojte na kabel standardní zástrčku, která je schopná pracovat se zatížením uvedeným na štítku.
  • Seite 83 Shrnutí Obecné pokyny 1.1 Bezpečnostní pokyny 1.2 Elektrická bezpečnost 1.3 Doporučení 1.4 Instalace 1.5 Odpadové hospodářství 1.6 Prohlášení o shodě Popis vý r obku 2.1 Přehled 2.2 Příslušenství 2.3 První použití Použití trouby 3.1 Popis displeje 3.2 Režimy vaření 4.1 Obecné poznámky k čištění Čištění...
  • Seite 84: Obecné Pokyny

    1. Obecné pokyny Děkujeme Vám, že jste si zvolili jeden z našich vý r obků. Pro dosažení nejlepších výsledků s troubou byste si měli pečlivě přečíst tento návod a uschovat jej pro budoucí použití. Před instalací trouby si poznamenejte vý r obní číslo, abyste jej mohli poskytnout pracovníkům zákaznických služeb v případě...
  • Seite 85: Instalace

    POZNÁMKA: protože trouba může vyžadovat údržbu, je vhodné mít k dispozici další elektrickou zásuvku, ke které lze troubu připojit po vyjmutí z prostoru, ve kterém je nainstalována. Napájecí kabel smí být nahrazen pouze servisním technikem nebo technikem s rovnocennou kvalifikací. 1.3 Doporučení...
  • Seite 86: Popis Výrobku

    2. Popis vý robku 2.1 Přehled 1. Ovládací panel 2. Polohy polic (podélný dr átěný r ošt, je-li součástí dodávky) 3. Kovový r ošt 4. Odkapávací plech 5. Ventilátor (za ocelovou deskou) 6. Sonda na maso 7. Dvířka trouby 2.2 Příslušenství Led vision Kovový...
  • Seite 87: První Použití

    2.3 První použití PŘEDBĚŽNÉ ČIŠTĚNÍ Před prvním použitím troubu vyčistěte. Otřete vnější povrchy vlhký m měkký m hadříkem. Umyjte všechna příslušenství a vytřete vnitřek trouby roztokem horké vody a promývací kapaliny. Nastavte prázdnou troubu na maximální teplotu a ponechte ji zapnutou zhruba po dobu 1 hodiny. To odstraní veškeré...
  • Seite 88 FUNKCE JAK POUŽÍVAT JAK DEAKTIVOVAT CO TO DĚLÁ PROČ JE TO POTŘEBA K d y ž p r o g r a m p e č e n í Pozn.: může být nastavena •Chcete-li upravit pečení Po skončení doby pečení se skončí, trouba se vypne a na p o u z e s a k t i v n í...
  • Seite 89: Nastavení Jazyka

    Pro podrobnější informace o ZPŮSOBU PŘIPOJENÍ vašeho simply-Fi spotřebiče a ZPŮSOBU POUŽITÍ nejlepším způsobem navštivte stránku http://www.candysimplyfi.com nebo navštivte příslušnou webstránku zákaznického servisu simply-Fi http://simplyfiservice.candy-hoover.com NASTAVENÍ JAZYKA Jazyk můžete nastavit, když je Gril trouba vypnuta stisknutím tlačítek Extra a Select Okno trouby současně...
  • Seite 90 3.2 Režimy vaření Volič T °C T °C Funkce (Závisí na modelu trouby) funkc ozmezí výchozí SVĚTLO: Zapne světlo v troubě. ROZMRAZOVÁNÍ: Je-li volič nastaven do této polohy. Ventilátor dmýchá 40 ÷ 40 vzduch o pokojové teplotě kolem zmrzlého pokrmu a tak jej za několik minut rozmrazí...
  • Seite 91 4. Čištění a údržba trouby 4.1 Obecné poznámky k čištění Životnost spotřebiče můžete prodloužit prostřednictvím pravidelného čištění. Před prováděním ručního čištění počkejte, až trouba vychladne. Nikdy nepoužívejte při čištění brusné mycí prostředky, drátěnku nebo ostré předměty. Předejdete tak neopravitelnému poškození smaltovaných dílů. Používejte pouze mycí...
  • Seite 92 DEMONTÁŽ A ČIŠTĚNÍ SKLENĚNÝCH DVÍŘEK 1. Otevřete dvířka trouby. 2.3.4. Zajistěte závěsy, vyšroubujte šrouby a demontujte horní kovový kryt vytažením směrem nahoru. 5.6. Vyjměte opatrně sklo ze dvířek trouby (Pozn: u pyrolytických trub vyjměte také druhé a třetí sklo (jsou-li osazena)). 7.
  • Seite 93: Řešení Potíží

    5. Řešení potíží 5.1 Často Kladené Otázky PROBLÉM MOŽNÁ PŘÍČINA ŘEŠENÍ Trouba se nezahřívá Nastavte hodiny Hodiny nejsou nastaveny Trouba se nezahřívá Deaktivujte dětský z ámek Dětský z ámek je aktivní Funkce pečení a teplota Přesvědčte se, že potřebná Trouba se nezahřívá nebyly nastaveny nastavení...
  • Seite 94 INSTALLATION INSTALLATION INSTALLATION DU FOUR KURULUM INSTALLAZIONE INSTALACE INSTALACIÓN If the furniture is equpped with a bottom at the back part, provide an opening for the power supply cable. Si le meuble est équipé d’un fond à l’arrière : prévoir une Opening 500 x 10 ouverture pour le passage du câble d'alimentation.
  • Seite 96 The manufacturer will not be responsible for any inaccuracy resulting from printing or transcript errors contained in this brochure. We reserve the right to carry out modifications to products as required, including the interests of consumption, without prejudice to the characteristics relating to safety or function.

Diese Anleitung auch für:

Fcxm625

Inhaltsverzeichnis