AXTON AXB20P Einbauanleitung
Inhaltsverzeichnis
Verfügbare Sprachen
Verfügbare Sprachen
Quicklinks
Inhaltsverzeichnis

Verwandte Anleitungen für AXTON AXB20P


Inhaltszusammenfassung für AXTON AXB20P
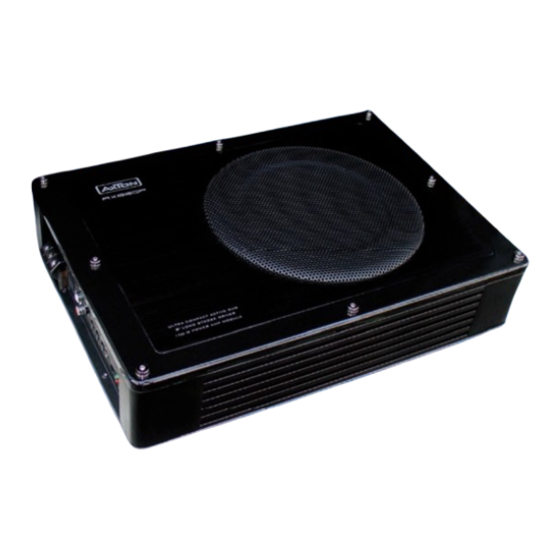
- Seite 1 AXB20P 8"/20 CM ACTIVE SUBWOOFER EINBAUANLEITUNG/INSTALLATION GUIDE...
-
Seite 10: Technische Daten
GeeHrter KuNDe Vielen Dank für das Vertrauen, das Sie uns mit dem Kauf dieses AXTON-Qualitätsprodukts entgegengebracht haben. Der AXTON Aktiv-Subwoofer wurde speziell für den Einsatz in mobilen Sound systemen mit einer 12-Volt-Stromversorgung (mit negativer Chassis Masse) entwickelt. Damit Sie sich mit den technischen Eigenschaften und klanglichen Feinheiten Ihres Aktiv- Subwoofers vertraut machen können, empfehlen wir Ihnen, diese Einbau- und Bedienungs-... - Seite 11 Zus. teCHNIsCHe DateN Versorgungsspannung 11-15V DC low level eingang 165 mV - 5 V High level eingang 1.0 V - 10 V tiefpass filter 40-200 Hz sicherung 7.5 a – 11 –...
-
Seite 12: Zu Ihrer Sicherheit
Spannungsversorgung resultiert, müssen Sie die defekte Sicherung gegen ein neues Exemplar mit identischen Werten austauschen. Sollte der Kurzschluss immer noch auftreten, wenden Sie sich bitte an Ihren AXTON-Händler. 7. Achten Sie darauf, dass bei ausgeschaltetem Motor die Batterie des Fahrzeuges nicht entladen wird. - Seite 13 störeINstraHluNGeN alle Hinweise in diesem Kapitel richten sich an eine im Bereich Car-audio fachkundige Person. Jegliche Verkabelung kann Störungen verursachen. Insbesondere Stromversorgungskabel, sowie Audiokabel mit Cinch Steckern sind davon aktiv und passiv betroffen. Bei Fernsteuerungskabeln ist das Problem weitaus geringer. Als Störungsursachen treten oft die Lichtmaschine (Pfeifen), die Zündung (Knistern) und auch andere Bauteile auf.
-
Seite 14: Montage
moNtaGe Montieren Sie das Gerät an einem geschützten, jedoch möglichst gut belüfteten Platz. Bedenken Sie das der Leistungsverstärker erhebliche Abwärme produziert, die zur Vermeidung von Überhitzungen auch abgeführt werden muss. Halten Sie Leitungslängen so kurz wie gerade nötig, um unnötige Leistungsverluste, sowie Störeinstrahlungen zu vermeiden. - Seite 15 VerDraHtuNG Wichtig: Vor jeglichen Verdrahtungsarbeitung lösen sie immer den nega- tiven Pol der Batterie um Kurzschlüsse, durch unterbrechung der masseverbin- dung, zu verhindern. Verbinden sie den negativen Batteriepol erst, wenn sie alle anderen Verbindungen hergestellt und überprüft haben. Die Spannungsversorgung (+12V) wird direkt am positiven Batteriepol abgegriffen, um ausreichende Leistung bei minimalem Rauschen zu gewährleisten.
- Seite 16 sCHaltPlaN Autobatterie Headunit 12 V-- REM ON/OFF i.e. Amp remote Sicherung Masse/GND 60 A 7.5 A L+R des LowLevel Ausgangs der Headunit. Benutzen Sie einen Y-Adapter, falls Sie einen mono sub-out anschliessen wollen. Montieren Sie den Bass Boost Regler an einer leicht erreich- baren Stelle.
-
Seite 17: Betrieb
BetrIeB Schalten Sie ihre Autostereo ein und begrenzen die Lautstärke auf ein geringes Niveau. Nun sollte die grüne LED am Frontpanel des Verstärkers aufleuchten. Falls das nicht der Fall ist, schalten Sie das Gerät sofort aus und überprüfen Sie Anschlüsse und Verkabelung. -
Seite 18: Warranty Conditions
Should your AXTON product require warranty service, please return it to the retailer from whom it was purchased. Please do not send any product to AXTON. Should you have diffi- culty in finding an authorized AXTON service center, details are available from the national distributor in the country of purchase.