AXTON ATB20STP Bedienungsanleitung
Inhaltsverzeichnis
Verfügbare Sprachen
Verfügbare Sprachen
Inhaltsverzeichnis

Verwandte Anleitungen für AXTON ATB20STP


Inhaltszusammenfassung für AXTON ATB20STP
- Seite 1 ATB20STP 8“/ 20 CM ACTIVE SUBWOOFER INSTALLATION & OPERATION MANUAL EINBAU & BEDIENUNGSANLEITUNG...
-
Seite 6: Verpackungsinhalt
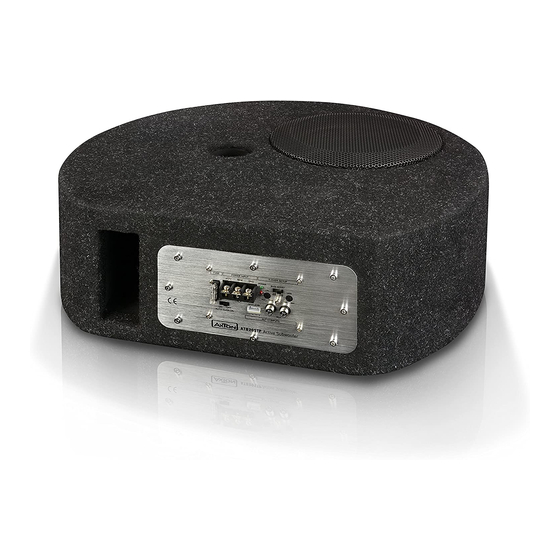
Sehr geehrter Kunde ABMESSUNGEN Vielen Dank für das Vertrauen, das Sie uns mit dem Kauf dieses AXTON-Qualitätsprodukts entgegengebracht haben. Der AXTON Aktiv-Subwoofer wurde speziell für den Einsatz in mobilen Sound systemen mit einer 12-Volt-Stromversorgung (mit negativer Chassis Masse) entwickelt. 500 mm Damit Sie sich mit den technischen Eigenschaften und klanglichen Feinheiten Ihres Aktiv- Subwoofers vertraut machen können, empfehlen wir Ihnen, diese Einbau- und Bedienungs-... -
Seite 7: Zu Ihrer Sicherheit
Exemplar mit identischen Werten austauschen. Sollte der Kurzschluss immer noch Um den besten Massepunkt zu finden, empfehlen wir folgende Vorgehensweise: auftreten, wenden Sie sich bitte an Ihren AXTON Fachhändler. • Messen Sie zuerst die Versorgungsspannung direkt an den Batteriepolen. 7. Achten Sie darauf, dass bei ausgeschaltetem Motor die Batterie des Fahrzeuges nicht •... -
Seite 8: Montage & Anschluss
MONTAGE & ANSCHLUSS MONTAGE & ANSCHLUSS Installieren Sie eine Hauptsicherung in max. 30 cm Entfernung vom Wichtig: Vor jeglichen Verdrahtungsarbeitung lösen Sie immer den negativen positiven Batteriepol in das Stromversorgungskabel. Pol der Batterie um Kurzschlüsse, durch Unterbrechung der Masseverbindung, zu verhindern. Verbinden Sie den negativen Batteriepol erst, wenn Sie alle anderen n Montieren Sie das Gerät an einem geschützten, jedoch möglichst gut belüfteten Verbindungen vorgenommen und überprüft haben. - Seite 9 GND (Masse) Stromterminal am Steuergerät auf einen mittleren Pegel. Drehen Sie das GAIN Potentiometer am Side- Power/Protect Status LED Panel der ATB20STP langsam auf, bis ein ausgewogener Klangeindruck mit gutem Bassanteil entsteht. Schaltbarer Bass-Boost 0 – 6 dB ...
-
Seite 10: Warranty Conditions
Should your AXTON product require warranty service, please return it to the retailer from Date of purchase: whom it was purchased. Please do not send any product to AXTON. Should you have difficulty in finding an authorized AXTON service center, details are available from the Your name: national distributor in the country of purchase. - Seite 11 Rev. A...