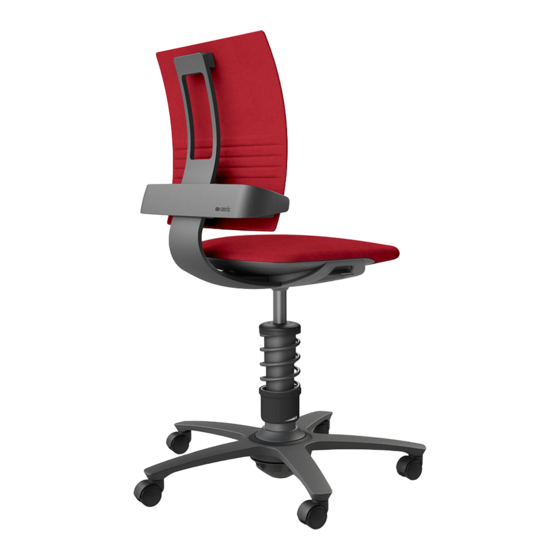
Aeris 3Dee Bedienungsanleitung
Vorschau ausblenden
Andere Handbücher für 3Dee:
- Information zu montage und einstellungen (2 Seiten) ,
- Anleitung (2 Seiten) ,
- Bedienungsanleitung (24 Seiten)
Werbung
Verfügbare Sprachen
Verfügbare Sprachen
Quicklinks
How to assemble the 3Dee
A
B
C
D
A Slot the rollers into the base and set
the base on the floor.
B Loosely insert the spring strut. Slowly
turn the spring strut until you feel it
sink into the base with an audible
click.
C Place the seat loosely on the gas
spring. Slowly turn the seat until you
feel it click in.
Video for assemble and
D Make sure that the chair cannot roll
adjustment:
away (e.g. block it with your foot).
www.swopper.de/en/3Dee/
Insert the backrest until you feel it
assemble-adjustment
click in.
The chair comes with braked rollers
(DIN EN 12529) that are suitable for
use on practically any type of floor.
Special carpet rollers are available for
use on high pile carpets.
Disassembly
Please note: The 3Dee can only be
disassembled in the factory (special
tools are required).
Work on or replacement of the gas
spring must be carried out only by
trained specialists.
Congratulations!
With the 3Dee you have made a choice
for active sitting. Here are a few tips for getting started:
Sit down on the centre of the 3Dee. Move in all directions
– up and down, backwards and forwards, and left and
right – to feel the full flexibility of movement. Try out all
the
adjustment options
and after a while you will find out
which settings are the best for you – the more you move
when sitting, the better it is for your muscles.
5
Height: You adjust the height using the
lever under the seat. The open angle
of your legs (thigh to lower leg) should
be just over 90°. We recommend also
adjusting the height of your desk
accordingly where possible.
4
Spring hardness: You can adjust the
extent of vertical movement to suit your
weight and personal preference. The
optimum setting is when you can move
freely up and down without resting
on the bottom stop. For adjusting the
spring hardness we recommend care-
fully turning over the seat and leaning it
on the backrest.
Adjustment: Screw the sleeve on the
spring strut to the left – for maximum
vertical movement/low weight.
Screw the sleeve to the right (observe
STOP mark!) – for reduced vertical
movement/more weight.
1
Care: All care information is available at
www.aeris.de.
Guarantee: We grant a guarantee of three years from the date of
purchase for all aeris products purchased directly from an
authorised aeris dealer. The guarantee terms are available at
www.aeris.de/garantie.
Direct registration! Scan the code!
Lumbar support: Using the lever on
the inside of the backrest bar on the
right you can continually adjust the
curve of the lumbar support to suit
your physique and personal preference.
Adjustment: Sit on the chair without
resting against the backrest and grasp
the adjusting bar of the backrest left
and right with both hands. Press the
lever on the inside on the right and
move the adjusting bar up or down into
the required position.
2
Backrest tension: Use the butterfly
nut under the seat to adjust the tension
of the backrest. Turn the butterfly nut to
the left in the
–
direction (about 10 –
15 times) for a softer setting with less
tension. Turn the butterfly nut to the
right in the
+
direction (about 10 – 15
times) for a harder setting with more
tension.
3
aeris-Impulsmöbel GmbH & Co. KG
Flexible sideways movement: We
Ahrntaler Platz 2 – 6
recommend starting off with a setting
D – 85540 Haar bei München
for reduced sideways movement and
Fon: + 49 (0) 89/900506 – 0
later adjusting the setting to provide as
www.aeris.de | info@aeris.de
much sitting movement as possible.
Adjustment: Carefully turn over the 3Dee
and lay it on the backrest. Turn the
handwheel to the left for more sideways
movement and to the right for less
sideways movement.
Werbung

Inhaltszusammenfassung für Aeris 3Dee
- Seite 1 Here are a few tips for getting started: the inside of the backrest bar on the Sit down on the centre of the 3Dee. Move in all directions right you can continually adjust the – up and down, backwards and forwards, and left and curve of the lumbar support to suit right –...
- Seite 2 (ca. 10 – 15 Umdrehungen). Demontage Federspannung: Sie können das Bitte beachten Sie: Die Demontage des 3Dee ist nur im Werk möglich (Spezialwerk- vertikale Schwingen regulieren – ent- zeug erforderlich). Austausch und Arbeiten an der Gasdruckfeder dürfen nur durch sprechend Ihrem Gewicht und Ihren eingewiesenes Fachpersonal vorgenommen werden.


