Herunterladen Diese Seite drucken
Pioneer S-DV424 Anleitung Zur Lautsprecheraufstellung
Vorschau ausblenden Andere Handbücher für S-DV424:

Werbung

Verfügbare Sprachen
  • DE

Verfügbare Sprachen

  • DEUTSCH, seite 14
Speaker System
Système Acoustique
Sistema di diffusori
Lautsprechersystem
Luidsprekersysteem
Sistema de altavoces
S-DV424
S-DV740
Speaker Setup guide
Guide d'installation des enceintes
Guida all'impostazione dei diffusori
Anleitung zur Lautsprecheraufstellung
Installatiehandleiding luidsprekers
Guía de instalación de los altavoces

Werbung

loading

Inhaltszusammenfassung für Pioneer S-DV424

  • Seite 1 Speaker System Système Acoustique Sistema di diffusori Lautsprechersystem Luidsprekersysteem Sistema de altavoces S-DV424 S-DV740 Speaker Setup guide Guide d'installation des enceintes Guida all’impostazione dei diffusori Anleitung zur Lautsprecheraufstellung Installatiehandleiding luidsprekers Guía de instalación de los altavoces...
  • Seite 2 Using four small screws for each speaker stand, secure the base to the stem as shown in the illustrations below. Make sure the Pioneer logo on the stem is facing forward, and the outlet on the base (for the speaker cord) is towards the back.
  • Seite 3 Place the front speakers onto the speaker stands as shown below. Line up the base of the speaker with the stand (figure A), then push the speaker slowly onto the speaker stand (figure B). Use even pressure to make sure the speaker is fully inserted and secure. Secure the speaker to the speaker stand with the screws provided.
  • Seite 4 Standard surround Attach the non-slip pads to the base of each of the center and surround 5-spot setup speakers. Use the adhesive to attach 4 pads to the base of This is a standard multichannel surround soundspeaker each speaker. setup for optimal 5.1 channel home theatre sound. Center Front left Front right...
  • Seite 5 Front surround After connecting the speaker wires to the surround speakers, use the groove provided to secure the speaker 3-spot setup wire as shown at left. Leave 10cm of slack from the speaker terminals so the upper (surround) speaker can This setup is ideal when rear surround speaker placement turn freely.
  • Seite 6: Éléments Fournis

    Assemblez les supports d'enceintes et les colonnes deux à deux au moyen des petites vis, comme indiqué dans l'illustration ci-dessous. Vérifiez que le logo Pioneer est orienté vers l'avant sur chaque colonne et que l'orifice sur le support (pour le cordon d'enceinte) est orienté vers l'arrière.
  • Seite 7 Placez les enceintes avant sur les supports d'enceintes, comme indiqué ci-dessous. Alignez la partie inférieure d'une enceinte avec la partie supérieure de la colonne (figure A), puis poussez délicatement l'enceinte sur la colonne (figure B). Poussez de façon uniforme afin de vous assurer que l'enceinte est engagée à...
  • Seite 8 Configuration Surround Fixez les tampons antidérapants sous les enceintes Surround et sous standard à 5 points l'enceinte centrale. Il s'agit d'une configuration standard d'enceintes pour un Placez quatre tampons antidérapants sous les supports de chaque enceinte. son Surround multicanaux 5.1, qui permet d'obtenir un son de cinéma à...
  • Seite 9 Front Surround – configu- Après avoir connecté les câbles aux enceintes Surround, attachez ceux-ci en les insérant dans la rainure située à ration en trois points l'arrière de chaque enceinte avant, comme indiqué dans l'illustration. Laissez environ 10 cm de mou à partir des bornes de connexion des enceintes Surround, de manière Cette configuration est idéale lorsqu'il n'est pas possible de à...
  • Seite 10 Usando quattro piccole viti per ogni porta-diffusore, fissare la base all’asta come mostrato nelle illustrazioni seguenti. Assicurarsi che il logo Pioneer sull’asta sia in posizione anteriore e che l’uscita sulla base (per il cavo del diffusore) sia in posizione posteriore.
  • Seite 11 Porre i diffusori frontali sui porta-diffusori come sotto mostrato. Allineare la base del diffusore con il porta-diffusore (figura A), quindi spingere il diffusore lentamente sul porta- diffusore (figura B). Applicare una pressione uniforme per assicurare che il diffusore sia inserito completamente e saldamente.
  • Seite 12 Configurazione surround Attaccare i feltrini anti-scivolamento alla base dei diffusori centrale e standard in 5 posizioni surround. È un’impostazione standard multicanale dei diffusori Usare l’adesivo per attaccare 4 feltrini alla base di ogni diffusore. surround per un audio ottimale home cinema a 5.1 canali.
  • Seite 13 Configurazione surround Dopo aver collegato i cavi dei diffusori ai diffusori surround, usare la scanalatura per fissare il cavo del frontale in 3 posizioni diffusore come mostrato sulla sinistra. Lasciare 10cm di cavo lasco dai terminali del diffusore, in modo che il Configurazione surround frontale in 3 posizioni: diffusore superiore (surround) possa girare liberamente.
  • Seite 14 Befestigen Sie jede Grundplatte mit jeweils vier kleinen Schrauben an einer Säule, wie in den folgenden Abbildungen gezeigt. Achten Sie darauf, dass das Pioneer-Logo an der Säule nach vorne weist, und dass sich der untere Auslass (für das Lautsprecherkabel) hinten befindet.
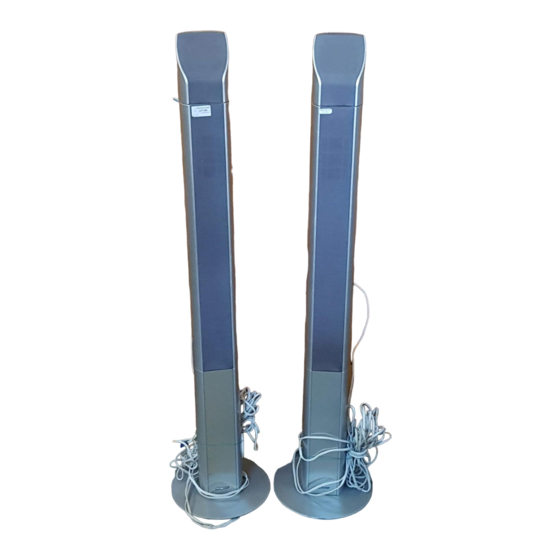
  • Seite 15 Platzieren Sie die vorderen Lautsprecher auf den Lautsprecherständern, wie unten gezeigt. Richten Sie die Unterseite der Lautsprecher auf den Ständer aus (Abbildung A), und drücken Sie dann den Lautsprecher langsam auf den Ständer (Abbildung B). Verwenden Sie gleichmäßigen Druck, um sicherzustellen, dass der Lautsprecher ganz aufgesteckt und sicher verbunden ist.
  • Seite 16 Standard-Surround- Bringen Sie die rutschfesten Füße an den Standfüßen des mittleren und der Aufbau mit 5 Orten Surround-Lautsprecher an. Dies ist eine standardmäßige Konstellation für Benutzen Sie die Klebefläche zur Befestigung der 4 Füße an der Unterseite jedes Lautsprechers. mehrkanalige Surround-Systeme zur optimalen Wiedergabe von 5.1-Kanal-Sound.
  • Seite 17 3-Punkt-Aufstellung für Nachdem Sie die Lautsprecherkabel an den Surround- Lautsprechern angeschlossen haben, legen Sie sie wie links Front Surround gezeigt in die Rille, um die Kabel sicher unter dem Lautsprecher zu führen. Lassen Sie eine Schlaufe von etwa 10 cm an den Dieser Aufbau ist ideal, wenn eine rückwärtige Aufstellung Lautsprecheranschlüssen, so dass sich der obere der Surround-Lautsprecher nicht möglich ist, oder wenn Sie...
  • Seite 18 Gebruik vier kleine schroeven voor elke luidsprekervoet, en zet de onderkanten op de poten vast zoals hieronder getoond. Zorg dat het Pioneer-logo op de poten naar voren wijst, en de opening op de onderkanten (voor de luidsprekerkabel) zich aan de achterkant bevindt.
  • Seite 19 Plaats de voor-luidsprekers op de luidsprekervoeten zoals hieronder getoond. Stem de positie van de onderkant van de luidspreker en die van de voet op elkaar af (afb. A), en druk de luidspreker vervolgens langzaam op de luidsprekervoet (afb. B). Gebruik een gelijkmatige druk om ervoor te zorgen dat de luidspreker er helemaal in steekt en goed vastzit.
  • Seite 20 Standaard 5-punts Breng de anti-schuifrubbers aan op de onderkanten van de centrale en surround-opstelling surround-luidsprekers. Dit is de standaard-multichannel-surroundopstelling Plak de 4 rubbers aan de onderkanten van de luidsprekers. van de luidsprekers, voor optimaal 5.1-kanaals- thuisbioscoop-geluid. Sluit het luidsprekersysteem aan. Centrum Front links Front rechts...
  • Seite 21 Surround voor 3- Nadat u de luidsprekerkabels op de surround-luidsprekers hebt aangesloten, gebruikt u de gleuf om de kabel vast te puntsopstelling zetten, zoals links getoond. Houd 10 cm vrije draadlengte vanaf de luidsprekeraansluitingen aan, zodat de bovenste Deze opstelling is ideaal, als u de luidsprekers niet achter u (surround-)luidspreker vrij kan draaien.
  • Seite 22 Utilizando cuatro tornillos pequeños para el soporte de cada altavoz, fije la base a la columna tal como se indica en las ilustraciones de abajo. Compruebe que el logotipo Pioneer de la columna esté situada delante y que salida de la base (para el cable del altavoz) esté situada en la parte de atrás.
  • Seite 23 Coloque los altavoces frontales sobre los soportes, tal como se indica abajo. Alinee la base del altavoz con la columna de soporte (figura A), y a continuación inserte lentamente el altavoz en la columna (figura B). Aplique una presión uniforme para asegurarse de que el altavoz quede completamente insertado y seguro.
  • Seite 24 Disposición estándar de Fije las almohadillas antideslizantes a la base del altavoz central y de los sonido surround de 5 puntos frontales. Esta es la instalación estándar de un sistema de altavoces Utilice el adhesivo para fijar las 4 almohadillas a la base de cada altavoz.
  • Seite 25 Disposición estándar de Después de conectar los cables a los altavoces surround, utilice la ranura suministrada para asegurar el cable del sonido surround de 3 puntos altavoz, tal como se muestra a la izquierda. Deje 10 cm de holgura desde los terminales del altavoz de modo que Esta instalación es idónea cuando no se puede colocar el altavoz superior (de surround) pueda girar libremente.
  • Seite 26 253 Alexandra Road, #04-01, Singapore 159936 TEL: 65-6472-7555 PIONEER ELECTRONICS AUSTRALIA PTY. LTD. 178-184 Boundary Road, Braeside, Victoria 3195, Australia, TEL: (03) 9586-6300 PIONEER ELECTRONICS DE MEXICO S.A. DE C.V. Blvd.Manuel Avila Camacho 138 10 piso Col.Lomas de Chapultepec, Mexico,D.F. 11000 TEL: 55-9178-4270 <04C00001>...

Diese Anleitung auch für:

S-dv740