HQ Power VDPL710MHW14B Bedienungsanleitung
Inhaltsverzeichnis
Verfügbare Sprachen
Verfügbare Sprachen
Quicklinks
VDPL710MHW14B
VDPL710MHW14W
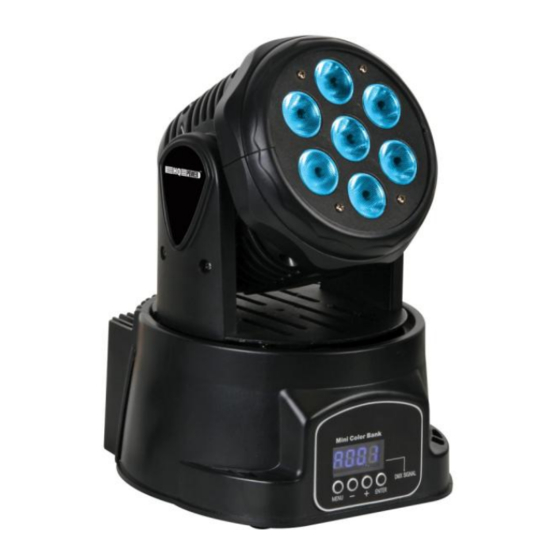
LED MINI MOVING HEAD 7 X 10 W RGBW
MINI MOVING HEAD – 7 X 10 W RGBW-LED
MINI PROJECTEUR LYRE – 7 X LED RGBW DE 10 W
MINI CABEZA MÓVIL – 7 X LED RGBW DE 10 W
MINI "MOVING HEAD"-SCHEINWERFER – 7 X 10 W RGBW-LED
VDPL710MHW14B
USER MANUAL
GEBRUIKERSHANDLEIDING
MODE D'EMPLOI
MANUAL DEL USUARIO
BEDIENUNGSANLEITUNG
3
10
17
24
31
VDPL710MHW14W
Inhaltsverzeichnis

Verwandte Anleitungen für HQ Power VDPL710MHW14B


Inhaltszusammenfassung für HQ Power VDPL710MHW14B
- Seite 1 VDPL710MHW14B VDPL710MHW14W LED MINI MOVING HEAD 7 X 10 W RGBW MINI MOVING HEAD – 7 X 10 W RGBW-LED MINI PROJECTEUR LYRE – 7 X LED RGBW DE 10 W MINI CABEZA MÓVIL – 7 X LED RGBW DE 10 W MINI "MOVING HEAD"-SCHEINWERFER –...
- Seite 2 VDPL710MHW14B/VDPL710MHW14W terminator – eindweerstand – résistance de terminaison – terminación – Terminierung How to turn the controller line from 3-pins into 5-pins (plug and socket). Controller line van 3-pin naar 5-pin aanpassen (stekker en contact). Modifier la ligne du contrôleur de 3 broches en 5 broches (fiche et contact).
-
Seite 31: Sicherheitshinweise
VDPL710MHW14B/VDPL710MHW14W BEDIENUNGSANLEITUNG Einführung An alle Einwohner der Europäischen Union Wichtige Umweltinformationen über dieses Produkt Dieses Symbol auf dem Produkt oder der Verpackung zeigt an, dass die Entsorgung dieses Produktes nach seinem Lebenszyklus der Umwelt Schaden zufügen kann. Entsorgen Sie die Einheit (oder verwendeten Batterien) nicht als unsortiertes Hausmüll;... -
Seite 32: Allgemeine Richtlinien
VDPL710MHW14B/VDPL710MHW14W Allgemeine Richtlinien Siehe Velleman® Service- und Qualitätsgarantie am Ende dieser Bedienungsanleitung. Schützen Sie das Gerät vor Staub und extremen Temperaturen. Beachten Sie, dass die Lüftungsschlitze nicht blockiert werden. Beachten Sie eine minimale Entfernung von 2,5 cm zwischen dem Gerät und jedem anderen Gegenstand. - Seite 33 VDPL710MHW14B/VDPL710MHW14W Installation Wählen Sie einen geeigneten Montageort. Verbinden Sie das Stromkabel mit dem Netz. Trennen Sie das Gerät nach Gebrauch vom Netz. Das Gerät montieren Lassen Sie das Gerät von einem Fachmann und gemäß den EN 60598-2-17 und allen anderen zutreffenden Normen installieren.
-
Seite 34: Farbeinstellungen
VDPL710MHW14B/VDPL710MHW14W Blättern Sie mit <UP> und <DOWN> durch das Menü. Drücken Sie auf <ENTER>, um die angezeigte Funktion auszuwählen oder eine Option einzuschalten. Drücken Sie auf <MODE/ESC>, um ohne Änderung vom Wert zum Hauptmenü zurückzukehren. Konfiguration Einstellungen Das Display kann automatisch ausgeschaltet werden und 180° gedreht werden. -
Seite 35: Standalone-Modus
VDPL710MHW14B/VDPL710MHW14W Betriebsdauer Das Gerät speichert die Zeit, die die Lampen funktioniert haben. Drücken Sie auf <MODE/ESC> bis <HOUR> auf dem Bildschirm erscheint und drücken Sie auf <ENTER>. Die Betriebsdauer wird in Stunden angezeigt. Drücken Sie auf <MODE/ESC> um den Modus zu verlassen. - Seite 36 VDPL710MHW14B/VDPL710MHW14W DMX-Modus Steuerung vom Gerät über einen universellen DMX-Controller. Alle DMX-gesteuerten Geräte brauchen eine digitale Startadresse, sodass das richtige Gerät auf die Signale reagieren kann. Diese digitale Startadresse ist die Kanalnummer, von der das Gerät die Befehle der DMX-Steuerung empfängt und ausführt. Sie können dieselbe Startadresse für eine ganze Gruppe von Geräten verwenden oder eine separate Startadresse für jedes Gerät eingeben.
-
Seite 37: Reinigung Und Wartung
VDPL710MHW14B/VDPL710MHW14W Kanal Beschreibung Stopp Neigeposition, Feineinstellung Schließen Master-Dimmer, Helligkeit von dunkel auf hell Schließen Rot, Helligkeit von dunkel auf hell Schließen Grün, Helligkeit von dunkel auf hell Schließen Blau, Helligkeit von dunkel auf hell Schließen Weiß, Helligkeit von dunkel auf hell Schließen... - Seite 38 VDPL710MHW14B/VDPL710MHW14W © URHEBERRECHT Velleman NV besitzt das Urheberrecht für diese Bedienungsanleitung. Alle weltweiten Rechte vorbehalten. Ohne vorherige schriftliche Genehmigung des Urhebers ist es nicht gestattet, diese Bedienungsanleitung ganz oder in Teilen zu reproduzieren, zu kopieren, zu übersetzen, zu bearbeiten oder zu speichern.
- Seite 40 - tout dommage à cause d’une utilisation commerciale, professionnelle ou • Consejo: Lea el manual del usuario y controle los cables, las pilas, etc. collective de l’appareil (la période de garantie sera réduite à 6 mois lors antes de devolver el aparato. Si no se encuentra un defecto en el artículo d’une utilisation professionnelle) ;...