Beko MGB 25332 BG Bedienungsanleitung
Mikrowellenherd
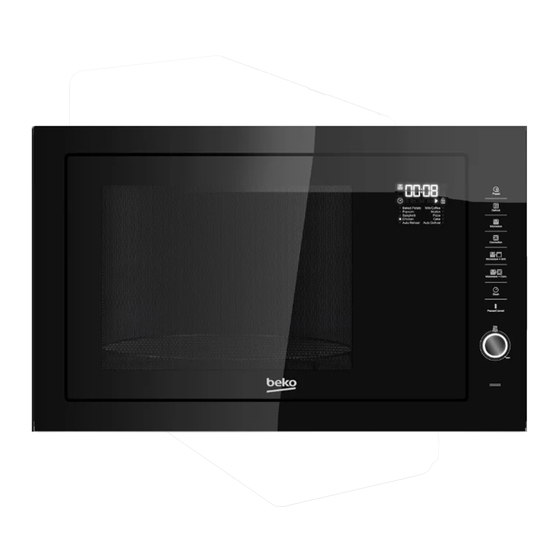
Vorschau ausblenden
Andere Handbücher für MGB 25332 BG:
- Bedienungsanleitung (376 Seiten) ,
- Bedienungsanleitung (376 Seiten)
Kapitel
Inhaltsverzeichnis

Verwandte Anleitungen für Beko MGB 25332 BG


Inhaltszusammenfassung für Beko MGB 25332 BG
- Seite 1 Microwave Oven User Manual MGB 25332 BG Mikrodalga Fırın MGB 25333 BG Kullanma Kılavuzu Mikrowellenherd Bedienungsanleitung Four à micro-ondes Manuel d’utilisation K LT ET BG...
-
Seite 51: Bedeutung Der Symbole
Bitte zunächst diese Anleitung lesen! Werter Kunde, Danke, dass Sie sich für ein Produkt der Marke Beko entschieden haben. Wir hoffen, dass Sie mit diesem Produkt, das mit den höchsten Qualitätsanforderungen und der modernsten Technologie hergestellt wurde, beste Ergebnisse erzielen. Bitte lesen Sie die gesamte Bedienungsanleitung und alle anderen Begleitdokumente aufmerksam, bevor Sie das Produkt verwenden;... - Seite 52 Inhalt 1 Wichtige Hinweise zu Sicherheit 4.5 Auftauen nach Gewicht ........69 und Umwelt 53-58 4.6 Auftauen nach Zeit ..........69 4.7 Küchentimer (Countdown) ........70 1.1 Allgemeine Sicherheit ..........53 4.8 Automatische Zubereitung .......70 1.1.1 Elektrische Sicherheit ........55 4.8.1 Gericht automatisch garen ......71 1.1.2 Produktsicherheit ..........56 4.9 Mehrstufiges Garen ..........72 1.2 Zweckmäßiger Gebrauch ........57...
-
Seite 53: Wichtige Hinweise Zu Sicherheit Und Umwelt
Wichtige Hinweise zu Sicherheit und Umwelt Dieser Abschnitt enthält Ihr Produkt dient dem Garen, Er- • Sicherheitsanweisungen, die hitzen und Auftauen von Lebens- beim Schutz vor Personen- mitteln zuhause. Es darf nicht und Sachschäden, Bränden, gewerblich eingesetzt werden. Stromschlägen und dem Austreten Der Hersteller haftet nicht für von Mikrowellenenergie hel- Schäden, die durch Missbrauch... -
Seite 54: Stellen Sie Den Mikrowellen
Wichtige Hinweise zu Sicherheit und Umwelt Das Gerät sollte nicht mit Zeit- Küchenutensilien können auf- • • schaltuhren oder separaten Fern- grund der von den erhitzten Le- steuerungssystemen betrieben bensmitteln übertragenen Hitze werden. heiß werden. Möglicherweise be- nötigen Sie Küchenhandschuhe Vor der ersten Inbetriebnahme •... -
Seite 55: Elektrische Sicherheit
Umwelt 1.1.1 Elektrische Gerät oder Netzstecker nie mit • Sicherheit feuchten oder nassen Händen berühren. Der Beko-Mikrowellenherd stimmt • Gerät so aufstellen, dass der mit geltenden Sicherheitsstan- • Netzstecker immer zugänglich ist. dards überein; daher sollten Gerät oder Netzkabel zur Vermei- Schäden am Netzkabel vermei-... -
Seite 56: Produktsicherheit
Wichtige Hinweise zu Sicherheit und Umwelt Drähte und/oder Metallgriffe von Geräte der Klasse B eignen sich • • mikrowellengeeigneten Papier- für den Einsatz in Wohnbereichen oder Kunststoffbehältern vor sowie Bereichen, die direkt mit dem Erhitzen im Mikrowellenherd einem Niederspannungs-Strom- entfernen. versorgungsnetz verbunden sind. -
Seite 57: Zweckmäßiger Gebrauch
Wichtige Hinweise zu Sicherheit und Umwelt Falls die Tür oder Türdichtungen Der Mikrowellenherd ist nur zum • • beschädigt sind, darf der Mikro- Auftauen, Garen und Schmoren wellenherd erst nach Repara- von Lebensmitteln vorgesehen. tur durch qualifiziertes Personal Übergaren Sie Lebensmittel nicht; •... -
Seite 58: Sie Dürfen Kindern Die Benut
Wichtige Hinweise zu Sicherheit und Umwelt Verschluckungsgefahr! Alle Ver- 1.4 Konformität mit der • WEEE-Richtlinie und packungsmaterialien von Kindern Entsorgung von Altprodukten fernhalten. Sie dürfen Kindern die Benut- Dieses Produkt enthält keine der in der • vom Ministerium für Umwelt und zung des Mikrowellenherds nur Städteplanung ausgestellten erlauben, wenn sie angemessen... -
Seite 59: Ihr Mikrowellenherd
Ihr Mikrowellenherd 2.1 Übersicht 2.1.1 Bedienelemente und Teile Dieses Gerät erfüllt die Vorgaben der europäischen Richtlinien 1. Bedienfeld 2004/108/EC, 2006/95/EC, 2. Drehtellerschaft 2009/125/EC und 2011/65/EU. 3. Drehtellerhalterung 230 V Stromverbrauch 4. Glasteller Wechselspannung, 50 5. Gerätefenster Hz, 1450 W (Mikrowelle) 1000 W (Grill) 6. -
Seite 60: Drehteller Installieren
Ihr Mikrowellenherd 2.1.3 Drehteller installieren Nabe (Unterseite) Göbek (alt kısım) Glasteller Cam tabla Drehtellerschaft Döner tabla mili Drehtellerhalterung Döner tabla desteği • Glasteller niemals verkehrt herum aufstellen. Der Glasteller darf niemals blockiert werden. • Sowohl Glasteller als auch Drehtellerhalterung müssen stets während des Garens verwendet werden. -
Seite 61: Installation Und Anschluss
Installation und Anschluss 3.1 Installation und Anschluss Zugängliche Flächen können wäh- • Entfernen Sie alle Verpackungsmaterialien rend des Betriebs heiß werden. und Zubehörteile. Untersuchen Sie das Gerät auf mögliche Schäden, wie Beulen Achten Sie darauf, das Netzkabel oder eine defekte Tür. Installieren Sie den nicht einzuklemmen oder zu bie- Mikrowellenherd nicht, falls er beschädigt ist. -
Seite 62: Integrierte Installation
Installation und Anschluss 3.2 Integrierte Installation 3.2.1 Möbelabmessungen für die integrierte Installation 380+2 62 / 371 DE Mikrowellenherd / Bedienungsanleitung... -
Seite 63: Schrank Vorbereiten
Installation und Anschluss 3.2.2 Schrank vorbereiten 1. Lesen Sie die Anweisungen aufn der Schablone (Schrank/unten) und legen Sie die Schablone auf die untere Innenseite des Schranks. CENTER LINE FRONT EDGE 2. Kennzeichnen Sie die Stellen an der unteren Innenseite des Schranks entsprechend den Markierungen „a“... -
Seite 64: Mikrowellenherd Befestigen
Installation und Anschluss 3.2.3 Mikrowellenherd befestigen 1. Installieren Sie den Mikrowellenherd im Schrank. - Stellen Sie sicher, dass die Rückseite des Mikrowellenherds in der Halterung eingerastet ist. - Achten Sie darauf, das Netzkabel nicht einzuklemmen oder zu biegen. Halterung braket 2. -
Seite 65: Funkstörungen
Installation und Anschluss 3.3 Funkstörungen • Decken Sie die Lebensmittel während des Garens ab. Durch Abdecken der Lebensmittel werden Spritzer verhindert und die Der Betrieb des Mikrowellenherds Lebensmittel gleichmäßig gegart. kann Störungen bei Radios, • Wenden Sie Lebensmittel, wie Geflügel und Fernsehern und ähnlichen Geräten Hamburger, während des Garens;... -
Seite 66: Utensilientest
Installation und Anschluss 2. Betreiben Sie den Mikrowellenherd 1 Minute Hersteller und/oder Händler haf- lang bei maximaler Leistung. ten nicht für Verletzungen oder Geräteschäden aufgrund von 3. Prüfen Sie vorsichtig die Temperatur des ge- testeten Utensils. Falls es sich erwärmt hat, Nichteinhaltung der Anweisungen zum elektrischen Anschluss. -
Seite 67: Bedienung
Bedienung 4.1 Bedienfeld 4.2 Bedienungsanweisungen 4.2.1 Zeit einstellen Wenn der Mikrowellenherd mit Strom versorgt wird, erscheint „0:00“ am Bildschirm und der Mikrowelle Summer gibt einen Signalton aus. 1. Drücken Sie zweimal (Küchentimer/Uhr) Grill/Kombination und die Stundenanzeige beginnt zu blinken. 2. Passen Sie durch Drehen von Auftauen nach Zeit Stundenwert an;... -
Seite 68: Dauer Einstellen
Bedienung 4.2.3 Anweisungen zum 3. Bestätigen Sie die Einstellung mit Tastenfeld (Mikrowelle) (Start/+30 Sek./Bestätigung) und drehen Sie zum Einstellen der Garzeit auf einen Wert zwi- Bestel- Bild- Mikrowel- schen 0:05 bis 95:00 lung schirm lenleistung 4. Drücken Sie zum Starten des Garens erneut P100 100 % (Start/+30 Sek./Bestätigung). -
Seite 69: Anweisungen Zum Tastenfeld (Grill/Kombination)
Bedienung 2. In den Modi Mikrowellengaren, Grill und 3. Drücken Sie zum Bestätigen (Start/+30 Kombigaren oder Auftauen wird die Garzeit Sek./Bestätigung) und „C-1“ wird am Bildschirm mit jeder Betätigung der Taste (Start/+30 angezeigt. Sek./Bestätigung) um 30 Sekunden erhöht. 4. Passen Sie durch Drehen von die Garzeit an, 3. -
Seite 70: Küchentimer (Countdown)
Bedienung 4.7 Küchentimer (Countdown) 4. Drücken Sie zum Starten des Garens (Start/+30 Sek./Bestätigung). Ihr Mikrowellenherd ist mit einem automati- schen Timer ausgestattet, der nicht mit den Beispiel: Wenn Sie Gerätefunktionen verknüpft ist und separat ge- „Automatische Zubereitung“ zum nutzt werden kann (er kann auf bis zu 95 Minuten Garen von 350 g Fisch verwenden eingestellt werden). -
Seite 71: Gericht Automatisch Garen
Bedienung 4.8.1 Gericht automatisch garen Gericht Gewicht Bildschirm 200 g Pizza 400 g 250 g Fleisch 350 g 450 g 200 g Gemüse 300 g 400 g 50 g (mit 450 ml kaltem Nudeln Wasser) 100 g (mit 800 ml kaltem Wasser) 200 g Kartoffeln... -
Seite 72: Mehrstufiges Garen
Bedienung 4.9 Mehrstufiges Garen 4.10 Abfragefunktion Es können maximal 2 Schritte zum Garen einge- 1. Drücken Sie in den Modi Mikrowelle, Grill und stellt werden. Falls beim mehrstufigen Garen den Kombination (Mikrowelle) oder (Grill/ Vorgang Auftauen beinhaltet, muss das Auftauen Kombination) und die aktuelle Leistungsstufe der erste Schritt sein. -
Seite 73: Reinigung Und Wartung
Reinigung und Wartung 5.1 Reinigung 7. Falls sich Dampf in und um die Gerätetür ansammelt, diese mit einem weichen Tuch WARNUNG: Reinigen Sie abwischen. Dies kann geschehen, wenn der das Gerät niemals mit Benzin, Mikrowellenherd bei hoher Luftfeuchtigkeit Lösungsmitteln, Scheuermitteln, verwendet wird. -
Seite 74: Lagerung
Reinigung und Wartung 14. Wenn der Mikrowellenherd in der Grillfunktion genutzt wird, können etwas Rauch und Gerüche entstehen, die nach einiger Zeit im Betrieb verschwinden. 5.2 Lagerung • Lagern Sie das Gerät sorgfältig, wenn Sie es längere Zeit nicht benutzen sollten. •... -
Seite 75: Mögliche Ursache
Fehlerbehebung Normal Mikrowellenherd verursacht Störungen des Der Radio- und Fernsehempfang kann durch Fernsehempfangs den Betrieb des Mikrowellenherdes gestört werden. Dies ähnelt den Störungen, die durch kleine Elektrogeräte, wie Mixer, Staubsauger und Ventilatoren, verursacht werden. Dies ist normal. Die Beleuchtung verdunkelt sich Arbeitet der Mikrowellenherd mit geringer Leistung, kann sich die Beleuchtung verdunkeln.