Herunterladen Inhalt Inhalt Diese Seite drucken
Inhaltsverzeichnis

Werbung

Verfügbare Sprachen
  • DE

Verfügbare Sprachen

  • DEUTSCH, seite 1
LEICA PINMASTER II PRO
ANLEITUNG   |   INSTRUCTIONS   |   NOTICE D'UTILISATION
GEBRUIKSAANWIJZING   |   ISTRUZIONI
取扱説明書
INSTRUCCIONES   |   

Werbung

Inhaltsverzeichnis
loading

Inhaltszusammenfassung für Leica PINMASTER II PRO

  • Seite 1 LEICA PINMASTER II PRO ANLEITUNG   |   INSTRUCTIONS   |   NOTICE D’UTILISATION GEBRUIKSAANWIJZING   |   ISTRUZIONI 取扱説明書 INSTRUCCIONES   |   ...
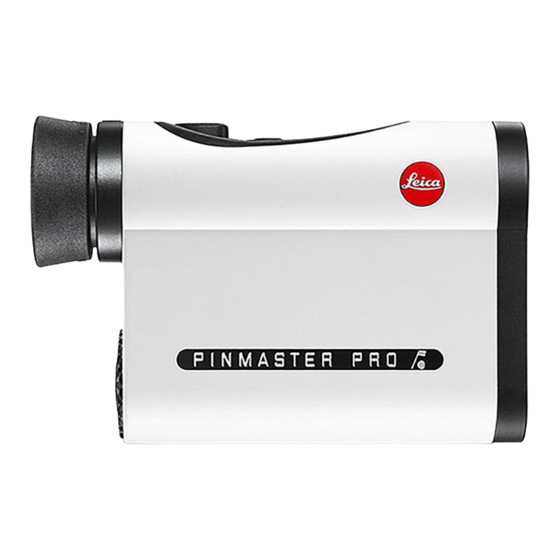
  • Seite 4: Bezeichnung Der Teile

    Haupttaste – Trageschnur Augenmuschel mit – Corduratasche Dioptrienskala – Garantiekarte Öse für Trageschnur Okular Batteriefachdeckel Batteriefach Objektivlinse Laser-Sendeoptik Warnhinweis Vermeiden Sie, wie bei jedem Fernglas, den direkten Blick mit Ihrem Leica Pinmaster Pro in helle Lichtquellen, um Augenverletzungen auszu- schließen.
  • Seite 5: Inhaltsverzeichnis

    Anbringen der Trageschnur ........ 5 Wir wünschen Ihnen viel Freude und Erfolg mit Ihrem Einsetzen und Auswechseln der Batterie ..... 5 neuen Leica Produkt. Der Leica Pinmaster II Pro sendet Ladezustand der Batterie........6 unsichtbare und für das Auge unschädliche Infrarot- Verwendung mit und ohne Brille ......
  • Seite 6: Entsorgung Elektrischer Und Elektronischer Geräte

    ENTSORGUNG ELEKTRISCHER UND ELEKTRONISCHER GERÄTE (Gilt für die EU sowie andere europäische Länder mit getrennten Sammelsystemen.) Dieses Gerät enthält elektrische und/oder elektroni- sche Bauteile und darf daher nicht im normalen Hausmüll entsorgt werden! Stattdessen muss es zwecks Recycling an entsprechenden, von den Gemein- den bereitgestellten Sammelstellen abgegeben werden.
  • Seite 7: Anbringen Der Trageschnur

    Bitte die kleine Schlaufe der Trageschnur durch die Öse am Gehäuse des Leica Pinmaster II Pro Der Leica Pinmaster II Pro wird zur Energieversor gung schieben. Dann das Ende der Trageschnur durch die mit einer 3 Volt Lithium-Batterie (z.B. Duracell DL CR2, kleine Schlaufe fädeln und so festziehen, dass sich die...
  • Seite 8: Ladezustand Der Batterie

    Batterie betrieben werden. erstmaligen Erscheinen von sind noch mehr als bAtt • Wenn der Leica Pinmaster II Pro längere Zeit nicht 100 Messungen mit fortschreitend verminderter benutzt wird, sollte die Batterie herausgenommen Reichweite möglich. werden. Unabhängig von der Anzeige können Sie jederzeit •...
  • Seite 9: Verwendung Mit Und Ohne Brille

    (Bild A, der Zielmarke auf den für Sie optimalen Wert Gummiaugenmuschel einstellen. Einfach durch den Leica Pinmaster II Pro ein Lieferzustand). In dieser Position ist der richtige weit entferntes Objekt anpeilen und durch Drehen an Abstand des Leica Pinmaster II Pro zum Auge gegeben.
  • Seite 10: Einstellung Der Gewünschten Maßeinheit

    Die jeweilige Einstellung ist stets an der Anzeige zu erkennen – sind metrische Werte gewählt, erscheint Die Anzeige des Leica Pinmaster II Pro kann auf Meter neben der Zielmarke rechts unten ein Punkt. oder die in den USA gebräuchlichen Yards eingestellt werden.
  • Seite 11: Entfernungsmessung

    Mit dem Erlöschen der Anzeige schaltet sich der Leica Pinmaster II Pro automatisch ab. SCAN-BETRIEB Mit dem Leica Pinmaster II Pro kann auch im Dauerbetrieb gemessen werden: Wenn die Haupttaste bei der 2. Betätigung gedrückt gehalten wird, schaltet sich das Gerät nach ca. 0,5 Sekunden in den ENTFERNUNGSMESSUNG Scan-Betrieb und führt dann permanent Messungen...
  • Seite 12: Erstziel-Logik

    ERSTZIEL-LOGIK Der Leica Pinmaster II Pro ist mit einer speziell für den Golfsport entwickelten Erstziel-Logik ausgestattet, die das Anmessen von kleinen Zielen wie Golffahnen erheblich erleichtert. Erfasst das Gerät zwei Entfernungen im Bereich der Zielmarke, wird die Entfernung zum näher gelegenen kleineren Ziel angezeigt A, und nicht die zum weiter entfernten, größeren Objekts B.
  • Seite 13: Messreichweite Und Genauigkeit

    MESSREICHWEITE UND GENAUIGKEIT Die Messgenauigkeit des Leica Pinmaster II Pro beträgt bis zu ±1m. Die maximale Reichweite wird erreicht bei gut reflektierenden Zielobjekten und einer visuellen Sichtweite von etwa 10km. Die Messreichweite wird von folgenden Faktoren beeinflusst: Reichweite höher geringer...
  • Seite 14: Angle Compensated Distance™ (Acd)

    Wichtig: horizontalen Entfernung. • Bitte beachten Sie, dass gerade bei großen Diese errechnet der Leica Pinmaster II Pro aus der Entfernungen der Einfluss aller ballistisch relevanten linear gemessenen Entfernung und einem Korrektur- Einflussfaktoren deutlich zunimmt und es zu faktor, der vom ebenfalls gemessenen Winkel abhängt.
  • Seite 15: Anzeige Und Überprüfung Der Einstellungen

    ANZEIGE UND ÜBERPRÜFUNG DER Einstellungen Wenn das Gerät eingeschaltet ist: Warten Sie, bis die EINSTELLUNGEN Anzeige erlischt. Wenn das Gerät nicht eingeschaltet Wenn Sie Ihre Einstellungen überprüfen möchten, ist: können Sie sich die Werte jederzeit anzeigen lassen. Beginnen Sie mit Schritt 1. Drücken Sie dazu die Nebentaste 2x kurz.
  • Seite 16: Pflege/Reinigung

    Tüchern besteht die Gefahr der statischen Aufladung. Alkohol und andere chemische Lösungen dürfen nicht zur Reinigung der Optik oder des Gehäuses verwendet werden. Jeder Leica Pinmaster II Pro trägt außer der Typbezeichnung seine „persönliche“ Fabrikationsnum- mer. Notieren Sie sich diese Nummer zur Sicherheit in...
  • Seite 17: Was Tun, Wenn

    WAS TUN, WENN ... Fehler Ursache Abhilfe Bei der Beobachtung wird kein a) Pupille des Beobachters liegt a) Augenposition korrigieren. kreisrundes Bild erreicht. nicht in der Austrittspupille des Okulars. b) Stellung der Augenmuschel b) Anpassung korrigieren: Brillenträ- entspricht nicht der richtigen ger knicken die Augenmuschel Benutzung mit und ohne Brille.
  • Seite 18: Technische Daten

    TECHNISCHE DATEN Vergrößerung Objektivdurchmesser 24mm Austrittspupille 3,4mm Dämmerungszahl Geometrische Lichtstärke 11,8 Sehfeld (auf 1.000m) / Objektiver Sehwinkel 115m / 6,5° Austrittspupillen-Längsabstand 15mm Prismenart Dachkant Vergütung auf Linsen High Durable Coating (HDC™) und hydrophobe Aqua-Dura Vergütung auf auf Prismen Aussenlinsen Phasenkorrekturbelag P40 Dioptrienausgleich ±3,5dpt.
  • Seite 19: Leica Product Support

    AG. Auch für Kaufberatungen und die Bestellung von (Adressenliste siehe Garantiekarte). Anleitungen ist sie Ihr Ansprechpartner. Alternativ können Sie Ihre Fragen ebenso über das Kontaktformu- Leica Camera AG lar auf der Website der Leica Camera AG an uns Customer Care richten. Am Leitz-Park 5 D-35578 Wetzlar...
  • Seite 20: Designation Of Parts

    Eye for carrying cord Eyepiece Battery compartment cover Battery compartment Lens Laser transmission lens Warning As with all binoculars and telescopes, avoid looking directly at bright light sources with your Leica Pin- master Pro in order to avoid eye damage.
  • Seite 21 Setting the desired unit of measure ....24 distance from these reflected signals. The Leica Distance measurement ........25 Pinmaster II Pro is equipped with a first target logic Scan mode ............25 specially developed for golf and a scanning mode. This First target logic ..........
  • Seite 22: Disposal Of Electrical And Electronic Equipment

    DISPOSAL OF ELECTRICAL AND ELECTRONIC EQUIPMENT (Applies within the EU, and for other European countries with segregated waste collection systems.) This device contains electrical and/or electronic components and must therefore not be disposed of in general household waste! Instead, it should be disposed of at a recycling collection point provided by the local authority.
  • Seite 23: Fitting The Carrying Cord

    FITTING THE CARRYING CORD INSERTING AND CHANGING THE BATTERY Push the small loop of the carrying cord through the The Leica Pinmaster II Pro is supplied with power by eyelet on the housing of the Leica Pinmaster II Pro. one 3 Volt lithium cell (e.g. Duracell DL CR 2, Ucar CR Then, thread the end of the carrying strap through the 2, Varta CR 2, or other CR 2 types).
  • Seite 24: Battery Charge State

    100 bAtt • If the Leica Pinmaster II Pro is used for a prolonged measurements are still possible with increasingly period, the battery should be removed.
  • Seite 25: Use With And Without Glasses

    (Figure A, as it comes). This position gives sharpness of the target mark to suit you best. Simply target the Leica Pinmaster II Pro on some far away the correct distance between the eye and the Leica object and turn the eyecup until the target mark is as Pinmaster II Pro.
  • Seite 26: Setting The Desired Unit Of Measure

    Note: The current setting can always be seen from the display The Leica Pinmaster II Pro can be set to meters or – if metric values have been selected, a dot always yards, the more commonly used unit in the USA.
  • Seite 27: Distance Measurement

    When the display goes out, the Leica Pinmaster II Pro switches off automatically. SCAN MODE The Leica Pinmaster II Pro can also be used for measurements in continuous mode: If the main button is held down the 2nd time it is pressed, the unit switches to scan mode after approx.
  • Seite 28: First Target Logic

    FIRST TARGET LOGIC The Leica Pinmaster II Pro is equipped with first target logic specially developed for golf, which greatly simplifies the measurement of small targets such as golf flag. If the unit records two distances in the area of the target mark, the distance to the closer –...
  • Seite 29: Measuring Range And Accuracy

    MEASURING RANGE AND ACCURACY The measuring accuracy of the Leica Pinmaster II Pro is up to ±1m. The maximum range is achieved with target objects with high reflectivity and a visual range of approx. 10km. The measuring range is influenced by...
  • Seite 30: Angle Compensated Distance™ (Acd)

    Important: horizontal distance. • Please note that particularly with large distances, The Leica Pinmaster II Pro calculates this from the the influence of all ballistically relevant factors linear measured distance and a compensation factor increases significantly and can result in deviations.
  • Seite 31: Display And Checking Of The Settings

    DISPLAY AND CHECKING OF THE SETTINGS Settings If the device is switched on: Wait until the display goes If you wish to check your settings, you can display the out. If the device is not switched on: values at any time. Start with Step 1.
  • Seite 32: Care/Cleaning

    CARE / CLEANING Attention: Do not open the unit under any circumstances! Your Leica Pinmaster II Pro does not require any special care. Any large dirt particles, such as sand, should be removed with a soft brush or blown off. Fingerprints, SPARE PARTS etc.
  • Seite 33: Troubleshooting

    TROUBLESHOOTING Fault Cause Remedy No circular image is obtained during a) Viewer's pupil is not in ocular's a) Correct the eye position. viewing. exit pupil. b) Eyecup position is not correct for b) Correct the adjustment: When us with/without glasses. wearing glasses, fold down the eyecup;...
  • Seite 34: Technical Data

    TECHNICAL DATA Magnification Lens diameter 24mm Exit pupil 3.4mm Twilight factor Geometric light intensity 11.8 Field of vision (at 1,000m) / objective viewing 115m / 6.5° angle Eyepoint design 15mm Prism type roof-type Coating on lens elements High Durable Coating (HDC™) and hydrophobic Aqua-Dura coating on outer on prisms lenses, phase correction coating P40 Diopter compensation...
  • Seite 35: Leica Product Support

    They are also the and repairs of your Leica equipment (see the warranty contact point for purchasing advice and to order card for a list of addresses).
  • Seite 36: Désignation Des Pièces

    Couvercle du compartiment à piles Compartiment à piles Lentille de l'objectif Optique d'émission laser Mise en garde Comme pour toutes les jumelles, évitez de regarder directement des sources de lumière intenses avec votre Leica Pinmaster Pro pour éviter des lésions oculaires.
  • Seite 37: Avant-Propos

    Portée de mesure et précision ......43 distance en est ainsi grandement facilitée. Angle Compensated Distance™ (ACD) ....44 Le Leica Pinmaster II Pro est équipé d'une optique de Affichage et vérification des réglages ....45 visée exceptionnelle d'un grossissement x7 permettant Entretien/Nettoyage ........
  • Seite 38: Élimination Des Appareils Électriques Et Électroniques

    ÉLIMINATION DES APPAREILS ÉLECTRIQUES ET ÉLECTRONIQUES (applicable à l'UE ainsi qu'aux autres pays européens possédant des systèmes de tri sélectif.) Cet appareil contient des composants électriques et/ ou électroniques et ne doit donc pas être jeté dans les ordures ménagères ordinaires. Il doit être déposé à un point de collecte municipal adapté...
  • Seite 39: Fixation Du Cordon De Port

    FIXATION DU CORDON DE PORT MISE EN PLACE ET REMPLACEMENT DE LA PILE Introduire la petite boucle du cordon de port dans Le Leica Pinmaster II Pro est équipé d'une pile au l'œillet du boîtier du Leica Pinmaster II Pro. Faire lithium 3 volts (par ex.
  • Seite 40: État De Charge De La Pile

    • Retirez la pile du Leica Pinmaster II Pro si vous ne d'effectuer encore 100 mesures dont la portée se pensez pas l'utiliser pendant une période prolongée.
  • Seite 41: Utilisation Avec Ou Sans Port De Lunettes

    Repérer simplement un objet lointain relevées (photo A, état les bonnettes en caoutchouc avec le Leica Pinmaster II Pro et régler la netteté à la livraison). Dans cette position, la distance entre le optimale du repère de visée en faisant tourner la Leica Pinmaster II Pro et l'œil est idéale.
  • Seite 42: Paramétrage De L'unité De Mesure Désirée

    Le paramètre choisi est toujours identifiable sur l'affichage – si le système métrique a été retenu, un L'affichage du Leica Pinmaster II Pro peut se régler en point apparaît en bas à droite à côté du repère de mètres ou en yards, utilisés habituellement aux USA.
  • Seite 43: Mesure De Distance

    - - - Lorsque l'affichage s'éteint, le Leica Pinmaster II Pro se désactive automatiquement. MODE SCAN Le Leica Pinmaster II Pro permet également d'effectuer des mesures en continu : si vous maintenez le bouton principal enfoncé...
  • Seite 44: Système Logique De La Cible La Plus Proche

    SYSTÈME LOGIQUE DE LA CIBLE LA PLUS PROCHE Le Leica Pinmaster II Pro est équipé d'un système logique de la cible la plus proche spécialement mis au point pour le golf ; celui-ci facilite notablement le mesure sur des cibles de petite taille tels que les drapeaux de golf.
  • Seite 45: Portée De Mesure Et Précision

    PORTÉE DE MESURE ET PRÉCISION La précision de mesure du Leica Pinmaster II Pro va jusqu'à ±1 m. La portée maximale est atteinte avec des objets cibles suffisamment réfléchissants et avec une visibilité d'environ 10 km. La portée de mesure est influencée par les facteurs suivants : Portée...
  • Seite 46: Angle Compensated Distance™ (Acd)

    équivalente. • N'oubliez pas qu'à grande distance, l'influence de Cette est calculée par le Leica Pinmaster II Pro à tous les facteurs pertinents d'un point de vue partir de la distance linéaire mesurée et d'un balistique augmente considérablement, ce qui peut coefficient de correction qui dépend de l'angle...
  • Seite 47: Affichage Et Vérification Des Réglages

    AFFICHAGE ET VÉRIFICATION DES RÉGLAGES Réglages Si l'appareil est allumé : attendez que l'affichage Si vous voulez vérifier vos réglages, vous pouvez s'éteigne. Si l'appareil n'est pas allumé : afficher leurs valeurs à tout moment. commencez par l'étape 1. Pour cela, appuyez brièvement 2 fois sur le bouton Appuyez sur le bouton auxiliaire pendant un auxiliaire 1.
  • Seite 48: Entretien/Nettoyage

    Si vous avez besoin d'une pièce de rechange pour votre nettoyées avec un chiffon humide, puis essuyées avec Leica Pinmaster II Pro, p. ex. des bonnettes ou un une peau de chamois douce et propre ou avec un cordon de port, contactez notre service après-vente ou chiffon non pelucheux.
  • Seite 49: Que Faire Si

    QUE FAIRE SI... Défaut Cause Remède Absence d'image de forme ronde a) La pupille de l'utilisateur ne cor- a) Corriger la position des yeux. respond pas à la pupille de sortie de l'oculaire. b) La position des bonnettes n'est b) Corriger l'adaptation : les pas adaptée à...
  • Seite 50: Caractéristiques Techniques

    CARACTÉRISTIQUES TECHNIQUES Grossissement Diamètre d'objectif 24mm Pupille de sortie 3,4mm Indice crépusculaire Luminosité géométrique 11,8 Champ de vision (à 1 000 m) / angle de vue 115m / 6,5° objectif Distance longitudinale de la pupille de sortie 15mm Type de prisme En toit High Durable Coating (HDC™) et traitement hydrophobe Aqua-Dura sur la Traitement des lentilles...
  • Seite 51: Leica Product Support

    LEICA PRODUCT SUPPORT LEICA CUSTOMER CARE Le service Product Support de Leica AG répondra Pour l'entretien de votre équipement Leica ou en cas volontiers par écrit, par téléphone ou par e-mail à de problème, le service Customer Care (SAV) de Leica toutes les questions d'ordre technique concernant les Camera AG ou le service de réparation d'une des...
  • Seite 52: Benaming Van De Onderdelen

    Draagriem Oogschelpen met – Corduratas Dioptrieschaal – Garantiekaart Oog voor draagriem Oculair Deksel batterijvak Batterijvak Objectieflens Laser-zendoptiek Waarschuwingsaanwijzing Vermijd, zoals bij elke verrekijker, met de Leica Pin- master Pro direct in heldere lichtbronnen te kijken, om oogletsel uit te sluiten.
  • Seite 53 Dioptrie-compensatie ........55 cessor uit het percentage gereflecteerd signaal de Instelling van de gewenste maateenheid ... 56 afstand tot het object. De Leica Pinmaster II Pro is Afstandsmeting ..........57 uitgerust met een speciaal voor de golfsport Scanfunctie ............. 57 ontwikkelde eerste-doel-logica en een scanmodus.
  • Seite 54: Milieuvriendelijk Afvoeren Van Elektrische En Elektroni- Sche Apparatuur

    MILIEUVRIENDELIJK AFVOEREN VAN ELEKTRISCHE EN ELEKTRONI- SCHE APPARATUUR (geldt voor de EU en overige Europese landen met gescheiden inzameling) Dit apparaat bevat elektrische en / of elektronische onderdelen en mag daarom niet met het gangbare huisvuil worden meegegeven! In plaats daarvan moet het voor recycling op door de gemeenten beschikbaar gestelde inzamelpunten worden afgegeven.
  • Seite 55: De Draagriem Aanbrengen

    DE DRAAGRIEM AANBRENGEN DE BATTERIJ PLAATSEN EN VERVANGEN De kleine lus van de draagriem door het De Leica Pinmaster II Pro heeft voor de energietoevoer aan de behuizing van de Leica Pinmaster II Pro een 3 Volt lithiumbatterij (bijvoorbeeld Duracell DL schuiven.
  • Seite 56: Laadtoestand Van De Batterij

    Als de batterij is verbruikt, verschijnt iedere keer na het temperaturen adviseren wij daarom de Leica inschakelen (door het indrukken van de hoofdknop 2) 1 Pinmaster II Pro dicht op het lichaam te dragen en seconde lang in plaats van het richtpunt. Nadat bAtt met een nieuwe batterij te gebruiken.
  • Seite 57: Gebruik Met En Zonder Bril

    (afbeelding A, aflevertoestand). het richtpunt op de voor u optimale waarde instellen. Eenvoudig via de Leica Pinmaster II Pro een ver In deze positie is de juiste afstand van de Leica verwijderd object peilen en door het verdraaien van de Pinmaster II Pro tot het oog gerealiseerd.
  • Seite 58: Instelling Van De Gewenste Maateenheid

    INSTELLING VAN DE GEWENSTE MAATEENHEID Opmerking: De betreffende instelling is steeds te herkennen aan de De weergave van de Leica Pinmaster II Pro kan worden weergave: als metrische waarden zijn geselecteerd, ingesteld op meters of op in de VS gebruikelijke yards.
  • Seite 59: Afstandsmeting

    - - - Zodra de weergave verdwijnt, wordt de Leica Pinmaster II Pro automatisch uitgeschakeld. SCANFUNCTIE Met de Leica Pinmaster II Pro kan ook permanent worden gemeten. Als de hoofdknop bij de tweede bediening ingedrukt wordt gehouden, schakelt het toestel na circa 2,5 seconden over naar de scanfunctie AFSTANDSMETING en verricht dan permanent metingen.
  • Seite 60: Eerste-Doel-Logica

    EERSTE-DOEL-LOGICA De Leica Pinmaster II Pro is uitgerust met een speciaal voor de golfsport ontwikkelde eerste-doel-logica, die het meten van kleine doelen zoals golfvlaggen aanzienlijk vereenvoudigt. Als het toestel twee afstanden in het bereik van het richtpunt meet, wordt de afstand tot het nader gelegen kleinere doel weergegeven A, en niet tot het verder verwijderde, grotere object B.
  • Seite 61: Reikwijdte En Meetprecisie

    REIKWIJDTE EN MEETPRECISIE De meetnauwkeurigheid van de Leica Pinmaster II Pro bedraagt maximaal ± 1 m. De maximale reikwijdte wordt bereikt bij goed reflecterende doelobjecten en een visueel zicht van circa 10 km. Het meetbereik wordt door de volgende factoren beïnvloed:...
  • Seite 62: Angle Compensated Distance™ (Acd)

    Belangrijk: afstand. • Houd er rekening mee dat juist bij grote afstanden De Leica Pinmaster II Pro berekent deze uit de het effect van alle ballistische relevante factoren lineair gemeten afstand en een correctiefactor, die duidelijk toeneemt en dat er afwijkingen kunnen afhankelijk is van de eveneens gemeten hoek.
  • Seite 63: Weergave En Controle Van De Instellingen

    WEERGAVE EN CONTROLE VAN DE Instellingen Wanneer het toestel ingeschakeld is: wacht totdat de INSTELLINGEN weergave uitgaat. Wanneer het toestel niet ingescha- Als u uw instellingen wilt controleren, kunt u de keld is: waarden op elk gewenst moment weergeven. begin met stap 1. Druk hiertoe 2x kort op de hulpknop 1.
  • Seite 64: Verzorging / Reiniging

    VERZORGING / REINIGING Let op: Het toestel mag in geen geval worden geopend! Een bijzonder onderhoud van uw Leica Pinmaster II Pro is niet nodig. Grote vuildeeltjes, zoals zand, moeten met een haarpenseel worden verwijderd of worden VERVANGENDE ONDERDELEN weggeblazen. Vingerafdrukken en dergelijke op de...
  • Seite 65: Wat Te Doen, Als

    WAT DOEN, ALS ... Fout Oorzaak Oplossing Bij de observatie wordt geen cirkel- a) De pupil van de waarnemer a) Ogenpositie corrigeren. vormig beeld bereikt. correspondeert niet met de uit- tredepupil van het oculair. b) De stand van de oogschelpen b) Aanpassing corrigeren: bril- komt niet overeen met het juiste dragers knikken de oogschelp...
  • Seite 66: Technische Gegevens

    TECHNISCHE GEGEVENS Vergroting Diameter objectief 24 mm Uittredepupil 3,4 mm Schemeringsgetal Geometrische lichtsterkte 11,8 Gezichtsveld (op 1.000 m) / objectieve 115 m / 6,5° gezichtshoek Uittredepupillen - lengteafstand 15 mm Prismasoort Dakkant Coating op lenzen High Durable Coating (HDC™) en hydrofobe Aqua-Dura coating op op prisma´s buitenlenzen fasecorrectiecoating P40 Dioptriecompensatie...
  • Seite 67: Leica Product Support

    LEICA PRODUCT SUPPORT LEICA CUSTOMER CARE Technische vragen over toepassingen met Leica-pro- Voor het onderhoud van uw Leica-uitrusting en in geval ducten, ook over de meegeleverde software, worden van schade kunt u gebruik maken van de Customer schriftelijk, telefonisch of per e-mail beantwoord door Care van Leica Camera AG of de reparatieservice van de afdeling Product Support van Leica Camera AG.
  • Seite 68: Denominazione Dei Componenti

    Occhielli per cinghia a tracolla Oculare Coperchio del vano batterie Vano batterie Lente dell'obiettivo Ottica di emissione laser Avviso Come con qualsiasi altro binocolo, anche con Leica Pinmaster Pro evitare di guardare direttamente sorgenti luminose molto chiare per evitare lesioni agli occhi.
  • Seite 69 Regolazione diottrica ........71 tramite un microprocessore integrato sulla base del Impostazione dell’unità di misura desiderata ..72 segnale riflesso. Leica Pinmaster II Pro è dotato di una Misurazione della distanza ........ 73 logica basata sul primo puntamento appositamente Modalità Scan ..........73 sviluppata per il golf oltre a una funzione di scansione.
  • Seite 70: Smaltimento Dei Dispositivi Elettrici Ed Elettronici

    SMALTIMENTO DEI DISPOSITIVI ELETTRICI ED ELETTRONICI (Si applica all'UE e agli altri Paesi europei con sistemi di raccolta differenziata.) Il presente apparecchio contiene componenti elettrici e/o elettronici e non deve pertanto essere smaltito insieme ai normali rifiuti domestici. Deve, invece, essere depositato presso gli appositi centri di raccolta allestiti dalle autorità...
  • Seite 71: Montaggio Della Cinghia A Tracolla

    BATTERIA Far passare la piccola ansa della cinghia a tracolla dentro Leica Pinmaster II Pro è alimentato da una batteria al l'occhiello sul corpo di Leica Pinmaster II Pro. Quindi, litio da 3 V (ad es. Duracell DL CR2, Ucar CR2, Varta passare l'estremità...
  • Seite 72: Stato Di Carica Della Batteria

    è possibile effettuare ancora • Se si lascia Leica Pinmaster II Pro inutilizzato per un più di altre 100 misurazioni con una portata lungo periodo, rimuovere la batteria. gradualmente ridotta.
  • Seite 73: Uso Con E Senza Occhiali

    In questa posizione la un oggetto distante e, ruotando la conchiglia oculare 3, distanza di Leica Pinmaster II Pro dall'occhio è quella regolare il collimatore fino a ottenere la messa a fuoco corretta. Se, invece, si utilizzano occhiali, la conchiglia oculare può...
  • Seite 74: Impostazione Dell'unità Di Misura Desiderata

    L'unità di misura selezionata viene indicata continua- mente sul display (se è stata selezionata l'opzione L'indicatore di Leica Pinmaster II Pro può essere metri, in basso a destra accanto al collimatore apparirà impostato su metri o su iarde (l'unità di misura più...
  • Seite 75: Misurazione Della Distanza

    è insufficiente, sul display appare - - - Quando il display si spegne, Leica Pinmaster II Pro si spegne automaticamente. MODALITÀ SCAN Con Leica Pinmaster II Pro è possibile eseguire...
  • Seite 76: Logica Basata Sul Primo Puntamento

    LOGICA BASATA SUL PRIMO PUNTAMENTO Leica Pinmaster II Pro è dotato di una logica basata sul primo puntamento appositamente sviluppata per il golf che facilita enormemente la misurazione di piccoli obiettivi quali, ad esempio, aste di bandiera. Quando il dispositivo rileva due distanze nell'area del collimatore, mostra la distanza dall'obiettivo più...
  • Seite 77: Portata Di Misura E Precisione

    PORTATA DI MISURA E PRECISIONE La precisione di misurazione di Leica Pinmaster II Pro arriva fino a ±1m. La portata di misurazione massima si ottiene quando l’oggetto osservato riflette bene a una distanza visiva di 10km. La portata di misurazione è...
  • Seite 78: Angle Compensated Distance™ (Acd)

    • Si noti che a grandi distanze l'effetto di tutti i fattori Questa viene calcolata da Leica Pinmaster II Pro balistici più importanti aumenta in modo sulla base della distanza lineare misurata e di un significativo e può determinare forti scostamenti.
  • Seite 79: Visualizzazione E Verifica Delle Impostazioni

    VISUALIZZAZIONE E VERIFICA DELLE Impostazioni Se il dispositivo è acceso: attendere che l'indicatore si IMPOSTAZIONI spenga. Se il dispositivo non è acceso: Se si desidera verificare le impostazioni, è possibile iniziare dal punto 1. richiamare e visualizzare i valori in qualsiasi momento. Premere a lungo il pulsante secondario (≥3s).
  • Seite 80: Cura E Manutenzione

    Qualora sia necessario ordinare ricambi per Leica quindi con una pelle di daino o un panno pulito che non Pinmaster II Pro, ad esempio la conchiglia oculare o la lasci peli. cinghia a tracolla, rivolgersi al nostro servizio di assistenza o al rappresentante autorizzato Leica più...
  • Seite 81: Che Cosa Fare Se

    CHE COSA FARE SE... Anomalia Causa Rimedio Durante l'osservazione non si ottie- a) La pupilla dell'osservatore non a) Correggere la posizione degli ne un'immagine circolare. coincide con la pupilla di uscita occhi. dell'oculare. b) La posizione della conchiglia ocu- lare non coincide con il corretto b) Correggere la regolazione: se utilizzo con o senza occhiali.
  • Seite 82: Dati Tecnici

    DATI TECNICI Ingrandimento Diametro obiettivo 24mm Pupilla di uscita 3,4mm Valore crepuscolare Luminosità geometrica 11,8 Campo visivo (su 1.000m) / angolo visivo 115m / 6,5° obiettivo Distanza longitudinale tra le pupille di uscita 15mm Tipo di prisma A tetto Trattamento antiriflesso sulle lenti High Durable Coating (HDC™) e trattamento idrorepellente Aqua-Dura sulle sui prismi lenti esterne, correzione di fase a strato P40...
  • Seite 83: Leica Customer Care

    PRODUCT SUPPORT DI LEICA LEICA CUSTOMER CARE Il Product Support di Leica Camera AG sarà lieto di Per la manutenzione dell'attrezzatura Leica e in caso di rispondere alle vostre domande tecniche sui prodotti guasti, rivolgersi al reparto Customer Care di Leica...
  • Seite 84: Denominación De Los Componentes

    Tapa del compartimento de las pilas Compartimento de las pilas Lente del objetivo Óptica láser del emisor Aviso Al igual que con cualquier prismático, no mire direc- tamente hacia fuentes de luz claras con su Leica Pinmaster Pro para evitar lesiones oculares.
  • Seite 85 (ACD - distancia con compensación de Direcciones del Servicio ángulo, por sus siglas en inglés), el Pinmaster II Pro se de Atención al Cliente de Leica ....... 97 convierte en su herramienta de entrenamiento perfecta para mejorar eficazmente su juego de golf.
  • Seite 86: Eliminación De Aparatos Eléctricos Y Electrónicos

    ELIMINACIÓN DE APARATOS ELÉCTRICOS Y ELECTRÓNICOS (Válido para la UE, así como para otros países europeos con sistemas de recolección separada de residuos.) ¡Este aparato contiene componentes eléctricos y/o electrónicos y por ello no debe eliminarse con la basura doméstica normal! En lugar de eso, deberá entregarse a los centros de recogida municipales correspondientes para su reciclaje.
  • Seite 87: Colocación Del Cordón De Transporte

    COLOCACIÓN DEL CORDÓN DE TRANSPORTE INSERCIÓN Y CAMBIO DE LA PILA Pase el lazo pequeño del cordón de transporte por el El Leica Pinmaster II Pro se suministra con una pila de ojal existente en la carcasa del Leica Pinmaster II litio de 3 voltios (p.
  • Seite 88: Estado De Carga De La Pila

    Después de que la indicación bAtt • Si el Leica Pinmaster II Pro no va a utilizarse durante parpadee por primera vez, pueden realizarse aún más un periodo prolongado, debe sacarse la pila. de 100 mediciones, si bien el alcance se reduce •...
  • Seite 89: Uso Con Y Sin Gafas

    En esta posición se obtiene la objeto alejado y ajuste entonces el punto de mira a la distancia correcta entre el Leica Pinmaster II Pro y el nitidez óptima girando el portaocular 3. El punto de ojo.
  • Seite 90: Ajuste De La Unidad De Medida

    AJUSTE DE LA UNIDAD DE MEDIDA Nota: En el visor siempre se puede reconocer el ajuste: si se El indicador del Leica Pinmaster II Pro puede ajustarse han seleccionado metros, aparece un punto abajo a la a metros o a yardas, habituales en los EE.UU.
  • Seite 91: Medición De La Distancia

    El Leica Pinmaster II Pro se desconecta automática- mente al apagarse la indicación. MODO DE BÚSQUEDA Con el Leica Pinmaster II Pro también se pueden realizar mediciones de modo continuo. Cuando se MEDICIÓN DE LA DISTANCIA mantiene pulsada la tecla principal en el 2º...
  • Seite 92: Lógica De Primer Objetivo

    LÓGICA DE PRIMER OBJETIVO El Leica Pinmaster II Pro está equipado con una lógica de primer objetivo, especialmente desarrollada para el deporte del golf, que facilita considerablemente la medición de pequeños objetivos como banderas de golf. Si el aparato registra dos distancias en la zona del punto de mira, muestra la distancia hasta el objetivo más pequeño...
  • Seite 93: Alcance De Medición Y Precisión

    ALCANCE DE MEDICIÓN Y PRECISIÓN La precisión de medición del Leica Pinmaster II Pro es de hasta ±1m. El alcance máximo se consigue con objetos que reflejen bien y con una visibilidad de unos 10 km. En el alcance de medición influirán los...
  • Seite 94: Angle Compensated Distance™ (Acd)

    • Tenga en cuenta que en las grandes distancias, la equivalente. influencia de todos los factores balísticos relevantes El Leica Pinmaster II Pro calcula el a partir de la se intensifica notablemente y puede que se distancia lineal medida y de un factor de corrección produzcan diferencias.
  • Seite 95: Visualización Y Comprobación De Los Ajustes

    VISUALIZACIÓN Y COMPROBACIÓN Ajustes Cuando el dispositivo esté encendido: espere a que se DE LOS AJUSTES apague la indicación. Cuando el dispositivo no esté En cualquier momento que desee comprobar sus encendido: ajustes, puede consultar los valores. empiece con el paso 1. Para ello, pulse brevemente la tecla secundaria Pulse la tecla secundaria de forma prolongada...
  • Seite 96: Cuidado/Limpieza

    El alcohol y otros solventes químicos no deben utilizarse para limpiar el objetivo o la carcasa. Cada Leica Pinmaster II Pro está provisto de su número de fabricación "personal" además de la denominación del modelo. Por seguridad, anote este número en sus...
  • Seite 97: Qué Hacer Si

    QUÉ HACER SI... Error Causa Solución Al mirar no se consigue una imagen a) La pupila del usuario no está en a) Corregir la posición del ojo. circular. la pupila de salida del ocular. b) La posición del portaocular no coincide con el uso correcto con b) Corrija el ajuste: Los usuarios y sin gafas.
  • Seite 98: Datos Técnicos

    DATOS TÉCNICOS Aumento Diámetro del objetivo 24mm Pupila de salida 3,4mm Factor crepuscular Potencia lumínica geométrica 11,8 Campo de visión (a 1.000 m)/ángulo de visión 115m / 6,5° objetivo Distancia longitudinal de la pupila de salida 15mm Tipo de prisma Roof Tratamiento antirreflexión en lentes High Durable Coating (HDC™) y tratamiento antirreflejos hidrófobo Aqua-Dura...
  • Seite 99: Direcciones Del Servicio De Atención Al Cliente De Leica

    Leica, están a su disposición el departamento si se ha suministrado, dirijiéndose por escrito, por Customer Care de Leica Camera AG o el Servicio de teléfono o por correo electrónico al departamento reparaciones del representante de Leica en su país Product Support de Leica Camera AG.
  • Seite 100 各部の名称 付属品 本体 サブボタン – 3V リチウム電池 CR2タイプ  – メインボタン キャリングストラップ – アイキャップ コーデュラケース – 視度スケール付き 保証書 – キャリングストラップ取り付け部 アイピース 電池収納部カバー 電池収納部 レンズ レーザーレンズ ご注意 他の双眼鏡関連商品の場合と同様に、目の損傷 を防ぐために本製品で、直接強い光線を見ない ようにしてください。...
  • Seite 101: はじめに

    はじめに 目次 お客様へ 各部の名称 ..............u4 独特の機能と性能をご活用の上、 末永く ご愛用くだ 付属品 ................u4 さい。 本製品は、 目に無害で不可視な赤外線レー はじめに ................99 ザーを出力し、 マイクロプロセッサーが反射してく キャリングストラップの取り付けかた ..101 る光を検知することにより対象物の距離を測定し 電池を入れる/交換する ........101 ます。 ゴルフ用のために特別に開発された ファー 電池残量 ..............102 ストターゲッ ト ・ ロジックおよびスキャンモードが メガネあり/メガネなしでの使用 ....103 装備されています。 これにより、 旗までの距離測定 視度調整...
  • Seite 102 電気 ・ 電子機器の廃棄について (EU諸国および分別廃棄を実施するその 他のヨーロッパ諸国のみ) この装置には電気 ・ 電子部品が含まれているため、 一般家庭廃棄物として廃棄することはできません。 お住まいの自治体のリサイクル用の廃棄物回収場 所にお持ちください。 回収は無料となっています。 電池や充電池を使用する装置を廃棄する場合は、 電池や充電池を取り外してから回収場所にお持ち ください。 廃棄についての詳しい情報は、 お住まいの自治体、 お近くの廃棄物回収業者、 またはご購入店にお問 い合わせください。...
  • Seite 103: キャリングストラップの取り付けかた

    開ける 閉じる キャリングス トラップの取り付けるかた 電池を入れる/交換する キャリングストラップの小さな輪をキャリングスト 本製品の電源には3 ボルトのリチウム電池 (例 ラップ取り付け部4に差し込んでください。 Duracell DL CR2, Ucar CR2, Varta CR2,もしくはそ キャリングストラップの端をこの小さな輪に通し、 し の他のCR2) が使われています。 っかりと取り付け部に固定されるまで引きだして下 電池収納部7のカバー6を左に回し、 取り外し さい。 ます。 電池のプラス極を前にして挿入します。 ( 電池 収納部の表示を参照。 ) カバーを右に回し、 再び取り付けます。...
  • Seite 104: 電池残量

    メモ 電池残量 • 低温では、 電池の機能が弱る可能性があります。 電池の容量が少なくなった場合、 電源を入れるた 低温では本製品をポケッ トに入れるなど出来る びに (メインボタン2を押す) 対象物の代わりに1秒 だけ体の近くに持ち、 また使用前には新しい電 ほどbAttが表示されます。 bAttが表示されてからま 池を使う様にしてください。 だ100回以上測定は出来ますが、 測定可能距離は • 本製品を長期間使用しない場合は、 電池を取り 次第に短くなってきます。 出しておく ことをおすすめします。 メインボタンを押すと再び測定ができます。 • 電池は低温で乾いた場所で保管してください。 ご注意 • 電池は絶対に火の中に投げ入れたり、 加熱、 再 充電あるいは分解などしないでください。 • 不要になった電池は毒性の環境への負担にな る物質を含むため、 一般家庭廃棄物として廃棄 することはできません。 お住まいの自治体の条 例や規則に従い、...
  • Seite 105: メガネあり/メガネなしでの使用

    メガネをかけて、 あるいはメガネなしでの使用 視度調整 ジオプターを調整するには、 ターゲッ トマークの焦 メガネをかけていない人が使用する場合は、 カバ 点をご自分にとって一番適切な値に調節してく だ ーのアイキャップ3を上にあげてください (図A。 販 さい。 アイキャップ3を回転させて、 ターゲッ トマー 売時の状態) 。 このポジションが、 本製品と目との間 クができるだけ鮮明に見えるように調整します。 タ の距離になります。 メガネをかけている人が使用す ーゲッ トマークはメインボタン2を押すと表示され る場合、 カバーのアイキャップは下に折り返します ます。 設定した値は 「+」 あるいは 「-」 のスケール (図B)。 3aでアイキャップ上で読み取ることができます。 視 度調整は、 ±3,5まで調整が可能です。...
  • Seite 106: 測定単位の設定

    測定単位の設定 メモ 設定は常にディスプレーに表示されています。 表示は、 メートルあるいは、 アメリカで使用されて メートルを選択した場合、ターゲットマークの いるヤードに設定することができます。 右下に点が表示されます。 測定単位を設定する サブボタンを押して設定を保存します。 サブボタン 1を長押し(3秒以上)します。 • 保存した設定とターゲットマークは、確 • USEUが点滅して表示されます。 認のため点灯し、その後表示はメニュー メインボタン2を押してご希望の測定単位、 項目一覧ACDに変わり、設定の変更がない を選 つまりヤードなら メートルなら USを、 場合はその後表示が消えます。 びます。...
  • Seite 107: ピント合わせ

    スキャンモード 本製品では連続使用も可能です。メインボタン2 を測定のために2度目に押した後、そのまま押し 続けると0.5秒後スキャンモードのスイッチがオ ンになり、常時測定を行います。表示が変化 し、スキャンモードであることが確認できま す。約0.5秒おきに、新しい測定値が表示されま す。 スキャンモードは特に旗の支柱および他の小さ な対象物を測定する場合に便利です。 ピン ト合わせ ピント合わせを正確に行うためには、 目標となるも メモ のを正確に捉える必要があります。 メインボタン2 スキャンモードでは、 常時測定をするため、 通常測 を押して、 ターゲッ トマークを起動します。 ターゲッ 定時よりも電気消費量が高くなります。 トマークは約4秒間表示されます。 ボタンを押した ままの場合はその間常に表示されます。 ターゲッ ト マークが表示されている間に目標が捉えられ、 再 度メインボタンを押すと距離が測定され測定値が 表示されます。 測定中はターゲッ トマークは表示さ れません。 ターゲッ トマークが表示中は再びメイン ボタンを押すと新たに測定できます。 対象物までの 距離が10メートル以下の場合、...
  • Seite 108: ファーストターゲットロジック

    ファース トターゲッ トロジッ ク 本製品にはゴルフ用に特別に開発されたファース トターゲッ ト ・ ロジックが装備されていて、 特に旗の ような小さな対象物を測定する場合にとても便利 です。 ターゲッ トマークの領域内にある2つの対象 物がある場合、 近くにある小さな目標Aまでの距離 が表示され、 遠くにある大きな対象Bは測定されま せん。 ファーストターゲッ ト ・ ロジックはスキャンモ ードでも作動します。 例えば旗の支柱が目標物に入 った場合、 背景にある藪までの210メートルは無視 され、 旗の支柱までの距離42メートルが表示され ます。 測定が完了した場合、 表示が速く点滅します。 「第二の標的 (地平線の前に旗がある状況やバン カー内での測定など) がない場合は、 表示が点滅し ません。 」...
  • Seite 109: 測定できる距離の範囲と精度

    測定できる距離の範囲と精度 本製品の測定精度は±1mです。 最大測定可能距 離は非常によく反射する物体で、 10kmまでの見通 しがいい場合となります。 測定可能距離は次の要 素に影響されます。 より高い より低い 測定可能距離 ホワイト ブラック 色 正しい 光沢あり 光沢なし 表面 垂直 鋭角 対象物の角度 大きい 小さい 対象物のサイズ 少ない(曇り) 多い(日中) 太陽光 クリア 霧 大気条件 均一 不均一 (家の壁) (藪・木) 対象物の構造 晴れで見通しがいい場合 間違い 約10m~750m 測定可能距離 375m ~ 約±1m 使用上のコツ...
  • Seite 110: Angle Compensated Distance™ (Acd)

    ANGLE COMPENSATED DISTANCE™ メモ ACD値は15m~400mのみ表示されます。 この範囲 ACD: 角度補償距離) 外の場合は実際に直線的に測られた距離が表示 上の方または下の方にある目標では弾道学的条 されます。 件が異なります。 その場合角度補償距離の知識が 必要となります。 重要 このACDは本製品より直線的に測られた距離と角 • 距離が遠くなればなるほど弾道学に必要となる 度により異なる補正値を決定します。 条件が増えるため精度が落ちます。 そのため表 示される値は参考値であることをご承知くださ い。 10° =打つ距離160m...
  • Seite 111: 設定の表示と確認

    設定 設定の表示と確認 電源が入っている場合表示が消えるまで待ってく 設定を確認したい場合、 値をいつでも表示させる ださい。 電源が入っていない場合 ことができます。 以下のように設定します。 サブボタン1を2回押します。 サブボタン 1を長押し(3秒以上) します。 • 設定値が2秒ごとにターゲッ トマークの下に (距 • 離値の代わりに) 表示されます。 USEUが表示されます。 サブボタンを3回長押し (2秒以上) します。 – 測定単位(メートル (EU) もしくは ヤード (US) ) • 表示が変わります。 (機能がオンになっている場合) – メインボタン2を押してACD ONもしくはOFFを選 びます。 サブボタンを押して設定を保存します。 • 設定は4秒程確認用に表示され消えます。...
  • Seite 112: お手入れ/クリーニング

    お手入れ/ク リーニング ご注意 どのような理由でも本体は分解しないで下さい。 本製品は特別なお手入れをして頂く必要はありま せん。 砂などの汚れは柔らかいブラシで取り除く 、 あるい スペア用アクセサリー は吹き飛ばしてください。 アイキャップ、 キャリングストラップなどのスペア用 レンズあるいは対眼レンズについた指紋などは、 アクセサリーが必要になった場合、 ライカカスタマ まず湿った布でふき取り、 その後柔らかい清潔な ーサービスにお問い合わせください。 革 もしくは埃のついていない布でふき取ります。 重要 汚れのひどいレンズの表面を拭く ときには、 強い力 をかけないでください。 傷に強くは作られています が、 砂や塩の結晶などにより傷つく ことがあります。 本体は湿らせた革でのみ拭いてください。 乾いた 布を使うと、 静電気が発生する可能性があります。 お手入れの際は、 アルコールや化学薬品は使用し ないでください。 本製品にはタイプ名だけではなく 製造番号も記されています。 紛失 ・ 盗難等に備え、 この番号を控えておくか、...
  • Seite 113: トラブルシューティング

    トラブルシ ューテ ィ ング 問題 原因 対処 観察時に円形の画像を得ること a) 観察する人の瞳孔が接眼レン a)目の位置が接眼レンズの中心 ができない。 ズの射出瞳にあっていない。 にくるように動かしてみる。 b) アイキャップの位置が正しく b) 位置を修正する。メガネをか 設定されていない。 けている人はアイキャップを 折り曲げ、メガネをかけてい ない人は伸ばして使用する。 ピントが外れている 視度調整が正確にできていない 視度調整を再度行う 測定時に- - a) 測定可能領域を超えている、 測定可能距離を確認する -が表示される あるいはそれ以下である。 b) 対象物の反射角度が不十分 である。 表示が点滅している/ 電池残量が十分でない 電池を交換する 測定が不可能...
  • Seite 114: テクニカルデータ

    テクニカルデータ 7倍 倍率 24mm レンズ直径 3.4mm 射出瞳 薄暮係数 115m/6.5 ° 視界(1.000mで) /視角 15mm 接眼レンズのアイレリーフ ダハプリズム プリズムタイプ コーティング  レンズ High Durable Coating (HDC™)と位相補正コーティング P40    プリズム表面 ±3,5dpt. 視度調整 -10℃~55℃ 作動温度 -15℃~75℃ 保存温度 30分間: 1mの水深まで 耐水性 炭素繊維強化プラスチック。ソフト漆塗り/アルミダイカスト 本体/胴体材料 750m 最大測定可能距離 約10m 最短距離 375m~ 約±1m/ 約±2m 精度...
  • Seite 115: ライカデジタルサポートセンター

    ライカデジタルサポートセンター ライカ カスタマーケア <使用方法等技術的なお問い合わせ窓口>  お手持ちの製品のメンテナンスや修理が必要な場 合は、 下記のカスタマーケア、 またはお近くのライ Tel: 0120-03-5508  カ正規販売店までご相談ください。 受付時間 : 月曜日-金曜日 9 : 30-18 : 00  祝祭日は受け付けておりません。   ライカカメラジャパン株式会社 カスタマーケア 東京都中央区銀座6-4-1 ライカ銀座店内 Tel:03-6215-7072 Fax.03-6215-7073 info@leica-camera.co.jp...
  • Seite 116 DAS WESENTLICHE. Leica Camera AG │ Am Leitz-Park 5 │ 35578 WETZLAR │ DEUTSCHLAND Telefon +49(0)6441-2080-0 │ Telefax +49(0)6441-2080-333 │ www.leica-camera.com 93 706 II/17/FX/B&S...

Inhaltsverzeichnis