Herunterladen Inhalt Inhalt Diese Seite drucken
Inhaltsverzeichnis

Werbung

Verfügbare Sprachen
  • DE

Verfügbare Sprachen

  • DEUTSCH, seite 66
IT
MANUALE DI INSTALLAZIONE USO E MANUTENZIONE
EN
INSTALLATION, USER AND MAINTENANCE MANUAL
DE
INSTALLATIONS, BEDIENUNGS UND WARTUNGSANLEITUNGEN
FR
NOTICE D'INSTALLATION
MANUAL DE INSTALACIÓN, USO Y MANTENIMIENTO
ES
ECOFIRE
PELLETOFEN - POÊLES À GRANULÉS - PELLET ESTUFA
Il presente manuale è parte integrante del prodotto.
Si raccomanda di leggere attentamente le istruzioni prima
dell'installazione, manutenzione o utilizzo del prodotto.
This manual is an integral part of the product.
Read the instructions carefully before installing, servicing or
operating the product.
Die vorliegende Anleitung ist fester Bestandteil des Produkts.
Vor der Installation, Wartung und Verwendung die Anleitungen
stets aufmerksam durchlesen.
®
DA INSERIMENTO
-
STUFE A PELLET
PELLET STOVES
Le présent manuel fait partie intégrante du produit.
Il est conseillé de lire attentivement les consignes
avant l'installation, l'entretien ou l'utilisation du produit.
Este
manual
es
parte
Se recomienda leer detenidamente las instrucciones antes
de la instalación, el mantenimiento y el uso del producto..
integrante
del
producto.

Werbung

Inhaltsverzeichnis
loading

Inhaltszusammenfassung für Palazzetti ECOFIRE DA INSERIMENTO

  • Seite 1 MANUALE DI INSTALLAZIONE USO E MANUTENZIONE INSTALLATION, USER AND MAINTENANCE MANUAL INSTALLATIONS, BEDIENUNGS UND WARTUNGSANLEITUNGEN NOTICE D’INSTALLATION MANUAL DE INSTALACIÓN, USO Y MANTENIMIENTO ® ECOFIRE DA INSERIMENTO STUFE A PELLET PELLET STOVES PELLETOFEN - POÊLES À GRANULÉS - PELLET ESTUFA Il presente manuale è...
  • Seite 2 Gentile cliente, desideriamo innanzitutto ringraziarLa per la preferenza che ha voluto accordarci acquistando il nostro prodotto e ci congratuliamo con Lei per la scelta. Per consentirLe di utilizzare al meglio la Sua nuova stufa, la invitiamo a seguire attentamente quanto descritto nel presente manuale. Dear Customer, We’d like to thank you for having purchased one of our products and congratulate you on your choice.
  • Seite 3 INDICE PREMESSA GENERALE UTILIZZO DELLA STUFA SIMBOLOGIA ACCENSIONE DESTINAZIONE D’USO MODIFICA DEI PARAMETRI SCOPO E CONTENUTO DEL MANUALE SPEGNIMENTO CONSERVAZIONE DEL MANUALE AGGIORNAMENTO DEL MANUALE GENERALITÀ FUNZIONI DISPONIBILI PRINCIPALI NORME RISPETTATE E DA 10.1 FUNZIONE TIMER RISPETTARE 10.2 FUNZIONE STAND-BY GARANZIA LEGALE 10.3 FUNZIONE ANTIGELO...
  • Seite 4: Premessa Generale

    La stufa funziona unicamente con la porta del a carico della PALAZZETTI, essa è, e rimane, focolare chiusa. a carico dell’installatore, al quale è demandata l’esecuzione delle verifiche relative alla canna Non si deve mai aprire la portina durante il fumaria e della presa d’aria ed alla correttezza delle...
  • Seite 5 1.11 ASSISTENZA TECNICA F) Direttiva 1999/5/CE: “Riguardante le PALAZZETTI mette a disposizione una tta rete di apparecchiature radio e le apparecchiature centri di assistenza tecnici specializzati, formati e terminali di telecomunicazione e il reciproco preparati direttamente in azienda.
  • Seite 6: Avvertenze Per La Sicurezza

    NOZIONI GENERALI AVVERTENZE PER L’UTILIZZATORE 2 AVVERTENZE PER LA Predisporre il luogo d’installazione della stufa SICUREZZA secondo i regolamenti locali, nazionale ed europei. La stufa, essendo un prodotto da riscaldamento, presenta delle super ci esterne particolarmente 2.1 AVVERTENZE PER L’INSTALLATORE calde.
  • Seite 7: Caratteristiche Del Combustibile

    NOZIONI GENERALI 3 CARATTERISTICHE DEL COMBUSTIBILE 3.1 CARATTERISTICHE DEL COMBUSTIBILE Il pellet (Fig. 3.1) è un composto costituito da varie tipologie di legno pressato con procedimenti meccanici nel rispetto delle normative a tutela dell’ambiente, è l’unico combustibile previsto per questo tipo di stufa. L’ef cienza e la potenzialità...
  • Seite 8: Preparazione Del Luogo D'installazione

    INSTALLAZIONE 5 PREPARAZIONE 5.3 LUOGO DI INSTALLAZIONE DELLA STUFA DEL LUOGO Proteggete dalle radiazioni calde del fuoco tutte le strutture che potrebbero incendiarsi se esposte a D’INSTALLAZIONE eccessivo calore. Pavimenti in legno o costituiti da materiale 5.1 CONSIDERAZIONI GENERALI in ammabile, devono essere protetti con materiale non combustibile;...
  • Seite 9: Scarico Fumi

    INSTALLAZIONE 5.4 SCARICO FUMI La stufa funziona con la camera di combustione in depressione è pertanto indispensabile assicurarsi che lo scarico dei fumi sia a tenuta. La stufa deve essere collegata ad un proprio sistema di evacuazione fumi esclusivo, ed idoneo ad assicurare una adeguata dispersione in atmosfera dei prodotti della combustione.
  • Seite 10 INSTALLAZIONE 5.4.1 Scarico a tetto mediante camino tradizionale Il camino per lo scarico dei fumi deve essere realizzato in osservanza alle norme UNI 10683- EN 1856-1-2- EN 1857- EN 1443- EN 13384-1-3- EN 12391-1 sia per quanto riguarda le dimensioni che per i materiali utilizzati nella sua costruzione.
  • Seite 11 INSTALLAZIONE 6 INSTALLAZIONE 6.1 INSTALLAZIONE GENERATORE DA INCASSO (CON BASAMENTO DI ESTRAZIONE) Nel caso di installazione in strutture con rivestimento in marmo o altro materiale la stufa è dotata di telaio con guide scorrevoli per agevolare l’estrazione l’apparecchiatura per i normali interventi di ispezione e controllo delle parti meccaniche ed elettriche.
  • Seite 12 INSTALLAZIONE PERICOLO Non utilizzare il sistema di scorrimento della caldaia per caricare il pellet nel serbatoio. Estrazione della stufa: Per estrarre la stufa procedere come segue (Fig. 6.1.6): 1. Aprire la portina; 2. Inserire la chiavetta (1) nella sua sede; 3.
  • Seite 13 INSTALLAZIONE 6.1.1 Installazione senza telaio basamento È possibile installare la stufa con distribuzione dell’aria frontale sul piano di un caminetto. Procedura: 1. S lare la stufa dal basamento (Fig. 6.1.7); 2. Posizionare e ssare con dei tasselli il basamento al piano del caminetto (Fig. 6.1.8); 3.
  • Seite 14 INSTALLAZIONE 6.2 PRESE D’ARIA Realizzare sulla parete in corrispondenza della stufa due prese aria esterne di 14 cm di diametro dotate di griglia anti-insetto. I fori devono essere eseguiti ad un’altezza inferiore a quella del piano fuoco. La presa d’aria (C) verrà utilizzata per fornire aria alla camera di combustione.
  • Seite 15 INSTALLAZIONE ambiente le prese d’aria A e B devono essere eseguite lateralmente al rivestimento. Nel caso in cui si dovessero riscaldare due ambienti le prese d’aria A deve essere eseguita lateralmente al rivestimento e la presa d’aria B deve essere collegata al secondo ambiente.
  • Seite 16: Raccordo In Controcappa Per Riscaldamento In Unico Ambiente

    INSTALLAZIONE (Solo versione da inserimento frontale) La sonda deve essere installata in prossimità dei fori di aspirazione laterale o frontale della base del rivestimento. Incollare il lo della sonda in corrispondenza delle prese d’aria (Fig. 6.3.6). 6.4 COLLEGAMENTO MANDATA ARIA CALDA Solo per il modello canalizzato Fig.
  • Seite 17: Schema Di Montaggio

    INSTALLAZIONE 6.5 SCHEMA DI MONTAGGIO Il montaggio deve essere fatto da personale quali cato. 1. Sigillare. 2. Rivestimento in bra ceramica o in lana di roccia provvisto di foglio di alluminio esterno, o canna fumaria a doppia parete. 3. Presa d’aria esterna sotto il piano fuoco. 4.
  • Seite 18: Collegamento Elettrico

    INSTALLAZIONE 6.7 REALIZZAZIONE FORI TECNICI SUL RIVESTIMENTO Il rivestimento deve essere fatto solo da personale quali cato. Sul rivestimento e sulla cappa devono essere eseguiti i fori tecnici per: A. alloggiamento display; B. le bocchette di aerazione; C. lo sfogo di calore in cappa; D.
  • Seite 19: Uso E Manutenzione

    USO E MANUTENZIONE USO E MANUTENZIONE 00 477 3370 - 09/2014 - PN - Italy...
  • Seite 20: Descrizione Della Stufa

    USO E MANUTENZIONE 7 DESCRIZIONE DELLA STUFA Prima di procedere con la lettura del libretto, prendere visione della descrizione della stufa contenuta nel “Libretto Prodotto” allegato. 7.1 PANNELLO COMANDI Il pannello (Fig. 7.1) è costituito dal display LCD retroilluminato, dal tasto di accensione , dal tasto di spegnimento e dai due tasti menù...
  • Seite 21: Accesso Ai Menu

    USO E MANUTENZIONE MENU COMPRESSO MENU ROTANTE MENU EASY I l l a m p e g g o d e l l e d u e P r i m a r i g a : “ M O D U L A temperature visualizzate LAVORO”...
  • Seite 22: Operazioni Preliminari

    USO E MANUTENZIONE 8 OPERAZIONI PRELIMINARI 8.3 IMPOSTAZIONI INIZIALI 8.1 CARICAMENTO PELLET Prima di utilizzare la stufa è necessario impostare La prima operazione da eseguire prima di la lingua la data e l’ora corrente. accendere il prodotto è quella di riempire il serbatoio di combustibile (pellet).
  • Seite 23: Utilizzo Della Stufa

    USO E MANUTENZIONE 9 UTILIZZO DELLA STUFA Una volta impostati tutti i parametri premere il tasto (“X”) per uscire dal menu 9.1 ACCENSIONE Per modi care i parametri del menu compresso Per accendere la stufa tenere premuto il tasto quando non ci si trova nella fase “LAVORO” è per qualche secondo.
  • Seite 24: Funzioni Disponibili

    USO E MANUTENZIONE 10 FUNZIONI DISPONIBILI 10.1 FUNZIONE TIMER Spostandosi sulla seconda riga (tasto Con questa funzione è possibile impostare i troviamo i giorni della settimana (L,...,D) da abbinare programmi personalizzati per l’accensione e/o lo al programma. spegnimento automatico della stufa. Spostarsi con il tasto tra i giorni e abilitare quelli desiderati con uno dei due tasti freccia.
  • Seite 25 USO E MANUTENZIONE ESEMPI: Esempio 1 display apparirà: MENU SET LAVORO (Fig.10.2). 2) Premere 3) Premere il tasto ) per scegliere il programma da modificare (es. “P2”) e 5) Premere il tasto o il tasto per scorrere le Fig.10.2 freccia. ci porteremo ci porteremo ci porteremo...
  • Seite 26 USO E MANUTENZIONE 10.2 FUNZIONE STAND-BY In fase di lavoro (cioè quando la stufa è accesa e a regime) consente di spegnere la stufa al raggiungimento della temperatura ambiente impostata (SET T. AMB.) e riavviarla al raggiungimento della temperatura ambiente minima impostata (TEMP.
  • Seite 27: Descrizione Dei Menu

    USO E MANUTENZIONE 11 DESCRIZIONE DEI MENU In questo capitolo vengono illustrati i contenuti dei menù della stufa, ai quali è possibile accedere attraverso la procedura descritta nel paragrafo 7.3. 11.1 MENU SET LAVORO Attraverso questo menù si imposta e si regola il funzionamento della stufa, visualizzando contemporaneamente tutti i parametri di lavoro.
  • Seite 28 USO E MANUTENZIONE Scorrere con i tasti i sottomenu Selezionare con il tasto quello al quale si vuole accedere Spostarsi tra i vari parametri con il tasto (quello selezionato lampeggerà) Modi carne il valore con i tasti Confermare la modi ca con il tasto (“ok”) Premere il tasto (“x”) per uscire dal sottomenu (ripremerlo eventualmente per uscire dai menu superiori).
  • Seite 29: Gestione Degli Allarmi

    USO E MANUTENZIONE 12 GESTIONE DEGLI ALLARMI Nel caso si veri chi un’anomalia nel funzionamento, viene attivata la seguente procedura: 1) allarme acustico (beep) con visualizzazione sul display della possibile causa; 2) il caricamento dei pellet viene bloccato; 3) il ventilatore espulsione fumi viene portato alla massima potenza. Di seguito sono riportati i vari messaggi di allarme che possono apparire sul display.
  • Seite 30: Precauzioni Di Sicurezza

    USO E MANUTENZIONE 13 MANUTENZIONE 13.1 PRECAUZIONI DI SICUREZZA Prima di effettuare qualsiasi operazione di manutenzione adottare le seguenti precauzioni: Assicurarsi che tutte le parti della stufa siano fredde. Accertarsi che le ceneri siano completamente spente. Utilizzare i dispositivi di protezione individuale previsti dalla direttiva 89/391/CEE.
  • Seite 31: Pulizia Del Vetro

    USO E MANUTENZIONE 13.3.2 Pulizia del vano raccogli cenere PER I MODELLI DOTATI DI VANO RACCOGLI CENERE La pulizia del vano raccogli cenere va eseguita ogni giorno o quando necessario. Aprire la portina del focolare e aspirare con un apposito aspiracenere l’accumulo di cenere depositatosi nel vano raccogli cenere lateralmente al braciere (Fig.15.6).
  • Seite 32: Pulizia Della Canna Fumaria

    USO E MANUTENZIONE 13.3.6 Pulizia coclea In caso di intasamento del tubo di alimentazione che dal serbatoio porta i pellet alla camera di combustione procedere come segue: rimuovere la griglia di protezione all’interno del serbatoio svitando con un cacciavite le quattro viti a croce;...
  • Seite 33: Manutenzione Straordinaria

    USO E MANUTENZIONE 13.4 MANUTENZIONE STRAORDINARIA La stufa a pellet è un generatore di calore a combustibile solido e come tale necessità di un intervento annuale di manutenzione straordinaria che deve essere effettuato dal Centro di Assistenza Tecnica Autorizzato una volta all’anno e preferibilmente a inizio stagione.
  • Seite 34 INDEX INTRODUCTION STOVE OPERATION SYMBOLS STARTING THE STOVE INTENDED USE MODIFYING THE PARAMETERS PURPOSE AND CONTENTS OF THIS MANUAL SWITCHING OFF HOW TO KEEP THIS MANUAL UPDATES TO THE MANUAL FUNCTIONS AVAILABLE GENERAL INFORMATION 10.1 TIMER FUNCTION MAIN REFERENCE STANDARDS 10.2 STANDBY FUNCTION PRODUCT WARRANTY...
  • Seite 35 DANGER: This speci es the behaviour required to ESPONSIBILITY FOR INSTALLATION prevent accidents or damage to materials. PALAZZETTI accepts no responsibility for the work carried out to install the stove; such responsibility 1.2 INTENDED USE lies with the installer, who is required to carry...
  • Seite 36 Make sure children do not play close to the stove while it’s operating. 1.11 TECHNICAL SERVICE PALAZZETTI has an extensive network of service 00 477 3370 - 09/2014 - PN - Italy...
  • Seite 37: Safety Warnings

    INTRODUCTION do not remove the ash; 2 SAFETY WARNINGS do not open the glass door; do not open the ash bin (where featured); 2.1 INSTALLATION WARNINGS make sure children keep away from the stove. Comply with the requirements speci ed in this manual. Comply with the requirements speci ed in this The stove assembly and dismantling instructions are manual.
  • Seite 38: Handling And Transport

    INTRODUCTION max. length 30 mm; max. moisture content 6 - 9%. The stove has a pellet hopper with the capacity speci ed in the technical data table in the Product Booklet enclosed. The pellet hopper is located at the top of the stove. It must always be able to be opened to load the pellets, and must remain closed during operation.
  • Seite 39: Installation Site Preparation

    INSTALLATION 5 INSTALLATION SITE 5.3 WHERE TO INSTALL THE STOVE Protect all structures that could burn if exposed to PREPARATION the heat radiated by the stove. Wood flooring or floors made with flammable materials must be protected with a material that 5.1 GENERAL INFORMATION will not burn like, for instance, a 2-3 mm thick sheet The following paragraphs provide instructions that...
  • Seite 40: Flue Gas Exhaust

    INSTALLATION 5.4 FLUE GAS EXHAUST The stove operates with negative pressure in the combustion chamber, and consequently the ue gas discharge must be airtight. The stove must be connected to its own separate flue gas exhaust system capable of ensuring adequate atmospheric dispersion of the combustion byproducts.
  • Seite 41 INSTALLATION 5.4.1 Discharge through roof using a traditional The chimney used to discharge the ue gas must be made in accordance with standards UNI 10683 - EN 1856-1-2 - EN 1857 - EN 1443 - EN 13384- 1-3 - EN 12391-1 both as regards the dimensions and the construction materials used.
  • Seite 42 INSTALLATION 6 INSTALLATION 6.1 INSTALLATION OF RECESSED GENERATOR (WITH EXTRACTION BASE) For installation in structures with marble cladding or other materials, the stove is equipped with a frame with sliding runners to make it easier to pull out the unit for normal inspection and checking of mechanical and electrical parts.
  • Seite 43 INSTALLATION DANGER pellets into the container. Extraction of the stove: To extract the stove, do the following (Fig. 6.1.5): 1) Open the door; 2) Insert the key (1) in its place; 3) Turn the key counter-clockwise to position (O); 4) Extract the stove by exerting pressure on the two side slots (2) Inserting the stove: To insert the stove, do the following (Fig.
  • Seite 44 INSTALLATION 6.1.1 Installation without base frame It is possible to install the built-in stove with front air installation on the surface of a replace. Procedure: 1) Slide the stove off the base(Fig. 6.1.7); 2) Use plugs to position and fasten the base to the surface of the replace (Fig.
  • Seite 45: Air Intake

    INSTALLATION 6.2 AIR INTAKE On the wall where the stove is located, provide two external air intakes with a diameter of 14 cm provided with an anti-insect grille. The holes are to be made at a height below that of the hearth. The air intake (C) will be used to provide air to the combustion chamber.
  • Seite 46 INSTALLATION must be connected to the second room. It is prohibited to connect air intake B to kitchens, bathrooms or bedrooms. In this type of installation the external air intake V is not necessary. Depending on the method adopted, we recommend you mark the position of the air intakes on the replace cladding and on the outside wall during the trial assembly.
  • Seite 47 INSTALLATION FRONT PELLET STOVE FOR BUILDING IN The probe must be inserted near the lateral or frontal air ventilation openings on the base of the cladding. Stick the probe support near the air vents (Fig. 6.3.6). 6.4 HOT AIR DELIVERY CONNECTION Fig.
  • Seite 48: Assembly Diagram

    INSTALLATION 6.5 ASSEMBLY DIAGRAM Assembly must be carried out by qualified personnel. 1) Seal 2) Covering in ceramic bre or rock wool with aluminium foil, or ue pipe with double wall. 3) External air intake below replace level 4) Heat recovery grid, x it on the highest point of the cladding.
  • Seite 49: Electrical Connection

    INSTALLATION 6.7 CREATION OF UTILITY HOLES ON CLADDING Cladding is to be made only by quali ed personnel. Utility holes must be made in the cladding for the following: A) display slot; B) ventilation vents; C) heat release in hood; D) ventilation of cladding on base;...
  • Seite 50: Use And Maintenance

    USE AND MAINTENANCE USE AND MAINTENANCE 00 477 3370 - 09/2014 - PN - Italy...
  • Seite 51: Stove Description

    USE AND MAINTENANCE 7 STOVE DESCRIPTION Before reading this booklet, check the description of the stove provided in the “Product Booklet” enclosed. 7.1 CONTROL PANEL The panel (Fig. 7.1) consists of a backlit LCD display, the on button , off button and two menu buttons ( The panel is used to:...
  • Seite 52: Accessing The Menus

    USE AND MAINTENANCE When the room temperature reaches the set point, the stove will adjust operation while consuming the least possible fuel, and the COMPRESSED MENU SCROLLING MENU EASY MENU T h e t w o t e m p e r a t u r e s First row: “MODULATION”...
  • Seite 53: Preliminary Operations

    USE AND MAINTENANCE 8 PRELIMINARY OPERATIONS 8.3 INITIAL SETTINGS 8.1 LOADING THE PELLETS The rst operation to be performed before starting The language, current date and time need to be set before using the stove. the appliance is to ll the hopper with fuel (pellets). The pellets are loaded into in the hopper using a 8.3.1 language setting scoop.
  • Seite 54: Stove Operation

    USE AND MAINTENANCE 9 STOVE OPERATION The values set will be retained until next modi ed, even when the stove is switched off or unplugged from the power supply. 9.1 STARTING THE STOVE To start the stove hold the * button for several EASY MENU seconds.
  • Seite 55: Functions Available

    USE AND MAINTENANCE 10 FUNCTIONS AVAILABLE the program. Use the button to scroll the days and enable 10.1 TIMER FUNCTION each day as desired using either of the two arrow This function is used to set custom programs for buttons. An icon representing a solid dot “ ” will automatically starting and/or switching off the stove.
  • Seite 56 USE AND MAINTENANCE EXAMPLES: Example 1 2) Press 3) Press Fig.10.2 Fig.10.3 Example 2 Fig.10.4 Exemple 3 Fig.10.5 00 477 3370 - 09/2014 - PN - Italy...
  • Seite 57 USE AND MAINTENANCE 10.2 STANDBY FUNCTION During operation (i.e. when the stove is on and in steady operating conditions) the stove can be switched off when reaching the set room temperature (SET ROOM T.) and start again when reaching the set minimum room temperature (START TEMP.).
  • Seite 58 USE AND MAINTENANCE 11 MENUS This chapter illustrates the contents of the menus on the stove’s display, accessed using the procedure described in paragraph 7.3. 11.1 OPERATING SETTINGS MENU This menu is used to set and adjust stove operation, and displays all the operating parameters. Access the “OPERATING SETTINGS MENU”...
  • Seite 59 USE AND MAINTENANCE 4) Scroll the submenus using the button 5) Use the button to select the desired submenu 6) Scroll the various parameters using the button (the selected parameter will be ashing) 7) Modify the value using the button 8) Con rm the setting by pressing (“ok”) 9) Press...
  • Seite 60: Alrm Management

    USE AND MAINTENANCE 12 ALRM MANAGEMENT If a malfunction occurs, the stove responds as follows: 1) an audible alarm (beep) is emitted and the display shows the possible cause; 2) pellet feed stops; 3) the ue gas exhaust fan operates at maximum speed. Below is a list of the various alarm messages that may be shown on the display.
  • Seite 61 USE AND MAINTENANCE 13 MAINTENANCE 13.1 SAFETY PRECAUTIONS Before performing any maintenance operations, adopt the following precautions: Make sure that all the parts of the stove have cooled down. Make sure that the ash is completely extinguished. Use the personal protective equipment speci ed by directive 89/391/EEC.
  • Seite 62: Cleaning The Glass

    USE AND MAINTENANCE 13.3.3 Cleaning the ash compartment FOR MODELS FITTED WITH ASH COMPARTMENT The ash compartment should be cleaned every day or whenever necessary. Open the firebox door and use a special ash vacuum cleaner to remove the ash accumulated in the ash compartment next to the burn pot (Fig.15.6).
  • Seite 63 USE AND MAINTENANCE 13.3.7 CLEANING THE loading SCREW If the feed pipe clogs, that takes the pellets to the combustion chamber, proceed as follows: remove the protective grid from inside the box, unscrewing the four cross-slotted screws with a screwdriver; remove the inspection plate stop (Fig.
  • Seite 64: Special Maintenance

    USE AND MAINTENANCE 13.4 SPECIAL MAINTENANCE The pellet stove is a solid fuel red heater and as such requires annual maintenance to be performed by an Authorised Service Centre once a year, preferably at the start of the season. The purpose of such maintenance is to ensure all the components are in perfect working order. If the control panel shows the message SPECIAL MAINTENANCE, immediately contact the Service Centre to have special maintenance performed on the stove.
  • Seite 65: Inhaltsverzeichnis

    INHALT ALLGEMEINES VORWORT EINSCHALTEN VERWENDETE SYMBOLE BEARBEITEN DER PARAMETER ZWECKBESTIMMUNG ABSCHALTEN ZWECK UND INHALT DES HANDBUCHS AUFBEWAHRUNG DES HANDBUCHS AKTUALISIERUNG DES HANDBUCHS VERFÜGBARE FUNKTIONEN ALLGEMEINES 10.1 TIMER-FUNKTION WICHTIGSTE BEFOLGTE UND ZU BEFOLGENDE 10.2 STANDBY-FUNKTION NORMEN 10.3 FROSTSCHUTZFUNKTION GESETZLICHE GARANTIE 10.4 SPARFUNKTION “ECONOMY”...
  • Seite 66: Allgemeines Vorwort

    1.4 AUFBEWAHRUNG DES HANDBUCHS Nachdruck dieses Handbuchs sind nur nach UFBEWAHRUNG UND ACHSCHLAGEN Genehmigung von PALAZZETTI zulässig. Die in diesem Das Handbuch muss sorgfältig verwahrt werden Handbuch enthaltenen technischen Informationen, und jederzeit sowohl dem Benutzer als auch gra schen Darstellungen und Spezi kationen dürfen den Installations- und Wartungstechnikern zum nicht an Dritte weitergegeben werden.
  • Seite 67: Wichtigste Befolgte Und Zu Befolgende Normen

    Schrumpffolie verpackt und an einer Holzpalette mittelbare oder unmittelbare Haftung der befestigt, die die Beförderung mit Gabelstaplern Firma PALAZZETTI für die folgenden Fälle und/oder anderen Flurförderzeugen gestattet. ausgeschlossen: Im Ofen liegt das folgende Material bei: Installation in Abweichung von den im Installations-, Betriebs- und Wartungsanleitung;...
  • Seite 68: Sicherheitshinweise

    ALLGEMEINE KONZEPTE gemäß den lokalen, nationalen und europäischen 2 SICHERHEITSHINWEISE Bestimmungen vor. Da der Ofen als Heizgerät dient, werden seine Außen ächen besonders heiß. Deshalb 2.1 HINWEISE FÜR DEN ist während des Betriebs maximale Vorsicht INSTALLATIONSTECHNIKER geboten, insbesondere: Die in diesem Handbuch enthaltenen Vorschriften Die Glasscheibe der Tür nicht berühren sind strikt zu befolgen.
  • Seite 69: Brennstoff-Eigenschaften

    ALLGEMEINE KONZEPTE 3 BRENNSTOFF- EIGENSCHAFTEN 3.1 BRENNSTOFFEIGENSCHAFTEN Holzpellets (Abb. 3.1) sind der einzige für diesen Ofentyp vorgesehene und zulässige Brennstoff und bestehen aus verschiedenen Arten von Holz, das unter Befolgung der Umweltschutzbestimmungen mechanisch gepresst wird. Wirkungsgrad und Wärmeleistung des Ofens können je nach Art und Qualität der verwendeten Pellets variieren.
  • Seite 70: Vorbereitung Des Aufstellungsortes

    INSTALLATION 5 VORBEREITUNG DES 5.3 AUFSTELLUNGSORT DES HEIZOFEN Alle Strukturen, die Feuer fangen können, vor der AUFSTELLUNGSORTES Hitze des Feuers schützen. Fußböden aus Holz oder anderen brennbaren Materialien müssen mit einem feuerfesten Material 5.1 ALLGEMEINES abgedeckt werden; z.B. Ein Blech mit 2-3 mm Die nachstehenden Abschnitte enthalten einige Stärke.
  • Seite 71: Abgasführung

    INSTALLATION 5.4 ABGASFÜHRUNG Der Ofen funktioniert mit Brennkammer in Unterdruck, daher ist unbedingt sicherzustellen, dass der Rauchabzug dicht ist. D e r O f e n m u s s m i t e i n e m e i g e n e n u n d ausschließlichen Rauchabzugssystem verbunden werden, das eine angemessene Abführung der Verbrennungsprodukte garantiert.
  • Seite 72: Abführung Über Das Dach Mit Traditionellem Schornstein

    INSTALLATION 5.4.1 Abführung über das dach mit traditionellem schornstein Der Schornstein für den Rauchabzug muss sowohl hinsichtlich der Maße als auch in Bezug auf das Baumaterial gemäß den Normen UNI 10683- EN 1856-1-2- EN 1857- EN 1443- EN 13384-1-3- EN 12391-1 ausgeführt werden.
  • Seite 73: Installation

    INSTALLATION 6 INSTALLATION 6.1 INSTALLATION DES EINBAUGENERATORS (MIT AUSZUGSSOCKEL) Für die Installation in einer Struktur mit Verkleidung aus Marmor oder anderem Material ist der Heizofen mit einem Gestell mit Gleitschienen ausgerüstet, um das Herausziehen des Geräts bei routinemäßigen Inspektionen und Kontrollen der mechanischen und elektrischen Teile zu erleichtern.
  • Seite 74 INSTALLATION GEFAHR Ofenauszug: Zum Herausziehen des Heizofens wie folgt vorgehen (Abb. 6.1.5): 1) Tür öffnen; 2) Schlüssel (1) einstecken; 3) Schlüssel im Gegenuhrzeigersinn in Position (O) drehen; 4) Heizofen an den beiden Seitenschlitze (2) herausziehen. Dieser Vorgang löst einen Sicherheitsschalter (W) aus, der die Stromversorgung deaktiviert.
  • Seite 75 INSTALLATION 6.1.1 Installation ohne Sockelgestell Das Einbaumodell der Ofen kann auch mit Frontalluftverteilung auf eine Kaminebene installiert werden. É possibile installare l’Eco re da inserimento con distribuzione dell’aria frontale sul piano di un caminetto. Procedura: 1) Das Gerät aus dem Sockel nehmen (Abb. 6.1.7). 2) Den Sockel auf der Kaminebene positionieren und mit Dübeln befestigen (Abb.
  • Seite 76: Lüftungsklappe

    INSTALLATION 6.2 LÜFTUNGSKLAPPE In der Wand in Übereinstimmung mit dem Heizofen zwei externe Lüftungsschächte von 14 cm Durchmesser mit Insektenschutzgitter einbauen. Diese Öffnungen müssen tiefer angelegt werden als die der Feuerebene. Der Lufteinlass (C) dient zur Luftzufuhr für die Verbrennungskammer. Verbrennungsluft. Der Lufteinlass (V) dient zur Versorgung des Heizkreislaufs.
  • Seite 77: Anschluss Des Elektrogebläses

    INSTALLATION 6.2.2.2 Ausführung mit Verteilung der Warmluft in Mehreren Räumen (bis zu 120 m Die richtige Lösung zum Beheizen eines großen Raumes oder mehrerer Räume (bis zu 120 m2) ist in Abb. 6.2.3 dargestellt. Wenn ein großer Raum beheizt werden soll, müssen die Lufteinlässe A und B seitlich an der Verkleidung positioniert werden.
  • Seite 78: Anschluss Warmluft-Vorlauf

    INSTALLATION Raumluft 30 cm vom Konvektionsgebläse installiert werden. Für den einbau folgende schritte folgen (siehe bild 6.3.3): 1) Fühler halterung von den hinteres stutzen ausschrauben. 2) Auf einen der 2 exibel rohre des luft ventilator ein loch bohren (b). 3) Fühler mit seine halterung im rohr, wie im bild gezeigt, einbauen.
  • Seite 79: Montageplan

    INSTALLATION Geräusche und Wärmeverlust zu vermeiden. (Abb.6.4.2: A-Doppelte Leitung), (Abb.6.4.3: B-Einfache Leitung) Wenn der Kamin dazu benutzt wird, 2 oder mehrere nebeineinander liegende Räume zu heizen, muß die Luftumwälzung der Raumluft gefördert werden, um die Temperatur in den verschiedenen Räumen gleichmäßig zu halten.
  • Seite 80: Ausführung Der Technischen Bohrungen An Der Verkleidung

    INSTALLATION 6.7 AUSFÜHRUNG DER TECHNISCHEN BOHRUNGEN AN DER VERKLEIDUNG Die Verkleidung darf nur von quali ziertem Personal realisiert werden. An der Verkleidung und der Haube müssen technischen Bohrungen vorgenommen werden für: A) Position des Anzeigeobjekts; B) die Öffnungen für die Luftzufuhr; C) den Wärmeabzug in der Haube;...
  • Seite 81 VERWENDUNG UND WARTUNG BEDIENUNGS- UND WARTUNGSANLEITUNG 00 477 3370 - 09/2014 - PN - Italy...
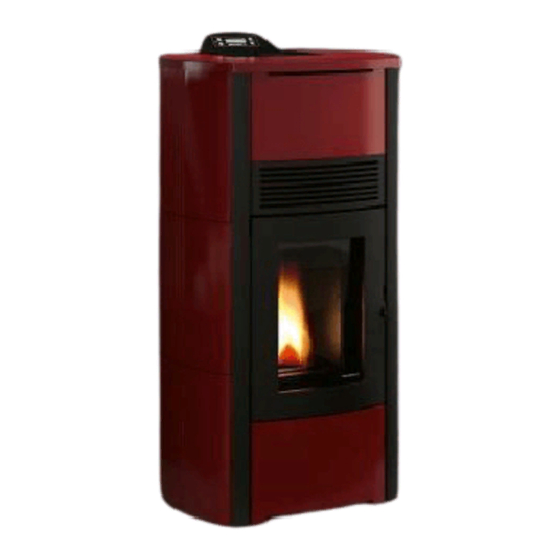
  • Seite 82: Beschreibung Des Ofens

    VERWENDUNG UND WARTUNG 7 BESCHREIBUNG DES OFENS Bevor Sie im Handbuch weiterlesen, bitten wir Sie, die im beiliegenden „Produktheft“ enthaltene Beschreibung des Ofens nachzuschlagen. 7.1 BEDIENPANEL Das Bedienpanel (Abb. 7.1) besteht aus dem hinterleuchteten LDC-Display, der Einschalttaste , der Ausschalttaste und den zwei Menütasten Am Bedienpanel können folgende Vorgänge gesteuert werden:...
  • Seite 83: Öffnen Der Menüs

    VERWENDUNG UND WARTUNG Wenn die Raumtemperatur effektiv der eingestellten Temperatur entspricht, wird der Ofen automatisch so geregelt, dass die Temperatur beibehalten und so wenig Energie erscheint: KOMPRIMIERTES MENÜ ROTIERENDES MENÜ MENU EASY Das Blinken der zwei angezeigten Erste Zeile: “MODULATION Temperaturen (Raumtemperatur BETRIEB”...
  • Seite 84: Vorbereitung

    VERWENDUNG UND WARTUNG 8 VORBEREITUNG 8.3 ANFÄNGLICHE EINSTELLUNGEN 8.1 PELLETZUFÜHRUNG Vor dem Gebrauch des Ofens müssen die Sprache, Bevor das Gerät eingeschaltet wird, muss als erstes das Datum und die aktuelle Uhrzeit eingestellt der Brennstoffbehälter (Pellets) gefüllt werden. werden. Die Pellets müssen mit einer Schaufel in den Behälter gefüllt werden.
  • Seite 85: Gebrauch Des Ofens

    VERWENDUNG UND WARTUNG 9 GEBRAUCH DES OFENS Nach Einstellung aller Parameter die Taste (“X”) drücken, um das Menü zu schließen. 9.1 EINSCHALTEN Um die Parameter des komprimierten Menüs zu Zum Einschalten des Ofens die Taste ein paar bearbeiten, solange die Phase „BETRIEB“ nicht aktiv Sekunden lang gedrückt halten.
  • Seite 86: Verfügbare Funktionen

    VERWENDUNG UND WARTUNG 10 VERFÜGBARE FUNKTIONEN wird die Einschaltung deaktiviert. 10.1 TIMER-FUNKTION Wenn als Ausschaltuhrzeit OFF eingestellt wird, Mit dieser Funktion können die benutzerde nierten wird die Ausschaltung deaktiviert. Programme für das automatische Ein- und/oder Diese Option ist nützlich, wenn nur die Einschaltung Ausschalten des Ofens eingerichtet werden.
  • Seite 87: Beispiele

    VERWENDUNG UND WARTUNG BEISPIELE: Beispiel 1 oder Fig.10.2 oder die Taste Fig.10.3 Beispiel 2 Fig.10.4 Beispiel 3 Fig.10.5 00 477 3370 - 09/2014 - PN - Italy...
  • Seite 88: Standby-Funktion

    VERWENDUNG UND WARTUNG 10.2 STANDBY-FUNKTION Während des Betriebs (d.h. wenn der Ofen eingeschaltet und in Betrieb ist) gestattet diese Funktion, den Ofen bei Erreichen der eingestellten Raumtemperatur (SW RAUMT.) aus- und bei Erreichen der eingestellten Mindestraumtemperatur (TEMP. START) wieder einzuschalten. Um diese Funktion zu aktivieren, das „MENÜ...
  • Seite 89: Beschreibung Der Menüs

    VERWENDUNG UND WARTUNG 11 BESCHREIBUNG DER MENÜS In diesem Kapitel werden die Inhalte der Menüs des Ofens beschrieben, die wie im Abschnitt 7.3 beschrieben geöffnet werden. 11.1 MENÜ BETRIEBSSOLLWERTE Über dieses Menü wird der Ofenbetrieb eingestellt und geregelt und gleichzeitig alle Betriebsparameter angezeigt. Das „MENÜ...
  • Seite 90 VERWENDUNG UND WARTUNG Mit den Tasten bzw. durch die Untermenüs blättern Mit der Taste wählen, welches geöffnet werden soll. Den Cursor mit der Taste von einem Parameter zum nächsten bewegen (der jeweils ausgewählte blinkt) Den Wert mit den Tasten oder ändern.
  • Seite 91: Verwaltung Der Alarmmeldungen

    VERWENDUNG UND WARTUNG 12 VERWALTUNG DER ALARMMELDUNGEN Bei Auftreten einer Betriebsstörung wird die folgende Prozedur aktiviert: 1) Akustischer Alarm (Piepton) mit Displayanzeige der möglichen Ursache; 2) die Pelletzuführung wird unterbrochen; 3) der Abgasventilator wird auf die höchste Leistungsstufe gebracht. Nachstehend sind die verschiedenen Alarmmeldungen aufgeführt, die auf dem Display erscheinen können. Außer der Alarmmeldung werden auch die Uhrzeit und das Datum angezeigt, an dem die Alarme aufgetreten sind.
  • Seite 92: Wartung

    VERWENDUNG UND WARTUNG 13 WARTUNG 13.1 SICHERHEITSMASSNAHMEN Vor der Ausführung von Wartungsarbeiten sind die folgenden Vorsichtsmaßnahmen zu ergreifen: Sicherstellen, dass alle Ofenteile kalt sind. Kontrollieren, ob die Asche vollkommen erloschen ist. Die in der Richtlinie 89/391/EWG vorgesehenen persönlichen Schutzausrüstungen benutzen. Sicherstellen, dass der Hauptschalter ausgeschaltet ist.
  • Seite 93: Reinigung Des Aschefachs (Modelle Mit Aschefach )

    VERWENDUNG UND WARTUNG 13.3.3 Reinigung des aschefachs ODELLE MIT SCHEFACH Die Reinigung der Asche Fach sollte täglich oder nach Bedarf durchgeführt werden. Die Tür des Feuerraums öffnen und mit einem Aschesauger die Asche, die sich in dem Aschefach neben der Brennschale angesammelt hat, absaugen (Abb.
  • Seite 94: Reinigung Schnecke

    VERWENDUNG UND WARTUNG 13.3.7 REINIGUNG SCHNECKE Bei Verstopfung des Beschickungsrohrs, das die Pellets vom Behälter zum Feuerraum leitet, wie folgt vorgehen: das Schutzgitter innerhalb des Behälters durch Ausschrauben der vier Kreuzschrauben abnehmen; die Befestigung der Inspektionsklappe abnehmen (Abb. 8.3.1); die Inspektionsklappe durch Ausschrauben des schwarzen Rasterknopfs abnehmen (Abb.
  • Seite 95: Ausserordentliche Wartung

    VERWENDUNG UND WARTUNG 13.4 AUSSERORDENTLICHE WARTUNG Der mit Festbrennstoff befeuerte PelletOfen erfordert einmal im Jahr eine außerordentliche Wartung, die möglichst bei Beginn der Heizsaison vom Vertragskundendienst durchzuführen ist. Mit dieser Wartung soll überprüft und sichergestellt werden, dass alle Komponenten einwandfrei funktionieren. Wenn am Bedienpanel die Meldung AUSSERORDENTLICHE WARTUNG angezeigt wird, muss sofort der technische Kundendienst kontaktiert werden, um die außerordentliche Wartung des Ofens durchführen zu lassen.
  • Seite 96 INDICE PREAMBULE UTILISATION DU POELE PICTOGRAMMES ALLUMAGE USAGE PREVU MODIFICATION DES PARAMETRES OBJET ET CONTENU DE CETTE NOTICE EXTINCTION CONSERVATION DE CETTE NOTICE MISE A JOUR DE LA NOTICE GENERALITES FONCTIONS DISPONIBLES NORMES PRINCIPALES DE REFERENCE 10.1 FONCTION TIMER GARANTIE LEGALE 10.2 FONCTION STAND-BY RESPONSABILITE DU FABRICANT...
  • Seite 97 à l’entretien. L’impression, la traduction et la reproduction, même partielle, de ce document doivent être soumis à Cette notice fait partie intégrante de l’équipement autorisation écrite de la Société PALAZZETTI. du poêle. Les informations techniques, les représentations ÉTÉRIORATION OU PERTE graphiques et spéci ques, présentes dans cette...
  • Seite 98 1.11 SERVICE APRES-VENTE F) Directive 1999/5/CE: “Concernant les PALAZZETTI met à la disposition de sa clientèle équipements hertziens et les équipements un réseau ramifié de centres SAV spécialisés terminaux de télécommunication et la disposant de personnels spécialisés formés...
  • Seite 99: Consignes De Securite

    INTRODUCTION pendant son fonctionnement, notamment: 2 CONSIGNES DE ne pas toucher et ne pas s’approcher de la vitre SECURITE de la porte au risque de se brûler, ne pas toucher à l’évacuation de la fumée, ne pas effectuer de nettoyage de quelque type 2.1 CONSIGNES DESTINEES A que ce soit, L’INSTALLATEUR...
  • Seite 100: Caracteristiques Du Combustible

    INTRODUCTION 3 CARACTERISTIQUES DU COMBUSTIBLE 3.1 CARACTERISTIQUES DU COMBUSTIBLE Les pellets (Fig. 3.1) proviennent des résidus de bois de différentes essences compressés mécaniquement dans le respect de l’environnement. C’est le seul combustible prévu pour ce type de poêle. L’ef cience et le rendement thermique du poêle peuvent varier en fonction du type et de la qualité...
  • Seite 101: Preparation Du Lieu D'installation

    INSTALLATION 5 PREPARATION DU 5.3 LIEU D’INSTALLATION DU POELE Veiller à ce que structures et autres éléments LIEU D’INSTALLATION susceptibles de s’enflammer sous l’effet des radiations chaudes du feu soient protégés. Les parquets ou autre sol en matériau in ammable 5.1 CONSIDERATIONS GENERALES doivent être protégés par un matériau ignifuge (ex.
  • Seite 102 INSTALLATION 5.4 EVACUATION DE LA FUMEE Le poêle marche avec la chambre de combustion en dépression, il est donc indispensable de s’assurer de l’étanchéité du conduit d’évacuation de la fumée. Le poêle doit être raccordé à son propre conduit d’évacuation de la fumée apte à assurer une dispersion adéquate des produits de la combustion dans l’atmosphère.
  • Seite 103 INSTALLATION 5.4.1 Evacuation par le toit a travers un conduit traditionnel Les dimensions et les matériels de construction d’un conduit d’évacuation de la fumée doivent être conformes aux normes UNI 10683- EN 1856-1-2- EN 1857- EN 1443- EN 13384-1-3- EN 12391-1. Des conduits DELABRES, construits avec des matériaux inadaptés ( brociment, acier galvanisé, etc.
  • Seite 104 INSTALLATION 6 INSTALLATION 6.1 INSTALLATION DU GÉNÉRATEUR À ENCASTREMENT (AVEC SOUBASSEMENT D’EXTRACTION) En cas d’installation sur des structures dont le revêtement est en marbre ou autre matériel, le poêle est muni d’un châssis équipé de rails à glissières pour faciliter le retrait de l’appareil durant les interventions courantes d’inspection et de contrôle des pièces mécaniques et électriques.
  • Seite 105 INSTALLATION DANGER chaudière pour charger le pellet dans le réservoir. Extraction du poêle: Pour retirer le poêle, procéder comme suit (Fig. 6.1.5): 1) Ouvrir la porte; 2) Insérer la clavette (1) dans son logement; 3) Tourner la clavette dans le sens contraire des aiguilles d’une montre en position (O);...
  • Seite 106 INSTALLATION 6.1.1 Installation sans châssis de soubassement Il est possible d’installer le poêle à encastrement avec distribution de l’air frontal sur le plan d’une cheminée. Procédure: 1) Dégager l’appareil du soubassement(Fig. 6.1.7); 2) Positionner et xer le soubassement au plan de la cheminée à...
  • Seite 107 INSTALLATION 6.2 PRISE D’AIR Réaliser sur le mur à hauteur du poêle deux prises d’air externes de 14 cm de diamètre dotées de grille anti-insectes. Les trous doivent être pratiqués à un niveau inférieur par rapport au plan du foyer. La prise d’air (C) servira à...
  • Seite 108: Raccordement Du Ventilateur

    INSTALLATION d’air A et B doivent être réalisées latéralement par rapport au revêtement. Si l’on désire réchauffer deux pièces, la prise d’air A doit être réalisée latéralement par rapport au revêtement et la prise d’air B doit être raccordée à la seconde pièce.
  • Seite 109 INSTALLATION Poêle à granulés à intégrer frontal La sonde doit être installée près des ouvertures latérales ou frontales d’aspiration de l’air de convection sur la base du revêtement. Coller le support porte-sonde en correspondance des prises d’air (Fig. 6.3.6). 6.4 RACCORDEMENT DU REFOULEMENT Fig.
  • Seite 110: Schéma De Montage

    INSTALLATION 6.5 SCHÉMA DE MONTAGE Le montage doit être fait par un personnel quali é. 1) Jointoyer 2) Revêtement en bre céramique ou en laine de roche pourvu de feuille d’aluminium externe ou de conduit de fumée à double paroi. 3) Prise d.air externe sous le niveau de la sole foyère 4) Grille de récupération de chaleur, à...
  • Seite 111: Branchement Électrique

    INSTALLATION 6.7 RÉALISATION DE TROUS TECHNIQUES SUR LE REVÊTEMENT Le revêtement doit être réalisé uniquement par du personnel quali é. Il faut réaliser des trous techniques sur le revêtement et sur la hotte pour: A) localisation de l’af chage; B) les bouches d’aération; C) le passage de chaleur dans la hotte;...
  • Seite 112 EMPLOI & ENTRETIEN EMPLOI & ENTRETIEN 00 477 3370 - 09/2014 - PN - Italy...
  • Seite 113: Description Du Poele

    EMPLOI & ENTRETIEN 7 DESCRIPTION DU POELE Avant de procéder à la lecture de cette notice, prendre vision de la description du poêle contenue dans la “notice technique” jointe. 7.1 PANNEAU DE COMMANDE Le panneau (Fig. 7.1) est constitué d’un écran LCD rétro éclairé, d’une touche d’allumage d’une touche d’extinction et de deux touches...
  • Seite 114 EMPLOI & ENTRETIEN Lorsque la température ambiante atteint effectivement celle programmée, le poêle se régule automatiquement pour maintenir la température en consommant le moins possible, MENU AFFICHAGE SIMULTANE MENU PAR DEFILEMENT MENU EASY Clignotement des deux températures Première ligne: “MODULATION af chées (l’ambiante et la programmée) MARCHE”...
  • Seite 115: Operations Preliminaires

    EMPLOI & ENTRETIEN 8 OPERATIONS PRELIMINAIRES 8.3 PARAMETRAGES PRELIMINAIRES 8.1 CHARGEMENT DES PELLETS Avant d’utiliser le poêle, il faut programmer la La première opération à effectuer avant d’allumer langue, la date et l’heure en cours. le poêle est celle de remplir la trémie de pellets. Les pellets doivent être versés dans la trémie avec 8.3.1 Parametrage langue une petite pelle.
  • Seite 116: Utilisation Du Poele

    EMPLOI & ENTRETIEN 9 UTILISATION DU POELE Pour modi er les paramètres du menu af chage simultané sans être dans la phase “MARCHE”, il faut aller dans le 9.1 ALLUMAGE “MENU SET MARCHE” comme illustré dans le Pour allumer le poêle, appuyer sur la touche paragraphe 11.1.
  • Seite 117: Fonctions Disponibles

    EMPLOI & ENTRETIEN 10 FONCTIONS DISPONIBLES désactive l’allumage. Le paramétrage de OFF comme horaire d’extinction, 10.1 FONCTION TIMER désactive l’extinction. Cette fonction permet de mettre au point les Cette option est utile si l’on souhaite programmer programmes personnalisés pour l’allumage et/ou l’allumage sans l’extinction et réciproquement.
  • Seite 118 EMPLOI & ENTRETIEN EXEMPLES: Exemple 1 Fig.10.2 programme. et saisir Fig.10.3 Exemple 2 Fig.10.4 Exemple 3 Fig.10.5 00 477 3370 - 09/2014 - PN - Italy...
  • Seite 119 EMPLOI & ENTRETIEN 10.2 FONCTION STAND-BY En phase de marche (c’est-à-dire lorsque le poêle est allumé et fonctionne à régime), cette fonction permet d’éteindre le poêle lorsque la température ambiante programmée (SET T. AMB.) est atteinte et de le rallumer lorsque la température ambiante minimale programmée (TEMP.
  • Seite 120: Description Des Menus

    EMPLOI & ENTRETIEN 11 DESCRIPTION DES MENUS Ce chapitre illustre le contenu des menus du poêle, auxquels il est possible d’accéder via la procédure décrite dans le paragraphe 7.3. 11.1 MENU SET MARCHE Ce menu permet de programmer et de réguler la marche du poêle, en visualisant simultanément tous les paramètres de marche.
  • Seite 121 EMPLOI & ENTRETIEN Faire dé ler les sous-menus avec les touches i sottomenu Sélectionner le sous-menu auquel on souhaite accéder avec la touche Se déplacer entre les différents paramètres avec la touche (le paramètre sélectionné clignotera) En modi er la valeur avec les touches Con rmer la modi cation avec la touche (“ok”) Appuyer sur la touche...
  • Seite 122: Gestion Des Alarmes

    EMPLOI & ENTRETIEN 12 GESTION DES ALARMES En cas de dysfonctionnement, la procédure suivante se déclenche: 1) alarme sonore (bip) avec af chage de la cause possible sur l’écran; 2) blocage du chargement des pellets; 3) l’extracteur de fumée se met à fonctionner à la vitesse maximale. Le tableau ci-dessous reporte les différents messages d’alarme pouvant s’af cher sur l’écran.
  • Seite 123 EMPLOI & ENTRETIEN 13 ENTRETIEN 13.1 MESURES DE SECURITE Avant d’effectuer toute opération d’entretien, adopter les mesures suivantes: Véri er si tous les éléments du poêle sont froids. Vérifier si les cendres sont complètement éteintes. Endosser l’équipement de protection individuelle prévu par la directive 89/391/CEE.
  • Seite 124 EMPLOI & ENTRETIEN 13.3.3 ’ POUR LES MODÈLES DOTÉS D UN CENDRIER Le nettoyage du compartiment à cendres doivent être effectuées quotidiennement ou selon les besoins. Ouvrir la porte du foyer et aspirer avec un aspirateur idoine les cendres qui se sont déposées dans le cendrier à...
  • Seite 125: Nettoyage De La Vis Sans Fin

    EMPLOI & ENTRETIEN 13.3.7 NETTOYAGE DE LA VIS SANS FIN En cas d’obstruction du tuyau d’alimentation qui, du réservoir, achemine les pellets vers la chambre de combustion, procéder comme suit: retirer la grille de protection présente à l’intérieur du réservoir en dévissant à l’aide d’un tournevis les quatre vis à...
  • Seite 126: Entretien Extraordinaire

    EMPLOI & ENTRETIEN 13.4 ENTRETIEN EXTRAORDINAIRE Le poêle est un générateur de chaleur à combustible solide et requiert à ce titre un entretien extraordinaire annuel qui doit être effectué par un Centre SAV agréé, une fois par an et de préférence en début de saison. Cet entretien a pour but de véri er le fonctionnement parfait de toutes les pièces.
  • Seite 127 INDICE PREMISA GENERAL USO DE LA ESTUFA SIMBOLOGÍA ENCENDIDO USOS MODIFICACIÓN DE LOS PARÁMETROS OBJETIVO Y CONTENIDO DEL MANUAL APAGADO CONSERVACIÓN DEL MANUAL ACTUALIZACIÓN DEL MANUAL GENERALIDADES FUNCIONES DISPONIBLES PRINCIPALES NORMAS RESPETADAS Y A 10.1 FUNCIÓN TEMPORIZADOR RESPETAR 10.2 FUNCIÓN STAND-BY GARANTÍA LEGAL 10.3 FUNCIÓN ANTICONGELACIÓN...
  • Seite 128: Premisa General

    La estufa funciona solamente con la puerta del instalación de la estufa no puede ser considerada a hogar cerrada. cargo de PALAZZETTI, dicha instalación queda a cargo del instalador, al cual se solicita la ejecución Nunca se debe abrir la portezuela durante el de las comprobaciones relativas a la chimenea, funcionamiento de la estufa.
  • Seite 129 1.11 ASISTENCIA TÉCNICA productos defectuosos”. PALAZZETTI pone a disposición una amplia red F) Directiva 1999/5/CE: “Relativa a los aparatos de centros de asistencia técnica especializados, de radio y a los aparatos terminales de formados y preparados directamente por la empresa.
  • Seite 130: Advertencia Sobre La Seguridad

    CONCEPTOS GENERALES intervenir en las partes eléctricas, electrónicas 2 ADVERTENCIA SOBRE y conectores. LA SEGURIDAD 2.3 ADVERTENCIAS PARA EL USUARIO Preparar el lugar de instalación de la estufa 2.1 ADVERTENCIAS PARA EL según los reglamentos locales, nacionales y europeos. INSTALADOR La estufa, siendo un producto de calefacción, Cumplir con las indicaciones del presente manual.
  • Seite 131: Características Del Combustible

    CONCEPTOS GENERALES 3 CARACTERÍSTICAS DEL COMBUSTIBLE 3.1 CARACTERÍSTICAS DEL COMBUSTIBLE El pellet (Fig. 3.1) es un compuesto formado por varios tipos de madera prensada proveniente de procesamientos mecánicos que respetan la normativa de tutela del medio ambiente, es el único combustible previsto para este tipo de estufas.
  • Seite 132: Preparación Del Lugar De Instalación

    INSTALACIÓN 5 PREPARACIÓN 5.3 LUGAR DE INSTALACIÓN DE LA ESTUFA DEL LUGAR DE Hay que proteger de las radiaciones calientes del fuego todas las estructuras que podrían incendiarse INSTALACIÓN si estuvieran expuestas a calor excesivo. Los suelos de madera o constituidos de material 5.1 CONSIDERACIONES GENERALES inflamable, se deben proteger con material incombustible;...
  • Seite 133: Salida De Humos

    INSTALACIÓN 5.4 SALIDA DE HUMOS La estufa funciona con la cámara de combustión en depresión y por lo tanto es indispensable asegurarse que la salida de humos sea hermética. La estufa debe conectarse a un sistema propio de evacuación de humos exclusivo e idóneo para asegurar una adecuada dispersión en la atmósfera de los productos de la combustión.
  • Seite 134 INSTALACIÓN 5.4.1 Salida en el techo mediante chimenea tradicional La chimenea para la salida de los humos debe realizarse cumpliendo con las normas UNI 10683- EN 1856-1-2- EN 1857- EN 1443- EN 13384-1-3- EN 12391-1 ya sea con respecto a las dimensiones como a los materiales utilizados en su fabricación.
  • Seite 135 INSTALACIÓN 6 INSTALACIÓN 6.1 INSTALACIÓN DEL GENERADOR EMPOTRABLE (CON BASE DE EXTRACCIÓN) En caso de instalación en estructuras con revestimiento de mármol u otro material, la estufa posee un armazón con guías correderas para facilitar la extracción del aparato para las intervenciones normales de inspección y control de las partes mecánicas y eléctricas.
  • Seite 136 INSTALACIÓN PELIGRO No utilizar el sistema de deslizamiento de la caldera para llenar el depósito de pellets. Extracción de la estufa: Para extraer la estufa, proceder como sigue (Fig. 6.1.5): 1) Abrir el portillo; 2) Introducir la chaveta (1) en su alojamiento; 3) Girar en sentido contrario al de las agujas del reloj la chaveta hasta la posición (O);...
  • Seite 137 INSTALACIÓN 6.1.1 Instalación sin armazón de base Es posible instalar la estufa con distribución del aire frontal en el hogar de una chimenea. Procedimiento: 1) Sacar la máquina de la base (Fig. 6.1.7); 2) Posicionar y jar con tacos la base al hogar de la chimenea (Fig.
  • Seite 138: Toma De Aire

    INSTALACIÓN 6.2 TOMA DE AIRE Realice sobre la pared, en correspondencia con la estufa, dos tomas de aire externas de 14 cm de diámetro, dotadas de rejillas anti-insectos. Los ori cios deben realizarse a una altura inferior a la de la super cie del fuego. La toma de aire (C) se utilizará...
  • Seite 139 INSTALACIÓN la Fig. 6.2.3. En caso de que se deba calentar un gran ambiente, las tomas de aire A y B deben realizarse a los lados del revestimiento. En caso de que se deban calentar dos ambientes, la toma de aire A deberá realizarse a un lado del revestimiento, mientras que la toma de aire B debe conectarse al segundo ambiente.
  • Seite 140 INSTALACIÓN 2) perforar uno de los dos tubos exibles de la toma de aire del ventilador (b) 3) volver a montar la sonda con el soporte en el tubo, como se muestra en la gura. Modelo Empotrable frontal La sonda debe de estar instalada cerca de las aperturas laterales ó...
  • Seite 141: Esquema De Montaje

    INSTALACIÓN lo tanto preparar rejillas de paso en las puertas o mantener entornadas las puertas. 6.5 ESQUEMA DE MONTAJE El montaje debe ser realizado por personal cuali cado. 1) Sellar 2) Revestimiento en bra cerámica o lana de roca, provisto de lámina de aluminio exterior, o cañón de humos de doble pared.
  • Seite 142: Conexión Eléctrica

    INSTALACIÓN 6.7 REALIZACIÓN DE ORIFICIOS TÉCNICOS EN EL REVESTIMIENTO El revestimiento sólo puede ser realizado por personal cuali cado. En el revestimiento y en la campana se deben realizar ori cios técnicos para: A) ubicación del display; B) las boquillas de ventilación; C) la evacuación de calor de la campana;...
  • Seite 143: Uso Y Mantenimiento

    USO Y MANTENIMIENTO USO Y MANTENIMIENTO 00 477 3370 - 09/2014 - PN - Italy...
  • Seite 144: Descripción De La Estufa

    USO Y MANTENIMIENTO 7 DESCRIPCIÓN DE LA ESTUFA Antes de leer el manual, consultar la descripción de la estufa en el apartado “Manual del Producto”. 7.1 PANEL DE MANDO El panel (Fig. 7.1) se compone del visor LCD con iluminación posterior, el botón de encendido , el botón de apagado y los dos botones del menú...
  • Seite 145 USO Y MANTENIMIENTO visualizará: MENÚ COMPRIMIDO MENÚ ROTATIVO MENÚ EASY la intermitencia de las dos Primera línea: “MODULA temperaturas visualizadas TRABAJO” ( l a a m b i e n t e Segunda línea: Además de los programada) parámetros de funcionamiento d e l a e s t u f a a p a r e c e r á...
  • Seite 146: Operaciones Preliminares

    USO Y MANTENIMIENTO 8 OPERACIONES PRELIMINARES 8.3 PROGRAMACIONES INICIALES 8.1 CARGA DE LOS PELLETS Antes de utilizar la estufa es necesario programar La primera operación a realizar antes de encender el idioma, la fecha y la hora corriente. el producto es llenar el depósito de combustible (pellet).
  • Seite 147: Uso De La Estufa

    USO Y MANTENIMIENTO 9 USO DE LA ESTUFA Para modi car los parámetros del menú comprimido cuando no se está en la fase “TRABAJO” es necesario entrar en 9.1 ENCENDIDO el “MENÚ SET TRABAJO” como se ilustra en el Para encender la estufa mantener presionado el párrafo 11.1.
  • Seite 148: Funciones Disponibles

    USO Y MANTENIMIENTO 10 FUNCIONES DISPONIBLES deshabilita el apagado. Esta opción es útil si se desea programar sólo el 10.1 FUNCIÓN TEMPORIZADOR encendido o sólo el apagado excluyendo el otro. Con esta función se pueden programar los programas personalizados para el encendido y/o Desplazándose a la segunda línea (botón el apagado automático de la estufa.
  • Seite 149 USO Y MANTENIMIENTO EJEMPLOS: ) para escoger Fig.10.2 y programar el se llega se pasa se pasa Fig.10.3 Fig.10.4 sola). Fig.10.5 00 477 3370 - 09/2014 - PN - Italy...
  • Seite 150 USO Y MANTENIMIENTO 10.2 FUNCIÓN STAND-BY En fase de trabajo (es decir cuando la estufa está encendida y en régimen) permite apagar la estufa cuando alcanza la temperatura ambiente programada (SET T. AMB.) y volverla a encender al alcanzar la temperatura ambiente mínima programada (TEMP.
  • Seite 151: Descripción De Los Menús

    USO Y MANTENIMIENTO 11 DESCRIPCIÓN DE LOS MENÚS En este capítulo se ilustran los contenidos de los menús de la estufa, a los cuales es posible entrar por medio del procedimiento descrito en el párrafo 7.3. 11.1 MENÚ SET TRABAJO Por medio de este menú, se programa y se regula el funcionamiento de la estufa, visualizando al mismo tiempo todos los parámetros de trabajo.
  • Seite 152 USO Y MANTENIMIENTO Pasar con los botones los sub-menús Seleccionar con el botón el submenú al que se desea entrar. Pasar los parámetros con el botón (aquel seleccionado parpadeará) Modi car el valor con los botones Con rmar la modi cación con el botón (“ok”).
  • Seite 153: Gestión De Las Alarmas

    USO Y MANTENIMIENTO 12 GESTIÓN DE LAS ALARMAS En el caso que se produzca una anomalía en el funcionamiento, se activa el siguiente procedimiento: 1) Alarma acústica (beep) con visualización en el visor de la posible causa. 2) La carga de los pellets se ha bloqueado. 3) El ventilador de expulsión de los humos está...
  • Seite 154: Precauciones De Seguridad

    USO Y MANTENIMIENTO 13 MANTENIMIENTO 13.1 PRECAUCIONES DE SEGURIDAD Antes de realizar cualquier operación de mantenimiento adoptar las siguientes precauciones: Asegurarse que todas las partes de la estufa estén frías. Asegurarse que las cenizas estén completamente apagadas. Utilizar los dispositivos de protección individual previstos por la directiva 89/391/CEE.
  • Seite 155: Limpieza Del Compartimiento Para Recoger Cenizas

    USO Y MANTENIMIENTO 13.3.3 Limpieza del compartimiento para recoger cenizas PARA LOS MODELOS CON COMPARTIMIENTO PARA RECOGER CENIZAS La limpieza de la ceniza compartimiento debe realizarse diariamente o según sea necesario. Abrir la portezuela del hogar y aspirar con aspirador de cenizas las cenizas acumuladas en el compartimento especí...
  • Seite 156: Limpieza De La Chimenea

    USO Y MANTENIMIENTO 13.3.7 Limpieza de la cóclea En caso de obstrucción del tubo de alimentación que del depósito lleva los pellet a la cámara de combustión proceder como sigue: retirar la rejilla de protección interior al depósito a ojando por medio de un destornillador los cuatro tornillos cruzados;...
  • Seite 157: Mantenimiento Extraordinario

    USO Y MANTENIMIENTO 13.4 MANTENIMIENTO EXTRAORDINARIO La estufa es un generador de calor de combustible sólido y por lo tanto requiere de una intervención anual de mantenimiento extraordinario que debe realizar el Centro de Asistencia Técnica autorizado, una vez al año y preferentemente al comienzo de la estación.
  • Seite 160 Palazzetti accepts no liability for any mistakes in this handbook and is free to modify the features of its products without prior notice.

Inhaltsverzeichnis