Herunterladen Inhalt Inhalt Diese Seite drucken
Gorgy Timing RADIO TIMING GTC Bedienungsanleitung

Gorgy Timing RADIO TIMING GTC Bedienungsanleitung

Hauptuhr & schaltuhr
Inhaltsverzeichnis

Werbung

Verfügbare Sprachen

Verfügbare Sprachen

HORLOGE MERE & PROGRAMMATEUR
MODE D'EMPLOI - PAGE 3
MASTER CLOCK & PROGRAMMER
USER GUIDE - PAGE 33
RELOJ PATRÓN Y PROGRAMADOR
MANUAL DE UTILIZACIÓN - PÁGINA 65
HAUPTUHR & SCHALTUHR
BEDIENUNGSANLEITUNG - SEITE 97
RADIO TIMING
GTC
®
MDE-Radio-Timing-GTC-3080V2.3

Werbung

Inhaltsverzeichnis
loading

Inhaltszusammenfassung für Gorgy Timing RADIO TIMING GTC

  • Seite 1 HORLOGE MERE & PROGRAMMATEUR MODE D’EMPLOI - PAGE 3 MASTER CLOCK & PROGRAMMER USER GUIDE - PAGE 33 RELOJ PATRÓN Y PROGRAMADOR MANUAL DE UTILIZACIÓN - PÁGINA 65 HAUPTUHR & SCHALTUHR BEDIENUNGSANLEITUNG - SEITE 97 RADIO TIMING ® MDE-Radio-Timing-GTC-3080V2.3...
  • Seite 2 (Enceintes, antennes, matériel hautes fréquences, sonneries électromécaniques...). Gorgy Timing décline toute responsabilité en cas d’accidents ou de dommages provoqués par une mauvaise utilisation du RT GTC. Les produits GORGY TIMING sont conformes aux normes : CE, EN 60950, EN 55022, EN 50024. MDE-Radio-Timing-GTC-3080V2.3...
  • Seite 3: Avertissements

    EXPLICATION DES SYMBOLES PRÉSENTS SUR LE PRODUIT Danger général – Si les instructions ne sont pas suivies, il y a un risque de dommages aux équipements. Danger électrique – Si les instructions ne sont pas suivies, il y a un risque d’électrocution et de dommages corporels.
  • Seite 4: Inhaltsverzeichnis

    SOMMAIRE CARACTERISTIQUES TECHNIQUES ................. 5 CONNEXION ET MISE EN SERVICE ................9 2.1. Installation RT GTC Boîtier mural ..................9 2.2. Installation RT GTC rack ....................10 2.3. Connexion .......................... 10 AFFICHAGE DE BASE ....................13 DEVERROUILLAGE DES TOUCHES DE PROGRAMMATION ......... 14 4.1.
  • Seite 5: Caracteristiques Techniques

    CARACTERISTIQUES TECHNIQUES Boîtier mural plastique blanc sérigraphié noir en face avant. Mise à l’heure et programmation par les 6 touches de face avant. Température de fonctionnement : -20°C à 50°C ; Température de stockage : -20°C à 70°C. Humidité : version standard 80% humidité relative, version tropicalisée 95% humidité relative. Environnement électromagnétique.
  • Seite 6 > 10 ans. ► Distribution d’heure par Code AFNOR NFS 87500 Le Radio Timing GTC peut être équipé en option d’une sortie code AFNOR NFS 87500, porteuse 1Khz. Isolation galvanique par transformateur. Niveau de sortie 2,2 Vcc.
  • Seite 7: Synchronisation Externe

    Mise à l’heure dès réception de 3 sec. de code. OPTION ENTRÉE OU SORTIE ASCII RS232 OU RS 422-485 Le Radio Timing GTC peut être équipé en option d’une entrée RS 232 ou RS 422-485 ou équipé en option de 2 sorties RS 232 ou d’une sortie RS 422-485.
  • Seite 8 ☛ L’émission de ce message signifie que la seconde est passée de 76 centièmes au moment de la réception du caractère «D». Commutateur SW1 Commutateur SW1 Paramètres N° switch N° switch Format, Parité, Taux de Bauds NB bit stop 7,no,2 8,no,1 8,no,2 1200...
  • Seite 9: Connexion Et Mise En Service

    2. CONNEXION ET MISE EN SERVICE 2.1. INSTALLATION RT GTC BOÎTIER MURAL ► 1 – Ouvrir le boîtier ► Tirer sur les 2 boutons situés sur les 2 cotés du produit. ► Déposer les flans. ► Choix de sortie des câbles : par la face arrière - 1 par goulotte haute ou basse - 2 et 3 ►...
  • Seite 10: Installation Rt Gtc Rack

    2.2. INSTALLATION RT GTC RACK Dimensions : L 482 x H 44 x P266 mm. Face avant fixation 464.5 2.3. CONNEXION Face avant ► Boîtier mural Sortie Face arrière 464,6 Impulsionnelle 4x 10,5 Sorties IRIG B / AFNOR Sources de synchronisations (entrée code - ANTENNE) RS485 RS232...
  • Seite 11 Face avant ► Rack Face arrière 464,6 4x 10,5 Profil 8 9 10 11 1. Câble d’alimentation 7. Switch manuel 2. Fusible impulsion 1A 8. Prise ASCII (selon les options) 464.5 3. Relais additionnels (en option) 9. Entrée de synchronisation antenne (code Input) 4.
  • Seite 12 ☛ Pour plus de précision sur le montage des antennes, vous pouvez consulter le mode d’emploi des antennes de Gorgy Timing sur le site internet www.gorgy-timing.com ☛ Les antennes TDF, DCF et GPS ainsi que le code IRIG B (sauf DCLS) et AFNOR ne possèdent pas de polarité.
  • Seite 13: Affichage De Base

    3. AFFICHAGE DE BASE TDF/DCF SYNCHRO VEN 22 FEVR 2013 11:42:45 (LOCAL) IMP: 30s Sr 11:42:45 ► La première ligne d’affichage indique : ► Le sigle « antenne ». ► Le type de code de synchronisation : TDF/DCF, GPS, AFNOR ou ASCII. ►...
  • Seite 14: Deverrouillage Des Touches De Programmation

    4. DEVERROUILLAGE DES TOUCHES DE PROGRAMMATION Le Radio Timing GTC peut être protégé des manipulations extérieures non autorisées grâce à la possibilité de programmer un code de protection sur 4 chiffres. Lors de l’appui sur la touche « MENU », l’écran suivant apparaît : ►...
  • Seite 15: Procedure De Modification Ou De Suppression Du Code Personnel

    Note 1 : Après validation du code ou après déverrouillage par la touche « ESC », l’accès aux menus est limité à 15 minutes. Le Radio Timing GTC est automatiquement verrouillé au bout de cette période. Note 2 : Une fois votre code personnel rentré, le premier menu («CODE?...») n’apparaitra plus ainsi que la dernière ligne d’affichage du menu suivant et...
  • Seite 16: Modes De Programmation

    e avant 5. MODES DE PROGRAMMATION RT GTC boîtier mural RT GTC Rack e arrière 464,6 Boutons programmateur + écran LCD Boutons programmateur + écran LCD ► La touche « MENU » sélectionne l’affichage des différents menus. ► La touche « ENTER» permet l’accès au menu affiché, la validation et la sélection du caractère suivant.
  • Seite 17: Mise En Service De La Distribution D'heure Impulsionnelle

    ☛ En cas de programmation d’une date ou heure erronée (exemple 30 FEVR), la sortie du menu s’effectue sans modification d’heure et date de la base de temps. ☛ En mode synchronisé, la mise à l’heure est automatique dès réception de deux messages consécutifs corrects.
  • Seite 18: Programmation Hebdomadaire D'un Circuit

    ☛ Le démarrage des impulsions commence après la validation du dernier caractère clignotant à condition que l’heure programmée soit cohérente (< 24). ☛ Si l’heure programmée est en avance de moins de 2 heures sur l’heure base de temps, aucune impulsion ne sera délivrée jusqu’à ce que les heures coïncident.
  • Seite 19: Mode Tempo (Déclenchement De Sonnerie Etc)

    ► A l’aide des touches « + » et « - », sélectionner le circuit à programmer puis valider par la touche « ENTER ». L’indication TEMPO ou ON/OFF clignote, sauf s’il existe déjà des événements pro- grammés dans le circuit sélectionné : Dans ce cas, on passe directement en phase 6.3.1.
  • Seite 20 ► Après validation de l’unité de PLANIFIER minute, l’écran de désactiva- UN EVENEMENT tion du contact s’affiche, indi- RELAIS: C1 ON/OFF quant les mêmes paramètres C1= OFF 08:00 horaires que pour l’écran pré- cédent. Le jour de semaine ou la dizaine d’heure clignote : ►...
  • Seite 21: Relecture De La Programmation Hebdomadaire

    5.4. RELECTURE DE LA PROGRAMMATION HEBDOMADAIRE A l’aide de la touche « MENU », ► AFFICHER sélectionner le menu : UN EVENEMENT VENDREDI 22 FEVR 2013 11:42:45 (LOCAL) ► Valider par la touche « ENTER » : En fonction de ce qui est programmé, un des trois écrans ci-dessous apparait et l’indication C1 clignote : ►...
  • Seite 22: Programmation Des Periodes

    ► La touche « + » permet de visualiser le pas de programme suivant. Lorsque le dernier pas est affiché, la touche « + » n’a plus d’effet. La touche « - » permet de réafficher les pas précédents. ► ►...
  • Seite 23: Relecture De La Programmation Des Periodes De Vacances Et Jours Feries Et Effacement De Certaines Periodes

    ☛ Lorsqu’on rentre dans le menu de programmation des jours fériés, la date qui s’affiche en DEBUT et FIN est la date courante. ☛ Lorsqu’on termine la programmation d’une date de DEBUT, celle-ci est automatiquement recopiée en date de FIN, permettant ainsi de simplifier l’opération de programmation des périodes.
  • Seite 24: Effacement D'une Ou Plusieurs Programmations

    ► Lorsqu’il n’y a pas ou plus de AFFICHER jours fériés programmés, l’écran UN JOUR FERIE suivant apparaît : VIDE ► La touche « BACK» permet le retour au menu de relecture des jours fériés ☛ Lorsqu’un jour férié est supprimé par la touche « ENTER », l’affichage indique automatiquement le jour férié...
  • Seite 25: Mode Un

    5.7.2. Mode UN ► Une pression sur la touche SUPPRIMER « - » permet d’afficher l’écran UN EVENEMENT suivant et l’indication du circuit REL. C1: 008 ON/OFF C1 clignote. ► A l’aide des touches « + » et « - », sélectionner le circuit contenant l’événement à effacer (C1, C2, etc…) ►...
  • Seite 26: Procedure A Suivre En Cas De Perte Du Code Personnel

    ☛ Notez votre version de firmware puis contactez le service SAV de Gorgy Timing 0 892 68 70 68* qui vous donnera le code usine du RT GTC correspondant à la version du firmware. *Appels depuis la France Métropolitaine uniquement (0,337 euro TTC/min) ►...
  • Seite 27: Forçage Manuel Pour Test Des Raccordements Des Sorties Contact

    5.11. FORÇAGE MANUEL POUR TEST DES RACCORDEMENTS DES SORTIES CONTACT. Version rack : dévisser les vis du capot avec un tournevis Torx N°T10 pour avoir Sortie Impulsionnelle accès au commutateurs. Sorties IRIG B / AFNOR 5.11.1. Forçage par les commutateurs internes Sources de synchronisations (entrée code - ANTENNE) ►...
  • Seite 28: Tableau De Programmation Rt Gtc

    5.12. TABLEAU DE PROGRAMMATION RT GTC EXEMPLE DE PROGRAMMATION ☛ Circuit de sonneries connecté sur le relais C1, déclenchement des sonneries à : ► 08H30, 10H00, 10H15, 11H30 les LUNDI, MARDI, JEUDI, VENDREDI, et SAMEDI. ► 13H30, 15H00, 15H15, 16H30 les LUNDI, MARDI, JEUDI et VENDREDI. ☛...
  • Seite 29 Tableau de programmation en mode TEMPORISATION Circuit N° Durée de fermeture Jours affectés Heure de déclenchement MDE-Radio-Timing-GTC-3080V2.3...
  • Seite 30 Pour le circuit C2 il s’agit donc d’une programmation en mode ON/OFF. Circuit N° Type de déclenchement Jours affectés Heure de déclenchement EX: C2 ON (fermeture du relais) Lu-Ma 08H15 EX: C2 OFF (Ouverture du relais) Lu-Ma 08H45 EX: C2 ON (fermeture du relais) Je-Ve 08H15...
  • Seite 31 Tableau de programmation en mode HORLOGE Circuit N° Type de déclenchement Jours affectés Heure de déclenchement MDE-Radio-Timing-GTC-3080V2.3...
  • Seite 32: Support Technique

    GORGY TIMING. ® ® ® ® Numéro de déclaration d’activité de prestataire de formation : 82 38 04877 38 GORGY TIMING RC 74 B 38 - Toutes modifications d'ordre technique ou esthétique peuvent être apportées sans préavis. MDE-Radio-Timing-GTC-3080V2.3...
  • Seite 33 MASTER CLOCK & PROGRAMMER RADIO TIMING ® USER GUIDE MDE-Radio-Timing-GTC-3080V2.3...
  • Seite 34 If the RT GTC does not store the time in its memory after a power failure, the bac- kup battery may be discharged. To replace it, contact the Gorgy Timing Customer service department (Contact details on the back of this manual) Modifying or opening the product without the consent of the Customer service department will void the warranty.
  • Seite 35 NOTICE OF SAFETY SIGNS ON THE PRODUCT Danger – risk of damage to equipment if the instructions are not followed. Electrical Hazard – Failure to follow the instructions may result in electric shock and injury to persons. The equipment is completely protected through double insulation. Warning Follow the precautions and instructions as indicated below in order to ensure your safety and that of your environment, and to prevent your device from any possible damage.
  • Seite 36 CONTENTS TECHNICAL FUNCTIONS ................... 37 SETTING UP AND CONNECTING ................41 2.1. SETTING UP RT GTC Wall Mount ..................41 2.2. SETTING UP RTGTC Rack ....................42 2.3. Connection ......................... 42 BASIC SCREEN ......................45 UNLOCKING OF THE PROGRAMMING KEYS ............46 4.1.
  • Seite 37: Technical Functions

    1. TECHNICAL FUNCTIONS ► White plastic wall-mounted box, with black print front panel. Time setting and programming via a keyboard of six buttons on the front panel. Operating temperature: -20° C + 70° C Storage temperature: -30° C + 80° C Humidity: standard version 80% relative humidity, tropical version 95% relative humidity.
  • Seite 38 > 10 years. ► AFNOR NFS 87500 time code distribution The Radio Timing GTC may optionally be equipped with an AFNOR NFS 87500 time- code output, carrier frequency 1Khz. Galvanic insulation by transformer. Output level 2.2 Vcc. Output impedance 10 Ohms Ability to drive 50-250 clocks via 5/10th bifilar link.
  • Seite 39: External Synchronization

    Updated upon receipt of 3 seconds of coherent code. OPTION: INPUT OR OUTPUT ASCII RS 232/ RS422-485 The Radio Timing GTC can be equipped optionally with 1 RS 232 or RS 422-485 input or be equipped with 2 RS232 outputs or one RS422-485 output.
  • Seite 40 ☛ Transmission of this message indicates that it is 76 hundredths after the second at the time of receipt of character «D». SW1 switch SW1 switch Settings Switch no.h Switch no. Format, Parity, Baud rate 7,no,2 8,no,1 8,no,2 1200 7,0,1 2400 7,odd,1 4800...
  • Seite 41: Setting Up And Connecting

    2. SETTING UP AND CONNECTING 2.1. SETTING UP RT GTC WALL MOUNT ► 1 – Open the box ► Pull the 2 buttons on the 2 sides of the product. ► Remove the lid. ► Choice of output for the cables: the rear - 1 the chute by up or down - 2 and 3 ►...
  • Seite 42: Setting Up Rtgtc Rack

    2.2. SETTING UP RTGTC RACK Dimensions : L 482 x H 44 x P266 mm. Face avant fixation Mounting of front panel 464.5 2.3. CONNECTION Face avant ► Wall mount case Pulse Face arrière 464,6 Output 4x 10,5 IRIG B / AFNOR Output Sources of synchronisation Input signal (antenna)
  • Seite 43 Face avant ► Rack 19”1U case Back panel Face arrière 464,6 4x 10,5 Profil 8 9 10 11 1. power cable Câble d’alimentation 7. Manual switch 2. fuse 1A pulse 8. ASCII connector (depending on options) 3. additional relays (as option) 9.
  • Seite 44 Wiring instructions : ► Ethernet cable RJ45 port for NTP interface (length maximum of 100m for ethernet cable) ► AWG 24 wire or multi-paired cable (0.8mm² minimum) for AFNOR interface. ► Length maximum: 20 Km ► AWG 22 wire for IRIG B interface ►...
  • Seite 45: Basic Screen

    3. BASIC SCREEN TDF/DCF SYNCHRO FRI 22 FEBR 2013 11:42:45 (LOCAL) IMP: 30s Sr 11:42:45 ► The first row of the display shows: ► The «antenna» icon ► The type of synchronization code: TDF / DCF, GPS, AFNOR or ASCII ►...
  • Seite 46: Unlocking Of The Programming Keys

    UNLOCKING OF THE PROGRAMMING KEYS The Radio Timing GTC can be protected against unauthorized external handlings by the ability to program a security code over 4 digits. ► When pressing the «MENU» button, the following screen appears: CODE? YES/NO the indication «NO» is flashing.
  • Seite 47: Procedure To Modify Or Delete Your Security Code

    Note 1: After entering the security code or after unlocking by the «ESC» key, accessing menus is limited to 15 minutes. The Radio Timing GTC is automa- tically locked after this period. Note 2: Once your security code is entered, the first menu («CODE?...» and the last row of above display will no longer appear and you will have to re- enter your code to access the menus.
  • Seite 48: Programming Mode

    e avant 5. PROGRAMMING MODE RT GTC Wall Mount RT GTC Rack e arrière 464,6 Programming buttons + LCD screen Programming buttons + LCD screen ► The «MENU» button allows the selection of the displayed menu. ► The «ENTER» button allows to access to the displayed menu and the validation or selection of the next character.
  • Seite 49: Starting Up The Time Pulse Distribution

    ☛ When programming a wrong date or time (e.g. 30 FEVR), the menu is exited done without modifying date and time of the time base. ☛ In synchronization input mode, the time setting is automatic upon reception of two successives coherent time values. 5.2.
  • Seite 50: Weekly Programming Of A Circuit

    ☛ The start of pulse generation occurs after the validation of the last flashing digit provided that the preset time is coherent (<24) ☛ If the programmed time is less than two hours ahead of the time base hour, no pulse will be sent until the times match. The circuit will then automatically enter normal operation (1 or 2 pulses per minute).
  • Seite 51: Pulse Mode (E.g. Siren Control, Etc.)

    ► Using the «+» or «-» button, select the circuit to be programmed then confirm by «ENTER» button. The indication PULSE or ON/OFF flashes, unless there are already scheduled events in the selected circuit: In this case, it goes directly to step 1 or 2 ►...
  • Seite 52 ► After validation of the unit of SCHEDULING minute, the screen for deac- AN EVENT tivation of relay is displayed, RELAY: C1 ON/OFF indicating the same settings as the previous screen. The C1= OFF 08:00 day of week or the tens of hour flash.
  • Seite 53: Reviewing The Weekly Program Settings

    5.4. REVIEWING THE WEEKLY PROGRAM SETTINGS ► Using the “MENU” button, select DISPLAYING the menu: AN EVENT FRI 22 FEBR 2013 11:42:45 (LOCAL) ► Confirm by pressing «ENTER»: Depending on the content of the circuit, one of the three screens below appears and the indication C1 flashes. ►...
  • Seite 54: Programming Holiday Periods And Public Holidays

    ► The «+» button allows you to view the next program step. When the last step is displayed, the «+» button has no more effect. ► The «-» button allows you to display the previous steps. ► Press the «BACK» button to return to the choice of the relay in case you want to switch to another circuit.
  • Seite 55: Review Of Programming For Holiday Periods And Public Holidays: Erasing Periods

    ☛ When entering the programming menu of the holiday periods, the date that appears in START and END rows is the current date. ☛ When finished programming a START date, this date is automatically copied in the END row thereby simplifying the definition of the period to be programmed.
  • Seite 56: Erasing One Or More Events

    ► When there are no or no more ADISPLAYING programmed holidays, this A PUBLIC HOLIDAY screen appears: EMPTY ► Press the “BACK” button to return to the menu selection. ☛ When the «ENTER» button cancels a public holiday, the display will automatically show the next public holiday or the message EMPTY if there are no more holidays.
  • Seite 57: One » Mode

    5.7.2. «ONE » Mode : ► Pressing the «-» button will DELETING display this screen with the in- AN EVENT dication of circuit C1 flashing. REL. C1: 008 ON/OFF ► Using the «+» and «-» but- DELETING tons, you can select the circuit AN EVENT containing the event to delete REL.
  • Seite 58: Procedure In Case Of Security Code Lost

    5.8. PROCEDURE IN CASE OF SECURITY CODE LOST ☛ Please note your firmware version and then contact the After Sales Service of Gorgy Timing at 0892 68 70 68 * that will give you the factory code of the GTC RT corresponding to its firmware version.
  • Seite 59: Manual Forcing To Test Contact Output Connections

    5.11. MANUAL FORCING TO TEST CONTACT OUTPUT CONNECTIONS Pulse Rack version: unscrew the cover with a Torx No. T10 screw driving to have access Output to switches. IRIG B / AFNOR Output Sources of synchronisation 5.11.1. Forcing using an internal switch Input signal (antenna) RS485 RS232...
  • Seite 60: Rt Gtc Programming Table

    5.12. RT GTC PROGRAMMING TABLE PROGRAMMING EXAMPLE ☛ Bell circuit connected to relay C1, bells sound at: ► 8:30am, 10:00am, 10:15am, 11:30am MON, TUE, THU, FRI, SAT ► -30pm, 3:00pm, 3:15pm, 4:30pm MON, TUE, THU, FRI ☛ Open access door (connected to circuit C2): ►...
  • Seite 61 Programming table in TIMEOUT mode Circuit N° Pulse duration Days affected Triggering time MDE-Radio-Timing-GTC-3080V2.3...
  • Seite 62 Circuit C2 should be programmed in ON/OFF mode: Circuit No. Triggering type Days affected Triggering time e.g. C2 ON (relay closes) Mo-Tu 08H15 e.g. C2 OFF (relay opens) Mo-Tu 08H45 e.g. C2 ON (relay closes) Th-Fr 08H15 e.g. C2 OFF (relay opens) Th-Fr 08H45 e.g.
  • Seite 63 Programming table in CLOCK mode Circuit No. Triggering type Days affected Triggering time MDE-Radio-Timing-GTC-3080V2.3...
  • Seite 64: Technical Support

    +33 476 30 48 20 support@gorgy-timing.fr RADIO TIMING®, LEDI®, LEDICA®, HANDI® are trademarks by GORGY TIMING. Number of statement for training provider activity : 82 38 04877 38 Gorgy Timing RC74B38 - Any technical, aesthetic, color modifications can be made without notice. MDE-Radio-Timing-GTC-3080V2.3...
  • Seite 65 RELOJ PATRÓN Y PROGRAMADOR RADIO TIMING ® MANUAL DE UTILIZACIÓN MDE-Radio-Timing-GTC-3080V2.3...
  • Seite 66 RT9s lo más lejos posible de las fuentes de radiación (Rejas, antenas, material de alta frecuencia, alarmas electromecánicas...). Gorgy Timing declina cualquier responsabilidad en caso de accidentes o de daños provoca- dos por una mala utilización del RT9s.
  • Seite 67 EXPLICACIÓN DE LOS SÍMBOLOS PRESENTES EN EL PRODUCTO Peligro general – Si no se siguen correctamente las instrucciones, hay riesgo dañar los equipos. Peligro eléctrico – Si no se siguen correctamente las instrucciones, hay un riesgo de electrocución y de daños corporales. Aparato enteramente protegido por doble aislamiento.
  • Seite 68 CONTENIDO CARACTERÍSTICAS TÉCNICAS ................69 CONEXIÓN Y PUESTA EN SERVICIO ................ 73 2.1. nstalación RT GTC Caja mural ................... 73 2.2. INSTALACIÓN rtgtc rack ....................74 2.3. CONEXIÓN ........................74 PANTALLA DE BASE ....................77 DESBLOQUEO DE LAS TECLAS DE PROGRAMACIÓN ......... 78 4.1.
  • Seite 69: Características Técnicas

    CARACTERÍSTICAS TÉCNICAS ► Caja mural de plástico blanco, serigrafiada en negro en la cara delantera. Puesta en hora y programación por medio de 6 teclas en la cara delantera. Temperatura de funcionamiento: de -20° C a + 70° C; Temperatura de almacenamiento: de -30° C a + 80° C. Humedad: versión estándar 80 % de humedad relativa, versión tropicalizada 95 % de humedad relativa.
  • Seite 70 > 10 años. ► Distribución de hora por Código AFNOR NFS 87500 En opción, el Radio Timing GTC puede ser equipado con una salida código AFNOR NFS 87500, portadora de 1Khz. Aislamiento galvánico por transformador. Nivel de salida 2,2 Vcc.
  • Seite 71 Puesta en hora desde la recepción de 3 s. de código. OPCIÓN ENTRADA O SALIDA ASCII RS232 O RS 422-485 En opción, el Radio Timing GTC puede ser equipado con una entrada RS 232 o RS 422-485 o con 2 salidas RS 232 o una salida RS 422-485.
  • Seite 72 ☛ La emisión de este mensaje significa que el segundo ha pasado de 76 centésimas en el momento de la recepción del carácter «D». Conmutador SW1 Parámetros Conmutador SW1 N° switch Formato, Paridad, N° switch Tasa de Baudios Número de bits stop 7,no,2 8,no,1 8,no,2...
  • Seite 73: Conexión Y Puesta En Servicio

    2. CONEXIÓN Y PUESTA EN SERVICIO 2.1. NSTALACIÓN RT GTC CAJA MURAL ► 1 – Abrir la caja ► Tirar de los 2 botones situados a cada lado del aparato. ► Desmontar los flancos. ► Elección de la salida de los cables: por la cara trasera - 1 por canaleta hacia arriba o hacia abajo - 2 y 3 ►...
  • Seite 74: Instalación Rtgtc Rack

    230 VAC 2.2. INSTALACIÓN RTGTC RACK TERRE (obligatoire) 230 VAC ► Dimensiones: Largo 482 x Ancho 44 x Profundo 266 mm. Face avant fixation Cara delantera fijación 464.5 Face avant 2.3. CONEXIÓN ► Caja mural Salida de impulsos Face arrière 464,6 Salida 4x 10,5...
  • Seite 75 Face avant ► Rack Cara trasera Face arrière 464,6 4x 10,5 Profil 8 9 10 11 1. Cable de alimentación 7. Switch manual 464.5 2. Fusible impulsión 1A 8. Conexión ASCII (según las opciones) 3. Relés adicionales (en opción) 9. Entrada de sincronización antena (code 4.
  • Seite 76 100 metros máximo para las antenas TDF/DCF y GPS para el cable bifilar blindado. ☛ Para más información sobre el montaje de las antenas, puede consultar el modo de empleo de las antenas de Gorgy Timing en la página web www.gorgy-timing.com ☛...
  • Seite 77: Pantalla De Base

    3. PANTALLA DE BASE TDF/DCF SYNCHRO VIE 22 FEBR 2013 11:42:45 (LOCAL) IMP: 30s Sr 11:42:45 ► La primera línea de visualización indica: ► El símbolo «antena». ► El tipo de código de sincronización: TDF/DCF, GPS, AFNOR o ASCII. ► El estado de la sincronización: SYNCHRO o NO SYNC.
  • Seite 78: Desbloqueo De Las Teclas De Programación

    4. DESBLOQUEO DE LAS TECLAS DE PROGRAMACIÓN El Radio Timing GTC puede ser protegido de las manipulaciones exteriores no autorizadas gracias a la posibilidad de programar un código de protección de 4 cifras. ► Pulsando la tecla« MENU », aparece la siguiente pantalla: La indicación «NON»...
  • Seite 79: Procedimiento De Modificación O De Supresión Del Código Personal

    Nota 1: Una vez validado el código o una vez desbloqueado con ayuda de la tecla« ESC », el acceso a los menús está limitado a 15 minutos. El Radio Timing GTC se bloquea automáticamente al cabo de este periodo de tiempo.
  • Seite 80: Modos De Programación

    avant 5. MODOS DE PROGRAMACIÓN RT GTC Caja mural RT GTC Rack arrière 464,6 Botonera programador + pantalla LCD Botonera programador + pantalla LCD ► La tecla« MENU » selecciona la visualización de los diferentes menús. ► La tecla« ENTER» permite acceder al menú visualizado, la validación y la selección del siguiente carácter.
  • Seite 81: Puesta En Servicio De La Distribución De Hora Impulsional

    ☛ En caso de programación de una fecha o una hora errónea (ejemplo: 30 FEVR), la salida del menú se efectúa sin modificación de la hora y la fecha en la base de tiempos. ☛ En modo sincronizado, la puesta en hora es automática una vez recibidos dos mensajes consecutivos correctos.
  • Seite 82: Programación Semanal De Un Circuito

    ☛ El inicio de los impulsos comienza una vez validado el último carácter parpadeante, a condición de que la hora programada sea coherente (< 24). ☛ Si la hora programada adelanta menos de 2 horas con relación a la hora de base de tiempos, no se emitirá ningún impulso hasta que las horas coincidan.
  • Seite 83: Modo Tempo (Activación De Un Timbre, Etc)

    ► Con ayuda de las teclas « + » y « - », seleccionar el circuito a programar y validar con la tecla« ENTER ».. La indicación TEMPO u ON/OFF parpadea, salvo si existen eventos programados en el circuito seleccionado. En este caso, se pasa directamente a la fase 6.3.1. ó 6.3.2.
  • Seite 84 ► Una vez validados los minu- PLANIFICACION tos, aparece la pantalla de DE UN EVENTO desactivación del contacto, RELE: C1 ON/OFF indicando los mismos pará- C1= OFF 08:00 metros horarios que en la pantalla precedente. El día de la semana o las decenas de las horas parpadean: ►...
  • Seite 85: Relectura De La Programación Semanal

    5.4. RELECTURA DE LA PROGRAMACIÓN SEMANAL ► Con ayuda de la tecla « MENU », MOSTRADO seleccionar el siguiente menú: UN EVENTO VIE 22 FEBR 2013 11:42:45 (LOCAL) ► Validar con la tecla« ENTER ». En función de lo que se haya programado, aparece una de las tres pantallas siguientes y la indicación C1 parpadea: ►...
  • Seite 86: Programación De Los Periodos De Vacacionesy Los Días Festivos

    ► La tecla« + » permite visualizar el paso de programa siguiente. Una vez que aparece el último paso de programa, la tecla« + » ya no tiene efecto. ► La tecla« - » permite visualizar de nuevo los pasos precedentes. ►...
  • Seite 87: Relectura De La Programación De Los Periodos De Vacaciones Y De Días Festivosy Borrado De Ciertos Periodos

    ☛ Entrando en el menú de programación de los días festivos, la fecha que aparece en DEBUT y en FIN es la fecha del día. ☛ Al terminar la programación de una fecha de DEBUT, esta última se copia automáticamente en fecha de FIN, permitiendo así simplificar la operación de programación de los periodos.
  • Seite 88: Borrado De Una O Varias Programaciones

    ► Si no hay (o ya no hay) días fes- MOSTRANDO tivos programados, aparece la UN DIA FESTIVO siguiente pantalla: VACIO ► La tecla « BACK» permite volver al menú de relectura de los días festivos ☛ Si se suprime un día festivo con la tecla « ENTER », la pantalla muestra automáticamente el día festivo siguiente o el mensaje VIDE si no hay más días festivos.
  • Seite 89: Modo Un

    5.7.2. Modo UN ► Una presión en la tecla « - » ELIMINACION permite mostrar la siguiente DE UN EVENTO pantalla y la indicación del cir- REL. C1: 008 ON/OFF cuito C1 parpadea. ► Con ayuda de las teclas « + » y « - », seleccionar el circuito que contiene el evento a borrar (C1, C2, etc…) ►...
  • Seite 90: Procedimiento A Seguir En Caso De Extravío Del Código Personal

    N°5 ☛ Anotar la versión del firmware y contactar con el servicio postventa de Gorgy Timing 0 892 68 70 68* para obtener el código de fábrica del RT GTC que corresponde a la versión del firmware. AUT OFF ON *Llamadas desde Francia metropolitana únicamente...
  • Seite 91: Forzado Manual Para Testar Las Conexiones De Las Salidas De Los Contactos

    5.11. FORZADO MANUAL PARA TESTAR LAS CONEXIONES DE LAS SALIDAS DE LOS CONTACTOS. Versión rack: desatornillar los tornillos del capó con un destornillador Torx N°T10 Salida de impulsos para acceder a los conmutadores. Salida IRIG B / AFNOR Introduzca el código 5.11.1.
  • Seite 92: Tabla De Programación Rt Gtc

    5.12. TABLA DE PROGRAMACIÓN RT GTC EJEMPLO DE PROGRAMACIÓN ☛ Circuito de timbres conectado al relé C1, activación de los timbres a: ► 08H30, 10H00, 10H15, 11H30 los LUNES, MARTES, JUEVES, VIERNES, y SÁBADOS. ► 13H30, 15H00, 15H15, 16H30 los LUNES, MARTES, JUEVES y VIERNES. ☛...
  • Seite 93 Tabla de programación en modo TEMPORIZACIÓN Circuito N° Tiempo de cierre Días afectados Hora de activación MDE-Radio-Timing-GTC-3080V2.3...
  • Seite 94 Para el circuito C2 se trata pues de una programación en modo ON/OFF. Circuito N° Tiempo de activación Días afectados Hora de activación EX: C2 ON (Cierre del relé) Lu-Ma 08H15 EX: C2 OFF (Apertura del relé) Lu-Ma 08H45 EX: C2 ON (Cierre del relé) Jue-Vie 08H15...
  • Seite 95 Tabla de programación en modo RELOJ Circuito N° Tiempo de activación Días afectados Hora de activación MDE-Radio-Timing-GTC-3080V2.3...
  • Seite 96: Soporte Técnico

    GORGY TIMING. ® ® ® ® Gorgy Timing RC74B38 Cualquier modificación de orden técnico, estético o de color pueden realizarse sin previo aviso. Número de declaración de actividad de prestatario de formación: : 82 38 04877 38 MDE-Radio-Timing-GTC-3080V2.3...
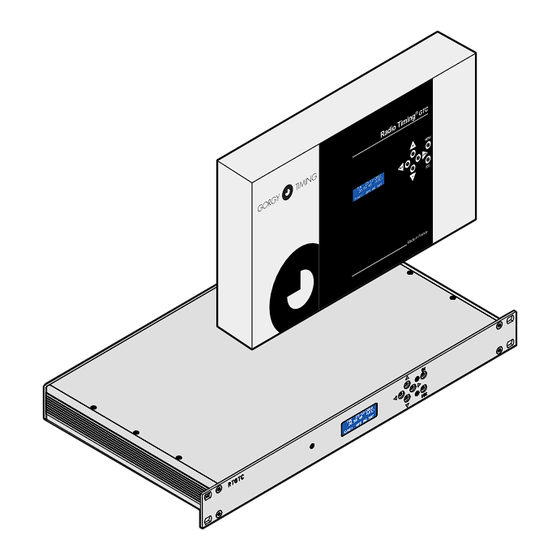
  • Seite 97 H A U P T U H R & S C H A L T U H R RADIO TIMING ® BEDIENUNGSANLEITUNG MDE-Radio-Timing-GTC-3080V2.3...
  • Seite 98 Sollte die RT GTC nach einem Stromausfall die Uhrzeit nicht mehr gespeichert haben, weist dies auf eine leere Sicherungsbatterie hin. Wenden Sie sich zum Austausch der Sicherungs- batterie an den Kundendienst von Gorgy Timing. (Siehe Rückseite der vorliegenden Anleitung) Sollten am Gerät Änderungen vorgenommen oder dieses geöffnet worden sein, ohne dass ein vorheriges Einverständnis seitens des Kundendienstes vorliegt, können Gewährleistung-...
  • Seite 99: Produktkennzeichnung

    PRODUKTKENNZEICHNUNG Allgemeine Gefahr - Wenn die Anweisungen nicht befolgt werden, besteht die Gefahr von Schäden an den Geräten. Elektrische Gefahr - Wenn die Anweisungen nicht befolgt werden, besteht die Gefahr von Stromschlägen und Verletzungen. Gerät durch doppelte Isolierung geschützt. Vorsicht Befolgen Sie die Anweisungen und Vorsichtsmaßnahmen um Ihre Sicherheit sowie die Ihrer Umgebung zu gewährleisten und um Ihr Gerät vor Schäden zu bewahren.
  • Seite 100 INHALTSVERZEICHNIS TECHNISCHE EIGENSCHAFTEN ................101 INBETRIEBNHAME UND ANSCHLUSS ..............105 2.1. Installation RT GTC Wandgehäuse .................. 105 2.2. Installation RT GTC Rack ....................106 2.3. ANSCHLUSS ........................106 LCD ANZEIGE ......................109 PROGRAMMIERTASTEN ENTRIEGELN ..............110 4.1. PROGRAMMIERTASTEN ENTRIEGELN ................ 110 4.2.
  • Seite 101: Technische Eigenschaften

    1. TECHNISCHE EIGENSCHAFTEN ► *Weißes Kunststoffgehäuse mit schwarzer Beschriftung. Einstellung der Uhrzeit und Programmierung über 6 Tasten auf der Fronseite. Betriebstemperatur: -20° C + 70° C. Lagertemperatur: -30° C + 80° C. Feuchtebeständigkeit: Standardausführung 80% , Tropenausführung 95%. CE-Kennzeichnung elektromagnetische Verträglichkeit. Gehäusemaße: L 373 x H 206 x T 82,5 mm.
  • Seite 102: Stromversorgung

    ► Stromversorgung 230VAC +10% -15% / 50-60Hz oder 115V. Verbrauch 45 VA. Ausgestattet mit einem Netzfilter und einer Sicherung. ► Anzeige LCD-Anzeige mit 80 Zeichen Zeichenhöhe: 3,5 mm ► Zeitbasis CMOS-Technologie Low-Power-Mikrocontroller 80C51. Quarz 32,768 Khz. Genauigkeit 0.1 Sek./Std. zwichen 20° C und 30° C. Autonomie der Zeitbasis >...
  • Seite 103: Externe Synchronisation

    EXTERNE SYNCHRONISATION Die Hauptuhr GTC kann mit 4 verschiedene Signale synchronisiert werden: ► DCF oder TDF Funksynchronisation. ► GPS Synchronisation. ► Code AFNOR NFS 87500/IRIG B Synchronisation. ► Code ASCII Synchronisation. ► TDF Funksynchronisation (Eingangscode) Die Hauptuhr wird mit einer Antenne 3F1 ausgesttatet. (Siehe Hinweis). ►...
  • Seite 104 ☛ Dies bedeutet, daß mit Empfang des Zeichens «D» 76 Hundertstelsekunden vergangen sind. Dipschalter SW1 Dipschalter SW1 Parameter Switch Nr. Switch Nr. Format, Parität, Baudrate NB Stop Bit 7,no,2 8,no,1 8,no,2 1200 7,0,1 2400 7,odd,1 4800 7,even,1 9600 7,1,1 9600 8,0,1 9600 8,odd,1...
  • Seite 105: Inbetriebnhame Und Anschluss

    2. INBETRIEBNHAME UND ANSCHLUSS 2.1. INSTALLATION RT GTC WANDGEHÄUSE ► 1 - Gehäuse öffnen ► Ziehen Sie beide Knöpfe links und rechts vom Gehäuse. ► Abdeckungen ablegen. ► Wahl der Kabelausgänge: von der Rückseite - 1 ► Von oben oder unten - 2 et 3 ►...
  • Seite 106: Installation Rt Gtc Rack

    230 VAC GROUND ( required 230 VAC 2.2. INSTALLATION RT GTC RACK ► Gehäusemaße: L 482 x H 44 x T 266 mm. Befestigung Frontseite Face avant fixation 464.5 Face avant 2.3. ANSCHLUSS ► Wandgehäusel Ausgang Min. Imp. Ausgang IRIGB /AFNOR Eingang Antenne Face arrière 464,6...
  • Seite 107 Face avant ► Rack Rückseite Face arrière 464,6 4x 10,5 Profil 8 9 10 11 1. Stromkabel 7. Manueller Schalter 464.5 2. Impuls Sicherung 1A 8. ASCII Anschluß (Option abhängig) 3. Zusätzliche Relais (Optional) 9. Antenne Synchronisationseingang (Input 4. NTP Eingang Code) 5.
  • Seite 108 Verkabelung: ► RJ 45 kabel für NTP Verbindung (maximale Länge 100m.) ► Code AFNOR Verbindung (0.8mm² Kabelstärke) : AWG24 oder mehrpolig (maximal Länge 20 km) ► AWG22 Kabel für IRIG B ► Antennen Kabel 9/10 SYT1 geschirmt. Antennenkabel Verlängerung: ► Maximal 100m für TDF/DCF und GPS Antennen mit geschirmtem Kabel.
  • Seite 109: Lcd Anzeige

    3. LCD ANZEIGE TDF/DCF SYNCHRO FRE 22 FEBR 2013 11:42:45 (LOKAL) IMP: 30s Sr 11:42:45 ► Erste Zeile: ► Antennensymbol. ► Synchronisationsart: TDF/DCF, GPS, AFNOR oder ASCII. ► Synchronisation Status: SYNCHRO oder KEIN SYNC. ► Bei einer autonome Uhr erscheint nur AUTONOM. ►...
  • Seite 110: Programmiertasten Entriegeln

    4. PROGRAMMIERTASTEN ENTRIEGELN Die Bedienung der Hauptuhr RT GTC kann mit einem 4 stelligen Zugangscode geschütz werden ► Bei Druck auf die «MENU» Taste erscheint folgende Anzeige: «NEIN» blinkt. CODE? JA/NEIN ► Drücken Sie auf «ENTER» um direkt auf Kapitel 6 zu gelangen. ►...
  • Seite 111: Zugangscode Ändern Oder Zugangscode Entfernen

    Hinweis 1: Nach Entriegelung der Programmiertasten (Code Eingabe oder druck auf«ESC» Taste), ist der Zugriff auf 15 Min. begrenzt. Danach verriegeln sich die Tasten automatisch. Hinweis 2: nachdem Sie Ihren persönlichen Code bestätigt haben, müssen Sie diesen Code eingeben um in das Menu zu gelagen. ☛...
  • Seite 112: Programmier Modus

    avant 5. PROGRAMMIER MODUS RT GTC Wandgehäuse RT GTC Rack arrière Programmiertasten + LCD Bildschirm Programmiertasten + LCD Bildschirm 464,6 ► Die «MENU» Taste ermöglicht die Auswahl verschiedener Menu . ► Die «ENTER» Taste ermöglicht den Zugriff, die Bestätigung und die Zeichenauswahl in dem angezeigtem Menu.
  • Seite 113: Einstellung Vom Minutenimpuls Ausgang

    ☛ Bei falscher Programmierung zum Beispiel (30 FEBR) werden die Einstellung nicht übernommen. ☛ Mit einer externen Synchronisation (Bspl. DCF) erfolgt die Zeiteinstellung automatisch. 5.2. EINSTELLUNG VOM MINUTENIMPULS AUSGANG ☛ Die angeschlossenen Nebenuhren der Minutenimpulslinie müssen alle auf die gleiche Zeit eingestellt sein. ►...
  • Seite 114: Wochenprogrammierung Von Einem Relais

    ☛ Der Impulsausgang wird aktiviert nach Eingabe des letzten blinkenden Zeichen. Vorrausgesetzt die Angaben sind richtig. (< 24). ☛ Ist die eingegeben Zeit im Vergleich zu der Zeitbasis geringer als zwei Stunden, werden kein Impuls ausgegeben bis die Zeiten übereinstimmen.. Danach werden die Impuls automatische im Normalmodus gesendet.
  • Seite 115: Modus Timer (Klingel, Usw

    ► Mit Hilfe der «+» und «-» Tasten, wählen Sie den gewünschen Relais und bestätigen Sie mit Hilfe der «ENTER» Taste. Die Anzeige TIMER oder ON/OFF blinkt, ausser ess wurden schon ein Modus für diesen Relais gewählt: In diesem Fall gehen Sie zu Punkt 6.3.1.
  • Seite 116 ► Nach Einstellung der Minuten PROGRAMMIERUNG erscheint das Deaktivations- EINES EREIGNISSES Feld für Relais RELE: C1 ON/OFF gleichen Einstellungs C1= OFF 08:00 Parameter wie zuvor. Der Wochentag oder die Uhrzeit: ► Mit Hilfe der «+», «-» und «ENTER» Tasten, wählen Sie den Wochentag und die Uhrzeit für die Deaktivierung des gewählten Relais.Nach Einstellung der Minuten erscheint ein neues Relais-Aktivierungsfeld mit den gleichen Einstellungsparameter wie zuvor: der Wochentag oder die Uhrzeit blinkt.
  • Seite 117: Wochenprogrammierung Überprüfen

    5.4. WOCHENPROGRAMMIERUNG ÜBERPRÜFEN ► Mit Hilfe der «MENU» Taste, ANZEIGE wählen Sie folgendes Menu: EINES EREIGNISSES FRE 22 FEBR 2013 11:42:45 (LOKAL) ► Bestätigen Sie mit der «ENTER» Taste: Gemäß der Programmierung erscheint eins von den drei unteren Felder. C1 blinkt: ANZEIGE ►...
  • Seite 118: Programmierung Von Ferienzeiten Und Feiertagen

    ► Mit Hilfe der «+» Taste gehen Sie auf den nächsten Programmschritt. ► Mit Hilfe der «-» Taste gehen Sie ein Programmschritt zurück. ► Mit Hilfe der «BACK» Taste gehen Sie auf das vorherige Feld zurück (Relais Auswahl). 5.5. PROGRAMMIERUNG VON FERIENZEITEN UND FEIERTAGEN. Diese Funktion ermöglicht die Relais an bestimmten Tagen auszuschalten.
  • Seite 119: Ferien- Und Feiertagsprogramme Überprüfen

    ☛ Beim ersten Zugriff auf das Menu ist das angezeigte Datum das aktuelle Datum. ☛ Nach Bestätigung des Anfangsdatum, erscheint dieses Datum automatisch im Enddatum, damit ist die Programmierung vereinfacht ☛ Um ein einzigen Tag zu programmieren (Bspl. 05. Okt.), geben Sie 05. Okt.
  • Seite 120: Löschen Von Einem Oder Mehreren Programmen

    ► Nach dem letzten Eintrag ers- ANZEIGE cheint folgendes Bild: FEIERTAGEN PROG. LEER ► Mit Hilfe der «BACK» Taste gelangen Sie auf das vorherige Menu. ☛ Nach dem Sie einen Feiertag mit «ENTER» gelöscht haben, erscheint automatische der nächste Feiertag oder die Nachricht LEER. 5.7.
  • Seite 121: Modus Einen

    5.7.2. Modus EINEN ► Hilfe «-» Taste LOSCHEN gelangen Sie auf folgendes EINES EREIGNISSES Menu C1 blinkt. REL. C1: 008 ON/OFF ► Mit Hilfe der «+» und «-» Taste, wählen Sie den gewünschten Relais aus (C1, C2, etc…) ► Bestätigen Sie den gewählten LOSCHEN Relais mit ENTER.
  • Seite 122: Vorgehensweise Bei Code Verlust

    5.8. VORGEHENSWEISE BEI CODE VERLUST Force N°6 Force ☛ N°5 Notieren Sie die Firmware-Version und kontaktieren Sie unseren Support Tel. 0721-60156 oder support@gorgy-timing.de. Sie erhalten danach den Werkscode entsprechend Ihrer Firmware-Version AUT OFF ON Force ► Geben Sie den Code ein (siehe Kapitel 5.1). N°4 Force Nach Entriegelung der Programmiertasten ist der Zugriff auf 15 Min.
  • Seite 123: Manueller Test Der Relais

    5.11. MANUELLER TEST DER RELAIS Ausgang Rack Ausführung: lösen Sie die Schrauben der Abdeckung mit einem Torx T10 Min. Imp. Ausgang Schraubenzieher um an die Schalter zu gelangen. IRIGB /AFNOR Eingang Antenne 5.11.1. Relais Test über interne Schalter oder Synchr. Code RS485 RS232 ►...
  • Seite 124: Tabelle Zur Programmierung Der Rt Gtc

    5.12. TABELLE ZUR PROGRAMMIERUNG DER RT GTC BEISPIEL EINER PROGRAMMIERUNG ☛ Schaltkreis für ein Läutwerk, angeschlossen am Relais C1, Auslösen der Signale um: ► 08H30, 10H00, 10H15, 11H30 Montag, Dienstag, Donnerstag, Freitag und Samstag ► 13H30, 15H00, 15H15, 16H30 Montag, Dienstag, Donnerstag und Freitag ☛...
  • Seite 125 Tabelle zur Programmierung im Modus Timer Relais Nr. Schließdauer Zeitpunkt Uhrzeit MDE-Radio-Timing-GTC-3080V2.3...
  • Seite 126 Tabelle zur Programmierung im ON/OFF Modus Relais Nr. Art des Auslösens Zeitpunkt Uhrzeit ON (Relais schließt) Mo-Di 08H15 OFF (Relais öffnet) Mo-Di 08H45 ON (Relais schließt) Do-Fr 08H15 OFF (Relais öffnet) Do-Fr 08H45 ON (Relais schließt) 08H15 OFF (Relais öffnet) 08H45 ON (Relais schließt) Mo-Di...
  • Seite 127 Tabelle zur Programmierung im ON/OFF Modus Relais Nr. Art des Auslösens Zeitpunkt Uhrzeit MDE-Radio-Timing-GTC-3080V2.3...
  • Seite 128 +33 476 30 48 20 support@gorgy-timing.de RADIO TIMING®, LEDI®, LEDICA®, HANDI® Marke und Modelle geschützt GORGY TIMING. GORGY TIMING RC 74 B 38 - Änderungen der Technik und Gestaltung vorbehalten Numéro de déclaration d’activité de prestataire de formation : 82 38 04877 38 MDE-Radio-Timing-GTC-3080V2.3...
  • Seite 129 NOTES MDE-Radio-Timing-GTC-3080V2.3...
  • Seite 130 GORGY TIMING. ® ® ® ® GORGY TIMING RC 74 B 38 - Cualquier modificación de orden técnico, estético o de color pueden realizarse sin previo aviso. RADIO TIMING , LEDI , LEDICA , HANDI Marke und Modelle geschützt GORGY TIMING.

Inhaltsverzeichnis