Chauvin Arnoux C.A 6240 Bedienungsanleitung
Micro-ohmmeter
Vorschau ausblenden
Andere Handbücher für C.A 6240:
- Bedienungsanleitung (25 Seiten) ,
- Kurzanleitung (2 Seiten) ,
- Bedienungsanleitung (21 Seiten)
Inhaltsverzeichnis
Werbung
Verfügbare Sprachen
Verfügbare Sprachen
Quicklinks
Werbung
Kapitel
Inhaltsverzeichnis

Verwandte Anleitungen für Chauvin Arnoux C.A 6240


Inhaltszusammenfassung für Chauvin Arnoux C.A 6240
- Seite 1 C.A 6240 „ Microhmmètre „ Microhmmeter „ Micro-Ohmmeter „ Microhmmetro „ Micróhmetro F R A N Ç A I S Notice de fonctionnement E N G L I S H User's manual D E U T S C H Bedienungsanleitung I T A L I A N O Manuale d’uso...
- Seite 3 „ La catégorie de mesure I correspond aux mesurages réalisés sur des circuits non reliés directement au réseau. Vous venez d’acquérir un microhmmètre C.A 6240 et nous vous remercions de votre confiance. Pour obtenir le meilleur service de votre appareil : „...
-
Seite 4: Précautions D'emploi
Vérifier que le commutateur est en position OFF avant de brancher la prise secteur pour recharger la batterie de l’appareil. Ne pas immerger le microhmmètre C.A 6240. Utiliser des accessoires de branchement dont la catégorie de surtension et la tension de service sont supérieures ou égales à celles de l’appareil de mesure (50V Cat III). -
Seite 5: Inhaltsverzeichnis
SOMMAIRE 1. PRÉSENTATION ..........................6 2. CHARGE BATTERIE ........................8 3. MESURE DE RÉSISTANCE ......................9 3.1. Mesure de très faible valeur .....................10 3.2. Mesures répétitives ......................11 3.3. Messages d’erreur ......................11 4. MÉMORISATION DE RÉSULTATS ....................13 4.1 Mise en mémoire .......................13 4.2. Relecture mémoire ......................14 4.3. -
Seite 6: Présentation
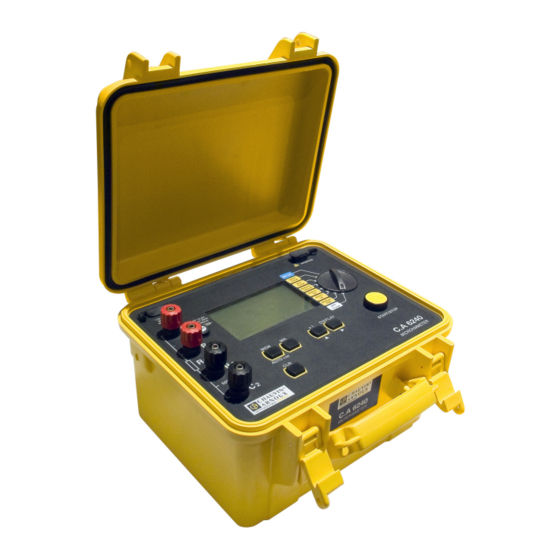
1. PRÉSENTATION... - Seite 7 Le Microhmmètre C.A 6240 est un appareil de mesure portatif destiné à la mesure de très faibles valeurs de résistances. Il est présenté dans un boîtier chantier. Il est alimenté par une batterie rechargeable avec chargeur intégré. Fonction de mesure résistance...
-
Seite 8: Charge Batterie
2. CHARGE BATTERIE Charge Capacité courante de la Charge batterie exprimée en %. Durée de la charge : 3h30 Commencer par charger complètement la batterie avant la première utilisation. Sur le calibre 10A, l’autonomie est de 1h20 environ. Il est donc préférable de charger la batterie avant d’entamer une campagne de mesures. -
Seite 9: Mesure De Résistance
3. MESURE DE RÉSISTANCE 1) Brancher les 2 câbles sur les 4 bornes de mesure, puis les 2 pinces Kelvin sur l’objet à tester. Ce dernier doit être hors tension. SET-UP Ω 10mA 400 Ω 2) Placer le commutateur sur la 10mA position 400W - 10mA. -
Seite 10: Mesure De Très Faible Valeur
… ou débrancher une des 2 pinces. Lors d’une mesure sur un élément inductif, l’énergie accumulée par cet élément durant la mesure doit ensuite se libérer. Il ne faut alors en aucun cas toucher ou débrancher les cordons de mesure avant d’avoir arrêter la mesure et d’avoir attendu au minimum 10 secondes la décharge complète de l’élément testé. -
Seite 11: Mesures Répétitives
3.2. MESURES RÉPÉTITIVES START/STOP Ω Brancher les pinces sur le premier objet à mesurer. La mesure démarre automatiquement. Retirer les pinces, la mesure s’arrête et le résultat s’affiche. Brancher les pinces sur le HOLD deuxième objet à mesurer. La mesure redémarre automatiquement. - Seite 12 … l’appui sur le bouton START/ STOP est sans effet, la mesure est impossible. Supprimer la tension pour effectuer la mesure. START/STOP Si une tension supérieure à 20 V est appliquée entre les bornes C1 et C2, le fusible HOLD >...
-
Seite 13: Mémorisation De Résultats
4. MÉMORISATION DE RÉSULTATS Le stockage des données est organisé en objets (OBJ.), chacun pouvant contenir plusieurs tests (TEST). OBJ. correspond à l’objet testé et chaque test correspond à une mesure effectuée sur cet objet. L’appareil peut stocker 100 mesures. 4.1 MISE EN MÉMOIRE ... -
Seite 14: Relecture Mémoire
4.2. RELECTURE MÉMOIRE Il faut tout d’abord arrêter la mesure en appuyant sur le bouton START/STOP. Pour changer d’objet. P o u r re l i re t o u s l e s t e s t s OBJ. -
Seite 15: Transfert Des Données Sur Pc
HOLD OBJ. TEST OBJ. TEST µ Ω START/STOP L’enregistrement automatique est activé. A chaque nouvelle mesure, le numéro du test est incrémenté et la mesure est enregistrée. P o u r a r r ê t e r l ’ e n r e g i s t r e m e n t automatique, appuyer sur le bouton START/STOP. -
Seite 16: Autres Fonctions (Set-Up)
5. AUTRES FONCTIONS (SET-UP) SET-UP SET-UP Ω 10mA Ω 10mA 4000m Ω 100mA 400m Ω Ω 4000µ Ω Charge 5.1. EFFACEMENT COMPLET DE LA MÉMOIRE >2s >2s 5.2. PROGRAMMATION DE L’HEURE >2s Pour modifier Pour modifier >2s les minutes l’heure 5.3. -
Seite 17: Programmation Du Temps D'arrêt Automatique
5.4. PROGRAMMATION DU TEMPS D’ARRÊT AUTOMATIQUE >2s Pour choisir l’arrêt automatique (ON) ou non (OFF) P o u r r é g l e r d u r é e fonctionnement : >2s 5, 10 ou 15 mn. 5.5. VISUALISATION DES PARAMÈTRES INTERNES DE L’APPAREIL >2s Configuration de Numéro de série... -
Seite 18: Caractéristiques
6. CARACTÉRISTIQUES 6.1. CONDITIONS DE RÉFÉRENCE Grandeurs d’influence Valeurs de référence Température 23 ± 3 °C Humidité relative 45 à 55 % HR Tension d’alimentation 6 V ± 0,2 V Tension externe présente aux bornes de la résistance sous test nulle Inductance de la résistance sous test nulle... -
Seite 19: Caractéristiques Des Mesures De Courant Circulant Dans La Résistance Mesurée
6.4. CARACTÉRISTIQUES DES MESURES DE COURANT CIRCULANT DANS LA RÉSISTANCE MESURÉE 5,00 – 40,0 – 0,400 – 4,00 – Domaine de mesure 39,99 mA 399,9 mA 3,999 A 11,00 A 10 mA 100 mA Résolution 1 mA 10 mA Précision ±... -
Seite 20: Conditions D'environnement
L’autonomie est fonction des calibres utilisés Nombre de mesures (1) Calibre 10 A Calibre 1 A 3 500 Calibre 100 mA 4 500 Calibre 10 mA 5 000 Appareil en veille ou à l’arrêt autonomie de 4 à 6 mois (1) établi pour des mesures d’une durée de 5 s toutes les 25 s. -
Seite 21: Maintenance
Le remplacement de la batterie devra être effectué par Manumesure ou un réparateur agréé par CHAUVIN ARNOUX. Ne monter que la batterie préconisée par le constructeur. Le changement de batterie n’entraîne pas la perte des données en mémoire. Par contre, il faut reprogrammer la date et l’heure (voir §... -
Seite 22: Réparation
Coordonnées disponibles sur notre site : http://www.chauvin-arnoux.com ou par téléphone aux numéros suivants : 02 31 64 51 55 (centre technique Manumesure) , 01 44 85 44 85 (Chauvin Arnoux). Pour les réparations hors de France métropolitaine, sous garantie et hors garantie, retournez l’appareil... -
Seite 23: Garantie
8. GARANTIE Notre garantie s’exerce, sauf stipulation expresse, pendant douze mois après la date de mise à disposition du matériel. Extrait de nos Conditions Générales de Vente, communiquées sur demande. La garantie ne s’applique pas suite à : „ une utilisation inappropriée de l’équipement ou à une utilisation avec un matériel incompatible ; „... -
Seite 24: Pour Commander
9. POUR COMMANDER C.A 6240 ........................P01.1432.00 Le C.A 6240 est livré dans une boîte en carton avec une sacoche de transport d’accessoires contenant : un jeu de 2 pinces Kelvin 10A avec câble de 3m, un cordon d’alimentation secteur de 2m, un câble de communication optique / USB,... - Seite 25 „ Measurement category I corresponds to measurements taken on circuits not directly connected to the network. Thank you for buying a C.A 6240 microhmmeter. For best results: „ read this operating manual carefully „ observe the precautions for use Attach one of the 5 specifications labels, with your appropriate language, on the inside of the lid.
-
Seite 26: Precautions For Use
Check that the switch is set to OFF before plugging in the mains cord to recharge the battery of the instrument. Do not immerse the C.A 6240 microhmmeter in water. Use connection accessories which have an overvoltage category and service voltage greater than or equal to those of the measuring instrument (50 V Cat III). - Seite 27 CONTENTS 1. PRESENTATION ...........................28 2. BATTERY CHARGE ........................30 3. RESISTANCE MEASUREMENT ....................31 3.1. Measurement of a very low value ..................32 3.2. Repetitive measurements ....................33 3.3. Error messages .........................33 4. STORAGE OF RESULTS ......................35 4.1 Storing ..........................35 4.2. Read memory ........................36 4.3.
-
Seite 28: Presentation
1. PRESENTATION... - Seite 29 The C.A 6240 Microhmmeter is a portable measuring instrument intended for the measurement of very low resistance values. It is enclosed in a site case and powered by a rechargeable battery with a built-in charger. Measurement functions resistance Controls 8-position switch, 5-key keypad, and 1 START/STOP button...
-
Seite 30: Battery Charge
2. BATTERY CHARGE Charge Current battery Charge capacity in %. Charging time: 3 h 30 Start by fully charging the battery before the first use. In the 10 A range, the battery life is approximately 1h20. It is therefore best to charge the battery before starting series of measurements. -
Seite 31: Resistance Measurement
3. RESISTANCE MEASUREMENT 1) Connect the 2 cables to the 4 measurement terminals, then the 2 Kelvin clips to the object to be tested, which must not be live. SET-UP Ω 10mA 2) Set the switch to 400W - 10 mA. 400 Ω... -
Seite 32: Measurement Of A Very Low Value
...or disconnect one of the 2 clips. The energy accumulated in an inductive component when a measurement is made on it must be released. You must never in any circumstances touch or disconnect the measurement leads until you have stopped making the measurement and waited at least ten seconds for all of the energy in the item tested to be dissipated. -
Seite 33: Repetitive Measurements
3.2. REPETITIVE MEASUREMENTS START/STOP Ω Connect the clips to the first object to be measured. The measurement starts automatically. Withdraw the clips: the measurement stops and the result is displayed. Connect the clips HOLD to the second object to be measured. The measurement restarts automatically. - Seite 34 ...pressing the START/STOP button has no effect: the measurement is impossible. Remove the voltage to make the measurement. START/STOP If a voltage greater than 20 V is applied between terminals C1 and C2, the fuse on the front HOLD >...
-
Seite 35: Storage Of Results
4. STORAGE OF RESULTS Data storage is organised into objects (OBJ.), each of which can contain several tests (TEST). OBJ. corresponds to the object tested and each test corresponds to a measurement made on the object. The instrument can store 100 measurements. 4.1 STORING ... -
Seite 36: Read Memory
4.2. READ MEMORY It is necessary first of all to stop the measurement by pressing the START/STOP button. To change objects. To read all tests containing a OBJ. TEST record. µ Ω To exit from the read memory function. 4.3. -
Seite 37: Transfer Of Data To Pc
HOLD OBJ. TEST OBJ. TEST µ Ω START/STOP At each new measurement, the test number is Automatic recording activated. incremented and the measurement is recorded. To stop automatic recording, press the START/STOP button. Ω START/STOP 4.6. TRANSFER OF DATA TO PC HX0056-Z X02870 First of all, install the driver... -
Seite 38: Other Functions (Set-Up)
5. OTHER FUNCTIONS (SET-UP) SET-UP SET-UP Ω 10mA Ω 10mA 4000m Ω 100mA 400m Ω Ω 4000µ Ω Charge 5.1. COMPLETE ERASURE OF MEMORY >2s >2s 5.2. PROGRAMMING THE TIME >2s To c h a n g e >2s To change the the minutes hour 5.3. -
Seite 39: Programming Of Automatic Stopping Time
5.4. PROGRAMMING OF AUTOMATIC STOPPING TIME >2s To choose automatic power-down select “ON”, if not, choose “OFF”. To adjust the On time: 5, 10, or 15 mins >2s 5.5. DISPLAYING THE INTERNAL PARAMETERS OF THE INSTRUMENT >2s Configuration of Serial number the instrument MEMMRCLR °C°F... -
Seite 40: Characteristics
6. CHARACTERISTICS 6.1. REFERENCE CONDITIONS Quantities of influence Reference values Temperature 23 ± 3 °C Relative humidity 45 to 55 % RH Supply voltage 6 V ± 0,2 V External voltage present on the terminals of the resistance being zero tested Inductance of the resistance being tested zero... -
Seite 41: Characteristics Of The Measurements Of The Current Flowing In The Resistance Measured
6.4. CHARACTERISTICS OF THE MEASUREMENTS OF THE CURRENT FLOWING IN THE RESISTANCE MEASURED 5,00 – 40,0 – 0,400 – 4,00 – Measurement range 39,99 mA 399,9 mA 3,999 A 11,00 A 10 mA 100 mA Resolution 1 mA 10 mA Accuracy ±... -
Seite 42: Environmental Conditions
The battery life depends on the ranges used Number of measurements (1) 10 A range 1 A range 3 500 100 mA range 4 500 10 mA range 5 000 Instrument on standby or off battery life 4 to 6 months (1) established for measurements lasting 5s, every 25s. -
Seite 43: Maintenance
7.1.1. RECHARGING THE BATTERY Recharge the battery (see §2) The battery must be replaced by Manumesure or by a repairer approved by Chauvin Arnoux. Only fit the battery recommended by the manufacturer. Replacing the battery does not cause a loss of the data in memory. -
Seite 44: Warranty
8. WARRANTY Except as otherwise stated, our warranty is valid for twelve months counting from the date on which the equipment is made available. Extract from our General Conditions of Sale, communicated on request. The warranty does not apply in the following cases: „... -
Seite 45: To Order
9. TO ORDER C.A 6240 ........................P01.1432.00 The C.A 6240 is delivered in a cardboard box with a carrying bag of accessories containing: one set of two 10 A Kelvin clips with a 3 m cable, one 2 m power cord, one optical / USB communication cable, “Micro Ohmmeter Transfer”... - Seite 47 „ Die Messkategorie I bezieht sich auf Messungen an Kreisen, die nicht direkt mit dem Stromnetz verbunden sind. Sie haben ein C.A 6240 Micro-Ohmmeter erworben, und wir danken Ihnen für Ihr Vertrauen. Für die Erlangung eines optimalen Betriebsverhaltens Ihres Gerätes: „...
-
Seite 48: Bedienungshinweise
Stellen Sie sicher, dass der Wahlschalter in Position OFF steht bevor der Netzstecker zur Aufladung des Akkus ans Netz angeschlossen wird. Micro-Ohmmeter C.A 6240 nicht eintauchen. Verwenden Sie Anschlusszubehör, dessen Überspannungskategorie und Betriebsspannung dem Messgerät entsprechen (50 V Cat III). Verwenden Sie nur Zubehör, das den Sicherheitsauflagen entspricht (IEC 61010-2-031). - Seite 49 INHALTSVERZEICHNIS 1. PRÄSENTATION ...........................50 2. AKKULADUNG ..........................52 3. MESSUNG DES WIDERSTANDES ....................53 3.1. Messen kleinster Widerstände..................54 3.2. Mehrfachmessungen ......................55 3.3. Fehlermeldungen ......................55 4. MESSWERTSPEICHER .......................57 4.1 Speichern ...........................57 4.2. Ablesen aus Speicher .......................58 4.3. Löschung eines Speicherwerts ..................58 4.4. Sonstige Informationen ....................58 4.5.
-
Seite 50: Präsentation
1. PRÄSENTATION... - Seite 51 C.A 6240 ist ein tragbares Micro-Ohmmeter zum Messen kleinster Widerstände. Es verfügt über ein baustellentaugliches Gehäuse und wird mit einem wiederaufladbaren Akku versorgt (eingebautes Ladegerät). Messfunktionen Widerstand Vorgangsweise 8-Stellungsschalter, 5 Tasten, 1 Ein-Aus-Knopf Anzeige beleuchtete LCD-Anzeige 100 x 57 mm, 2 Zeilen Simultan-...
-
Seite 52: Akkuladung
2. AKKULADUNG Charge M o m e n t a n e A k k u - Charge Leistung in %. Ladedauer: 3h30 Vor der ersten Verwendung muss der Akku vollständig aufgeladen werden. Im Messbereich 10A bietet der Akku ca. 1h20 Betriebsdauer. Bevor Sie längere Messungen vornehmen, sollte daher der Akku aufgeladen werden. -
Seite 53: Messung Des Widerstandes
3. MESSUNG DES WIDERSTANDES 1) Die 2 Kabel an die 4 Messbuchsen anschließen, dann die 2 Kelvin-Klemmen an das Testobjekt anschließen. Das Testobjekt darf nicht unter Spannung stehen. SET-UP Ω 10mA 400 Ω 2) Schalter auf 400W – 10 mA 10mA stellen. -
Seite 54: Messen Kleinster Widerstände
... oder nehmen Sie eine der Klemmen ab. Nach Induktiv-Messungen muss die vom Prüfling gespeicherte Energie wieder abgeleitet werden. Die Messleitungen weder berühren noch abnehmen, solange die Messung läuft, und dann mindestens weitere 10 Sekunden warten, bis der Prüfling vollständig entladen ist. Diese Anweisung muss unbedingt beachtet werden, andernfalls besteht die Gefahr eines Lichtbogens, der Gerät und Bediener gefährden könnte! I n b e i d e n F ä... -
Seite 55: Mehrfachmessungen
3.2. MEHRFACHMESSUNGEN START/STOP Ω Die Klemmen werden an das erste Testobjekt angeschlossen, der Messvorgang startet automatisch. Nun die Klemmen abnehmen; der Messvorgang wird unterbrochen und der HOLD Wert angezeigt. Die Klemmen werden an das nächste Testobjekt angeschlossen, und der µ... -
Seite 56: Messbereichsüberschreitung
... ist die START/STOP-Taste wirkungslos und ein Messen nicht möglich. Vo r d e m M e s s e n m u s s d i e Spannung entfernt werden. START/STOP D i e S i c h e r u n g a n d e r Gerätevorderseite „brennt durch“... -
Seite 57: Messwertspeicher
4. MESSWERTSPEICHER Die Datenspeicherung ist nach Gegenständen (OBJ) sortiert, denen mehrere Tests (TEST) zugeordnet werden können. OBJ steht für das Testobjekt, jeder Test entspricht einem Messwert für diesen Gegenstand. Das Gerät kann bis zu 100 Messwerte speichern. 4.1 SPEICHERN Der gemessene Wert kann gespeichert werden. -
Seite 58: Ablesen Aus Speicher
4.2. ABLESEN AUS SPEICHER Zuerst muss mit START/STOP der Messvorgang unterbrochen werden. Anderen Gegenstand anzeigen. Alle Tests mit Speicherwerten OBJ. TEST anzeigen. µ Ω Funktion „Ablesen aus Speicher“ verlassen. 4.3. LÖSCHUNG EINES SPEICHERWERTS Löschen eines Speicherwerts (Ablesen aus Speicher oder nicht): ... -
Seite 59: Datenübertragung Auf Pc
HOLD OBJ. TEST OBJ. TEST µ Ω START/STOP Automatische Speicherfunktion ist Mit jedem neuen Messwert wird die Testnummer aktiviert. erhöht und der Wert gespeichert. B e e n d e n d e r a u t o m a t i s c h e n Speicherfunktion: START/STOP Taste drücken. -
Seite 60: Andere Funktionen (Set-Up)
ANDERE FUNKTIONEN (SET-UP) SET-UP SET-UP Ω 10mA Ω 10mA 4000m Ω 100mA 400m Ω Ω 4000µ Ω Charge 5.1. LÖSCHEN DES GESAMTEN SPEICHERS >2s >2s 5.2. UHRZEITEINSTELLUNG >2s Minuten >2s Stunden ändern ändern 5.3. DATUMSEINSTELLUNG >2s A u s w a h l d e s Datumsformats: ttmm (Europa) mmtt (USA) -
Seite 61: Programmieren Der Automatischen Abschaltfunktion
5.4. PROGRAMMIEREN DER AUTOMATISCHEN ABSCHALTFUNKTION >2s Automatisches Abschalten ein- (ON) oder ausgeschaltet (OFF). E i n s t e l l e n d e r Betriebsdauer: 5, 10 oder 15 mn. >2s 5.5. ANZEIGE DER GERÄTEPARAMETER >2s Gerätekonfiguration Seriennummer MEMMRCLR °C°F °... -
Seite 62: Allgemeine Technische Daten
6. ALLGEMEINE TECHNISCHE DATEN 6.1. REFERENZ BEDINGUNGEN Einflussgröße Referenzwerte Temperatur 23 ± 3 °C Relative Feuchte 45 bis 55 % r.F. Spannungsversorgung 6 V ± 0,2 V Externe Spannung an den Buchsen des Testwiderstands keine Induktivität des Testwiderstands keine Elektrische Feldstärke keine Magnetische Feldstärke <... -
Seite 63: Technische Daten Der Strommessung Im Messwiderstand
6.4. TECHNISCHE DATEN DER STROMMESSUNG IM MESSWIDERSTAND 5,00 – 40,0 – 0,400 – 4,00 – Messbereich 39,99 mA 399,9 mA 3,999 A 11,00 A 10 mA 100 mA Auflösung 1 mA 10 mA Genauigkeit ± 0,5% ± 2 D ± 0,5% ± 1 D 6.5. -
Seite 64: Umweltbedingungen
Die Betriebsdauer hängt von den Messbereichen ab. Anzahl Messungen (1) Messbereich 10 A Messbereich 1 A 3 500 Messbereich 100 mA 4 500 Messbereich 10 mA 5 000 G e r ä t i n S t a n d b y o d e r Betriebsdauer 4 bis 6 Monate ausgeschaltet (1) ausgehend von 5 Sek. -
Seite 65: Wartung
Es wird mindestens eine einmal jährlich durchgeführte Überprüfung dieses Gerätes empfohlen. Für Überprüfung und Kalibrierung wenden Sie sich bitte an unsere zugelassenen Messlabors (Auskunft und Adressen auf Anfrage), bzw. an die Chauvin Arnoux Niederlassung oder den Händler in Ihrem Land. 7.1.5. AKTUALISIERUNG DES GERÄTEPROGRAMMS Chauvin Arnoux ist ständig darauf bedacht, bestmögliche Leistungen zu erbringen und technische... -
Seite 66: Garantie
8. GARANTIE Mit Ausnahme von ausdrücklichen anders lautenden Vereinbarungen ist Garantiezeit zwölf Monate ab Bereitstellungsdatum des Geräts. Auszug aus den Allgemeinen Geschäftsbedingungen (Gesamttext auf Anfrage). Die Garantie verfällt bei: „ unsachgemäße Benutzung des Gerätes oder Verwendung mit inkompatiblen anderen Geräten; „... -
Seite 67: Bestellangaben
9. BESTELLANGABEN C.A 6240 ........................P01.1432.00 Das C.A 6240 wird in einem Karton mit Zubehörtasche geliefert. Inhalt: Satz mit 2 Kelvin-Klemmen (10 A, Kabel 3 m), Netzkabel (2 m), Optisches USB-Anschlusskabel, Software „Micro Ohmmeter Transfer“, 5 Kurzanleitungen, und diese Betriebsanleitung in 5 Sprachen. - Seite 69 „ La categoria di misura I corrisponde alle misurazioni effettuate su circuiti non collegati direttamente alla rete. Avete appena acquistato un microhmmetro C.A 6240 e vi ringraziamo della vostra fiducia. Per ottenere le migliori prestazioni dal vostro apparecchio: „ leggete attentamente il presente libretto di funzionamento „...
- Seite 70 Verificare che il commutatore sia posizionato su OFF prima di collegare la presa rete per ricaricare la batteria dell’apparecchio. Non immergere il microhmmetro C.A 6240. Utilizzare accessori d’allacciamento la cui categoria di sovratensione e la tensione di servizio sono superiori o uguali a quelle dell’apparecchio di misura (50 V Cat. III).
- Seite 71 INDICE 1. PRESENTAZIONE ........................72 2. CARICA BATTERIA ........................74 3. MISURA DI RESISTENZA ......................75 3.1. Misura di debolissimo valore ...................76 3.2. Misure ripetitive ........................77 3.3. Messaggi d’errore ......................77 4. MEMORIZZAZIONE DEI RISULTATI ...................79 4.1 Memorizzazione .........................79 4.2. Rilettura memoria ......................80 4.3. Soppressione memoria ....................80 4.4.
-
Seite 72: Presentazione
1. PRESENTAZIONE... - Seite 73 Il Microhmmetro C.A 6240 è un apparecchio di misura portatile destinato alla misura di debolissimi valori di resistenze. Viene presentato in un contenitore per cantiere. Viene alimentato da una batteria ricaricabile con caricatore integrato. Funzioni di misura resistenza Messa in opera...
-
Seite 74: Carica Batteria
2. CARICA BATTERIA Charge Capacità corrente della Charge batteria espressa in %. Durata della carica: 3 h 30 Iniziare caricando completamente la batteria al primo utilizzo. Sul calibro 10 A, l’autonomia è di 1 h 20 circa. Quindi è preferibile caricare la batteria prima d’avviare una campagna di misura. -
Seite 75: Misura Di Resistenza
3. MISURA DI RESISTENZA 1) Allacciare i 2 cavi sui 4 morsetti di misura, poi le 2 pinze Kelvin sull’oggetto da testare. Quest’ultimo dovrà essere fuori tensione. SET-UP Ω 10mA 400 Ω 2) Posizionare il commutatore su 10mA 400W –... -
Seite 76: Misura Di Debolissimo Valore
...oppure disinserire una delle 2 pinze. Quando si misura su un componente induttivo, l’energia accumulata da questo elemento durante la misura deve poi sprigionarsi. In questo caso è tassativo non toccare (o disinserire) i cordoni di misura prima di avere interrotto la misura stessa e prima che siano trascorsi almeno dieci secondi: durante questi istanti l’elemento testato si scaricherà... -
Seite 77: Misure Ripetitive
3.2. MISURE RIPETITIVE START/STOP Ω Allacciare le pinze sul primo oggetto da misurare. La misura si avvia automaticamente. Rimuovere le pinze, la misura si blocca e il risultato si visualizza. Allacciare le pinze sul HOLD secondo oggetto da misurare. La misura si riavvia automaticamente. - Seite 78 ...premere il bottone START/ STOP è senza effetto, la misura è impossibile. S o p p r i m e re l a t e n s i o n e p e r effettuare la misura. START/STOP Se si applica una tensione s u p e r i o re a 2 0 V f r a i morsetti C1 e C2, il fusibile HOLD...
-
Seite 79: Memorizzazione Dei Risultati
4. MEMORIZZAZIONE DEI RISULTATI Lo stoccaggio dei dati viene organizzato in oggetti (OBJ.): ciascuno può contenere vari test (TEST). OBJ. corrisponde all’oggetto testato ed ogni test corrisponde ad una misura effettuata su quest’oggetto. L’apparecchio può stoccare 100 misure. 4.1 MEMORIZZAZIONE ... -
Seite 80: Rilettura Memoria
4.2. RILETTURA MEMORIA Occorre innanzitutto bloccare la misura premendo il bottone START/STOP. Per cambiare l’oggetto. Per rileggere tutti i test contenenti OBJ. TEST una registrazione. µ Ω Per uscire dalla funzione di rilettura memoria. 4.3. SOPPRESSIONE MEMORIA Per sopprimere una registrazione (rilettura memoria o no): ... -
Seite 81: Trasferimento Dei Dati Su Pc
HOLD OBJ. TEST OBJ. TEST µ Ω START/STOP La registrazione automatica viene Ad ogni nuova misura, il numero del test viene attivata. incrementato e la misura viene registrata. Per bloccare la registrazione automatica, premere il bottone START/STOP. Ω START/STOP 4.6. -
Seite 82: Altre Funzioni (Set-Up)
5. ALTRE FUNZIONI (SET-UP) SET-UP SET-UP Ω 10mA Ω 10mA 4000m Ω 100mA 400m Ω Ω 4000µ Ω Charge 5.1. SOPPRESSIONE COMPLETA DELLA MEMORIA >2s >2s 5.2. PROGRAMMAZIONE DELL’ORA >2s Per modificare >2s Per modificare i minuti l’ora 5.3. PROGRAMMAZIONE DELLA DATA >2s Per scegliere il formato della data: ggmm... -
Seite 83: Programmazione Del Tempo Di Bloccaggio Automatico
5.4. PROGRAMMAZIONE DEL TEMPO DI BLOCCAGGIO AUTOMATICO >2s Per scegliere lo spegnimento automatico selezionare “ON”, altrimenti “OFF”. P e r r e g o l a r e d u r a t a funzionamento: 5, >2s 10 o 15 mn. 5.5. -
Seite 84: Caratteristiche
6. CARATTERISTICHE 6.1. CONDIZIONI DI RIFERIMENTO Grandezze d’influenza Valori di riferimento Temperatura 23 ± 3 °C Umidità relativa 45 a 55 % UR Tensione d’alimentazione 6 V ± 0,2 V Tensione esterna presente ai morsetti della resistenza sotto test nulla Induttanza della resistenza sotto test nulla Campo elettrico... -
Seite 85: Caratteristiche Delle Misure Di Tensione Ai Morsetti Della Resistenza Misurata
6.4. CARATTERISTICHE DELLE MISURE DI TENSIONE AI MORSETTI DELLA RESISTENZA MISURATA 5,00 – 40,0 – 0,400 – 4,00 – Campo di misura 39,99 mA 399,9 mA 3,999 A 11,00 A Risoluzione 10 mA 100 mA 1 mA 10 mA Precisione ±... -
Seite 86: Condizioni Ambientali
L’autonomia è in funzione dei calibri utilizzati Numero delle misure (1) Calibro 10 A Calibro 1 A 3 500 Calibro 100 mA 4 500 Calibro 10 mA 5 000 Apparecchio in standby o Autonomia: da 4 a 6 mesi fermo (1) stabilito per misure di una durata di 5 s ogni 25 s. -
Seite 87: Manutenzione
Come tutti gli apparecchi di misura o di prova, è necessaria una verifica periodica. Vi consigliamo almeno una verifica annuale dell’apparecchio. Per le verifiche e calibrazioni, rivolgetevi ai nostri laboratori di metrologia accreditati (ragguagli ed estremi su domanda), alla filiale Chauvin Arnoux o all’agente del vostro paese. -
Seite 88: Garanzia
8. GARANZIA La nostra garanzia si esercita, salvo stipulazione esplicita, per dodici mesi dopo la data di messa a disposizione del materiale. Estratto delle nostre Condizioni Generali di Vendita, comunicate su domanda. La garanzia non si applica in seguito a: „... -
Seite 89: Per Ordinare
9. PER ORDINARE C.A 6240 ........................P01.1432.00 Il C.A 6240 viene fornito in una scatola di cartone con una sacca per trasportare i seguenti accessori: un set di 2 pinze Kelvin 10 A con cavo lungo 3 m, un filo d’alimentazione rete lungo 2 m, un cavo di comunicazione ottica/USB, il software “Micro Ohmmeter Transfer”,... - Seite 91 „ La categoría de medida I corresponde a las medidas realizadas en los circuitos no conectados directamente a la red. Usted acaba de adquirir un micróhmetro C.A 6240 y le agradecemos su confianza. Para obtener el mejor servicio con su aparato: „...
-
Seite 92: Precauciones De Uso
Comprobar que el interruptor esté en la posición OFF antes de conectar con la red para recargar la batería del aparato. No sumergir el micróhmetro C.A 6240. Utilizar accesorios de conexión cuya categoría de sobretensión y tensión de servicio sean superiores o iguales a las del aparato de medida (50 V Cat III). Utilizar sólo accesorios que cumplan con las normas de seguridad (IEC 61010-2-031). - Seite 93 ÍNDICE 1. PRESENTACIÓN ..........................94 2. CARGA DE LA BATERÍA ......................96 3. MEDIDA DE LA RESISTENCIA ....................97 3.1. Medida de muy bajo valor ....................98 3.2. Medidas repetitivas ......................99 3.3. Mensajes de error ......................99 4. MEMORIZACIÓN DE LOS RESULTADOS ................101 4.1 Memorización ........................101 4.2.
-
Seite 94: Presentación
1. PRESENTACIÓN... - Seite 95 El micróhmetro C.A 6240 es un aparato de medida portátil que se usa para medir valores muy bajos de resistencias. Se presenta en una carcasa robusta y estanca. Está alimentado por una batería recargable con cargador integrado. Funciones de medida...
-
Seite 96: Carga De La Batería
2. CARGA DE LA BATERÍA Charge Capacidad corriente de la Charge batería expresada en %. Duración de la carga: 3 h 30. Empezar por cargar completamente la batería antes de la primera utilización. En el calibre 10 A, la autonomía es de aproximadamente 1 h 20. Es pues preferible cargar la batería antes de emprender una campaña de medidas. -
Seite 97: Medida De La Resistencia
3. MEDIDA DE LA RESISTENCIA 1) Conectar los 2 cables a los 4 terminales de medida y las 2 pinzas Kelvin al objeto que va a probar. Este último debe estar apagado. SET-UP Ω 10mA 400 Ω 2) Poner el interruptor en la posición 10mA 400W –... -
Seite 98: Medida De Muy Bajo Valor
...o desconectar una de las 2 pinzas. La energía acumulada en un elemento inductivo cuando se realiza una medida debe liberarse. Bajo ningún concepto debe tocar o desconectar los cables de medida antes de haber parado la medida y esperado al menos 10 segundos la descarga completa del elemento probado. El incumplimiento de esta recomendación puede traducirse por la producción de un arco, potencialmente peligroso para el instrumento y para el operador. -
Seite 99: Medidas Repetitivas
3.2. MEDIDAS REPETITIVAS START/STOP Ω Conectar las pinzas al primer objeto que va a medir. La medida se inicia automáticamente. Quitar las pinzas, la medida se para y se visualiza el resultado. Conectar las pinzas HOLD al segundo objeto que va a medir. Se inicia de nuevo la medida automáticamente. - Seite 100 ...pulsar el botón START/STOP no sirve de nada, la medida es imposible. Suprimir la tensión para realizar la medida. START/STOP Si se aplica una tensión superior a 20 V entre los terminales C1 y C2, se destruye el fusible ubicado HOLD >...
-
Seite 101: Memorización De Los Resultados
4. MEMORIZACIÓN DE LOS RESULTADOS El almacenamiento de los datos se organiza en objetos (OBJ.), cada uno pudiendo contener varias pruebas (TEST). OBJ. corresponde al objeto probado y cada prueba corresponde a una medida realizada a este objeto. El aparato puede almacenar 100 medidas. 4.1 MEMORIZACIÓN ... -
Seite 102: Lectura De La Memoria
4.2. LECTURA DE LA MEMORIA Ante todo, parar la medida pulsando el botón START/STOP. Para cambiar de objeto. Para leer todas las pruebas que OBJ. TEST contienen un registro. µ Ω Para salir de la función de lectura de la memoria. 4.3. -
Seite 103: Transferencia De Los Datos Al Pc
HOLD OBJ. TEST OBJ. TEST µ Ω START/STOP El registro automático está activado. A cada nueva medida, el número de la prueba se incrementa y la medida se registra. Parar el registro automático, pulsar el botón START/STOP. Ω START/STOP 4.6. -
Seite 104: Otras Funciones (Set-Up)
5. OTRAS FUNCIONES (SET-UP) SET-UP SET-UP Ω 10mA Ω 10mA 4000m Ω 100mA 400m Ω Ω 4000µ Ω Charge 5.1. BORRADO COMPLETO DE LA MEMORIA >2s >2s 5.2. PROGRAMACIÓN DE LA HORA >2s Para modificar Para modificar >2s los minutos la hora 5.3. -
Seite 105: Programación Del Tiempo De Parada Automática
5.4. PROGRAMACIÓN DEL TIEMPO DE PARADA AUTOMÁTICA >2s Para elegir paro automático (ON) o no (OFF). P a r a a j u s t a r l a d u r a c i ó n d e funcionamiento: 5, >2s 10 o 15 min. -
Seite 106: Características
6. CARACTERÍSTICAS 6.1. CONDICIONES DE REFERENCIA Magnitudes de influencia Valores de referencia Temperatura 23 ± 3 °C Humedad relativa de 45 a 55 % HR Tensión de alimentación 6 V ± 0,2 V Tensión externa presente en los bornes de la resistencia bajo nula prueba Inductancia de la resistencia bajo prueba... -
Seite 107: Características De Las Medidas De La Corriente Que Circula En La Resistencia Medida
6.4. CARACTERÍSTICAS DE LAS MEDIDAS DE LA CORRIENTE QUE CIRCULA EN LA RESISTENCIA MEDIDA 5,00 – 40,0 – 0,400 – 4,00 – Campo de medida 39,99 mA 399,9 mA 3,999 A 11,00 A 10 mA 100 mA Resolución 1 mA 10 mA Precisión ±... -
Seite 108: Condiciones De Entorno
La autonomía depende de los calibres utilizados Número de medidas (1) Calibre 10 A Calibre 1 A 3 500 Calibre 100 mA 4 500 Calibre 10 mA 5 000 Aparato en modo suspensión autonomía de 4 a 6 meses o apagado (1) establecido para medidas de una duración de 5 s todos los 25 s. -
Seite 109: Mantenimiento
Con el deseo permanente de proporcionar el mejor servicio prestado en rendimientos y evolución técnica, Chauvin Arnoux le ofrece la posibilidad de actualizar el software integrado en el aparato (firmware) descargando gratuitamente la nueva versión disponible en nuestro sitio Internet. -
Seite 110: Garantía
8. GARANTÍA Nuestra garantía tiene validez, salvo estipulación expresa, durante doce meses a partir de la fecha de puesta a disposición del material. Extracto de nuestras Condiciones Generales de Venta, comunicadas a quien las solicite. La garantía no se aplicará en los siguientes casos: „... -
Seite 111: Para Pedidos
9. PARA PEDIDOS C.A 6240 ........................P01.1432.00 El C.A 6240 se suministra en una caja de cartón con una bolsa de transporte de accesorios que contiene: un juego de 2 pinzas Kelvin 10 A con cable de 3 m, un cable de alimentación de red de 2 m, un cable de comunicación óptico / USB,... - Seite 112 Tel: +86 21 65 21 51 96 - Fax: +86 21 65 21 61 07 SCANDINAVIA - CA Mätsystem AB USA - Chauvin Arnoux Inc - d.b.a AEMC Instruments Box 4501 - SE 18304 TÄBY 200 Foxborough Blvd. - Foxborough - MA 02035...