Inhaltsverzeichnis
Werbung
Verfügbare Sprachen
Verfügbare Sprachen
Quicklinks
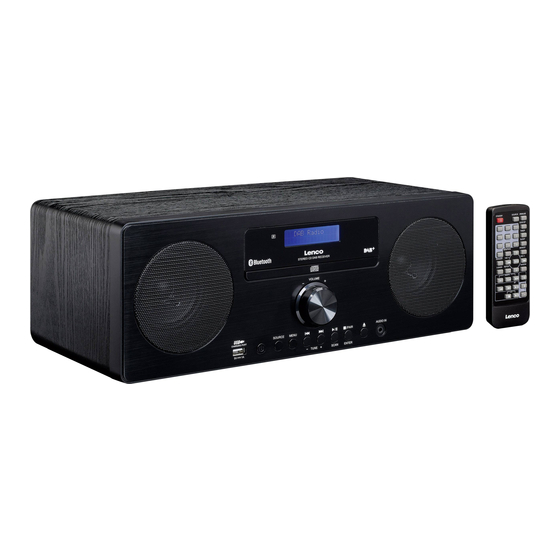
Model DAR-060
User manual - DAB+/FM radio with CD player and Bluetooth
Gebruikshandleiding - DAB+/FM-radio met cd-speler en Bluetooth
Benutzerhandbuch - DAB+/FM Radio mit CD Player und Bluetooth
Mode d'emploi - Radio DAB+/FM avec lecteur CD et Bluetooth
Manual del usuario - Radio DAB+/FM con reproductor de CD y Bluetooth
Werbung
Inhaltsverzeichnis

Verwandte Anleitungen für LENCO DAR-060


Inhaltszusammenfassung für LENCO DAR-060
- Seite 1 Model DAR-060 User manual - DAB+/FM radio with CD player and Bluetooth Gebruikshandleiding - DAB+/FM-radio met cd-speler en Bluetooth Benutzerhandbuch - DAB+/FM Radio mit CD Player und Bluetooth Mode d’emploi - Radio DAB+/FM avec lecteur CD et Bluetooth Manual del usuario - Radio DAB+/FM con reproductor de CD y Bluetooth...
-
Seite 32: Deutsch
Deutsch DAR-060 ACHTUNG: Die zweckentfremdete Bedienung, Benutzung oder Einstellung der Prozeduren kann zu gefährlichen Unfällen durch Strahlen führen. Dieses Gerät darf außer von qualifizierten Fachleuten von niemand anderem repariert oder eingestellt werden. VORSICHTSMASSNAHMEN VOR DER BENUTZUNG BEFOLGEN SIE IMMER FOLGENDE ANWEISUNGEN: Benutzen Sie das Gerät nicht in der Nähe von Wasser. - Seite 33 29. Bei der Batterieentsorgung sind die Entsorgungsvorschriften einzuhalten. 30. Das Gerät kann nur bei moderaten Temperaturen verwendet werden. Eine Nutzung in extrem kalten oder heißen Umgebungen sollte vermieden werden. 31. Das Typenschild befindet sich an der Unter- oder Rückseite des Gerätes. 32.
-
Seite 34: Vorderansicht
VORDERANSICHT 1. ANZEIGE Anzeige des Betriebsmodus und von Informationen 2. IR-EMPFANGSFELD 3. CD-FACH-TÜR 4. – LAUTSTÄRKE + Stellen Sie hiermit die Lautstärke ein. 5. USB LADEANSCHLUSS 6. EINSCHALTTASTE/STANDBY Drücken Sie die Taste, um das Gerät einzuschalten. Drücken Sie die Taste erneut, um es auszuschalten und in den Standby-Modus zu versetzen. -
Seite 35: Rückseite
14. AUDIO IN Anschluss eines externen Audio-Players RÜCKSEITE 1. STROMKABELANSCHLUSS 2. ANT Die Antenne muss ausgezogen werden, um einen guten Empfang sicherzustellen. -
Seite 36: Fernbedienung
FERNBEDIENUNG EINSCHALTTASTE/STANDBY ZIFFERNTASTEN MEM/PROG VORHERIGER /TITEL EQUALIZER WIEDERHOLE X-BASS INFO SENDERSUCHLAUF MENÜ VORHERIGER BLUETOOTH-TITEL NÄCHSTER BLUETOOTH-TITEL BLUETOOTH WIEDERGABE/PAUSE STOPP CD ABSPIELEN/PAUSE LAUTSTÄRKE + LAUTSTÄRKE - STUMM ZUFALL SENDER- NÄCHSTER /TITEL EINGABE MONO/STEREO SENDER+ AUTOMATISCHE ABSCHALTUNG ZEITSCHALTUHR UHREINSTELLUNG ÖFFNEN/SCHLIEßEN QUELLE Betrieb mit der Fernbedienung Eine CR2025-Batterie ist in der Fernbedienung bereits enthalten. -
Seite 37: Grundlegende Bedienung
Halten Sie sich zum Ersetzen der Batterie bitte an die Abbildung unten. Achten Sie beim Einlegen der Batterie auf die richtige Richtung. Battery case Batteriefach Pull out the battery case Batteriefach herausziehen Push in according to this direction In die angezeigte Richtung drücken CR2025 battery CR2025-Knopfzelle ... -
Seite 38: Automatischer Suchlauf
Automatischer Suchlauf 1. Wechseln Sie in den DAB-Modus. 2. Starten Sie mit der Taste SCAN die automatische Suche nach verfügbaren DAB-Sendern. Manueller Suchlauf 1. Wechseln Sie in den DAB-Modus. 2. Rufen Sie mit der Taste MENU die Menüsteuerung auf. 3. Drücken Sie die Taste PREVIOUS oder NEXT bis „Manual tune“... -
Seite 39: Fm-Radiobedienung
Kompressor Durch den Kompressor werden leisere Klänge besser hörbar, wenn das Gerät in einer lauten Umgebung verwendet wird. Die Kompressionsstufe einer Sendung wird durch das Sendestudio festgelegt und zusammen mit dem Service übertragen. Durch Ändern des Werts des Kompressors Ihres Geräts sind Sie in der Lage, den Kompressionsfaktor bezüglich dieser Stufe anzupassen. -
Seite 40: Audioeinstellung
1. Radiotext: Im Lauftext gibt der Radiosender Informationen über Musiktitel oder Programmdetails. 2. Programmart (PTY): Die Art des Programms, das vom Sendestudio bereitgestellt wird. 3. Frequenz Aktuelle Frequenz des Kanals. 4. Audioart: Stereo oder Mono 5. Uhrzeit Zeigt die von dem Radiosender bereitgestellte Zeit an. 6. -
Seite 41: Zufallswiedergabe
Anzeige als auch Bluetooth-Statusanzeige weiter. Schalten Sie in diesem Fall die Bluetoth- Funktion Ihres Geräts ein und aktivieren Sie die Suche bis „Lenco DAR-060“ gefunden wurde. Wählen Sie „Lenco DAR-060“ auf dem Bluetooth Gerät aus, um die Verbindung herzustellen. Geben Sie, falls erforderlich, den Zugangscode „0000“... -
Seite 42: Einschlaffunktion
X-BASS Sie können ebenfalls den Basseffekt der Musik verstärken. Durch Drücken der Taste X-BASS schalten Sie den X-Bass- Effekt Ein oder Aus. EINSCHLAFFUNKTION 1. Ist die Anlage eingeschaltet, drücken Sie wiederholt die Taste SLEEP, um die Dauer aus folgenden Möglichkeiten zu wählen: Sleep ausgeschaltet, 90, 80, 70, 60, 50, 40, 30, 20 oder 10 Minuten. -
Seite 43: Spracheinstellung
Datumsformat einstellen 1. Wechseln Sie hierfür in den DAB- oder UKW-Modus. 2. Rufen Sie mit der Taste MENU die Menüsteuerung auf. 3. Drücken Sie die Taste PREVIOUS oder NEXT bis „Time“ („Uhrzeit“) angezeigt wird und dann die Taste ENTER. 4. Drücken Sie die Taste PREVIOUS (VORHERGEHENDE) oder NEXT (NÄCHSTE), bis „Datumsformat einstellen“... -
Seite 44: Zurücksetzen Auf Werkseinstellung
ZURÜCKSETZEN AUF WERKSEINSTELLUNG Diese Funktion setzt das Gerät auf die ursprünglichen Werkseinstellungen zurück. 1. Wechseln Sie in den DAB-Modus. 2. Rufen Sie mit der Taste MENU die Menüsteuerung auf. 3. Drücken Sie die Taste PREVIOUS oder NEXT bis „Factory Reset“ (Zurücksetzen auf Werkseinstellung) angezeigt wird und dann die Taste ENTER. - Seite 45 Fehlersuche Kein Strom • Stellen sie sicher, dass das Netzkabel sicher eingesteckt ist. • Stellen Sie sicher, dass die Anlage eingeschaltet ist. Die Fernbedienung funktioniert nicht • Verwenden Sie die Fernbedienung in der Nähe der Anlage. • Richten Sie die Fernbedienung auf den Fernbedienungssensor der Anlage. •...
-
Seite 46: Technische Spezifikationen
Änderungen ohne vorherige Ankündigung vorgenommen werden. GARANTIE Lenco bietet Leistungen und Garantien im Einklang mit Europäischem Recht. Im Falle von Reparaturen (sowohl während als auch nach Ablauf der Garantiezeit) sollten Sie deshalb Ihren Einzelhändler kontaktieren. Wichtiger Hinweis: Es ist nicht möglich, Geräte für Reparaturen direkt an Lenco zu schicken.