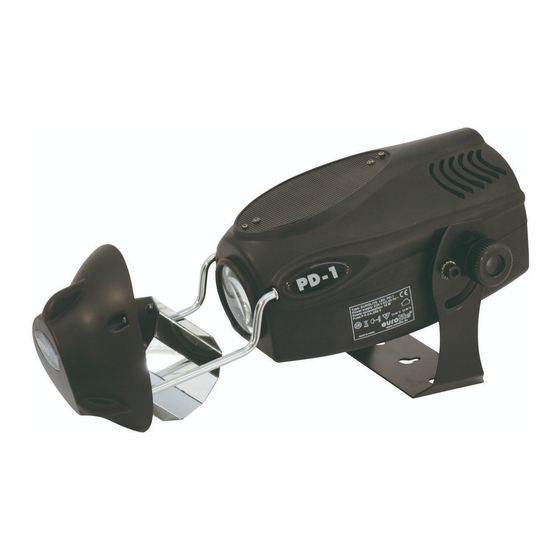
EuroLite LED PD-1 Bedienungsanleitung
Lighting effect

Verwandte Anleitungen für EuroLite LED PD-1


Inhaltszusammenfassung für EuroLite LED PD-1
- Seite 1 BEDIENUNGSANLEITUNG USER MANUAL LED PD SERIES Lighting effect © Für weiteren Gebrauch aufbewahren! Copyright Keep this manual for future needs! Nachdruck verboten! Reproduction prohibited!
-
Seite 2: Inhaltsverzeichnis
This user manual is valid for the article numbers: 51807821, 51807823, 51807825 Das neueste Update dieser Bedienungsanleitung finden Sie im Internet unter: You can find the latest update of this user manual in the Internet under: www.eurolite.de 2/20 00038069.DOC, Version 1.0... -
Seite 3: Einführung
- sich die letzte Version der Anleitung im Internet herunter laden EINFÜHRUNG Wir freuen uns, dass Sie sich für einen EUROLITE LED PD-1, LED PD-2 oder LED PD-3 entschieden haben. Wenn Sie nachfolgende Hinweise beachten, sind wir sicher, dass Sie lange Zeit Freude an Ihrem Kauf haben werden. - Seite 4 Unbedingt lesen: Bei Schäden, die durch Nichtbeachtung der Anleitung verursacht werden, erlischt der Garantiean- spruch. Für daraus resultierende Folgeschäden übernimmt der Hersteller keine Haftung. Das Gerät darf nicht in Betrieb genommen werden, nachdem es von einem kalten in einen warmen Raum gebracht wurde.
-
Seite 5: Bestimmungsgemässe Verwendung
GESUNDHEITSRISIKO! Blicken Sie niemals direkt in die Lichtquelle, da bei empfindlichen Menschen u. U. epileptische Anfälle ausgelöst werden können (gilt besonders für Epileptiker)! Kinder und Laien vom Gerät fern halten! Das Gerät darf niemals unbeaufsichtigt betrieben werden! BESTIMMUNGSGEMÄSSE VERWENDUNG Bei diesem Gerät handelt es sich um eine ortsfeste Leuchte für allgemeine Zwecke. Dieses Produkt ist nur für den Anschluss an 230 V, 50 Hz Wechselspannung zugelassen und wurde ausschließlich zur Verwendung in Innenräumen konzipiert. -
Seite 6: Gerätebeschreibung
• Einfache Bedienung • Farben und Strobe-Effekt, die sich über einen DMX-Controller oder DIP-Schalter aufrufen lassen • Spiegelwalze musikgetaktet über eingebautes Mikrofon (gilt nur für LED PD-1) • Spiegel musikgetaktet über eingebautes Mikrofon (gilt nur für LED PD-2 und LED PD-3) •... -
Seite 7: Installation
INSTALLATION Montage Das Gerät kann in jeder möglichen Position installiert werden, ohne seine funktionellen Eigenschaften zu verändern. Befestigung Achtung: Festinstallation wird empfohlen! Vergewissern Sie sich vor der Montage, dass die Montagefläche mindestens die 10-fache Punktbelastung des Eigengewichtes des Gerätes aushalten kann. Der Installationsort muss so gewählt werden, dass das Gerät absolut plan an einem festen, erschütterungs- freien, schwingungsarmen Ort befestigt werden kann. -
Seite 8: Bedienung
BEDIENUNG Wenn Sie das Gerät an die Spannungsversorgung angeschlossen haben, nimmt das Gerät den Betrieb auf. Stand Alone-Betrieb Der LED PD lässt sich im Stand Alone-Betrieb ohne Controller einsetzen. Dank des eingebauten Mikrofones ist kein Controller nötig, und die Strahlen werden musikgesteuert durch den Raum geworfen. Die Empfindlichkeit kann mit Hilfe des Drehreglers an der Geräterückseite beeinflußt werden. -
Seite 9: Dmx-Protokoll
DMX-Protokoll Kanal 1 Strobe 1 - 127 128 - 255 Strobe (zunehmend) Kanal 2 Blau 0 - 255 0-100 % Kanal 3 Grün 0 - 255 0-100 % Kanal 4 0 – 255 0-100 % Anschluss an den DMX-512 Controller / Verbindung Projektor – Projektor Achten Sie darauf, dass die Adern der Datenleitung an keiner Stelle miteinander in Kontakt treten. -
Seite 10: Adressierung Des Gerätes
Adressierung des Gerätes Jedes Gerät belegt 4 Steuerkanäle. Damit die Steuersignale richtig an jedes Gerät adressiert werden, müssen die Geräte kodiert werden. Die Kodierung muss an jedes Gerät einzeln durchgeführt werden, indem Sie die DIP-Schalter entsprechend untenstehender Tabelle einstellen. Die Startadresse ist der erste Kanal, auf den das Gerät auf Signale vom Controller reagiert. Bitte vergewissern Sie sich, dass sich die Steuerkanäle nicht mit anderen Geräten überlappen, damit das Gerät korrekt und unabhängig von anderen Geräten in der DMX-Verbindung funktioniert. -
Seite 11: Sicherungswechsel
FUTURELIGHT CP-240 Controller Best.-Nr. 51834265 FUTURELIGHT CP-512/64 Controller 16bit Best.-Nr. 51834295 EUROLITE DMX Operator 192 Kanäle Best.-Nr. 70064520 EUROLITE DMX Scan Control 192 Kanäle Best.-Nr. 70064525 Wizard-512 USB DMX-Software + Interface Best.-Nr. 51860102 Wizard-1024 USB DMX-Software + Interface Best.-Nr. 51860110 FUTURELIGHT DES-3 Abschlusstecker 3-pol Best.-Nr.