Pioneer DEH-4700BT Installationsanleitung
Vorschau ausblenden
Andere Handbücher für DEH-4700BT:
- Schnellstartanleitung (33 Seiten) ,
- Bedienungsanleitung (23 Seiten)
Inhaltsverzeichnis
Werbung
Verfügbare Sprachen
Verfügbare Sprachen
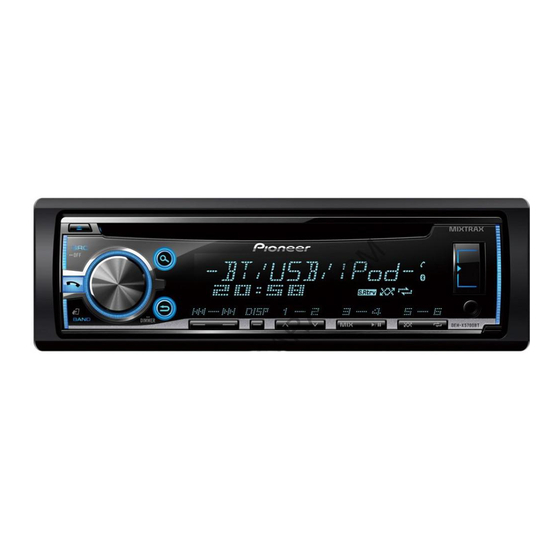
CD RDS RECEIVER
AUTORADIO CD RDS
SINTOLETTORE CD RDS
REPRODUCTOR DE CD CON RECEPTOR RDS
CD RDS-EMPFÄNGER
CD RDS-ONTVANGER
CD RDS ПРИЕМНИК
DEH-X5700BT
DEH-4700BT
Installation Manual
Manuel d'installation
Manuale d'installazione
Manual de instalación
Installationsanleitung
Installatiehandleiding
Руководство по установке
Werbung
Inhaltsverzeichnis

Verwandte Anleitungen für Pioneer DEH-4700BT


Inhaltszusammenfassung für Pioneer DEH-4700BT
- Seite 1 CD RDS RECEIVER AUTORADIO CD RDS SINTOLETTORE CD RDS REPRODUCTOR DE CD CON RECEPTOR RDS CD RDS-EMPFÄNGER CD RDS-ONTVANGER CD RDS ПРИЕМНИК DEH-X5700BT DEH-4700BT Installation Manual Manuel d’installation Manuale d’installazione Manual de instalación Installationsanleitung Installatiehandleiding Руководство по установке...
-
Seite 2: Power Cord
Microphone (4 m) Black (chassis ground) Connections/Installation Rear output or subwoofer output Blue/white Front output (Only for DEH-X5700BT) The pin position of the ISO connector Antenna input will differ depending on the type of – Never cut the insulation of the power Connections Fuse (10 A) vehicle. -
Seite 3: Installing The Microphone
The microphone should be placed directly are not blocking the vents. in front of the driver at a suitable distance to pick up their voice clearly. CAUTION DEH-4700BT Leave ample 5 cm Tighten two screws on each side. It is extremely dangerous to allow the... - Seite 4 Install the microphone clip on the sun Install the microphone on the rear side visor. of the steering column. Lowering the sun visor reduces the voice recognition rate. Double-sided tape Microphone clip To install on the steering column Slide the microphone base to detach it from the microphone clip.
-
Seite 6: Cet Appareil
• Le câble noir est la masse. Les câbles de Cordon d’alimentation Raccordements/Installation masse de cet appareil et d’autres équipements (notamment les produits à haute intensité tels que les amplificateurs – Placez tous les câbles à l’écart des Raccordements de puissance) doivent être câblés endroits chauds (ex. -
Seite 7: Installation
(ex. : la sortie du chauffage). d’extrêmes graves • Une performance optimale Vert/noir : arrière gauche ou haut- est obtenue lorsque DEH-4700BT parleur d’extrêmes graves l’appareil est installé à un Violet : arrière droite ou haut-parleur angle inférieur à 60°. -
Seite 8: Installation Du Microphone
Retrait de l’appareil Microphone Pour installer l’appareil sur le Pince du microphone Retirez l’anneau de garniture. pare-soleil Base du microphone Installez le microphone sur l’arrière de Faites passer le fil du microphone dans la colonne de direction. la rainure. Fil du microphone Rainure Anneau de garniture... -
Seite 10: Cavo Di Alimentazione
• Il cavo nero è la messa a terra. I cavi di Cavo di alimentazione Connessioni/Installazione messa a terra per l’unità e per altre apparecchiature (in particolare prodotti ad alta corrente, come ad esempio – Non collegare il cavo giallo alla batteria Connessioni amplificatori di potenza) devono essere facendolo passare attraverso il foro del... -
Seite 11: Installazione
(max. 300 mA 12 V CC). un’angolazione inferiore ai Interlinee altoparlante 60°. Bianco: anteriore sinistra • Durante l’installazione, per garantire la DEH-4700BT Bianco/nero: anteriore sinistra corretta dispersione del calore quando si Grigio: anteriore destra utilizza l’unità, accertarsi di lasciare Cruscotto... -
Seite 12: Installazione Del Microfono
Rimozione dell’unità Installare il microfono sul lato Per l’installazione sul parasole posteriore del piantone dello sterzo. Rimuovere l’anello di rivestimento. Posizionare l’interlinea del microfono nella scanalatura. Interlinea microfono Scanalatura Anello di rivestimento Linguetta a tacche • Il rilascio del pannello anteriore Nastro biadesivo Installare il gancio del microfono sul consente un più... - Seite 14 En función del tipo de vehículo, la Esta unidad Conexiones/instalación función de puede ser diferente. En este caso, asegúrese de conectar – No acorte ningún cable. Conexiones Amarillo – Nunca corte el aislamiento del cable de Reserva (o adicional) alimentación de esta unidad para Amarillo Importante compartir la potencia con otros...
-
Seite 15: Instalación
Soporte DIN trasero espacio suficiente detrás del panel posterior y recoja los cables sueltos para Determine la posición exacta para DEH-4700BT que no obstruyan las salidas de encajar los orificios del soporte con los ventilación. orificios del lateral de la unidad. -
Seite 16: Instalación Del Micrófono
Instalación del micrófono Instalación en la columna de dirección El micrófono debe instalarse directamente Deslice la base del micrófono para delante del conductor, a una distancia separarla de la pinza. adecuada para poder captar la voz correctamente. PRECAUCIÓN Debe evitarse en todos los casos que el cable del altavoz se enrede con la columna de dirección o la palanca de cambios. -
Seite 18: Dieses Gerät
• Das schwarze Kabel ist das Massekabel. Stromkabel Anschlüsse/Einbau Massekabel für dieses Gerät und andere Geräte (insbesondere Hochstromprodukte wie – Verbinden Sie das gelbe Kabel nicht mit Anschlüsse Leistungsverstärker) müssen separat der Batterie, indem Sie es durch das verlegt und angeschlossen werden. Loch zum Motorraum führen. -
Seite 19: Einbau
Winkel von Schwarzgrün: hinten links oder weniger als 60 ° eingebaut Armaturenbrett Subwoofer wird. DEH-4700BT Montagerahmen Violett: hinten rechts oder • Achten Sie, um eine ordnungsgemäße • Stellen Sie sicher, dass das Gerät sicher Subwoofer Wärmeableitung des Geräts an seinem Platz eingebaut ist. -
Seite 20: Anbringen Des Mikrofons
Ziehen Sie auf jeder Seite zwei Anbringen des Mikrofons Schrauben an. Das Mikrofon sollte direkt vor dem Fahrer in einer geeigneten Entfernung angebracht werden, um die Stimme klar aufzufangen. VORSICHT Schneidschraube (5 mm × 8 mm) Es ist äußerst gefährlich, dem Befestigungswinkel Mikrofonkabel zu erlauben, sich um die Armaturenbrett oder Konsole... - Seite 22 • De zwarte kabel is aarde. Aardingskabels Stroomkabel Verbindingen/installatie voor dit toestel en andere uitrusting (met name producten die veel stroom trekken zoals eindversterkers) moeten – Verbind de gele kabel niet met de accu Verbindingen afzonderlijk worden aangesloten. Anders door deze door het gat naar het kan er, wanneer ze toevallig loskomen, motorcompartiment te voeren.
- Seite 23 Een onstabiele 12 V gelijkstroom). • Tijdens de installatie dient u voor een installatie kan leiden tot verspringen DEH-4700BT Luidsprekerdraden goede warmteafvoer bij het gebruik van of andere storingen. Wit: links voor het toestel te zorgen. Voorzie daartoe...
-
Seite 24: De Microfoon Installeren
Het toestel verwijderen Installeer de microfoon aan de Installeren op de zonneklep achterzijde van de stuurkolom. Verwijder het sierkader. Plaats de microfoondraad in de groef. Microfoondraad Groef Sierkader Gekeepte lip Installeer de microfoonklem op de • Door het voorpaneel los te maken, Dubbelzijdige tape zonneklep. - Seite 26 • Никогда не подключайте синий/белый Шнур питания Подключения/Установка провод к терминалу питания внешнего усилителя. Также никогда не подключайте его к терминалу питания – Уберите все кабели подальше от Подключения автоматической антенны. В противном движущихся частей, таких как рычаг случае это может привести к переключения...
- Seite 27 Зеленый/черный: Задний левый производительность или сабвуфер Приборная панель достигается при Фиолетовый: Задний правый или Установочная шахта DEH-4700BT установке устройства под сабвуфер • Убедитесь, что устройство углом менее 60°. Фиолетовый/черный: Задний правый установлено прочно. Непрочная • Чтобы обеспечить необходимое или сабвуфер...
-
Seite 28: Установка Микрофона
Затяните по бокам два винта. ВНИМАНИЕ Установка на рулевую Запутывание провода микрофона колонку вокруг рулевой колонки или рычага переключения передач может привести Передвиньте основу микрофона, к возникновению чрезвычайно опасной чтобы отсоединить его от зажима ситуации. Устанавливайте микрофон для микрофона. таким образом, чтобы он не мешал Саморез... - Seite 32 © 2014 PIONEER CORPORATION. All rights reserved. © 2014 PIONEER CORPORATION. Tous droits de reproduction et de traduction réservés. © PIONEER CORPORATION, 2014. Все права защищены. <QRD3264-B> EW...