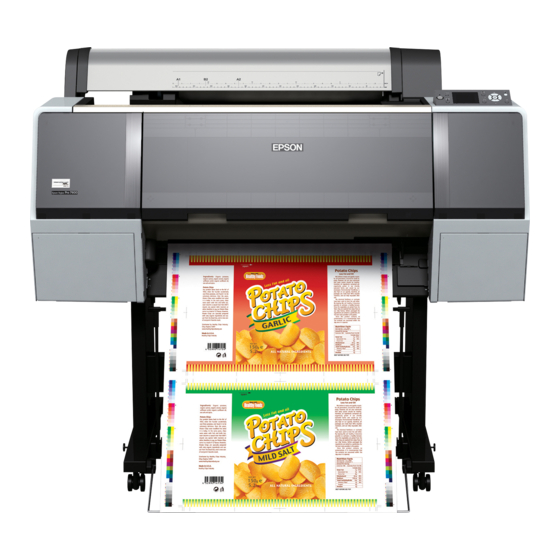
Epson Stylus Pro 7900 Auspack- Und Aufstellhinweise
Inhaltsverzeichnis
Quicklinks
Unpacking and Setup Guide
EN
Guide de déballage et d'installation
FR
Auspack- und Aufstellhinweise
DE
Handleiding voor uitpakken en installeren
NL
Guida di disimballaggio e installazione
IT
Manual de desembalaje e instalación
ES
Guia de Desembalagem e Instalação
PT
Before assembling the printer, clear the work area by putting away the
w
removed packing materials and bundled items. Working in an untidy place
may cause injury.
Avant d'assembler l'imprimante, nettoyez la zone de travail en éloignant tous
les matériaux d'emballage et les éléments inclus. Un assemblage dans un
endroit en désordre peut entraîner des blessures.
Bevor Sie den Drucker aufbauen, räumen Sie den Arbeitsbereich auf, indem
Sie das Verpackungsmaterial und die mitgelieferte Teile entfernen. Das
Arbeiten an einem unaufgeräumten Platz kann Verletzungen zur Folge haben.
Voordat de printer wordt geassembleerd, moeten het verpakkingsmateriaal
en meegeleverde onderdelen van de werkplaats worden verwijderd. Een
rommelige werkplaats verhoogt het risico op lichamelijk letsel.
Prima di assemblare la stampante, sgomberare l'area di lavoro allontanando
i materiali di imballaggio e gli accessori in dotazione. Se l'area di lavoro è
disordinata, potrebbero verifi carsi infortuni.
Antes de montar la impresora, limpie el área de trabajo retirando los
materiales de embalaje y los elementos incluidos. El trabajo en un lugar
desordenado puede dar lugar a lesiones.
Antes de ligar a impressora, limpe a área de trabalho, afastando os materiais
de embalagem e itens associados. Trabalhar num local que não se encontre
desimpedido pode causar lesões.
Inhaltsverzeichnis

Verwandte Anleitungen für Epson Stylus Pro 7900


Inhaltszusammenfassung für Epson Stylus Pro 7900
- Seite 1 Unpacking and Setup Guide Before assembling the printer, clear the work area by putting away the removed packing materials and bundled items. Working in an untidy place may cause injury. Avant d’assembler l’imprimante, nettoyez la zone de travail en éloignant tous Guide de déballage et d’installation les matériaux d’emballage et les éléments inclus.
-
Seite 2: Important Safety Instructions
Warning, Cautions, and Notes / Avertissement, Mises en garde et Remarques / Warn-, Vorsichts- und allgemeine Hinweise / Waarschuwingen en Opmerkingen / Avvisi, avvertenze e note / Advertencias, avisos y notas / Avisos, Precauções e Notas Safety Instructions Read all of these instructions before using your printer. Also be sure to follow all warnings and Warning: Caution: Note:... -
Seite 3: Consignes De Sécurité
Consignes de sécurité Sicherheitshinweise Lisez toutes ces consignes avant d’utiliser votre imprimante. Respectez bien tous les Lesen Sie alle diese Anweisungen, bevor Sie den Drucker verwenden. Befolgen Sie außerdem avertissements et consignes indiqués sur l’imprimante. alle am Drucker angebrachten Warnungen und Hinweise. Consignes de sécurité... -
Seite 4: Veiligheidsvoorschriften
Veiligheidsvoorschriften Avvertenze per la sicurezza Lees al deze instructies door alvorens de printer in gebruik te nemen. Neem tevens alle Prima di utilizzare la stampante, leggere tutte le seguenti istruzioni. Assicurarsi inoltre di seguire waarschuwingen en instructies in acht die zijn aangebracht op de printer. tutte le avvertenze e le istruzioni applicate sulla stampante. -
Seite 5: Instrucciones De Seguridad
Instrucciones de seguridad Instruções de Segurança Lea todas estas instrucciones antes de utilizar la impresora. Asegúrese de cumplir con todos los Leia todas as instruções antes de utilizar a impressora. Assegure-se, também, de que segue avisos e instrucciones marcados en la impresora. todos os avisos e instruções assinalados na impressora. - Seite 6 Choosing a place for the printer / Choix d’un emplacement pour Selbst wenn die oben erwähnten Bedingungen eingehalten werden, können Sie eventuell nicht korrekt drucken, wenn diese Umgebungsbedingungen nicht für das Papier geeignet sind. l’imprimante / Auswahl des Druckerstandorts / Een plaats kiezen voor Beachten Sie die Hinweise auf dem Papier.
- Seite 7 Espace autour de l’imprimante Laissez suffi samment d’espace (300 mm en plus des dimensions indiquées dans le tableau ci-après) pour l’installation de l’imprimante. Epson Stylus Pro 9900/9910 Epson Stylus Pro 7900/7910 Freiräume um den Drucker 1864 mm 1356 mm Halten Sie ausreichenden Platz (300 mm zusätzlich zu den in folgender Tabelle angegebenen...
- Seite 8 Unpacking / Déballage / Auspacken / Uitpakken / Disimballaggio / Desembalaje / Desembalagem Stand Epson Stylus Pro 7900 / Epson Stylus Pro 7910 Epson Stylus Pro 9900 / Epson Stylus Pro 9910 Paper Basket Paper Basket...
- Seite 9 Setup fl ow / Déroulement de l’installation / Aufstellungsreihenfolge / Opeenvolgende handelingen / Procedura di installazione / Procedimiento de instalación / Decorrer da confi guração Assembling Assemblage Montieren Setting up Confi guration Aufstellen Aligning the print head Alignement de la tête d’impression Ausrichten des Druckkopfs Installing the Printer Software Installation du logiciel de l’imprimante...
- Seite 10 Assembling / Assemblage / Montieren / Assemblage / Assemblaggio / Montaje / Ligar Have two people assemble the Stand (about 17.1 kg for ESP 9900 / 9910, about 15.5 kg for ESP 7900 / 7910). Deux personnes sont nécessaires à l’assemblage du support (environ 17,1 kg pour les modèles ESP 9900 / 9910, environ 15,5 kg pour les modèles ESP 7900 / 7910). Der Ständer sollte von zwei Personen zusammengebaut werden (ca.
- Seite 11 Do not attempt to lift the printer unit with fewer than four people (about 116.0 kg for ESP 9900 / 9910, about 84.5 kg for ESP 7900 / 7910). N’essayez pas de soulever l’imprimante si vous êtes moins de quatre personnes (environ 116,0 kg pour les modèles ESP 9900 / 9910, environ 84,5 kg pour les modèles ESP 7900 / 7910). Versuchen Sie keinesfalls den Drucker mit weniger als vier Personen anzuheben (ca.
- Seite 12 Paper Basket Epson Stylus Pro 7900 / 7910 Epson Stylus Pro 7900 / 7910 Epson Stylus Pro 9900 / 9910 Epson Stylus Pro 7900 / 7910 Epson Stylus Pro 7900 / 7910 Epson Stylus Pro 7900 / 7910 Epson Stylus Pro 7900 / 7910...
- Seite 13 Epson Stylus Pro 7900 / 7910 Push the black plastic part all the way in the pipe. Poussez complètement la partie en plastique noir dans la conduite. Drücken Sie das schwarze Plastikteil bis zum Anschlag in das Rohr. Duw het zwarte plastic onderdeel helemaal in de buis.
- Seite 14 Epson Stylus Pro 7900 / 7910 Epson Stylus Pro 7900 / 7910...
- Seite 15 Epson Stylus Pro 9900 / 9910 Epson Stylus Pro 9900 / 9910 Epson Stylus Pro 9900 / 9910 Epson Stylus Pro 9900 / 9910 Epson Stylus Pro 9900 / 9910 Epson Stylus Pro 9900 / 9910...
- Seite 16 Epson Stylus Pro 9900 / 9910 Epson Stylus Pro 9900 / 9910 Epson Stylus Pro 9900 / 9910 Epson Stylus Pro 9900 / 9910 Push the black plastic part all the way in the pipe. Poussez complètement la partie en plastique noir dans la conduite.
- Seite 17 Epson Stylus Pro 9900 / 9910 Epson Stylus Pro 9900 / 9910 Epson Stylus Pro 9900 / 9910 Epson Stylus Pro 9900 / 9910 Epson Stylus Pro 9900 / 9910 Epson Stylus Pro 9900 / 9910...
- Seite 18 Setting up / Confi guration / Aufstellen / Installatie / Confi gurazione / Instalación / Confi gurar When you are removing the protective materials, touch a metallic part of the printer to prevent generating static electricity. Lorsque vous retirez les matériaux de protection, touchez une pièce métallique de l’imprimante pour empêcher la génération d’électricité statique. Berühren Sie beim Entfernen des Schutzmaterials ein Metallteil des Druckers, um elektrostatische Aufl...
- Seite 19 Epson Stylus Pro 9900 / 9910 Epson Stylus Pro 9900 / 9910 Use only the type of power source indicated on the printer’s label. Utilisez uniquement le type de source d’alimentation électrique indiquée sur l’étiquette de l’imprimante. Verwenden Sie ausschließlich die auf dem Druckeretikett angegebene Stromversorgung.
-
Seite 20: Installing The Ink Cartridges
In order to prevent an initial ink charging from failing, be sure to read the Ink Charging Sheet. Afi n d’éviter un échec de chargement initial en encre, veillez à lire la feuille concernant le chargement en encre. Lesen Sie das Blatt mit der Beschreibung der Tintenbefüllung durch, um einen Fehler bei der Erstbefüllung mit Tinte zu vermeiden. Lees in ieder geval het blad met de instructies voor de installatie van de cartridges voordat u de cartridges installeert. -
Seite 21: Loading The Roll Paper
Do not touch the green IC chip on the side of the ink cartridge. Doing so may prevent normal operation and printing. Ne touchez pas la puce verte située sur le côté de la cartouche d’encre. Ceci pourrait empêcher un fonctionnement normal et une impression normale. Berühren Sie den grünen IC-Chip an der Seite der Tintenpatrone nicht. - Seite 23 PAPER RELEASED LOAD PAPER READY ROLL PAPER SETTINGS ARE THESE SETTINGS OK? NO PAPER SELECTED...
- Seite 24 Printing the status sheet READY MENU MENU PRINTER SETUP PRINTER SETUP TEST PRINT TEST PRINT MAINTENANCE MAINTENANCE PRINTER STATUS PRINTER STATUS PAPER SETUP PAPER SETUP TEST PRINT TEST PRINT STATUS SHEET NOZZLE CHECK NOZZLE CHECK PRINT STATUS SHEET STATUS SHEET NETWORK STATUS SHEET NETWORK STATUS SHEET JOB INFORMATION...
- Seite 25 If you cannot print properly, see "Problem Solver" in the User's Guide to solve the problem. Si vous ne parvenez pas à imprimer correctement, consultez la section “Résolution des problèmes” du Guide d’utilisation pour résoudre le problème. Sollten ein korrekter Druck nicht möglich sein, schlagen Sie im „Problemlöser” im Benutzerhandbuch nach, wie Sie das Problem lösen können. Indien zich bij het afdrukken problemen voordoen, raadpleegt u het gedeelte “Problemen oplossen”...
- Seite 26 Aligning the print head / Alignement de la tête d’impression / Ausrichten des Druckkopfs / Uitlijning van de printkop / Allineamento della testina di stampa / Alineación del cabezal de la impresora / Alinhar as cabeças de impressão READY MENU MENU PRINTER SETUP PRINTER STATUS...
- Seite 27 Matte Paper HEAD ALIGNMENT HEAD ALIGNMENT PAPER THICKNESS Singleweight Matte PAPER THICKNESS Photo Quality IJ Paper ALIGNMENT ALIGNMENT Doubleweight Matte Enhanced Matte Archival Matte ALIGNMENT AUTO ALIGNMENT AUTO ALIGNMENT AUTO UNI-D UNI-D MANUAL BI-D 2-COLOR BI-D 2-COLOR BI-D ALL BI-D ALL BI-D #1 BI-D #1 BI-D #2...
- Seite 28 Indien het volgende dialoogvenster verschijnt, controleert u of de uitgever SEIKO EPSON is, en klikt u op Blokkering opheffen. Se viene visualizzata la seguente fi nestra di dialogo, verifi care che l’autore sia SEIKO EPSON e fare clic su Sblocca.
- Seite 29 Follow the on-screen instructions to complete the installation. Suivez les instructions à l’écran pour terminer l’installation. Folgen Sie den Bildschirmanweisungen, um die Installation fertig zu stellen. Volg de instructies op het scherm om de installatie van de software te voltooien. Seguire le istruzioni a schermo per completare l’installazione.
- Seite 30 Mac OS X v10.3.9 , v10.4 Application Utilities Printer Setup Utilities Mac OS X v10.5 Application System Preferences Printer Setup Utilities See the User’s Guide for detailed information on the printer. Consultez le Guide d’utilisation pour obtenir des informations détaillées sur l’imprimante. Einzelheiten zum Drucker fi...