Xomax XM-2DTSBN6214 Montageanleitung

Verwandte Anleitungen für Xomax XM-2DTSBN6214


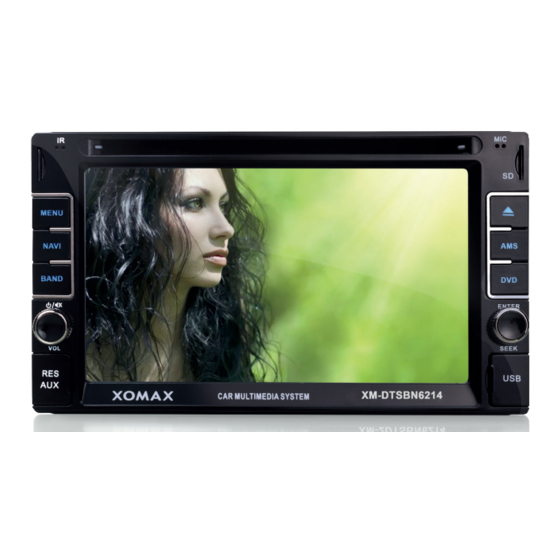
Inhaltszusammenfassung für Xomax XM-2DTSBN6214
- Seite 1 XOMAX Installation Manual Montageanleitung XM-2DTSBN6214 Installation Manual ENGLISH Montageanleitung DEUTSCH...
- Seite 2 Thema: Montageanleitung XM-2DTSBN6214 Vielen Dank für Ihr Vertrauen, das Sie uns mit dem Kauf eines XOMAX Autoradios erwiesen haben. Wir wünschen Ihnen viel Spaß mit Ihrem neuen Multimedia Autoradio. Bitte lesen Sie sich diese Montageanleitung sorgfältig durch, bevor Sie das Gerät installieren und in Betrieb nehmen.
-
Seite 3: Inhaltsverzeichnis
2 Befestigung des Fixierbleches ..12 Alt-Geräteentsorgung 3 Transportschrauben entfernen ..13 4 Einbaurahmen fixieren ....13 Batterieentsorgung 5 Autoradio anschließen ....14 6 Autoradio fixieren .......14 7 Blende anbringen ......15 XOMAX X M - 2 D T S B N 6 2 1 4... -
Seite 4: Sicherheitshinweise Und Vorsichtsmaßnahmen
Sie nicht, das Gerät bei auftretenden Problemen eigen- Betriebstemperatur mächtig zu reparieren. Bei einer Öffnung besteht die Gefahr eines Vergewissern Sie sich vor dem Stromschlages. Einschalten des Gerätes, dass die XOMAX X M - 2 D T S B N 6 2 1 4... -
Seite 5: Reinigung Des Gerätes
Um Feuergefahr und die Gefahr eines zu wischen. elektrischen Schlags zu vermeiden, setzen sie das Gerät weder Regen noch sonstiger Feuchtigkeit aus. XOMAX X M - 2 D T S B N 6 2 1 4... -
Seite 6: Installationshinweise
Einbauhilfen oder Adapter für Ihren schauen Sie in die Bedienungsanlei- Anschluss benötigen. Diese sollten bei tungen beider Geräte, um die richtige Ihrem Fachhändler vorrätig sein. Funktion der Kabel herauszufinden. XOMAX X M - 2 D T S B N 6 2 1 4... - Seite 7 Gefahr, dass die Batterie sich entlädt. » Führen Sie das gelbe Kabel nicht direkt in den Motorraum durch, um es an die Batterie anzuschließen. Dies XOMAX X M - 2 D T S B N 6 2 1 4...
-
Seite 8: Anschlussschema Iso-Stecker
Thema: Anschlussschema ISO-Stecker Anschlussschema ISO-Stecker Phantomeinspeisung Radio-Antenne Aktiv Zündung Dauerstrom Lautsprecher hinten links vorne links vorne rechts hinten rechts XOMAX X M - 2 D T S B N 6 2 1 4... -
Seite 9: Anschlussschema Cinch
Audio-/Videoquelle z.B. z.B. Kopfstützenmonitor Kopfstützenmonitor z.B. DVB-T Receiver (optional), oder Deckenmonitor oder Deckenmonitor MP3- oder Video Player (optional) externer Monitor 1 externer Monitor 2 (optional) (optional) XOMAX X M - 2 D T S B N 6 2 1 4... -
Seite 10: Iso-Buchsen-Belegung
Anschluss kann bei Nichtübereinstim- jedem Ausschalten des Radios verloren mung der Belegung zu schwerwie- gehen. In dem Fall können diese zwei genden Fehlern führen. Klemmen vertauscht werden. XOMAX X M - 2 D T S B N 6 2 1 4... -
Seite 11: Iso-Kabel Anschlüsse
ISO-Buchse führen zu lassen. Die ISO-Buchse dient dem verein- fachten Anschluss des Autoradios an Ihr Fahrzeug. Vorausgesetzt, das Fahrzeug hat einen genormten ISO-Anschluss mit passender Belegung. XOMAX X M - 2 D T S B N 6 2 1 4... -
Seite 12: Einbauanleitung
Später (siehe Seite 14) wird das gegebenenfalls übersprungen werden. Autoradio mit einer Mutter daran Das Fixierblech muss so am Fahrzeug befestigt. befestigt werden, dass das Radio mit XOMAX X M - 2 D T S B N 6 2 1 4... -
Seite 13: Transportschrauben Entfernen
Lieferumfang enthalten) zunächst vom Einbaurahmen im Schacht zu fixieren. Autoradio ab. Verwenden Sie dafür zwei Ausziehschlüssel Seite 16 . Gegebe- nenfalls muss auch die Blende entfernt XOMAX X M - 2 D T S B N 6 2 1 4... -
Seite 14: Autoradio Anschließen
Loch des Fixierblechs durchgerutscht Dieser Vorgang bezieht sich auf den sein. Befestigen Sie nun das Autoradio Schritt 2 und kann gegebenenfalls am Fixierblech mit einer Mutter. übersprungen werden. XOMAX X M - 2 D T S B N 6 2 1 4... -
Seite 15: Blende Anbringen
Thema: Einbauanleitung Blende 7 Blende anbringen Jetzt kann die Blende vorsichtig auf die Radiofront drauf geschoben werden, insofern diese sich nicht bereits am Gerät befindet. XOMAX X M - 2 D T S B N 6 2 1 4... -
Seite 16: Ausbauanleitung
Daher kann es sein, dass Ihr Als erstes sollte die Mutter mit Hilfe Autoradio nicht mit einem Fixierblech eines Schlüssels vom Fixierblech an der befestigt wurde. Geräterückseite gelöst werden. XOMAX X M - 2 D T S B N 6 2 1 4... -
Seite 17: Blende Lösen
4 Ausziehschlüssel verwenden gleichem Abstand nach oben und unten eingeführt werden. Führen Sie nun die Ausziehschlüssel in die dafür vorgesehenen Aussparungen zwischen dem Einbaurahmen und dem Autoradio ein. XOMAX X M - 2 D T S B N 6 2 1 4... -
Seite 18: Autoradio Lösen
6 Autoradio entfernen wurde, sollten alle Kabel abgeschlossen und der ISO-Stecker abgeklemmt Ziehen Sie nun das Autoradio aus dem werden. Radioschacht bzw. aus dem Einbau- rahmen heraus. XOMAX X M - 2 D T S B N 6 2 1 4... -
Seite 19: Montagezubehör Entfernen
Thema: Ausbauanleitung 5 Montagezubehör entfernen Wenn Sie das Radio nicht wieder einbauen möchten, kann im letzten Schritt das Montagezubehör (Fixier- blech, Einbaurahmen) entfernt werden. XOMAX X M - 2 D T S B N 6 2 1 4... -
Seite 20: Rückfahrkamera
Spannung angeschlossen - wie oben für Kamera beschrieben. » Der Empfänger wird an das Radio und auch an Spannung angeschlossen - wie oben für Kamera beschrieben XOMAX X M - 2 D T S B N 6 2 1 4... -
Seite 21: Lenkradfernbedienung
(+)-Kabel verbunden werden muss. » Funktionstest: Drücken Sie eine Taste auf der Lenkradfernbedienung, sollte eine zugeordnete Sensortaste im Einstellungsmenü (LENKRAD STEUE- RUNG) aufleuchten. XOMAX X M - 2 D T S B N 6 2 1 4... -
Seite 22: Allgemeine Problemlösung
Allgemeine Problemlösung Diese Problemlösungsvorschläge sind allgemeingültig und beziehen sich auf verschiedene XOMAX Modelle mit ähnlichen Eigenschaften. Bitte beachten Sie, dass einige Punkte sich nicht auf Ihr Autoradiomodell beziehen könnten oder dass Funktionen beschrieben sind, welche Ihr Gerät eventuell nicht unterstützt. - Seite 23 Knopf drücken. Schauen Sie sich dabei das Kamerabild auf dem Display des Kamerage- rätes an. Wenn die Fernbedienung funktioniert, sollte das rote IR-Signal auf dem Display zu sehen sein. XOMAX X M - 2 D T S B N 6 2 1 4...
- Seite 24 Phantomeinspeisung mit integriertem Diversity System benötigt. Hinweis: Eine Phantomeinspeisung ist nicht mit einem Antennenverstärker zu verwechseln. Ein einfacher Antennenverstärker bietet nur selten einen bedeutenden Effekt. XOMAX X M - 2 D T S B N 6 2 1 4...
- Seite 25 Bildschirm erscheint die Meldung ADJUST FINISH.Tippen Sie nun auf eine beliebige Stelle des Bildschirmes, um zurück in das Menü zu gelangen. XOMAX X M - 2 D T S B N 6 2 1 4...
-
Seite 26: Alt-Geräteentsorgung
Handhabung der Geräte am Ende ihrer Lebensdauer ergeben könnten. Genauere Information zur nächstgele- genen Sammelstelle oder Recyclinghof erhalten Sie bei Ihrer Gemeindeverwal- tung. XOMAX X M - 2 D T S B N 6 2 1 4...