Midland G6 XT Bedienungsanleitung
Quicklinks
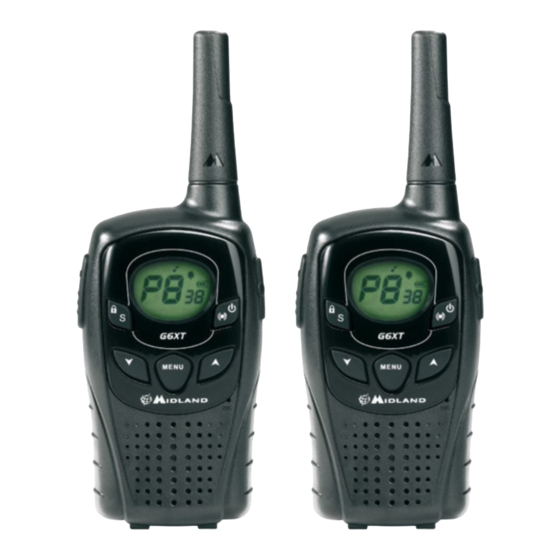
MIDLAND G6 XT
DESCRIZIONE DELL'APPARATO
MIDLAND G6 XT
Ricetrasmettitore PMR446
Fate riferimento all'immagine per identificare tutte le parti
principali dell'apparato.
Grazie per aver scelto i prodotti Midland! L'apparato Midland G6 XT
è un ricetrasmettitore che può essere utilizzato senza licenza, in
quasi tutta Europa. Per ulteriori informazioni, consultate la tabella
"Restrizioni all'uso".
Come previsto da dl 259 del 01/08/2003 e da nota 101C del PNF, gli
apparati PMR446 sono soggetti ad una dichiarazione d'utilizzo e ad un
contributo annuo. Per ottenere la modulistica e le modalità di ottenimento
dell'autorizzazione generale contattate l'Ispettorato Territoriale nel
vostro capoluogo di regione o visitate il sito web del Ministero delle
Comunicazioni (www.urpcomunicazioni.it oppure www.urpcomunicazioni.
it/ispettorati).
L'utilizzo dell'apparato è consentito solamente dopo aver inviato la pratica
all'Ispettorato Territoriale.
Raccomandiamo di conservare una copia di tale pratica.
MIDLAND G6 XT unisce tutte le funzionalità avanzate di un
ricetrasmettitore di ultima generazione, con una modalità di utilizzo
semplice e immediata.
Infatti, MIDLAND G6 XT può funzionare in modalità "standard" con tutte
le funzioni attive, oppure in modalità "Baby sitter" con solo le funzionalità
specifiche per l'utilizzo come Baby monitor.
DOTAZIONE
13
ANTENNA
• 2 Ricetrasmettitori Midland G6XT
14
ALTOPARLANTE
• 2 Clip da cintura
• 2 Pacchi batteria 600mAh
Serve per ricevere l'audio.
• 1 caricatore doppio da tavolo
15
mic In questo punto si trova il microfono per la trasmissione.
• 1 adattatore da muro
16
PTT Premendo il pulsante permette la trasmissione vocale.
17
MENU La pressione di questo pulsante permette di entrare nel
COPERTURA/PORTATA
menu di configurazione della radio.
Le prestazioni dei ricetrasmettitori dipendono dalle condizioni ambientali
18
▲▼ servono a variare le impostazioni all'interno del Menu e in
ed atmosferiche. Fattori ambientali quali alture, edifici, alberi, fogliame
ricezione aumenta/decrementa il volume audio.
possono diminuire la copertura.
19
/S premendo questo pulsante, si avvia la funzione SCAN;
Le prestazioni ottimali si ottengono in campo aperto mentre la portata
tenendolo premuto per circa 3 secondi si attiva il "Blocco tastiera".
si potrà ridurre, per esempio all'interno di un'automobile o di un edificio.
20
/
serve per inviare un segnale di chiamata dell'Out of
Tipicamente la copertura in città, in presenza di edifici è di 1-2 Km.
In campo aperto, ma con presenza di alberi, case, fogliame, la copertura
range oppure tenendo premuto per circa 3 secondi permette di
accendere/spegnere la radio.
è di 4-6 Km.
In campo aperto, a vista e senza nessun tipo d'interferenza, come per
21
PRESA ESTERNA "SPK/MIC-CHG"
esempio in montagna, la copertura può essere anche superiore ai 12
Consente il collegamento a dispositivi esterni quali: cuffie,microfoni,
Km.
caricatore ecc (2 pin).
DESCRIZIONE DELLE PARTI
OPERAZIONI G6 XT
DISPLAY
ACCENSIONE/SPEGNIMENTO
Il vostro ricetrasmettitore utilizza un display LCD (a cristalli liquidi); i simboli
Premere e tenere premuto il tasto
per circa tre secondi. Il display
ed i parametri che possono apparire di volta in volta sono i seguenti:
eseguirà un auto test per un secondo e visualizzerà l'ultimo canale
utilizzato.
REGOLAZIONE VOLUME
Per regolare il volume sul livello ottimale, premere i tasti ▲▼ finché non
si ottiene il livello desiderato.
SELEZIONE CANALI
Premere una volta il tasto MENU e di seguito i tasti ▲▼ per selezionare
uno dei canali disponibili. Premere PTT per confermare la selezione
1
TX
Compare quando state trasmettendo (pulsante PTT premuto).
effettuata oppure attendere circa 5 secondi.
2
RX
Appare sul display quando il ricetrasmettitore sta ricevendo
I canali disponibili sono da 1 a 8.
un segnale.
CANALE
FREQ. RX/TX (MHz)
CANALE
1
446.00625
5
3
Indica il numero del canale selezionato.
4
Indica il codice del tono CTCSS selezionato (of-38).
2
446.01875
6
3
446.03125
7
5
Indica che la funzione "Out of range" è attiva.
4
446.04375
8
6
Indica lo stato di carica delle batterie.
7
Indica che la funzione "Baby Sitter" è attiva.
Vi sono anche 40 canali pre-registrati (dal 9 al 48) che corrispondo ad un
8
VOX Indica che la funzione Vox è attiva.
determinato canale PMR446 associato ad un tono CTCSS.
9
Indica che il tono tastiera è attivo
Per visualizzare momentaneamente il relativo canale PMR446 -tono sub
10
Indica che la funzione Roger Beep è attiva.
audio, tenere premuto per 5 secondi circa il tasto MENU.
11
Indica che il blocco tastiera è stato attivato.
12 SCAN Indica che la radio sta facendo lo SCAN dei canali.
MIDLAND G6 XT
DESCRIPTION OF THE CONTROLS
Refer to this picture to identify the various parts of the device:
PMR446 transceiver
Thanks for choosing Midland! Midland G6 XT is a portable
transceiver that is free use in almost all European countries. For
further information, we suggest you look at the "Restrictions on the
use" chart.
MIDLAND G6 XT joins all the advanced functions of last generation
transceivers with its simply and easy use.
MIDLAND G6 XT can operate as a "standard" radio with all the traditional
functions or as "baby monitor" , with only the specific "Baby Sitter"
functions.
CONTENT
• 2 Midland G6XT transceivers
• 2 Belt clip
• 2 600mAh Battery packs
• 1 double desktop charger
• 1 wall adaptor
COVERAGE/RANGE
The maximum range depends on terrain condition and is obtained during
use in an open spaces.
The only limitations to maximum possible range are environmental factors
13
ANTENNA
such as blockage caused by trees, buildings, or other obstructions. Inside
14
BUILT-IN SPEAKER - Here is where the speaker is housed.
a car or a metallic construction, the range can be reduced.
15
BUILT-IN MICROPHONE - Here is where sound is picked up by
Normally the coverage in the city, with buildings or other obstructions is
the microphone.
about 1 or 2 Km. In open spaces but with obstructions like trees, leaves
16
PTT (push to talk) Push this button to transmit.
or houses the maximum possible range is about 4-6 Km. In open spaces,
without obstructions and in sight, like for example in mountain, the
17
MENU: Press this button to enter the radio's menu.
coverage can be more than 12 Km.
18
▲▼ use these buttons for changing the settings
19
/S Press this button to activate the scanning of the channels.
If you keep it pressed for about 5 seconds, the keypad lock is
DESCRIPTION OF THE CONTROLS
activated.
AND FUNCTIONS
20
/
Press this button to use the Out of range function. If you keep
it pressed for about 5 seconds, you turn on/turn off the radio.
DISPLAY
21
EXTERNAL SPEAKER/MIC/CHG JACK - allows the connection
Your midland G6 XT keeps you constantly updated about its operational
with external devices as headsets, microphones, charger...
status through a Liquid Crystal Display (LCD). The symbols and their
corresponding parameters that may appear, according to the operational
status of the device, are described as follows:
OPERATIONS AND FUNCTIONS
POWER ON/POWER OFF
Press and keep pressing the button
for about 3 seconds. The display
will do an auto scanning for about 1 second. You will visualize on the
display the last used channel.
VOLUME ADJUSTMENT
Use the ▲▼ to increase or decrease the volume setting.
CHANNEL SELECTION
Press the MENU button. The number of the channel will start flashing on
1
TX
Appears while you are transmitting a signal (PTT button
the display.
pressed)
Press the scroll buttons ▼▲ till you select the desired channel. Press the
2
RX
Means that the radio is receiving a signal.
PTT button to confirm, or wait for 5 seconds.
3
Indicates the channel selected
4
Indicates the sub audio tone selected. (of-38).
Channel
FREQ. RX/TX (MHz)
Channel
5
VOX Indicates if VOX MENU is active.
1
446.00625
5
2
446.01875
6
6
Indicates the battery level.
7
Indicates if the Out of Range is active.
3
446.03125
7
8
Indicates that the baby sitting function is on.
4
446.04375
8
9
Indicates that the Beep tone is on
There are also 40 pre-set channels. Each pre-set channel corresponds to
10
Indicates that the Roger Beep function is active
a PMR channel with a CTCSS tone already attributed.
11
Means that the keypad lock is on
12 SCAN Indicates that the radio is scanning the channels
For displaying the channel/sub audio tone of the preset channel
To momentarily display the PMR446 channel and the subadio tone used
in the pre-set channels, go to the desired channel (from 9 to 48) and keep
pressed the MENU for 5 seconds.
TRANSMISSION AND RECEPTION
To communicate, all radios in your group must be set on the same
channel.
To transmit, press and hold the PTT button and speak in a normal voice
into the microphone. The "TX" icon will appear continuously on the LCD
display while transmitting.
M DLAND G6 XT
M
M
W
M
G
W
▲▼
BED ENELEMENTE UND FUNKT ONEN
BED ENUNGSH NWE SE
▲▼
W
W
▼▲
M
G
M DLAND G6 XT
Ó
O
O
O
M
O
Ó
O
▲▼
DESCR PC ÓN DE LOS CONTROLES Y
FUNC ONES
OPERAC ONES Y FUNC ONES
O
G
O
O
M
Ó
▼▲
TRASMISSIONE E RICEZIONE
BEEP TASTIERA
Per comunicare con altre radio, è necessario che tutte siano sintonizzate
Questa funzione, se attiva, genera un beep audio ogni volta che si preme un
sullo stesso canale.
tasto. Nel caso si desideri escludere il beep audio, è possibile farlo premendo
Per trasmettere, premere il pulsante PTT e parlare con un tono di voce
il tasto MENU, sino a visualizzare sul display
normale nel microfono. L'icona "TX" apparirà sul display durante la
tramite i tasti ▲▼ "OF".
trasmissione. Per una massima chiarezza della voce tenere il microfono
Confermare premendo il pulsante PTT oppure attendere 5 secondi. In
distante dalla bocca 2/3 centimetri.
questo modo, alla pressione di un tasto non si sentirà alcun suono. Per
Per poter ricevere, rilasciare il pulsante PTT.
attivare questa funzione ripetere la procedura indicata selezionando "on".
Quando la radio è in ricezione, sul display apparirà l'icona "RX".
Confermare premendo il pulsante PTT oppure attendere 5 secondi.
Sul display l'icona
SQUELCH
eliminazione dei rumori di fondo/estenzione copertura
ROGER BEEP
Nel MIDLAND G6 XT il filtro per la riduzione del rumore di fondo (squelch)
(Tonalità di conferma fine conversazione)
è sempre attivo.
Al rilascio del tasto PTT, quindi alla fine di ogni trasmissione, viene emessa
una tonalità, che indica al vostro interlocutore che può iniziare a parlare.
BLOCCO TASTIERA
Nel G6 XT questa funzione si attiva premendo il tasto MENU, sino a
Mantenere premuto il tasto
/S per più di 5 secondi. Il simbolo
indica
visualizzare sul display
che il blocco tastiera è stato attivato e tutti i pulsanti, eccetto PTT e
Premere il pulsante PTT oppure attendere 5 secondi per confermare la
sono disabilitati.
programmazione. Sul display l'icona
Per disattivarlo, premerlo nuovamente
/S per più di 3 secondi.
funzione è attiva.
Per disattivare la funzione ripetere la procedura indicata selezionando "OF".
TONI CTCSS
I toni CTCSS sono dei codici che possono essere aggiunti ai canali per
CALL
crearne altri personali.
G6 XT consente di inviare un segnale sonoro di avviso chiamata a tutti gli
Per ogni canale, si possono scegliere fino a 38 codici CTCSS differenti.
utenti sullo stesso canale; per inviare la chiamata occorre premere due
L'implementazione di questi codici può essere fatta solo sugli 8 canali
volte velocemente il pulsante PTT.
principali (da 1 a 8).
Sul display apparirà l'icona "TX".
I canali pre-registrati da 9 a 48 non possono essere modificati.
Per attivare i codici CTCSS premere tre volte il pulsante MENU, poi
SCAN: Scansione dei canali
tramite i tasti ▲▼ selezionare il tono desiderato "of-38". Per confermare
SCAN esegue la scansione (ASCOLTO) di tutti i canali occupati.
premere il pulsante PTT o attendere cinque secondi. Sul display apparirà
Si utilizza per controllare le conversazioni su tutti i canali. In presenza di
il tono scelto.
un segnale su un canale (quindi di una conversazione), la scansione si
Per disabilitare le funzioni CTCSS selezionare il canale desiderato,
interrompe. Nel caso in cui sia presente un disturbo o una conversazione
premere il pulsante MENU sino a visualizzare sul display il codice del
non desiderata è possibile far avanzare la scansione premendo i tasti
tono CTCSS lampeggiante a destra, e selezionare "00" tramite ▲▼.
▲▼.
Per confermare premere PTT o attendere 5 secondi.
Durante questa funzione è presente il riconoscimento automatico
N.B.: Per poter comunicare con le altre radio le impostazioni dei toni
(CTCSS detector) dei toni sub-audio in ricezione, ovvero la radio si
devono essere le stesse.
fermerà sui canali dove è presente un segnale e il display mostrerà il
tono sub-audio utilizzato dal chiamante. Il tono CTCSS decodificato
Toni CTCSS
non viene automaticamente impostato in trasmissione dalla radio è
Numero
Tono
Numero
Tono
Numero
Tono
necessario quindi, per poter comunicare, impostarlo manualmente. (Vedi
sul display
frequenza Hz
sul display
frequenza Hz
sul display
frequenza Hz
par. "Impostazione toni CTCSS")
Attivazione funzione SCAN
01
67.0
14
107.2
27
167.9
1. Premere il tasto SCAN: viene attivata la scansione dei canali e
02
71.9
15
110.9
28
173.8
"SCAN" verrà visualizzato sul display.
03
74.4
16
114.8
29
179.9
2. Premere i tasti ▲▼ per evitare temporaneamente l'ascolto di canali
04
77.0
17
118.8
30
186.2
che presentano un forte rumore di fondo o una conversazione non
05
79.7
18
123.0
31
192.8
desiderata.
06
82.5
19
127.3
32
203.5
Trasmissione durante funzione SCAN
07
85.4
20
131.8
33
210.7
Alla pressione del pulsante PTT la radio trasmette sul canale da dove si
08
88.5
21
136.5
34
218.1
è fatta partire la scansione oppure sul canale occupato utilizzando il tono
09
91.5
22
141.3
35
225.7
subaudio pre-impostato.
10
94.8
23
146.2
36
233.6
Per disattivare la funzione, premere nuovamente SCAN.
11
97.4
24
151.4
37
241.8
12
100.0
25
156.7
38
250.3
OUT OF RANGE
13
103.5
26
162.2
Midland G6 XT ha la possibilità di selezionare la funzione "out of range"
VOX
manuale o automatico.
Grazie a questa funzione è possibile verificare se una coppia di apparati
Il G6 XT ha 4 livelli di VOX (off,1,2,3,4). Questa funzione permette di
rimane sempre in portata.
attivare la comunicazione senza premere il pulsante PTT. E' sufficiente
Per attivare su entrambe le radio la funzione Out of Range:
parlare e la comunicazione viene attivata.
La sensibilità è regolabile su 3 livelli (livello 1 più sensibile) e attivabile con
Out of range automatico:
o senza accessori, il quarto livello disponibile attiva la funzione VOX con
FREQ. RX/TX (MHz)
Premere il tasto MENU sino a visualizzare sul display
Talkback: nel caso in cui uno dei due apparati trasmette ininterrottamente
per più di 20 secondi, il VOX Talkback ne interrompe la trasmissione per
quindi con i tasti ▲▼ la modalità "AU"(automatico).
446.05625
dieci secondi, liberando il canale e concedendo così all'altro utente la
Confermare le impostazioni con il pulsante PTT o attendere 5 secondi.
446.06875
possibilità di parlare.
Dal momento in cui le due radio hanno la funzione attiva, automaticamente
446.08125
Per attivare i vari livelli del VOX premere il tasto MENU fino a visualizzare
si trasmetteranno a vicenda un codice di controllo ogni 30 secondi. Non
446.09375
sul display "VOX" lampeggiante, dopodiché tramite i tasti ▲▼ selezionare
appena questa trasmissione si interrompe ed uno dei due apparati non
"1","2","3" o "4" Per confermare premere il pulsante PTT o attendere
riceve il codice di controllo per più di 2 volte consecutive, la radio emetterà
cinque secondi.
un suono di avviso e "OU NO" lampeggerà sul display finché la radio non
Sul display l'icona "VOX" rimarrà fissa, indicandovi che la funzione è
tornerà in portata.
attiva.
Per disattivare la funzione VOX seguire le indicazioni sopra indicate
Out of range manuale:
selezionando la voce "OF".
Premere il tasto MENU sino a visualizzare sul display
quindi con i tasti ▲▼ la modalità "PB"(manuale).
For a maximum clarity, hold the device at a distance of about 2/3 cm.
for 5 seconds.
To receive a CALL, release the PTT button. The "RX" icon will appear on
The radio will display
the display when your radio is receiving a transmission.
ROGER BEEP (end of transmission tone)
SQUELCH
When the PTT button is released, the radio will beep to confirm to other
With the SQUELCH function, noises can be suppressed on the free
users that you've finished your transmission and that they can begin to
channel. In MIDLAND G6 XT this function is always active.
speak.
To turn the ROGER BEEP on, press the MENU button till the display
KEYPAD LOCK
shows "
of"; than by the scroll buttons ▲▼, select "on".
To confirm, push the PTT button or wait for 5 seconds. The radio will
Keep pressed the button
/S for about 5 seconds.
will appear on the
display
steadily. That means that the function is on.
display. In this way, the Lock function is activated and all the buttons,
To disable this function, repeat the procedure selecting the "OF".
except PTT and
, will be disabled.
To disable this function, keep pressed again the button /S for about 5
CALL ALERT SELECTION
seconds.
G6 XT allows to send a CALL alert signal to all the users of the same
channel.
CTCSS TONES
To CALL, quickly press twice the PTT button. The "TX" icon appears on
The CTCSS tones are codes that can be added to the channels for
the display.
creating new private ones. For each channel you can choose until 38
CTCSS.
SCAN FUNCTION
The addition of these codes can be made on the main PMR channels
(from 1 to 8).
The SCAN mode monitors the busy channels.
The pre-set channels from 9 to 48 can not be modified.
It is used to check speech traffic on the channels before transmitting and
To select a privacy code for the current channel press 3 times the MENU
allows the unit to stop on a channel that someone is talking on. In case
button, then with the scroll buttons ▲▼ select the desired code.
of undesired conversation, you can skip this channel by pushing the ▲▼
To confirm the selection, press the PTT button or wait for 5 seconds.
buttons.
The selected Privacy Code will appear on the display.
When the SCAN function is enabled, the CTCSS detector is activated: the
To disable the CTCSS function, select the private code and then press the
radio automatically detects the sub-audio tone of the calling part, which
MENU button, until you visualize the flashing CTCSS Privacy Code on the
will be displayed. The CTCSS tone received won't be automatically set
during transmission and, therefore, to talk, it must be manually set.
display. Select then "00" using the scroll buttons ▲▼.
(See par. "CTCSS sub-tone setting")
To confirm, press PTT or wait for 5 seconds.
To enable SCAN:
1. Press SCAN key: channels will start scanning and "SCAN" will be
Note: To communicate with other radios, they must be set to the same
displayed.
channel and Privacy Code selections.
2. Press ▲▼ to skip the channels with a strong background noise or
undesired conversation.
CTCSS TONE TABLE
Number
Tone
Number
Tone
Number
Tone
Transmission during the SCAN function
Displayed
Frequency Hz
displayed
Frequency Hz
displayed
Frequency Hz
Pressing PTT, the radio will transmit on the channel where the scan
01
67.0
14
107.2
27
167.9
started or on the busy channel, using the pre-set subaudio tone.
02
71.9
15
110.9
28
173.8
To deactivate this function, push the SCAN key again.
03
74.4
16
114.8
29
179.9
04
77.0
17
118.8
30
186.2
OUT OF RANGE
05
79.7
18
123.0
31
192.8
The G6 XT is equipped with the "out of range" function.
06
82.5
19
127.3
32
203.5
With the MIDLAND G6 XT you can choose between the automatic Out of
07
85.4
20
131.8
33
210.7
Range or the manual one.
08
88.5
21
136.5
34
218.1
To enable/disable the Out-Of-Range function:
09
91.5
22
141.3
35
225.7
Automatic Out of Range
10
94.8
23
146.2
36
233.6
Press MENU till the display shows
11
97.4
24
151.4
37
241.8
the buttons ▲▼.
12
100.0
25
156.7
38
250.3
Confirm the settings with the PTT button or wait for 5 seconds.
13
103.5
26
162.2
By setting this function a pair of G6 XT transmitts every 30 seconds a data
control code. As soon as the contact between both units is getting lost and
VOX
one station doesn't receive this data control code twice consecutively,
Your G6 XT has 4 VOX levels (off, 1, 2, 3, and 4). This function allows the
the icon "OU NO" starts flashing in the display and you will hear a beep
user to activate the communication without pressing the PTT button. You
tone.
just have to speak and the communication is on.
You can set the VOX on 3 sensibility levels, with or without accessories.
Manual Out of range:
The fourth level activates the VOX with Talkback function: when one of
Press MENU till the display shows
FREQ. RX/TX (MHz)
the two devices transmit for more than 20 seconds, the VOX Talkback
buttons ▲▼.
446.05625
stops the transmission for 10 seconds; so the other user has himself the
Confirm the settings with the PTT button or wait for 5 seconds.
446.06875
opportunity to talk.
The radio will display
To set the VOX level, press the MENU button, until the display shows
To switch on this function manually, press the button
446.08125
"VOX" flashing on the display.
446.09375
After that, with the scroll buttons ▲▼, select "1","2","3" or "4".
To disable this function, push MENU till "
To confirm, press the PTT button or wait for 5 seconds.The radio will
select "OF" (disabled) with the buttons ▲▼.
display "VOX" steadily. That means that the function is on. To disable the
Confirm your selection by pushing PTT or waiting for 5 seconds.
VOX function, follow the previous indications, but select "oF" and then
push the PTT key to confirm.
BABY SITTER FUNCTION
Midland G6 XT can operate on 2 different ways: as a standard radio with
BEEP TONE
all the traditional functions, or as baby monitor, for holding your baby in
This function permits you to produce a beep tone every time you press
check.
a button.
If you set the radio in baby sitter mode, all the other traditional functions
If you want to disable this function, press the MENU button until the
are disabled and the transceiver works only as baby monitor.
display shows "
on", then select by the scroll buttons ▲▼ "OF".
To set the radio for the baby, that will be put near the cradle, press the
To confirm, press the PTT button or wait for 5 seconds.
MENU button twice, until the display will show "
In this way, all "beeps" and "tones" are disabled.
Using the scroll buttons ▲▼, you can choose between the 2 possible
To re-enable this function, repeat the procedure selecting the "on" using
options: "b" or "P"; select "b" and then press the PTT button to confirm or
the scroll buttons ▲▼ and confirm by pressing the PTT button or wait
wait for 5 seconds. The radio will display
Q
Ö
W
▲▼
W
▲▼
▲▼
Ö
▲▼
O
▲▼
Ö
▲▼
OG
m
M
Ó
Ó
O O
OG
Q
OQ
O
O
Ó
O O
▲▼
▲▼
O O
▲▼
▲▼
O
▲▼
Confermare le impostazioni con il pulsante PTT o attendere 5 secondi.
Per inviare la richiesta manualmente premere il tasto
/ .
La radio in ricezione risponderà sempre e automaticamente ad una
richiesta da parte della radio richiedente, senza che anch'essa debba
e "on", e poi selezionare
essere precedentemente impostata.
Per disattivare la funzione, premere il tasto MENU sino a visualizzare sul
display "
AU" o "
PB"; quindi, selezionare con ▲▼ "OF".
FUNZIONALITÁ BABY SITTER
rimarrà fissa, indicandovi che la funzione è attiva.
Midland G6 XT può operare in due modalità distinte: radio standard
con tutte le funzionalità attive, oppure in modalità "Baby Sitter" con
attive solo le funzionalità specifiche per l'utilizzo come baby monitor
(controllo del bambino nella culla). Per impostare la radio da posizionare
vicino alla culla del bambino, premere il tasto MENU due volte, fino a
visualizzare sul display "
OF" (baby sitter off). Ora grazie ai tasti
▲▼ potete scorrere tra le due opzioni possibili e selezionate la voce
"b" (che identifica "baby"). Premete quindi il tasto PTT per conferma
; con i tasti ▲▼ selezionare "on".
o aspettate 5 secondi. Sul display l'icona
rimarrà fissa, indicandovi
che la funzione è attiva. Avendo selezionato l'opzione "b", sul display
rimarrà fissa, indicandovi che la
comparirà l'indicazione del canale "b1". Ora prendete l'altra radio, quella
che utilizzerà il genitore e fate la stessa procedura selezionando però
questa volta l'opzione "P" (che indica "parent"). Anche in questo caso
apparirà l'icona
sullo schermo, che vi indicherà che la funzione è
attiva, insieme all'indicazione del canale "P1". Potrebbe capitare che il
canale selezionato sia disturbato, quindi è opportuno scegliere un altro
canale. Premere il tasto MENU una volta e cambiate canale con i tasti
▲ e ▼ (questa procedura va fatta su entrambe le radio). Sono disponibili
9 canali, da "P1" a "P9" per la radio del genitore (parent) e da "b1" a
"b9" per la radio del bambino (baby). Naturalmente entrambe le radio
devono essere posizionate sullo stesso numero di canale.
Esempio: se la radio posta vicino al bambino è stata impostata sul canale
"b4", la radio del genitore dovrà essere posizionata sul canale "p4".
La modalità "baby sitter" offre una serie di funzionalità specifiche realizzate
per l'utilizzo come baby moniotr:
• Trasmissione automatica radio baby (VOX): la radio del bambino
andrà automaticamente in trasmissione quando capterà un qualsiasi
rumore emesso nelle sue vicinanze (per esempio bambino che
piange)
• Verifica della portata (automatico): se la radio del genitore si
allontana troppo e risulta essere fuori portata, dopo circa 2 minuti la
radio emette un segnale sonoro, indicando che se il bambino dovesse
piangere non lo si sentirebbe. Al riavvicinamento e quindi rientrando in
portata, la radio non emetterà più tale segnale sonoro.
• Verifica della portata (manuale): se volete assicurarvi che la radio
del bambino sia in portata e funzionante, potete inviare manualmente
dalla radio del genitore, una richiesta di verifica. Premete brevemente
il tasto
/ . Se la radio del bambino risponde, verrà emesso un
segnale sonoro.
• Parlare al bambino: in ogni momento potete parlare al bambino
semplicemente premendo il tasto PTT presente sulla radio. Mentre il
bambino piange, cioè quando la vostra radio è in ricezione, dovreste
aspettare che il bambino smetta di piangere perchè possiate parlare
(nel tentativo magari di tranquilizzarlo). Grazie alla funzione "Talk
Back" la radio smette automaticamente di trasmettere dopo circa
20 secondi di trasmissione continua (anche se il bambino sta ancora
piangendo), dandovi così la possibilità di parlargli.
Per disabilitare la funzione baby sitter è sufficiente premere il tasto MENU
due volte, fino a visualizzare sul display, accanto al canale baby o parent
impostato, "b" o "P". Con i tasti ▲▼ selezionate "OF" poi premere il
tasto PTT per conferma o attendere 5 secondi.
Ora la radio ha la funzione baby sitter disattivata e tutte le funzionalità
standard sono tornate attive!
VANO BATTERIA
; selezionare
E CLIP DA CINTURA
La clip posteriore di serie vi permette di fissare
facilmente il ricetrasmettitore alla cintura.
Tuttavia questa va rimossa nel caso in cui
dobbiate rimuovere le batterie.
Per rimuovere la clip cintura sollevare la
linguetta e far scivolare la clip verso l'alto.
Dopo aver rimosso la clip, spingere la linguetta
del coperchio verso il basso e rimuovere il
coperchio sollevandolo tramite l'apposito
; selezionare
cavo. Inserire il pacco batteria oppure 4 pile
alcaline/ricaricabili.
is active. At the same time, on the display you will also see "b1", that is
steadily. That means that the function is on.
the "baby" channel in use.
Now take the other radio, the one used by the parent, follow the same
procedure and select the option "P". Also in this case, the icon
appear on the screen together with "P1", that is the "Parent" channel
in use.
If the channel in use is noisy, you can choose another baby sitter channel.
There are 9 available baby sitter channels: from "P1" to "P9" for the
parent's radio and from "b1" to "b9" for the baby's one. Press the MENU
button once and then change the channel using the scroll buttons ▲▼
in both radios.
Remember that the 2 radio should operate in the same channel
number.
For example: if the radio placed near the baby is set on the channel "b4",
the other one used for listening the baby should be set on channel "P4".
The baby sitter mode allows some specific functions for monitoring the
baby:
• Automatic transmission of the baby's radio (VOX): the baby's radio
will automatically transmit when it picks any noises up. E.g.: when the
baby cries.
• Automatic out of range: if the parent's radio moves too much away
from the baby's radio, after 2 minutes an alert beep tone is emitted
from the "parent" radio, advising you that the two radios are not in
range anymore. You must reduce the distance between the radios to
stop the alert sound.
• Manual out of range: you can also manually check if the "baby" radio
is in range. Briefly press the button
/
on the "parent" radio. If the
two radios are in range, you will hear a tone segnal, otherwise if you
don't hear any tone, that means that your radio is out of range.
• Talk to the baby: normally at any moment, you can talk to the baby
just pressing the PTT button on the parent's radio. But if the baby is
crying (that means that the radio is transmitting), you should wait until
the baby stops crying. Thanks to the Talk back function, if you hear
your baby crying for more than 20 seconds, the VOX Talkback stops
the transmission for 10 seconds, permitting you to talk and calm the
baby down.
To disable the baby sitter function, press the MENU button twice, till
visualize beside the baby sitter channel "b" or "P". Press now the
buttons ▲▼ to chose "OF". Confirm your selection by pushing PTT or
wait for 5 seconds.
Now the baby sitter function is disable and all the standard functions are
back.
THE BATTERY COMPARTMENT
AND THE BELT CLIP
Installing and removing the belt clip:
with the belt clip you can easily attach the
, than select "AU" (automatic) with
transceiver to your belt.
The clip however, must be removed in
order to install or change the batteries.
To remove the belt clip lift the trigger and
slide the clip up.
Unhook the battery holder in the lower part
of the radio and gently slide the cover.
G6 XT accepts the supplied battery pack
or 4AAA alkaline/rechargeable batteries.
, than select "PB" (manual) with the
RECHARGING THE BATTERY AND POWER SAFE
The battery power saving feature enables a reduction in the consumption
steadily. That means that the function is on.
of up to 50%; power saving comes on automatically when the transceiver
/ .
does not receive any signal for more than 7 seconds.
It takes 8/10 hours to fully recharge.
AU" or "
PB" is displayed;
For maximum battery life, we recommend charging the battery pack
when the G6 XT is off and the low battery icon comes on blinking on the
display.
The recharge can be done in two ways: insert the radio into the proper
seat of the desktop charger or use the wall adaptor.
OF"(baby sitter off).
, that means that the function
▲▼
▲▼
M
G
W
▲▼
W
W
W
W
W
▲▼
▲▼
O
▲▼
▲▼
m
▲▼
M
▲▼
▲▼
O
OM
M
O
Ó
▲▼
▲▼
G
O
O
O
RICARICA DELLE BATTERIE E RISPARMIO ENERGIA
AVVERTENZE
NON APRITE LA RADIO PER NESSUN MOTIVO!!
Midland G6 XT è dotato di un dispositivo automatico di risparmio batterie
che consente di ridurre i consumi delle batterie fino al 50%.
La meccanica ed elettronica di precisione di cui é composto l'apparato
Se la radio non riceve alcun segnale per circa sette secondi la funzione
richiede esperienza e strumentazione; per lo stesso motivo la radio non
viene attivata automaticamente.
va assolutamente riallineata, essa infatti é già stata tarata in fabbrica per
le massime prestazioni.
Per una carica completa delle batterie sono necessarie 8/10 ore.
L'apertura del ricetrasmettitore da parte di personale non autorizzato farà
Ricordiamo e raccomandiamo che per un rendimento migliore, la
decadere automaticamente la garanzia.
carica va effettuata con l'apparato spento e quando le batterie sono
completamente scariche.
TABELLA DELLE SOLUZIONI
Quando il pacco batteria è scarico, l'icona icona
lampeggia sul display,
occorre quindi procedere alla ricarica il prima possibile.
PROBLEMA
La ricarica dell'apparato può avvenire in due modi, inserendolo
La radio non si accende
nell'apposito caricatore da tavolo, oppure utilizzando il caricatore da muro
direttamente nella presa CHG dell'apparato stesso.
La radio si spegne subito
dopo l'accensione
ATTENZIONE:
Le batterie non si ricaricano
! Non sovraccaricate le batterie! Quando le batterie sono
completamente cariche, il processo di carica non si blocca
La radio si accende, ma non
automaticamente.
riceve segnali
Non dimenticate quindi di staccare al più presto il ricetrasmettitore
dal caricabatteria non appena é trascorso il tempo necessario;
diversamente,
potreste
danneggiare
le
batterie
e/o
il
ricetrasmettitore.
Non riuscite a mettervi in
! Non cercate di caricare batterie alcaline o comunque batterie non
contatto con la controparte
ricaricabili. Accertatevi che nel vano batterie dell'apparecchio,
con il caricabatterie collegato, siano inserite esclusivamente
batterie ricaricabili NI-MH o il pacco batteria fornito in dotazione!
Le batterie alcaline non sono ricaricabili! Batterie non idonee
La ricezione è spezzata e/o
possono perdere liquido, esplodere o anche bruciare e causare
disturbata
gravi danni!
! L'utilizzo di un caricabatterie non originale può causare danni al
vostro apparecchio o causare esplosioni e lesioni personali.
Il VOX fa trasmettere
! Non gettate mai le batterie nel fuoco, né avvicinatele a sorgenti di
accidentalmente la radio
calore: possono causare esplosioni e lesioni personali.
Smaltite le batterie esclusivamente seguendo le normative
E' necessario parlare a
volume alto per trasmettere
locali.
con il VOX
! Non mescolate assieme batterie vecchie e nuove e/o di tipo
diverso e/o utilizzate in modo diverso.
Malfunzionamenti della logica
(simboli incongruenti sul
Effetto memoria delle batterie ricaricabili
display, blocco funzioni ecc.)
Le batterie ricaricabili Ni-MH (Nickel-metal-idrato) possono essere soggette
a quello che viene chiamato "Effetto Memoria". Quest'ultimo si manifesta
SPECIFICHE TECNICHE
con una drastica diminuzione dell'autonomia d'uso dell'apparecchio
e viene innescato se, sistematicamente, ricaricate le batterie prima di
Canali .................................................................................................................................................................................. 1~8 PMR+ 40 preset channels
averlo scaricato del tutto e/o non le caricate completamente.
Generazione delle frequenze .................................................................................................................................................................. sintetizzatore PLL
Per evitare il manifestarsi dell'effetto memoria:
Copertura di frequenza ............................................................................................................................................................. 446.00625 - 446.09375MHz
• Quando possibile, ricaricate le vostre batterie ricaricabili solo dopo
Passo Canalizzazione ............................................................................................................................................................................................12.5 KHz
averlo scaricato completamente (fino a che l'apparecchio si spegne
Alimentazione ........................................................... 4,8 V 600 mAh (Pacco batteria) - 4x AAA type 1.5V@ 1050mAh+/-10% VCC(Alkaline/Ricaricabili)
Temperatura operativa .................................................................................................................................................................................. da -20° a +55°
con il normale uso)
Dimensioni (senza antenna) ....................................................................................................................................................................... 58x160x28 mm
• Non scollegate il caricabatterie prima del tempo necessario ad
Peso (senza batterie............................................................................................................................................................................................... 0,095 Kg
effettuare una carica completa.
Ciclo di funzionamento ..........................................................................................................................................................TX 5%, RX 5%, stand-by 90%
• Scaricate e caricate a fondo le batterie almeno due volte al mese.
Per eliminare l'effetto memoria, basta semplicemente effettuare tre o
quattro cicli di scarica/carica profonda.
Trasmettitore
Potenza di uscita ........................................................................................................................................................................................... .500 mW ERP
L'effetto memoria non va confuso con la normale vita delle batterie che
Tipo di modulazione .........................................................................................................................................................................................................FM
é mediamente di circa 300-400 cicli di carica/scarica. E' normale che
Reiezione Spurie ........................................................................................................................................................................ rispetta le normative ETSI
l'autonomia operativa si riduca quando le batterie stanno raggiungendo il
Deviazione massima ...............................................................................................................................................................................................±25 KHz
termine del ciclo di vita; in questo caso sostituite le batterie.
Impedenza antenna ..................................................................................................................................................................................................50 Ohm
Ricevitore
INDICAZIONE LIVELLO DELLE BATTERIE
Sensibilità a 12dB Sinad........................................................................................................................................................................................... 0,35µV
Il livello di potenza delle batterie del G6 XT viene indicato attraverso
Potenza di uscita audio ....................................................................................................................................................................... .300mW a 10% THD
un'icona posta in alto a destra del display
.
Reiezione immagine .................................................................................................................................................................................................... 60 dB
Quando il numero delle barre è completo, il pacco batteria è carico; mentre
Reiezione spurie ...........................................................................................................................................
quando il livello della batteria è basso il display mostrerà
lampeggiante.
Questo indicherà la necessità di ricaricare la batteria.
UTILIZZO E CURA DELLA RADIO
! Utilizzare un panno morbido per pulire la radio. Non usare alcool
o detergenti.
! Non immergere nell'acqua.
! Spegnere la radio e rimuovere le batterie durante un lungo tempo
di inutilizzo.
WARNINGS:
TABLE OF SOLUTIONS
! Do not overcharge the batteries! When these are fully charged the
charging process does not stop automatically.
Problem
will
Do not forget therefore, to remove the transceiver from the
The radio doesn't switch on
charger as soon as the batteries are charged.
! Do not try to charge alkaline batteries or non rechargeable
The radio switches
batteries. Make sure that when you charge the radio, only
off shortly after it has been
rechargeable NI-MH batteries or the supplied battery pack should
switched on
be contained in the battery compartment! It is very dangerous
attempting to recharge other types of batteries (for example
The battery does not recharge The battery-charger has not been connected or
alkaline or manganese batteries). Batteries which are not suitable
to be recharged may leak, explode or even burn and cause
The radio switches on but is
damage!
unable to receive signals
! Using a different battery charger, other than the one specified can
cause damage to your device or may even cause explosions and
personal injuries.
It is not possible to
! Do not throw batteries into fire or place them near heat, as
communicate with other
this may cause explosions or personal injuries. Dispose of the
parties
batteries according to procedures set out by local regulations.
! Do not mix old and new batteries or batteries of different types or
batteries which have been used in different manners.
Reception is fragmented
MEMORY EFFECT OF RECHARGEABLE BATTERIES
and/or disturbed
Rechargeable NiMH (Nickel-Metal-Hydrate) batteries are affected by what
is known as the "memory effect". This phenomenon is associated with a
drastic reduction of battery autonomy and is triggered if the batteries are
regularly charged before being fully discharged and/or are not completely
VOX causes the radio
recharged.
to accidentally enable
To avoid the memory effect:
transmission
• When possible, recharge the batteries only when they are completely
The VOX feature requires
discharged (until the device turns itself off during normal use)
speaking in a loud voice
• Do not disconnect the battery charger before the time indicated for a
Logic related faults
full battery charge.
(unreadable displayed
• Discharge and recharge your batteries completely at least twice a
symbols, functions )
month.
In any case, the best solution for avoiding the memory effect is to use in
turn two battery sets: one in use, and the other as a spare set.
TECHNICAL SPECIFICATIONS
The memory effect can be easily eliminated by completely discharging/
Channels ................................................................................................................................................................ 1~8 PMR+ 40 CTCSS preset channels
charging the batteries 3 or 4 times.
Frequency generation................................................................................................................................................................................. PLL synthesizer
Frequency range .......................................................................................................................................................... 446.00625 - 446.09375MHz (PMR)
The memory effect should not be confused with the normal battery life,
Channel separation .............................................................................................................................................................................................. 12.5 KHz
which is 300-400 cycles of charge/discharge on average.
Rated power supply ....................................................................4,8 V 600mAh (Battery pack) - 4x AAA type 1,5 V (Alkaline/rechargeable) +/- 10% VDC
It is completely normal for operating duty to decrease when the batteries
Operating temperature ............................................................................................................................................................................. from -20° to +55°
have reached the end of their life; at this point, you will need to substitute
Size (without antenna .................................................................................................................................................................................. 58x160x28 mm
the batteries.
Weight (without batteries ....................................................................................................................................................................................... 0,095 kg
Operation cycle (% on 1 h .................................................................................................................................................... TX 5%, RX 5%, stand-by 90%
BATTERY LEVEL INDICATOR
G6 XT has a BATTERY LEVEL METER that shows the battery power
Transmitter
level.
Output power (ERP) ................................................................................................................................................................................................500 mW
The greater the number of bars visible, the stronger the battery level will
Type of modulation ......................................................................................................................................................................................................... FM
be. When the battery level is low, the battery icon
will flash in the
Suppression of spurious signals ................................................................................................................................................... Compliant with ETSI law
display, indicating that your batteries should be replace or recharged if
Max deviation ........................................................................................................................................................................................................ ±2,5 KHz
using a rechargeable battery.
Antenna impedance................................................................................................................................................................................................. 50 Ohm
USE AND CARE
Receiver
Sensitivity at 12dB Sinad .......................................................................................................................................................................................... 0,35μV
! Use a soft damp cloth to clean the radio. Do not use alcohol or
Image rejection .............................................................................................................................................................................................................60dB
cleaning solutions.
Spurious Rejection .......................................................................................................................................................................................................60dB
! Do not immerse the radio in water.
Inter Modulation Distortion............................................................................................................................................................................................60dB
! Turn off the radio and remove the batteries during long term
Audio output power............................................................................................................................................................................. 300mW @ 10% THD
storage.
Medium frequencies ............................................................................................................................................................... 1°:21,250 MHz ; 2°:450 KHz
Connection for external microphone and recharge ............................................................................................................................... 2,5 mm jack stereo
WARNINGS
Connector for external speaker .............................................................................................................................................................. 3.5 mm jack mono
! DO NOT OPEN THE RADIO FOR ANY REASON!
The mechanics and electronics radio precision require experience and
specialized equipment; for the same reason, the radio should under
Specifications are subject to change without notice.
no circumstances be realigned as it has already been calibrated for
maximum performance.
Unauthorized opening of the transceiver will void the warranty.
G
Ö
G
G
W
W
W
W
W
W
W
▲▼
W
M MO
O
▲▼
O M MO
G
O
O
O
M
M
O
Ó
G
POSSIBILE CAUSA
SOLUZIONE
Pacco batterie o batterie scariche e/o non installate
Verificate che pacco batterie/batterie siano cariche e
correttamente
installarle correttamente
Pacco batterie o batterie scariche
Caricare il pacco batterie o cambiare le batterie
Caricatore non connesso correttamente alla radio o
Verificate la connessione del caricatore e l'installazione
pacco batterie non installato correttamente
delle batterie
Radio collocata in un punto troppo schermato
Spostatevi in un luogo più aperto
Livello del volume troppo basso
Regolate il livello del volume
Errato CTCSS
Verificate che il CTCSS sia lo stesso impostato dai
vostri corrispondenti
Errata selezione del canale radio
Selezionate lo stesso canale radio della controparte
Radio collocata in un punto schermato o distante
Spostatevi in un luogo più favorevole
rispetto la controparte
Errato CTCSS
Verificate che il CTCSS sia lo stesso impostato dai
vostri corrispondenti
Corrispondente troppo lontano e/o ricetrasmettitore
Avvicinatevi alla controparte e spostatevi in un luogo
schermato da ostacoli in direzione del corrispondente.
più favorevole
Radio collocata troppo vicina ad apparati interferenti
Allontanate la radio dagli apparecchi interferenti.
(televisori, computer ecc.).
Sensibilità eccessiva e/o rumore ambientale eccessivo
Riducete la sensibilità del VOX
Sensibilità troppo bassa
Se il rumore ambientale non è elevato aumentate la
sensibilità, oppure utilizzate un accessorio microfonico
opzionale
Impostazione errata indotta da qualche disturbo
Ricaricare le batterie
nell'alimentazione
Possible cause
Solution
The battery pack/batteries are discharged and/or have
Verify that the battery pack/batteries are charged and
not been installed correctly.
that they have been correctly installed.
Discharged battery pack/batteries.
Recharge the battery pack/batteries if they are
rechargeable or change them .
Inspect the connections of the battery-charger and the
installed correctly.
installation of the battery pack/batteries.
The site of installation is too shielded.
Move to another area.
The volume is too low
Adjust the volume.
Incorrect CTCSS
Check that the CTCSS tone corresponds to the one set
by the parties you are communicating with.
An incorrect radio channel has been selected.
Select the same radio channel used by the parties you
are communicating with.
The radio is installed in a shielded area or is too far
Move to another area.
from the party you are communicating with
Incorrect CTCSS
Check that the CTCSS tone corresponds to the one set
by the parties you are communicating with.
The transmission distance is excessive and/or there are
Move closer to the party you are communicating with or
obstacles in the transmission path
to another area.
The radio has been installed too close to equipment
Increase the distance between the radio and this
that causes interference (televisions, computers, etc.)
equipment.
Reduce the VOX sensitivity
The sensitivity and/or environmental noise are too high.
If the environmental noise is not high, increase the
The sensitivity is too low.
sensitivity or use an optional microphone
Incorrect setting caused by a problem with the power
Recharge the batteries or change them.
supply.
G
W
G
G
W
W
W
W
W
G
W
O
W
W
M
O
O
W
W

Verwandte Anleitungen für Midland G6 XT


Inhaltszusammenfassung für Midland G6 XT
- Seite 1 Appears while you are transmitting a signal (PTT button Your G6 XT has 4 VOX levels (off, 1, 2, 3, and 4). This function allows the the icon “OU NO” starts flashing in the display and you will hear a beep Sensitivity at 12dB Sinad ......................................
- Seite 2 30 segundos um código de controlo de dados. Assim que o contacto entre premido MENU por 5 segundos. O seu G6 XT possui 4 níveis de VOX (desligado, 1, 2, 3 e 4). Esta função Quanto maior o número de barras visíveis, mais carga têm as pilhas.