Herunterladen Inhalt Inhalt Diese Seite drucken
Metz mecablitz M400 - Nikon Bedienungsanleitung

Metz mecablitz M400 - Nikon Bedienungsanleitung

Vorschau ausblenden Andere Handbücher für mecablitz M400 - Nikon:
Inhaltsverzeichnis

Werbung

Verfügbare Sprachen
  • DE

Verfügbare Sprachen

  • DEUTSCH, seite 1
mecablitz M400

Werbung

Inhaltsverzeichnis
loading

Inhaltszusammenfassung für Metz mecablitz M400 - Nikon

  • Seite 1 mecablitz M400...
  • Seite 2: Inhaltsverzeichnis

    Vorwort ..........4 1 Sicherheitshinweise .
  • Seite 3 11 OPTION-Menü ........31 12 Blitztechniken.
  • Seite 4: Vorwort

    Vorwort 1 Sicherheitshinweise Schlagen Sie bitte auch die Bildseite am Ende der Anleitung auf. Erklärung Fingerzeig, Hinweis Achtung - Extrem wichtiger Sicherheitshinweis ! Bestimmungsgemäßer Gebrauch...
  • Seite 6: Dedicated-Blitzfunktionen

    2 Dedicated-Blitzfunktionen Im Rahmen dieser Bedienungsanleitung ist es nicht möglich, alle Kameratypen mit den einzelnen Blitzfunktionen detailliert zu beschreiben. Beachten Sie deshalb die Hinweise zum Blitzbetrieb in der Bedienungsanleitung Ihrer Kamera, welche Blitzfunktionen von Ihrem Kameratyp unterstützt werden bzw. an der Kamera selbst eingestellt wer- den müssen! TTL BL Bei der Verwendung von Objektiven ohne CPU (z.B.
  • Seite 7: Blitzgerät Vorbereiten

    3 Blitzgerät vorbereiten Batterien austauschen 3.1 Stromversorgung Batterien- bzw. Akkuauswahl Achten Sie beim Einsetzen der Batterien bzw. Akkus auf die richtige Polarität gemäß den Symbolen im Verwenden Sie nur die oben angegebenen Stromquellen. Bei der Verwendung von anderen Batteriefach. Vertauschte Pole können zur Zerstörung des Gerätes führen! Explosionsgefahr Stromquellen besteht die Gefahr, dass das bei unsachgemäßem Betrieb der Batterien.
  • Seite 8: Montage Des Blitzgerätes

    3.2 Montage des Blitzgerätes 3.3 Ein- und Ausschalten des Blitzgerätes Blitzgerät auf die Kamera montieren Kamera und Blitzgerät vor der Montage oder Demontage ausschalten. Wird das Blitzgerät längere Zeit nicht gebraucht, so empfehlen wir: Blitzgerät mit der Taste aus- schalten und die Stromquellen (Batterien, Akkus) entnehmen.
  • Seite 9: Das Menü Optionen

    3.5 Das Menü OPTIONEN 3.7 Automatische Geräteabschaltung / Auto - OFF OPT. ZOOM STANDBY AF BEAM DISPLAY UNIT RESET MODE , CHANNEL GROUP SYNC, ° 3.6 INFO INFO Im SLAVE/SERVO-Betrieb ist die automatische ° Geräteabschaltung nicht aktiv. INFO Wenn das Blitzgerät längere Zeit nicht benötigt wird, sollte das Gerät grundsätzlich immer mit der Taste ausgeschaltet werden!
  • Seite 10: Oled-Anzeigen Am Blitzgerät

    4 OLED-Anzeigen am Blitzgerät Automatische Geräteabschaltung einstellen 4.1 Blitzbereitschaftsanzeige OPT. STANDBY OPT. ° 4.2 Belichtungskontrollanzeige STANDBY TTL BL AUTO °...
  • Seite 11: Anzeigen Im Display

    Es erfolgt keine Reichweitenanzeige . . . - wenn der Reflektorkopf aus seiner Normalposition (nach oben oder seitwärts) abgeschwenkt ist. 5 Anzeigen im Display - wenn das Blitzgerät im REMOTE MASTER; REMOTE SLAVE, SERVO- oder AUTO-Blitzbetrieb arbeitet. 5.2.1 Reichweitenanzeige in den i TTL-/ i TTL BL-Blitzbetriebsarten TTL BL TTL BL FP...
  • Seite 12: Reichweitenanzeige Im Manuellen

    5.2.2 Reichweitenanzeige im manuellen Blitzbetrieb 5.2.5 Unterbelichtungsanzeige „EXP.“ 5.2.3 Überschreitung des Anzeigebereichs EXP. 5.2.4 Error-Anzeige „FEE“...
  • Seite 13: Anzeigen Im Kamerasucher

    6 Anzeigen im Kamerasucher 7 Blitzbetriebsarten Blitzsymbol blinkt TTL BL Blitzsymbol leuchtet Blitzsymbol leuchtet nach der Aufnahme weiter, bzw. verlischt kurzzeitig MASTER Blitzsymbol blinkt nach dem Auslösen SLAVE SERVO TTL BL Grundsätzlich zur Fehlbelichtung: 7.1 Der AUTO-Blitzbetrieb...
  • Seite 14 7.2 i-TTL-Blitzbetrieb 7.3 i-TTL-BL -Blitzbetrieb Betriebsart einstellen Betriebsart einstellen MODE MODE TTL BL ° ° Bei einigen Kameras wird die BL-Blitzbetrieb bei SPOT-Belichtungsmessung nicht unterstützt! Diese Blitzbetriebsart (Symbol „BL“) wird dabei automatisch gelöscht bzw. lässt sich nicht aktivie- ren.
  • Seite 15: Manueller Blitzbetrieb

    7.4 Manueller Blitzbetrieb Verschiedene Kameras unterstützen den manuellen Blitzbetrieb nur in der Kamerabetriebsart M (Manuell). In anderen Kamerabetriebsarten erfolgt eine Fehlermeldung im Display und die Auslösung wird verriegelt. Manuelle Teillichtleistungen Einstellvorgang M FP Betriebsart einstellen MODE °...
  • Seite 16: Automatische Kurzzeitsynchronisation (Fp)

    7.5 Automatische Kurzzeitsynchronisation (FP) 7.6 Manueller Blitzbetrieb mit Entfernungsvorgabe (GN) Betriebsart einstellen MODE ° TTL FP...
  • Seite 17: Led-Videolicht

    7.7 LED-Videolicht 7.8 Favoritenprogramme Betriebsart einstellen Einstellvorgang für das Speichern eines Favoritenprogrammes MODE MODE ° ° SAVE °...
  • Seite 18: Manuelle Blitzbelichtungs-Korrektur

    8 Manuelle Blitzbelichtungs- Einstellvorgang für das Laden eines Favoritenprogrammes korrektur ° LOAD Tipp ° Dunkles Motiv vor hellem Bildhintergrund: Positiver Korrekturwert. Helles Motiv vor dunklem Bildhintergrund: Negativer Korrekturwert.
  • Seite 19: Sonderfunktionen

    9 Sonderfunktionen Einstellvorgang 9.1 Motorzoom-Reflektor Vergessen Sie nicht die manuelle Blitzbelichtungs- korrektur nach der Aufnahme an der Kamera wieder zu löschen! 9.1.1 Automatische Zoomsteuerung. Achtung: Stark reflektierende Gegenstände im Bild des Motivs können die Belichtungsautomatik der Kamera stören. Die Aufnahme wird dann unterbe- lichtet.
  • Seite 20: Manueller Zoom-Betrieb

    9.1.2 Manueller Zoom-Betrieb Der Auto-Zoom-Betrieb ist in diesem Fall nicht mög- lich! Einstellvorgang OPT. ZOOM OPT. ° ZOOM °...
  • Seite 21 9.2 Weitwinkelstreuscheibe Rückstellen auf Auto-Zoom OPT. ZOOM OPT. Die automatische Anpassung des Motorzoom- Reflektor erfolgt nicht bei der Verwendung der Weitwinkelstreuscheibe ° A-Zoom 9.3 mecabounce Diffuser MBM-04 ZOOM Es erfolgt keine automatische Anpassung des ° Motorzoom-Reflektors bei der Verwendung eines mecabounce.
  • Seite 22: Der Drahtlose Remote-Betrieb

    10 Der drahtlose Remote-Betrieb 10.1 Master Blitzbetrieb...
  • Seite 23: Master-B Litzb Etrieb Einstellen

    litzb 10.1.2 Blitzbetriebsart am Master-Blitzgerät ein- 10.1.1 Master-B etrieb einstellen stellen OPT. MODE MASTER OPT. MODE ° ° MODE MASTER ° MASTER...
  • Seite 24: Belichtungskorrektur (Ev) Im Ttl-Betrieb Am Master-Blitzgerät Einstellen

    10.1.3 Belichtungskorrektur (EV) im TTL-Betrieb am 10.1.4 Teillichtleistung im M-Betrieb am Master-Blitzgerät einstellen Master-Blitzgerät einstellen OPT. OPT. OPT. OPT. ° ° ° ° MASTER MASTER...
  • Seite 25: Remote-Kanal Einstellen

    10.1.5 Remote-Kanal einstellen 10.1.6 Gruppe, Blitzbetriebsart und Teillichtleistung (P) bzw. MASTER Ein Remote Kanal kann nicht selektiert werden, wenn Belichtungskorrektur (EV) für das am Master eine Gruppe eingestellt ist. Slave-Blitzgerät am Master einstellen MASTER OPT. CHANNEL OPT. MODE MODE ° CHANNEL °...
  • Seite 26 10.2 Remote-Slave-Blitzbetrieb MODE MODE ° ° Im Slave-Betrieb erfolgt keine Anzeige der Reichweite und keine automatische Anpassung des Zoomreflektors.
  • Seite 27: Remote-Slave-Blitzbetrieb Einstellen

    10.2.1 Remote-Slave-Blitzbetrieb einstellen 10.2.2 Remote-Kanal einstellen OPT. CHANNEL OPT. SLAVE MODE ° CHANNEL ° SLAVE °...
  • Seite 28: Slave-Gruppe Einstellen

    10.3 SERVO-Betrieb 10.2.3 Slave-Gruppe einstellen OPT. GROUP OPT. Wenn das Blitzgerät der Kamera AF-Meßblitze zur automatischen Fokusierung abgibt, ist der ° Servobetrieb nicht möglich. An der Kamera den AF-Meßblitz deaktivieren Verwenden Sie, wenn möglich, eine andere GROUP AF-Betriebsart der Kamera oder stellen auf manuel- le Fokusierung um.
  • Seite 29: Servo-Blitzbetrieb Einstellen

    10.3.1 SERVO-Blitzbetrieb einstellen 10.3.2 Vorblitzunterdrückung bzw. Synchronisation einstellen OPT. MODE SYNC OPT. SERVO ° MODE SYNC ° SERVO ° SERVO...
  • Seite 30: Servo-Betrieb Teillichtleistung Einstellen

    10.3.3 Servo-Betrieb Teillichtleistung einstellen 10.3.4 Lernfunktion SERVO Slave-Gruppen und Remote-Kanäle können im Wenn das kameraeigene Blitzgerät AF-Meßblitze SERVO-Betrieb nicht eingestellt werden. zur automatischen Fokusierung abgibt, ist system- Das Kamerablitzgerät darf nicht im Remote-Betrieb bebedingt kein Lernbetrieb möglich. arbeiten Gegebenenfalls die AF-Meßblitz-Funktion an der Kamera deaktivieren.
  • Seite 31: Option-Menü

    11 OPTION-Menü Einstellvorgang für die Lernfunktion 11.1 Automatischer Zoom-Betrieb (A-ZOOM) OPT. SYNC 11.2 Manueller Zoom-Betrieb OPT. Einstellvorgang OPT. ° ZOOM OPT. LEARN SYNC ° ° 35mm ZOOM LEARN °...
  • Seite 32: Af-Hilfslicht (Af Beam)

    11.3 AF-Hilfslicht (AF BEAM) Einstellvorgang OPT. AF-BEAM OPT. ° AF-BEAM °...
  • Seite 33: Blitztechniken

    12 Blitztechniken 12.2 Indirektes Blitzen mit Reflektorkarte 12.1 Indirektes Blitzen 12.3 Blitzbelichtungs-Messwertspeicher Bei geschwenktem Reflektorkopi erfolgt keine Anzeige der Reichweite und keine automatische Anpassung der Reflektorposition.
  • Seite 34: Blitzsynchronisation

    13 Blitzsynchronisation 13.1 Automatische Blitzsynchronzeitsteuerung...
  • Seite 35: Normal Synchronisation

    13.2 Normalsynchronisation 13.4 Synchronisation auf den 2.Verschlussvorhang (REAR) 13.3 Langzeitsynchronisation (SLOW) Verwenden Sie bei langen Verschlusszeiten ein Stativ um verwackelte Aufnahmen zu vermeiden!
  • Seite 36: Display Einstellungen

    14 Display Einstellungen 14.2 m - ft Umschaltung (UNIT) 14.1 Helligkeit Einstellvorgang OPT. Einstellvorgang OPT. UNIT DISPLAY OPT. OPT. ° ° UNIT HIGH DISPLAY ° °...
  • Seite 37: Wartung Und Pflege

    15 Wartung und Pflege 15.3 Werkseinstellung (RESET) Einstellvorgang OPT. RESET OPT. 15.1 Firmware-Update ° RESET www.metz-mecatech.de 15.2 Formieren des Blitzkondensators °...
  • Seite 38: Hilfe Bei Störungen

    16 Hilfe bei Störungen Die Zoom-Position des Reflektors wird nicht automatisch der aktuel- len Zoom-Position des Objektivs angepasst Die Einstellung für die manuelle TTL-Blitzbelichtungskorrektur wird nicht wirksam Im Display erfolgt keine Reichweitenanzeige Es findet keine automatische Umschaltung auf die Blitzsynchronzeit statt Das AF-Hilfslicht des Blitzgerätes wird nicht aktiviert...
  • Seite 39 Die Aufnahmen sind zu dunkel Die Aufnahmen sind zu hell...
  • Seite 40: Technische Daten

    17 Technische Daten Vidoeleuchte: Maximale Leitzahl bei ISO 100; Zoom 105 mm: Blitzbetriebsarten: Manuelle Teillichtleistungen: Abmaße Blitzleuchtzeiten Farbtemperatur: Gewicht: Lichtempfindlichkeit: Synchronisation: Auslieferungsumfang: Blitzanzahlen Blitzfolgezeit Ausleuchtung des Motorzoom-Reflektors: Schwenkbereiche und Raststellungen des Reflektorkopfes:...
  • Seite 41: Sonderzubehör

    18 Sonderzubehör • Blitzgerätehalter FGH 40-60 • mecabounce Diffuser MBM-04 • TTL Verbindungskabel für Canon TCC-20 • Blitzgeräte-Standfuß S60 • Easy Softbox ESB 60-60 • Easy Softbox ESB 40-40...
  • Seite 42 Batterie-Entsorgung...
  • Seite 43: Garantiebestimmungen
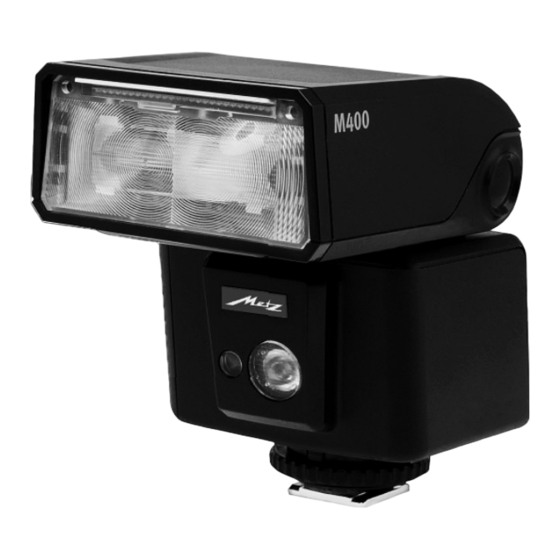
    Garantiebestimmungen...
  • Seite 45 Reflektorkarte Weitwinkelstreuscheibe LED Videoleuchte AF-Hilfslicht Batteriefach 4xAA USB-Buchse (Micro) ON- / OFF-Taster leuchet grün bei erreichter der Blitzgereitschaft leuchtet rotv im Standby Cursortaste Auswahl der Menüpunkte sowie Wertverstellung Blitzbetriebsarten : Einstellungen Bestätigungs- / Infotaste OLED-Display Rändelmutter Sensor für den Remote-Betrieb...
  • Seite 46 Préambule..........48 1 Consignes de sécurité...
  • Seite 47 11 OPTION menú ........75 12 Techniques de photographie au flash .
  • Seite 48: Préambule

    Préambule 1 Consignes de sécurité Veuillez également déplier le rabat en dernière page pour consulter les illustrations. Explication Doigt pointé, remarque Attention : consigne de sécurité extrêmement importante ! Utilisation correcte...
  • Seite 50: Fonctions Flash Dédiées

    2 Fonctions flash dédiées Dans le cadre du présent mode d’emploi, il n’est pas possible d’aborder en détail tous les types d’appareils photo et leurs fonctions flash corre- spondantes. Nous vous renvoyons à ce sujet à la description de l’emploi du flash figurant dans le mode d’emploi de l’appareil photo où...
  • Seite 51: Préparation Du Flash

    3 Préparation du flash Remplacement des piles 3.1 Alimentation Choix des piles ou accus N’utilisez que les sources d’alimentation indiquées ci-dessus. Si vous utilisez d’autres sources d’ali- À la mise en place des piles ou accumulateurs, respectez la polarité conformément aux symboles mentation, le flash risque d’être endommagé.
  • Seite 52: Montage Du Flash

    3.2 Montage du flash 3.3 Mise en marche et coupure du flash Fixation du flash sur l’appareil Éteindre l’appareil photo et le flash avant le monta- ge ou le démontage du flash ! Si le flash reste inutilisé pendant une période pro- longée, nous recommandons de mettre le flash hors service avec la touche et retirer les sour-...
  • Seite 53: Coupure Automatique Du Flash / Auto - Off

    3.5 Le menu OPTIONEN 3.7 Coupure automatique du flash / Auto - OFF OPT. ZOOM STANDBY AF BEAM ÉCRAN ÉCRAN RESET MODE , CHANNEL GROUP SYNC, 3.6 INFO INFO ° ° En mode SLAVE/SERVO, la mise hors tension auto- INFO matique n’est pas activée.
  • Seite 54: Oled De Signalisation Sur Le Flash

    4 OLED de signalisation sur le flash Régler l’arrêt automatique de l'appareil 4.1 Affichage de disponibilité du flash OPT. STANDBY OPT. 4.2 Témoin de mode de fonctionnement du ° flash STANDBY TTL BL AUTO °...
  • Seite 55: Indications Sur L'écran

    Aucune portée ne s’affiche si . . . - lorsque la tête zoom est orientée différemment de sa position normale (vers le haut ou le côté) 5 Indications sur l’écran - lorsque le flash fonctionne en mode REMOTE MASTER, REMOTE SLAVE, SERVO ou AUTO. 5.2.1 Indication de la portée en mode flash i TTL-/i TTL BL TTL BL...
  • Seite 56: Dépassement De La Capacité D'affichage

    5.2.2 Indication de la portée en mode flash manuel 5.2.5 Signalisation de sous-exposition „EXP.“ 5.2.3 Dépassement de la capacité d’affichage EXP. 5.2.4 Affichage d’erreur «FEE»...
  • Seite 57: Signalisations Dans Le Viseur

    6 Signalisations dans le viseur 7 Modes de fonctionnement du flash Symbole éclair clignote AUTO TTL BL Symbole éclair s'allume Symbole éclair reste allumé après la prise de vue ou s'éteint passagèrement MASTER Symbole de flèche clignote après le déclenchement SLAVE SERVO TTL BL...
  • Seite 58: Mode Flash I-Ttl-Bl

    7.2 Mode flash i-TTL 7.3 Mode flash i-TTL-BL Réglage du mode Réglage du mode MODE MODE TTL BL ° ° Le mode flash BL est pas prise en charge sur cer- tains appareils photo, Lorsque la mesure de l'expo- sition de SPOT est actif. Ce mode de flash (symbole "BL") est automatique- ment supprimé...
  • Seite 59: Mode Flash Manuel

    7.4 Mode flash manuel Plusieurs modèles d'appareil photo prennent en charge le mode flash manuel exclusivement lors- qu'ils sont eux-mêmes en mode de fonctionnement manuel M. Dans les autres modes de fonctionne- ment de l'appareil photo, un message d'erreur s'affiche à l'écran et le déclenchement se verrouille Puissances partielles manuelles M FP Procédure de réglage...
  • Seite 60: Synchronisation Automatique Haute Vitesse (Fp)

    7.5 Synchronisation automatique haute 7.6 Mode flash manuel avec vitesse (FP) prédéfinition de l’éloignement (GN) Réglage du mode MODE ° TTL FP...
  • Seite 61: Programme Favori

    7.7 Mode LED (éclairage vidéo) 7.8 Programme favori Réglage du mode Marche à suivre pour enregistrer un programme favori MODE MODE ° ° SAVE °...
  • Seite 62: Correction Manuelle D'exposition Au Flash

    8 Correction manuelle d’exposition au Marche à suivre pour charger un programme favori flash ° LOAD ° Conseil : sujet sombre sur fond clair: valeur de correction positive. sujet clair sur fond sombre: valeur de correction négative.
  • Seite 63: Fonctions Spéciales

    9 Fonctions spéciales Procédure de réglage 9.1 Asservissement de la tête zoom motorisée N'oubliez pas d'effacer la correction d'exposition au flash manuelle sur l'appareil photo, après la pri- se de vue! 9.1.1 Zoom automatique. Attention: Les objets fortement réfléchissants situ- és sur la photo du sujet peuvent gêner l’automatis- me d’exposition de l’appareil photo.
  • Seite 64 9.1.2 Mode zoom manuel Le mode zoom automatique n’est pas possible dans ce cas ! Procédure de réglage OPT. ZOOM OPT. ° ZOOM °...
  • Seite 65: Diffuseur Grand-Angle

    9.2 Diffuseur grand-angle Retour au mode zoom automatique OPT. ZOOM OPT. L’adaptation automatique du réflecteur du zoom motorisé ne s’effectue pas si le diffuseur grand angle est utilisé. 9.3 mecabounce Diffuser MBM-04 A-Zoom ZOOM L’adaptation automatique du réflecteur du zoom °...
  • Seite 66: Mode Multi-Flash Sans Fil

    10 Mode multi-flash sans fil 10.1 Mode remote maître...
  • Seite 67: Régler Le Mode Remote Maître

    10.1.1 Régler le mode remote maître 10.1.2 Régler le mode de flash sur le flash maître OPT. MODE OPT. MASTER MODE ° ° MODE MASTER ° MASTER...
  • Seite 68: Régler La Puissance Partielle En Mode M Sur Le Flash Maître

    10.1.3 Régler la valeur de correction 10.1.4 Régler la puissance partielle en mode M sur d'exposition (EV) en mode TTL sur le flash le flash maître maître OPT. OPT. OPT. OPT. ° ° ° MASTER MASTER...
  • Seite 69: Régler Le Mode Remote Canal

    10.1.5 Régler le mode remote canal 10.1.6 Régler le groupe, le mode de fonctionnement et la puissance partielle (P) ou la valeur de cor- MASTER Un remote canal ne peut pas être sélectionné rection d’exposition (EV) pour le flash esclave quand un groupe a été...
  • Seite 70: Mode Flash Remote Slave

    10.2 Mode flash remote slave MODE MODE ° ° En mode esclave, il n'y a aucune indication de la portée et aucun réglage automatique de la position du zoom.
  • Seite 71: Régler Le Mode Flash Remote Esclave

    10.2.1 Régler le mode flash remote esclave 10.2.2 Régler le canal esclave OPT. CHANNEL OPT. SLAVE MODE ° ° CHANNEL SLAVE °...
  • Seite 72: Régler Le Groupe Esclave

    10.3 Modo flash SERVO 10.2.3 Régler le groupe esclave OPT. GROUP OPT. Lorsque le flash de l'appareil d'éclairage AF emet l'autofocus servo-opération est impossible. ° Désactiver le faisceau de mesure AF sur l'appareil photo Utilisez un mode AF de la caméra ou de passer à GROUP mise au point manuelle.
  • Seite 73: Régler Le Mode Flash Servo

    10.3.1 Régler le mode flash SERVO 10.3.2 Régler le pré-éclair ou la synchronisation OPT. MODE SYNC OPT. SERVO ° MODE SYNC ° SERVO ° SERVO...
  • Seite 74: Réglage Du Mode Servo Puissance Partielle

    10.3.3 Réglage du mode servo puissance partielle 10.3.4 Fonction d’apprentissage SERVO Si le flash de l’appareil photo émet des flashs de Les groupes esclaves et les canaux remote ne peu- mesure AF pour la mise au point automatique, vent pas être réglés en mode SERVO. aucun mode d’apprentissage n’est possible pour Le flash de l’appareil ne doit pas être utilisé...
  • Seite 75: Option Menú

    11 OPTION menú Processus de réglage de la fonction d’apprentissage 11.1 Mode Zoom automatique (A-ZOOM) OPT. SYNC 11.2 Mode Zoom manuel OPT. Procédure de réglage OPT. ° ZOOM OPT. LEARN SYNC ° ° 35mm ZOOM LEARN °...
  • Seite 76 11.3 AF-BEAM (lumière auxiliaire AF) Procédure de réglage OPT. AF-BEAM OPT. ° AF-BEAM °...
  • Seite 77: Techniques De Photographie Au Flash

    12 Techniques de photographie au 12.2 Éclairage indirect au flash avec carte- réflecteur flash 12.1 Éclairage indirect au flash 12.3 Mémoire des mesures d’exposition au flash FE Lorsque la tête du réflecteur est donné, il n'y a aucune indication de la portée et aucun ajustement automatique de la position du réflecteur.
  • Seite 78: Synchronisation Du Flash

    13 Synchronisation du flash 13.1 Commutation automatique sur la vitesse de synchro-flash...
  • Seite 79: Synchronisation Normale

    13.2 Synchronisation normale 13.4 Synchronisation sur le 2e rideau (REAR) 13.3 Synchronisation en vitesse lente (SLOW) Utilisez un trépied pour éviter les images floues!
  • Seite 80: Réglages De L'écran Tactile

    14 Réglages de l’écran tactile 14.2 Affichage des portées en mètres ou pieds (UNIT) 14.1 Luminosité Procédure de réglage Procédure de réglage OPT. OPT. UNIT DISPLAY OPT. OPT. ° ° feet UNIT HIGH DISPLAY ° °...
  • Seite 81: Maintenance Et Entretien

    15 Maintenance et entretien 15.3 Réinitialisation Procédure de réglage OPT. RESET OPT. 15.1 Mise à jour du micrologiciel ° RESET www.metz-mecatech.de 15.2 Formation du condensateur de flash °...
  • Seite 82: Remède En Cas De Mauvais Fonctionnement

    16 Remède en cas de mauvais fonctionnement Il est impossible de régler automatiquement la position du réflec- teur à la position actuelle du zoom de l’objectif. Le réglage de la correction manuelle d’exposition au flash en mode TTL ne prend pas effet. La portée n’est pas indiquée sur l’écran.
  • Seite 83 Les prises de vue sont trop sombres. Les prises de vue sont trop claires.
  • Seite 84: Caractéristiques Techniques

    17 Caractéristiques techniques Éclairage vidéo: Nombre-guide max. pour ISO 100/21°, Zoom 105 mm:: Modes flash: Potencias parciales manuales: Dimensions Durées de l’éclair Poids : Température de couleur: Sensibilité: Fourniture: Synchronisation: Autonomie Temps de recyclage, Iluminación: Orientation et crantages de la tête zoom:...
  • Seite 85: Accessoires En Option

    18 Accessoires en option • Support de flash FGH 40-60 • mecabounce Diffuser MBM-04 • Câble de connexion TTL pour Canon TCC-20 • Pied de flash S60 • Easy Softbox ESB 60-60 • Easy Softbox ESB 40-40...
  • Seite 86 Elimination des batteries...
  • Seite 89 Carte-réflecteur (intégré) Diffuseur grand angle (intégré) Voyant lumière vidéo Lumière auxiliaire AF Compartiment piles (4x AA – voir consignes de sécurité) Prise USB (micro) Touche ON / OFF allume en vert lorsqu'il atteint l'état de préparation du flash feux rouges en mode veille Touches directionnelles: Sélection des éléments du menu et réglage des paramètres Modes de fonctionnement du flash...
  • Seite 90 Voorwoord ..........92 1 Veiligheidsinstructies .
  • Seite 91 18 Bijzondere toebehoren ....... 129 11 OPTION-Menu ........119 12 Flitstechnieken .
  • Seite 92: Voorwoord

    Voorwoord 1 Veiligheidsinstructies Sla s.v.p. ook de flap aan het einde van de gebruiksaanwijzing open. Toelichting Vingerwijzing, aanwijzing Opgelet – extreme belangrijke veiligheidsaan- wijzing Gebruiksdoel...
  • Seite 94: Dedicated Flitsfuncties

    2 Dedicated flitsfuncties In het kader van deze gebruiksaanwijzing is het niet mogelijk, alle cameramodellen met hun individuele flitsfuncties gedetailleerd te beschrijven. Zie daarvoor de aanwijzingen in de gebruiksaan- wijzing van uw camera met betrekking tot de moge- lijke flitsfuncties, welke flitsfuncties door uw came- ra worden ondersteund, c.q.
  • Seite 95: Flitser Gereedmaken

    3 Flitser gereedmaken Het vervangen van de batterijen 3.1 Voeding Batterij-, c.q. accukeuze Gebruik alleen de hierboven aangegeven stroom- Let bij het inzetten van de batterijen, c.q. accu’s op bronnen. Bij het gebruik van andere stroombronnen de juiste polariteit, overeenkomstig de symbolen in ontstaat het gevaar dat de flitser beschadigd raakt.
  • Seite 96: Het Aanbrengen Van De Flitser

    3.2 Het aanbrengen van de flitser 3.3 In- en uitschakelen van de flitser Flitser op de camera monteren Camera en flitser vóór het aanbrengen of afnemen uitschakelen. Als u denkt, dat u de flitser gedurende langere tijd niet gaat gebruiken, bevelen wij aan om de flitser met de toets auit te schakelen en de stroom- bronnen eruit te nemen.
  • Seite 97: Het Menu Opties

    3.5 Het menu OPTIES 3.7 Automatische uitschakeling / Auto – OFF OPT. ZOOM STANDBY AF BEAM DISPLAY UNIT RESET MODE , CHANNEL GROUP SYNC, ° 3.6 INFO INFO In de SLAVE/SERVO functie is de automatische uit- ° schakeling van de flitser niet actief. INFO Als u de flitser langere tijd niet gaat gebruiken, schakel hem dan in principe altijd via zijn...
  • Seite 98: Oled-Aanduidingen Op De Flitser

    4 OLED-aanduidingen op de flitser Het instellen van de automatische uitschakeling 4.1 Flitsparaatheids aanduiding OPT. STANDBY OPT. ° 4.2 Belichtingscontrole TTL BL STANDBY AUTO °...
  • Seite 99: Aanduidingen In Het Display

    Er verschijnt geen aanduiding van de reikwijdte. . . - als de kop van de reflector uit zijn normale positie (naar boven of zijwaarts) is gezwenkt, 5 Aanduidingen in het display - Wanneer de flitser in de REMOTE MASTER; REMO- TE SLAVE, SERVO of AUTO-flitsfunctie werkt.
  • Seite 100 5.2.2 Aanduiding van de reikwijdte in de functie van met de hand in te stellen flitser 5.2.5 Aanduiding van onderbelichting„EXP.“’ EXP. 5.2.3 Overschrijding van het bereik van de aanduidingen 5.2.4 Error-aanduiding ‘FEE’...
  • Seite 101: Aanduidingen In De Zoeker Van De Camerar

    6 Aanduidingen in de zoeker van de 7 Flitsfuncties camerar AUTO Flitssymbool knippert TTL BL Flitssymbool verschijnt Na de opname blijft het flitssymbool staan, c.q. dooft even MASTER SLAVE Na de opname knippert het pijlsymbool SERVO TTL BL Basiscorrectie bij een foute belichting: 7.1 De AUTO-flitsmodus...
  • Seite 102 7.2 i-TTL-flitsfunctie 7.3 i-TTL-BL-flitsfunctie Het instellen van de flitsfunctie Het instellen van de flitsfunctie MODE MODE TTL BL ° ° De BL flitser wordt niet ondersteund op sommige camera's, Als de belichting spotmeting actief is. Deze flitser modus (symbool "BL") wordt automa- tisch verwijderd of kan niet worden geactiveerd.
  • Seite 103: Manual Flitsfunctie

    7.4 Manual flitsfunctie Sommige camera's ondersteunen de handinstelling van de flitser alleen in de camerafunctie M (manu- ell). In andere camera's verschijnt er een foutmel- ding in het display en wordt het ontspannen geblokkeerd. Met de hand in te stellen deelvermogens Het instellen M FP Het instellen van de flitsfunctie...
  • Seite 104: Automatische Synchronisatie Bij Korte Belichtingstijden (Fp)

    7.5 Automatische synchronisatie bij 7.6 Flitsen met handinstelling en afstandsbe- korte belichtingstijden (FP) rekening (GN) Het instellen van de functie MODE ° TTL FP...
  • Seite 105: Favoriete Programma

    7.7 LED-videolicht 7.8 Favoriete programma Het instellen van de functie Instellen van het opslaan van een favoriet program- MODE MODE ° ° SAVE °...
  • Seite 106: Met De Hand In Te Stellen Correctie Op De Flitsbelichting

    8 Met de hand in te stellen correctie Het instellen voor het laden van een favoriet pro- gramma op de flitsbelichting ° LOAD ° Tip: Donker onderwerp tegen een lichte achtergrond: positieve correctiewaarde. Licht onderwerp tegen donkere achtergrond: negatieve correctiewaarde.
  • Seite 107: Bijzondere Functies

    9 Bijzondere functies Het instellen 9.1 Motorische zoominstelling van de reflector Vergeet niet de met de hand ingestelde correctie op de flitsbelichting na de opname op de camera uit te schakelen! Opgelet: Sterk reflecterende onderwerpen in het onderwerp kunnen de belichtingsautomatiek van 9.1.1 Autozoom.
  • Seite 108 9.1.2 Manual zoomfunctie De autozoomfunctie is in die gevallen niet moge- lijk! Het instellen OPT. ZOOM OPT. ° ZOOM °...
  • Seite 109 9.2 Groothoekdiffusor Terugzetten naar autozoom OPT. ZOOM OPT. De gemotoriseerde reflector wordt bij het gebruik van de groothoekdiffusor niet automatisch aan- gepast. ° 9.3 mecabounce Diffuser MBM-04 A-Zoom ZOOM De gemotoriseerde reflector wordt bij het gebruik van een Mecabounce niet automatisch aangepast. °...
  • Seite 110: Flitsen Met Bediening Op Afstand

    10 Flitsen met bediening op afstand 10.1 Remote master-functie...
  • Seite 111: Remote-Masterfunctie Instellen

    10.1.1 Remote-masterfunctie instellen 10.1.2 Flitsfunctie op de masterflitser instellen OPT. MODE OPT. MASTER MODE ° ° MODE MASTER ° MASTER...
  • Seite 112: Op De Flitser In Te Stellen Correctie Op De Flitsbelichting (Ev) In De Ttl-Functie

    10.1.3 Op de flitser in te stellen correctie op de 10.1.4 Deelvermogen in de M-functie op de master- flitsbelichting (EV) in de TTL-functie flitser instellen OPT. OPT. OPT. OPT. ° ° ° MASTER ° MASTER...
  • Seite 113: Remote-Kanaal Instellen

    10.1.5 Remote-kanaal instellen 10.1.6 Groep, flitsmodus en flitsvermogen (P), resp. belichtingscorrectie (EV) voor de sla- MASTER Een kanaal kan niet worden geselecteerd als een ve-flitser op de master instellen groep is ingesteld op de master. MASTER OPT. CHANNEL OPT. MODE MODE °...
  • Seite 114 10.2 Remote-slaafflitsfunctie MODE MODE ° In slave-modus, is er geen indicatie van bereik en geen automatische aanpassing van de zoomstand. °...
  • Seite 115: Slaafkanaal Instellen

    10.2.1 Slaafkanaal instellen 10.2.2 Slaafkanaal instellen OPT. CHANNEL OPT. SLAVE MODE ° ° CHANNEL SLAVE °...
  • Seite 116 10.3 SERVO-functie 10.2.3 Slaafkanaal instellen OPT. GROUP OPT. Wanneer de flitser van de camera AF-verlichting ° zendt de autofocus servo-operatie is niet mogelijk. Eventueel kan de meetbundel AF-functie op de camera uitschakelen. GROUP Gebruik een andere AF-modus van de camera of schakel op handmatige scherpstelling.
  • Seite 117: Servo-Flitsfunctie Instellen

    10.3.1 SERVO-flitsfunctie instellen 10.3.2 Onderdrukking van de flits vooraf, c.q. het instellen van de synchronisatie OPT. MODE SYNC OPT. SERVO MODE ° SYNC ° SERVO ° SERVO...
  • Seite 118: Deelvermogen In De Servo-Functie

    10.3.3 Deelvermogen in de SERVO-functie 10.3.4 Leerfunctie SERVO Als de cameraflitser voor het automatisch scherp- Slaafgroepen en remote-kanalen kunnen in de SER- stellen AF-meetflitsen ontsteekt, laat het systeem VO-functie niet worden ingesteld. de leerfunctie niet toe. De flitser op de camera mag niet in de Gebruik dan, indien mogelijk, een andere camera- remote-functie werken.
  • Seite 119: Option-Menu

    11 OPTION-Menu Het instellen van de leerfunctie 11.1 Automatische zoom-regeling (A-ZOOM) OPT. SYNC 11.2 Handmatige zoom-regeling OPT. Het instellen OPT. ZOOM ° OPT. LEARN SYNC ° ° 35mm ZOOM LEARN °...
  • Seite 120 11.3 AF-BEAM (AF-hulplicht) Het instellen OPT. AF-BEAM OPT. ° AF-BEAM °...
  • Seite 121: Flitstechnieken

    12 Flitstechnieken 12.2 Indirect flitsen met een reflectiekaart 12.1 Indirect flitsen 12.3 Geheugen van de meetwaarde FE Wanneer de kop van de reflector wordt gegeven, is er geen indicatie van bereik en geen automatische aanpassing van de reflector positie.
  • Seite 122: Flitssynchronisatie

    13 Flitssynchronisatie 13.1 Automatische sturing naar de flitssyn- chronisatietijd...
  • Seite 123: Normale Synchronisatie

    13.2 Normale synchronisatie 13.4 Synchronisatie bij het dichtgaan van de sluiter (REAR) 13.3 Synchronisatie bij lange belichting- stijden (SLOW) Gebruik een statief om onscherpe foto's te voorkomen!
  • Seite 124: Touch-Display Instellingen

    14 Touch-display instellingen 14.2 Reikwijdte aanduidden in m of ft (UNIT). 14.1 Helderheid Het instellen Het instellen OPT. OPT. UNIT DISPLAY OPT. OPT. ° ° UNIT HIGH DISPLAY ° °...
  • Seite 125: Onderhoud En Verzorging

    15 Onderhoud en verzorging 15.3 Fabrieksinstellingen (RESET) Het instellen OPT. RESET OPT. 15.1 Update van de firmware ° RESET www.metz-mecatech.de 15.2 Het formeren van de flitscondensator °...
  • Seite 126: Troubleshooting

    16 Troubleshooting De instelling voor met de hand in te stellen correcties op de TTL-flitsbelichting werkt niet. De automatische omschakeling naar de flitssynchronisatietijd vindt niet plaats. In het display verschijnt de reikwijdte niet. De AF-meetflits van de flitser wordt niet geactiveerd. De opname zijn te donker.
  • Seite 127 De opnamen zijn te licht .
  • Seite 128: Technische Gegevens

    17 Technische gegevens Videolamp: Richtgetallen bij ISO 100/21°, Zoom 105 mm: Flitsfuncties: Met de hand instelbare deelvermogens: Afmetingen Flitsduur Gewicht : Kleurtemperatuur Lichtgevoeligheid : De levering omvat: Synchronisatie: Aantallen flitsen Flitsvolgtijd Verlichtingshoek: Zwenkbereiken en klikstanden van de reflectoren:...
  • Seite 129: Bijzondere Toebehoren

    18 Bijzondere toebehoren • Flitserhouder FGH 40-60 • mecabounce Diffuser MBM-04 • TTL-verbindingskabel voor Canon TCC-20 • Voetie voor flitsers S60 • Easy Softbox ESB 60-60 • Easy Softbox ESB 40-40...
  • Seite 130 Afvoeren van de batterijen...
  • Seite 133 Reflectiekaart (verzonken) Groothoekdiffusor (verzonken) Led videolicht AF-hulplicht Batterijvak (4x AA – zie veiligheidsinstructies) USB-aansluiting (micro) ON- / OFF-toets brandt groen bij het bereiken van de flitsparaatheid licht rood op in stand-by Cursorknoppen: Keuzemenu en aanpassing waarden Gebruikswijzen flitsern Optiemenu Bevestigings-/Infoknop OLED-display Gekartelde moer Ingebouwde sensor voor de remote-functie...
  • Seite 136: Safety Instructions

    Introduction 1 Safety instructions Take a look at the diagrams at the end of the manu- Declaration Tip, note Attention - Extremely important safety information! Proper Use...
  • Seite 138: Dedicated Flash Functions

    2 Dedicated flash functions It is impossible to describe all camera types and their individual dedicated flash functions within the scope of these instructions. Therefore, please refer to the flash mode descripti- on in your camera’s operating instructions to find out which functions are supported and which ones have to be set manually on the camera.
  • Seite 139: Preparing The Flash Unit For Use

    3 Preparing the flash unit for use Replacing batteries 3.1 Power supply Suitable batteries/rechargeable batteries When inserting batteries, ensure that the polarity is correct and matches the symbols in the battery compartment. Inserting the batteries in the wrong direction can destroy the flash unit! Always replace Please only use the power sources given above.
  • Seite 140: Mounting The Flash Unit

    3.2 Mounting the flash unit 3.3 Switching the flash unit on and off Mounting the flash unit on the camera Turn off the camera and flash before mounting or removing. If the flash unit will not be used for an extended period of time, we recommend that you switch off the flash unit with the button and remove the...
  • Seite 141: The Options Menu

    3.5 The OPTIONS Menu 3.7 Auto OFF for the flash unit OPT. ZOOM STANDBY AF BEAM DISPLAY UNIT RESET MODE , CHANNEL GROUP SYNC, ° 3.6 INFO INFO In SLAVE/SERVOo mode, the automatic cut-off is not activated. ° The flash unit should always be turned off using INFO the main switch if it is not going to be used...
  • Seite 142: Oled Displays On The Flash Unit

    4 OLED displays on the flash unit Setting the automatic unit switch-off 4.1 Flash readiness indication OPT. STANDBY OPT. 4.2 Correct exposure indication ° TTL BL AUTO STANDBY °...
  • Seite 143: Information In Display

    5 Information in Display 5.2.1 Range display in i TTL-/ i TTL BL- flash modes TTL BL TTL BL FP TTL FP 5.1 Display of the flash mode TTL BL 5.2 Range display The flash range is not displayed when . . . - when the reflector head is tilted out of its normal position (upwards or sideways).
  • Seite 144: Range Display In Manual Flash Mode

    5.2.2 Range display in manual flash mode 5.2.5 Underexposure warning „EXP.“ 5.2.3 Exceeding the display range EXP. 5.2.4 „FEE“ error display...
  • Seite 145: Displays In The Camera Viewfinder

    6 Displays in the camera viewfinder 7 Flash modes Flash symbol flashes AUTO Flash symbol is illuminated TTL BL Flash symbol remains lit up after the shot or goes out briefly rrow symbol blinks after shooting MASTER SLAVE SERVO TTL BL Incorrect exposure guidelines: 7.1 AUTO Flash Mode...
  • Seite 146 7.2 i-TTL flash mode 7.3 i-TTL-BL flash mode Setting the mode of operation Setting the mode of operation TTL BL MODE MODE ° ° The BL flash mode is not supported on some came- ras, when the SPOT exposure metering is active. This flash mode (symbol „BL") is automatically deleted or can not be activated.
  • Seite 147: Manual Flash Mode

    7.4 Manual flash mode Various cameras support manual flash mode M only in the camera's M mode (manual). In other camera models, an error message appears in the display and the release is locked. Manual partial light output levels Setting procedure M FP Setting the mode of operation MODE...
  • Seite 148: Automatic High-Speed Synchronisation (Fp)

    7.5 Automatic high-speed synchronisation 7.6 Manual flash mode with distance (FP) guideline (GN) Setting the mode of operation MODE ° TTL FP...
  • Seite 149: Favorite Programme

    7.7 LED Video Light 7.8 Favorite programme Setting the mode of operation Procedure for saving a favourite programme MODE MODE ° ° SAVE °...
  • Seite 150: Manual Flash Exposure Correction

    8 Manual flash exposure correction Procedure for loading a favourite programme ° LOAD Tip: ° Dark subject against light background: positive correction factor. Light subject against dark background: negative correction factor.
  • Seite 151: Special Functions

    9 Special functions Setting procedure 9.1 Motor zoom reflector After the shot, remember to cancel the manual flash exposure correction in the camera! Strongly reflecting objects in the motif can have a 9.1.1 Auto zoom. negative impact on the camera’s automatic exposu- re.
  • Seite 152 9.1.2 Manual zoom mode In this case auto-zoom mode is not possible! Setting procedure OPT. ZOOM OPT. ° ZOOM °...
  • Seite 153: Wide-Angle Diffuser

    9.2 Wide-angle diffuser Resetting to auto-zoom OPT. ZOOM The automatic adjustment of the motor-zoom reflec- OPT. is not activated if the wide-angle diffuser is in use. ° 9.3 mecabounce Diffuser MBM-04 A-Zoom ZOOM The automatic adjustment of the motor-zoom reflector is not activated if the Mecabounce is in use.
  • Seite 154: Cordless Flash Mode

    10 Cordless flash mode 10.1 Remote master mode settings...
  • Seite 155 10.1.1 Remote master mode settings 10.1.2 Setting the flash mode on the master flash unit OPT. MODE OPT. MASTER MODE ° ° MODE MASTER ° MASTER...
  • Seite 156: Setting The Exposure Correction (Ev) In Ttl Mode On The Master Flash Unit

    10.1.3 Setting the exposure correction (EV) in TTL 10.1.4 Partial light output in M-mode mode on the master flash unit settings on the master flash unit OPT. OPT. OPT. OPT. ° ° ° ° MASTER MASTER...
  • Seite 157: Remote Channel Settings

    10.1.5 Remote channel settings 10.1.6 Set the Group, Flash Mode and Partial Light Output (P) or Exposure Compensation (EV) MASTER A remote channel can not be selected when a group for the Slave Flash Unit on the Master has been set on the master. OPT.
  • Seite 158 10.2 Remote slave flash mode MODE MODE ° In slave mode, there is no indication of reach and no automatic adjustment of the zoom position. °...
  • Seite 159: Remote Slave Flash Mode Settings

    10.2.1 Remote slave flash mode settings 10.2.2 Setting the slave channel OPT. CHANNEL OPT. SLAVE MODE ° ° CHANNEL SLAVE °...
  • Seite 160: Setting The Slave Group

    10.3 SERVO mode 10.2.3 Setting the slave group OPT. GROUP OPT. When the flash of the camera AF illuminator emits the auto focus servo operation is not possible. Disable the AF measuring beam on the camera ° Use a different AF mode of the camera or switch to manual focusing.
  • Seite 161: Setting Servo Flash Mode

    10.3.1 Setting SERVO flash mode 10.3.2 Pre-flash suppression or synchronisation settings OPT. MODE SYNC OPT. SERVO ° MODE SYNC ° SERVO ° SERVO...
  • Seite 162: Learn Function

    10.3.3 Servo mode partial light output 10.3.4 Learn function settings SERVO If the camera’s own flash device provides for auto- Slave groups and remote channels cannot be set in matic focussing AF measuring flashes, then due to SERVO mode. the system characteristics no learn operation is The camera flash unit may not work in the remote possible.
  • Seite 163 11 OPTION menu Setting procedure for the learn function 11.1 Automatic Zoom Operation (A-ZOOM) OPT. SYNC 11.2 Manual Zoom Operation OPT. Setting procedure OPT. ZOOM ° OPT. LEARN SYNC ° ° 35mm ZOOM LEARN °...
  • Seite 164 11.3 AF-BEAM (AF auxiliary light) Setting procedure OPT. AF-BEAM OPT. ° AF-BEAM °...
  • Seite 165: Flash Techniques

    12 Flash techniques 12.2 Bounce flash with a reflector card 12.1 Bounce flash 12.3 Flash exposure memory FE When the reflector head is given, there is no indica- tion of reach and no automatic adjustment of the reflector position.
  • Seite 166: Flash Synchronisation

    13 Flash synchronisation 13.1 Automatic flash sync speed control...
  • Seite 167: Slow Synchronisation (Slow)

    13.2 Normal synchronisation 13.4 Second curtain synchronisation (REAR) 13.3 Slow synchronisation (SLOW) Use a tripod to avoid blurred images!
  • Seite 168: Touch Display Settings

    14 Touch display settings 14.2 Range display in m or ft (UNIT) 14.1 Brightness Setting procedure OPT. Setting procedure OPT. UNIT DISPLAY OPT. OPT. ° ° UNIT HIGH DISPLAY ° °...
  • Seite 169: Care And Maintenance

    15 Care and maintenance 15.3 Factory settings (RESET) Setting procedure OPT. RESET OPT. 15.1 Firmware updates ° www.metz-mecatech.de RESET 15.2 Conditioning the flash capacitor °...
  • Seite 170 16 Troubleshooting The reflector position is not automatically adjusted to the current zoom position of the lens. The setting for manual TTL flash exposure correction has no effect. No maximum flash range indication appears on the display panel. Automatic switching to the flash sync speed fails to occur. The AF measuring beam of the flash unit is not activated.
  • Seite 171 The shots are too dark. The shots are too bright.
  • Seite 172: Technical Data

    17 Technical data Video light: Max. guide numbers at ISO 100/21°, zoom 105 mm: Flash modes: Manual partial light output levels: Dimensions Flash durations: Weight : Colour temperature: Sensitivity to light: Included: Synchronisation: Number of flashes: Recycling time: Light coverage: Swivelling ranges and locking positions of the reflector:...
  • Seite 173: Optional Accessories

    18 Optional accessories • Flash device holder FGH 40-60 • mecabounce Diffuser MBM-04 • TTL connecting cable for Canon TCC-20 • Flash unit mounting foot S60 • Easy Softbox ESB 60-60 • Easy Softbox ESB 40-40...
  • Seite 174 Disposal of batteries...
  • Seite 177 Reflector card (recessed) Wide angle diffuser disk (recessed) LED video light AF auxiliary light Battery compartment (4x AA – see safety information) USB socket (micro) ON / OFF button lights up green when reaching the flash readiness lights red in standby Cursor keys: Selection of menu items and value adjustment Flash modes...
  • Seite 178 Premessa ..........180 1 Avvertenze per la sicurezza .
  • Seite 179 11 OPTION-Menu ........208 12 Tecniche lampo.
  • Seite 180: Premessa

    Premessa 1 Avvertenze per la sicurezza Consultare anche gli schemi al termine delle istru- zioni. Spiegazione Indicazione, nota Attenzione – Avvertenze per la sicurezza estrema- mente importanti! Uso conforme ö...
  • Seite 181 ö...
  • Seite 182: Funzioni Flash Dedicate

    2 Funzioni flash dedicate In questo manuale non è possibile descrivere det- tagliatamente le singole funzioni dedicate ai rispet- tivi tipi di fotocamere, pertanto vi invitiamo a con- sultare le avvertenze riportate nel libretto d’istruzioni della vostra fotocamera, nelle quali TTL BL sono riportate le funzioni flash supportate e quelle che invece devono essere impostate!
  • Seite 183: Preparazione Del Flash

    3 Preparazione del flash Sostituzione delle batterie 3.1 Alimentazione Scelta delle pile o delle batterie Quando inserite le pile/batterie assicuratevi sem- pre che le polarità (+/-) siano corrette, come indi- Utilizzate solo le sorgenti d’alimentazione indicate cato dai simboli all’interno del vano batteria. sopra.
  • Seite 184: Montaggio Del Flash

    3.2 Montaggio del flash 3.3 Accensione e spegnimento del flash Montaggio del flash sulla camera Spegnete la camera e il flash con l’interruttore prin- cipale! Se il flash non viene usato per periodi di tempo pro- lungati, consigliamo di spegnere il flash con il tasto e togliere le sorgenti d’alimentazione (batterie, batterie ricaricabili).
  • Seite 185: Il Menu Opzioni

    3.5 Il menu OPZIONI 3.7 Spegnimento automatico dell’apparec- chio/Auto - OFF OPT. ZOOM STANDBY AF BEAM DISPLAY UNIT RESET MODE , CHANNEL GROUP SYNC, 3.6 INFO ° INFO ö ° Nel modo SLAVE/SERVO lo spegnimento automati- INFO co dell'apparecchio non è attivo. Se prevedete di non utilizzare il flash per lungo tempo è...
  • Seite 186: Indicazioni Sul Flash

    4 Indicazioni sul flash Impostare lo spegnimento automatico dell’appa- recchio 4.1 Indicazione flash pronto OPT. STANDBY OPT. ° 4.2 Indicazione di corretta esposizione STANDBY TTL BL AUTO ö °...
  • Seite 187: Indicazioni Sul Display

    Non viene indicato il campo di utilizzo . . . - se la testa della parabola viene spostata dalla sua normale posizione (verso l'alto, verso il basso o lateralmente). 5 Indicazioni sul display - Se il flash lavora in modalità REMOTE MASTER; REMOTE SLAVE, SERVO o AUTO.
  • Seite 188 5.2.2 Indicazione del campo di utilizzo del flash nel modo flash manuale 5.2.5 Indicazioni di sottoesposizione „EXP.“ 5.2.3 Superamento del campo indicato EXP. 5.2.4 Segnalazione di errore „FEE“ ö...
  • Seite 189: Indicazioni Sul Mirino Della Camera

    6 Indicazioni sul mirino della camera 7 Modalità flash Il simbolo flash lampeggia AUTO Il simbolo flash si accende TTL BL Il simbolo flash rimane acceso dopo lo scatto o si spegne brevemente Il simbolo della freccia lampeggia dopo lo scatto MASTER SLAVE SERVO...
  • Seite 190: Modalità I-Ttl

    7.2 Modalità i-TTL 7.3 i-Modalità i-TTL-BL Impostare la modalità Impostare la modalità MODE MODE TTL BL ° ° ö La modalità flash BL non è supportata su alcune fotocamere, Quando la misurazione dell'esposizio- ne SPOT è attivo. Questa modalità flash (simbolo "BL") viene auto- maticamente cancellato o non può...
  • Seite 191: Modo Flash Manuale

    7.4 Modo flash manuale Diversi tipi di fotocamera supportano la modalità flash manuale M solo se impostate sulla modalità fotocamera M (manuale). In altre modalità di fotocamera apparirà un segnale di errore sul display e non sarà possibile scattare la foto.
  • Seite 192: Sincronizzazione Automatica Con Tempi Corti (Fp)

    7.5 Sincronizzazione automatica con tempi 7.6 Modalità manuale con impostazione della corti (FP) distanza Impostare la modalità MODE ° ö TTL FP...
  • Seite 193: Programma Favorito

    7.7 Luce video a LED 7.8 Programma favorito Impostare la modalità Procedura per l’impostazione del salvataggio di un programma preferito MODE MODE ° ° SAVE ö °...
  • Seite 194: Correzione Manuale D'esposizione Flash

    8 Correzione manuale d’esposizione Procedura per l’impostazione del caricamento di un programma preferito flash ° LOAD ° Suggerimenti: Soggetto scuro su sfondo chiaro: valore di correzione positivo. Soggetto chiarosu sfondo scuro: ö valore di correzione negativo.
  • Seite 195: Funzioni Speciali

    9 Funzioni speciali Procedura per l’impostazione 9.1 Parabola con zoom motorizzato Non dimenticate di disattivare nuovamente la corre- zione manuale d'esposizione flash, una volta scat- 9.1.1 Zoom automatico. tata la foto! Attenzione: Oggetti fortemente riflettenti nell’im- magine del soggetto possono disturbare l’esposi- zione automatica della fotocamera.
  • Seite 196 9.1.2 Modo Zoom manuale In tal caso non è possibile il modo zoom automati- Procedura per l’impostazione OPT. ZOOM OPT. ° ZOOM ö °...
  • Seite 197: Diffusore Grandangolare

    9.2 Diffusore grandangolare Ripristino dello zoom automatico OPT. ZOOM OPT. L’adattamento automatico della parabola con zoom motorizzato non avviene se si utilizza il diffusore grandangolare ° A-Zoom 9.3 mecabounce Diffuser MBM-04 ZOOM L’adattamento automatico della parabola con ° zoom motorizzato non avviene se si utilizza un ö...
  • Seite 198: Controllo A Distanza Wi-Fi

    10 Controllo a distanza wi-fi 10.1 Funzionamento master remoto ö...
  • Seite 199: Impostare La Modalità Sul Flash Master

    10.1.1 Impostazione del funzionamento master 10.1.2 Impostare la modalità sul flash master remoto OPT. MODE OPT. MASTER MODE ° ° MODE MASTER ° MASTER ö...
  • Seite 200: Impostare La Potenza Ridotta In Modalità M Sul Flash Master

    10.1.3 Impostare la correzione dell’esposizione 10.1.4 Impostare la potenza ridotta in modalità M (EV) in modalità TTL nel flash master sul flash master OPT. OPT. OPT. OPT. ° ° ° ° MASTER ö MASTER...
  • Seite 201: Impostare Il Canale Remoto

    10.1.5 Impostare il canale remoto 10.1.6 Impostare il gruppo, la modalità e il livello di potenza ridotta (P), ovvero la correzione MASTER Un canale remoto non può essere selezionata quando dell'esposizione (EV) per il flash slave sul un gruppo è stata impostata sul master. master MASTER OPT.
  • Seite 202: Modo Con Controllo A Distanza

    10.2 Modo con controllo a distanza MODE MODE ° ö In modalità slave, non vi è alcuna indicazione di portata e nessuna regolazione automatica della ° posizione dello zoom.
  • Seite 203: Impostare La Modalità Slave Remota

    10.2.1 Impostare la modalità slave remota 10.2.2 Impostare il canale slave OPT. CHANNEL OPT. SLAVE MODE ° CHANNEL ° SLAVE ° ö...
  • Seite 204: Impostare Il Gruppo Slave

    10.3 Modo SERVO 10.2.3 Impostare il gruppo slave OPT. GROUP OPT. Quando il flash della fotocamera AF illuminatore emette la messa a fuoco automatica servo-opera- zione non è possibile. ° Disabilitare il raggio di misura AF sulla fotocamera. Utilizzare una modalità AF diversa della fotocamera o passare alla messa a fuoco manuale.
  • Seite 205: Impostare La Modalità Servo

    10.3.1 Impostare la modalità SERVO 10.3.2 Impostare la soppressione pre-lampo e la sincronizzazione OPT. MODE SYNC OPT. ° SERVO MODE SYNC ° ° SERVO SERVO ö...
  • Seite 206: Funzione Di Apprendimento

    10.3.3 Impostare la potenza ridotta in 10.3.4 Funzione di apprendimento modalità servo SERVO Se il flash della fotocamera emette lampi di misura- zione AF per la messa a fuoco automatica, il siste- Nella modalità SERVO gruppi slave e canali remote ma non consente la funzione di apprendimento.
  • Seite 207: Option Menu

    11 OPTION-Menu Procedura per l’impostazione della funzione di apprendimento 11.1 Modo Zoom automatico (A-ZOOM) OPT. 11.2 Modo Zoom manuale SYNC OPT. Procedura per l’impostazione OPT. ° OPT. ZOOM LEARN SYNC ° ° 35mm ZOOM ö LEARN °...
  • Seite 208 11.3 AF-BEAM (Illuminatore ausiliario AF) Procedura per l’impostazione OPT. AF-BEAM OPT. ° AF-BEAM ° ö...
  • Seite 209: Tecniche Lampo

    12 Tecniche lampo 12.2 Lampo riflesso con pannello riflettente 12.1 Lampo riflesso 12.3 Memoria misurazioni dell’esposizione FE Quando viene somministrato la testa della parabo- la, non vi è alcuna indicazione di portata e nessuna regolazione automatica della posizione della para- bola.
  • Seite 210: Sincronizzazione Automatica Del Lampo

    13 Sincronizzazione del lampo 13.1 Sincronizzazione automatica del lampo ö...
  • Seite 211: Sincronizzazione Normale

    13.2 Sincronizzazione normale 13.4 Sincronizzazione sulla seconda tendina (REAR) 13.3 Sincronizzazione con tempi più lunghi (SLOW) ö Utilizzare un treppiede per evitare immagini mosse!
  • Seite 212: Impostazioni Del Display Touch

    14 Impostazioni del display touch 14.2 Indicazione del campo d’utilizzo in m o ft (UNIT) 14.1 Luminosità Procedura per l’impostazione Procedura per l’impostazione OPT. OPT. UNIT OPT. DISPLAY OPT. ° ° UNIT HIGH DISPLAY ° ö °...
  • Seite 213: Cura E Manutenzione

    15 Cura e manutenzione 15.3 Impostazioni di fabbrica (RESET) Procedura per l’impostazione OPT. RESET OPT. 15.1 Aggiornamento del software ° RESET www.metz-mecatech.de 15.2 Formazione del condensatore flash ° ö...
  • Seite 214: In Caso Di Anomalie Di Funzionamento

    16 In caso di anomalie di funzionamento La posizione della parabola non viene adeguata automaticamente alla posizione zoom dell’obiettivo. L’impostazione per la compensazione manuale dell’esposizione TTL non è possibile. Sul display non è indicato il campo d’utilizzo. Non ha luogo la commutazione automatica sul tempo sincro. Il flash di misurazione AF del lampeggiatore non si attiva.
  • Seite 215 Le riprese sono troppo scure. Le riprese sono troppo chiare. ö...
  • Seite 216: Dati Tecnici

    17 Dati tecnici Luci video: Numero guida massimo per ISO 100/21°, Zoom 105 mm: Modalità di funzionamento del flash: Livelli di potenza luminosa ridotta manuale: Dimensioni Durata del lampo, Peso: Temperatura di colore: Sensibilità alla luce: Dotazione standard: Sincronizzazione: Numero lampi, Tempo di ricarica Illuminazione: ö...
  • Seite 217: Accessori Opzionali

    18 Accessori opzionali • Lampeggia titolare FGH 40-60 • mecabounce Diffuser MBM-04 • Cavo di collegamento TTL per Canon TCC-20 • Base d’appoggio S60 • Easy Softbox ESB 60-60 • Easy Softbox ESB 40-40 ö...
  • Seite 218 Smaltimento delle batterie ö...
  • Seite 219 ö...
  • Seite 220 ö...
  • Seite 221 Pannello riflettente (incassato) Diffusore grandangolare (incassato) Luce video a LED Luce ausiliaria AF Vano batterie (4x AA – s. Avvertenze sulla sicurezza) Presa USB (micro) Pulsante on/off brandt groen bij het bereiken van de flitsparaatheid licht rood op in stand-by Scelta menu e regolazione valori Scelta menu e regolazione valori Modalità...
  • Seite 222 Introducción ......... . . 224 1 Indicaciones de seguridad.
  • Seite 223 11 OPTION-Menu ........251 12 Técnicas de destello.
  • Seite 224: Introducción

    Introducción 1 Indicaciones de seguridad Despliegue la doble página con el dibujo al final de las instrucciones. Explicación Indicación, nota Atención: nota de seguridad muy importante Uso previsto...
  • Seite 226: Funciones Dedicadas Del Flash

    2 Funciones dedicadas del flash En el marco de estas instrucciones no es posible describir detalladamente todos los modelos de cámara y cada una de sus funciones de flash dedi- cadas. Por ese motivo, es aconsejable consultar las indica- ciones sobre los modos del flash en el manual de instrucciones de la cámara para saber qué...
  • Seite 227: Preparación Del Flash

    3 Preparación del flash Cambiar pilas 3.1 Alimentación de energía Selección de pilas o baterías Al colocar las pilas o baterías, observar la polari- dad correcta indicada por los símbolos del compar- Utilice sólo las fuentes de alimentación indicadas arriba. Si emplea otras fuentes de ali- timento de las pilas.
  • Seite 228: Montaje Del Flash

    3.2 Montaje del flash 3.3 Conexión y desconexión del flash Colocar el flash en la cámara Desconectar la cámara y el flash antes de montar- los o desmontarlos. Si el flash no se usa durante mucho tiempo, reco- mendamos: apagar el flash con la tecla retirar las fuentes de alimentación (pilas, pilas recargables).
  • Seite 229: Opciones Del Menú

    3.5 OPCIONES del menú 3.7 Desconexión automática del flash (Auto - Off) OPT. ZOOM STANDBY AF BEAM DISPLAY UNIT RESET MODE , CHANNEL GROUP SYNC 3.6 INFO ° INFO En los modos de funcionamiento SLAVE/SERVO no ° está activada la desconexión automática. INFO Cuando no se vaya a utilizar el flash durante un periodo de tiempo prolongado, debe apagarse...
  • Seite 230: Indicadores Oled En El Flash

    4 Indicadores OLED en el flash Ajustar desconexión automática del aparato 4.1 Indicación de disponibilidad del flash OPT. STANDBY OPT. 4.2 Indicación del control de la exposición ° TTL BL AUTO STANDBY °...
  • Seite 231: Indicaciones En La Pantalla

    No aparecerá ninguna indicación de alcance . . . - cuando el cabezal del reflector esté abatido sin 5 Indicaciones en la pantalla encontrarse en su posición normal (hacia arriba o hacia un lado). - cuando el flash funcione en modo REMOTO MAE- STRO, REMOTO ESCLAVO, SERVO y AUTO .
  • Seite 232 5.2.2 Indicación de alcance en modo manual 5.2.5 Indicación de subexposición „EXP.“ 5.2.3 Superación del margen de indicación EXP. 5.2.4 Indicación de error „FEE“...
  • Seite 233: Indicaciones En El Visor De La Cámara

    6 Indicaciones en el visor de la cámara 7 Modos de funcionamiento del flash El símbolo de flash parpadea AUTO El símbolo de flash se ilumina TTL BL El símbolo de flash sigue encendido después de la toma o se apaga brevemente El símbolo de flecha parpadea después de MASTER disparar...
  • Seite 234: Modo De Flash I-Ttl-Bl

    7.2 i-Modo de flash i-TTL 7.3 Modo de flash i-TTL-BL Ajustar modo de funcionamiento Ajustar modo de funcionamiento MODE MODE TTL BL ° ° El modo de flash BL no está soportado en algunas cámaras, Cuando la medición de la exposición SPOT está...
  • Seite 235: Modo De Flash Manual

    7.4 Modo de flash manual ¡Varias cámaras son compatibles con el funciona- miento de flash manual únicamente cuando la cámara se encuentra en modo de funcionamiento M (manual)! ¡En otros modos de funcionamiento de la cámara, aparecerá en la pantalla un mensaje de error y se bloqueará...
  • Seite 236: Sincronización Rápida Automática (Fp)

    7.5 Sincronización rápida automática (FP) 7.6 Funcionamiento de flash manual con indi- cación de la distancia (GN) Ajustar modo de funcionamiento MODE ° TTL FP...
  • Seite 237: Programa Favorito

    7.7 Luz LED para vídeo 7.8 Programa favorito Ajustar modo de funcionamiento Proceso de ajuste para guardar un programa favorito MODE MODE ° ° SAVE °...
  • Seite 238: Corrección Manual De La Exposición Del Flash

    8 Corrección manual de la exposición Proceso de ajuste para cargar un programa favorito del flash ° LOAD ° Sugerencia: Motivo oscuro en fondo de imagen claro: valor de corrección positivo. Motivo claro en fondo de imagen oscuro: valor de corrección negativo.
  • Seite 239: Funciones Especiales

    9 Funciones especiales Configuración 9.1 Reflector con zoom motorizado Tras la toma, ¡no olvide volver a borrar en la cáma- ra la corrección de la exposición del flash manual! Atención: Los objetos muy reflectantes en la imagen del motivo pueden perturbarel sistema de 9.1.1 Auto-Zoom exposición automática de la cámara.
  • Seite 240 9.1.2 Funcionamiento manual de zoom En tal caso, no resulta posible el funcionamiento con auto-zoom! Configuración OPT. ZOOM OPT. ° ZOOM °...
  • Seite 241: Difusor De Gran Angular

    9.2 Difusor de gran angular Restablecer auto-zoom OPT. ZOOM OPT. No se efectuará el ajuste automático del reflector con zoom motorizado cuando se esté empleando el difusor de gran angular ° 9.3 mecabounce Diffuser MBM-04 A-Zoom ZOOM No se efectuará el ajuste automático del reflector °...
  • Seite 242: El Funcionamiento Remoto

    10 El funcionamiento Remoto 10.1 Funcionamiento maestro remoto...
  • Seite 243: Ajustar Modo Maestro Remoto

    10.1.1 Ajustar modo maestro remoto 10.1.2 Ajustar modo en flash maestro OPT. MODE OPT. MASTER MODE ° MODE ° MASTER ° MASTER...
  • Seite 244: Ajustar Potencia Parcial De Luz En El Modo M Del Flash Maestro

    10.1.3 Ajustar compensación de exposición (EV) en 10.1.4 Ajustar potencia parcial de luz en el modo M modo TTL en flash maestro del flash maestro OPT. OPT. OPT. OPT. ° ° ° ° MASTER MASTER...
  • Seite 245: Ajustar Canal Remoto

    10.1.5 Ajustar canal remoto 10.1.6 Ajustar grupo, modo de funcionamiento de flash, potencia luminosa parcial (P) o compen- MASTER Un canal remoto no se puede seleccionar cuando sación de exposición (EV) para el flash esclavo un grupo se ha fijado en el maestro. en flash maestro MASTER OPT.
  • Seite 246: Modo Remoto Esclavo

    10.2 Modo remoto esclavo MODE MODE ° En el modo esclavo, no hay ninguna indicación de su alcance y sin ajuste automático de la posición de ° zoom.
  • Seite 247: Ajustar Modo De Flash Esclavo Remoto

    10.2.1 Ajustar modo de flash esclavo remoto 10.2.2 Ajustar canal esclavo OPT. CHANNEL OPT. SLAVE MODE ° ° CHANNEL SLAVE °...
  • Seite 248: Ajustar Grupo Esclavo

    10.3 Modo SERVO 10.2.3 Ajustar grupo esclavo OPT. GROUP OPT. Cuando el flash de la cámara del iluminador AF emite el enfoque automático servo-operación no es posible. ° Desactivar el haz de medición AF de la cámara Utilice un modo AF diferente de la cámara o cambi- ar a enfoque manual.
  • Seite 249: Ajustar Modo De Funcionamiento Servo

    10.3.1 Ajustar modo de funcionamiento SERVO 10.3.2 Ajustar anulación de predestello y sincroni- zación OPT. MODE SYNC OPT. SERVO ° MODE SYNC ° SERVO ° SERVO...
  • Seite 250: Función De Aprendizaje

    10.3.3 Ajustar potencia parcial de luz en modo 10.3.4 Función de aprendizaje Servo SERVO En modo SERVO no es posible ajustar grupos escla- Cuando el flash instalado en la cámara emita pre- vos ni canales remotos. El flash de la cámara no destellos AF de medición para el enfoque automáti- puede trabajar en modo remoto.
  • Seite 251: Option-Menu

    11 OPTION-Menu Proceso de ajuste para la función de aprendizaje 11.1 Modo de zoom automático (A-ZOOM) OPT. SYNC 11.2 Funcionamiento manual de zoom OPT. Configuración ° OPT. OPT. ZOOM LEARN SYNC ° ° 35mm ZOOM LEARN °...
  • Seite 252 11.3 AF-BEAM (luz auxiliar AF) Configuración OPT. AF-BEAM OPT. ° AF-BEAM °...
  • Seite 253: Técnicas De Destello

    12 Técnicas de destello 12.2 Destellos indirectos con tarjeta reflec- tante 12.1 Destellos indirectos 12.3 Memoria FE de valores de medición del flash Cuando se da la cabeza del reflector, no hay ningu- na indicación de su alcance y sin ajuste automático de la posición del reflector.
  • Seite 254: Sincronización Del Flash

    13 Sincronización del flash 13.1 Control automático de la sincronización del flash...
  • Seite 255: Sincronización Normal

    13.2 Sincronización normal 13.4 Sincronización con la segunda cortinilla (REAR) 13.3 Sincronización de velocidad lenta (SLOW) Utilice un trípode para evitar las imágenes borro- sas!
  • Seite 256: Configuración De Pantalla Táctil

    14 Configuración de pantalla táctil 14.2 Indicaciones de alcance en m o ft (UNIT) 14.1 Brillo Configuración Configuración OPT. OPT. UNIT OPT. DISPLAY OPT. ° ° UNIT HIGH DISPLAY ° °...
  • Seite 257: Mantenimiento Y Cuidadoss

    15 Mantenimiento y cuidadoss 15.3 Valores de fábrica (RESET) Configuración OPT. RESET OPT. 15.1 Actualización del firmware ° RESET www.metz-mecatech.de 15.2 Formación del condensador de destellos °...
  • Seite 258: Ayuda En Caso De Problemas

    16 Ayuda en caso de problemas La configuración de la corrección manual de la exposición del flash TTL no tiene ningún efecto. No tiene lugar una conmutación automática a la velocidad de sincro- En la pantalla no aparece la indicación del alcance. nización del flash.
  • Seite 259 La imagen aparece demasiado clara.
  • Seite 260: Características Técnicas

    17 Características técnicas Luz para vídeo: Máximo número guía con ISO 100/21°, zoom 105 mm: Tipos de funcionamiento del flash: Potencias parciales manuales: Dimensiones Duración de destellos Temperatura de color: Peso: Sensibilidad de la película: Sincronización: Componentes suministrados: Cantidad de destellos, Intervalo entre destellos, Iluminación: Gama de inclinación y posiciones de enclavamiento del reflector:...
  • Seite 261: Accesorios Especiales

    18 Accesorios especiales • Soporte para flash FGH 40-60 • mecabounce Diffuser MBM-04 • Cable de conexión TTL para Canon TCC-20 • Pie de apoyo para flashes S60 • Easy Softbox ESB 60-60 • Easy Softbox ESB 40-40...
  • Seite 262 Eliminación de las baterías...
  • Seite 265 Tarjeta reflectante (hundido) Difusor de gran angular (hundido) LED luz para vídeo Luz auxiliar AF Compartimento de baterías (4x AA – s. Indicaciones de seguridad) Toma USB (micro) Tecla ON/OFF se ilumina en verde cuando se alcanza la disposición de disparo luces rojas en modo de espera Teclas de cursor Selección de opciones de menú...
  • Seite 267 Tabelle 2: Blitzleuchtzeiten in den Teillichtleistungsstufen Tableau 2: Durée de líéclair pour les différents niveaux de puissance Tabel 2: Flitsduur en deelvermogensstappen Table 2: Flash durations at the individual partial light output levels Tabella 2: Durata del lampo ai vari livelli di potenza flash Tabla 2: Duraciones de destellos en los escalones de potencias parciales de luz Tabelle 3: Maximale Leitzahlen im HSS/FP-Betrieb...
  • Seite 268 Tabelle 4: Blitzfolgezeiten und Blitzanzahl bei den versch. Batterietypen Tableau 4: Temps de recyclage et autonomie pour différents types de piles Tabel 4: Flitsvolgtijden en aantallen flitsen bij de verschillende voedingstypes Table 4: Recycling times and number of flashes with different battery types Tabella 4: Tempi di ricarica e numero lampi con i diversi tipi di batterie Tabla 4: Tiempos de secuencias de dest.
  • Seite 269 ö...
  • Seite 270 ö...
  • Seite 272 j l x k ö c...

Inhaltsverzeichnis