Herunterladen Inhalt Inhalt Diese Seite drucken
Inhaltsverzeichnis

Werbung

Verfügbare Sprachen
  • DE

Verfügbare Sprachen

  • DEUTSCH, seite 57
CQX1A1521Z
Z
T-R650
AM/FM Stereo Tuner
OWNER'S MANUAL
MANUEL DU PROPRIÉTAIRE
MANUAL DEL USUARIO
BEDIENUNGSANLEITUNG
MANUALE DI ISTRUZIONI
HANDLEIDING

Werbung

Inhaltsverzeichnis
loading

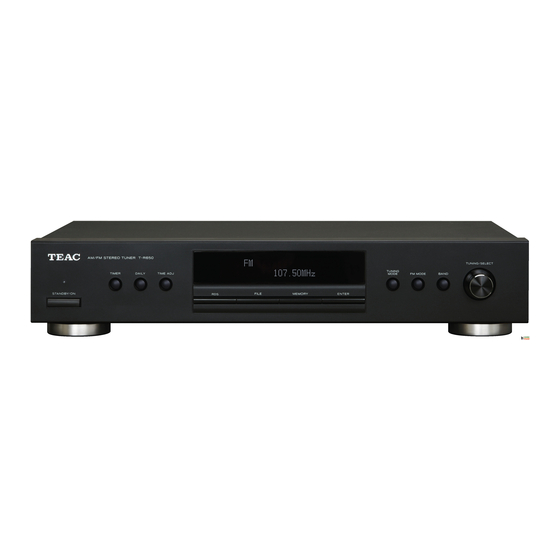
Inhaltszusammenfassung für Teac T-R650

  • Seite 1 CQX1A1521Z T-R650 AM/FM Stereo Tuner OWNER’S MANUAL MANUEL DU PROPRIÉTAIRE MANUAL DEL USUARIO BEDIENUNGSANLEITUNG MANUALE DI ISTRUZIONI HANDLEIDING...
  • Seite 2: Important Safety Instructions

    8) Do not install near any heat sources such as radiators, heat < IF YOU ARE EXPERIENCING PROBLEMS WITH THIS PRODUCT, registers, stoves, or other apparatus (including amplifiers) that CONTACT TEAC FOR A SERVICE REFERRAL. DO NOT USE THE produce heat. PRODUCT UNTIL IT HAS BEEN REPAIRED.
  • Seite 3: Inhaltsverzeichnis

    Contents Before use Read this before attempting any operations. Thank you for choosing TEAC. Read this manual carefully to get the best performance from this unit. < The voltage supplied to the unit should match the voltage as printed on the rear panel. If you are in any doubt regarding this Before use .
  • Seite 4: Connection

    B REMOTE CONTROL jack These jacks transmit an analog 2-channel audio signal. Connect If you have TEAC A-R650, connect this jack to the A-R650’s these jacks to the TUNER jacks of the amplifier (A-R650) with a remote control jack wi†h remote control connection cord.
  • Seite 5: Connecting Antennas

    Connecting Antennas AM Indoor Loop Antenna FM Indoor Antenna The high-performance AM loop antenna provided with this unit is Connect the lead-type FM antenna to the FM 75Ω socket, extend sufficient for good reception in most areas. the lead and tune in your favourite station (see page 8). To stand the loop antenna on a surface, fix the claw to the slot in Adjust the antenna in a suitable location like a window frame or the antenna base.
  • Seite 6: Parts Identification

    Parts Identification STANDBY/ON Press this button to turn the unit on or put in the standby mode. The standby indicator lights red when the unit is in the standby mode. When the unit is turned on, it goes out. TIMER Press this button to turn on or off the timer function.
  • Seite 7: Basic Operations

    DIMMER This function is available only when the REMOTE CONTROL Press this button to dim the display. jack of the T-R650 and the A-R650 are connected with a remote control connection cord. Note: The remote control unit is not provided for this unit.
  • Seite 8: Manual Tune

    Listening to FM/AM Select FM or AM by pressing the BAND button repeatedly. Select the station you want to listen to. Select the desired tuning mode. Manual tuning mode Turn the TUNING/SELECT knob until the station you want to listen to is found. The frequency changes by a fixed step (FM: 50 kHz steps, AM: 9 kHz steps).
  • Seite 9: Preset Tuning

    Preset Tuning 1 Within 4 seconds, select the preset number for this station. Manual Preset Turn the TUNING/SELECT knob. You can store up to 30 FM and 30 AM stations. Select AM or FM by pressing the BAND button repeatedly. 10:00 Stereo CH12 108.00MHz...
  • Seite 10: How To Select Preset Stations (Fm/Am)

    Preset Tuning 2 You can assign names to the preset stations. (Up to 4 characters) How to select preset stations (FM/AM) When the FILE button is pressed, the assiggned name is displayed Select AM or FM by pressing the BAND button repeatedly. instead of the clock.
  • Seite 11: Preset Tuning (Remote Control)

    Preset Tuning 1 (Remote Control) Manual Preset Press the ENTER button. You can store up to 30 FM and 30 AM stations. Select AM or FM by pressing the BAND button repeatedly. The next “-” flashes. Up to 4 characters can be used per station. Repeat steps to input characters.
  • Seite 12 Preset Tuning 2 (Remote Control) Presetting Automatically Within 4 seconds, press the button to select the preset number for this station. Select FM or AM by pressing the BAND button repeatedly. 10:00 Stereo CH12 108.00MHz Press and hold the MEMORY button for more than 2 seconds.
  • Seite 13: Rds 1

    RDS 1 The Radio Data System (RDS) is a broadcasting service which allows How to select preset stations stations to send additional information along with the regular radio Select AM or FM by pressing the BAND button repeatedly. programme signal. RDS works on the FM waveband in Europe only.
  • Seite 14: Pty Search

    RDS 2 PTY Search You can search for stations by programme type. The clock setting of this unit is automatically adjusted according to the CLOCK TIME (CT) data. Select FM by pressing the BAND button repeatedly. If you tune in an RDS station broadcasting incorrect CT data, the clock might be wrongly adjusted, and that may eventually affect the timer operation.
  • Seite 15 31 kind of PTY programmes: Phone In: programme in which the public expresses its view by phone. News: Travel & Touring: brief announcements, events, public opinion, reports, actual travel reports. situations. Leisure & Hobby: Current Affairs: programmes concerning recreational activities. a kind of suggestion including practical announcements other Jazz Music: than news, documents, discussion, analysis and so on.
  • Seite 16: Setting The Clock

    Setting the Daily Timer 1 < The unit uses the 24-hour clock. This function is available only when REMOTE CONTROL jacks of the T-R650 and the A-R650 are connected with a remote control connection cord. Press the TIME ADJ button.
  • Seite 17 Turn the TUNING/SELECT knob to set the start time Turn the TUNING/SELECT knob to set the stop time (minutes), and press the ENTER button. (minutes), and press the ENTER button. Off time00:00:00 Off time09:15:00 CH12 108.00MHz CH12 108.00MHz The on-time is set. “Off time” appears on the display, and the hour Now the timer setting is stored in memory.
  • Seite 18: Sleep Timer

    The timer indicator ( ) is appeard right side on the display. This function is available only when the REMOTE CONTROL jack of the T-R650 and the A-R650 are connected with a remote control connection cord. Timer indicator The power can be switched off after a specified amount of time.
  • Seite 19: Troubleshooting

    If your unit is not working properly, it might help to reset it to the problem yourself before you call your dealer or a TEAC service factory default.
  • Seite 20: Specifications

    For European Customers Specifications Information for Users on Collection and Disposal of Old Equipment and used Batteries FM Tuner Tuning range ....87.50 - 108.00 MHz (50 kHz steps) These symbols on the products, packaging, and/or Usable sensitivity.
  • Seite 21: Avant Utilisation

    Sommaire Avant utilisation Lisez ceci avant d’essayer d’utiliser l’appareil. Merci d’avoir choisi TEAC. Lisez ce manuel avec attention pour obtenir les meilleures performances possibles de cet < La tension d’alimentation de l’appareil doit être celle indiquée à appareil. l’arrière de l’appareil. En cas de doute, contactez un électricien.
  • Seite 22: Branchements

    B Prise REMOTE CONTROL Si vous avez un A-R650 TEAC, connectez cette prise à la prise REMOTE CONTROL de l’A-R650 au moyen d’un cordon de connexion de télécommande. Vous avez alors accès aux...
  • Seite 23: Raccordement Des Antennes

    Raccordement des antennes Antenne cadre AM intérieure L’antenne filaire doit être tendue à l’extérieur ou à l’intérieur près d’une fenêtre. Pour une meilleure réception, raccordez le bornier L’antenne cadre AM à haute performance fournie pour l’appareil est GND à une terre fiable. suffisante pour une bonne réception dans la plupart des régions.
  • Seite 24: Identification Des Parties

    Identification des parties STANDBY/ON Appuyez sur cette touche pour mettre l’appareil en service ou en veille (Standby). Le voyant Standby est allumé en rouge quand l’appareil est en veille. Quand l’appareil est en service, le voyant est éteint. TIMER Appuyez sur cette touche pour activer ou désactiver la minuterie. DAILY Appuyez sur cette touche pour régler la minuterie.
  • Seite 25: Fonctionnement De Base

    Cette fonction est disponible uniquement quand les prises Utilisez ces touches pour sélectionner le numéro de mémoire REMOTE CONTROL du T-R650 et A-R650 sont connectées avec un cordon de connexion de télécommande. Utilisez la (preset) pour la station. télécommande fournie avec le A-R650.
  • Seite 26: Écoute D'une Émission Fm/Am

    : < Appuyez sur la touche ENTER pour arrêter la syntonisation Syntonisation manuelle automatique. (sur le panneau frontal du T-R650) < > < Servez-vous du bouton TUNING (...
  • Seite 27: Sélection D'un Préréglage

    Sélection d’un préréglage 1 Dans les 4 secondes, sélectionnez le numéro de préréglage Préréglage manuel (preset) pour cette station. Vous pouvez mémoriser un maximum de 30 stations FM et de 30 Tournez le bouton TUNING/SELECT. stations AM. Sélectionnez AM ou FM en appuyant répétitivement sur la touche BAND.
  • Seite 28 Sélection d’un préréglage 2 Vous pouvez affecter des noms aux stations préréglées. (4 caractères Comment sélectionner les stations (FM/AM) maximum) préréglées Quand vous appuyez sur les touches FILES, les noms affectés sont affichés à la place de l'horloge. Appuyez de nouveau sur la touche Sélectionnez AM ou FM en appuyant répétitivement sur la FILE pour retourner à...
  • Seite 29: Sélection D'un Préréglage (Télécommande)

    Sélection d’un préréglage 1 (télécommande) Préréglage manuel Pulse el botón ENTER. Vous pouvez mémoriser un maximum de 30 stations FM et de 30 stations AM. Sélectionnez AM ou FM en appuyant répétitivement sur la touche BAND. Le “-” suivant clignote. Se pueden usar 4 caracteres por emisora.
  • Seite 30 Sélection d’un préréglage 2 (télécommande) Préréglage automatique Dans les 4 secondes, appuyez sur la touche afin de sélectionner le numéro de preset pour cette station. Sélectionnez FM ou AM en appuyant répétitivement sur la touche BAND. 10:00 Stereo CH12 108.00MHz Maintenez pressée la touche MEMORY pendant plus de 2 Vous pouvez aussi employer les touches numériques.
  • Seite 31: Rds 1

    RDS 1 Le Radio Data System (RDS) est un service radio qui permet aux Comment sélectionner les stations préréglées stations émettrices de diffuser des informations complémentaires (presets) parallèlement à l’émission radio elle-même. Sélectionnez AM ou FM en appuyant répétitivement sur la Le système RDS fonctionne uniquement sur la bande FM en touche BAND.
  • Seite 32: Recherche Par Type De Programme (Pty)

    RDS 2 Recherche par type de programme (PTY) Vous pouvez rechercher des stations par type de programme. Le réglage de l’horloge de cet appareil se fait automatiquement en fonction des données CLOCK TIME (CT). Sélectionnez FM en appuyant répétitivement sur la touche Si vous vous connectez à...
  • Seite 33 31 types de programme PTY: Phone In : émissions au cours desquelles les auditeurs s’expriment en direct. News (nouvelles) : Travel & Touring (voyages) : communiqués, événements, sondages, reportages, situations émissions à caractère touristique. vécues. Leisure & Hobby : Current Affairs (informations générales) : émissions sur les activités de loisirs.
  • Seite 34: Réglage De L'horloge

    < L’horloge de l’appareil est au format 24 heures. Cette fonction est disponible uniquement quand les prises REMOTE CONTROL du T-R650 et de l’A-R650 sont connectées au moyen d’un Appuyez sur la touche TIME ADJ. cordon de connexion de télécommande.
  • Seite 35 Tournez le bouton TUNING/SELECT pour sélectionner Tournez le bouton TUNING/SELECT pour sélectionner l’heure de démarrage (la minute) et appuyez sur la touche l’heure d’arrêt (minute) et appuyez sur la touche ENTER. ENTER. Off time09:15:00 Off time00:00:00 CH12 108.00MHz CH12 108.00MHz Le réglage de la minuterie est enregistré.
  • Seite 36: Extinction Différée

    Le témoin de minuterie ( ) apparaît du côté droit de l’afficheur. Cette fonction est disponible uniquement quand les prises REMOTE CONTROL du T-R650 et A-R650 sont connectées avec un cordon de connexion de télécommande. Utilisez la Témoin de minuterie télécommande fournie avec le A-R650.
  • Seite 37: Dépannage

    à votre revendeur ou au service après-vente Si votre appareil ne fonctionne pas correctement, le ramener aux TEAC. réglages d’usine par défaut peut peut-être vous aider. Cela annulera vos réglages (y compris le mot de passe) et les autres réglages personnels (stations préréglées, etc.).
  • Seite 38: Caractéristiques Techniques

    Pour les consommateurs européens Caractéristiques techniques Information pour les utilisateurs sur la collecte et l’enlèvement des équipements et piles usagés Tuner FM Plage de syntonisation ..87,50 - 108,00 MHz (pas de 50 kHz) Ces symboles sur les produits, emballages et/ou documents Sensibilité...
  • Seite 39: Antes De Comenzar

    Contenido Antes de comenzar Lea esto antes de continuar. Gracias por seleccionar TEAC. Lea detenidamente este manual para obtener el mejor rendimiento posible de esta unidad. < La tensión de voltaje suministrada a la unidad debe coincidir con la tensión de voltaje indicada en el panel trasero. En caso de Antes de comenzar .
  • Seite 40: Conexión

    PRECAUCIÓN: B Terminal REMOTE CONTROL < Desconecte la corriente de todos los equipos antes de realizar las Si tiene un TEAC A-R650, conecte este terminal al terminal conexiones. del mismo nombre del A-R650 con el cable de conexión de < Lea las instrucciones de cada uno de los componentes que control remoto.
  • Seite 41: Conexión De Las Antenas

    Conexión de las antenas < Aunque utilice una antena de AM exterior, no desconecte la Antena de cuadro de AM interior antena de cuadro. La antena de cuadro de AM de altas prestaciones suministrada para esta unidad es suficiente para una recepción óptima en la mayoría de las zonas.
  • Seite 42: Identificación De Las Piezas

    Identificación de las piezas STANDBY/ON Pulse este botón para encender o poner en reposo (modo “standby”) esta unidad. El indicador de modo “standby” se ilumina en rojo cuando la unidad está en reposo. Cuando la unidad está encendida, el indicador se apaga. TIMER Pulse este botón para activar o desactivar la función del temporizador.
  • Seite 43: Ajuste Del Temporizador Diario

    Pulse este botón para poner la unidad en modo de reposo Esta función está disponible solamente cuando el conector (standby). REMOTE CONTROL del T-R650 y el A-R650 están conectados por un cable de control remoto. Utilice el mando a distancia suministrado con el A-R650 Botones ARRIBA y ABAJO de sintonización...
  • Seite 44: Manual Tune

    Sintonización manual < Pulse el botón ENTER para detener la sintonización automática. < > Manual tune (del panel frontal del T-R650) < Utilice el botón TUNING ( ) cuando use el mando a distancia 108.00MHz Modo de presintonización Sintonización automática Ver páginas 45 a 49.
  • Seite 45: Presintonización

    Presintonización 1 Seleccione el número de presintonía para esta emisora en Presintonización manual menos de 4 segundos. Puede memorizar hasta 30 emisoras de FM y 30 de AM. Gire el mando TUNING/SELECT. Seleccione AM o FM pulsando repetidamente el botón BAND.
  • Seite 46 Presintonización 2 Puede asignar nombres a las presintonías. (Hasta 4 caracteres) Cómo seleccionar las emisoras presintonizadas Cuando pulsa el botón FILE, se muestra el nombre asignado en lugar (FM/AM) del reloj. Pulse el botón FILE nuevamente para volver a la pantalla Seleccione AM o FM pulsando repetidamente el botón normal (reloj).
  • Seite 47: Presintonización (Mando A Distancia)

    Presintonización 1 (mando a distancia) Presintonización manual Pulse el botón ENTER. Puede memorizar hasta 30 emisoras FM y 30 AM. Seleccione AM o FM pulsando repetidamente el botón BAND. El siguiente “-“ destella. Se pueden usar 4 caracteres por emisora. Repita los pasos para introducir los caracteres.
  • Seite 48 Presintonización 2 (mando a distancia) Presintonización automática En menos de 4 segundos, pulse el botón para seleccionar el número de presintonía para esta emisora. Seleccione FM o AM pulsando repetidamente el botón BAND. 10:00 Stereo CH12 108.00MHz También puede utilizar los botones numéricos. Pulse el botón MEMORY durante más de 2 segundos.
  • Seite 49: Rds

    El Sistema de Datos por Radio (RDS) es un servicio de radiodifusión Cómo seleccionar las emisoras presintonizadas que permite a las emisoras enviar una información adicional junto (FM/AM) con la señal de radio habitual. Seleccione AM o FM pulsando repetidamente el botón El RDS funciona solamente con la banda de FM en Europa.
  • Seite 50: Búsqueda Pty

    RDS 2 Búsqueda PTY Podrá efectuar la búsqueda de emisoras por el tipo de programa. La puesta en hora del reloj de esta unidad se realiza automáticamente de acuerdo con los datos CLOCK TIME (CT). Seleccione FM pulsando repetidamente el botón BAND. Si sintoniza una emisora RDS que esté...
  • Seite 51 31 tipos de programas PTY: Phone In (de intervención telefónica): Programas en los que el público expresa su punto de vista por teléfono. News (noticias): Informaciones breves, eventos, opinión pública, crónicas, Travel & Touring (viajes y rutas): situaciones reales. Crónicas de viajes. Current Affairs (actualidad): Leisure &...
  • Seite 52: Puesta En Hora Del Reloj

    Programando el temporizador diario 1 < La unidad utiliza un reloj de 24 horas. Esta función está disponible solamente cuando los terminales REMOTE CONTROL del T-R650 y del A-R650 están conectados por un Pulse el botón TIME ADJ. cable de control remoto.
  • Seite 53 Gire el mando TUNING/SELECT para definir el horario de Gire el mando TUNING/SELECT para definir el horario de inicio (minutos) y pulse el botón ENTER. parada (minutos) y pulse el botón ENTER. Off time00:00:00 Off time09:15:00 CH12 108.00MHz CH12 108.00MHz El horario de encendido queda definido.
  • Seite 54: Desconexión Programada

    El indicador de temporizador ( ) aparece en la parte derecha de la pantalla. Esta función está disponible solamente cuando el conector REMOTE CONTROL del T-R650 y el A-R650 están conectados por un cable de control remoto. Utilice el mando a distancia indicador de temporizador...
  • Seite 55: Solución De Problemas

    No puede recibirse ninguna emisora, o la señal es demasiado débil. e Compruebe que la antena está conectada correctamente. e Sintonice bien la emisora. El T-R650 tendrá ahora los ajustes por defecto que vienen de e Instale de nuevo la antena, colocándola en una mejor posición fábrica. de recepción.
  • Seite 56: Especificaciones

    Para consumidores europeos Especificaciones Información para consumidores sobre recogida y eliminación de equipos viejos y pilas usadas Sintonizador de FM Rango de sintonización ..87,50 a 108,00 MHz (en pasos de 50 kHz) Estos símbolos en los productos, embalajes y/o documentos Sensibilidad útil .
  • Seite 57: Wartung Und Pflege

    STANDBY/ON-Schalter befinden sich in der Stellung „Standby” – geringen Ruhestrom aus dem Stromnetz. < Platzieren Sie den T-R650 so, dass die Wandsteckdose, an der Sie den Tuner angeschlossen haben, jederzeit leicht zugänglich ist. < Achten Sie darauf, dass Netzstecker und -kabel stets in einwand- freiem Zustand sind.
  • Seite 58: B Remote Control

    Sofern Sie einen TEAC A-R650 besitzen, verwenden Sie das mitgelieferte Fernbedienungskabel, um die REMOTE CONTROL- Achten Sie darauf, dass die verwendete Steckdose die korrekte Buchsen des T-R650 und des A-R650 miteinander zu verbinden. Spannung liefert. Anschließend können Sie die umfangreichen Systemsteuerungs- Halten Sie beim Anschließen bzw.
  • Seite 59: Anschließen Der Antennen

    MW-Rahmenantenne Der Antennendraht sollte außen oder innen in der Nähe eines Fensters angebracht werden. Zur weiteren Verbesserung des Die zum Lieferumfang des T-R650 gehörende Hochleistungs-MW- Empfangs, verbinden Sie die GND-Klemme mit einer zuverlässi- Rahmenantenne gewährleistet in den meisten Gebieten gute gen Erdleitung (Hauserde).
  • Seite 60: Bedienelemente Und Deren Funktion

    Bedienelemente und deren Funktion STANDBY/ON Mittels dieser Taste schalten Sie den T-R650 ein oder in den Bereitschaftsmodus (Standby). Die Standby-Anzeige leuchtet rot, wenn sich der Tuner im Bereitschaftsmodus befindet. Nach dem Einschalten erlicht die Anzeige. TIMER Diese Taste dient zum Ein-/Ausschalten der Timerfunktion.
  • Seite 61: Grundlegende Bedienung

    Fernbedienung (im Lieferumfang des A-R650) Mittels dieser Taste schalten Sie den T-R650 ein. STANDBY Mittels dieser Taste versetzen Sie den T-R650 in den Bereitschafts- modus. Manuelle Senderabstimmung (UP DOWN-Tasten) Normal q Abgeblendet q Licht aus Diese Tasten dienen bei manueller Senderabstimmung zum Einstellen der gewünschten Empfangsfrequenz eines Senders...
  • Seite 62: Manual Tune

    Automatische Senderabstimmung Starten Sie die automatische Senderabstimmung durch Drehen des TUNING/SELECT-Reglers. Sobald ein Sender gefunden wird, stellt der T-R650 dessen Empfangsfrequenz optimal ein. Wiederholen Sie diesen Vorgang, bis der gewünschte Sender gefunden ist. < Betätigen Sie zum Beenden der automatischen Senderabstim- Bei jedem Betätigen der ENTER-Taste wechselt der Abstimm-...
  • Seite 63: Manuelle Preset-Belegung

    Presets, in dem Sie diesen Sender speichern möchten. Bis zu 30 UKW- sowie 30 MW-Empfangsfrequenzen können im Drehen Sie am TUNING/SELECT-Regler. T-R650 in Presets gespeichert werden. Betätigen Sie zum Auswählen von AM (MW) oder FM (UKW) wiederholt die BAND-Taste. 10:00 Stereo CH12 108.00MHz...
  • Seite 64: Aufrufen Von Sender-Presets (Ukw/Mw)

    Nummer des gewünschten Speicherplatzes (Sender- CH09 92.50MHz Presets) aus. “----“ erscheint, und der erste “-“ blinkt im Display. Wählen Sie mittels TUNING/SELECT-Taste den gewünschten Buchstaben aus. Der T-R650 stellt die Empfangsfrequenz des gewählten Sender- Presets ein. Zur Verfügung stehen:...
  • Seite 65: Senderspeicherplätze (Mittels Fernbedienung) 1

    Senderspeicherplätze (mittels Fernbedienung) 1 Manuelle Preset-Belegung Betätigen Sie die ENTER-Taste. Bis zu 30 UKW- sowie 30 MW-Empfangsfrequenzen können im T-R650 in Presets gespeichert werden. Betätigen Sie zum Auswählen von AM (MW) oder FM (UKW) wiederholt die BAND-Taste. Der nächste „-“ blinkt.
  • Seite 66 Senderspeicherplätze (mittels Fernbedienung) 2 < Wiederholen Sie zum Speichern weiterer Sender die Bedien- Wählen Sie innerhalb von vier Sekunden mittels oder schritte Taste die Nummer des Presets, in dem Sie diesen Sen- der speichern möchten. < Die Speicherplatzbelegung wird automatisch abgebrochen, wenn die MEMORY-Taste nicht innerhalb von vier Sekunden nach Auswahl der Preset-Nummer betätigt wird.
  • Seite 67: Aufrufen Von Sender-Presets

    Sekunden warten.) TA (TRAFFIC ANNOUNCE) (Verkehrsmeldungen) Wenn Sie TRAFFIC ANNOUNCE wählen, blinkt „TRAFFIC ANNOUNCE” etwa drei Sekunden lang. Danach sucht der T-R650 nach Verkehrsmeldungen. < Sobald ein Verkehrsprogramm gefunden wird, wechselt RDS automatisch zur PROGRAM SERVICE-Anzeige.
  • Seite 68: Pty-Suche

    Zeit an. Dies kann schließlich zu uner- wünschten Beeinträchtigungen des Timer betriebs führen. Schalten Sie die automatische Uhrzeitsynchronisation aus, wenn Sie nicht möchten, dass die Uhr des T-R650 zu den emp- fangenen CT-Daten synchronisiert wird. < CT-Daten werden unabhängig vom gewählten RDS-Modus empfangen und die interne Uhr wird zu diesen Daten syn- chronisiert.
  • Seite 69 31 unterschiedliche PTY-Programme: Phone In: Programme mit telefonischer Beteiligung der Zuhörer News: Travel & Touring: kurze Ansagen, Ereignisse, öffentliche Meinung, Berichte, aktuelle Reiseberichte Situationen Leisure & Hobby: Current Affairs: Programme über Freizeitaktivitäten Stellungnahmen, einschließlich praktischer Anregungen außer Jazz Music: Nachrichten, Dokumentationen, Diskussionen, Analysen, usw. Jazz-Musik Information: tägliche Informationen oder Berichte, wie etwa Wettervor-...
  • Seite 70: Einstellen Der Uhrzeit

    Einstellen der Uhrzeit Einstellen des Timers 1 < Die Uhrzeit wird vom T-R650 im 24-Stundenformat angezeigt. Diese Funktion ist verfügbar, wenn die REMOTE CONTROL-Buchsen des T-R650 und des A-R650 mittels Fernbedienungskabel verbunden Betätigen Sie die TIME ADJ-Taste. sind. < Stellen Sie die korrekte Uhrzeit ein, bevor Sie den Timer program- mieren.
  • Seite 71 Stellen Sie mittels TUNING/SELECT-Regler den „Minuten- Stellen Sie mittels TUNING/SELECT-Regler den „Minuten- wert“ der Startzeit ein, und betätigen Sie die ENTER-Taste. wert“ der Stoppzeit ein, und betätigen Sie anschließend die ENTER-Taste. Off time00:00:00 Off time09:15:00 CH12 108.00MHz CH12 108.00MHz Die Einschaltzeit ist programmiert. „Off time” erscheint im Display, und der „Stundenwert“...
  • Seite 72: Aktivieren Der Timerfunktion

    < Bei Erreichen der Startzeit schalten sich alle mittels Fernbedie- nungskabel verbundenen Komponenten gemeinsam ein. Am Die normale Displayanzeige T-R650 wird der zuletzt empfangene Sender eingestellt, und am Die Einschlaftimerfunktion ist deaktiviert. A-R650 wird die Signalquelle gewählt, die zuletzt aktiv war.
  • Seite 73: Hilfe Bei Funktionsstörungen

    Falls beim A-R650 etwaige Funktionsstörungen auftreten soll- Wiederherstellen der Werkseinstellung ten, versuchen Sie bitte, anhand der folgenden Hinweise selbst Falls am T-R650 Fehlfunktionen auftreten, kann das Wiederher- Abhilfe zu schaffen, bevor Sie sich an Ihren Fachhändler oder ein stellen der Werkseinstellung möglicherweise Abhilfe schaffen.
  • Seite 74: Technische Daten

    Hinweise für Kunden in Europa Technische Daten Entsorgung elektrischer oder elektronischer Geräte sowie verbrauchter Batterien UKW-Tunerteil Empfangsbereich ......87,50 - 108,00 MHz Sofern Geräte, deren Verpackung oder Batterien mit dem Symbol (in Schritten von 50 kHz) einer durchgekreuzten Abfalltonne gekennzeichnet sind oder...
  • Seite 75: Prima Dell'uso

    Indice Prima dell’uso Prima di usare l’apparecchio raccomandiamo di leggere Vi ringraziamo innanzi tutto per aver scelto TEAC. Per ottenere quanto segue. le massime prestazioni dall’apparecchio qui descritto vi raccomandiamo di leggere con cura il presente manuale. < L’apparecchio deve essere alimentato alla tensione riportata sul pannello posteriore.
  • Seite 76: Collegamenti

    ATTENZIONE: B Presa REMOTE CONTROL < Prima di collegare fra loro i vari apparecchi si raccomanda di Avendo a disposizione un TEAC A-R650, si potranno effettuare spegnerli. utili operazioni di controllo del sistema: < Prima di procedere con il collegamento di un componente si Collegare la presa REMOTE CONTROL del sintonizzatore alla raccomanda di leggerne il manuale d’uso.
  • Seite 77: Antenna Am A Telaio Per Interni

    Collegamento delle antenne Antenna AM a telaio per interni Antenna FM per interni L’antenna AM a telaio ad alte prestazioni fornita per l’uso con questo Collegare l’antenna FM a filo alla presa FM 75Ω, stendendola apparecchio normalmente offre una buona ricezione in ogni area. quindi bene e regolando il sintonizzatore sulla stazione desiderata Per poterla collocare su un piano d’appoggio la si deve innanzi (vedere a pagina 80).
  • Seite 78: Identificazione Delle Parti

    Identificazione delle parti STANDBY/ON Accende l’apparecchio o lo porta in standby. Quando il sintonizzatore è in modalità di attesa (standby) l’indicatore di standby è illuminato di colore rosso. Quando l’unità è accesa, la luce si spegne. TIMER Attiva o disattiva la funzione timer. DAILY Imposta il timer.
  • Seite 79: Operazioni Di Base

    Questa tasto serve selezionare un canale preset. Questa funzione è disponibile esclusivamente quando con il cavo di telecomando si collegano fra loro le prese REMOTE CONTROL del T-R650 e dell’A-R650. Si può quindi DIMMER usare il telecomando dell’A-R650. Premendo il tasto DIMMER si oscura il display.
  • Seite 80: Ascolto Delle Bande Fm E Am

    Sintonizzazione manuale < Per interrompere la sintonizzazione automatica è sufficiente < > premere il tasto ENTER. (sul pannello anteriore del T-R650) Manual tune < Quando si usa il telecomando, utilizzare il tasto tuning ( 108.00MHz Modalità di sintonizzazione preimpostata...
  • Seite 81: Presintonizzazione 1

    Presintonizzazione 1 Entro 4 secondi selezionare il numero di preimpostazione Presintonizzazione manuale da assegnare alla stazione. L’apparecchio può memorizzare sino a 30 stazioni FM, 30 stazioni Ruotare la manopola TUNING/SELECT. Selezionare AM o FM premendo ripetutamente il tasto BAND. 10:00 Stereo CH12 108.00MHz Sintonizzare la stazione da memorizzare.
  • Seite 82: Presintonizzazione (Telecomando)

    Presintonizzazione 2 Presintonizzazione 1 (telecomando) Alle stazioni preimpostate si può assegnare un nome (di lunghezza Come selezionare la stazioni FM e AM non superiore a 4 caratteri). preimpostate Quando si preme il tasto FILE, anziché l'orologio appare il nome così Selezionare AM o FM premendo ripetutamente il tasto assegnato alla stazione.
  • Seite 83 Presintonizzazione manuale Premere ENTER. L’apparecchio può memorizzare sino a 30 stazioni FM, 30 stazioni Selezionare AM o FM premendo ripetutamente il tasto BAND. Diventa lampeggiante l’indicazione “-” successivo. Per il nome di ciascun’emittente si possono usare fino a 4 caratteri. Per impostare tutti i caratteri, ripetere i passi Premere il tasto MEMORY.
  • Seite 84 Presintonizzazione 2 (telecomando) Entro 4 secondi, premere il tasto per selezionare Preimpostazione automatica (solo con le il numero di preselezione per questa stazione. bande FM e AM) Selezionare FM o AM premendo ripetutamente il tasto BAND. 10:00 Stereo CH12 108.00MHz Per quest’operazione si possono anche usare i tasti numerici del telecomando in dotazione all'amplificatore A-R650.
  • Seite 85: Rds 1

    RDS 1 L’RDS (Radio Data System) è un servizio di radiotrasmissione Come selezionare la stazioni FM e AM attraverso il quale le stazioni possono inviare informazioni aggiuntive preimpostate insieme al normale segnale radio. Selezionare AM o FM premendo ripetutamente il tasto Esso è...
  • Seite 86: Ricerca Pty

    RDS 2 Ricerca PTY Le stazioni possono altresì essere ricercate per tipo di programma. La regolazione dell’orologio dell’apparecchio avviene automaticamente usando i dati CLOCK TIME (CT). Selezionare FM premendo ripetutamente il tasto BAND. Qualora si sintonizzi una stazione RDS che diffonde dati CT non corretti l’orologio potrebbe regolarsi in modo altrettanto non corretto, compromettendo così...
  • Seite 87 31 tipi di programmi PTY: Phone In: programmi liberi di opinione pubblica condotti telefonicamente. News: Travel & Touring: brevi annunci, eventi, programmi di opinione pubblica, servizi e servizi di viaggi. situazioni attuali. Leisure & Hobby: Current Affairs: programmi sulle attività ricreative. tipi di suggerimenti, compresi gli annunci di tipo pratico, ad Jazz Music: eccezione di notiziari, documenti, discussioni, analisi e altri.
  • Seite 88: Regolazione Dell'orologio

    Questa funzione è disponibile esclusivamente quando con il cavo di telecomando si collegano fra loro le prese REMOTE CONTROL del Premere il tasto TIME ADJ. T-R650 e dell’A-R650. < Prima d’impostare il timer è necessario regolare l’orologio. Premere il tasto DAILY.
  • Seite 89 Ruotare la manopola TUNING/SELECT sino a regolare i Ruotare la manopola TUNING/SELECT sino a regolare i minuti di attivazione del timer e, quindi, premere il tasto minuti di disattivazione del timer e, quindi, premere il ENTER. tasto ENTER. Off time09:15:00 CH12 108.00MHz Off time00:00:00...
  • Seite 90: Sleep Timer (Spegnimento Ritardato)

    Questa funzione è disponibile esclusivamente quando con il cavo di telecomando si collegano fra loro le prese REMOTE l’indicatore del timer CONTROL del T-R650 e dell'A-R650. Si può quindi usare il telecomando dell'A-R650 Timer On L’alimentazione può essere tolta dopo un intervallo predefinito.
  • Seite 91: Risoluzione Dei Problemi

    Se l’apparecchio inizia a non funzionare correttamente si può TEAC. provare a ripristinarne le impostazioni predefinite o di fabbrica. Questa operazione annulla tuttavia le impostazioni della Non arriva la corrente rete (compresa la password) e le altre impostazioni definite e Verificare che la spina del cavo d’alimentazione sia inserita a...
  • Seite 92: Caratteristiche Tecniche

    Per I clienti europei Caratteristiche tecniche Disposizioni relative allo smaltimento di vecchi apparecchi e di pile scariche Sintonizzatore FM Gamma di sintonizzazione ....Da 87,50 a 108,00 MHz La presenza di questi simboli sugli apparecchi, sugli imballi, e/o (a passi di 50 kHz) sulla documentazione a loro allegata, significa che gli apparecchi...
  • Seite 93: Voordat U Begint

    Inhoud Voordat u begint Lees het onderstaande aandachtig voordat u het apparaat in Dank u dat u voor een TEAC apparaat heeft gekozen. Lees gebruik neemt. deze handleiding aandachtig door om optimaal plezier van uw nieuwe aanwinst te hebben. < De plaatselijke netspanning dient overeen te komen met de Voordat u begint .
  • Seite 94: Aansluiten

    < Lees de handleiding van elk apparaat dat u met dit apparaat wilt Wanneer u ook een TEAC A-R650 bezit, verbind dan deze afstandsbediening aansluiting met de afstandsbediening verbinden. uitgang van de A-R650 om het gehele systeem te kunnen bedienen.
  • Seite 95: Am-Kamerantenne

    Aansluiten van antennes AM-kamerantenne Hang de antennedraad buitenshuis of binnenshuis in de buurt van een raam op. Verbind de GND aansluiting met een De “high-performance” bijgeleverde AM-ringantenne is voldoende aardingspunt voor een betere ontvangst. voor een goede ontvangst in de meeste gebieden. Druk het lipje van de ringantenne in het antennevoetje om de <...
  • Seite 96: Bedieningsorganen

    UNING MODE - Afstemfunctie Indrukken om een afstemfunctie te kiezen. FM MODE - FM-functie Bij FM kiest u hiermee mono of stereo. BAND - Afstembereik Druk op deze toets om FM of AM of internet-radio te kiezen. UR-431 Bij de T-R650 geleverde afstandsbediening...
  • Seite 97: Basis Bediening

    Indrukken om een zender af te stemmen of een voorkeurpositie Normaal q Gedimd q Display uitgeschakeld te kiezen. Deze functie kan uitsluitend worden gebruikt wanneer de REMOTE CONTROL aansluitingen van de T-R650 en A-R650 Voorkeurzenders kiezen (Hoger/Lager) middels een afstandsbedieningskabel zijn verbonden. Indrukken om een voorkeurpositie te kiezen.
  • Seite 98: Luisteren Naar Fm/Am

    Telkens wanneer u op TUNING MODE drukt, verandert de zender is gevonden. afstemfunctie als volgt: < Druk op ENTER om het automatisch afstemmen te stoppen. (op Zelf afstemmen het voorpaneel van de T-R650) < > < Gebruik TUNING wanneer u via de afstandsbediening werkt. Manual tune 108.00MHz...
  • Seite 99: Voorkeurzenders 1

    Voorkeurzenders 1 Druk binnen 4 seconden op MEMORY. Zelf opslaan U kunt maximaal 30 FM en30 AM zenders opslaan. Kies AM of FM door herhaaldelijk op BAND te drukken. De zender wordt nu opgeslagen. Stem de zender die u wilt opslaan af. <...
  • Seite 100 Voorkeurzenders 2 U kunt namen voor de geprogrammeerde voorkeurzenders invoeren. Voorkeurzenders kiezen (maximaal 4 tekens) Kies AM of FM door herhaaldelijk op BAND te drukken. De ingevoerde naam verschijnt in plaats van de klok wanneer u op de FILE toets drukt. Druk nogmaals op de FILE toets om weer het normale display (de klok) te tonen.
  • Seite 101: Voorkeurzenders (Afstandsbediening) 1

    Voorkeurzenders (Afstandsbediening) 1 Zelf opslaan Druk op de ENTER-toets. U kunt maximaal 30 FM en 30 AM zenders opslaan. Kies AM of FM door herhaaldelijk op BAND te drukken. De volgende “-“ knippert. Tot en met 4 karakters kunnen per zender gebruikt worden. Herhaal stap om de karakters in te voeren.
  • Seite 102 Voorkeurzenders (Afstandsbediening) 2 De zender wordt nu vastgelegd. Druk binnen 4 seconden op om een voorkeurpositie te kiezen voor deze zender. < Herhaal stappen voor het opslaan van meerdere voorkeurzenders. Automatisch opslaan van voorkeurzenders Kies FM of AM door herhaaldelijk op BAND te drukken. 10:00 Stereo CH12 108.00MHz...
  • Seite 103: Rds

    Radio Data System (RDS) is een systeem waarmee zenders behalve Kiezen van voorkeurzenders de normale radioprogrammasignalen ook extra informatie Kies AM of FM door herhaaldelijk op BAND te drukken. uitzenden. RDS werkt uitsluitend in Europa op de FM-band. Stem op een FM-zender af (zie bladzijde 98). Druk op RDS MODE.
  • Seite 104: Pty-Zoeken

    PTY-zoeken U kunt zenders aan de hand van het programmatype zoeken. De ingebouwde klok wordt automatisch aan de hand van de CLOCK TIME (CT) gelijkgezet. Kies FM door herhaaldelijk op BAND te drukken. Indien u op een zender afstemt die in een andere tijdzone staat, zal de klok een verkeerde tijd aangeven, wat ook de werking van de timer kan beïnvloeden.
  • Seite 105 31 Typen programma’s: Social Affairs: Sociale informatie. News: Religion: Korte meldingen, evenementen, meningen, reportages, Religieuze programma’s. actualiteiten. Phone In: Current Affairs: Programma’s met informatie van de luisteraar zelf, meestal per Onderwerpen buiten het nieuws, documentaires, discussies, telefoon. analyses, enz. Travel & Touring: Information: Reisverslagen.
  • Seite 106: Klok Gelijkzetten

    Timer instelling - Dagelijks 1 < De klok heeft een 24-uurs cyclus. Deze functie kan uitsluitend worden gebruikt wanneer de REMOTE CONTROL aansluitingen van de T-R650 en de A-R650 via een kabel Druk op TIME ADJ. zijn verbonden. < Voordat u de timer kunt instellen, eerst de klok gelijkzetten.
  • Seite 107 Stel met TUNING/SELECT de starttijd (minuten) in en druk Stel met TUNING/SELECT de stoptijd (minuten) in en druk vervolgens op ENTER. vervolgens op ENTER. Off time00:00:00 Off time09:15:00 CH12 108.00MHz CH12 108.00MHz De starttijd is nu ingesteld. ”Off time” verschijnt in de display en De timerinstelling wordt nu opgeslagen.
  • Seite 108: Sleeptimer Functie

    SL:90 (80, 70, 60, 50, 40, 30, 20 of 10) < Indien de timer is geactiveerd en AM of FM als bron is gekozen, De T-R650 schakelt na 90 (80, 70, 60, 50, 40, 30, 20 of 10) licht de timer indicatie in de display op.
  • Seite 109: Problemen

    Apparaat terugzetten in de fabrieksinstellingen het apparaat heeft en kijk of u het probleem zelf kunt oplossen Indien het apparaat onjuist functioneert, kan het terugzetten in alvorens uw leverancier of de servicedienst van TEAC te de fabrieksinstellingen het probleem mogelijk oplossen. waarschuwen.
  • Seite 110: Technische Gegevens

    Voor Europese Klanten Technische gegevens Informatie voor Gebruikers Over het Verzamelen en Verwerken van Oude Apparatuur en Gebruikte Batterijen FM-tuner Afstembereik ... 87,50 - 108,00 MHz (stappen van 50 kHz) Deze symbolen op de producten, de verpakking en/of Bruikbare gevoeligheid .
  • Seite 112 7733 Telegraph Road, Montebello, California 90640 Phone: (323) 726-0303 TEAC CANADA LTD. 5939 Wallace Street, Mississauga, Ontario L4Z 1Z8, Canada Phone: (905) 890-8008 TEAC MEXICO, S.A. de C.V Río Churubusco 364, Colonia Del Carmen, Delegación Coyoacán, CP 04100, México DF, México Phone: (5255)5010-6000 TEAC UK Ltd.

Inhaltsverzeichnis