Linksys WAP54G Installationsanleitung
Vorschau ausblenden
Andere Handbücher für WAP54G:
- Benutzerhandbuch (83 Seiten) ,
- Kurzanleitung (64 Seiten)
Quicklinks
A Division of Cisco Systems, Inc.
4 ,
2
GHz
802.11g
Wireless
Wireless
Model No.
WAP54G (EU/LA/UK)
Model No.
Model No.
®
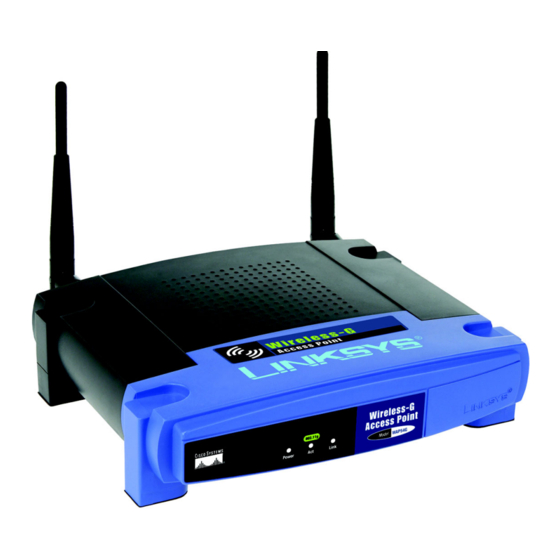
Package Contents
• Wireless-G Access Point
• Detachable Antennas
• Power Adapter
• Setup CD with User Guide
• Ethernet Network Cable
• Quick Installation (some models
may only have the Quick Installation
on the Setup CD)
Wireless-G
Access Point
Quick Installation Guide
Quick Installation Guide
1
Kapitel
Fehlerbehebung

Verwandte Anleitungen für Linksys WAP54G


Inhaltszusammenfassung für Linksys WAP54G
- Seite 1 • Setup CD with User Guide • Ethernet Network Cable • Quick Installation (some models may only have the Quick Installation on the Setup CD) Wireless-G 802.11g Access Point Quick Installation Guide Quick Installation Guide Wireless Wireless Model No. WAP54G (EU/LA/UK) Model No. Model No.
- Seite 2 Connecting the Access Point Connect your Ethernet network cable to your network router or switch. Then connect the other end of the network cable to the Access Point’s LAN (Ethernet network) port. Connect the included power adapter to the Access Point’s Power port.
- Seite 3 Configuring the Access Point Insert the Setup CD into your PC's CD-ROM drive. The Setup Wizard should run automatically, and the Welcome screen should appear. If it does not, click Start and select Run. Enter D:\setup.exe (if “D” is the letter of your PC's CD-ROM drive).
- Seite 4 Make sure the Access Point’s Power, Act, and Link LEDs are lit. If they are not, check the cable connections. Click Next. The Setup Wizard will search for the Access Point within your network and display a list of all access points.
- Seite 5 There are two ways to If you have already set up NOTE: configure the Access Point’s your network using your router’s wireless settings. SecureEasySetup feature, then you cannot use the Access Point’s If you have other SecureEasySetup feature. You SecureEasySetup devices, then must manually configure the proceed to “SecureEasySetup.”...
- Seite 6 Review the new settings, and click Yes to save them. NOTE: Write down these settings. You may need to manually configure non-SecureEasySetup devices in the future. Click Online Registration to register the Access Point, or click Exit to end the Setup Wizard.
- Seite 7 Select the level of security you want to use: WEP , WPA/WPA2 Personal, WPA-Enterprise, or Linksys Wireless Guard. Click Next. Follow the appropriate instructions. WEP - Select the level of encryption you want to use, WEP (64-bit) or WEP (128-bit).
- Seite 8 Product Registration the Wireless-G Access Point http://www.linksys.com/registration is complete. Linksys is a registered trademark or trademark of Cisco Systems, Inc. and/or its affiliates in the U.S. and certain other countries. Copyright © 2005 Cisco Systems, Inc. All rights reserved. WAP54G v3-QIG-EU-LA-UK-50715 KL...
-
Seite 9: Access Point
Pakkens indhold • Trådløs-G Access point • Aftagelige antenner • Strømforsyning • Installations-cd med brugervejledning • Ethernet-netværkskabel • Installationsvejledning (til nogle modeller findes installationsvejledningen kun på installations-cd-rom'en) Trådløs-G 802.11g Access point Installationsvejledning Installationsvejledning Trådløs Wireless Modelnr. WAP54G (DK) Modelnr. Modelnr. - Seite 10 Tilslutning af access point'et Tilslut Ethernet-kablet til netværksrouteren eller switchen. Slut derefter den anden ende af netværkskablet til access point'ets LAN-port (Ethernet-netværksport). Slut strømforsyningen til strømstikket på det trådløse access point. Slut derefter strømforsyningen til en stikkontakt. Lysdioderne på frontpanelet lyser, så snart access point'et er tændt.
- Seite 11 Konfiguration af access point'et Placer installations-cd-rom'en i pc'ens cd-rom-drev. Den guidede konfiguration køres automatisk, og skærmbilledet Welcome (Velkommen) vises. Hvis det ikke er tilfældet, skal du klikke på Start og vælge Run (Kør). Skriv D:\setup.exe (hvis "D" er bogstavet for cd-rom-drevet på...
- Seite 12 Kontrollér, at der er lys i Power, Act og Link på access point'et. Hvis de ikke lyser, skal du kontrollere kabelforbindelserne. Klik på Next (Næste). Den guidede konfiguration vil søge efter access point'et på netværket og vise en liste med alle access points.
- Seite 13 Du kan konfigurere de trådløse Hvis du ikke allerede har BEMÆRK: indstillinger i access point'et på konfigureret netværket ved hjælp af to måder. routerens SecureEasySetup- Hvis du har andre funktion, kan du ikke bruge access SecureEasySetup-enheder, skal point'ets SecureEasySetup-funktion. du fortsætte med Du skal manuelt konfigurere de "SecureEasySetup"...
- Seite 14 Gennemse de nye indstillinger, og klik på Yes (Ja) for at gemme dem. BEMÆRK: Notér disse indstillinger. Du får måske brug for manuelt at konfigurere ikke-SecureEasySetup- enheder på et senere tidspunkt. Klik på Online Registration (Onlineregistrering) for at registrere access point'et, eller klik på...
- Seite 15 Vælg det sikkerhedsniveau, du vil bruge: WEP , WPA/WPA2 Personal, WPA-Enterprise eller Linksys Wireless Guard. Klik på Next (Næste). Følg den relevante vejledning. WEP – Vælg den krypteringsgrad, du vil bruge: WEP (64-bit) eller WEP (128-bit). Indtast et adgangsord for automatisk at generere en WEP-nøgle, eller indtast WEP-...
- Seite 16 Produktregistrering værktøj. Du finder yderligere oplysninger i http://www.linksys.com/registration brugervejledningen på cd-rom'en. Linksys er et registreret varemærke tilhørende Cisco Systems, Inc. og/eller Cisco Systems associerede Tillykke! Installationen af Trådløs-G selskaber i USA og visse andre lande. Copyright © 2005 Cisco Systems, Inc. Alle rettigheder forbeholdes.
- Seite 17 • Wireless-G Access Point • Abnehmbare Antennen • Netzstromadapter • Installations-CD-ROM mit Benutzerhandbuch • Ethernet-Netzwerkkabel • Kurzanleitung (bei einigen Modellen ist die Kurzanleitung nur auf der Installations-CD enthalten) Wireless-G 802.11g Access Point Kurzanleitung Kurzanleitung Wireless Wireless Modell-Nr. WAP54G (DE) Modell-Nr. Modell-Nr.
-
Seite 18: Anschließen Des Access Points
Anschließen des Access Points Schließen Sie das Ethernet- Netzwerkkabel an Ihren Netzwerkrouter oder -Switch an. Schließen Sie das andere Ende des Kabels an den LAN-Port des Access Points (Ethernet- Netzwerk) an. Schließen Sie den Netzstromadapter an den Stromanschluss des Access Points an. -
Seite 19: Konfigurieren Des Access Points
Konfigurieren des Access Points Legen Sie die Installations-CD- ROM in das CD-ROM-Laufwerk Ihres PCs ein. Der Setup- Assistent sollte automatisch gestartet und das Willkommensfenster angezeigt werden. Wenn dies nicht der Fall ist, klicken Sie auf Start und anschließend auf Ausführen. Geben Sie D:\setup.exe ein (wenn „D“... - Seite 20 Stellen Sie sicher, dass die Power-, Act- und Link-LEDs (Netzstrom, Verarbeitung, Verbindung) des Access Points leuchten. Wenn nicht, überprüfen Sie die Kabelverbindungen. Klicken Sie auf Next (Weiter). Der Setup-Assistent durchsucht das Netzwerk nach dem Access Point und zeigt dann eine Liste aller Access Points an.
- Seite 21 Sie können die Wireless- Wenn Sie das Netzwerk HINWEIS: Einstellungen des Access Points bereits mit der SecureEasySetup- auf zwei Arten konfigurieren. Funktion des Routers eingerichtet haben, können Sie die Wenn Sie über andere SecureEasySetup-Funktion des Access SecureEasySetup-Geräte Points nicht verwenden. Sie müssen verfügen, fahren Sie mit die Wireless-Einstellungen des Access „SecureEasySetup“...
- Seite 22 Überprüfen Sie die neuen Einstellungen, und klicken Sie auf Yes (Ja), um diese Einstellungen zu speichern. HINWEIS: Notieren Sie sich diese Einstellungen. Sie müssen möglicherweise Geräte manuell konfigurieren, die nicht über eine SecureEasySetup- Funktion verfügen. Klicken Sie auf Online Registration (Online-Registrierung), um den Access Point zu registrieren, oder klicken Sie auf Exit (Beenden), um...
- Seite 23 Wählen Sie die gewünschte Sicherheitsstufe aus: WEP , WPA/ WPA2 Personal, WPA-Enterprise oder Linksys Wireless Guard. Klicken Sie auf Next (Weiter). Fahren Sie mit den entsprechenden Anleitungen fort. WEP – Wählen Sie die gewünschte Verschlüsselungs- ebene aus: WEP (64-Bit) oder WEP (128-Bit).
- Seite 24 Produktregistrierung http://www.linksys.com/registration Informationen zur erweiterten HINWEIS: Konfiguration finden Sie im webbasierten Linksys ist eine eingetragene Marke bzw. eine Marke von Cisco Systems, Inc. und/oder deren Access Point-Dienstprogramm. Weitere Zweigunternehmen in den USA und anderen Informationen zu diesem Thema entnehmen Ländern. Copyright © 2005 Cisco Systems, Inc.
- Seite 25 • Guía de instalación rápida (es posible que algunos modelos sólo dispongan de esta guía en el CD de configuración) Wireless-G 802.11g Punto de acceso Guía de instalación rápida Guía de instalación rápida Wireless Inalámbrico Nº de modelo WAP54G (ES) Nº de modelo Nº de modelo...
- Seite 26 Conexión del punto de acceso Conecte el cable de red Ethernet al ruteador o conmutador de red. A continuación, conecte el otro extremo del cable de red al puerto LAN (red Ethernet) del punto de acceso. Conecte el adaptador de corriente incluido al puerto de alimentación del punto de acceso.
-
Seite 27: Configuración Del Punto De Acceso
Configuración del punto de acceso Inserte el CD de configuración en la unidad de CD-ROM del PC. El asistente de configuración se debe ejecutar de forma automática y debe aparecer la pantalla Welcome (Bienvenido). Si no es así, haga clic en Inicio y seleccione Ejecutar. - Seite 28 Asegúrese de que las luces Power (Alimentación), Act (Actividad) y Link (Enlace) del punto de acceso están encendidas. Si no lo están, compruebe las conexiones de los cables. Haga clic en Next (Siguiente). El asistente de configuración busca el punto de acceso en la red y muestra una lista de todos los puntos de acceso.
- Seite 29 Puede configurar los Si ya ha configurado la red NOTA: parámetros inalámbricos del con la función SecureEasySetup punto de acceso de dos del ruteador, no puede utilizar la formas. función SecureEasySetup del Si tiene más dispositivos punto de acceso. Debe configurar SecureEasySetup, vaya a manualmente los parámetros “SecureEasySetup”.
- Seite 30 Revise los parámetros nuevos y haga clic en Yes (Sí) para guardarlos. NOTA: Anote estos parámetros. Es posible que tenga que configurar manualmente dispositivos sin SecureEasySetup en el futuro. Haga clic en Online Registration (Registro en línea) para registrar el punto de acceso, o bien haga clic en Exit (Salir) para cerrar el asistente de configuración.
- Seite 31 Seleccione el nivel de seguridad que desea utilizar: WEP , WPA/ WPA2 Personal, WPA-Enterprise o Linksys Wireless Guard. Haga clic en Next (Siguiente). Siga las instrucciones correspondientes. WEP: Seleccione el nivel de encriptación que desea utilizar, WEP (64-bit) o WEP (128-bit).
- Seite 32 Consulte la guía del usuario del http://www.linksys.com/registration CD-ROM para obtener más información. Linksys es una marca registrada o marca comercial de Cisco Systems, Inc. y/o sus filiales Enhorabuena. La instalación del en EE.UU. y otros países. Copyright © 2005 Cisco Systems, Inc.
-
Seite 33: Point D'accès
• Câble réseau Ethernet • Installation rapide (pour certains modèles, seule l'installation rapide est disponible sur le CD d'installation) Sans fil - 802.11g Point d'accès Guide d'installation rapide Guide d'installation rapide Sans fil Sans fil Modèle WAP54G (FR) Modèle Modèle... - Seite 34 Branchement du point d'accès Reliez votre câble réseau Ethernet à votre routeur ou commutateur. Branchez ensuite l'autre extrémité du câble sur le port LAN (Réseau Ethernet) du point d'accès. Branchez l'adaptateur électrique fourni sur la prise Power (Alimentation) du point d'accès.
- Seite 35 Configuration du point d'accès Insérez le CD d'installation dans le lecteur correspondant de votre ordinateur. L'Assistant de configuration démarre automatiquement et l'écran Welcome (Bienvenue) apparaît. Si ce n'est pas le cas, cliquez sur Démarrer, puis sur Exécuter. Entrez D:\setup.exe (si «...
- Seite 36 Vérifiez que les voyants Power, Act et Link sont allumés. Si ce n'est pas le cas, vérifiez que le câble est bien connecté. Cliquez sur Next (Suivant). L'Assistant de configuration recherche le point d'accès de votre réseau et affiche une liste de tous les points d'accès.
- Seite 37 Il existe deux modes de Si vous avez déjà REMARQUE : configuration des paramètres configuré votre réseau en utilisant la sans fil du point d'accès. fonction SecureEasySetup de votre routeur, vous ne pouvez pas utiliser Si vous disposez d'autres la fonction SecureEasySetup du périphériques SecureEasySetup, point d'accès.
- Seite 38 Vérifiez les nouveaux paramètres, puis cliquez sur Yes (Oui) pour les enregistrer. REMARQUE : Notez ces paramètres. Vous pourriez en avoir besoin plus tard pour configurer manuellement des périphériques ne disposant pas de la fonction SecureEasySetup. Cliquez sur le bouton Online Registration (Enregistrement en ligne) pour enregistrer le point d'accès ou sur le bouton Exit...
- Seite 39 Sélectionnez le niveau de sécurité que vous souhaitez utiliser : WEP , WPA/WPA2 Personal, WPA-Enterprise ou Linksys Wireless Guard. Cliquez sur Next (Suivant). Suivez les instructions adaptées. WEP : sélectionnez le niveau de cryptage de votre choix : WEP (64-bit) ou WEP (128-bit).
- Seite 40 Web du point d'accès. Pour http://www.linksys.com/registration obtenir de plus amples informations, reportez-vous au Guide de l'utilisateur Linksys est une marque déposée ou une marque commerciale de Cisco Systems, Inc. et /ou ses figurant sur le CD-ROM. filiales aux Etats-Unis et dans certains autres pays.
-
Seite 41: Access Point
• Guida di installazione rapida (alcuni modelli non dispongono della Guida di installazione rapida nel CD per l'installazione guidata Wireless-G 802.11g Access Point Guida di installazione rap Guida di installazione rapida Wireless Wireless N. modello WAP54G (IT) N. modello N. modello... - Seite 42 Collegamento dell'Access Point Collegare il cavo di rete Ethernet al router o allo switch di rete. Collegare l'altra estremità del cavo di rete alla porta LAN (rete Ethernet) dell'Access Point. Collegare l'adattatore di corrente fornito alla porta di alimentazione dell'Access Point, quindi collegare l'adattatore di corrente a una presa elettrica.
- Seite 43 Configurazione dell'Access Point Inserire il Setup CD (CD per l'installazione guidata) nell'unità CD-ROM del PC. L'installazione guidata dovrebbe avviarsi automaticamente visualizzando la schermata Welcome (Benvenuti). In caso contrario, fare clic sul pulsante Start e selezionare Esegui. Immettere D:\setup.exe (se "D" è...
- Seite 44 Verificare che i LED Alimentazione, Act e Link dell'Access Point siano illuminati. In caso contrario, verificare i collegamenti del cavo. Fare clic su Next (Avanti). L'installazione guidata esegue la ricerca dell'Access Point all'interno della rete e visualizza un elenco contenente tutti gli access point. Se vengono visualizzati più...
- Seite 45 Esistono due procedure per la Se la rete è stata già NOTA configurazione delle configurata con la funzione impostazioni dell'Access Point. SecureEasySetup del router, non è possibile utilizzare la funzione Se si dispone di altri dispositivi SecureEasySetup dell'Access SecureEasySetup, passare a Point.
- Seite 46 Verificare le nuove impostazioni, quindi fare clic su Yes (Sì) per salvarle. NOTA Prendere nota delle impostazioni. In futuro potrebbe essere necessario configurare dispositivi diversi da SecureEasySetup. Fare clic su Online Registration (Registrazione online) per registrare l'Access Point o fare clic su Exit (Esci) per uscire dall'installazione guidata.
- Seite 47 Selezionare il livello di protezione che si desidera applicare: WEP , WPA/WPA2 Personal, WPA-Enterprise o Linksys Wireless Guard. Fare clic su Next (Avanti). Attenersi alle istruzioni corrispondenti. WEP - Selezionare il livello di cifratura da applicare, WEP (64 bit) o WEP (128 bit).
- Seite 48 Registrazione del prodotto informazioni, consultare la Guida per http://www.linksys.com/registration l'utente sul CD-ROM. Linksys è un marchio registrato o un marchio di Cisco Systems, Inc. e/o dei relativi affiliati negli Congratulazioni! L'installazione del Stati Uniti e in altri Paesi. Copyright © 2005 Cisco Wireless G Access Point Systems, Inc.
- Seite 49 Manual de Instalação Rápida no CD de configuração) Sem fios 802.11g Ponto de acesso Manual de Instalação Ráp Manual de Instalação Rápida Sem fios Wireless Modelo n.º WAP54G (PT) Modelo n.º Modelo n.º...
- Seite 50 Ligar o ponto de acesso Ligue o cabo de rede Ethernet ao router ou comutador da rede. Em seguida, ligue a outra extremidade do cabo de rede à porta LAN (rede Ethernet) do Ponto de acesso. Ligue o transformador incluído à...
- Seite 51 Configurar o ponto de acesso Coloque o CD de configuração na unidade de CD-ROM do computador. O Setup Wizard (Assistente de configuração) deverá ser executado automaticamente e deverá ser apresentado o ecrã Welcome (Bem-vindo). Se tal não acontecer, clique em Iniciar e seleccione Executar.
- Seite 52 Certifique-se de que os LEDs Power (Alimentação), Act (Actividade) e Link (Ligação) do Ponto de acesso estão acesos. Se não estiverem, verifique as ligações dos cabos. Clique em Next (Seguinte). O Setup Wizard (Assistente de configuração) procurará o Ponto de acesso na rede e apresentará uma lista de todos os pontos de acesso.
- Seite 53 Existem duas formas de Se já tiver configurado a NOTA: configurar as definições sem rede utilizando a funcionalidade fios do Ponto de acesso. SecureEasySetup do router, não poderá utilizar a funcionalidade Se tiver outros dispositivos com SecureEasySetup do Ponto de SecureEasySetup, avance para acesso.
- Seite 54 Reveja as novas definições e clique em Yes (Sim) para as guardar. NOTA: Tome nota destas definições. No futuro, poderá ter de configurar manualmente dispositivos sem SecureEasySetup. Clique em Online Registration (Registo online) para registar o Ponto de acesso ou clique em Exit (Sair) para terminar o Setup Wizard (Assistente de configuração).
- Seite 55 Seleccione o nível de segurança que pretende utilizar: WEP , WPA/WPA2 Personal, WPA-Enterprise ou Linksys Wireless Guard. Clique em Next (Seguinte). Siga as instruções adequadas. WEP - Seleccione o nível de encriptação que pretende utilizar, WEP (64 bits) ou WEP (128 bits).
- Seite 56 Web do Ponto de acesso. Consulte o Manual do Utilizador no CD-ROM para Linksys é uma marca registada ou marca comercial obter mais informações. da Cisco Systems, Inc. e/ou das respectivas afiliadas nos E.U.A. e noutros países. Copyright © 2005 Cisco Parabéns! A instalação do Ponto de...
- Seite 57 A Division of Cisco Systems, Inc. Innehåll i förpackningen • Wireless-G Accesspunkt • Löstagbara antenner • Strömadapter • Installations-cd med användarhandbok • Ethernet-nätverkskabel • Snabbinstallation (vissa modeller har bara Snabbinstallation på installations- cd-skivan) Wireless-G 802.11g Accesspunkt Snabbinstallationshandbo Snabbinstallationshandbok Trådlöst Wireless Modellnummer WAP54G (SE) Modellnummer Modellnummer...
- Seite 58 Ansluta accesspunkten Anslut Ethernet-nätverkskabeln till nätverksswitchen eller routern. Anslut därefter den andra änden av nätverkskabeln till accesspunktens LAN-port (Ethernet-nätverket). Anslut den medföljande strömadaptern till accesspunktens strömport. Anslut sedan strömadaptern till ett eluttag. Lysdioderna på frontpanelen tänds så snart du startar accesspunkten.
- Seite 59 Konfigurera accesspunkten Sätt in cd-skivan med installationsguiden i datorns cd-enhet. Guiden startas och skärmen Welcome (Välkommen) visas automatiskt. Om den inte gör det klickar du på Start och sedan på Run (Kör). Ange D:\setup.exe (om ”D” är cd-enhetens beteckning). På skärmen Welcome (välkommen) klickar du på...
- Seite 60 Kontrollera att accesspunktens lysdioder för Power (ström), Act (aktiv) och Link (länk) lyser. Om de inte lyser kontrollerar du kabelanslutningarna. Klicka på Next (Nästa). Installationsguiden söker efter accesspunkten i nätverket och visar sedan en lista över samtliga accesspunkter. Om flera accesspunkter visas kan du välja en viss punkt genom att klicka på...
- Seite 61 Accesspunktens trådlösa Om nätverket har OBS! inställningar kan konfigureras installerats med funktionen på två sätt. SecureEasySetup hos routern kan du inte använda accesspunktens Om det finns andra SecureEasySetup-funktion. Du SecureEasySetup-enheter går du måste manuellt konfigurera till ”SecureEasySetup”. Om inte accesspunktens trådlösa går du till ”Manuell konfiguration”.
- Seite 62 Granska de nya inställningarna och spara dem genom att klicka på Yes (Ja). OBS! Skriv ned inställningarna. Du kan i framtiden behöva konfigurera enheter som inte har SecureEasySetup. Klicka på Online Registration (Onlineregistrering) om du vill registrera accesspunkten eller på Exit (Avsluta) om du vill avsluta installationsguiden.
- Seite 63 Välj säkerhetsnivå: WEP , WPA/ WPA2 Personal (WPA/WPA2 privat), WPA-Enterprise (WPA företag) eller Linksys Wireless Guard. Klicka på Next (Nästa). Följ motsvarande instruktioner. WEP - Välj den krypteringsnivå du vill använda, WEP (64-bit) eller WEP (128-bit). Generera en WEP-nyckel automatiskt genom att ange en lösenordsfras eller ange...
- Seite 64 Produktregistrering konfigurering. Mer information finns i http://www.linksys.com/registration användarhandboken på cd-skivan. Linksys är ett registrerat varumärke eller ett varumärke som tillhör Cisco Systems, Inc. och/eller dess samarbetspartner i USA och vissa andra länder. Klart! Installationen av Wireless-G Copyright © 2005 Cisco Systems, Inc. Med ensamrätt.
- Seite 65 ® A Division of Cisco Systems, Inc. Wireless-G 802.11g User Guide Access Point WIRELESS WAP54G (EU/LA/UK) Model No.
- Seite 66 Wireless-G Access Point Copyright and Trademarks Specifications are subject to change without notice. Linksys is a registered trademark or trademark of Cisco Systems, Inc. and/or its affiliates in the U.S. and certain other countries. Copyright © 2005 Cisco Systems, Inc. All rights reserved.
-
Seite 67: Inhaltsverzeichnis
Wireless-G Access Point Table of Contents Chapter 1: Introduction Welcome What’s in this User Guide? Chapter 2: Planning Your Wireless Network Network Topology Roaming Network Layout Chapter 3: Getting to Know the Wireless-G Access Point The Front Panel The Back Panel Chapter 4: Connecting the Wireless-G Access Point Overview Connections for Setup... - Seite 68 Wireless-G Access Point Appendix A: Troubleshooting Frequently Asked Questions Appendix B: Wireless Security Security Precautions Security Threats Facing Wireless Networks Appendix C: Upgrading Firmware Appendix D: Windows Help Appendix E: Glossary Appendix F: Specifications Appendix G: Warranty Information Appendix H: Regulatory Information Appendix I: Contact Information...
-
Seite 69: List Of Figures
Wireless-G Access Point List of Figures Figure 3-1: Front Panel Figure 3-2: Back Panel Figure 4-1: Connect the Ethernet Network Cable Figure 4-2: Connect the Power Figure 5-1: Welcome Screen Figure 5-2: Connect the Network Cable to the Router or Switch Screen Figure 5-3: Connect the Network Cable to the Access Point Screen Figure 5-4: Power on the Access Point Screen Figure 5-5: Check the Access Point’s Status Screen... - Seite 70 Wireless-G Access Point Figure 5-25: Congratulations Screen Figure 6-1: Login Screen Figure 6-2: Setup - Automatic Configuration - DHCP Screen Figure 6-3: Setup - Static IP Screen Figure 6-4: Setup - AP Mode Screen Figure 6-5: Site Survey Screen Figure 6-6: Wireless Repeater Diagram Figure 6-7: Wireless Bridge Diagram Figure 6-8: Wireless - Basic Wireless Settings Screen Figure 6-9: Press the SecureEasySetup Button for Your Wireless Client...
-
Seite 71: Chapter 1: Introduction Welcome
Wireless-G Access Point Chapter 1: Introduction Welcome access point: a device that allows wireless-equipped Thank you for choosing the Wireless-G Access Point. This Access Point will allow you to network wirelessly better computers and other devices to communicate with a wired than ever. -
Seite 72: What's In This User Guide
Wireless-G Access Point What’s in this User Guide? This user guide covers the steps for setting up and using the Wireless-G Access Point. • Chapter 1: Introduction This chapter describes the Access Point’s applications and this User Guide. • Chapter 2: Planning your Wireless Network This chapter describes the basics of wireless networking. - Seite 73 • Appendix H: Regulatory Information This appendix supplies the Access Point’s regulatory information. • Appendix I: Contact Information This appendix provides contact information for a variety of Linksys resources, including Technical Support. Chapter 1: Introduction What’s in this User Guide?
-
Seite 74: Chapter 2: Planning Your Wireless Network
(peer-to-peer) without the use of an access Linksys wireless adapters also provide users access to a wired network when using an access point, such as the point. -
Seite 75: Network Layout
To link your wired network with your wireless network, connect the Access Point’s Ethernet network port to any switch or router. With these, and many other, Linksys products, your networking options are limitless. Go to the Linksys website at www.linksys.com/international for more information about wireless products. -
Seite 76: Chapter 3: Getting To Know The Wireless-G Access Point
Wireless-G Access Point Chapter 3: Getting to Know the Wireless-G Access Point The Front Panel The Access Point's LEDs, which indicate activity and status information, are located on the front panel. Figure 3-1: Front Panel (Cisco logo) Orange/White. The Cisco logo is the Access Point’s SecureEasySetup button. It lights up when NOTE: SecureEasySetup is a feature that makes it the Access Point is powered on. -
Seite 77: The Back Panel
Wireless-G Access Point The Back Panel The Access Point's Ethernet network and power ports, as well as the Reset button, are located on the back panel. port: the connection point on a computer or networking device used for plugging in cables or adapters Figure 3-2: Back Panel LAN Port... -
Seite 78: Chapter 4: Connecting The Wireless-G Access Point
Wireless-G Access Point Chapter 4: Connecting the Wireless-G Access Point Overview This chapter explains how to connect the Access Point for setup. Connections for Setup 1. Connect your Ethernet network cable to your network router or switch. Then connect the other end of the network cable to the Access Point’s LAN (Ethernet network) port. -
Seite 79: Chapter 5: Setting Up The Wireless-G Access Point
2. On the Welcome screen, click the Click Here to Start or Setup button if this is the first time you are running the Setup Wizard. These are your other choices: Install Linksys Wireless Guard - Linksys Wireless Guard is a subscription service that secures your network; it is available only in the USA and Canada. -
Seite 80: Figure 5-2: Connect The Network Cable To The Router Or Switch Screen
Wireless-G Access Point 3. Optimally, you should set up the Access Point using a PC on your wired network. Connect a network cable to your network router or switch. Then click the Next button. Figure 5-2: Connect the Network Cable to the Router or Switch Screen 4. -
Seite 81: Figure 5-4: Power On The Access Point Screen
Wireless-G Access Point 5. Connect the power adapter to the Access Point and an electrical outlet. Then click the Next button. Figure 5-4: Power on the Access Point Screen 6. Make sure the Access Point’s Power, Act, and Link LEDs are lit on its front panel. If they are not, check your cable connections. -
Seite 82: Figure 5-6: Select The Access Point Screen
Wireless-G Access Point 7. The Setup Wizard will run a search for the Access Point within your network and then display a list along with the status information for the selected access point. If this is the only access point on your network, it will be the only one displayed. -
Seite 83: Figure 5-8: Basic Settings Screen
Wireless-G Access Point 9. The Basic Settings screen will appear next. Enter a descriptive name in the Device Name field. Create a password that will control access to the Access Point’s Web-based Utility and Setup Wizard. If your network router will automatically assign an IP address to the Access Point, then select Automatic- DHCP. -
Seite 84: Figure 5-10: Secureeasysetup Screen
Wireless-G Access Point Using the Access Point’s SecureEasySetup Feature Read these instructions before you press any SecureEasySetup buttons. You should locate the SecureEasySetup buttons of your devices before using the Access Point’s SecureEasySetup feature. NOTE: SecureEasySetup uses WPA-Personal encryption. If your current wireless devices do not support WPA-Personal security, then you cannot use SecureEasySetup on your network. -
Seite 85: Figure 5-14: Configure Wireless Settings Screen
Wireless-G Access Point 2. Press the Access Point’s Cisco logo for only one to two seconds and then release it. NOTE: If you accidentally press the Cisco logo for five to eight seconds, then the Access Point’s SSID and WPA-Personal settings will be changed, and you will have to re-configure all of your wireless client devices. -
Seite 86: Figure 5-16: Congratulations Screen
Wireless-G Access Point 6. The Congratulations screen will appear. Click the Online Registration button to register the Access Point, or click the Exit button to exit the Setup Wizard. Congratulations! The installation of the Wireless-G Access Point is complete. If you need to configure a non-SecureEasySetup device, proceed to the next section, “Configuring a Non-SecureEasySetup Device.”... -
Seite 87: Figure 5-17: Configure Wireless Settings Screen
SSID - Enter the name of your wireless network. The SSID must be identical for all devices in the network. The default setting is linksys (all lowercase). Channel - Select the operating channel for your wireless network. All of your wireless devices will use this channel to communicate. -
Seite 88: Figure 5-19: Security Settings Screen
Wireless-G Access Point 3. Select the level of security you want to use: WEP, WPA/WPA2 Personal, WPA-Enterprise, or Linksys Wireless Guard, which is available only in the USA and Canada. WEP stands for Wired Equivalent Privacy, and WPA stands for Wi-Fi Protected Access. Click the Next button and proceed to step 4. -
Seite 89: Figure 5-21: Wpa Personal Settings
Wireless-G Access Point WPA Personal To use WPA Personal security, select WPA Personal from the Security drop-down menu. WPA Personal offers two encryption methods, TKIP and AES, with dynamic encryption keys. Select TKIP or AES for encryption. Then enter a Passphrase that is 8-32 characters in length. Encryption - Select TKIP or AES from the Encryption drop-down menu. -
Seite 90: Figure 5-23: Wpa2 Mixed Mode Settings Screen
USA and Canada. network access. NOTE: The Linksys Wireless Guard service is available only in the USA and Canada. Chapter 5: Setting up the Wireless-G Access Point Using the Setup Wizard... -
Seite 91: Figure 5-24: Confirm New Settings Screen
Wireless-G Access Point 5. The Setup Wizard will ask you to review your settings before it saves them. Click the Yes button if you are satisfied with your settings, or click the No button if you do not want to save your new settings. Figure 5-24: Confirm New Settings Screen 6. -
Seite 92: Chapter 6: Configuring The Wireless-G Access Point
Wireless-G Access Point Chapter 6: Configuring the Wireless-G Access Point Overview HAVE YOU: Enabled TCP/IP on your PCs? PCs communicate over the network with this The Access Point has been designed to be functional right out of the box, with the default settings in the Setup protocol. -
Seite 93: Chapter 6: Configuring The Wireless-G Access Point Navigating The Utility
Wireless-G Access Point Wireless You will use the Wireless tabs to enter a variety of wireless settings for the Access Point. • Basic Wireless Settings. Enter the network mode, SSID, and other basic settings on this screen. • Wireless Security. Use this screen to configure the Access Point’s wireless security settings. •... -
Seite 94: Accessing The Utility
Wireless-G Access Point Accessing the Utility To access the Web-based Utility of the Access Point, launch Internet Explorer or Netscape Navigator. In the Address field, enter the Access Point’s default IP address, 192.168.1.245, or the IP address you entered during the Setup Wizard. -
Seite 95: Figure 6-3: Setup - Static Ip Screen
Wireless-G Access Point Select Static IP if you want to assign a static or fixed IP address to the Access Point. Then complete the following: IP Address. The IP address must be unique to your network. We suggest you use the default IP address of 192.168.1.245. -
Seite 96: The Setup - Ap Mode Tab
AP (Access Point) Client. When set to AP Client mode, the AP Client is able to talk to one remote access point within its range. This feature only works with another Wireless-G Access Point (model number: WAP54G). This mode allows the AP Client to act as a client of a remote access point. The AP Client cannot communicate directly with any wireless clients. -
Seite 97: Figure 6-6: Wireless Repeater Diagram
Wireless Repeater. When set to Wireless Repeater mode, the Wireless Repeater is able to talk to up a remote access point within its range and retransmit its signal. This feature only works with the Linksys Wireless-G Router (model number: WRT54G) or another Wireless-G Access Point (model number: WAP54G). -
Seite 98: Figure 6-7: Wireless Bridge Diagram
This feature only works with another Wireless-G Point can ONLY be accessed by another access point Access Point (model number: WAP54G). in Wireless Bridge mode. In order for your other wireless devices to access the Access Point, you must reset it to Access Point mode. -
Seite 99: The Wireless - Basic Wireless Settings Tab
Wireless-G Access Point The Wireless - Basic Wireless Settings Tab Change the wireless network settings on this screen. Basic Wireless Settings Configure the Access Point using the available settings. Mode. Select Mixed and both Wireless-G and Wireless-B computers will be allowed on the network, but the speed will be reduced. -
Seite 100: Figure 6-10: Waiting For Completion Of Secureeasysetup
Wireless-G Access Point A new screen will be displayed while the Access Point is waiting for you to push the SecureEasySetup button on your wireless client. When the SecureEasySetup process is complete, the Basic Wireless Settings screen will appear, and the Current Encryption and Status information will be updated. -
Seite 101: The Wireless - Wireless Security Tab
Wireless-G Access Point The Wireless - Wireless Security Tab Change the Access Point’s wireless security settings on this screen. Wireless Security Security Mode. Select the security method you want to use, WPA-Personal, WPA2-Personal, WPA2-Mixed, WPA-Enterprise, RADIUS, or WEP. (WPA stands for Wi-Fi Protected Access, which is a security standard stronger than WEP encryption. -
Seite 102: Figure 6-15: Wireless Security - Wpa2-Mixed Screen
Wireless-G Access Point WPA2-Mixed Encryption. TKIP + AES is automatically selected so both methods can be used. Passphrase. Enter a Passphrase (also called a WPA Shared Key) of 8-32 characters. Key Renewal. Enter a Key Renewal timeout period, which instructs the Access Point how often it should change the encryption keys. -
Seite 103: Figure 6-17: Wireless Security - Radius Screen
Wireless-G Access Point RADIUS This option features WEP used in coordination with a RADIUS server. (This should only be used when a RADIUS server is connected to the Access Point.) RADIUS Server. Enter the RADIUS server’s IP address. RADIUS Port. Enter the port number used by the RADIUS server. Shared Secret. -
Seite 104: The Wireless - Wireless Mac Filter Tab
Wireless-G Access Point The Wireless - Wireless MAC Filter Tab This screen allows you to permit or block wireless access for computers with specific MAC addresses. Wireless MAC Filter Access Restriction If you want to control access to your wireless network, select Enable. If you do not wish to filter users by MAC address, select Disable. -
Seite 105: The Wireless - Advanced Wireless Settings Tab
Wireless-G Access Point The Wireless - Advanced Wireless Settings Tab This screen allows you to configure the advanced settings for the Access Point. In most cases, these settings do not need to be changed. Advanced Wireless You can change the data transmission and output power settings for the Access Point. Authentication Type. - Seite 106 Wireless-G Access Point Antenna Selection. This selection is for choosing which antenna transmits data, left or right. If you are not sure which antenna to use, keep the default, Diversity, to increase reception. packet: a unit of data sent over a network. Beacon Interval.
-
Seite 107: The Administration - Management Tab
Wireless-G Access Point The Administration - Management Tab On this screen you can configure the password as well as back up or restore the Access Point’s configuration file. Management You should change the password that controls access to the Access Point’s Web-based Utility. AP’s Password Password. -
Seite 108: The Administration - Snmp Tab
Wireless-G Access Point The Administration - SNMP Tab SNMP is a popular network monitoring and management protocol. It provides network administrators with the ability to monitor the status of the Access Point and receive notification of any critical events as they occur on the Access Point. -
Seite 109: The Administration - Log Tab
In the field provided, enter the IP address of this PC. To view these permanent logs, you must use Logviewer software, which can be downloaded free of charge from www.linksys.com/international. View Log. To see a temporary log of the Access Point’s most recent activities, click this button. -
Seite 110: The Administration - Factory Defaults Tab
Before you upgrade the Access Point’s firmware, write down all of your custom settings. After you upgrade its firmware, you will have to re-enter all of your configuration settings. To upgrade the Access Point’s firmware: 1. Download the firmware upgrade file from the Linksys website, www.linksys.com/international. 2. Extract the firmware upgrade file on your computer. -
Seite 111: The Status - Local Network Tab
Wireless-G Access Point The Status - Local Network Tab The Local Network screen displays the Access Point’s current status information for the local network. AP’s Information Firmware Version. This is the version of the Access Point’s current firmware. Local Network MAC Address. -
Seite 112: The Status - Wireless Network Tab
Wireless-G Access Point The Status - Wireless Network Tab The Wireless Network screen displays the Access Point’s current status information for its wireless network. Wireless Network MAC Address. The MAC Address of the Access Point’s wireless interface is displayed here. Mode. -
Seite 113: Appendix A: Troubleshooting
This appendix provides solutions to problems that may occur during the installation and operation of the Wireless-G Access Point. Read the description below to solve your problems. If you can't find an answer here, check the Linksys website at www.linksys.com/international. Frequently Asked Questions Can the Access Point act as my DHCP server? No. - Seite 114 Wireless-G Access Point What IEEE 802.11g features are supported? The product supports the following IEEE 802.11g functions: • CSMA/CA plus Acknowledge protocol • OFDM protocol • Multi-Channel Roaming • Automatic Rate Selection • RTS/CTS feature • Fragmentation • Power Management What is Ad-hoc? An Ad-hoc wireless LAN is a group of computers, each with a WLAN adapter, connected as an independent wireless LAN.
- Seite 115 Can Linksys wireless products support file and printer sharing? Linksys wireless products perform the same function as LAN products. Therefore, Linksys wireless products can work with NetWare, Windows NT/2000, or other LAN operating systems to support printer or file sharing.
- Seite 116 Wireless-G Access Point What is a MAC Address? The Media Access Control (MAC) address is a unique number assigned by the manufacturer to any Ethernet networking device, such as a network adapter, that allows the network to identify it at the hardware level. For all practical purposes, this number is usually permanent.
-
Seite 117: Appendix B: Wireless Security
Wireless-G Access Point Appendix B: Wireless Security Linksys wants to make wireless networking as safe and easy for you as possible. The current generation of Linksys products provide several network security features, but they require specific action on your part for implementation. - Seite 118 This includes hackers. So, don’t broadcast the SSID. Wireless networking products come with a default SSID set by the factory. (The Linksys default SSID is “linksys”.) Hackers know these defaults and can check these against your network. Change your SSID to something unique and not something related to your company or the networking products you use.
- Seite 119 These security recommendations should help keep your mind at ease while you are enjoying the most flexible and convenient technology Linksys has to offer. Appendix B: Wireless Security Security Threats Facing Wireless Networks...
-
Seite 120: Appendix C: Upgrading Firmware
The Access Point's firmware is upgraded through the Web-based Utility’s Administration - Firmware Upgrade tab. Follow these instructions: 1. Download the firmware upgrade file from the Linksys website, www.linksys.com/international. 2. Extract the firmware upgrade file on your computer. 3. Open the Access Point’s Web-based Utility. -
Seite 121: Appendix D: Windows Help
Wireless-G Access Point Appendix D: Windows Help Almost all wireless products require Microsoft Windows. Windows is the most used operating system in the world and comes with many features that help make networking easier. These features can be accessed through Windows Help and are described in this appendix. -
Seite 122: Appendix E: Glossary
Wireless-G Access Point Appendix E: Glossary 802.11b - A wireless networking standard that specifies a maximum data transfer rate of 11Mbps and an operating frequency of 2.4GHz. 802.11g - A wireless networking standard that specifies a maximum data transfer rate of 54Mbps, an operating frequency of 2.4GHz, and backward compatibility with 802.11b devices. - Seite 123 Wireless-G Access Point Cable Modem - A device that connects a computer to the cable television network, which in turn connects to the Internet. CSMA/CA (Carrier Sense Multiple Access/Collision Avoidance) - A method of data transfer that is used to prevent data collisions.
- Seite 124 Wireless-G Access Point EAP (Extensible Authentication Protocol) - A general authentication protocol used to control network access. Many specific authentication methods work within this framework. EAP-PEAP (Extensible Authentication Protocol-Protected Extensible Authentication Protocol) - A mutual authentication method that uses a combination of digital certificates and another system, such as passwords. EAP-TLS (Extensible Authentication Protocol-Transport Layer Security) - A mutual authentication method that uses digital certificates.
- Seite 125 Packet - A unit of data sent over a network. Passphrase - Used much like a password, a passphrase simplifies the WEP encryption process by automatically generating the WEP encryption keys for Linksys products. PEAP (Protected Extensible Authentication Protocol) - A mutual authentication method that uses a combination of digital certificates and another system, such as passwords.
- Seite 126 Wireless-G Access Point Ping (Packet INternet Groper) - An Internet utility used to determine whether a particular IP address is online. POP3 (Post Office Protocol 3) - A standard mail server commonly used on the Internet. Port - The connection point on a computer or networking device used for plugging in cables or adapters. Power over Ethernet (PoE) - A technology enabling an Ethernet network cable to deliver both data and power.
- Seite 127 Wireless-G Access Point Spread Spectrum - Wideband radio frequency technique used for more reliable and secure data transmission. SSID (Service Set IDentifier) - Your wireless network's name. Static IP Address - A fixed address assigned to a computer or device that is connected to a network. Static Routing - Forwarding data in a network via a fixed path.
- Seite 128 Wireless-G Access Point VPN (Virtual Private Network) - A security measure to protect data as it leaves one network and goes to another over the Internet. WAN (Wide Area Network)- The Internet. WEP (Wired Equivalent Privacy) - A method of encrypting network data transmitted on a wireless network for greater security.
-
Seite 129: Appendix F: Specifications
802.11g: Typ. 13.5 +/- 2dBm @ Normal Temp Range 802.11b: Typ: 16.5 +/- 2dBm @ Normal Temp Range Security Features WPA, WPA2, Linksys Wireless Guard (USA and Canada only), WEP Encryption, MAC Filtering, SSID Broadcast enable/disable WEP Key Bits 64/128-bit... - Seite 130 Wireless-G Access Point Operating Humidity 10% to 85% Non-Condensing Storage Humidity 5% to 90% Non-Condensing Appendix F: Specifications...
-
Seite 131: Appendix G: Warranty Information
Your exclusive remedy and Linksys' entire liability under this warranty will be for Linksys at its option to repair or replace the Product or refund Your purchase price less any rebates. -
Seite 132: Appendix H: Regulatory Information
Wireless-G Access Point Appendix H: Regulatory Information FCC Statement This product has been tested and complies with the specifications for a Class B digital device, pursuant to Part 15 of the FCC Rules. These limits are designed to provide reasonable protection against harmful interference in a residential installation. - Seite 133 Wireless-G Access Point Compliance Information for 2.4-GHz Wireless Products Relevant to the EU and Other Countries Following the EU Directive 1999/5/EC (R&TTE Directive) Declaration of Conformity with Regard to the EU Directive 1995/5/EC (R&TTE Directive) Appendix H: Regulatory Information...
- Seite 134 • A pdf file is included on the product's CD. • A print copy is included with the product. • A pdf file is available on the product's webpage. Visit www.linksys.com/international and select your country or region. Then select your product.
- Seite 135 Wireless-G Access Point CE Marking For the Linksys Wireless-B and Wireless-G products, the following CE mark, notified body number (where applicable), and class 2 identifier are added to the equipment. Check the CE label on the product to find out which notified body was involved during the assessment.
- Seite 136 (AC9SMA) and an R-TNC extension cable (AC9TNC). Both of these cables are 9 meters long and have a cable loss (attenuation) of 5 dB. To compensate for the attenuation, Linksys also offers higher gain antennas, the HGA7S (with R-SMA connector) and HGA7T (with R-TNC connector).
- Seite 137 NOTE: The power output setting may not be available on all wireless products. For more information, refer to the documentation on your product’s CD or http://www.linksys.com/international. Wireless Adapters Wireless adapters have the power output set to 100% by default. Maximum power output on each adapter does not exceed 20 dBm (100 mW);...
- Seite 138 7. Click the type of documentation you want. The document will automatically open in PDF format. NOTE: If you have questions regarding the compliance of these products or you cannot find the information you need, please contact your local sales office or visit http://www.linksys.com/international for more details. Appendix H: Regulatory Information...
-
Seite 139: Appendix I: Contact Information
Appendix I: Contact Information Need to contact Linksys? Visit us online for information on the latest products and updates to your existing products at: http://www.linksys.com/international If you experience problems with any Linksys product, you can e-mail us at: In Europe... - Seite 140 ® A Division of Cisco Systems, Inc. Wireless-G 802.11g Benutzerhandbuch Access Point WIRELESS WAP54G (DE) Modell-Nr.
- Seite 141 Wireless-G Access Point Copyright und Marken Technische Änderungen vorbehalten. Linksys ist eine eingetragene Marke bzw. eine Marke von Cisco Systems, Inc. und/oder deren Zweigunternehmen in den USA und anderen Ländern. Copyright © 2005 Cisco Systems, Inc. Alle Rechte vorbehalten. Andere Handelsmarken und Produktnamen sind Marken bzw. eingetragene Marken der jeweiligen Inhaber.
- Seite 142 Wireless-G Access Point Inhaltsverzeichnis Kapitel 1: Einführung Willkommen Inhalt dieses Benutzerhandbuchs Kapitel 2: Planen des Wireless-Netzwerks Netzwerktopologie Roaming Netzwerkanordnung Kapitel 3: Beschreibung des Wireless-G Access Points Vorderseite Rückseite Kapitel 4: Anschließen des Wireless-G Access Points Übersicht Anschlüsse für die Einrichtung Kapitel 5: Einrichten des Wireless-G Access Points Übersicht Verwenden des Setup-Assistenten...
- Seite 143 Wireless-G Access Point Registerkarte „Administration“ (Verwaltung) – „Factory Defaults“ (Werkseinstellungen) Registerkarte „Administration“ (Verwaltung) – Firmware Upgrade (Aktualisieren der Firmware) Registerkarte „Status“ – „Local Network“ (Lokales Netzwerk) Registerkarte „Status“ – „Wireless Network“ (Wireless-Netzwerk) Anhang A: Fehlerbehebung Häufig gestellte Fragen Anhang B: Sicherheit im Wireless-Netzwerkbetrieb Vorsichtsmaßnahmen Sicherheitsrisiken bei Wireless-Netzwerken Anhang C: Firmware wird aktualisiert...
- Seite 144 Wireless-G Access Point Abbildungsverzeichnis Abbildung 3-1: Vorderseite Abbildung 3-2: Rückseite Abbildung 4-1: Anschließen des Ethernet-Netzwerkkabels Abbildung 4-2: Anschließen des Netzstroms Abbildung 5-1: Fenster Welcome (Willkommen) Abbildung 5-2: Fenster zum Anschließen des Netzwerkkabels an den Router oder Switch Abbildung 5-3: Fenster zum Anschließen des Netzwerkkabels an den Access Point Abbildung 5-4: Fenster zum Einschalten des Access Points Abbildung 5-5: Fenster zum Überprüfen der Statusinformationen des...
- Seite 145 Wireless-G Access Point Abbildung 5-18: Fenster Wireless Settings (Wireless-Einstellungen) Abbildung 5-19: Fenster Security Settings (Sicherheitseinstellungen) Abbildung 5-20: Fenster WEP Settings (WEP-Einstellungen) Abbildung 5-21: „WPA Personal“ – Einstellungen Abbildung 5-22: Fenster mit den Einstellungen von „WPA2 Personal“ Abbildung 5-23: Fenster mit den Einstellungen von „WPA2 Gemischter Modus“...
- Seite 146 Wireless-G Access Point Abbildung 6-15: Fenster Wireless Security (Wireless-Sicherheit) – WPA2-Mixed (WPA2 Gemischt) Abbildung 6-16: Fenster Wireless Security (Wireless-Sicherheit) – WPA-Enterprise Abbildung 6-17: Fenster Wireless Security (Wireless-Sicherheit) – RADIUS Abbildung 6-18: Fenster Wireless Security (Wireless-Sicherheit) – WEP Abbildung 6-19: Fenster Wireless – Wireless MAC Filter (Wireless-MAC-Filter) 34 Abbildung 6-20: Fenster Wireless –...
-
Seite 147: Kapitel 1: Einführung
Wireless-G Access Point Kapitel 1: Einführung Willkommen Access Point: Ein Gerät, über das Computer und andere Vielen Dank, dass Sie sich für einen Wireless-G Access Point entschieden haben. Dieser Access Point optimiert Geräte mit Wireless-Funktionalität mit einem verdrahteten den Wireless-Netzwerkbetrieb wie nie zuvor. Netzwerk kommunizieren können. -
Seite 148: Inhalt Dieses Benutzerhandbuchs
Wireless-G Access Point Inhalt dieses Benutzerhandbuchs In diesem Benutzerhandbuch sind die zur Installation und Verwendung des Wireless-G Access Point erforderlichen Schritte aufgeführt. • Kapitel 1: Einführung In diesem Kapitel werden die Anwendungen des Access Points sowie dieses Benutzerhandbuch beschrieben. • Kapitel 2: Planen des Wireless-Netzwerks In diesem Kapitel werden die Grundlagen des Wireless-Netzwerkbetriebs beschrieben. - Seite 149 • Anhang H: Zulassungsinformationen In diesem Anhang sind die für den Access Point geltenden Zulassungsinformationen aufgeführt. • Anhang I: Kontaktinformationen In diesem Anhang finden Sie Kontaktinformationen zu einer Reihe von Linksys Ressourcen, darunter auch zum technischen Support. Kapitel 1: Einführung...
-
Seite 150: Kapitel 2: Planen Des Wireless-Netzwerks
Access Point miteinander kommunizieren (Peer-to- Peer). Mit Wireless-Adaptern von Linksys erhalten Benutzer bei Verwendung eines Access Points, z. B. des Wireless- G Access Points, oder eines Wireless-Routers außerdem Zugang zu verdrahteten Netzwerken. Ein integriertes Wireless- und verdrahtetes Netzwerk wird als Infrastrukturnetzwerk bezeichnet. Wireless-PCs können in einem Infrastruktur: Ein Wireless-Netzwerk, das über einen Access... -
Seite 151: Netzwerkanordnung
Schließen Sie den Ethernet-Netzwerk-Port des Access Points an einen Switch oder Router an, wenn Sie das verdrahtete Netzwerk mit dem Wireless-Netzwerk verbinden möchten. Mit diesen Produkten, wie mit vielen weiteren Linksys Produkten auch, stehen Ihnen grenzenlose Netzwerk- betriebsoptionen offen. Weitere Informationen zu Wireless-Produkten finden Sie auf der Website von Linksys unter www.linksys.com/international. -
Seite 152: Kapitel 3: Beschreibung Des Wireless-G Access Points
Wireless-G Access Point Kapitel 3: Beschreibung des Wireless-G Access Points Vorderseite Die LEDs des Access Points, die die Netzwerkaktivität und Statusinformationen anzeigen, befinden sich auf der Gerätevorderseite. Abbildung 3-1: Vorderseite (Cisco Logo) Orange/weiß. Das Cisco Logo stellt die SecureEasySetup-Taste des Access Points dar. Diese HINWEIS: Bei SecureEasySetup handelt es sich um Taste leuchtet auf, wenn der Access Point eingeschaltet wird. -
Seite 153: Rückseite
Wireless-G Access Point Rückseite Der Ethernet-Netzwerk-Port, der Stromanschluss und die Reset-Taste befinden sich auf der Rückseite. Port: Der Anschlusspunkt an einem Computer oder Netzwerkgerät, an dem Kabel oder Adapter angeschlossen werden. Abbildung 3-2: Rückseite LAN-Port Der Ethernet-Netzwerk-Port dient zum Anschluss an ein Ethernet-Netzwerkgerät, z. B. einen Switch oder Router. -
Seite 154: Kapitel 4: Anschließen Des Wireless-G Access Points
Wireless-G Access Point Kapitel 4: Anschließen des Wireless-G Access Points Übersicht 1. In diesem Kapitel wird erklärt, wie Sie den Access Point für die Einrichtung anschließen. Anschlüsse für die Einrichtung 2. Schließen Sie das Ethernet-Netzwerkkabel an Ihren Netzwerk-Router oder -Switch an. Schließen Sie das andere Ende des Kabels an den LAN-Port des Access Points (Ethernet-Netzwerk) an. -
Seite 155: Kapitel 5: Einrichten Des Wireless-G Access Points
Setup (Einrichten), wenn Sie den Setup-Assistenten zum ersten Mal ausführen. Des Weiteren stehen folgende Optionen zur Verfügung: Install Linksys Wireless Guard (Linksys Wireless Guard installieren): Bei Linksys Wireless Guard handelt es sich um ein en Dienst, der zum Schutz Ihres Netzwerks abonniert werden kann. Der Dienst ist nur in den USA und Kanada verfügbar. -
Seite 156: Abbildung 5-2: Fenster Zum Anschließen Des Netzwerkkabels An Den Router Oder Switch
Wireless-G Access Point 3. Führen Sie die Einrichtung des Access Points möglichst über einen PC im verdrahteten Netzwerk durch. Schließen Sie ein Netzwerkkabel an Ihren Netzwerk-Router oder Switch an. Klicken Sie anschließend auf die Schaltfläche Next (Weiter). Abbildung 5-2: Fenster zum Anschließen des Netzwerkkabels an den Router oder Switch 4. -
Seite 157: Abbildung 5-4: Fenster Zum Einschalten Des Access Points
Wireless-G Access Point 5. Schließen Sie den Netzstromadapter an den Access Point und an eine Steckdose an. Klicken Sie anschließend auf die Schaltfläche Next (Weiter). Abbildung 5-4: Fenster zum Einschalten des Access Points 6. Stellen Sie sicher, dass die LEDs Power (Netzstrom), Act (Verarbeitung) und Link (Verbindung) auf der Vorderseite des Access Points leuchten. -
Seite 158: Abbildung 5-6: Fenster Zum Auswählen Des Access Points
Wireless-G Access Point 7. Der Setup-Assistent durchsucht das Netzwerk nach dem Access Point und zeigt dann eine Liste der verfügbaren Access Points sowie den Status des ausgewählten Access Points an. Falls dies der einzige Access Point in Ihrem Netzwerk ist, wird nur dieser aufgeführt. Bei mehreren aufgeführten Access Points wählen Sie einen Access Point aus, indem Sie auf diesen klicken. -
Seite 159: Abbildung 5-8: Fenster Basic Settings (Grundlegende Einstellungen)
Wireless-G Access Point 9. Das Fenster Basic Settings (Grundlegende Einstellungen) wird als Nächstes angezeigt. Geben Sie in das Feld Device Name (Gerätename) einen aussagekräftigen Namen ein. Geben Sie ein Passwort für den Zugriff auf das webbasierte Dienstprogramm und den Setup-Assistenten des Access Points ein. Wenn Ihr Netzwerk-Router dem Access Point automatisch eine IP-Adresse zuweist, wählen Sie Automatic- DHCP (Automatische Konfiguration –... -
Seite 160: Abbildung 5-10: Secureeasysetup-Fenster
Wireless-G Access Point Verwenden der SecureEasySetup-Funktion des Access Points Lesen Sie die folgenden Anweisungen, bevor Sie eine der SecureEasySetup-Tasten verwenden. Stellen Sie vor Verwendung der SecureEasySetup-Funktion des Access Points fest, wo sich an jedem Gerät die SecureEasySetup-Taste befindet. HINWEIS: SecureEasySetup verwendet die WPA Personal-Verschlüsselung. Wenn Ihre aktuellen Wireless-Geräte die Sicherheitsmethode WPA Personal nicht unterstützen, können Sie SecureEasySetup nicht in Ihrem Netzwerk verwenden. -
Seite 161: Abbildung 5-14: Fenster Configure Wireless Settings (Konfigurieren Der Wireless-Einstellungen)
Wireless-G Access Point 2. Halten Sie das Cisco Logo des Access Points höchstens eine bis zwei Sekunden lang gedrückt. HINWEIS: Wenn Sie das Cisco Logo aus Versehen fünf bis acht Sekunden gedrückt halten, werden die SSID und die WPA Personal-Einstellungen des Access Points geändert, und Sie müssen alle Wireless-Client-Geräte erneut konfigurieren. -
Seite 162: Abbildung 5-16: Fenster Congratulations (Herzlichen Glückwunsch)
Wireless-G Access Point 6. Das Fenster Congratulations (Herzlichen Glückwunsch) wird angezeigt. Klicken Sie auf die Schaltfläche Online Registration (Online-Registrierung), um den Access Point zu registrieren, oder auf die Schaltfläche Exit (Beenden), um den Setup-Assistenten zu beenden. Herzlichen Glückwunsch! Die Installation des Wireless-G Access Points ist abgeschlossen. Falls Sie noch ein Gerät ohne SecureEasySetup-Funktion konfigurieren müssen, fahren Sie mit dem nächsten Abschnitt, „Konfigurieren eines Geräts ohne SecureEasySetup-Funktion“, fort. -
Seite 163: Abbildung 5-17: Fenster Configure Wireless Settings (Konfigurieren Der Wireless-Einstellungen)
SSID: Geben Sie den Namen Ihres Wireless-Netzwerks ein. Die SSID muss für alle Geräte im Netzwerk identisch sein. Die Standardeinstellung ist linksys (Kleinbuchstaben). Channel (Kanal): Wählen Sie den Betriebskanal für Ihr Wireless-Netzwerk aus. Über diesen Kanal kommunizieren alle Wireless-Geräte. -
Seite 164: Abbildung 5-19: Fenster Security Settings (Sicherheitseinstellungen)
Wireless-G Access Point 3. Wählen Sie die gewünschte Sicherheitsstufe aus: WEP, WPA/WPA2 Personal, WPA-Enterprise oder Linksys Wireless Guard, das nur in den USA und Kanada verfügbar ist. WEP ist die Abkürzung für Wired Equivalent Privacy und WPA für Wi-Fi Protected Access. Klicken Sie auf die Schaltfläche Next (Weiter), und fahren Sie mit Schritt 4 fort. -
Seite 165: Abbildung 5-21: „Wpa Personal" - Einstellungen
Wireless-G Access Point WEP Key (WEP-Schlüssel): Der eingegebene WEP-Schlüssel muss mit dem WEP-Schlüssel Ihres Wireless- Verschlüsselung: Die Codierung von Daten, die über ein Netzwerk übertragen werden. Netzwerks übereinstimmen. Geben Sie für die 128-Bit-Verschlüsselung genau 26 hexadezimale Zeichen ein. Gültige hexadezimale Zeichen sind Zeichen von „0“ bis „9“ und von „A“ bis „F“. Klicken Sie auf die Schaltfläche Next (Weiter), um fortzufahren, oder auf die Schaltfläche Back (Zurück), um zum vorherigen Fenster zurückzukehren. -
Seite 166: Abbildung 5-23: Fenster Mit Den Einstellungen Von „Wpa2 Gemischter Modus
Sie einen eigenen RADIUS-Server einrichten müssen. Der Dienst steht nur in den USA und Kanada eines Authentifizierungsservers. zur Verfügung. HINWEIS: Der Linksys Wireless Guard-Dienst steht nur in den USA und Kanada zur Verfügung. Kapitel 5: Einrichten des Wireless-G Access Points Verwenden des Setup-Assistenten... -
Seite 167: Abbildung 5-24: Fenster Confirm New Settings (Bestätigen Neuer Einstellungen)
Wireless-G Access Point 5. Der Setup-Assistent fordert Sie auf, die Einstellungen vor dem Speichern zu überprüfen. Wenn Sie mit den Einstellungen zufrieden sind, klicken Sie auf die Schaltfläche Yes (Ja). Klicken Sie auf die Schaltfläche No (Nein), falls Sie die neuen Einstellungen nicht speichern möchten. Abbildung 5-24: Fenster Confirm New Settings (Bestätigen neuer Einstellungen) 6. -
Seite 168: Kapitel 6: Konfigurieren Des Wireless-G Access Points
Wireless-G Access Point Kapitel 6: Konfigurieren des Wireless-G Access Points Übersicht HABEN SIE: TCP/IP auf Ihren PCs aktiviert? PCs tauschen über das Netzwerk mit diesem Protokoll Der Access Point ist mit den Standardeinstellungen des Setup-Assistenten sofort einsatzfähig. Wenn Sie Daten aus. Weitere Informationen zu TCP/IP diese Einstellungen jedoch ändern möchten, können Sie den Access Point über Ihren Web-Browser mit dem erhalten Sie in „Anhang D: Windows-Hilfe“. -
Seite 169: Kapitel 6: Konfigurieren Des Wireless-G Access Points Navigation Im Dienstprogramm
Wireless-G Access Point Wireless Auf den Registerkarten des Fensters Wireless sind eine Reihe von Wireless-Einstellungen für den Access Point einzugeben. • Basic Wireless Settings (Grundlegende Wireless-Einstellungen): Geben Sie in diesem Fenster den Netzwerkmodus, die SSID und andere grundlegende Einstellungen ein. •... -
Seite 170: Zugriff Auf Das Dienstprogramm
Wireless-G Access Point Zugriff auf das Dienstprogramm Wenn Sie auf das webbasierte Dienstprogramm des Access Points zugreifen möchten, starten Sie Internet Explorer oder Netscape Navigator. Geben Sie in das Adressfeld entweder die Standard-IP-Adresse des Access Points (192.168.1.245) oder die IP-Adresse ein, die Sie bei Ausführung des Setup-Assistenten angegeben haben. -
Seite 171: Abbildung 6-3: Fenster Setup (Einrichtung) - Static Ip (Statische Ip-Adresse)
Wireless-G Access Point Wählen Sie Static IP (Statische IP-Adresse) aus, wenn Sie dem Access Point eine statische IP-Adresse zuweisen möchten. Geben Sie anschließend Folgendes ein: IP Address (IP-Adresse): Die IP-Adresse muss im Netzwerk eindeutig sein. Verwenden Sie am besten die Standard-IP-Adresse 192.168.1.245. -
Seite 172: Registerkarte „Setup" (Einrichtung) - „Ap Mode" (Ap-Modus)
WICHTIG: Bei den Modi AP-Client- und Wireless Bridge muss der Remote-Access Point ein zweiter Linksys Wireless-G Access Point (Modellnummer WAP54G) sein. Beim Wireless-Überträger-Modus muss es sich bei der Remote-Wireless Bridge um einen zweiten Linksys Wireless-G Access Point (Modellnummer WAP54G) oder Wireless-G Router (Modellnummer WRT54G) handeln. -
Seite 173: Abbildung 6-6: Beispiel Eines Wireless-Überträgers
Wireless Repeater (Wireless-Überträger): Wenn der Modus Wireless Repeater (Wireless-Überträger) aktiviert ist, kann der Wireless-Überträger Kontakt mit einem Remote-Access Point innerhalb seiner Reichweite herstellen und dessen Signal erneut übertragen. Diese Funktion ist nur mit dem Linksys Wireless-G Router (Modellnummer WRT54G) oder einem weiteren Wireless-G Access Point (Modellnummer WAP54G) einsetzbar. -
Seite 174: Abbildung 6-7: Beispiel Einer Wireless Bridge
Access Points verbunden (durch zusätzliche Access Points können weitere verdrahtete Netzwerke eingebunden auf den Access Point NUR durch einen anderen werden). Diese Funktion ist nur mit einem weiteren Wireless-G Access Point (Modellnummer WAP54G) Access Point im Wireless Bridge-Modus möglich. einsetzbar. -
Seite 175: Registerkarte „Wireless" - „Basic Wireless Settings" (Grundlegende Wireless-Einstellungen)
Wireless-G Access Point Registerkarte „Wireless“ – „Basic Wireless Settings“ (Grundlegende Wireless-Einstellungen) In diesem Fenster ändern Sie die Einstellungen des Wireless-Netzwerks. Grundlegende Wireless-Einstellungen Konfigurieren Sie den Access Point mithilfe der verfügbaren Einstellungen. Mode (Modus): Bei Wahl von Mixed (Gemischt) sind sowohl Wireless-G- als auch Wireless-B-Computer im Netzwerk erlaubt, allerdings unter Beeinträchtigung der Geschwindigkeit. -
Seite 176: Abbildung 6-9: Betätigen Der Wireless Secureeasysetup-Funktion
Wireless-G Access Point Schaltfläche „SecureEasySetup“: Hier wird der Status der SecureEasySetup-Funktion des Access Points angezeigt. Wenn Sie die SecureEasySetup-Funktion des Access Points verwenden möchten, klicken Sie auf die Schaltfläche SecureEasySetup. HINWEIS: Wenn Sie das Netzwerk bereits mit der SecureEasySetup-Funktion des Routers Abbildung 6-9: Betätigen der Wireless eingerichtet haben, können Sie die SecureEasySetup-Funktion des Access Points nicht verwenden. -
Seite 177: Registerkarte „Wireless" - „Wireless Security" (Wireless-Sicherheit)
Wireless-G Access Point Registerkarte „Wireless“ – „Wireless Security“ (Wireless-Sicherheit) In diesem Fenster ändern Sie die Wireless-Sicherheitseinstellungen des Access Points. Wireless-Sicherheit Security Mode (Sicherheitsmodus): Wählen Sie die gewünschte Sicherheitsmethode aus: WPA-Personal, WPA2-Personal, WPA2-Mixed (WPA2 Gemischt), WPA-Enterprise, RADIUS oder WEP. (WPA steht für Wi-Fi Protected Access. -
Seite 178: Abbildung 6-15: Fenster Wireless Security (Wireless-Sicherheit) - Wpa2-Mixed (Wpa2 Gemischt)
Wireless-G Access Point WPA2 Gemischt Encryption (Verschlüsselung): TKIP + AES ist automatisch ausgewählt, sodass beide Methoden verwendet werden können. Passphrase: Geben Sie eine Passphrase (auch „WPA Gemeinsamer Schlüssel“ genannt) mit einer Länge von 8 bis 32 Zeichen ein. Key Renewal (Schlüsselerneuerung): Legen Sie eine Wartezeit für die Schlüsselerneuerung fest. Diese Zeitangabe teilt dem Access Point mit, wie oft die Verschlüsselungsschlüssel auszutauschen sind. -
Seite 179: Abbildung 6-17: Fenster Wireless Security (Wireless-Sicherheit) - Radius
Wireless-G Access Point RADIUS Bei dieser Option wird WEP in Kombination mit einem RADIUS-Server verwendet. (Diese Vorgehensweise sollte nur angewendet werden, wenn ein RADIUS-Server mit dem Access Point verbunden ist.) RADIUS Server (RADIUS-Server): Geben Sie die IP-Adresse des RADIUS-Servers ein. RADIUS Port (RADIUS-Port): Geben Sie die Port-Nummer des RADIUS-Servers ein. -
Seite 180: Registerkarte „Wireless" - „Wireless Mac Filter" (Wireless-Mac-Filter)
Wireless-G Access Point Registerkarte „Wireless“ – „Wireless MAC Filter“ (Wireless-MAC-Filter) In diesem Fenster können Sie Computern mit bestimmten MAC-Adressen den Zugriff auf das Wireless-Netzwerk erlauben bzw. verweigern. Wireless-MAC-Filter Zugriffsbeschränkung Wenn Sie den Zugriff auf Ihr Wireless-Netzwerk steuern möchten, wählen Sie Enable (Aktivieren) aus. Falls die Benutzer nicht nach der MAC-Adresse gefiltert werden sollen, wählen Sie Disable (Deaktivieren) aus. -
Seite 181: Registerkarte „Wireless" - „Advanced Wireless Settings" (Erweiterte Wireless-Einstellungen)
Wireless-G Access Point Registerkarte „Wireless“ – „Advanced Wireless Settings“ (Erweiterte Wireless-Einstellungen) In diesem Fenster können Sie die erweiterten Einstellungen für den Access Point konfigurieren. In den meisten Fällen müssen an diesen Einstellungen keine Änderungen vorgenommen werden. Erweitertes Wireless Sie können für den Access Point eine andere Datenübertragungsrate und Ausgangsleistung einstellen. Authentication Type (Authentifizierungstyp): Wählen Sie die gewünschte Authentifizierungsmethode für den Access Point aus: Shared Key (Freigegebener Schlüssel) oder Open System (Default) (Offenes System, Standard). - Seite 182 Wireless-G Access Point CTS Protection Mode (CTS-Schutzmodus): Die Funktion des CTS-Schutzmodus (CTS = Clear-To-Send) CTS (Clear To Send): Ein von einem Wireless-Gerät verbessert zwar die Fähigkeit des Access Points, sämtliche Wireless-G-Übertragungen zu empfangen, verringert gesendetes Signal, das angibt, dass das Gerät für jedoch auch beträchtlich die Leistung.
-
Seite 183: Registerkarte „Administration" (Verwaltung) - „Management" (Verwaltungsfunktionen)
Wireless-G Access Point Registerkarte „Administration“ (Verwaltung) – „Management“ (Verwaltungsfunktionen) In diesem Fenster können Sie das Passwort einstellen sowie die Konfigurationsdatei des Access Points sichern und wiederherstellen. Verwaltungsfunktionen Sie sollten das Passwort für den Zugriff auf das webbasierte Dienstprogramm des Access Points ändern. Passwort des Access Points Abbildung 6-21: Fenster Administration (Verwaltung) –... -
Seite 184: Registerkarte „Administration" (Verwaltung) - „Snmp
Wireless-G Access Point Registerkarte „Administration“ (Verwaltung) – „SNMP“ SNMP ist ein häufig verwendetes Protokoll zur Netzwerküberwachung und -verwaltung. Es bietet Netzwerkadministratoren die Möglichkeit, den Status des Access Points zu überwachen und bei kritischen Ereignissen in Zusammenhang mit dem Access Point entsprechende Benachrichtigungen zu erhalten. SNMP V1/V2c Wählen Sie Enable (Aktivieren) aus, um die SNMP-Funktion zu unterstützen. -
Seite 185: Registerkarte „Administration" (Verwaltung) - „Log" (Protokoll)
Protokolldateien erhält. Geben Sie hierfür die IP-Adresse des jeweiligen PCs in das vorgesehene Feld ein. Zur Anzeige dieser ständig aufgezeichneten Protokolle benötigen Sie die Logviewer-Software, die Sie sich kostenlos unter www.linksys.com/international herunterladen können. View Log (Protokoll anzeigen): Zum Anzeigen eines temporären Protokolls der letzten Access Point-Aktivitäten klicken Sie auf diese Schaltfläche. -
Seite 186: Registerkarte „Administration" (Verwaltung) - „Factory Defaults" (Werkseinstellungen)
Nach dem Aktualisieren der Firmware müssen Sie alle eigenen Konfigurationseinstellungen erneut eingeben. So aktualisieren Sie die Firmware des Access Points: 1. Laden Sie die Firmware-Aktualisierungsdatei unter www.linksys.com/international herunter. Abbildung 6-26: Fenster Administration (Verwaltung) – 2. Extrahieren Sie die Firmware-Aktualisierungsdatei auf Ihrem Computer. -
Seite 187: Registerkarte „Status" - „Local Network" (Lokales Netzwerk)
Wireless-G Access Point Registerkarte „Status“ – „Local Network“ (Lokales Netzwerk) Das Fenster Local Network (Lokales Netzwerk) gibt über den aktuellen Status des Access Points hinsichtlich des lokalen Netzwerks Auskunft. Informationen zum Access Point Firmware Version (Firmware-Version): Hier wird die Version der aktuellen Firmware des Access Points angezeigt. -
Seite 188: Abbildung 6-28: Fenster Status - Wireless Network (Wireless-Netzwerk)
Wireless-G Access Point Registerkarte „Status“ – „Wireless Network“ (Wireless-Netzwerk) Das Fenster Wireless Network (Wireless-Netzwerk) gibt über den aktuellen Status des Access Points hinsichtlich dessen Wireless-Netzwerks Auskunft. Wireless-Netzwerk MAC Address (MAC-Adresse): Hier ist die MAC-Adresse der Wireless-Schnittstelle des Access Points aufgeführt. Mode (Modus): Dies gibt über den Modus des Access Points Auskunft. -
Seite 189: Anhang A: Fehlerbehebung
Wireless-G Access Points auftreten können. Lesen Sie sich zur Fehlerbehebung die unten aufgeführte Beschreibung durch. Wenn hier kein Lösungsvorschlag zu Ihrem Problem aufgeführt ist, finden Sie weitere Informationen auf der Linksys Website unter www.linksys.com/international. Häufig gestellte Fragen Kann der Access Point als DHCP-Server eingesetzt werden? Nein. - Seite 190 Wireless-G Access Point Welche IEEE 802.11b-Funktionen werden unterstützt? Das Gerät unterstützt die folgenden IEEE 802.11-Funktionen: • CSMA/CA sowie das Acknowledge-Protokoll • Multi-Channel-Roaming • Automatische Ratenauswahl • RTS/CTS • Fragmentierung • Energieverwaltung Welche IEEE 802.11g-Funktionen werden unterstützt? Das Gerät unterstützt die folgenden IEEE 802.11g-Funktionen: •...
-
Seite 191: Anhang A: Fehlerbehebung Häufig Gestellte Fragen
Wireless-G Access Point jedem Access Point verarbeitet wird, und die Entfernung zwischen jedem Access Point zum verdrahteten Backbone ausgewertet. Anschließend ermittelt der Knoten auf Grundlage dieser Informationen den geeigneten Access Point und registriert dessen Adresse. Die Kommunikation zwischen Knoten und Host-Computer kann in beide Richtungen des Backbones verlaufen. - Seite 192 Verbesserung von Sicherheit und Zugriffskontrolle. Benutzer können sie nach Bedarf einrichten. Können Wireless-Produkte von Linksys Datei- und Druckerfreigabe unterstützen? Wireless-Produkte von Linksys entsprechen LAN-Produkten. Deshalb können sie unter NetWare, Windows NT/ 2000 oder anderen LAN-Betriebssystemen Drucker- oder Dateifreigabe unterstützen. Was ist WEP? WEP ist die Abkürzung für Wired Equivalent Privacy.
- Seite 193 Wireless-G Access Point Fungiert der Access Point als Firewall? Nein. Der Access Point ist lediglich eine Bridge zwischen verdrahteten Ethernet-Clients und Wireless-Clients. Die Signalstärke ist absolut ausreichend, das Netzwerk wird jedoch nicht angezeigt. Sicherheit im Wireless-Netzwerkbetrieb, wie WEP oder WPA, ist wahrscheinlich auf dem Access Point aktiviert, jedoch nicht auf dem Wireless-Adapter (oder umgekehrt).
-
Seite 194: Anhang B: Sicherheit Im Wireless-Netzwerkbetrieb
Wireless-G Access Point Anhang B: Sicherheit im Wireless-Netzwerkbetrieb Linksys hat es sich zum Ziel gesetzt, den Wireless-Netzwerkbetrieb für Sie so sicher und einfach wie möglich zu gestalten. Die aktuellen Produkte von Linksys bieten verschiedene Netzwerksicherheitsfunktionen. Um diese anzuwenden, müssen Sie jedoch bestimmte Schritte ausführen. Beachten Sie daher Folgendes beim Einrichten bzw. - Seite 195 Geräte für den Wireless-Netzwerkbetrieb sind werkseitig auf eine Standard-SSID eingestellt. (Die Standard-SSID von Linksys lautet „linksys“.) Hacker kennen diese Standardeinstellungen und können Ihr Netzwerk darauf überprüfen. Ändern Sie Ihre SSID in einen eindeutigen Namen, der keinerlei Bezug zu Ihrem Unternehmen oder zu den von Ihnen verwendeten Netzwerkprodukten hat.
- Seite 196 Sie jedoch sensible Daten über das Netzwerk senden, sollten Sie diese verschlüsseln. Wenn Sie diese Sicherheitsempfehlungen einhalten, können Sie ganz beruhigt arbeiten und die flexible und praktische Technologie von Linksys bedenkenlos einsetzen. Anhang B: Sicherheit im Wireless-Netzwerkbetrieb Sicherheitsrisiken bei Wireless-Netzwerken...
-
Seite 197: Anhang C: Firmware Wird Aktualisiert
Die Firmware des Access Points wird über die Registerkarte Administration – Firmware Upgrade (Verwaltung – Aktualisieren der Firmware) des webbasierten Dienstprogramms aktualisiert. Führen Sie die folgenden Schritte aus: 1. Laden Sie die Aktualisierungsdatei für die Firmware von der Linksys-Website unter www.linksys.com/international herunter. 2. Extrahieren Sie die Firmware-Aktualisierungsdatei auf Ihrem Computer. -
Seite 198: Anhang D: Windows-Hilfe
Wireless-G Access Point Anhang D: Windows-Hilfe Für fast alle Wireless-Produkte ist Microsoft Windows erforderlich. Windows ist das weltweit am häufigsten verwendete Betriebssystem und bietet zahlreiche Funktionen, die den Netzwerkbetrieb vereinfachen. Diese Funktionen können über die Windows-Hilfe aufgerufen werden und werden im vorliegenden Anhang erläutert. TCP/IP Ein Computer kann nur dann mit einem Access Point kommunizieren, wenn TCP/IP aktiviert ist. -
Seite 199: Anhang E: Glossar
Wireless-G Access Point Anhang E: Glossar 802.11b: Ein Standard für den Wireless-Netzwerkbetrieb, der eine maximale Datenübertragungsrate von 11 MBit/s sowie eine Betriebsfrequenz von 2,4 GHz festlegt. 802.11g: Ein Standard für den Wireless-Netzwerkbetrieb, der eine maximale Datenübertragungsrate von 54 Mbit/s und eine Betriebsfrequenz von 2,4 GHz sowie die Abwärtskompatibilität mit Geräten festlegt, die dem Standard 802.11b entsprechen. - Seite 200 Wireless-G Access Point Byte: Eine Dateneinheit, die üblicherweise aus acht Bit besteht. CSMA/CA (Carrier Sense Multiple Access/Collision Avoidance): Eine Datenübertragungsmethode, die verwendet wird, um Datenkollisionen zu verhindern. CTS (Clear To Send): Ein von einem Wireless-Gerät gesendetes Signal, das angibt, dass das Gerät für Daten empfangsbereit ist.
- Seite 201 Wireless-G Access Point EAP-PEAP (Extensible Authentication Protocol-Protected Extensible Authentication Protocol): Eine gegenseitige Authentifizierungsmethode, bei der eine Kombination von digitalen Zertifikaten sowie ein anderes System, z. B. Passwörter, verwendet werden. EAP-TLS (Extensible Authentication Protocol-Transport Layer Security): Eine gegenseitige Authentifizierungsmethode, bei der digitale Zertifikate verwendet werden. Ethernet: Ein Netzwerkprotokoll, mit dem festgelegt wird, wie Daten auf gängigen Übertragungsmedien gespeichert und von dort abgerufen werden.
- Seite 202 Wireless-G Access Point IPCONFIG: Ein Dienstprogramm für Windows 2000 und Windows XP, das die IP-Adresse von bestimmten Geräten im Netzwerk anzeigt. IPSec (Internet Protocol Security): Ein VPN-Protokoll, das für den sicheren Austausch von Paketen auf der IP-Ebene verwendet wird. ISM-Band: Bei Übertragungen im Wireless-Netzwerkbetrieb verwendete Funkbandbreite. ISP (Internet Service Provider): Internetdienstanbieter;...
- Seite 203 Informationen während der Übertragung verloren gehen. Paket: Eine Dateneinheit, die über Netzwerke gesendet wird. Passphrase: Wird wie ein Passwort verwendet und erleichtert die WEP-Verschlüsselung, indem für Linksys Produkte automatisch WEP-Verschlüsselungsschlüssel erstellt werden. PEAP (Protected Extensible Authentication Protocol): Eine gegenseitige Authentifzierungsmethode, bei der eine Kombination aus digitalen Zertifikaten und einem anderen System, z.
- Seite 204 Wireless-G Access Point RTS (Request To Send): Eine Methode zur Koordination von großen Datenpaketen in einem Netzwerk mithilfe der RTS-Schwelle. Server: Ein beliebiger Computer, der innerhalb eines Netzwerks dafür sorgt, dass Benutzer auf Dateien zugreifen, kommunizieren sowie Druckvorgänge und andere Aktionen ausführen können. SMTP (Simple Mail Transfer Protocol): Das standardmäßige E-Mail-Protokoll im Internet.
- Seite 205 Wireless-G Access Point TFTP (Trivial File Transfer Protocol): Eine Version des TCP/IP-FTP-Protokolls, das über keinerlei Verzeichnis- oder Passwortfunktionalitäten verfügt. TKIP (Temporal Key Integrity Protocol): Eine Wireless-Verschlüsselungsmethode, bei der für jedes übertragene Datenpaket dynamische Verschlüsselungsschlüssel zur Verfügung stehen. Topologie: Die physische Anordnung eines Netzwerks. TX-Rate: Übertragungsrate.
-
Seite 206: Anhang F: Spezifikationen
(Verbindung), SecureEasySetup Übertragungsleistung 802.11g: i. d. R. 13,5 +/- 2 dBm bei normaler Temperatur 802.11b: i. d. R. 6,5 +/- 2 dBm bei normaler Temperatur Sicherheitsmerkmale WPA, WPA2, Linksys Wireless Guard (nur USA und Kanada), WEP-Verschlüsselung, MAC-Filtering, SSID-Broadcast aktiviert/deaktiviert WEP-Schlüssel/Bits: 64-/128-Bit... - Seite 207 Wireless-G Access Point Luftfeuchtigkeit bei Betrieb 10 % bis 85 %, nicht kondensierend Luftfeuchtigkeit bei Lagerung 5 % bis 90 %, nicht kondensierend Anhang F: Spezifikationen...
-
Seite 208: Anhang G: Garantieinformationen
DEN KAUFBELEG BEARBEITET WERDEN. Der Versand fehlerhafter Produkte an Linksys erfolgt auf Ihre Verantwortung. Linksys kommt nur für Versandkosten von Linksys zu Ihrem Standort per UPS auf dem Landweg auf. Bei Kunden außerhalb der USA und Kanadas sind sämtliche Versand- und Abfertigungskosten durch die Kunden selbst zu tragen. - Seite 209 Die vorliegende Gewährleistung ist nur in dem Land gültig bzw. kann nur in dem Land verarbeitet werden, in dem das Produkt erworben wurde. Richten Sie alle Anfragen direkt an: Linksys, P.O. Box 18558, Irvine, CA 92623, USA Anhang G: Garantieinformationen...
-
Seite 210: Anhang H: Zulassungsinformationen
Wireless-G Access Point Anhang H: Zulassungsinformationen FCC-Bestimmungen Dieses Gerät wurde geprüft und entspricht den Bestimmungen für ein digitales Gerät der Klasse B gemäß Teil 15 der FCC-Bestimmungen. Die Grenzwerte wurden so festgelegt, dass ein angemessener Schutz gegen Störungen in einer Wohngegend gewährleistet ist. - Seite 211 Wireless-G Access Point Informationen zur Einhaltung gesetzlicher Vorschriften bei 2,4-GHz-Wireless-Produkten für den Bereich der EU und anderer Länder gemäß der EU-Richtlinie 1999/5/EG (R&TTE-Richtlinie) Konformitätserklärung zur EU-Richtlinie 1995/5/EG (R&TTE-Richtlinie) Anhang H: Zulassungsinformationen...
- Seite 212 • PDF-Datei auf der Produkt-CD. • Druckversion im Lieferumfang des Produkts. • PDF-Datei auf der Produkt-Webseite. Rufen Sie www.linksys.com/international auf, und wählen Sie das für Sie zutreffende Land bzw. die entsprechende Region aus. Wählen Sie dann Ihr Produkt aus. Wenn Sie weitere technische Dokumente benötigen, finden Sie entsprechende Hinweise im Abschnitt „Technische Dokumente unter www.linksys.com/international“...
- Seite 213 Wireless-G Access Point CE-Kennzeichnung Die Wireless-B- und Wireless-G-Produkte von Linksys sind mit der folgenden CE-Kennzeichnung, der Nummer der Überwachungs- und Zertifizierungsstelle (sofern zutreffend) und der Kennung der Klasse 2 versehen. oder oder Überprüfen Sie das CE-Etikett auf dem Produkt, um die Überwachungs- und Zertifizierungsstelle zu ermitteln, die in die Bewertung einbezogen wurde.
- Seite 214 Umständen voraus, dass Sie die Antenne(n) vom Produkt trennen und mithilfe eines Verlängerungskabels an einem anderen Ort als das Gerät installieren. Für diese Anwendungen bietet Linksys ein R-SMA-Verlängerungskabel (AC9SMA) und ein R-TNC-Verlängerungskabel (AC9TNC). Beide Kabel sind neun Meter lang. Der Verlust durch das Kabel (die Abschwächung) liegt bei 5 dB.
- Seite 215 HINWEIS: Die Einstellungen für die Ausgangsleistung sind u. U. nicht für alle Wireless-Produkte verfügbar. Weitere Informationen finden Sie in der Dokumentation auf der Produkt-CD oder unter http://www.linksys.com/international. Wireless-Adapter Bei Wireless-Adaptern ist die Ausgangsleistung standardmäßig auf 100 % eingestellt. Die Ausgangsleistung der einzelnen Adapter beträgt maximal 20 dBm (100 mW), liegt aber gewöhnlich bei 18 dBm (64 mW) oder darunter.
- Seite 216 Technische Dokumente unter www.linksys.com/international Führen Sie die folgenden Schritte aus, um auf die gewünschten technischen Dokumente zuzugreifen: 1. Navigieren Sie mit dem Browser zur Website http://www.linksys.com/international. 2. Klicken Sie auf Ihre Region. 3. Klicken Sie auf den Namen Ihres Landes.
-
Seite 217: Anhang I: Kontaktinformationen
Möchten Sie sich persönlich an Linksys wenden? Informationen zu den aktuellen Produkten und Aktualisierungen für bereits installierte Produkte finden Sie online unter: http://www.linksys.com/international Wenn Sie im Zusammenhang mit Linksys Produkten auf Probleme stoßen, können Sie uns unter folgenden Adressen eine E-Mail senden: In Europa... - Seite 218 ® A Division of Cisco Systems, Inc. Sans fil - 802.11g Guide de l’utilisateur Point d’accès SANS FIL WAP54G (FR) Modèle...
- Seite 219 Point d’accès sans fil - G Copyright et marques commerciales Les spécifications peuvent être modifiées sans préavis. Linksys est une marque commerciale, déposée ou non, de Cisco Systems, Inc. et/ou ses filiales aux Etats-Unis et dans certains autres pays. Copyright © 2005 Cisco Systems, Inc.
- Seite 220 Point d’accès sans fil - G Table des matières Chapitre 1 : Introduction Bienvenue Contenu de ce guide de l’utilisateur Chapitre 2 : Planification de votre réseau sans fil Topologie réseau Itinérance Configuration du réseau Chapitre 3 : Présentation du point d’accès sans fil - G Panneau avant Le panneau arrière Chapitre 4 : Connexion du point d’accès sans fil - G...
- Seite 221 Point d’accès sans fil - G Onglet Status - Local Network (Etat - Réseau local) Onglet Status - Wireless Network (Etat - Réseau sans fil) Annexe A : Dépannage Questions fréquemment posées Annexe B : Sécurité sans fil Mesures de sécurité Menaces liées à...
-
Seite 222: Liste Des Figures
Point d’accès sans fil - G Liste des figures Figure 3-1 : Panneau avant Figure 3-2 : Panneau arrière Figure 4-1 : Connexion du câble réseau Ethernet Figure 4-2 : Connexion de l’adaptateur secteur Figure 5-1 : Ecran Welcome (Bienvenue) Figure 5-2 : Ecran de connexion du câble réseau au routeur ou au commutateur Figure 5-3 : Ecran de connexion du câble réseau au point d’accès... - Seite 223 Point d’accès sans fil - G Figure 5-18 : Ecran Wireless Settings (Paramètres sans fil) Figure 5-19 : Ecran Security Settings (Paramètres de sécurité) Figure 5-20 : Ecran WEP Settings (Paramètres WEP) Figure 5-21 : Paramètres WPA Personal Figure 5-22 : Ecran WPA2 Personal Settings (Paramètres WPA2 Personal) Figure 5-23 : Ecran WPA2 Mixed Mode Settings (Paramètres Mode mixte WPA2) Figure 5-24 : Ecran Confirm New Settings...
- Seite 224 Point d’accès sans fil - G Figure 6-16 : Ecran Wireless Security - WPA-Enterprise (Sécurité sans fil - WPA-Enterprise) Figure 6-17 : Ecran Wireless Security - RADIUS (Sécurité sans fil - RADIUS) Figure 6-18 : Ecran Wireless Security - WEP (Sécurité sans fil - WEP) Figure 6-19 : Ecran Wireless - Wireless MAC Filter (Sans fil - Filtre MAC sans fil) Figure 6-20 : Ecran Wireless - Advanced Wireless Settings...
-
Seite 225: Chapitre 1 : Introduction
Point d’accès sans fil - G Chapitre 1 : Introduction Bienvenue point d’accès : périphérique permettant aux ordinateurs et Merci d’avoir choisi le point d’accès sans fil G. Il va vous permettre d’exploiter un réseau sans fil comme jamais aux autres périphériques sans fil de communiquer avec un vous ne l’avez fait. -
Seite 226: Contenu De Ce Guide De L'utilisateur
Point d’accès sans fil - G Contenu de ce guide de l’utilisateur Ce guide de l’utilisateur présente les étapes inhérentes à l’installation et à l’utilisation du point d’accès sans fil G. • Chapitre 1 : Introduction Ce chapitre décrit les applications du point d’accès sans fil G et le présent Guide de l’utilisateur. •... - Seite 227 • Annexe H : Réglementation Cette annexe contient des informations sur la réglementation du point d’accès. • Annexe I : Contacts Cette annexe fournit des informations sur diverses ressources Linksys que vous pouvez contacter, notamment le support technique. Chapitre 1 : Introduction...
-
Seite 228: Chapitre 2 : Planification De Votre Réseau Sans Fil
: groupe de périphériques sans fil communiquant directement entre eux (point à point) sans l’intervention d’un Les adaptateurs sans fil de Linksys permettent également aux utilisateurs d’accéder à un réseau câblé lors de point d’accès. l’utilisation d’un point d’accès, tel que le point d’accès sans fil G ou un routeur sans fil. Un réseau sans fil intégré... -
Seite 229: Configuration Du Réseau
Pour relier votre réseau câblé à votre réseau sans fil, connectez le port réseau Ethernet du point d’accès à n’importe quel commutateur ou routeur. Fortes de tous ces éléments et des nombreux autres produits Linksys, vos possibilités en matière de développement réseau sont illimitées. Pour plus d’informations sur les produits sans fil, accédez au site Web de Linksys www.linksys.com/international. -
Seite 230: Chapitre 3 : Présentation Du Point D'accès Sans Fil - G
Point d’accès sans fil - G Chapitre 3 : Présentation du point d’accès sans fil - G Panneau avant Les voyants du point d’accès, qui donnent des informations relatives à l’activité et à l’état, se trouvent sur le panneau avant. Figure 3-1 : Panneau avant (Logo Cisco) Orange/Blanc. -
Seite 231: Le Panneau Arrière
Point d’accès sans fil - G Le panneau arrière Les ports alimentation et réseau Ethernet du point d’accès ainsi que le bouton Reset (Réinitialisation) sont situés port : point de connexion sur un ordinateur sur le panneau arrière. ou un périphérique réseau utilisé pour le branchement à... -
Seite 232: Chapitre 4 : Connexion Du Point D'accès Sans Fil - G
Point d’accès sans fil - G Chapitre 4 : Connexion du point d’accès sans fil - G Présentation 1. Ce chapitre explique comment connecter le point d’accès pour le configurer. Connexions pour configuration 2. Connectez votre câble réseau Ethernet à votre commutateur ou routeur réseau. Connectez ensuite l’autre extrémité... -
Seite 233: Chapitre 5 : Configuration Du Point D'accès Sans Fil - G
Setup (Configuration) si c’est la première fois que vous exécutez l’Assistant de configuration. Vous avez d’autres possibilités : Install Linksys Wireless Guard (Installation de Linksys Wireless Guard) - Linksys Wireless Guard est un service contractuel qui sécurise votre réseau. Il est uniquement disponible aux Etats-Unis et au Canada. -
Seite 234: Figure 5-2 : Ecran De Connexion Du Câble Réseau Au Routeur Ou Au
Point d’accès sans fil - G 3. Idéalement, vous devriez configurer le point d’accès à l’aide d’un ordinateur de votre réseau câblé. Connectez un câble réseau à votre commutateur ou routeur réseau. Puis cliquez sur le bouton Next (Suivant). Figure 5-2 : Ecran de connexion du câble réseau au routeur ou au commutateur 4. -
Seite 235: Figure 5-4 : Ecran Power On The Access Point (Mise Sous Tension Du Point D'accès)
Point d’accès sans fil - G 5. Branchez l’adaptateur secteur sur le point d’accès et sur une prise électrique. Puis cliquez sur le bouton Next (Suivant). Figure 5-4 : Ecran Power on the Access Point (Mise sous tension du point d’accès) 6. -
Seite 236: Figure 5-6 : Ecran Select The Access Point (Sélection Du Point D'accès)
Point d’accès sans fil - G 7. L’Assistant de configuration recherche le point d’accès sur votre réseau, puis affiche les données relatives à l’état du point d’accès sélectionné. Si votre réseau comporte un seul point d’accès, la liste ne contiendra qu’une occurrence. -
Seite 237: Figure 5-8 : Ecran Basic Settings (Paramètres De Base)
Point d’accès sans fil - G 9. L’écran Basic Settings (Paramètres de base) s’affiche ensuite. Saisissez un nom descriptif dans le champ Device Name (Nom de périphérique). Créez un mot de passe pour contrôler l’accès à l’utilitaire Web et à l’Assistant de configuration du point d’accès. -
Seite 238: Figure 5-10 : Ecran Secureeasysetup
Point d’accès sans fil - G Utilisation de la fonctionnalité SecureEasySetup du point d’accès Lisez ces instructions avant d’appuyer sur le moindre bouton SecureEasySetup. Vous devez localiser les boutons SecureEasySetup de vos périphériques avant d’utiliser la fonctionnalité SecureEasySetup du point d’accès. REMARQUE : SecureEasySetup utilise le cryptage WPA-Personal. -
Seite 239: Figure 5-14 : Ecran Configure Wireless Settings (Configuration Des Paramètres Sans Fil)
Point d’accès sans fil - G 2. Maintenez enfoncé le logo Cisco du point d’accès pendant une ou deux secondes, puis relâchez-le. REMARQUE : Si vous appuyez accidentellement sur le logo Cisco pendant cinq à huit secondes, les paramètres SSID et WPA-Personal du point d’accès seront modifiés et vous devrez reconfigurer tous vos périphériques sans fil. -
Seite 240: Figure 5-16 : Ecran Congratulations (Félicitations)
Point d’accès sans fil - G 6. L’écran Congratulations (Félicitations) apparaît. Cliquez sur le bouton Online Registration (Enregistrement en ligne) pour enregistrer le point d’accès ou cliquez sur le bouton Exit (Quitter) pour quitter l’Assistant de configuration. Félicitations ! L’installation du point d’accès sans fil G est terminée. Si vous devez configurer un périphérique non-SecureEasySetup, passez à... -
Seite 241: Figure 5-17 : Ecran Configure Wireless Settings (Configuration Des Paramètres Sans Fil)
SSID : saisissez le nom de votre réseau sans fil. Il doit être identique pour tous les points du réseau. Le paramètre par défaut est linksys (en minuscules). Channel (Canal) : sélectionnez le canal de votre réseau sans fil. Tous vos périphériques sans fil utiliseront ce canal pour communiquer. -
Seite 242: Figure 5-19 : Ecran Security Settings (Paramètres De Sécurité)
Linksys. (Si vous avez des produits sans fil non-Linksys, saisissez la clé WEP manuellement sur ces sur un réseau sans fil pour une sécurité accrue. -
Seite 243: Figure 5-21 : Paramètres Wpa Personal
Point d’accès sans fil - G WEP Key (Clé WEP) : la clé WEP saisie doit correspondre à celle de votre réseau sans fil. Pour le cryptage cryptage : codage de données transmises sur un réseau. 128 bits, saisissez exactement 26 caractères hexadécimaux. Les caractères hexadécimaux valides sont compris entre «... -
Seite 244: Figure 5-23 : Ecran Wpa2 Mixed Mode Settings (Paramètres Mode Mixte Wpa2)
Ce service contractuel vous offre la sécurité WPA Enterprise sans que vous deviez concevoir votre propre serveur RADIUS ; il est uniquement disponible aux Etats-Unis et au Canada. REMARQUE : Le service Linksys Wireless Guard est uniquement disponible aux Etats-Unis et au Canada. -
Seite 245: Figure 5-24 : Ecran Confirm New Settings (Confirmation Des Nouveaux Paramètres)
Point d’accès sans fil - G 5. L’Assistant de configuration vous invite à vérifier vos paramètres avant de les enregistrer. Cliquez sur le bouton Yes (Oui) si vous êtes satisfait de vos paramètres ou cliquez sur le bouton No (Non) si vous ne souhaitez pas les enregistrer. -
Seite 246: Chapitre 6 : Configuration Du Point D'accès Sans Fil - G
Point d’accès sans fil - G Chapitre 6 : Configuration du point d’accès sans fil - G Présentation AVEZ-VOUS : activé TCP/IP sur vos ordinateurs ? Les ordinateurs utilisent ce protocole pour Le point d’accès a été conçu pour fonctionner correctement dès son déballage, avec les paramètres par défaut communiquer sur le réseau. - Seite 247 Point d’accès sans fil - G Sans fil Utilisez les onglets Wireless (Sans fil) pour saisir de nombreux paramètres sans fil du point d’accès. • Basic Wireless Settings (Paramètres sans fil de base). Saisissez le mode réseau, le SSID et d’autres paramètres de base dans cet écran.
-
Seite 248: Accès À L'utilitaire
Point d’accès sans fil - G Accès à l’utilitaire Pour accéder à l’utilitaire Web du point d’accès, lancez Internet Explorer ou Netscape Navigator. Dans le champ Address (Adresse), saisissez l’adresse IP par défaut du point d’accès 192.168.1.245 ou l’adresse IP saisie durant l’exécution de l’Assistant de configuration. -
Seite 249: Figure 6-3 : Ecran Setup - Static Ip (Configuration - Ip Statique)
Point d’accès sans fil - G Si vous souhaitez attribuer une adresse IP fixe ou statique au point d’accès, sélectionnez Static IP (IP statique). Renseignez ensuite les champs suivants : IP Address (Adresse IP). L’adresse IP doit être unique sur le réseau. Nous vous suggérons d’utiliser l’adresse IP par défaut 192.168.1.245. -
Seite 250: Onglet Setup - Ap Mode (Configuration - Mode Du Point D'accès)
IMPORTANT : Pour les modes AP Client (Client PA) et Wireless Bridge (Pont sans fil), le point d’accès distant doit être une deuxième point d’accès sans fil G Linksys (modèle : WAP54G). Pour le mode Wireless Repeater (Répéteur sans fil), le pont sans fil disant doit être un deuxième point d’accès sans fil G Linksys (modèle : WAP54G) ou routeur sans fil G (modèle : WRT54G). -
Seite 251: Figure 6-6 : Schéma De Répéteur Sans Fil
étendue et retransmettre son signal. Cette fonctionnalité s’applique uniquement avec le routeur sans fil G Linksys (modèle : WRT54G) ou un autre point d’accès sans fil G (modèle : WAP54G). Figure 6-6 : Schéma de répéteur sans fil Pour configurer un environnement de répéteur sans fil, sélectionnez Wireless Repeater (Répéteur sans fil) et... -
Seite 252: Figure 6-7 : Schéma De Pont Sans Fil
(utilisez des points d’accès supplémentaires pour connecter davantage de réseaux est accessible UNIQUEMENT par un autre point câblés). Cette fonctionnalité s’applique uniquement avec un autre point d’accès sans fil G (modèle : WAP54G). d’accès en mode Pont sans fil. Pour que les autres périphériques sans fil accèdent au point d’accès,... -
Seite 253: Onglet Wireless - Basic Wireless Settings (Sans Fil - Paramètres Sans Fil De Base)
Point d’accès sans fil - G Onglet Wireless - Basic Wireless Settings (Sans fil - Paramètres sans fil de base) Modifiez les paramètres de réseau sans fil dans cet écran. Paramètres sans fil de base Configurez le point d’accès à l’aide des paramètres disponibles. Mode. -
Seite 254: Figure 6-10 : Attente Jusqu'à L'exécution De Secureeasysetup
Point d’accès sans fil - G Vous êtes invité à appuyer sur le bouton SecureEasySetup (matériel ou logiciel) de votre client sans fil (ordinateur ou autre périphérique réseau) en-déans les deux minutes pour compléter le processus SecureEasySetup. Cliquez sur le OK pour continuer. Un nouvel écran s’affiche jusqu’à... -
Seite 255: Onglet Wireless - Wireless Security (Sans Fil - Sécurité Sans Fil)
Point d’accès sans fil - G Onglet Wireless - Wireless Security (Sans fil - Sécurité sans fil) Modifiez les paramètres de sécurité sans fil du point d’accès dans cet écran. Sécurité sans fil Security Mode (Mode Sécurité). Sélectionnez la méthode de sécurité que vous souhaitez utiliser, WPA- Personal, WPA2-Personal, WPA2-Mixed, WPA-Enterprise, RADIUS ou WEP. -
Seite 256: Figure 6-15 : Ecran Wireless Security - Wpa2-Mixed (Sécurité Sans Fil - Wpa2-Mixed)
Point d’accès sans fil - G WPA2-Mixed Encryption (Cryptage). Les méthodes TKIP + AES sont automatiquement sélectionnées et peuvent donc être utilisées toutes les deux. Passphrase (Phrase mot de passe). Saisissez une phrase mot de passe (également appelée clé partagée WPA) comportant entre 8 et 32 caractères. -
Seite 257: Figure 6-17 : Ecran Wireless Security - Radius (Sécurité Sans Fil - Radius)
Point d’accès sans fil - G RADIUS Cette option associe le système WEP à l’utilisation conjointe d’un serveur RADIUS (Ne doit être utilisée que lorsqu’un serveur RADIUS est connecté au point d’accès). RADIUS Server (Serveur RADIUS). Saisissez l’adresse IP du serveur RADIUS. RADIUS Port (Port RADIUS). -
Seite 258: Onglet Wireless - Wireless Mac Filter (Sans Fil - Filtre Mac Sans Fil)
Point d’accès sans fil - G Onglet Wireless - Wireless MAC Filter (Sans fil - Filtre MAC sans fil) Cet écran vous permet de d’autoriser ou d’interdire l’accès sans fil pour les ordinateurs dotés d’adresses MAC spécifiques. Filtre MAC sans fil Access Restriction (Restriction d’accès) Si vous souhaitez contrôler l’accès à... -
Seite 259: Onglet Wireless - Advanced Wireless Settings (Sans Fil - Paramètres Sans Fil Avancés)
Point d’accès sans fil - G Onglet Wireless - Advanced Wireless Settings (Sans fil - Paramètres sans fil avancés) Cet écran vous permet de configurer les paramètres avancés du point d’accès. Dans la plupart des cas, il n’est pas nécessaire de modifier ces paramètres. Advanced Wireless (Paramètres sans fil avancés) Vous pouvez modifier les paramètres de transmission de données et de puissance de sortie du point d’accès. - Seite 260 Point d’accès sans fil - G que les produits sans fil G ne rencontrent d’importants problèmes en essayant de transmettre au point d’accès dans un environnement au trafil 802.11b dense. Frame Burst Mode (Mode Rafale de trames). Selon le fabricant de vos produits sans fil, vous pouvez réduire la déperdition et optimiser les performances de votre réseau en choisissant d’activer cette option.
-
Seite 261: Onglet Administration - Management (Administration - Gestion)
Point d’accès sans fil - G Onglet Administration - Management (Administration - Gestion) Dans cet écran, vous pouvez configurer le mot de passe ainsi que sauvegarder ou restaurer le fichier de configuration du point d’accès. Management (Gestion) Il est recommandé de modifier le mot de passe qui contrôle l’accès à l’utilitaire Web du point d’accès. AP’s Password (Mot de passe PA) Password (Mot de passe). -
Seite 262: Onglet Administration - Snmp
Point d’accès sans fil - G Onglet Administration - SNMP SNMP est un protocole très répandu de contrôle et de gestion réseau. Il offre aux administrateurs de réseau la possibilité de contrôler l’état du point d’accès et de recevoir des notifications lorsque le moindre problème se produit sur le point d’accès. -
Seite 263: Onglet Administration - Log (Administration - Fichier Journal)
à cet effet, saisissez l’adresse IP de cet ordinateur. Pour afficher les journaux permanents, vous devez utiliser le logiciel Logviewer, téléchargeable gratuitement depuis le site www.linksys.com/international. View Log (Afficher journal). Pour afficher un fichier journal temporaire contenant les dernières activités du point d’accès, cliquez sur ce bouton. -
Seite 264: Onglet Administration - Factory Defaults (Administration - Paramètres D'usine)
à niveau le micrologiciel, vous devrez réintroduire tous vos paramètres de configuration. Pour mettre à niveau le micrologiciel du point d’accès : 1. Téléchargez le fichier de mise à niveau du micrologiciel depuis le site Web de Linksys, www.linksys.com/international. -
Seite 265: Onglet Status - Local Network (Etat - Réseau Local)
Point d’accès sans fil - G Onglet Status - Local Network (Etat - Réseau local) L’écran Local Network (Réseau local) affiche les informations d’état actuelles du point d’accès pour le réseau local. AP’s Information (Informations du PA) Firmware Version (Version de micrologiciel). Il s’agit de la version actuelle du micrologiciel du point d’accès. Local Network (Réseau local) MAC Address (Adresse MAC). -
Seite 266: Figure 6-28 : Ecran Status - Wireless Network (Etat - Réseau Sans Fil)
Point d’accès sans fil - G Onglet Status - Wireless Network (Etat - Réseau sans fil) L’écran Wireless Network (Réseau sans fil) affiche les informations d’état actuelles du point d’accès pour son réseau sans fil. Wireless Network (Réseau sans fil) MAC Address (Adresse MAC). -
Seite 267: Annexe A : Dépannage
Cette annexe apporte la solution aux problèmes qui peuvent pendant l’installation et l’utilisation du point d’accès sans fil G. Lisez la description ci-dessous pour résoudre vos problèmes. Si vous ne trouvez pas la réponse appropriée dans cette section, visitez le site web de Linksys à l’adresse suivante : www.linksys.com/international. - Seite 268 Point d’accès sans fil - G Quelles sont les fonctionnalités IEEE 802.11g prises en charge ? Le produit prend en charge les fonctionnalités IEEE 802.11g suivantes : • Protocole CSMA/CA plus Acknowledge • Protocole OFDM • Itinérance multicanal • Sélection de débit automatique •...
- Seite 269 Les produits sans fil Linksys prennent-ils en charge le partage de fichiers et d’imprimante ? Les produits sans fil Linksys jouent le même rôle que les produits LAN. Par conséquent, les produits sans fil Linksys sont compatibles avec Netware, Windows NT/2000 ou d’autres systèmes d’exploitation réseau pour la prise en charge du partage de fichiers et d’imprimante.
- Seite 270 Point d’accès sans fil - G Qu’est-ce que WEP ? WEP (Wired Equivalent Privacy) est un système de protection des données fondé sur un algorithme de clé partagée 40 bits, conforme à la norme IEEE 802.11. Qu’est-ce qu’une adresse MAC ? L’adresse MAC (Media Access Control) est un numéro unique attribué...
-
Seite 271: Annexe B : Sécurité Sans Fil
Annexe B : Sécurité sans fil Linksys souhaite rendre la mise en réseau sans fil aussi fiable et facile que possible. La génération actuelle de produits Linksys intègre plusieurs fonctions de sécurité réseau que vous devez cependant mettre en œuvre vous- même. - Seite 272 Les périphériques réseau sans fil possèdent un nom SSID par défaut, configuré en usine (Le nom SSID par défaut de Linksys est « linksys »). Les pirates informatiques connaissent ces noms par défaut et peuvent vérifier s’ils sont utilisés par votre réseau. Modifiez votre nom SSID, afin qu’il soit unique, tout en évitant d’en choisir un en relation avec votre société...
- Seite 273 Ces conseils de sécurité vous permettent de conserver votre tranquillité d’esprit tout en profitant de la technologie la plus adaptée et la plus souple que Linksys vous propose. Annexe B : Sécurité sans fil...
-
Seite 274: Annexe C : Mise À Niveau Du Micrologiciel
Vous pouvez mettre à niveau le micrologiciel du point d’accès via l’onglet Administration - Firmware Upgrade (Administration - Mise à niveau du micrologiciel) de l’utilitaire Web. Pour cela, procédez comme suit : 1. Téléchargez le fichier de mise à niveau du micrologiciel à partir du site Web de Linksys, www.linksys.com/international. -
Seite 275: Annexe D : Aide De Windows
Point d’accès sans fil - G Annexe D : Aide de Windows Presque tous les produits sans fil exigent l’utilisation de Microsoft Windows. Windows est le système d’exploitation le plus répandu à l’échelle internationale. Il est accompagné d’un grand nombre de fonctionnalités qui facilitent toutes les tâches d’exploitation en réseau. -
Seite 276: Annexe E : Glossaire
Point d’accès sans fil - G Annexe E : Glossaire 802.11b : norme de mise en réseau sans fil qui spécifie un débit de transfert de données maximal de 11 Mbit/s et une fréquence de 2,4 GHz. 802.11g : norme de mise en réseau sans fil qui spécifie un débit de transfert de données maximal de 54 Mbit/s, une fréquence de 2,4 GHz et une rétro-compatibilité... - Seite 277 Point d’accès sans fil - G CTS (Clear To Send) : signal émis par un périphérique sans fil pour indiquer qu’il est prêt à recevoir des données. DDNS (Dynamic Domain Name System) : permet l’hébergement d’un site Web, d’un serveur FTP ou d’un serveur e-mail avec un nom de domaine fixe (par exemple www.xyz.com) et une adresse IP dynamique.
- Seite 278 Point d’accès sans fil - G Finger : programme qui vous fournit le nom associé à une adresse e-mail. Fragmentation : acte de scinder un paquet en unités plus petites lors d’une transmission sur un support réseau inapte à prendre en charge la taille d’origine du paquet. FTP (File Transfer Protocol) : protocole utilisé...
- Seite 279 Point d’accès sans fil - G Mbit/s (Mégabits par seconde) : un million de bits par seconde ; unité de mesure pour la transmission de données. Mémoire tampon : zone de mémoire partagée ou attribuée, qui est utilisée pour prendre en charge et coordonner différentes activités informatiques et de mise en réseau afin que l’une ne soit pas bloquée par l’autre.
- Seite 280 Phrase mot de passe : utilisée comme un mot de passe, une phrase mot de passe simplifie le processus de cryptage WEP en générant automatiquement les clés de cryptage WEP des produits Linksys. Ping (Packet INternet Groper) : utilitaire Internet utilisé pour déterminer si une adresse IP particulière est connectée.
- Seite 281 Point d’accès sans fil - G RTS (Request To Send) : méthode de mise en réseau consistant à coordonner des paquets importants par le biais du paramètre RTS Threshold (Seuil RTS). Serveur : tout ordinateur dont le rôle sur un réseau est de fournir aux utilisateurs un accès à des fichiers, des imprimantes, des outils de communication et d’autres services.
- Seite 282 Point d’accès sans fil - G WAN (Wide Area Network) : Internet. WEP (Wired Equivalent Privacy) : méthode permettant de crypter des données transmises sur un réseau sans fil pour une sécurité accrue. WINIPCFG : utilitaire Windows 98 et Me qui affiche l’adresse IP d’un périphérique réseau particulier. WLAN (Wireless Local Area Network) : groupe d’ordinateurs et de périphériques connexes qui communiquent entre eux sans fil.
-
Seite 283: Annexe F : Spécifications
802.11g : Typ. 13,5 +/- 2dBm à température normale 802.11b : Typ : 16,5 +/- 2dBm à température normale Fonctionnalités de sécurité WPA, WPA2, Linksys Wireless Guard (uniquement aux Etats-Unis et au Canada), Cryptage WEP, filtrage MAC, activer/désactiver diffusion SSID Bits clé... - Seite 284 Point d’accès sans fil - G Humidité en fonctionnement 10 à 85 %, non condensée Humidité de stockage 5 à 90 %, non condensée Annexe F : Spécifications...
-
Seite 285: Annexe G : Informations De Garantie
Cette garantie ne s’applique pas si le produit (a) a été modifié, sauf si cette modification est le fait de Linksys, (b) n’a pas été installé, exploité, réparé ou entretenu conformément aux instructions fournies pas Linksys ou (c) a été altéré suite à une charge physique ou électrique anormale, un usage inadapté... -
Seite 286: Annexe H : Réglementation
Point d’accès sans fil - G Annexe H : Réglementation Déclaration FCC Cet équipement a été testé et déclaré conforme aux normes des équipements numériques de catégorie B, conformément à la section 15 des règlements FCC. L’objectif de ces normes est de fournir une protection raisonnable contre toute interférence nuisible dans une installation résidentielle. - Seite 287 Point d’accès sans fil - G Informations de conformité pour les produits sans fil 2,4 GHz applicable dans l’Union européenne et d’autres pays suivant la directive européenne 1999/5/CE (R&TTE) Déclaration de conformité selon la directive européenne 1995/5/CE (R&TTE) Annexe H : Réglementation...
- Seite 288 • Le CD du produit comporte un fichier pdf. • Une copie imprimée est fournie avec le produit. • Un fichier PDF est disponible sur la page Web du produit. Visitez www.linksys.com/international et sélectionnez votre pays ou région. Sélectionnez ensuite votre produit.
- Seite 289 Point d’accès sans fil - G Marquage CE Pour les produits Linksys sans fil B et G, le marquage CE, le numéro de l’organisme notifié (le cas échéant) et l’identifiant de classe 2 suivants sont ajoutés à l’équipement. Vérifiez l’étiquette CE sur le produit pour déterminer quel d’organisme notifié a été pris impliqué dans l’appréciation.
- Seite 290 R-SMA (AC9SMA) et R-TNC (AC9TNC). Ces câbles mesurent tous les deux 9 mètres de long et présentent une atténuation de 5 dB. Pour la compenser, Linksys propose également des antennes à gain plus élevé, la HGA7S (avec le connecteur R-SMA) et la HGA7T (avec le connecteur R-TNC). Ces antennes présentent un gain de 7 dBi et ne peuvent être utilisées qu’avec le câble R-SMA ou R-TNC.
- Seite 291 REMARQUE : Le paramètre de sortie n’est peut être pas disponible sur tous les produits sans fil. Pour plus d’informations, reportez-vous à la documentation fournie sur le CD du produit ou visitez http://www.linksys.com/international. Adaptateurs sans fil La sortie des adaptateurs sans fil est définie à 100 % par défaut. La sortie maximale de chaque adaptateur ne dépasse pas 20 dBm (100 mW).
- Seite 292 Point d’accès sans fil - G Documents techniques disponibles sur le site www.linksys.com/international Pour accéder aux documents techniques, procédez comme suit : 1. Ouvrez la page http://www.linksys.com/international. 2. Cliquez sur votre région de résidence. 3. Cliquez sur le nom de votre pays de résidence.
-
Seite 293: Annexe I : Contacts
Consultez notre site Web pour obtenir des informations sur les derniers produits et les mises à jour disponibles pour vos produits existants à l’adresse http://www.linksys.com/international. Si vous rencontrez des problèmes avec un produit Linksys, adressez-nous un e-mail et envoyez-le au service Support technique du pays où vous résidez : Europe...