Optoma DS330 Handbuch
Inhaltsverzeichnis
Verfügbare Sprachen
Verfügbare Sprachen
Quicklinks
CONTENTS
Usage Notice .....................................................................................2
Safety Instructions ................................................................................................................. 2
Introduction .......................................................................................5
Projector Features ................................................................................................................. 5
Package Contents ................................................................................................................. 6
Projector Overview ................................................................................................................ 7
Using the Product .............................................................................9
Control Panel ......................................................................................................................... 9
Connection Ports ................................................................................................................. 10
Remote Control ................................................................................................................... 12
Installing the Batteries ......................................................................................................... 15
Remote Control Operation ................................................................................................... 16
Connection ......................................................................................17
Connecting a computer or monitor ...................................................................................... 18
Connecting Video source devices ....................................................................................... 20
Operation .........................................................................................23
Powering On/Off the Projector ............................................................................................. 23
Adjusting the Projector Height ............................................................................................. 24
Adjusting the Projector Zoom and Focus ............................................................................ 24
Adjusting Projection Image Size .......................................................................................... 25
Menu Operation ................................................................................................................... 26
Appendix ..........................................................................................42
Installing the Dust Filter ....................................................................................................... 42
Replacing the Lamp ............................................................................................................. 43
Ceiling mount installation ..................................................................................................... 45
Compatibility Modes ............................................................................................................ 46
RS232 Commands and Protocol Function List .................................................................... 50
Troubleshooting ................................................................................................................... 56
Optoma Global Offices ........................................................................................................ 58
Regulation & Safety Notices ................................................................................................ 61
EN-1
Kapitel
Inhaltsverzeichnis
Fehlerbehebung

Verwandte Anleitungen für Optoma DS330


Inhaltszusammenfassung für Optoma DS330
- Seite 63 Menübedienung ........................27 Anhang .....................43 Staubfilter installieren ......................43 Lampe austauschen ......................44 Deckenmontage ........................46 Kompatibilitätsmodi ......................47 RS232 –– Befehle und Protokollfunktionen ................51 Problemlösung ........................57 Optoma-Niederlassungen weltweit ..................59 Hinweise zu Vorschriften und zur Sicherheit ............... 62 DE-1...
-
Seite 64: Nutzungshinweise
Nutzungshinweise Sicherheitshinweise Lesen Sie die gesamte Anleitung gründlich durch, bevor Sie Ihren Projektor bedienen. Bewahren Sie die Anleitung auf, damit Sie später darin nachlesen können. 1. Anleitung lesen Sämtliche Sicherheits- und Bedienungshinweise sollten gründlich gelesen werden, bevor Sie mit dem Gerät arbeiten. 2. - Seite 65 7. Wartungsarbeiten Versuchen Sie nicht, den Projektor selbst zu reparieren oder zu warten. Wenden Sie sich im Problemfall mit einer Reparaturanfrage an einen qualifizierten Fachmann. 8. Ersatzteile Wenn Ersatzteile gebraucht werden, achten Sie darauf, ausschließlich vom Hersteller empfohlene Ersatzteile zu verwenden. Nicht zugelassene Ersatzteile können zu Bränden, Stromschlägen und weiteren Gefährdungen führen.
- Seite 66 Hinweise zum Netzkabel Das Netzkabel muss an die Belange des Landes angepasst sein, in dem der Projektor genutzt wird. Bitte vergleichen Sie Ihren Netzstecker mit den nachstehenden Abbildungen und überzeugen Sie sich davon, dass Sie das richtige Netzkabel verwenden. Falls der Stecker des mitgelieferten Netzkabels nicht Ihre Steckdosen passen sollte, wenden Sie sich bitte an Ihren Händler.
-
Seite 67: Einleitung
Einleitung Projektormerkmale Ihr Projektor arbeitet mit einer optischen Hochleistungs-Engine und bietet ein benutzerfreundliches Design, das sowohl zuverlässig funktioniert als auch leicht zu bedienen ist. Ihr Projektor weist folgende Merkmale auf: ® Texas Instruments-Einchip-DLP -Technologie (0,55 Zoll) (SVGA/XGA- Modell) ® Texas Instruments-Einchip-DLP -Technologie (0,65 Zoll) (WXGA- Modell) SVGA (800 x 600 Pixel) -
Seite 68: Lieferumfang
Lieferumfang Achten Sie beim Auspacken Ihres Projektors darauf, dass all diese Komponenten mitgeliefert wurden: Projector (Projektor) (Objektivkappe variiert je Netzkabel VGA-Kabel (D-Sub-zu-D-Sub) nach Region) Fernbedienung (IR) oder Fernbedienung mit Transporttasche Laserpointer (je nach Region) & Batterien (zwei (Sonderzubehör bei Stück, AAA) bestimmten Modellen) Schraube &... -
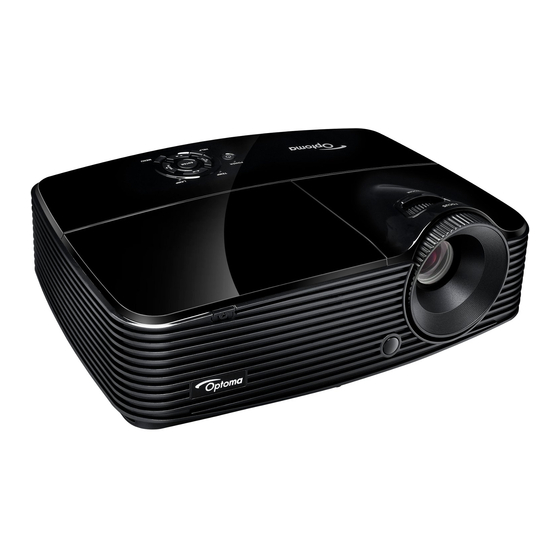
Seite 69: Projektor –- Überblick
Projektor –– Überblick Vorderseite Luftauslass Lufteinlass Vorderer Belüftungsöffnungen Fernbedienungssensor Höhenverstellungsfuß Zoomring Projektionsobjektiv Bedienfeld Fokusring Lampenabdeckung Lautsprecher DE-7... -
Seite 70: Rückseite
Rückseite Ohne HDMI-Modelle HDMI-Modelle Netzkabelanschluss Anschlüsse Kensington-Schloss Unterseite Sicherheitsleiste Deckenmontagebohrungen Hinweis Bei Bedarf können Sie den Projektor an der Decke anbringen. Die Deckenhalterung zählt jedoch nicht zum Standardlieferumfang. Ihr Händler hilft Ihnen bei Fragen rund um die Deckenmontage gerne weiter. DE-8... -
Seite 71: Einsatz Und Bedienung
Einsatz und Bedienung Bedienfeld Trapez ( / ) Zur manuellen Korrektur verzerrter Bilder, die durch nicht senkrechte Projektion entstehen. TEMP (Temperatur-LED) Lesen Sie bitte unter „„LED-Meldungen““ auf Seite 57 nach. SOURCE Zum Umschalten zwischen Eingangssignalen. POWER (Betriebsanzeige-LED) Lesen Sie bitte unter „„LED-Meldungen““ auf Seite 57 nach. -
Seite 72: Anschlüsse
Anschlüsse AUDIO-IN 1 Mit diesem Anschluss verbinden Sie den Audioausgang eines Computers. S-VIDEO Hier schließen Sie den S-Video-Ausgang externer Videogeräte an. VGA1/YPbPr Mit diesem Anschluss verbinden Sie Geräte mit analogem RGB- oder Component-Ausgang. VGA-OUT Hier schließen Sie einen externen Monitor an. Im Eco-Modus (Bereitschaft) ist VGA-OUT deaktiviert. - Seite 73 AUDIO-OUT Hier verbinden Sie das Gerät mit einem externen Lautsprechersystem. Das Durchschleifen von Audiosignalen wird von Audio 1, 2 und HDMI unterstützt. Im Eco-Modus (Bereitschaft) ist AUDIO-OUT deaktiviert. Im Aktiv-Modus (Bereitschaft) ist AUDIO-OUT aktiviert. AUDIO-IN 2 Mit diesem Anschluss verbinden Sie den Audioausgang eines Videogerätes.
-
Seite 74: Fernbedienung
Fernbedienung Die Fernbedienung variiert je nach Region. Power Zum Ein- und Ausschalten des Projektors. Source Zum Umschalten zwischen Eingangssignalen. Linke Maustaste Führt bei aktiviertem Mausmodus einen linken Mausklick aus. DE-12... - Seite 75 Richtungstasten Mit den vier Richtungstasten wählen Sie Elemente aus und passen Werte an. Aufwärtstaste: Wenn das Menü ausgeblendet ist, emuliert die Abwärtstaste die USB-Maus. Linkstaste: Wenn das Menü ausgeblendet ist, emuliert die Linkstaste die USB-Maus. Rechtstaste: Wenn das Menü ausgeblendet ist, emuliert die Rechtstaste die USB-Maus.
- Seite 76 Lautstärke +/- Zum Einstellen der Lautstärke. Menü Zur Anzeige der Bildschirmmenüs. Zoom Vergrößert oder verkleinert das projizierte Bild. AV mute De-/Aktiviert vorübergehend Bild und Ton. Video Zeigt Signale vom Videoeingang an. Schaltet die 3D-Funktion ein und aus. Bei geschlossenem Bildschirmmenü: Zum Umschalten in den Mausmodus.
-
Seite 77: Batterien Einlegen
Batterien einlegen 1. Öffnen Sie die Batteriefachabdeckung in gezeigter Ausrichtung. 2. Legen Sie die Batterien wie in der Abbildung dargestellt in das Fach ein. 3. Schließen Sie die Batteriefachabdeckung. Vorsicht Verwenden Sie keine anderen als die hier genannten Batterietypen; andernfalls besteht Explosionsgefahr. -
Seite 78: Einsatz Der Fernbedienung
Einsatz der Fernbedienung Richten Sie die Fernbedienung auf den Fernbedienungssensor, drücken Sie anschließend die gewünschte Taste. Projektor von vorne bedienen Hinweis Falls Sonnenlicht oder das Licht anderer starker Lichtquellen (wie Neonröhren) auf den Fernbedienungssensor fällt, kann dies die Funktion der Fernbedienung beeinträchtigen. Benutzen Sie die Fernbedienung am besten nur an Stellen, von denen aus eine direkte Sichtverbindung zum Fernbedienungssensor möglich ist. -
Seite 79: Anschlüsse
Anschlüsse Beachten Sie unbedingt Folgendes, wenn Sie eine Signalquelle an den Projektor anschließen: 1. Schalten Sie sämtliche beteiligten Geräte aus, bevor Sie Verbindungen herstellen. 2. Nutzen Sie stets die für die jeweilige Signalquelle geeigneten Signalkabel. 3. Achten Sie darauf, das die Kabel bis zum Anschlag eingesteckt werden. 1. -
Seite 80: Computer Oder Bildschirm Anschließen
Computer oder Bildschirm anschließen Computer anschließen Ihr Computer ist mit zwei VGA-Eingängen ausgestattet, an denen Sie ® ® sowohl IBM -kompatible PCs als auch Macintosh -Computer anschließen können. Sie benötigen einen Mac-Adapter, wenn Sie ältere Macintosh- Computer anschließen möchten. So schließen Sie den Projektor an einen Notebook- oder Desktop- Computer an: 1. -
Seite 81: Einen Bildschirm Anschließen
Einen Bildschirm anschließen Wenn Sie Ihre Präsentation aus der Nähe über einen Bildschirm und gleichzeitig auf der Leinwand betrachten möchten, können Sie den VGA- OUT-Signalausgang am Projektor über ein VGA-Kabel anhand der nachstehenden Anweisungen mit einem externen Bildschirm verbinden: So schließen Sie den Projektor an einen Bildschirm an: 1. -
Seite 82: Externe Videoquellen Anschließen
Externe Videoquellen anschließen Über die folgenden Ausgänge können Sie Ihren Projektor an unterschiedlichste Videoquellen anschließen: HDMI Component-Video S-Video Video (Composite) Sie müssen Ihren Projektor lediglich über eine der obigen Verbindungsmöglichkeiten an ein externes Gerät anschließen; allerdings bieten die unterschiedlichen Anschlussarten auch unterschiedliche Bildqualitäten. -
Seite 83: Hdmi-Quellen Anschließen
HDMI-Quellen anschließen Schauen Sie nach, ob ungenutzte HDMI-Ausgänge an Ihrem externen Videogerät zur Verfügung stehen: Falls ja, führen Sie einfach die weiteren Schritte aus. Falls nicht, müssen Sie sich für eine andere Anschlussmethode entscheiden. So schließen Sie den Projektor an ein HDMI-Gerät an: 1. -
Seite 84: S-Video-Gerät Anschließen
S-Video-Gerät anschließen Schauen Sie nach, ob ein ungenutzter S-Video-Ausgang an Ihrem externen Videogerät zur Verfügungt steht: Falls ja, führen Sie einfach die weiteren Schritte aus. Falls nicht, müssen Sie sich für eine andere Anschlussmethode entscheiden. So schließen Sie den Projektor an ein S-Video-Gerät an: 1. -
Seite 85: Betrieb
Betrieb Projektor ein- und ausschalten Projektor einschalten: 1. Schließen Sie das Netzkabel und relevante Peripheriesignalkabel an den Projektor an. 2. Drücken Sie zum Einschalten des Projektors Der Projektor braucht etwa eine Minute zum Aufwärmen. 3. Schalten Sie die externe Signalquelle (z. B. Computer, Notebook, DVD- Player, usw.) ein. -
Seite 86: Projektionshöhe Einstellen
Projektionshöhe einstellen Neigungsverstellungsfuß Höhenverstellungsfuß Ihr Projektor ist mit einem Fuß zur Höhenverstellung ausgestattet, mit dem Sie die Projektionshöhe entsprechend anpassen können. 1. Drehen Sie zum Erhöhen oder Absenken des Bildes den höhenverstellbaren Fuß. 2. Zur Feinabstimmung der Höhe drehen Sie den Fuß zur Höheneinstellung. -
Seite 87: Projizierte Bildgröße Einstellen
Projizierte Bildgröße einstellen Bitte schauen Sie sich die nachstehende Abbildung nebst Tabelle zum Ermitteln von Projektionsflächengröße und Projektionsabstand an. Maximaler Zoom Minimaler Zoom Projektionsfläche Objektivmitte Vertikaler Versatz Projektionsdistanz SVGA/XGA-Modell 4 : 3-Bildfläche Projektionsgröße Projektionsdistanz [Fuß (m)] Vertikaler Diagonale Bildhöhe Versatz [Zoll (cm)] [Zoll (cm)] (Min. -
Seite 88: Menübedienung
Menübedienung Ihr Projektor ist mit einem mehrsprachigen Bildschirmmenü (OSD) ausgestattet, über das Sie diverse Anpassungen vornehmen und eine Vielzahl von Einstellungen ändern können. Bedienung 1. Drücken Sie zum Öffnen des OSD-Menüs „„Menu““ an der Fernbedienung oder am Bedienfeld. 2. Bei angezeigtem OSD können Sie mit beliebige Optionen im Hauptmenü... - Seite 89 Menübaum Hauptmenü Untermenü Einzeloptionsmenü Präsentation / Hell / Film / sRGB / Tafel / Anzeigemodus Benutzer / Drei Dimensionen Helligkeit Kontrast Schärfe Farbe Farbton Film / Video / Gamma Grafiken / Standard BrilliantColor™™ Farbtemperatur Warm / Mittel / Kühl Farbton / Sättigung / Farbeinstell.
- Seite 90 SVGA / XGA: 4:3 / 16:9 / Native / Auto Format WXGA: 4:3 / 16:9 oder 16:10 / LBX / Native / Auto Rändermaske Zoom Image Shift ANZEIGE Ver. Trapezkor. 3D-Modus DLP Link / IR Drei Dimensionen / L 3D--->2D Drei Dimensionen Auto / Side By Side / 3D Format...
- Seite 91 VGA1 / VGA2 / Video Eingabequelle / S-Video / HDMI* Source Lock Ein/Aus Große Höhe Ein/Aus Info ausblenden Ein/Aus Tastenfeldsperre Ein/Aus Testbild Kein / Raster / Weiß Infrarot Funktion Ein/Aus Schwarz / Rot / Blau / Hintergrundfarbe Grün / Weiß Anzeigemodus / Fernbedienungseinst Format / 3D-Sync.
-
Seite 92: Anzeigemodus
BILD Anzeigemodus Sie können aus verschiedenen Werksvorgaben für unterschiedliches Bildmaterial auswählen. Präsentation: Gute Farbe und Helligkeit bei PC-Eingabe. Hell: Maximale Helligkeit bei PC-Eingabe. Film: Zum Einsatz im Heimkino. sRGB: Standardisierte exakte Farbwiedergabe. Tafel: Diese Modus sollte zur Erzielung optimaler Farbeinstellungen bei Projektion auf eine Tafel (grün) ausgewählt werden. - Seite 93 Farbton Lässt das Bild rötlicher oder grünlicher erscheinen. Hinweis „„Farbe““- und „„Farbton““-Funktionen werden nur im Videomodus unterstützt. Erweitert Gamma Dies ermöglicht ihnen die Auswahl einer Degamma-Tabelle, die zur Erzielung optimaler Bildqualität für den Eingang fein eingestellt wurde. Film: Zum Einsatz im Heimkino. Video: Für Video- oder TV-Quellen.
-
Seite 94: Zurücksetzen
Farbeinstell. Drücken Sie zum Aufrufen des nächsten Menüs /„„Enter““; wählen Sie dann mit die Farbe. Drücken Sie zum Abschließen der Auswahl „„Enter““. Rot/Grün/Blau/Zyan/Magenta/Gelb/Weiß: Schalten Sie mit zwischen Farbton/Sättigung/Verstärkung um, drücken Sie dann zum Anpassen des Wertes Zurücksetzen: Wählen Sie zum Rücksetzen der Farbeinstellungen auf die werkseitigen Standardeinstellungen „„Ja““. - Seite 95 ANZEIGE Format Mit dieser Funktion wählen Sie das gewünschte Bildformat. Bei SVGA/XGA-Modellen: Source 480i/p 576i/p 1080i/p 720p Polykarbonat (Quelle) (PC) 1024 x 768, mittig 16:9 1024 x 576, mittig Native Zeigt das Originalbild ohne Skalierung an. Auto Bei einer 4:3-Quelle: Automatische Größenänderung auf 1024 x 768 (Standard) Bei einer 16:9-Quelle: Automatische Größenänderung auf 1024 x 576 Bei einer 15:9-Quelle: Automatische Größenänderung auf 1024 x 614...
- Seite 96 16:9-Projektionsfläche 16 : 9- 480i/p 576i/p 1080i/p 720p Polykarbonat Projektionsfläche (PC) 960 x 720, mittig 16:9 1280 x 720, mittig 1280 x 960, mittig, dann Bildanzeige: 1280 x 720, mittig. Native 1:1-Abbildung, 1:1-Abbildung, 1280 x 720, 1:1-Abbildung, mittig Anzeige 1280 x mittig mittig Auto (Standard)
- Seite 97 IR: Wählen Sie zur Nutzung optimierter Einstellungen für „„IR““-basierte 3D-Brillen IR. 3D--->2D Drei Dimensionen: Wählen Sie das 3D Format. L: Zur Auswahl der Daten zum linken Auge. R: Zur Auswahl der Daten zum rechten Auge. 3D Format Side By Side: Verwenden Sie diesen Modus bei 3D-Inhalten im „„Side- By-Side““-Format.
-
Seite 98: Menüposition
SETUP Sprache Zur Auswahl der Sprache, in der die OSD-Menüs angezeigt werden. Rufen Sie mit /„„Enter““ das Untermenü auf, wählen Sie mit Ihre bevorzugte Sprache. Drücken Sie zum Abschließen der Auswahl „„Enter““. Projektion Zum Anpassen des Bildes an die Aufstellungsart des Projektors: Aufrecht oder kopfüber, vor oder hinter der Projektionsfläche. -
Seite 99: Projektor-Id
Sicherheits-Timer Mit dieser Funktion können Sie festlegen, wie lange (Monat/Tag/Stunde) der Projektor genutzt werden kann. Sobald die Zeit abgelaufen ist, müssen Sie Ihr Kennwort erneut eingeben. Kennwort ändern Erstmalig: 1. Drücken Sie zum Festlegen des Kennwortes „„Enter““. 2. Das Kennwort muss 4-stellig sein. 3. -
Seite 100: Audioeingang
Audioeingang Zur Auswahl der Audioeingangsquellen. Erweitert Logo Mit dieser Funktion legen Sie die gewünschte Startanzeige fest. Falls Änderungen vorgenommen werden, werden diese beim nächsten Einschalten des Projektors wirksam. Standard: Die Standardstartanzeige. Neutral: Neutrale Startanzeige. Closed Caption Mit dieser Funktion legen Sie die gewünschte Startanzeige fest. Falls Änderungen vorgenommen werden, werden diese beim nächsten Einschalten des Projektors wirksam. -
Seite 101: Eingabequelle
OPTIONEN Eingabequelle Mit dieser Option können Sie Eingangsquellen de-/aktivieren. Rufen Sie mit /„„Enter““ das Untermenü auf; wählen Sie die erforderlichen Quellen. Drücken Sie zum Abschließen der Auswahl „„Enter““. Der Projektor sucht nicht nach Quellen, die nicht ausgewählt sind. Source Lock Ein: Der Projektor prüft nur die aktuellen Quelle. - Seite 102 Tastenfeldsperre Wenn die Tastenfeldsperre „„aktiviert““ ist, kann der Projektor nicht über das Bedienfeld, wohl aber über die Fernbedienung gesteuert werden. Durch Auswahl von „„Aus““ können Sie das Bedienfeld wieder nutzen. Hinweis Halten Sie zum Abschalten der Tastenfeldsperre die „„Enter““-Taste an der Oberseite des Projektors 5 Sekunden gedrückt.
-
Seite 103: Lampeneinstellungen
Eco: Die VGA-OUT-Funktion ist nicht verfügbar, wenn sich der Projektor im Bereitschaftsmodus befindet. Aktiv: VGA-OUT- und AUDIO-OUT-Funktion sind nicht verfügbar, wenn sich der Projektor im Bereitschaftsmodus befindet. Hinweis Wenn Betriebsmodus (Standby) auf Eco (<0,5 W) eingestellt ist, werden VGA-Ausgang und Audio-Durchschleifen deaktiviert, wenn sich der Projektor im Bereitschaftsmodus befindet. -
Seite 104: Anhang
Anhang Staubfilter installieren Achten Sie darauf, die Schritte zum Installieren des Staubfilters zu befolgen. 1. Richten Sie den Filter an den beiden Hakenpositionen (Nr. 1 und 2) aus, drücken Sie ihn von links nach rechts in den Projektor. 2. Drücken Sie die letzte Hakenposition (Nr. 3), bis er einrastet. Staubfilter 3. -
Seite 105: Lampe Austauschen
Lampe austauschen Im Laufe der Zeit nimmt die Helligkeit der Projektorlampe mehr und mehr ab, ein Ausfall der Lampe wird immer wahrscheinlicher. Wir empfehlen den Austausch der Lampe, sobald eine entsprechende Warnmeldung angezeigt wird. Versuchen Sie nicht, die Lampe selbst auszutauschen. Lassen Sie den Austausch von einer qualifizierten Fachkraft durchführen. - Seite 106 1. Schalten Sie den Projektor aus. 2. Trennen Sie das Netzkabel. 3. Drehen Sie die Schraube an der Seite der Lampenabdeckung heraus. 4. Heben Sie die Abdeckung ab. 5. Lösen Sie die Schrauben am Lampenmodul. 6. Heben Sie den Griff, ziehen Sie das Lampenmodul langsam und vorsichtig heraus.
-
Seite 107: Deckenmontage
Deckenmontage 1. Damit es nicht zu Schäden am Projektor kommt, nutzen Sie unbedingt eine Optoma-Deckenhalterung. 2. Falls Sie einen Deckenmontagesatz eines Drittanbieters verwenden möchten, achten Sie unbedingt darauf, dass die Schrauben zur Befestigung der Halterung am Projektor die folgenden Eigenschaften... -
Seite 108: Kompatibilitätsmodi
Kompatibilitätsmodi Computerkompatibilität Signal Auflösung Bildfrequenz (Hz) Hinweise zum 640 x 480 60/67/72/85 Mac 60/72/85 SVGA 800 x 600 60(*2)/72/85/120(*2) Mac 60/72/85 1024 x 768 60(*2)/70/75/85/ Mac 60/70/75/85 120(*2) HDTV(720P) 1280 x 720 50/60(*2)/120(*2) Mac 60 WXGA 1280 x 768 60/75/85 Mac 60/75/85 1280 x 800 Mac 60... -
Seite 109: Videokompatibilität
True 3D-Videokompatibilitätstabelle HDMI Eingangstiming 1.4a 3D- 1280 x 720P bei 50 Hz Top and Bottom Eingang 1280 x 720P bei 60Hz Top and Bottom 1280 x 720P bei 50 Hz Frame Packing 1280 x 720P bei 60Hz Frame Packing 1920 x 1080i bei 50 Hz Side By Side (Halbbilder) 1920 x 1080i bei 60 Hz Side By Side (Halbbilder) 1920 x 1080P bei 24 Hz Top and Bottom 1920 x 1080P bei 24 Hz Frame Packing... - Seite 110 IR-Code Benutzercode: 32CD Tastencode Definition des Tastenaufdrucks Ein-/Ausschalten Umschalten Source (Quelle) User (Benutzer) Neusynchronisierung Aufwärtspfeil Linkspfeil Rechtspfeil Abwärtspfeil DE-48...
- Seite 111 Enter (Eingabetaste) Enter (Eingabetaste) Nicht verfügbar Laser Page+ (nächste Seite) Modus Page- (vorherige Seite) Keystone + Keystone - Lautstärke + Lautstärke - Helligkeit/1 Menü/2 Zoom/3 HDMI/4 Standbild/5 AV-Stummschaltung/6 S-Video/7 VGA/8 Video/9 Kontrast Drei Dimensionen Die nachstehenden IR-Codes dienen nur der benutzerdefinierten Fernsteuerung.
-
Seite 112: Rs232 –- Befehle Und Protokollfunktionen
RS232 –– Befehle und Protokollfunktionen RS232-Pinbelegung D-Sub, 9-polig Kabel (auf Projektorseite) (auf Kabelseite) 1 CD Farbe Schwarz Braun Orange Gelb Grün Blau Purpur Weiß SHELL SHELL RS232-Protokollfunktionen Baudrate: 9600 XX = 01 - 99, Projektor-ID, XX = 00 gilt für sämtliche Datenbits: 8 Projektoren Parität: Keine... - Seite 113 ----------------------------------------------------------------------------------------------------------------------------------------------------------------------------------- SEND to projector ----------------------------------------------------------------------------------------------------------------------------------------------------------------------------------- Function 232 ASCII Code HEX Code Description ----------------------------------------------------------------------------------------------------------------------------------------------------------------------------------- ~XX00 1 7E 30 30 30 30 20 31 0D Power ON ~XX00 0 7E 30 30 30 30 20 30 0D Power OFF (0/2 for backward compatible) ~XX00 1 ~nnnn 7E 30 30 30 30 20 31 20 a 0DPower ON with Password ~nnnn = ~0000 (a=7E 30 30 30 30)
- Seite 114 ~XX60 1 7E 30 30 36 30 20 31 0D Format ~XX60 2 7E 30 30 36 30 20 32 0D 16:9 ~XX60 3 7E 30 30 36 30 20 33 0D 16:10(WXGA) ~XX60 5 7E 30 30 36 30 20 35 0D ~XX60 6 7E 30 30 36 30 20 36 0D Native...
- Seite 115 ---------------------------------------------------------------------------------------------------------------------------------------------------------------------------------- ~XX77 n 7E 30 30 37 37 20 aabbcc 0D Security Security Timer Month/Day/Hour n = mm/dd/hh mm= 00 (aa=30 30) ~ 12 (aa=31 32) dd = 00 (bb=30 30) ~ 30 (bb=33 30) hh= 00 (cc=30 30) ~ 24 (cc=32 34) ~XX78 1 7E 30 30 37 38 20 31 0D Security Settings...
- Seite 116 ~XX105 1 7E 30 30 31 30 35 20 31 0D Advanced Direct Power On ~XX105 0 7E 30 30 31 30 35 20 30 0D Off (0/2 for backward compatible) ~XX106 n 7E 30 30 31 30 36 20 a 0D Auto Power Off (min) n = 0 (a=30) ~ 180 (a=31 38 30) ~XX107 n...
- Seite 117 ----------------------------------------------------------------------------------------------------------------------------------------------------------------------------------- READ from projector ----------------------------------------------------------------------------------------------------------------------------------------------------------------------------------- Function Projector Return Description 232 ASCII Code HEX Code ~XX121 1 7E 30 30 31 32 31 20 31 0D Input Source Commands n: 0/1/2/3/4/5= None/VGA1/VGA2/Video/S- Video/HDMI ~XX122 1 7E 30 30 31 32 32 20 31 0D Software Version OKdddd dddd: FW version ~XX123 1...
-
Seite 118: Problemlösung
Problemlösung Bitte schauen Sie sich zunächst die nachstehenden Hinweise zur Problemlösung an, bevor Sie das Gerät reparieren lassen. Falls sich das Problem nicht lösen lassen sollte, wenden Sie sich bitte an einen Händler oder ein Servicecenter vor Ort. Bitte schauen Sie sich auch den Abschnitt „„LED-Meldungen““... - Seite 119 LED-Meldungen Meldung Betriebs-LED Betriebs-LED Temperatur-LED Lampen-LED (rot) (grün) (rot) (rot) Bereitschaftsmodus Leuchtet (Netzkabel eingesteckt) Einschalten Blinkt (Aufwärmen) 0,5 Sek. aus 0,5 Sek. ein Einschalten & Leuchtet Lampe leuchtet auf Abschalten Blinkt (Kühlung) 0,5 Sek. aus 0,5 Sek. ein Leuchtet dauerhaft rot, sobald Lüfter anhält Kurzübersicht...
-
Seite 120: Optoma-Niederlassungen Weltweit
Optoma-Niederlassungen weltweit Bei Kundendienstanfragen wenden Sie sich bitte an Ihre lokale Niederlassung. 3178 Laurelview Ct. Fremont, CA 94538, USA 888-289-6786 www.optomausa.com services@optoma.com Kanada 3178 Laurelview Ct. Fremont, CA 94538, USA 888-289-6786 www.optomausa.com services@optoma.com Europa 42 Caxton Way, The Watford Business... - Seite 121 Skandinavien Lerpeveien 25 +47 32 98 89 90 3040 Drammen +47 32 98 89 99 Norway info@optoma.no PO.BOX 9515 3038 Drammen Norway Lateinamerika 3178 Laurelview Ct. Fremont, CA 94538, USA 888-289-6786 www.optoma.com.br www.optoma.com.mx Korea WOOMI TECH.CO.,LTD. 4F,Minu Bldg.33-14, Kangnam-Ku, +82+2+34430004...
- Seite 122 +86-21-62947376 +86-21-62947375 1205 www.optoma.com.cn DE-60...
-
Seite 123: Hinweise Zu Vorschriften Und Zur Sicherheit
Hinweise zu Vorschriften und zur Sicherheit In diesem Anhang finden Sie allgemeine Hinweise zu Ihrem Projektor. FCC-Hinweis Dieses Gerät wurde getestet und als mit den Grenzwerten für Digitalgeräte der Klasse B gemäß Teil 15 der FCC-Regularien übereinstimmend befunden. Diese Grenzwerte wurden geschaffen, um angemessenen Schutz gegen Störungen beim Betrieb in Wohngebieten zu gewährleisten. -
Seite 124: Eu-Konformitätserklärung
Betriebsbedingungen Dieses Gerät erfüllt Teil 15 der FCC-Regularien. Der Betrieb unterliegt den folgenden beiden Bedingungen: 1. Dieses Gerät darf keine Funkstörungen verursachen, und 2. Dieses Gerät muss jegliche empfangenen Störungen hinnehmen, einschließlich Störungen, die zu unbeabsichtigtem Betrieb führen können. Hinweis: Kanada Dieses Digitalgerät der Klasse B erfüllt alle Anforderungen der kanadischen Bestimmungen ICES-003.