Inhaltsverzeichnis
Werbung
Quicklinks
May -2001
Pneumatic Fastener Driving Tools
Pneumatiska Infästningsverktyg
Pneumatische Befestigungsgeräte
Cloueuses-Agrafeuses Pneumatiques
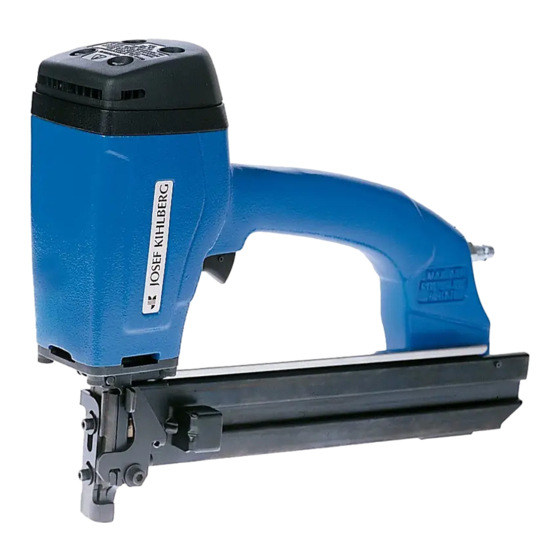
JK45-783
Repair Instructions
Underhållsinstruktion
Reparaturanleitung
Reparaturanleitung
Josef Kihlberg AB
Box 126, S-544 22 Hjo, Sweden
Telephone: +46 (0)503 328 00 Telefax: +46 (0)503 328 01
www.kihlberg.se
e-mail: reception@kihlberg.se
E
S
D
F
Werbung
Inhaltsverzeichnis

Verwandte Anleitungen für Josef Kihlberg JK45-783


Inhaltszusammenfassung für Josef Kihlberg JK45-783
- Seite 1 Pneumatic Fastener Driving Tools Pneumatiska Infästningsverktyg Pneumatische Befestigungsgeräte Cloueuses-Agrafeuses Pneumatiques JK45-783 Repair Instructions Underhållsinstruktion Reparaturanleitung Reparaturanleitung Josef Kihlberg AB Box 126, S-544 22 Hjo, Sweden Telephone: +46 (0)503 328 00 Telefax: +46 (0)503 328 01 www.kihlberg.se e-mail: reception@kihlberg.se May -2001...
-
Seite 2: Inhaltsverzeichnis
The employer must ensure that: Arbetsgivaren skall se till att: ! these Repair instructions are made available to, ! denna Underhållsinstruktion hålls tillgänglig för, studied and followed by all personnel concerned; samt att den studeras och åtföljs av, all berörd personal;... -
Seite 3: Safety Warnings
Safety Warnings Säkerhetsvarningar Sicherheitshinweise Instructions de sécurité E Read these warnings to prevent injuries to S Läs dessa varningar för att undvika skador på yourself and to bystanders. Dig själv eller åskådare. Refer Maintenance section För ytterligare information se anvisningarna i additional information. - Seite 4 Safety Warnings Säkerhetsvarningar Sicherheitshinweise Instructions de sécurité E Always disconnect the tool from the air S Koppla alltid bort verktyget från tryckluften supply and empty the magazine when töm magasinet underhåll servicing or repairing the tool. reparation och vid avhjälpande av störningar. Never leave a loaded tool unattended.
-
Seite 5: Maintenance
Maintenance Underhåll Wartung Entretien E Connect the tool to the compressed air line S Koppla verktyget till tryckluftsystemet innan before loading fasteners. The maximum infästningselement laddas. Det högsta tillåtna permitted air pressure is 8 bar.(110 psi). lufttrycket är 8 bar. Se till att luftslangen är Ensure that the air hose diameter is not less rätt dimensionerad - min 10mm - för att than 10 mm (3/8") to prevent malfunction due... - Seite 6 Servicing the driving parts Underhåll av drivande delar Wartung der Antriebsteile Entretien des pièces motrices E Remove S Demontera de fyra skruvarna till täckkåpan. four screws securing protective cover. F Retirer les quatre vis du carter de protection. D Die vier Schrauben entfernen, mit denen die Schutzhaube befestigt ist.
-
Seite 7: Servicing The Magazine
Servicing the magazine Underhåll av magasin Wartung des Magazins Entretien du magasin E Remove the two screws at the rear that secure S Demontera de två bakre skruvarna som håller the magazine to the tool body. magasinet. D An der Rückseite die beiden Schrauben l’arrière, retirer deux... -
Seite 8: Servicing The Magazine
Servicing the magazine Underhåll av magasin Wartung des Magazins Entretien du magasin E If the pusher needs to be changed, tap out the S Om frammataren behöver bytas, demontera stop pin with a drift, change the pusher and stoppet med en dorn, byt frammatare och refit the stop pin. - Seite 9 Servicing the trigger valve (cont.) (Forts.) Underhåll av avtryckarventil Wartung des Abzugventils (Forts.) (Suite) Entretien de la valve détente E Remove the spring pin securing the trigger. S Demontera spännstift som håller avtryckaren. D Den Federstift entfernen, mit dem der Abzug F Retirer goupille élastique...
-
Seite 10: Servicing The Driving Parts
Servicing the driving parts (cont.) (Forts.) Underhåll av drivande delar Wartung der Antriebsteile (Forts.) (Suite) Entretien des pièces motrices E Using a drift, tap out the spring pin securing S Demontera spännstift håller the safety yoke. säkerhetsbygeln med en dorn. D Mit einem Dorn den Federstift herausklopfen, F A l’aide d’un mandrin, expulser la mit dem der Sicherheitsbügel befestigt ist. - Seite 11 Servicing the driving parts (cont.) (Forts.) Underhåll av drivande delar Wartung der Antriebsteile (Forts.) (Suite) Entretien des pièces motrices E Inspect the piston bumper for signs of wear. S Kontrollera kolvdämpare beträffande If the bumper needs to be changed, insert the slitage.
- Seite 12 Servicing the magazine Underhåll av magasin Wartung des Magazins Entretien du magasin E Install the safety yoke and tighten its screw as S Montera säkerhetsbygeln och drag åt shown. Note: The yoke must be able to move skruv enligt bild. Obs! bygeln måste löpa lätt och får ej kärva.
- Seite 13 Servicing the driving parts (Cont.) (Forts.) Underhåll av drivande delar Wartung der Antriebsteile (Forts.) (Suite) Entretien des pièces motrices E Dismantle the holder ring by inserting the tip S Demontera låshylsan genom att föra in of a screwdriver, as shown, and prying out en skruvmejsel enligt bild och böj ut the lock pins.
- Seite 14 Servicing the driving parts (cont.) (Forts.) Underhåll av drivande delar Wartung der Antriebsteile (Forts.) (Suite) Entretien des pièces motrices E On the cylinder, change the O-rings and fit S Byt o-ringar och montera de vita the white sealing rings. The ring that is bored tätningsringarna till cylinderfoder.
-
Seite 15: Recommissioning After Repair
Recommissioning after repair Idrifttagande efter underhåll Wiederinbetriebnahme nach Reparatur Remise en service après réparation E Reconnect the tool to the compressed air supply. S Koppla verktyget till tryckluftsnätet igen. Check that no air leaks occur, either during Kontrollera att inget luftläckage förekommer, operation or at rest. -
Seite 16: Recommissioning After Repair
Recommissioning after repair Idrifttagande efter underhåll Wiederinbetriebnahme nach Reparatur Remise en service après réparation E Check that the tool is properly lubricated. The tool S Kontrollera att verktyget smörjs riktigtVerktyget must be lubricated by an oil mist. skall smörjas medelst dimsmörjning. Oil specification for mist oiler: Oljerekommendation för smörjapparat: - Part no:...