Herunterladen Inhalt Inhalt Diese Seite drucken
Vermeiren V300 Gebrauchsanweisung
Vorschau ausblenden Andere Handbücher für V300:
Inhaltsverzeichnis

Werbung

Verfügbare Sprachen
  • DE

Verfügbare Sprachen

  • DEUTSCH, seite 69
V RM IR N
V300, V300
I N S T R U C T I O N M
N U
L
M O D E
D ' E M P L O I
G E B R U I K S
N W I J Z I N G
G E B R
U C H S
N W E I S U N G
I S T R U Z I O N I P E R L ' U S O
M N U L D E I N S T R U C C I O N E S
I N S T R U K C J
O B S Ł U G I

Werbung

Inhaltsverzeichnis
loading

Inhaltszusammenfassung für Vermeiren V300

  • Seite 1 V RM IR N V300, V300 I N S T R U C T I O N M M O D E D ’ E M P L O I G E B R U I K S N W I J Z I N G...
  • Seite 2 No part of this manual may be reproduced in any form what so ever (print, photocopy, microfilm or any other process) without written permission of the publisher, or processed, duplicated or distributed by using electronic systems. © N.V. Vermeiren N.V. 2016 Instructions pour les distributeurs Ce manuel d'instructions fait partie du produit et doit accompagner chaque produit vendu.
  • Seite 3: Inhaltsverzeichnis

    V300, V300D 2016-06 Contents Preface ....................2   Product description ..............3       Intended Use ........................ 3     Technical specifications ....................4     Drawing ........................6     Accessories ........................7     Location identification plate ..................7  ...
  • Seite 4: Preface

    First of all we want to thank you for putting your trust in us by selecting one of our wheelchairs. The Vermeiren wheelchairs are the result of many years of research and experience. During the development, special attention was given to the ease of use and the serviceability of the wheelchair.
  • Seite 5: Product Description

    When used on mats, carpeted floors or loose floor coverings, the floor covering can get damaged. Use only Vermeiren approved accessories. The manufacturer is not liable for damage caused by the lack of or improper service or as a result of not following instructions from this manual.
  • Seite 6: Technical Specifications

    Max. 2.5 bar Storage and use temperature + 5 °C + 41 °C Storage and use humidity We reserve the right to introduce technical changes. Measurement tolerance ± 15 mm / 1,5 kg / ° Table 1: Technical specifications V300 Page 4 ...
  • Seite 7 V300, V300D 2016-06 Make Vermeiren Address Vermeirenplein 1/15, B-2920 Kalmthout Type Manual wheelchair Model V300D Maximum occupant mass 130 kg Description Min. Max. Overall length with footrest 1040 mm Effective seat width 390 mm 420 mm 440 mm 460 mm...
  • Seite 8: Drawing

    V300, V300D 2016-06 The wheelchair complies to the requirements set up in: ISO 7176-8: Requirements and test methods for static, impact and fatigue strengths. ISO 7176-16: Resistance to ignition of upholstered parts Drawing 1 = Armpads 2 = Armrests 3 = Footrests...
  • Seite 9: Accessories

    V300, V300D 2016-06 Accessories The following accessories are available for the V300, V300D:  Anterior pelvic belt (B20) for mounting on the tubes of the back (see according manual)  Anti-tipping device (B78) for mounting on the bottom frame (see according manual).
  • Seite 10: Mounting The Rear Wheels

    V300, V300D 2016-06 Mounting the rear wheels  1. Take the rear wheel and push on button 2. Keep the button pushed in and mount the rear wheels axle till it stops. 3. Release the button. 4. Check that the wheels is secured.
  • Seite 11: Mounting Or Removing Of Armrests

    V300, V300D 2016-06 To apply the brakes: Push the brake levers forward till you feel a distinctive click. CAUTION: Risk of unintended movement – Make sure the wheelchair is on a flat horizontal surface before releasing the brakes. Never release both brakes simultaneously.
  • Seite 12: Transfer In And Out The Wheelchair

    V300, V300D 2016-06 To open and remove the armrest:  1. Press lever and pull the front of the armrest upwards. 2. Fold the armrest backwards.  To remove the armrest, press button and pull the rear of the armrest from tube hood .
  • Seite 13: Correct Position In The Wheelchair

    Do not attempt moving on too high slopes. The maximum slope angles (upwards and downwards) are mentioned in table 1 for V300 and table 2 for V300D. Ask an attendant to help you moving on the slope. Lean forward to move your centre of gravity forward.
  • Seite 14 V300, V300D 2016-06 An experienced user can negotiate higher curbs by himself. This is best done backwards. Turn the wheelchair to have the rear wheels facing the curb. Lean forward to move your centre of gravity forward. Move the wheelchair close to the curbs.
  • Seite 15: Fold Up The Wheelchair

    V300, V300D 2016-06 2.11.3 Taking of stairs Taking of stairs while you staying in the wheelchair shall be according following rules: WARNING: Risk of tipping over – Taking of stairs shall always with 2 attendants. Remove the footrests. One attendant tip the wheelchair slightly backwards.
  • Seite 16: Use Of The Wheelchair As Seat In A Motor Vehicle

    V300, V300D 2016-06 2.15 Use of the wheelchair as seat in a motor vehicle WARNING: The wheelchair has passed the crash of ISO 7176-19: 2008 and, as such, has been designed and tested for use only as forward-facing seat in a motor vehicle.
  • Seite 17 V300, V300D 2016-06 figure 3 Steps to secure the wheelchair user: 1. Remove both arm rests. 2. If present, attach the wheelchair's pelvic belt. 3. Attach the occupant restraint belts according to the instructions of the strap-system manufacturer. 4. Wear the pelvic belt low across the front of the pelvis, so that the angle of the pelvic belt is within the preferred zone of 30°...
  • Seite 18: Installation And Adjustment

    Accessories Adjusting the seat height and seat angle The Vermeiren V300, V300D is adjustable in 4 seat heights and 5 seat angles (0°-2,5°-5°- 7,5°-10°) by changing the position of the wheels for each height and angle there is a different setting of the front and rear wheels.
  • Seite 19 V300, V300D 2016-06 Front wheel Axle plate rear wheels Seat height 440 mm Seat height 470 mm Seat height 500 mm (standard) Seat height 530 mm Page 17 ...
  • Seite 20 If you don't find the right combination you can always contact the company Vermeiren. Check that the swivel axles are perpendicular to the ground. If necessary use the procedure below to adjust the castor stem housing: Loosen the 3 bolts using a size 5 Allen key.
  • Seite 21: Adjusting The Seat Depth

    V300, V300D 2016-06 Adjusting the seat depth The Vermeiren V300, V300D is adjustable in 5 seat depths by changing the cross and the backrest connection . Back rest connection  Seat depth Cross 460 mm Hole 1 and 3 Position 1...
  • Seite 22: Adjust The Brakes

    V300, V300D 2016-06 Adjust the brakes WARNING: Risk of injury – Brakes may only be adjusted by your specialist dealer. Adjust the brakes according following rules: 1. Install the wheels according § 2.2.  2. Disconnect the brakes by pulling lever backwards.
  • Seite 23: Adjusting The Armrest

    V300, V300D 2016-06 3.6.3 Adjusting angle foot plates 100° 80° Adjust the angle of the foot plates as follow:  Loosen bolt Adjust tube  in the desired angle. The angle indication (80°-85°-90°-95°-100°) is according the dashes .  Retighten the bolt Adjusting the armrest The armrest of your wheelchair can be adjustable in height and depth.
  • Seite 24: Adjusting The Stability And The Maneuverability

    Adjust the stability and maneuverability according following steps: 1. Loosen the bolts of axle plate. 2. Move the axle plate  in the desired position. 3. Retighten the bolts. Maintenance For the maintenance manual of the wheelchairs refer to the Vermeiren website: www.vermeiren.com. Page 22 ...
  • Seite 25 V300, V300D 2016-06 Table des matières Préface ....................2   Description du produit ............3       Utilisation prévue ......................3     Caractéristiques techniques ..................4     Schéma ........................6     Accessoires ........................6    ...
  • Seite 26: Préface

    Nous tenons tout d'abord à vous remercier de nous avoir fait confiance en choisissant l'un de nos fauteuils roulants. Les fauteuils roulants Vermeiren sont le résultat de nombreuses années de recherche et d'expérience. Au cours du développement, une attention spéciale a été portée sur la facilité...
  • Seite 27: Description Du Produit

    En cas d'utilisation sur des paillassons, moquettes ou revêtements de sols non fixés, le revêtement de sol peut être endommagé. Utilisez uniquement des accessoires approuvés par Vermeiren. Le fabricant n'est pas responsable des dommages causés par l'absence ou l'inadéquation de l'entretien, ou par le non-respect des instructions de ce manuel.
  • Seite 28: Caractéristiques Techniques

    Température de stockage et d'utilisation + 5 °C +41 °C Humidité de stockage et d'utilisation Nous nous réservons le droit d’apporter des modifications techniques. Tolérance de mesure ± 15 mm / 1,5 kg / ° Tableau 1 : Caractéristiques techniques V300 Page 4 ...
  • Seite 29 V300, V300D 2016-06 Marque Vermeiren Adresse Vermeirenplein 1/15, B-2920 Kalmthout Type Fauteuil roulant manuel Modèle V300D Masse maximale de l'occupant 130 kg Description Minimum Maximum Longueur totale avec repose-pied 1040 mm Largeur d'assise efficace 390 mm 420 mm 440 mm 460 mm 480 mm 500 mm...
  • Seite 30: Schéma

    8 = Dossier 9 = Patte d'inclinaison 10 = Traverse 11 = Poignées Accessoires Les accessoires suivants sont disponibles pour le V300, V300D :  Sangle pelvienne antérieure (B20) à monter sur les tubes du dossier (voir le manuel correspondant) ...
  • Seite 31: Emplacement De La Plaque D'identification

    V300, V300D 2016-06 Emplacement de la plaque d'identification 1 = Logo Vermeiren 2 = Taxi crochets 3 = Plaque d'identification 4 = Nom Vermeiren Explication des symboles Poids maximum Usage intérieur et extérieur Pente sécurisée maximale Conformité CE Désignation type Utilisation Ce chapitre décrit l'utilisation quotidienne.
  • Seite 32: Montage Des Roues Arrière

    V300, V300D 2016-06 Montage des roues arrière 1. Prenez la roue arrière et poussez sur le  bouton 2. Maintenez le bouton enfoncé et montez l'essieu arrière jusqu'à ce qu'il soit bloqué. 3. Relâchez le bouton. 4. Vérifiez que les roues sont bloquées.
  • Seite 33: Montage Ou Retrait Des Repose-Bras

    V300, V300D 2016-06 AVERTISSEMENT : les freins sont réglables et peuvent s'user. Contrôlez le fonctionnement des freins avant chaque utilisation. Pour actionner les freins : Poussez les poignées de freins vers l'avant jusqu'à ce que vous sentiez un clic net.
  • Seite 34: Transfert Dans Et Hors Du Fauteuil Roulant

    V300, V300D 2016-06 Pour ouvrir et retirer l'accoudoir :  1. Appuyez sur le levier et tirez l'avant de l'accoudoir vers le haut. 2. Pliez l'accoudoir vers l'arrière.  Pour retirer l'accoudoir, appuyez sur le bouton et tirez l'arrière du repose-bras hors du logement de tube.
  • Seite 35: Position Correcte Du Fauteuil Roulant

    N'essayez pas de franchir des pentes trop difficiles. Les angles de pente maximum (montée et descente) sont indiqués dans le tableau 1 pour V300 et tableau 2 pour V300D. Demandez à un assistant de vous aider à franchir une pente.
  • Seite 36: Passage De Marches Ou De Bordures De Trottoirs

    V300, V300D 2016-06 2.11 Passage de marches ou de bordures de trottoirs 2.11.1 Descente de marches ou de bordures de trottoirs Il est possible de descendre de petites bordures de trottoirs en avançant. Assurez-vous que les repose-pieds ne touchent pas le sol.
  • Seite 37: Pliage Du Fauteuil Roulant

    V300, V300D 2016-06 Un utilisateur entraîné peut franchir seul des bordures de trottoirs. AVERTISSEMENT : risque de basculement. Si vous n'êtes pas assez expérimenté pour contrôler le fauteuil roulant, demandez de l'aide à quelqu'un. Roulez jusqu'aux bordures de trottoirs. Assurez-vous que les repose-pieds ne touchent pas les bordures de trottoirs.
  • Seite 38: Transport En Voiture

    V300, V300D 2016-06 2.14 Transport en voiture AVERTISSEMENT : risque de blessure. Vérifiez que le fauteuil roulant est bien fixé. Vous éviterez ainsi des blessures des passagers en cas de collision ou de freinage brutal. AVERTISSEMENT : risque de blessure. N'utilisez JAMAIS la même ceinture pour attacher le passager et le fauteuil roulant.
  • Seite 39 V300, V300D 2016-06 7. Fixez les sangles avant de sécurité comme indiqué par le fabricant. (figure 3) Les points d’accroches sont indiqués sur le fauteuil roulant par un symbole. (figure 8. Reculez le fauteuil de façon à ce que les sangles avant soient tendues.
  • Seite 40: Installation Et Réglage

    Installation et réglage Les instructions de ce chapitre sont destinées au distributeur. Le Vermeiren V300, V300D a été conçu pour un réglage avec un minimum de pièces de rechange. Il n'est pas nécessaire de stocker des pièces de rechange. Pour trouver un service d'entretien ou un revendeur spécialisé près de chez vous, contactez l'établissement Vermeiren le plus proche.
  • Seite 41: Réglage De La Hauteur Du Siège Et De L'angle Du Siège

    Réglage de la hauteur du siège et de l'angle du siège Le Vermeiren V300, V300D est réglable sur 4 hauteurs de siège et 5 angles de siège (0°- 2,5°-5°-7,5°-10°) en modifiant la position des roues pour chaque hauteur et angle, avec un réglage différent des roues avant et arrière.
  • Seite 42 V300, V300D 2016-06 Procédez comme indiqué ci-dessous pour modifier la hauteur du siège : Retirez les roues arrière (voir § 2.13). Vissez les douilles de l'essieu arrière depuis la plaque d'essieu. Assemblez les douilles de l'essieu dans le trou approprié de la plaque d'essieu, voir le tableau 3 et la figure précédente.
  • Seite 43: Réglage De La Profondeur Du Siège

    V300, V300D 2016-06 Réglage de la profondeur du siège Le Vermeiren V300, V300D peut être réglé sur 5 profondeurs d'assise en modifiant la traverse et la liaison avec le dossier . Liaison avec le dossier  Profondeur du siège Traverse...
  • Seite 44: Réglez Les Freins

    V300, V300D 2016-06 Réglez les freins AVERTISSEMENT : risque de blessure, seul le distributeur peut régler les freins. Réglez les freins d'après les règles suivantes : 1. Installez les roues d'après le § 2.2.  2. Déconnectez les freins en tirant le levier vers l'arrière.
  • Seite 45: Réglage Du Repose-Bras

    V300, V300D 2016-06 3.6.3 Réglage de l'angle des plaques repose-pieds 100° 80° Réglez l'angle des plaques repose-pieds de la manière suivante :  Desserrez le boulon Réglez le tube  à l'angle souhaité. L'indication d'angle (80°, 85°, 90°, 95°, 100°) correspond aux petits traits .
  • Seite 46: Réglage De La Stabilité Et De La Manœuvrabilité

    1. Desserrez les boulons de la plaque d'essieu. 2. Déplacez la plaque d'essieu  dans la position souhaitée. 3. Reserrez les boulons. Maintenance Le mode d'emploi des fauteuils roulants manuels se trouve sur le site Internet de Vermeiren, www.vermeiren.be, www.vermeiren.fr. Page 22 ...
  • Seite 47 V300, V300D 2016-06 Inhoudsopgave Voorwoord................... 2   Productomschrijving ............... 3       Toepassingsgebied ....................3     Technische specificaties ..................4     Tekening ........................6     Accessoires ......................6     Locatie identificatieplaat ..................7    ...
  • Seite 48: Voorwoord

    Voorwoord We willen U danken voor het vertrouwen dat U in onze producten stelt. De rolstoelen van Vermeiren zijn het resultaat van jarenlange studies en ervaringen. Bij de ontwikkeling werd veel aandacht besteed aan een eenvoudige bediening en een gemakkelijk onderhoud.
  • Seite 49: Productomschrijving

    Gebruik enkel door Vermeiren goedgekeurde accessoires. Vermeiren is niet aansprakelijk voor schade door gebrekkig of onvoldoende onderhoud of als gevolg van het niet naleven van instructies van deze handleiding. Het naleven van de gebruiks- en onderhoudsinstructies vormen een essentieel onderdeel van de garantiebepalingen.
  • Seite 50: Technische Specificaties

    Diameter Krypton PU stuurwielen 200 mm Bandenspanning stuurwielen (enkel voor Max. 2,5 bar luchtbanden) Opslag en gebruikstemperatuur +5 °C +41 °C Opslag en gebruiksluchtvochtigheid Technische wijzigingen voorbehouden. Meettolerantie ± 15 mm / 1,5 kg / ° Tabel 1: Technische Specificaties V300 Pagina 4 ...
  • Seite 51 V300, V300D 2016-06 Merk Vermeiren Adres Vermeirenplein 1/15, B-2920 Kalmthout Type Manuele rolstoel Model V300D Maximale massa gebruiker 130 kg Omschrijving Min. Max. Totale lengte inclusief voetsteun 1040 mm Effectieve zitbreedte 390 mm 420 mm 440 mm 460 mm 480 mm...
  • Seite 52: Tekening

    8 = Rug 9 = Trapdop 10 = Kruis 11 = Handvaten Accessoires Volgende accessoires zijn beschikbaar voor de V300, V300D:  Anterior bekkengordel (B20) om te bevestigen aan de tubes van de rug (zie volgens handleiding)  Anti-tipping apparaat (B78) om te bestiging aan het onderste frame (zie volgens handleiding) Pagina 6 ...
  • Seite 53: Locatie Identificatieplaat

    V300, V300D 2016-06 Locatie identificatieplaat 1 = Logo Vermeiren 2 = Taxi haken 3 = Identificatieplaat 4 = Naam Vermeiren Gebruikte symbolen Maximum gewicht Gebruik voor binnen en buiten Maximale veilige helling CE conformiteit Type aanduiding Gebruik Dit hoofdstuk beschrijft het normaal gebruik. Deze instructies zijn van toepassing voor de gebruiker en de vakhandelaar.
  • Seite 54: Plaatsen Van De Achterwielen

    V300, V300D 2016-06 Plaatsen van de achterwielen  1. Neem het achterwiel en druk naafknop 2. Houdt de naafknop ingedrukt en plaats het achterwiel in de asbus tot deze niet meer verder kan. 3. Laat de naafknop los. 4. Kijk na of het wiel goed vastzit.
  • Seite 55: Plaatsen Of Verwijderen Van De Armsteunen

    V300, V300D 2016-06 Om de remmen in te schakelen: Druk de hendels van de remmen naar voren tot U een duidelijke klik voelt. VOORZICHTIG: Gevaar op ongecontroleerde beweging – zorg ervoor dat alvorens de remmen los gezet worden, de rolstoel vlak staat. Los nooit beide remmen tegelijk.
  • Seite 56: Transfer In En Uit De Rolstoel

    V300, V300D 2016-06 Voor het openen en afnemen van de armsteun gaat U als volgt te werk:  1. Druk op knop en trek de voorzijde van de armsteun omhoog. 2. Klap de armsteun naar achter.  Als U de armsteun wilt verwijderen, druk dan op knop en trek de achterzijde van ...
  • Seite 57: Correcte Positie In De Rolstoel

    Neem geen te steile helling. De maximale hoek bergop en bergaf staat in tabel 1 voor V300 en tabel 2 voor V300D. Vraag een begeleider om U te helpen de helling te nemen. Buig lichtjes voorover om Uw zwaartepunt naar voren te verplaatsen.
  • Seite 58 V300, V300D 2016-06 Hogere trottoirs kunnen met een begeleider voorwaarts genomen worden: Laat de begeleider de rolstoel lichtjes naar achter kantelen. Rijd op de achterwielen het trottoir af. Zet de rolstoel terug op de vier wielen. Een geoefend gebruiker kan een hoger trottoir zelf afrijden. Dit kan het best achterwaarts gedaan worden.
  • Seite 59: Opvouwen Van De Rolstoel

    V300, V300D 2016-06 2.11.3 Nemen van trappen Het nemen van trappen terwijl U in de rolstoel zit doet U als volgt. WAARSCHUWING: Kantelgevaar – Voor het nemen van trappen zijn altijd 2 begeleiders nodig. Verwijder de voetsteunen. Laat één begeleider de rolstoel lichtjes naar achteren kantelen.
  • Seite 60: Gebruik Van De Rolstoel Als Zit In Een Motorvoertuig

    V300, V300D 2016-06 2.15 Gebruik van de rolstoel als zit in een motorvoertuig WAARSCHUWING: De rolstoel heeft de crashtest volgens ISO 7176-19: 2008 doorstaan en is zodanig ontworpen en getest om alleen te worden gebruikt als een naar voren gerichte zit in een motorvoertuig.
  • Seite 61 V300, V300D 2016-06 Figuur 4 iguur 3 Procedure om de rolstoelgebruiker vast te maken: 1. Verwijder beide armsteunen. 2. Indien aanwezig, bevestig de rolstoel bekkengordel. 3. Bevestig het veiligheidssysteem voor inzittenden volgens de instructies van het riem- systeem van de fabrikant.
  • Seite 62: Montage En Afstellen

    Montage en afstellen De in dit hoofdstuk beschreven instructies zijn bestemd voor de vakhandelaar. De Vermeiren V300, V300D is speciaal ontworpen om te worden afgesteld met een minimum aan te vervangen onderdelen. Zo is er geen extra voorraad nodig van vervangonderdelen.
  • Seite 63 V300, V300D 2016-06 Voorwiel Asplaat achterwiel Zithoogte 440 mm Zithoogte 470 mm Zithoogte 500 mm (standaard) Zithoogte 530 mm Pagina 17 ...
  • Seite 64 V300, V300D 2016-06 Om de zithoogte te wijzigen gaat U als volgt te werk: Verwijder de achterwielen (zie § 2.13). Schroef de montagebussen van de achterwielen los van de asplaat. Monteer de bussen in het juiste gat van de asplaat, zie Tabel 3 en voorgaande figuur.
  • Seite 65: Instellen Van De Zitdiepte

    V300, V300D 2016-06 Instellen van de zitdiepte De Vermeiren V300, V300D is instelbaar in 5 zitdieptes door het kruis en de rugbevestiging  te verstellen.  Zitdiepte Kruis rugbevestiging 460 mm Gaten 1 en 3 Positie 1 440 mm (Standaard)
  • Seite 66: Afstellen Van De Remmen

    V300, V300D 2016-06 Afstellen van de remmen WAARSCHUWING: Gevaar voor letsel – Laat de remmen afstellen door een erkend vakhandelaar. Het afstellen van de remmen doet U als volgt: 1. Monteer de wielen zoals beschreven in § 2.22.  2. Zet de remmen los door hendel naar achteren te trekken.
  • Seite 67: Afstellen Van De Armsteunen

    V300, V300D 2016-06 Door de linker en rechter voetplaat uit te wisselen, kunnen de voetplaten naar voor versteld worden. 3.6.3 Hoekafstelling voetplaten 100° 80° Om de hoek van de voetplaten te verstellen gaat U als volgt te werk:  Draai schroef los.
  • Seite 68: Instellen Van De Stabiliteit En Manouvreerbaarheid

    2. Zet de asplaat  in de gewenste positie. 3. Draai de bouten van de asplaat terug vast. Onderhoud Voor de onderhoudshandleiding van de manuele rolstoelen kan U de website van Vermeiren raadplegen: www.vermeiren.be, www.vermeiren.nl. Clusteromschrijvingen De V300, V300D met 24 inch achterwielen voldoen voor:...
  • Seite 69 V300, V300D 2016-06 Inhalt Vorwort ....................2   Produktbeschreibung .............. 3       Verwendungszweck ..................... 3     Technische Daten ......................4     Zeichnungen ........................ 6     Zubehör ........................6       Positionstypenschild ....................7  ...
  • Seite 70: Vorwort

    Zuerst möchten wir uns für das Vertrauen bedanken, das Sie in uns gesetzt haben, indem Sie sich für einen unserer Rollstühle entschieden haben. Die Vermeiren-Rollstühle sind das Ergebnis langjähriger Forschung und Erfahrung. In der Entwicklungsphase wurde besonderer Wert auf Bedienerfreundlichkeit und leichte Wartung des Rollstuhls gelegt.
  • Seite 71: Produktbeschreibung

    Wird der Rollstuhl auf Matten, Auslegeware oder Teppichböden verwendet, könnten diese Bodenbeläge beschädigt werden. Verwenden Sie ausschließlich von Vermeiren genehmigtes Zubehör. Für Schäden durch nicht oder mangelhaft durchgeführte Wartung oder durch Nichtbeachtung der folgenden Anweisungen übernimmt der Hersteller keine Haftung.
  • Seite 72: Technische Daten

    200 mm Reifendruck, Lenkräder max. 2,5 bar Temperaturbereich für Lagerung und Nutzung + 5 °C + 41 °C Luftfeuchtigkeitsbereich für Lagerung und Nutzung Technische Änderungen vorbehalten. Messtoleranzen ± 15 mm / 1,5 kg / ° Tabelle 1: Technische Daten V300 Seite 4 ...
  • Seite 73 V300, V300D 2016-06 Hersteller Vermeiren Adresse Vermeirenplein 1/15, B-2920 Kalmthout (Belgien) Manueller Rollstuhl Modell V300D Max. zulässiges Gewicht des Fahrers 130 kg Beschreibung Min. Max. Gesamtlänge mit Fußauflage 1040 mm Effektive Sitzbreite 390 mm 420 mm 440 mm 460 mm...
  • Seite 74: Zeichnungen

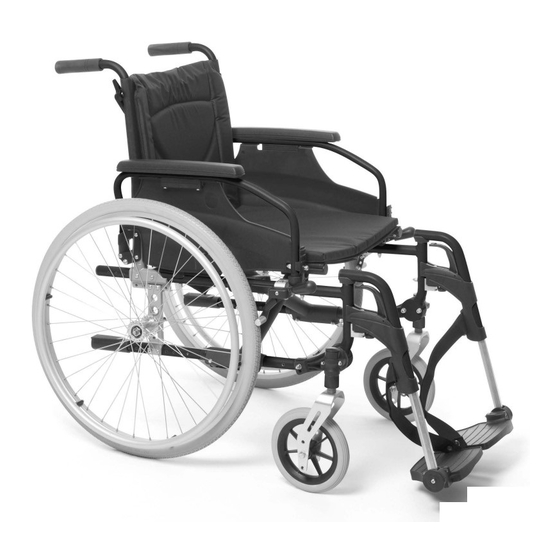
    8 = Rückenlehne 9 = Kipphilfe 10 = Schere 11 = Handgriffe Zubehör Für den V300, V300D ist das folgende Zubehör erhältlich:  Vorderer Beckengurt (B20) zur Befestigung an den Rohren der Rückenlehne (siehe entsprechendes Handbuch)  Anti-Kippvorrichtung (B78) zur Befestigung am unteren Rahmen (siehe entsprechendes Handbuch) Seite 6 ...
  • Seite 75: Positionstypenschild

    V300, V300D 2016-06 Positionstypenschild 1 = Logo Vermeiren 2 = Taxi Haken 3 = Positionstypenschild 4 = Name Vermeiren Zeichenerklärung Max. zulässiges Gewicht Innen- und Außenbereich Maximale, sichere Steigung CE-Konformität Typenbezeichnung Verwendung In diesem Kapitel wird die tägliche Verwendung beschrieben. Diese Anweisungen richten sich an den Benutzer und an den Fachhändler.
  • Seite 76: Montage Der Hinterräder

    V300, V300D 2016-06 Montage der Hinterräder 1. Nehmen Sie das Hinterrad in die Hand und  drücken Sie auf den Arretierstift 2. Halten Sie den Arretierstift gedrückt und schieben Sie das Hinterrad bis zum Anschlag auf die Achse. 3. Lassen Sie den Arretierstift los.
  • Seite 77: An- Oder Abbauen Der Armauflagen

    V300, V300D 2016-06 So betätigen Sie die Bremsen: Drücken Sie die Bremshebel nach vorn, bis sie ein deutliches Klicken fühlen. VORSICHT: Gefahr einer unbeabsichtigten Bewegung. Achten Sie darauf, dass der Rollstuhl auf einer flachen, horizontalen Fläche steht, bevor Sie die Bremsen lösen.
  • Seite 78: Setzen In Den Rollstuhl

    V300, V300D 2016-06 So entriegeln Sie eine Armauflage und bauen sie ab:  1. Drücken Sie den Hebel und ziehen Sie die Vorderseite der Armauflage nach oben. 2. Klappen Sie die Armauflage nach hinten.  Zum Abbauen der Armauflage drücken Sie den Knopf und ziehen den hinteren Teil der Armauflage aus der Aufnahme .
  • Seite 79: Prüfen Sie, Ob Die Sitzposition Korrekt Ist

    Sie ihn stets anlegen. Versuchen Sie nicht, zu steile Steigungen hinauf zu fahren. Die maximalen Steigungswinkel (sowohl auf- als auch abwärts), sind in Tabelle 1 für V300 und Tabelle 2 für V300D aufgeführt. Bitten Sie einen Helfer, Sie beim Hinauffahren der Steigung zu unterstützen.
  • Seite 80: Überwinden Von Stufen Und Bordsteinen

    V300, V300D 2016-06 2.11 Überwinden von Stufen und Bordsteinen 2.11.1 Hinunterfahren von Stufen und Bordsteinen Stufen und Bordsteine können vorwärts überwunden werden. Achten Sie darauf, dass die Fußplatten den Boden nicht berühren. Ein geübter Fahrer kann Stufen und Bordsteine problemlos...
  • Seite 81: Überwinden Von Treppen

    V300, V300D 2016-06 WARNUNG: Kippgefahr – Wenn Sie noch unerfahren in der Handhabung eines Rollstuhls sind, lassen Sie sich von einer zweiten Person helfen. Fahren Sie bis an den Bordstein heran. Achten Sie darauf, dass die Fußplatten den Bordstein nicht berühren.
  • Seite 82: Transport In Einem Auto

    V300, V300D 2016-06 2.14 Transport in einem Auto WARNUNG: Verletzungsgefahr – Achten Sie darauf, den Rollstuhl ordnungsgemäß zu befestigen. So vermeiden Sie Verletzungen der Fahrzeuginsassen bei einer Kollision oder einem plötzlichen Bremsmanöver. WARNUNG: Verletzungsgefahr – Verwenden Sie zum Sichern des Rollstuhls und des Fahrzeuginsassens NIEMALS den gleichen Sicherheitsgurt.
  • Seite 83 V300, V300D 2016-06 Montieren Sie die vorderen Gurte des Rollstuhl-Gurtsystems gemäß den Angaben des jeweiligen Herstellers an den angegebenen Positionen am Rollstuhl. (Abb. 3) Diese Stellen sind am Rollstuhl mit einem Symbol markiert. (Abb. 4) Ziehen Sie den Rollstuhl soweit nach hinten, bis die vorderen Gurte gespannt sind.
  • Seite 84: Zusammenbau Und Einstellung

    Zusammenbau und Einstellung Die Anweisungen in diesem Kapitel richten sich an den Fachhändler. Der Vermeiren V300, V300D wurde so konzipiert, dass er optimal verstellt werden kann und nur ein Minimum an Ersatzteilen erfordert. Daher ist es nicht erforderlich, dass ein spezieller Vorrat an Ersatzteilen angelegt wird.
  • Seite 85: Einstellen Der Sitzhöhe Und Des Sitzwinkels

    V300, V300D 2016-06 Einstellen der Sitzhöhe und des Sitzwinkels Der Vermeiren V300, V300D ist 4-fach in der Sitzhöhe und 5-fach bei den Sitzwinkeln verstellbar (0°-2,5°-5°-7,5°-10°). Bei jeder Sitzhöhe und für jeden Sitzwinkel wird eine andere Position der Vorder- und Hinterräder gewählt.
  • Seite 86 V300, V300D 2016-06 So ändern Sie die Sitzhöhe: Bauen Sie die Hinterräder ab (siehe § 2.13). Schrauben Sie die Achsbuchsen der Hinterräder von der Achsplatte ab. Montieren Sie die Achsbuchsen in der richtigen Bohrung der Achsplatte, siehe Tabelle 3 und vorherige Abbildung.
  • Seite 87: Einstellen Der Sitztiefe

    V300, V300D 2016-06 Einstellen der Sitztiefe Die Sitztiefe des Vermeiren V300, V300D kann durch Ändern der Schere und der Rückenlehnenverbindung  5-fach verstellt werden. Rückenlehnenverbindung  Sitztiefe Schere 460 mm Bohrung 1 und 3 Position 1 440 mm (Standard) Bohrung 2 und 4...
  • Seite 88: Einstellen Der Bremsen

    V300, V300D 2016-06 Einstellen der Bremsen WARNUNG: Verletzungsgefahr – Bremsen dürfen nur vom Fachhändler eingestellt werden. So stellen Sie die Bremsen ein: 1. Bauen Sie die Räder gemäß den Anweisungen in § 2.2 an. 2. Lösen Sie die Bremsen, indem Sie den ...
  • Seite 89: Einstellen Des Fußplattenwinkels

    V300, V300D 2016-06 3.6.3 Einstellen des Fußplattenwinkels 100° 80° So stellen Sie den Fußplattenwinkel ein:  Lösen Sie die Schrauben Verstellen Sie das Rohr  in den gewünschten Winkel. Die Winkelanzeige (80°-85°-90°-95°-100°) kann an den Strichen  abgelesen werden. ...
  • Seite 90: Einstellen Der Stabilität Und Der Manövrierbarkeit

    1. Lösen Sie die Schrauben der Achsplatte. 2. Verschieben Sie die Achsplatte  in die gewünschte Position. 3. Ziehen Sie die Schrauben wieder fest. Wartung Hinweise zur Wartung der Rollstühle entnehmen Sie bitte der Website von Vermeiren: www.vermeiren.de, www.vermeiren.at, www.vermeiren.ch. Seite 22 ...
  • Seite 91 V300, V300D 2016-06 Indice Premessa ....................2   Descrizione del prodotto ............3       Utilizzo previsto ......................3     Specifiche tecniche ...................... 4     Schema ........................6     Accessori ........................6       Posizione della targhetta di identificazione ..............7  ...
  • Seite 92: Premessa

    Ringraziamo per la fiducia accordataci con l’acquisto di una carrozzina di nostra produzione. Le carrozzine Vermeiren sono il risultato di molti anni di ricerca ed esperienza. Durante lo sviluppo, è stata dedicata attenzione speciale alla facilità d'uso e alla praticità della carrozzina.
  • Seite 93: Descrizione Del Prodotto

    Quando utilizzata su pavimenti con tappeti, moquette o rivestimenti, la carrozzina può danneggiarli. Utilizzare solo gli accessori approvati Vermeiren. La casa costruttrice non può essere ritenuta responsabile per danni causati dalla mancanza di manutenzione adeguata o risultanti dal mancato rispetto delle istruzioni contenute nel presente manuale.
  • Seite 94: Specifiche Tecniche

    Temperatura di utilizzo e di conservazione + 5 °C + 41 °C Umidità di utilizzo e di conservazione Ci riserviamo il diritto di apportare modifiche tecniche. Tolleranza ± 15 mm / 1,5 kg / ° Tabella 1: Specifiche tecniche V300 Pagina 4 ...
  • Seite 95 V300, V300D 2016-06 Produttore Vermeiren Indirizzo Vermeirenplein 1/15, B-2920 Kalmthout Tipo Carrozzina manuale Modello V300D Peso massimo dell'occupante 130 kg Descrizione Min. Max. Lunghezza complessiva con poggiapiedi 1040 mm Larghezza effettiva del sedile 390 mm 420 mm 440 mm 460 mm...
  • Seite 96: Schema

    8 = Schienale 9 = Calotta ribaltamento 10 = Crociera 11 = Impugnature Accessori I seguenti accessori sono disponibili per il modello V300, V300D:  Cintura pelvica anteriore (B20) per il montaggio sui tubi posteriori (vedere il manuale adatto) ...
  • Seite 97: Posizione Della Targhetta Di Identificazione

    V300, V300D 2016-06 Posizione della targhetta di identificazione 1 = Logo Vermeiren 2 = Taxi ganci 3 = Targhetta di identificazione 4 = Nome Vermeiren Significato dei simboli Peso massimo Utilizzo interno ed esterno Pendenza massima consentita Conformità CE Modello Utilizzo In questo capitolo viene descritto l'utilizzo quotidiano.
  • Seite 98: Montaggio Delle Ruote Posteriori

    V300, V300D 2016-06 Montaggio delle ruote posteriori 1. Prendere la ruota posteriore e premere sul  pulsante 2. Tenere premuto il pulsante e montare l'asse delle ruote posteriori fino a quando non si arresta. 3. Rilasciare il pulsante. 4. Verificare che le ruote siano fissate.
  • Seite 99: Montaggio O Rimozione Dei Poggiabraccia

    V300, V300D 2016-06 Per frenare: spingere le impugnature dei freni in avanti fino a sentire un clic. ATTENZIONE: rischio di movimento indesiderato. Accertarsi che la carrozzina sia su una superficie orizzontale prima di rilasciare i freni. Non rilasciare entrambi i freni contemporaneamente.
  • Seite 100: Trasferire La Carrozzina All'interno E All'esterno

    V300, V300D 2016-06 Per aprire e rimuovere il bracciolo:  1. Premere la leva e tirare la parte anteriore del bracciolo verso l'alto. 2. Piegare all'indietro il bracciolo.  Per rimuovere il poggiabraccia, premere il pulsante e tirare la parte posteriore del poggiabraccia dal coperchio del tubo .
  • Seite 101: Posizione Corretta Nella Carrozzina

    Non tentare di spostarsi su pendenze troppo ripide. Le pendenze massime (in discesa e in salita) sono riportate nella tabella 1 per V300 e tabella 2 per V300D. Chiedere all'accompagnatore un aiuto per spostarsi in pendenza. Inclinarsi in avanti per spostare il baricentro in avanti.
  • Seite 102 V300, V300D 2016-06 Gli scalini più alti possono essere superati con un accompagnatore: Chiedere all'accompagnatore di inclinare la carrozzina leggermente all'indietro. Superare i gradini procedendo sulle ruote posteriori. Riportare la carrozzina sulle quattro ruote. Un utente esperto è in grado di affrontare gli scalini da solo. È...
  • Seite 103: Ripiegare La Carrozzina

    V300, V300D 2016-06 2.11.3 Fare le scale È possibile fare le scale nella carrozzina, adottando le regole che seguono: AVVERTENZA: rischio di ribaltamento. È possibile fare le scale facendosi assistere sempre da due accompagnatori. Rimuovere i poggiapiedi. Far inclinare la carrozzina leggermente all'indietro all'accompagnatore.
  • Seite 104: Uso Della Carrozzina Quale Sedile Su Un'autovettura

    V300, V300D 2016-06 2.15 Uso della carrozzina quale sedile su un'autovettura AVVERTENZA: La carrozzina ha passato il test dell’ISO 7176-19: 2008 e, per questo, è stata disegnata e testata per essere utilizzata quale sedile su un’autovettura, rivolti in direzione di marcia.
  • Seite 105 V300, V300D 2016-06 Figura 4 Figura 3 Istruzioni per la sicurezza del paziente: 1. Rimuovere entrambi i braccioli. 2. Se presente, allacciare la cintura pelvica della carrozzina. 3. Allacciare la cinture di sicurezza del paziente seguendo le istruzioni del costruttore del sistema di passanti.
  • Seite 106: Installazione E Regolazione

    Le istruzioni contenute nel presente capitolo sono destinate al rivenditore. La carrozzina Vermeiren V300, V300D è stata messa a punto per essere regolata con un numero minimo di parti di ricambio. Non è necessario un altro set di parti di ricambio.
  • Seite 107: Regolazione Dell'altezza E Dell'angolazione Del Sedile

    2016-06 Regolazione dell'altezza e dell'angolazione del sedile La carrozzina Vermeiren V300, V300D consente di regolare l'altezza del sedile in quattro posizioni, mentre per l'angolazione sono disponibili cinque posizioni (0°-2,5°-5°-7,5°- 10°), modificando la posizione delle ruote per ciascuna altezza e angolazione è disponibile un'impostazione diversa delle ruote anteriori e posteriori.
  • Seite 108 Per altre combinazioni di inclinazione e altezza del sedile, è possibile adottare la procedura seguente per regolare la forcella anteriore e la piastra dell'asse nella combinazione giusta. Se non si trova la combinazione giusta, è sempre possibile contattare Vermeiren. Verificare che gli assi rotanti siano perpendicolari al suolo. Se necessario, adottare la procedura seguente per regolare l'alloggiamento dello stelo pressofuso: Allentare i 3 bulloni tramite una chiave a brugola da 5.
  • Seite 109: Regolazione Della Profondità Del Sedile

    V300, V300D 2016-06 Regolazione della profondità del sedile La profondità del sedile della carrozzina Vermeiren V300, V300D è regolabile in 5 posizioni modificando connessione tra la crociera e lo schienale. Profondità sedile Crociera Connessione dello schienale  460 mm Foro 1 e 3...
  • Seite 110: Regolare I Freni

    V300, V300D 2016-06 Regolare i freni AVVERTENZA: rischio di lesione. I freni devono essere regolati solo dal rivenditore. Regolare i freni rispettando le regole seguenti: 1. Installare le ruote in base a quanto riportato nel § 2.2.  2. Scollegare i freni tirando la leva all'indietro.
  • Seite 111: Regolazione Del Poggiabraccia

    V300, V300D 2016-06 3.6.3 Regolazione dell'angolazione delle pedane 100° 80° Regolare l'angolazione delle pedane nel modo seguente:  Allentare il bullone Regolare il tubo  nell'angolazione desiderata. L'indicazione dell'angolazione (80°-85°-90°-95°-100°) è relativa ai trattini .  Serrare nuovamente il bullone Regolazione del poggiabraccia È...
  • Seite 112: Regolazione Della Stabilità E Della Manovrabilità

    1. Allentare i bulloni della piastra dell'asse. 2. Spostare la piastra dell'asse  nella posizione desiderata. 3. Serrare nuovamente i bulloni. Manutenzione Per il manuale di manutenzione della carrozzine consultate il sito web Vermeiren: www.vermeiren.it. Pagina 22 ...
  • Seite 113 V300, V300D 2016-06 Índice Introducción ..................2   Descripción del producto ............3       Uso previsto......................... 3     Especificaciones técnicas .................... 4     Esquema ........................6     Accesorios ........................6       Placa de identificación de ubicaciones ................ 7  ...
  • Seite 114: Introducción

    En primer lugar, nos gustaría agradecerle que haya confiado en nosotros escogiendo una de nuestras sillas de ruedas. Las sillas de ruedas Vermeiren son el resultado de muchos años de experiencia e investigación. Durante su desarrollo, hemos puesto especial atención en crear una silla de ruedas práctica y fácil de usar.
  • Seite 115: Descripción Del Producto

    Si la utiliza encima de alfombras, suelos enmoquetados o sobre suelos con recubrimientos que no estén fijados, pueden dañarse estos recubrimientos. Sólo use accesorios Vermeiren aprobados. El fabricante no se hace responsable de los daños causados por la falta de mantenimiento, un mantenimiento inadecuado o como resultado de no observar las instrucciones indicadas en este manual.
  • Seite 116: Especificaciones Técnicas

    Máx. 2,5 bar Temperatura de almacenamiento y de uso +5 °C +41 °C Humedad de almacenamiento y de uso Reservado el derecho de aplicar modificaciones técnicas. Tolerancia de las medidas ±15 mm/ 1,5 kg/° Tabla 1: Especificaciones técnicas V300 Página 4 ...
  • Seite 117 V300, V300D 2016-06 Fabricante Vermeiren Dirección Vermeirenplein 1/15, B-2920 Kalmthout Tipo Silla de ruedas manual Modelo V300, V300D Peso máximo del ocupante 130 kg Descripción Mín. Máx. Longitud total con reposapiés 1040 mm Anchura útil del asiento 390 mm 420 mm...
  • Seite 118: Esquema

    8 = Respaldo 9 = Tapón del extremo 10 = Cruceta 11 = Empuñaduras Accesorios La V300, V300D cuenta con los siguientes accesorios:  Cinturón pélvico anterior (B20) para su montaje en los tubos de la parte trasera (consulte el manual) ...
  • Seite 119: Placa De Identificación De Ubicaciones

    V300, V300D 2016-06 Placa de identificación de ubicaciones 1 = Logo Vermeiren 2 = Taxi ganchos 3 = Placa de identificación 4 = Nombre Vermeiren Explicación de los símbolos Peso máximo Uso en el interior y en el exterior Pendiente máxima segura Conformidad con la normativa CE Designación de tipo...
  • Seite 120: Montaje De Las Ruedas Traseras

    V300, V300D 2016-06 Montaje de las ruedas traseras  1. Sujete la rueda trasera y presione el botón 2. Mantenga el botón presionado y monte el eje de las ruedas traseras hasta el tope. 3. Suelte el botón. 4. Compruebe que las ruedas están seguras.
  • Seite 121: Montaje Y Desmontaje De Los Soportes De Brazos

    V300, V300D 2016-06 Para accionar los frenos: Empuje las palancas del freno hacia delante hasta que oiga un clic. ATENCIÓN: Riesgo de movimientos no deseados: asegúrese de que la silla de ruedas se encuentra sobre una superficie horizontal plana antes de soltar los frenos.
  • Seite 122: Traslado A Y Desde La Silla De Ruedas

    V300, V300D 2016-06 Para abrir y retirar el reposabrazos:  1. Presione la palanca y tire de la parte delantera del reposabrazos hacia arriba. 2. Pliegue el reposabrazos hacia atrás.  Para retirar el reposabrazos, pulse el botón y extraiga la parte posterior del reposabrazos del capuchón del tubo .
  • Seite 123: Posición Correcta En La Silla De Ruedas

    Si hay un cinturón de seguridad disponible en la silla de ruedas, abrócheselo. No intente desplazarse por pendientes demasiado inclinadas. Los ángulos de pendiente máximos (ascendentes y descendentes) están indicados en la tabla 1 V300 y tabla 2 V300D. Pida a un acompañante que le ayude a desplazarse por pendiente.
  • Seite 124: Franqueo De Peldaños Y Bordillos

    V300, V300D 2016-06 2.11 Franqueo de peldaños y bordillos 2.11.1 Bajar peldaños y bordillos Se pueden bajar bordillos pequeños desplazándose hacia delante. Asegúrese de que los reposapiés no tocan el suelo. Los usuarios experimentados puede franquear peldaños y bordillos pequeños sin ayuda:...
  • Seite 125: Plegado De La Silla De Ruedas

    V300, V300D 2016-06 Los usuarios experimentados pueden franquear bordillos sin ayuda: ADVERTENCIA: Riesgo de vuelco: si no tiene suficiente experiencia para controlar su silla de ruedas, pida ayuda a un acompañante. Acérquese hasta el bordillo. Asegúrese de que el reposapiés no toca el bordillo.
  • Seite 126: Transporte En Coche

    V300, V300D 2016-06 2.14 Transporte en coche ADVERTENCIA: Riesgo de lesiones: compruebe que la silla de ruedas se encuentra correctamente fijada. Para evitar cualquier daño a los pasajeros en caso de colisión o frenado brusco. ADVERTENCIA: Riesgo de lesiones: no utilice NUNCA el mismo cinturón de seguridad para fijar la silla de ruedas y el pasajero.
  • Seite 127 V300, V300D 2016-06 7. Monte las correas de sujeción frontal de acuerdo a las instrucciones del fabricante del sistema de la correa en el lugar indicado. (Figura 3) Este lugar está marcado en la silla de ruedas con un símbolo. (Figura 4) 8.
  • Seite 128: Instalación Y Ajuste

    Instalación y ajuste Este capítulo contiene instrucciones destinadas a los distribuidores especializados. La silla Vermeiren V300, V300D está diseñada para ser regulada mediante un mínimo de piezas de repuesto. No es necesario disponer de un stock extra de piezas de repuesto.
  • Seite 129: Ajuste De La Altura Del Asiento Y Del Ángulo Del Asiento

    Ajuste de la altura del asiento y del ángulo del asiento El asiento de la silla Vermeiren V300, V300D dispone de 4 alturas y 5 ángulos (0°-2,5°-5°- 7,5°-10°) regulables mediante la modificación de la posición de las ruedas para cada altura y ángulo con ajustes diferentes en las ruedas delanteras y traseras.
  • Seite 130 Para las demás combinaciones de ángulo y altura del asiento, siga el procedimiento anterior para ajustar la horquilla y la placa eje en la combinación adecuada. En caso de no encontrar la combinación correcta, contacte con la empresa Vermeiren. Verifique que los ejes pivotantes se encuentran en posición perpendicular con respecto al suelo.
  • Seite 131: Ajuste De La Profundidad Del Asiento

    2016-06 Ajuste de la profundidad del asiento El asiento de la silla Vermeiren V300, V300D dispone de 5 posiciones de profundidad regulables mediante la modificación de la pieza de unión de la cruceta y del respaldo . Unión del respaldo ...
  • Seite 132: Ajuste De Los Frenos

    V300, V300D 2016-06 Ajuste de los frenos ADVERTENCIA: Riesgo de lesiones: sólo su distribuidor especializado puede ajustar los frenos. Ajuste los frenos según las instrucciones siguientes: 1. Monte las ruedas según se indica en el apartado 2.2. 2. Para desconectar los frenos, tire de la ...
  • Seite 133: Ajuste Del Reposabrazos

    V300, V300D 2016-06 3.6.3 Ajuste del ángulo de las bases de los estribos 100° 80° Regule el ángulo de las bases de los estribos como se indica a continuación:  Afloje el tornillo Ajuste el tubo  en el ángulo deseado. Las marcas indican el ángulo (80°-85°-90°-95°-100°) .
  • Seite 134: Ajuste De La Estabilidad Y La Maniobrabilidad

    V300, V300D 2016-06 Regule la altura y la profundidad del reposabrazos como se indica a continuación: Extraiga los dos tornillos situados debajo del reposabrazos. Coloque la cantidad correcta de bloques debajo y encima de los tubos (véase la tabla 5).
  • Seite 135 V300, V300D 2016-06 Spis treści Wstęp ....................2   Opis produktu ................3     Przeznaczenie ......................3     Parametry techniczne ....................4     Rysunek ........................6     Akcesoria ........................6     Płytka określająca położenie ..................7  ...
  • Seite 136: Wstęp

    Wstęp Przede wszystkim pragniemy Państwu podziękować za zaufanie, jakim nas Państwo obdarzyli, dokonując wyboru jednego z naszych wózków inwalidzkich. Wózki inwalidzkie Vermeiren są konstruowane na podstawie wieloletnich badań i doświadczenia. W procesie projektowania szczególną uwagę poświęcono łatwości użycia i solidności.
  • Seite 137: Opis Produktu

    Podczas użytkowania na matach, dywanach lub luźnych przykryciach podłogowych może dojść do uszkodzenia powierzchni wykładzinowej. Należy korzystać wyłącznie z akcesoriów zatwierdzonych przez firmę Vermeiren. Producent nie ponosi odpowiedzialności za uszkodzenia spowodowane brakiem lub nieodpowiednim serwisowaniem bądź będące skutkiem nieprzestrzegania zaleceń...
  • Seite 138: Parametry Techniczne

    Maksymalnie 2,5 bara Temperatura przechowywania i użytkowania +5°C +41°C Wilgotność powietrza do przechowywania i użytkowania Producent zastrzega sobie prawo do wprowadzania zmian parametrów technicznych. Tolerancja pomiarów ± 15 mm / 1,5 kg / ° Tabela 1: Parametry techniczne V300 Strona 4 ...
  • Seite 139 V300, V300D 2016-06 Producent Vermeiren Adres Vermeirenplein 1/15, B-2920 Kalmthout Ręczny wózek inwalidzki Model V300D Maksymalna waga użytkownika 130 kg Opis Min. Maks. Długość całkowita z podnóżkiem 1040 mm Szerokość użytkowa siedziska 390 mm 420 mm 440 mm 460 mm...
  • Seite 140: Rysunek

    8 = Oparcie 9 = Zaślepka 10 = Krzyżak 11 = Uchwyty Akcesoria Dla modelu V300, V300D dostępne są następujące akcesoria:  Pas stabilizujący miednicę od przodu (B20) do zamocowania na rurach z tyłu wózka (patrz instrukcja)  Urządzenie zapobiegające przewróceniu wózka (B78) do zamocowania na dolnej ramie wózka (patrz instrukcja)
  • Seite 141: Płytka Określająca Położenie

    V300, V300D 2016-06 Płytka określająca położenie 1 = Logo Vermeiren 2 = Taxi haki 3 = Płytka określająca 4 = Imię i nazwisko Vermeiren Objasnienia symboli Waga maksymalna Użycie wewnątrz i na zewnątrz budynków Maks. bezpieczne nachylenie CE deklaracja Oznaczenie typu Sposób użycia...
  • Seite 142: Montaż Kół Tylnich

    V300, V300D 2016-06 Montaż kół tylnich  1. Chwyć tylne koło i naciśnij przycisk 2. Przytrzymując wciśnięty przycisk, nałóż oś tylnego koła aż do zablokowania. 3. Zwolnij przycisk. 4. Sprawdź, czy koło jest bezpiecznie zamocowane. Rozkładanie wózka inwalidzkiego PRZESTROGA: Ryzyko przytrzaśnięcia – trzymaj palce w bezpiecznej odległości od ruchomych części wózka inwalidzkiego.
  • Seite 143: Montaż I Demontaż Podłokietników

    V300, V300D 2016-06 Aby zaciągnąć hamulec: Popchnij dźwignie hamulców w przód, aż da się słyszeć wyraźne kliknięcie. PRZESTROGA: Ryzyko niezamierzonego ruchu – przed zwolnieniem hamulców upewnij się, że wózek inwalidzki znajduje się na płaskiej, poziomej powierzchni. Nigdy nie zwalniaj obu hamulców jednocześnie.
  • Seite 144: Wsiadanie I Zsiadanie Z Wózka Inwalidzkiego

    V300, V300D 2016-06 Aby rozłożyć i zdemontować podłokietnik:  1. Naciśnij dźwignię i pociągnij przód podłokietnika w górę. 2. Odchyl podłokietnik w tył.  Aby wymontować podłokietnik, naciśnij przycisk i wyciągnij tył podłokietnika z ramy . Wsiadanie i zsiadanie z wózka inwalidzkiego PRZESTROGA: Jeśli nie można samemu bezpiecznie wsiąść...
  • Seite 145: Prawidłowa Pozycja W Wózku Inwalidzkim

    Nie próbuj poruszać się po zbyt dużych pochyłościach. Maksymalne dopuszczalne kąty nachylenia podłoża (w górę i w dół) zawiera Tabela 1 dla V300 i tabela 2 dla V300D. Poproś opiekuna o pomoc podczas ruchu na pochyłym podłożu. Pochyl się w przód, aby przesunąć środek ciężkości do przodu.
  • Seite 146: Pokonywanie Progów Lub Krawężników

    V300, V300D 2016-06 2.11 Pokonywanie progów lub krawężników 2.11.1 Zjazd z progów lub krawężników Z niskiego krawężnika można zjechać, poruszając się w przód. Upewnij się, że podnóżki nie dotykają ziemi. Doświadczony użytkownik może samodzielnie pokonać niewielkie progi lub krawężniki. OSTRZEŻENIE: Ryzyko wywrócenia – jeśli nie posiadasz wystarczającego doświadczenia w...
  • Seite 147: Składanie Wózka Inwalidzkiego

    V300, V300D 2016-06 Doświadczony użytkownik może samodzielnie pokonywać krawężniki. OSTRZEŻENIE: Ryzyko wywrócenia – jeśli nie posiadasz wystarczającego doświadczenia w korzystaniu z wózka inwalidzkiego, poproś o pomoc opiekuna. Podjedź do krawężnika. Upewnij się, że podnóżki nie dotykają krawężnika. Odchyl się w tył, utrzymując równowagę na tylnych kołach.
  • Seite 148: Transport Wsamochodzie

    V300, V300D 2016-06 2.14 Transport wsamochodzie OSTRZEŻENIE: Ryzyko urazu – upewnij się, że wózek inwalidzki jest prawidłowo umocowany. Pozwoli to zapobiec urazom pasażerów podczas kolizji lub gwałtownego hamowania. OSTRZEŻENIE: Ryzyko urazu – NIGDY nie używaj jednego pasa bezpieczeństwa do zabezpieczenia pasażera i wózka inwalidzkiego.
  • Seite 149 V300, V300D 2016-06 7. W pierwszej kolejności zamontuj pasy mocujące z przodu wózka zgodnie z instrukcją producenta systemu mocującego we wskazane miejsce. (Rysunek 3) miejsce mocowania jest zaznaczone na wózku inwalidzkim z symbolem. (Rysunek 4) 8. Wycofaj wózek do momentu aż pasy z przodu się napną.
  • Seite 150: Montaż I Regulacja

    Montaż i regulacja Instrukcje zawarte w niniejszym rozdziale są przeznaczone dla wyspecjalizowanego sprzedawcy. Wózek Vermeiren V300, V300D zaprojektowano w taki sposób, aby jego regulacja wymagała minimum części zamiennych. Nie jest wymagany zapas dodatkowych części zamiennych. Informacje na temat najbliższych punktów usługowych lub przedstawicieli otrzymać można w najbliższym biurze Vermeiren.
  • Seite 151: Regulacja Wysokości I Kąta Nachylenia Siedziska

    2016-06 Regulacja wysokości i kąta nachylenia siedziska W wózku Vermeiren V300, V300D można ustawić 4 różne wysokości i 5 kątów nachylenia siedziska (0°-2,5°-5°-7,5°-10°), zmieniając pozycję kół. Dla każdej wysokości i kąta nachylenia wymagana jest inna konfiguracja przednich i tylnich kół.
  • Seite 152 Jeśli występują trudności ze znalezieniem odpowiedniej kombinacji, zawsze można skontaktować się z firmą Vermeiren. Sprawdź, czy ośki skrętne są ustawione prostopadle do podłoża. W razie potrzeby skorzystaj z poniższej procedury, aby wyregulować obudowę nóżki kółka: Poluzuj 3 śruby, używając klucza imbusowego 5 mm.
  • Seite 153: Regulacja Głębokości Siedziska

    V300, V300D 2016-06 Regulacja głębokości siedziska W wózku Vermeiren V300, V300D można ustawić 5 różne głębokości siedziska, zmieniając pozycję krzyżaka i złącza oparcia . Głębokość siedziska Krzyżak Złącze oparcia  460 mm Otwory 1 i 3 Pozycja 1 440 mm (Standard)
  • Seite 154: Regulacja Hamulców

    V300, V300D 2016-06 Regulacja hamulców OSTRZEŻENIE: Ryzyko urazu – regulacji hamulców może dokonywać wyłącznie wyspecjalizowany sprzedawca. Aby wyregulować hamulce: 1. Zamontuj koła zgodnie z § 2.2.  2. Odłącz hamulce, pociągając dźwignię w tył.  3. Poluzuj śruby , aby umożliwić ruch ...
  • Seite 155: Regulacja Podłokietników

    V300, V300D 2016-06 3.6.3 Regulacja kąta nachylenia podnóżków 100° 80° Aby wyregulować kąt nachylenia podnóżków:  Poluzuj śrubę Ustaw rurkę  pod żądanym kątem. Kąt nachylenia (80°-85°-90°-95°-100°) jest wskazywany przez listki .  Dokręć śrubę Regulacja podłokietników Można wyregulować zarówno wysokość, jak i głębokość podłokietników wózka inwalidzkiego.
  • Seite 156: Regulacja Stabilności I Manewrowości

    V300, V300D 2016-06 Aby wyregulować wysokość i głębokość podłokietników: Wykręć obie śruby pod podłokietnikiem. Umieść odpowiednią liczbę bloczków pod i nad rurkami, patrz Tabela 5. Zamontuj podłokietnik w odpowiednich otworach, aby dostosować głębokość. Regulacja stabilności i manewrowości Stabilność i manewrowość wózka można wyregulować, przesuwając płytę osi tylnich kół .
  • Seite 159  Les listes des contrôles à effectuer lors des entretiens de même que toute autre information technique sont disponibles auprès de nos filiales. Pour de plus amples informations, consultez le site: www.vermeiren.fr.  Servicelijsten en andere technische informatie kunt u aanvragen bij onze vestigingen. Meer informatie vindt u ook op: www.vermeiren.be.
  • Seite 160 Fax: +41(0)31 818 40 98 website: www.vermeiren.it website: www.vermeiren.ch e-mail: info@vermeiren.it e-mail: info@vermeiren.ch Poland Spain / Portugal Vermeiren Polska Sp. z o.o Vermeiren Iberica, S.L. Carratera de Cartellà, Km 0,5 Łączna PL-55-100 Trzebnica Sant Gregori Parc Industrial Edifici A Tel: +48(0)71 387 42 00...

Diese Anleitung auch für:

V300 d

Inhaltsverzeichnis