Bosch HVA541NS0 Gebrauchsanleitung
Einbauherd
Inhaltsverzeichnis
Verfügbare Sprachen
Verfügbare Sprachen
Quicklinks
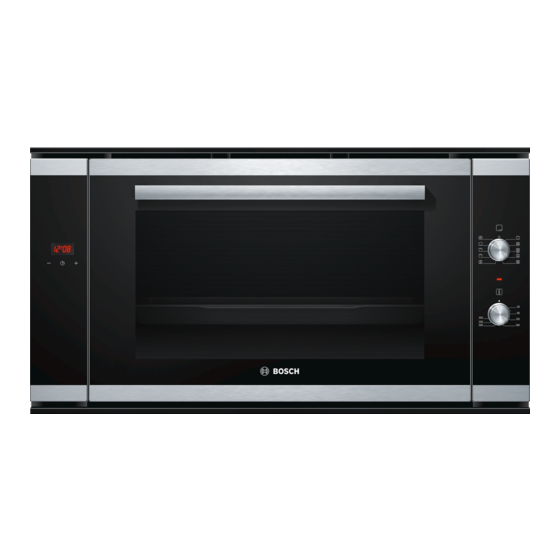
Einbauherd HVA541NS0
Built-in cooker HVA541NS0
Cuisinière encastrable HVA541NS0
Cucina da incasso HVA541NS0
Inbouwfornuis HVA541NS0
[de] Gebrauchsanleitung .................................. 3
[en] Instruction manual .................................. 16
[fr] Notice d'utilisation .................................. 29
[it]
Istruzioni per l'uso ................................... 43
[nl] Gebruiksaanwijzing ................................. 57
Kapitel
Inhaltsverzeichnis

Verwandte Anleitungen für Bosch HVA541NS0


Inhaltszusammenfassung für Bosch HVA541NS0
- Seite 1 Einbauherd HVA541NS0 Built-in cooker HVA541NS0 Cuisinière encastrable HVA541NS0 Cucina da incasso HVA541NS0 Inbouwfornuis HVA541NS0 [de] Gebrauchsanleitung ........3 [it] Istruzioni per l’uso ........43 [en] Instruction manual ........16 [nl] Gebruiksaanwijzing ......... 57 [fr] Notice d’utilisation ........29...
-
Seite 3: Inhaltsverzeichnis
Weitere Informationen zu Produkten, Zubehör, Ersatzteilen und Services finden Sie im Internet: www.bosch-home.com und Online-Shop: www.bosch-eshop.com Für Produktinformationen sowie Anwendungs- und Bedienungs- fragen berät Sie unser Bosch-Infoteam unter Tel.: 089 69 339 339 (Mo-Fr: 8.00-18.00 Uhr) Nur für Deutschland gültig. -
Seite 4: Wichtige Sicherheitshinweise
: Wichtige Sicherheitshinweise Diese Anleitung sorgfältig lesen. Nur dann Brandgefahr! können Sie Ihr Gerät sicher und richtig Im Garraum gelagerte, brennbare Gegen- ■ bedienen. Die Gebrauchs- und Montagean- stände können sich entzünden. Nie brenn- leitung für einen späteren Gebrauch oder bare Gegenstände im Garraum für Nachbesitzer aufbewahren. -
Seite 5: Ursachen Für Schäden
Stromschlaggefahr! Ursachen für Schäden Unsachgemäße Reparaturen sind gefähr- Achtung! ■ lich. Nur ein von uns geschulter Kunden- Zubehör, Folie, Backpapier oder Geschirr auf dem Garraum- ■ dienst-Techniker darf Reparaturen boden: Kein Zubehör auf den Garraumboden legen. Den Gar- raumboden nicht mit Folie, egal welcher Art, oder Backpapier durchführen. -
Seite 6: Funktionswähler
Funktionswähler Die Elektronikuhr Mit dem Funktionswähler stellen Sie die Heizart ein. Mit der Elektronikuhr können Sie Ihren Backofen steuern. So können Sie z. B. den Zeitpunkt vorwählen, zu dem sich der Backofen einschalten bzw. die Zeitschaltautomatik den Back- Stellung Verwendung oder Garprozess beenden soll. -
Seite 7: Vor Dem Ersten Benutzen
Zubehör können Sie beim Kundendienst, im Fachhandel oder im Internet nachkaufen. Zubehör Beschreibung Back- und Bratrost Für Geschirr, Kuchenformen, Bra- ten, Grillstücke, Tiefkühlgerichte. Emailliertes Backblech Für saftige Kuchen, Gebäck, Tief- kühlgerichte und große Braten. Auch als Fettauffang-Gefäß ver- wendbar. Sicherungsstifte Zum Sperren der Scharniere. -
Seite 8: So Bedienen Sie Ihren Backofen
So bedienen Sie Ihren Backofen Versenkbare Bedienelemente Hinweise Zum Verändern der Restlaufzeit die Taste drücken, bis in Der Funktionswähler und der Temperaturwähler sind versenk- ■ der Anzeige das Symbol blinkt. Dann mit den Tasten “+” bar. Zum Ein- und Ausrasten drücken Sie auf das jeweilige und “-”... -
Seite 9: Eingestellte Werte Anzeigen Und Ändern
Mit den Tasten + und - die Ausschaltzeit einstellen Restlaufzeit Kurzzeitwecker anzeigen (z. B. 19:30 Uhr). Taste drücken, bis in der Anzeige das Symbol blinkt. Die Ausschaltzeit kann bis zu 23 Stunden und 59 Minuten In der Anzeige wird die Restlaufzeit angezeigt und kann mit den eingestellt werden. -
Seite 10: Katalytische Garraumverkleidung
Gerätetür einhängen Bereich Reinigungsmittel Backofentür seitlich mit beiden Händen greifen. Dichtung Heiße Spüllauge: Nicht abnehmen! Mit einem Spültuch reinigen. Nicht Scharniere in die Aussparungen des Backofens schieben (a). scheuern. Hinweis: Die Kerbe unten an den Scharnieren muss im Rah- Gestelle Heiße Spüllauge: men des Backofens einrasten (b). -
Seite 11: Einhängegitter Aus- Und Einhängen
Mittlere Scheibe herausnehmen. Türscheiben einbauen Mittlere Scheibe wieder einsetzen. Hinweis: Auf den korrekten Sitz der Scheibe achten. Alle Gummilager müssen plan auf der äußeren Scheibe aufliegen. Innere Scheibe wieder einsetzen. Hinweis: Alle vier Befestigungsstifte müssen in den dafür vor- gesehenen Halterungen einrasten. Backofentüre wieder einbauen. -
Seite 12: Backofenlampe Auswechseln
Glasabdeckung abnehmen. Dazu mit der Hand die Glasab- Stromschlaggefahr! deckung von vorne öffnen. Falls sich die Glasabdeckung Unsachgemäße Reparaturen sind gefährlich. Nur ein von uns schwer abnehmen lassen sollte, einen Löffel zu Hilfe nehmen. geschulter Kundendienst-Techniker darf Reparaturen durchfüh- Backofenlampe herausziehen. ren. -
Seite 13: Energie- Und Umwelttipps
Energie- und Umwelttipps Umweltgerecht entsorgen Hier erhalten Sie Tipps, wie Sie beim Backen und Braten Ener- gie sparen können und wie Sie Ihr Gerät richtig entsorgen. Entsorgen Sie die Verpackung umweltgerecht. Energiesparen Dieses Gerät ist entsprechend der europäischen Richtlinie 2012/19/EU über Elektro- und Elektronikalt- Heizen Sie den Backofen nur vor, wenn es im Rezept ange- ■... -
Seite 14: Braten Und Grillen
Tipps zum Backen So stellen Sie fest, ob der Rührkuchen Stechen Sie etwa 10 Minuten vor Ende der im Rezept angegebenen Backzeit mit einem durchgebacken ist. Holzstäbchen an der höchsten Stelle in den Kuchen. Wenn kein Teig mehr am Holz klebt, ist der Kuchen fertig. -
Seite 15: Für Sie In Unserem Kochstudio Getestet
Für Sie in unserem Kochstudio getestet Hier finden Sie eine Auswahl an Gerichten und die optimalen Einstellungen dazu. Wir zeigen Ihnen, welche Heizart und Tem- peratur und Einschubhöhe für Ihr Gericht am besten geeignet ist. Hinweise Die Zeitangaben in den Tabellen sind Richtwerte. Sie sind ■... - Seite 70 ÒªëàdG ¢Uƒ°üîH äGOÉ°TQE G á©£b ≈∏Y á≤©∏ªdÉH §¨°VG .zá≤©∏ªdG QÉÑàNG{ πª©H ºb hC G (á°ü°üîàªdG ôLÉàªdG »a ôaƒàe) Ωƒë∏dG ôàeƒeôJ Ωóîà°SG .ºë∏dG ™£b è°†f øe ≥≤ëàdG ∂æμªj ∞«c ¢†©Ñd êÉàëJ âdGR ’ É¡fC G »æ©j Gò¡a ,ºë∏dG á©£b â£Ñg GPE G .è°†f ób ºë∏dG ¿C G »æ©j Gò¡a ,É¡«a â∏ZƒJ GPE É a .ºë∏dG .âbƒdG .IQGôëdG áLQOh ´ÉØJQ’G iƒà°ùe øe ≥≤ëJ ájɨ∏d É...
- Seite 71 õ«ÑÿG ¢Uƒ°üîH íFÉ°üf GPE G .á£≤f ≈∏YC G øe ∂«μdG »a á«Ñ°ûN É°üY ¢SôZG áØ°UƒdG »a OóëªdG õ«ÑîdG âbh ájÉ¡f øe ≥FÉbO »dGƒM πÑb .»éæØ°SE ’ G ∂«μdG è°†f øe ≥≤ëàJ ∞«c .âé°†f ób ∂«μdG ¿ƒμJ ,É°ü©dÉH ø«é©dG ≥°üà∏j ºd ≈YGôJ .äÉLQO QGó≤ªH πbC G IQGôM áLQO ≈∏Y ¿ôØdG §Ñ°VG hC G áeOÉ≤dG IôªdG »a πFGƒ°ùdG øe πbC G ᫪c Ωóîà°SG .§Ñ¡j ∂«μdG...
- Seite 72 áÄ«ÑdGh ábÉ£dG ∫ƒM íFÉ°üf áÄ«ÑdG ≈∏Y á¶aÉëe á≤jô£H äÉØ∏îªdG øe ¢ü∏îàdG ∫ƒMh AGƒ°ûdGh äGRƒÑîªdG OGóYE G AÉæKC G ábÉ£dG ô«aƒJ á«Ø«c ∫ƒM íFÉ°üf Éæg óéJ .᪫∏°S á≤jô£H ∑RÉ¡L øe ¢ü∏îàdG á«Ø«c .áÄ«ÑdÉH ô°†J ’ á≤jô£H ∞«∏¨àdG OGƒe øe ¢ü∏îJ ábÉ£dG ô«aƒJ ≥∏©àj ɪ«a á«HhQhC ’...
- Seite 73 »a .∂jó«H ΩÉeC ’ G øe »LÉLõdG AÉ£¨dG íàaG ∂dòH ΩÉ«≤∏d .»LÉLõdG AÉ£¨dG ™∏NG !»FÉHô¡μdG ≥©°üdG ô£N .á≤©∏ªH ø©à°SG »LÉLõdG AÉ£¨dG ™∏N Qò©J ádÉM ∫ɪYC G ò«ØæJ Rƒéj ’ .QÉ£NC G ≈∏Y É«æa ᪫∏°ùdG ô«Z ìÓ°UE ’ G ∫ɪYC G …ƒ£æJ .êQÉî∏d ¿ôØdG áѪd ÜòLG .Éæ∏Ñ...
- Seite 75 RÉ¡édG ÜÉH Ö«côJ äÉضæªdG ¥É£ædG .ø«ÑfÉédG øe ∂jój Éà∏μH ¿ôØdG ÜÉH ∂°ùeC G :øNÉ°S »fƒHÉ°U ∫ƒ∏ëe ΩÉμME ’ G QÉWE G .É¡μëH º≤J ’ .áªYÉf »fGhC G áWƒØH É¡Ø«¶æàH ºb !¬μØH º≤J ’ ¿ôØdG ∞jhÉéJ »a äÓ°üتdG πNOC G :øNÉ°S »fƒHÉ°U ∫ƒ∏ëe ¿ÉÑ°†≤dG :áXƒë∏e ¿ôØdG QÉWE G »a âÑãj ¿C G Öéj äÓ°üتdÉH »∏Ø°ùdG õëdG...
- Seite 76 »¡£dG »JÉ≤«ªd »≤ÑàªdG 𫨰ûàdG âbh ¢VôY ∫ÉãªdG π«Ñ°S ≈∏Y) ±É≤jE ’ G âbh §Ñ°†H ºb QGQRC ’ G ΩGóîà°SÉH áYÉ°ùdG 19:30 .¢Vô©dG IóMh »a õeôdG ¢†eƒj ¿C G ≈dE G QõdG ≈∏Y §¨°VG .á≤«bO h áYÉ°S ≈àM ±É≤jE ’ G âbh §Ñ°V øμÁ QGQRC ’...
- Seite 77 ¿ôØdG ∫ɪ©à°SG á≤jôW äGOÉ°TQE G πNGó∏d ∂jôëà∏d á∏HÉ≤dG 𫨰ûàdG ô°UÉæY ¢Vô©dG IóMh »a ¢†eƒj ¿C G ≈dE G QõdG ≈∏Y §¨°VG »≤ÑàªdG 𫨰ûàdG âbh ô««¨àd .πNGó∏d ∂jôëà∏d ¿ÓHÉb IQGôëdG áLQO QÉ«àNG ìÉàØeh áØ«XƒdG QÉ«àNG ìÉàØe ■ QGQRC ’ G ΩGóîà°SÉH »≤ÑàªdG 𫨰ûàdG âbh ô««¨àH ºb ºK . õeôdG .»æ©ªdG 𫨰ûàdG ô°üæY ≈∏Y §¨°VG »LQÉîdG hC G »∏NGódG ™°VƒdG ≈∏Y â«Ñãà∏d “-”...
- Seite 78 ôÑY hC G á°ü°üîàªdG ôLÉàªdG øe hC G AÓª©dG áeóN øe äÉ«dɪμdG AGô°T É k ≤ M’ ∂æμªj .âfôàfE ’ G ìô°ûdG äÉ«dɪμdG AGƒ°ûdGh õ«ÑîdG áμÑ°T ºë∏dG ™£bh ∂«μdG »fGƒ°Uh »fGhC Ó d .IóªéªdG äÉÑLƒdGh ájƒ°ûªdG ᪩WC ’ Gh É櫪dG á≤Ñ£H »∏£ªdG õ«ÑîdG ìƒd (π«eÉæjE ’...
- Seite 79 á«fhôàμdE ’ G áYÉ°ùdG áØ«XƒdG QÉ«àNG ìÉàØe ≥Ñ°ùe πμ°ûH Óãe ∂æμªj .á«fhôàμdE ’ G áYÉ°ùdG ≥jôW øY ¿ôØdG »a ºμëàdG ∂æμªj .áØ«XƒdG QÉ«àNG ìÉàØe ΩGóîà°SÉH ø«î°ùàdG ´ƒf §Ñ°V ∂æμªj á«æeõdG 𫨰ûàdG á«dB G ¬«a Ωƒ≤J …òdG hC G ¿ôØdG 𫨰ûJ ¬«a ºàj …òdG âbƒdG QÉ«àNG ΩGóîà°S’G ™°VƒdG »JÉ≤«ªc á«fhôàμdE ’...
- Seite 80 QGô°VC ’ G ÜÉÑ°SC G !»FÉHô¡μdG ≥©°üdG ô£N !¬«ÑæJ .QÉ£NC G ≈∏Y É«æa ᪫∏°ùdG ô«Z ìÓ°UE ’ G ∫ɪYC G …ƒ£æJ ■ áeóN »æa πÑb øe ’E G ìÓ°UE ’ G ∫ɪYC G ò«ØæJ Rƒéj ’ õ«M á«°VQC G ≈∏Y »fGhC ’ G hC G äGRƒÑîªdG ¥Qh hC G Ωƒ«æeƒdC ’ G ≥FÉbQ hC G äÉ«dɪμdG ■...
- Seite 84 èeóªdG óbƒªdG HVA541NS0 ∫ɪ©à°S’G π«dO [ar] *9000971541* 914775555 940130 9000971541...