Herunterladen Inhalt Inhalt Diese Seite drucken
Inhaltsverzeichnis

Werbung

Verfügbare Sprachen
  • DE

Verfügbare Sprachen

  • DEUTSCH, seite 1
de
Gebrauchs- und
Montageanleitung
en
Operating and
installation instructions
fr
Notice de montage
et d'utilisation
nl
Gebruiks- en
montageaanwijzing
it
Istruzioni per l'uso
e l'installatore
es
Instrucciones de uso
y montaje
el
Οδηγίες χρήσης και
τοποθέτησης
de
en
fr
nl
it
es
el

Werbung

Inhaltsverzeichnis
loading

Inhaltszusammenfassung für NEFF D 8680

  • Seite 1 Gebrauchs- und Montageanleitung Operating and installation instructions Notice de montage et d’utilisation Gebruiks- en montageaanwijzing Istruzioni per l’uso e l’installatore Instrucciones de uso y montaje Οδηγίες χρήσης και τοποθέτησης...
  • Seite 2 Seite pagina 03 – 15 55 – 67 page página 16 – 28 68 – 80 page 81 – 94 29 – 41 Σελίδα pagina 42 – 54 Abb. 1 Abb. 1 ELEKTRO ELECTR. KAASU ELETT. GASS mind. mind.
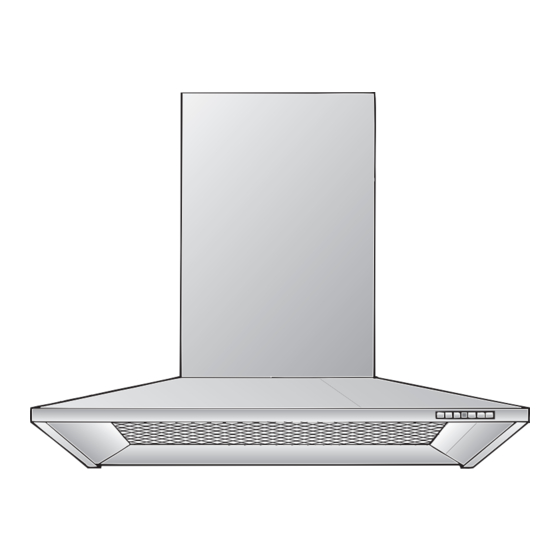
  • Seite 3: Gerätebeschreibung

    Gebrauchsanweisung: Gerätebeschreibung Betriebsarten Kamin- Dies kann erreicht werden, wenn durch verblendung nicht verschließbare Öffnungen, z. B. in Türen, Fenstern und in Verbindung mit Zuluft-/Abluftmauerkasten oder durch andere techn. Maßnahmen, wie gegenseitige Verriegelung o. ä., die Verbrennungsluft nachströmen kann. Schalter Bei nicht ausreichender Zuluft besteht Licht/Lüfter Vergiftungsgefahr durch zurückgesaugte Verbrennungsgase.
  • Seite 4: Vor Dem Ersten Benutzen

    Vor dem ersten Benutzen Wichtige Hinweise: Bevor Sie das neue Gerät benutzen, Diese Gebrauchsanweisung gilt für lesen Sie bitte sorgfältig die mehrere Geräte-Ausführungen. Gebrauchsanweisung. Es ist möglich, dass einzelne Sie enthält wichtige Informationen für Ihre Ausstattungsmerkmale beschrieben Sicherheit sowie zum Gebrauch und zur sind, die nicht auf Ihr Gerät zutreffen.
  • Seite 5: Bedienen Der Dunstabzugshaube

    Bedienen der Dunstabzugshaube Intensivstufe: Der Küchendunst wird am wirkungsvollsten beseitigt durch: Durch die Intensivstufe wird die höchste Leistung erreicht. Sie wird kurzzeitig Einschalten der Dunstabzugshaube benötigt. bei Kochbeginn. Drücken Sie die Taste + so oft, bis die Ausschalten der Dunstabzugshaube Anzeige ç...
  • Seite 6: Filter Und Wartung

    Filter und Wartung Fettfilter: Aus- und Einbauen der Metall-Fettfilter: Achtung: Die Halogenlampen müssen Zur Aufnahme der fettigen Bestandteile ausgeschaltet und abgekühlt sein. des Küchendunstes sind Metall- Fettfilter eingesetzt. 1. Drücken Sie die Raste an den Fettfiltern in Pfeilrichtung ein und klappen Sie die Die Filtermatten bestehen aus unbrenn- Fettfilter ab.
  • Seite 7 Filter und Wartung Aktivkohlefilter: Sättigungsanzeige: Zum Binden der Geruchsstoffe beim Umluftbetrieb. Bei Sättigung des Aktivkohlefilters ertönt nach dem Ausschalten des Lüfters für 10 Sekunden ein Signal und die Anzeige ã leuchtet. Spätestens dann sollte der Aktivkohlefilter gewechselt werden. Einbauen: Ausbauen: Achtung: Die Halogenlampen müssen Achtung: Die Halogenlampen müssen ausgeschaltet und abgekühlt sein.
  • Seite 8: Reinigen Und Pflegen

    Reinigen und Pflegen Auswechseln der Lampen Dunstabzugshaube durch Ziehen des 1. Schalten Sie die Dunstabzugshaube aus Netzsteckers bzw. Ausschalten der und machen Sie durch Ziehen des Netz- Sicherung stromlos machen. steckers oder Ausschalten der Sicherung die Dunstabzugshaube stromlos. Beim Reinigen der Fettfilter die zugänglichen Gehäuseteile von Die Halogenbirnen werden bei Betrieb abgelagertem Fett reinigen.
  • Seite 9: Einstellung Der Sättigungsanzeige

    Störungen Einstellung der Sättigungsanzeige ã Wenn in der Anzeige ein oder Sollte die Umstellung der Betriebsart erscheint: (Abluft/Umluftbetrieb) notwendig sein, muss auch die Sättigungsanzeige für die Filter Siehe Abschnitt „Filter und Wartung”. entsprechend umgestellt werden (siehe Wenn sich die Dunstabzugshaube nicht Montageanweisung).
  • Seite 10 Montageanweisung: Wichtige Hinweise Über Gas-Kochstellen ist die Montage Altgeräte sind kein wertloser Abfall. der Dunstabzugshaube bei einem Durch umweltgerechte Entsorgung können Mindestabstand von 650 mm – Abb. 1 – wertvolle Rohstoffe wiedergewonnen nur zulässig, wenn folgende Nennwärme- werden. belastungen (Hs) nicht überschritten Bevor Sie das Altgerät entsorgen, machen werden: Sie es unbrauchbar.
  • Seite 11: Vor Der Montage

    Vor der Montage Abluftbetrieb mind.40 mind. 45 700-1105 mind.550 Die Abluft wird über einen Lüftungsschacht Dies kann erreicht werden, wenn durch nach oben, oder direkt durch die Außen- nicht verschließbare Öffnungen, z. B. in wand ins Freie geleitet. Türen, Fenstern und in Verbindung mit Zuluft-/Abluftmauerkasten oder durch Die Abluft darf weder in einen in Betrieb andere techn.
  • Seite 12: Anschluss Abluftrohr L 150 Mm

    Vor der Montage Optimale Leistung der Dunstabzugs- Anschluss Abluftrohr l 150 mm: haube: Abluftrohr direkt am Luftstutzen Kurzes, glattes Abluftrohr. befestigen. Möglichst wenig Rohrbögen. Möglichst große Rohrdurchmesser und Anschluss Abluftrohr l 120 mm: große Rohrbögen. Reduzierstutzen in den Luftstutzen Der Einsatz von langen, rauhen einsetzen, 2 Löcher l 3 mm vorbohren Abluftrohren, vielen Rohrbögen oder und verschrauben.
  • Seite 13: Elektrischer Anschluss

    Vor der Montage Elektrischer Anschluss Die Dunstabzugshaube darf nur an eine Vorbereiten der Wand vorschriftsmäßig installierte Schutzkontakt- Die Wand muss eben und senkrecht steckdose angeschlossen werden. sein. Die Schutzkontaktsteckdose möglichst Bei Geräten mit Beleuchtung hinten: direkt hinter der Kaminverblendung Wird direkt unter die Dunstabzugshaube anbringen.
  • Seite 14 Einbauen Hinweis: Achten Sie auf eventuell zu Die Dunstabzugshaube ist für die Montage an die Küchenwand vorgesehen. montierende Sonderzubehörteile. 1. Fettfilter abnehmen 5. Haltewinkel für Kaminverblendung mit 2 Sechskantschrauben anschrauben. (siehe Gebrauchsanweisung). 6. Die beiden oberen Sechskant- 2. Von der Decke bis zur Unterkante der schrauben bis auf ca.
  • Seite 15 Einbauen 08. Die beiden unteren Sechskant- 13. Die beiden Teile der Kaminverblendung schrauben eindrehen. ineinander schieben (Schlitze am obe- ren Teleskopteil nach unten) und in den Vor dem Festdrehen der Ausschnitt an der Dunstabzugshaube 4 Schrauben ist die Dunstabzugs- einsetzen. haube auszurichten.
  • Seite 16: Appliance Description

    Instructions for use: Appliance description Operating modes Chimney This can be achieved if combustion air can panelling flow through non-lockable openings, e.g. in doors, windows and via the air- intake/exhaust-air wall box or by other technical measures, such as reciprocal interlocking, etc.
  • Seite 17: Before Using For The First Time

    Before using for the first time Important notes: Before using your new appliance, please The Instructions for Use apply to several read these Instructions for Use carefully. versions of this appliance. Accordingly, They contain important information you may find descriptions of individual concerning your personal safety as well features that do not apply to your as on use and care of the appliance.
  • Seite 18: Operating Procedure

    Operating procedure Intensive setting: The most effective method of removing vapours produced during cooking is to: Maximum power is obtained at the intensive setting. It is only required for short Switch the ventilator ON intervals. as soon as you begin cooking. ç...
  • Seite 19 Filters and maintenance Grease filters: Removing and inserting the metal grease filters: Metal filters are used to trap the greasy Warning: The halogen bulbs must be element of the vapours that develop switched off and cool. during cooking. 1. Press the catch on the grease filters The filter mats are made from non- inwards and fold the filters down.
  • Seite 20 Filters and maintenance Activated carbon filter: Saturation indicator: For neutralizing odours in recirculating mode. When the activated carbon filter reaches saturation point, an acoustic signal is sounded for 10 seconds after the fan has switched off, and a appears in the ã...
  • Seite 21: Cleaning And Care

    Cleaning and care Replacing the light bulbs Disconnect the extractor hood from the 1. Switch off the extractor hood and pull electricity supply by pulling out the out the mains plug or switch off the mains plug or switching it off at the fuse electricity supply at the fuse box.
  • Seite 22 Setting the saturation indicator If you encounter a problem If an appears in the display: If it becomes necessary to change the ã operating mode (exhaust-air/recirculating See "Filters and maintenance" Section. mode), the saturation indicator for the filters If is not possible to operate the extractor must also be altered (see Installation hood: Instructions).
  • Seite 23: Installation Instructions

    Installation Instructions: Important information The installation of the extractor hood Old appliances are not worthless above gas cooking devices, at a rubbish. If they are disposed of in an minimum height of 650 mm – Fig. 1 – is environment-friendly manner, valuable raw permitted provided that the following materials can be recovered for use again.
  • Seite 24: Prior To Installation

    Prior to installation Exhaust-air mode mind.40 mind. 45 700-1105 mind.550 The exhaust air is discharged upwards This can be achieved if combustion air can through a ventilation shaft or directly flow through non-lockable openings, e.g. in through the outside wall into the open. doors, windows and via the air- intake/exhaust-air wall box or by other Exhaust air should neither be directed...
  • Seite 25 Prior to installation For optimum extractor hood efficiency: Connecting a l 150 mm exhaust-air pipe: Short, smooth air exhaust pipe. Mount the pipe directly onto the air As few bends in the pipe as possible. outlet on the hood. Diameter of pipe to be as large as possible and no tight bends in pipe.
  • Seite 26: Electrical Connection

    Prior to installation Electrical connection WARNING: THIS APPLIANCE MUST BE Preparing the wall EARTHED The wall must be flat and perpendicular. IMPORTANT: Fitting a Different Plug: Ensure that the wall is capable of The wires in the mains lead are coloured in providing a firm hold for mounting accordance with the following code: screws and plugs.
  • Seite 27: Installation

    Installation This extractor hood is intended to be Note: Take into account any special mounted onto the kitchen wall. accessories that are going to be fitted. 1. Remove the grease filter (refer to 5. Attach the fixing bracket for the Operating Instructions).
  • Seite 28 Installation 08. Screw in the two lower hexagon head 13. Push both sections of the flue panelling cap screws. together (slots in the upper section must be pointing downwards) and Before the 4 screws are tightened insert into the opening in the extractor down, align the extractor hood properly.
  • Seite 29: Description De L'appareil

    Mode d’emploi: Description de l'appareil Modes de fonctionnement On y parvient en présence d'ouvertures non Capot de obturables ménagées par ex. dans les por- cheminée tes, fenêtres et en association avec des ventouses télescopiques d'admission/ évacuation de l'air à travers la maçonnerie ou par d'autres mesures techniques telles qu'un verrouillage réciproque ou assimilé...
  • Seite 30: Avant La Première Utilisation

    Avant la première utilisation Remarques importantes: Lisez attentivement la présente notice La présente notice d'emploi vaut pour d'emploi avant d'utiliser votre appareil plusieurs versions de l'appareil. pour la première fois. Elle contient des Elle peut contenir des descriptions informations importantes non seulement d'accessoires ne figurant pas dans votre pour votre sécurité...
  • Seite 31: Utilisation De La Hotte Aspirante

    Utilisation de la hotte aspirante Ventilation intensive: La méthode la plus efficace pour supprimer les buées de cuisson consiste à: Au niveau intensif, le ventilateur développe sa plus grande puissance. Vous n'en aurez Enclencher la hotte aspirante que brièvement besoin. en début de cuisson.
  • Seite 32 Filtre et entretien Filtres à graisse: Retrait et mise en place des filtres à graisse en métal: Vous pouvez utiliser divers filtres pour Attention: les ampoules halogènes doivent retenir les particules grasses en s'être éteintes et avoir refroidi. suspension dans les buées de cuisson. 1.
  • Seite 33 Filtre et entretien Filtre à charbon actif: Indicateur de saturation: Ce filtre sert à retenir les substances odoriférantes lorsque la hotte recycle l'air. Une fois que le filtre à charbon actif est saturé, un signal retentit pendant 10 secondes après que vous avez éteint le ã...
  • Seite 34: Nettoyage Et Entretien

    Nettoyage et entretien Changer les ampoules halogènes Avant tout nettoyage et entretien, mettez 1. Avant tout nettoyage et entretien, mettez d'abord la hotte hors tension en débran- d'abord la hotte hors tension en chant la fiche mâle de la prise de courant débranchant la fiche mâle de la prise de ou en coupant le disjoncteur/fusible.
  • Seite 35 Réglage de l'indicateur de saturation Dérangements apparaît à l'indicateur: S'il faut convertir la hotte sur un autre mode ã (par ex. du mode Air évacué au mode Air Voir la section intitulée "Filtre et recyclé), vous devrez aussi modifier en entretien".
  • Seite 36 Notice de montage: Remarques importantes Le montage de la hotte aspirante à la Les anciens appareils ne sont pas des distance minimum de 650 mm au-dessus déchets sans valeur. de foyers au gaz (voir fig. 1) n'est admis Leur élimination respectueuse de que si les charges thermiques nominales l'environnement permet de récupérer de ci-dessous ne sont pas dépassées:...
  • Seite 37: Avant Le Montage

    Avant le montage Evacuation de l'air à l'extérieur mind.40 mind. 45 700-1105 mind.550 L'air vicié est évacué vers le haut par un conduit d'aération ou directement à l'air On y parvient en présence d'ouvertures libre par traversée du mur extérieur. non obturables ménagées par ex.
  • Seite 38 Avant le montage Pour que la hotte aspirante ait le Branchement du conduit meilleur rendement, veillez à ce que: d'évacuation l 150 mm: Le conduit d'évacuation soit court et Fixez le conduit d'évacuation lisse. directement sur l'orifice. Il ait le moins possible de coudes. Branchement du conduit Il ait le plus fort diamètre et que les coudes soient les plus arrondis...
  • Seite 39: Branchement Électrique

    Avant le montage Branchement électrique Préparation du mur La fiche mâle de la hotte aspirante ne Le mur doit être bien plat et vertical. pourra être branchée que dans une prise secteur à contacts de terre réglementaire- Utilisez des chevilles pour assurer une ment posée.
  • Seite 40 Encastrement Cette hotte aspirante est prévue pour le Remarque: rappellez-vous que vous aurez montage contre le mur de la cuisine. peut-être des accessoires spéciaux à monter. 1. Retirer le filtre à graisse (voir la notice d'utilisation). 5. Au moyen de 2 vis hexagonales, visser les cornières servant à...
  • Seite 41 Encastrement 08. Vissez les vis hexagonales du bas. 13. Insérer l'un dans l'autre les deux éléments du capotage-cheminée (les Avant de visser ces 4 vis à fond, fentes de l'élément télescopique ajuster la hotte aspirante en position. supérieur doivent être tournées vers le 09.
  • Seite 42: Gebruik Met Circulatielucht

    Gebruiksaanwijzing: Beschrijving van het apparaat Gebruiksmogelijkheden Schoor- Dit kan men bereiken wanneer er door steenaf- niet-afsluitbare openingen, bijv. in deuren, scherming ramen en d.m.v. luchtaanvoer-/ luchtafvoersleuven in de muur of door andere technische maatregelen, zoals wederzijdse vergrendeling e.d., verbrandingslucht kan toestromen. Schakelaars verlichting Wanneer er onvoldoende lucht wordt...
  • Seite 43: Vóór Het Eerste Gebruik

    Vóór het eerste gebruik Belangrijke aanwijzingen: Lees de gebruiksaanwijzing zorgvuldig Deze gebruiksaanwijzing geldt voor voordat u het nieuwe apparaat gebruikt. verschillende uitvoeringen van het Ze bevat belangrijke informatie voor uw apparaat. Het is mogelijk dat er een veiligheid en voor het gebruik en het aantal kenmerken worden beschreven onderhoud van het apparaat.
  • Seite 44 Bedienen van de wasemafzuigkap Intensieve stand: De keukenwasem wordt op de doeltreffendste manier verwijderd door: Met de intensieve stand wordt het hoogste vermogen bereikt. Dit is voor korte tijd Inschakelen van de afzuigkap nodig. bij het begin van het koken. Druk op de toets + een aantal keren in Uitschakelen van de afzuigkap totdat de aanduiding...
  • Seite 45 Filter en onderhoud Vetfilters: Metalen vetfilters verwijderen en aanbrengen: Voor de opname van de vettige bestand- Attentie: De halogeenlampen moeten delen van de keukenwasem worden uitgeschakeld en afgekoeld zijn. metalen vetfilters gebruikt. 1. Druk de blokkering van de vetfilters in de De filtermatten bestaan uit onbrandbaar richting van de pijl in en klap de vetfilters materiaal.
  • Seite 46 Filter en onderhoud Actieve-koolfilter: Verzadigingsaanduiding: Voor het opnemen van de reukstoffen als de afzuigkap werkt met luchtcirculatie. Bij verzadiging van het actieve-koolfilter klinkt na het uitschakelen van de ventilator gedurende 10 seconden een signaal en ã gaat de aanduiding branden. Uiterlijk dan moet het actieve-koolfilter worden vervangenn.
  • Seite 47: Reiniging En Onderhoud

    Reiniging en onderhoud Lamp vervangen Wasemafzuigkap stroomloos maken 1. Schakel de wasemafzuigkap uit en maak door de stekker uit het stopcontact te het apparaat stroomloos door de stekker trekken of de zekering uit te schakelen. uit het stopcontact te trekken of de zekering uit te schakelen.
  • Seite 48 Storingen Instelling van de verzadigingsaanduiding Wanneer op de indicatie een of een ã wordt weergegeven: Als een verandering van de afvoerkap (wer- king met luchtafvoer of met luchtcirculatie) Zie de paragraaf "Filters en onderhoud". nodig is, moet de verzadigingsaanduiding Als de afzuigkap niet kan worden voor de filters overeenkomstig worden bediend: ingesteld (zie het montagevoorschrift).
  • Seite 49 Montagevoorschrift: Belangrijke voorschriften Boven een gasfornuis is de montage Oude apparaten zijn geen waardeloos bij een minimumafstand van 650 mm afval. Door een milieubewuste afvoer (afb. 1) alleen toegestaan als de volgende kunnen waardevolle materialen opnieuw nominale warmtebelastingen (Hs) niet worden gebruikt.
  • Seite 50: Voor De Montage

    Voor de montage Afzuigkap met luchtafvoer mind.40 mind. 45 700-1105 mind.550 De afvoerlucht wordt via een afvoerschacht Dit kan men bereiken wanneer er door naar boven of rechtstreeks door de niet-afsluitbare openingen, bijv. in deuren, buitenmuur naar buiten geleid. ramen en d.m.v. luchtaanvoer-/ luchtafvoersleuven in de muur of door De afvoerlucht mag niet worden andere technische maatregelen, zoals...
  • Seite 51 Voor de montage Optimaal vermogen van de wasem- Aansluiting luchtafvoerpijp l 150 mm: afzuigkap: Luchtafvoerpijp rechtstreeks aan de Korte, gladde luchtafvoerpijp. luchtaansluiting bevestigen. Zo min mogelijk bochten. Zo groot mogelijke buisdiameter en Aansluiting luchtafvoerpijp l 120 mm: grote bochten. Verloopstuk in het aansluitstuk van de Gebruik van lange, ruwe luchtafvoer- luchtafvoer steken, 2 gaten l 3 mm buizen, veel buisbochten of kleine...
  • Seite 52: Elektrische Aansluiting

    Voor de montage Elektrische aansluiting De wasemafzuigkap mag alleen worden Voorbereiden van de muur aangesloten aan een volgens de voor- De muur moet vlak en loodrecht zijn. schriften geïnstalleerd, geaard stopcontact. Pluggen moet stevig kunnen worden Het geaarde stopcontact moet indien bevestigd.
  • Seite 53 Inbouwen De wasemafzuigkap is voorzien voor Opmerking: let op eventueel te monteren montage aan de keukenmuur. extra toebehoren. 1. Vetfilter verwijderen (zie de gebruiks- 5. De bevestigingshaak voor het schoor- aanwijzing). steenafschermstuk vastschroeven met 2 zeskantschroeven. 2. Van het plafond tot aan de onderkant van de wasemafzuigkap een middellijn 6.
  • Seite 54 Inbouwen 08. De twee onderste zeskantschroeven 13. De beide delen van de schoorsteenaf- vastdraaien. scherming in elkaar schuiven (openingen op het bovenste Voordat de vier schroeven worden telescoopdeel naar beneden) en in de vastgedraaid, moet de wasemafzuigkap uitsparing op de wasemafzuigkap op de juiste plaats worden gebracht.
  • Seite 55: Modi Di Funzionamento

    Istruzioni per l’uso: Descrizione dell'apparecchio Modi di funzionamento rivestimento È possibile conseguire ciò quando l'aria per camino la combustione può continuare ad affluire attraverso aperture non chiudibili, per es. in di porte, finestre ed in combinazione con cassette murali per l'alimentazione/ espulsione dell'aria o con altre misure tecniche, come interdizione reciproca e interruttore...
  • Seite 56: Avvertenze Importanti

    Precede la prima utilizzazione Avvertenze importanti: Prima di usare il nuovo apparecchio, leg- Questo libretto di istruzioni per l'uso gete attentamente le istruzioni per l'uso. è previsto per più versioni dell' Esse contengono informazioni importanti apparecchio. É possibile che siano per la Vostra sicurezza, e anche per l'uso descritti singoli particolari della dotazio- e la manutenzione dell'apparecchio.
  • Seite 57: Uso Della Cappa Aspirante

    Uso della cappa aspirante Grado forte: Per eliminare nel modo più efficace i vapori di cottura: con il grado forte si raggiunge la massima potenza. Questa ènecessaria per breve Accendere la cappa aspirante tempo. all'inizio della cottura. Premere il tasto + più volte, finché non Spegnere la cappa aspirante compare l'indicazione ç...
  • Seite 58 Filtri e manutenzione Filtro per grassi: Smontaggio e montaggio dei filtri metallici per grassi: Per trattenere i componenti grassi dei Attenzione: le lampadine alogene devono vapori di cottura si utilizzano filtri essere spente e raffreddate. metallici per grassi. 1. Premere il dispositivo di arresto dei filtri Le stuoie filtro sono costituite da materiale per grassi nel senso della freccia, ruotare ininfiammabile.
  • Seite 59 Filtri e manutenzione Filtro a carbone attivo: Per fissare gli odori nel funzionamento a Indicazione di saturazione: ricircolo d'aria. quando il filtro a carbone attivo è saturo, dopo avere spento il ventilatore per 10 secondi viene emesso un segnale acustico ã...
  • Seite 60: Pulizia E Manutenzione

    Pulizia e manutenzione Cambio delle lampade Togliere corrente alla cappa aspirante 1. Spegnere la cappa aspirante e togliere estraendo la spina di alimentazione, corrente sfilando la spina di alimenta- oppure togliendo il fusibile. zione, oppure togliendo il fusibile. Quando si lavano i filtri per grassi, pulire Le lampadine alogene accese si anche i depositi di grasso sulle parti surriscaldano.
  • Seite 61 Guasti Regolazione dell'indicazione di saturazione ã Se nel display compare una oppure Se fosse necessaria la commutazione del Vedi capitolo "Filtri e manutenzione". tipo di funzionamento (a scarico d'aria/a Se la cappa aspirante non risponde al ricircolo d'aria) deve essere cambiata comando: conformemente anche l'indicazione di Togliere tensione alla cappa aspirante...
  • Seite 62 Istruzioni per il montaggio: Avvertenze importanti Sopra a fornelli a gas il montaggio Gli apparecchi dismessi non sono rifiuti della cappa aspirante è ammesso ad una senza valore. distanza minima di 650 mm - fig. 1 - solo Attraverso lo smaltimento ecologico se non si superano i carichi termici nominali possono essere recuperati materiali seguenti:...
  • Seite 63: Prima Del Montaggio

    Prima del montaggio Funzionamento a scarico d'aria mind.40 mind. 45 700-1105 mind.550 L'aria di scarico viene condotta verso l'alto, È possibile conseguire ciò quando l'aria per attraverso un pozzo di ventilazione, oppure la combustione può continuare ad affluire direttamente all'aperto, attraverso la parete attraverso aperture non chiudibili, per es.
  • Seite 64: Collegamento Del Tubo Di Scarico

    Prima del montaggio Rendimento ottimale della cappa Collegamento del tubo di scarico aspirante: l 150 mm: Tubo di scarico corto, liscio. fissare il tubo di scarico direttamente al manicotto dell'aria. Il minor numero possibile di gomiti di tubo. Collegamento del tubo di scarico Diametri di tubo possibilmente grandi e l 120 mm: gomiti grandi.
  • Seite 65: Allacciamento Elettrico

    Prima del montaggio Allacciamento elettrico La cappa aspirante deve essere Preparazione del muro collegata solo ad una presa di corrente con Il muro deve essere piano e verticale. contatto di terra, installata a norma. Provvedere ad un robusto fissaggio dei Disporre la presa con contatto di terra se tasselli.
  • Seite 66 Montaggio La cappa aspirante è prevista per il Avvertenza: tenere conto degli eventuali montaggio sul muro della cucina. accessori speciali da montare. 1. Rimuovere il filtro grassi (vedi istruzioni 5. Avvitare la squadra d'arresto per il per l'uso). rivestimento del camino con 2 viti a testa esagonale.
  • Seite 67 Montaggio 08. Avvitare le due viti a testa esagonale 13. Introdurre una nell'altra le due parti del inferiori. rivestimento del camino (fessura della parte telescopica superiore rivolta verso Prima di stringere le 4 viti, la cappa il basso) e inserire il tutto nella fessura aspirante deve essere allineata.
  • Seite 68: Modalidades De Funcionamiento

    Instrucciones para el uso: Modalidades de funcionamiento Descripción del aparato Para ello, es necesario que existan Revestimien- aperturas no bloqueables por las que el aire to en forma de combustión pueda renovarse y de chimenea ventilarse sin dificultad, por ejemplo por puertas, ventanas o cajas murales para la alimentación o evacuación del aire o también pueden tomarse otras otras...
  • Seite 69: Antes De La Primera Utilización

    Antes de la primera utilización Antes de la puesta en marcha inicial del aparato: Las presentes instrucciones de servicio Antes de emplear el aparato nuevo deberá leer detenidamente las son válidas para diferentes modelos de instrucciones de servicio de la cocina aparato;...
  • Seite 70 Manejo de la campana extractora Escalón intensivo: La manera más eficaz de absorber los vahos producidos en la cocina durante la Seleccionando el escalón de funciona- preparación de los alimentos es: miento intensivo, el ventilador desarrolla su máxima potencia. Este escalón se suele Conectando la campana extractora usar sólo durante cortos períodos.
  • Seite 71 Filtros y mantenimiento Filtro antigrasa: Desmontar y montar los filtros antigrasa metálicos: Para retener las partículas de grasa ¡Atención! Las lámparas halógenas tienen contenidas en el vaho de la cocina se que estar desconectadas y frías. montan filtros metálicos. 1. Presionar el enclavamiento de los filtros Las esterillas de filtro son de metal antigrasa en dirección a la flecha.
  • Seite 72 Filtros y mantenimiento Filtro de carbón activo: Indicación del grado de saturación de grasa del filtro: Para retener los olores durante el En caso de estar saturado el filtro de funcionamiento de la campana carbón activo, se activa, tras desconectar extractora con evacuación del aire al el ventilador, durante 10 segundos una interior (recirculación del aire).
  • Seite 73: Limpieza Y Cuidados

    Limpieza y cuidados Sustituir las lámparas Desconectar la campana extractora de la 1. Desconectar la campana extractora de red eléctrica extrayendo el cable de la red eléctrica,.extrayendo el cable de conexión de la toma de corriente o a conexión de la toma de corriente o a través del fusible.
  • Seite 74 Averías y perturbaciones Ajustar la indicación del grado de saturación del filtro En caso de que en la pantalla de visua- ã lización aparezcan las letras En caso de que fuera necesario modificar la Véase al respecto el capítulo «Filtros y modalidad de funcionamiento de la campa- mantenimiento».
  • Seite 75 Instrucciones de montaje: – Advertencias importantes Esta campana extractora sólo deberá No tire su aparato usado al vertedero más próximo. Los aparatos eléctricos usa- montarse con un lateral junto a un armario o dos incorporan materiales valiosos que se pared alta. Distancia mínima a observar: pueden recuperar.
  • Seite 76: Antes Del Montaje

    Antes del montaje Funcionamiento con evacuación del aire al exterior mind.40 mind. 45 700-1105 mind.550 El aire de evacuación pasa a través de un Para ello, es necesario que existan túnel de ventilación hacia arriba o aperturas no bloqueables por las que el directamente hacia el exterior, a través de aire de combustión pueda renovarse y la correspondiente pared.
  • Seite 77 Antes del montaje Condiciones necesarias para lograr la Conexión de los tubos de óptima potencia y rendimiento de la evacuación campana extractora: Tubo con diámetro de 150 mm: Tubo de evacuación corto y liso. Fijar directamente el tubo de evacuación Menor número de codos posible.
  • Seite 78: Conexión Eléctrica

    Antes del montaje Conexión eléctrica La campana extractora sólo podrá Preparativos en la pared conectarse a una toma (caja) de corriente La pared tiene que ser lisa y vertical. provista de puesta a tierra. La toma de Procurar un asiento firme de los tacos corriente deberá...
  • Seite 79: Montaje

    Montaje Esta campana extractora ha sido Atención: ¡Ténganse en cuenta los diseñada exclusivamente para su montaje posibles accesorios opcionales que se en la pared. vayan a montar con la campana extractora! 1. Retirar el filtro antigrasa (véanse al 5. Montar y fijar la escuadra de soporte respecto las instrucciones de uso de la del revestimiento con dos tornillos campana).
  • Seite 80 Montaje 08. Enroscar los dos tornillos hexagonales 13. Enganchar los dos elementos del inferiores. revestimiento de la chimenea desplazándolos uno respecto al ¡Antes de apretar a tope los tornillos otro - las ranuras de la parte de sujeción de la campana, hay que telescópica superior deberá...
  • Seite 81 Οδηγίες χρήσεως Περιγραφή της συσκευής Τρ ποι λειτουργίας Αυτ µπορεί να επιτευχθεί, ταν χάρη σε Επένδυση ανοίγµατα που δεν κλείνουν, π.χ. σε της π ρτες, παράθυρα και σε συνδυασµ µε "καµινάδας" πλαίσιο εντοιχισµού εισ δου/εξ δου αέρα ή χάρη σε άλλα τεχνικά µέτρα, πως αµοιβαία...
  • Seite 82: Πριν Την Πρώτη Χρήση

    Πριν την πρώτη χρήση Σπουδαίες υποδείξεις: Μην παρασκευάζετε ποτέ φλαµπέ φαγητών κάτω απ τον απορροφητήρα Tο παρ ν εγχειρίδιο οδηγιών χρήσης κουζίνας. ισχύει για διάφορα µοντέλα της Κίνδυνος να πάρει φωτιά το φίλτρο συσκευής. Eνδέχεται ορισµένα λιπών απ τις ανερχ µενες φλ γες. µεµονωµένα...
  • Seite 83 Χειρισµ ς του απορροφητήρα κουζίνας Εντατική βαθµίδα: Οι ατµοί κουζίνας µπορούν να απορροφηθούν µε τον πλέον Μέσω της εντατικής βαθµίδας επιτυγχάνεται η αποτελεσµατικ τερο τρ πο: µεγαλύτερη ισχύς του απορροφητήρα. Αυτή χρειάζεται για µικρ χρονικ διάστηµα. θέτοντας τον αεριστήρα σε λειτουργία κατά...
  • Seite 84 Φίλτρα και συντήρηση Φίλτρα λιπών: Αφαίρεση και τοποθέτηση των µεταλλικών φίλτρων λιπών: Για την πρ σληψη των λιπαρών Προσοχή: Οι λαµπτήρες αλογ νου πρέπει συστατικών του ατµού της κουζίνας έχουν να είναι σβηστοί και να έχουν κρυώσει. τοποθετηθεί στη συσκευή µεταλλικά φίλτρα...
  • Seite 85 Φίλτρα και συντήρηση Φίλτρο ενεργού άνθρακα: Για τη συγκράτηση των οσµηρών ουσιών Ένδειξη κορεσµού του φίλτρου: κατά τη λειτουργία ανακύκλωσης αέρα. Σε περίπτωση κορεσµού του φίλτρου ενεργού άνθρακα ηχεί µετά τη θέση του αεριστήρα εκτ ς λειτουργίας επί 10 ã δευτερ...
  • Seite 86: Καθαρισµ Σ Και Περιποίηση

    Καθαρισµ ς και περιποίηση Αλλαγή των λαµπτήρων Αποµονώνετε τον απορροφητήρα 1. Θέτετε τον απορροφητήρα κουζίνας κουζίνας απ το ηλεκτρικ ρεύµα εκτ ς λειτουργίας και τον τραβώντας το φις απ την πρίζα ή αποµονώνετε απ το ηλεκτρικ ρεύµα αντίστοιχα κατεβάζοντας την ασφάλεια. τραβώντας...
  • Seite 87 Ρύθµιση της ένδειξης Βλάβες κορεσµού των φίλτρων ã ταν εµφανίζεται στην ένδειξη ένα ή Σε περίπτωση που είναι απαραίτητη η Βλ. στο κεφάλαιο "Φίλτρα και ρύθµιση του είδους λειτουργίας συντήρηση". (απορρ φηση ακάθαρτου αέρα/λειτουργία ταν δεν µπορείτε να χειριστείτε τον ανακύκλωσης...
  • Seite 88 Οδηγίες Τοποέτησης: Σηµαντικές υποδείξεις Πάνω απ "µάτια" υγραερίου η Οι παλιές συσκευές δεν αποτελούν τοποθέτηση του απορροφητήρα άχρηστα απορρίµµατα. Με την απ συρσή επιτρέπεται µε την ελάχιστη απ σταση τους σύµφωνα µε τους κανονισµούς για των 650 mm – απεικ νιση 1 – και µ νον, την...
  • Seite 89 Πριν την τοποθέτηση Λειτουργία απορρ φησης ακάθαρτου αέρα mind.40 mind. 45 700-1105 mind.550 Ο ακάθαρτος αέρας διοχετεύεται µέσω Αυτ µπορεί να επιτευχθεί, ταν χάρη σε µιας καταπακτής προς τα πάνω ή ανοίγµατα που δεν κλείνουν, π.χ. σε καταλήγει απευθείας στο ύπαιθρο π...
  • Seite 90 Πριν την τοποθέτηση Ιδανική απ δοση του απορροφητήρα Σύνδεση σωλήνα απορρ φησης κουζίνας: ακάθαρτου αέρα, διαµέτρου 150 mm: Κοντ ς, λείος σωλήνας απορρ φησης Στερεώστε τον σωλήνα απορρ φησης ακάθαρτου αέρα. ακάθαρτου αέρα απευθείας στη Κατά το δυνατ ν λιγ τερες γωνιακές σύνδεση.
  • Seite 91 Σύνδεση στο δίκτυο του Πριν την τοποθέτηση ηλεκτρικού ρεύµατος Προετοιµασία του τοίχου Ο απορροφητήρας κουζίνας επιτρέπεται Ο τοίχος πρέπει να είναι επίπεδος και να συνδεθεί στο δίκτυο του ηλεκτρικού κάθετος. ρεύµατος µ νον µέσω πρίζας σούκο, Η σταθερ τητα των ούπατ πρέπει να εγκατεστηµένης...
  • Seite 92 Τοποθέτηση Ο απορροφητήρας κουζίνας προορίζεται Υπ δειξη: Προσέξτε τα µέρη ειδικών για την τοποθέτηση σε τοίχο της εξαρτηµάτων, τα οποία πρέπει κουζίνας. ενδεχοµένως να τοποθετηθούν. Βιδώστε τη γωνιά συγκράτησης για την Αφαιρέστε το φίλτρο λιπών (βλ. στις επένδυση της "καµινάδας" µε 2 βίδες Οδηγίες...
  • Seite 93 Τοποθέτηση Βιδώστε τις δύο κάτω βίδες µε Ωθήστε τα δύο µέρη της επένδυσης εξαγωνική κεφαλή. της "καµινάδας" το ένα µέσα στο άλλο (οι σχισµές στο επάνω τµήµα Προτού σφίξετε τις 4 βίδες, πρέπει να τηλεσκοπικού τύπου δείχνουν προς τα ευθυγραµµίσετε τον απορροφητήρα. κάτω) και...
  • Seite 94 Ρύθµιση απ τη λειτουργία απορρ φησης ακάθαρτου αέρα στη λειτουργία ανακύκλωσης αέρα Ρύθµιση του ηλεκτρονικού συστήµατος Πατήστε το πλήκτρο 0 και κρατήστε το ελέγχου στη λειτουργία ανακύκλωσης Ενώ είναι αναµµένη ή ένδειξη αέρα: πατήστε επιπλέον το πλήκτρο Ο απορροφητήρας είναι ρυθµισµένος ã...
  • Seite 95 Notizen...
  • Seite 96 Notizen...
  • Seite 97 Notizen...
  • Seite 98 Z5114X5 351210 90 cm: Z5844X0 60 cm: Z5843X0 90 cm: Z5841N0 60 cm: Z5840N0 90 cm: Z5861N0 60 cm: Z5860N0 204 631...
  • Seite 100 Fax: +49 (0) 89 / 45 90-35 32 Fax: +43 (0) 1/ 6 05 75-5 12 60 Internet: www.neff.de Internet: www.neff.at € 0,12/min. DTAG Für Österreich: Tel: 08 10 / 70 04 00 zum Regionaltarif D 8680 5750 204 631 D 8980 Printed in Germany 0803 Es.

Diese Anleitung auch für:

D 8980

Inhaltsverzeichnis